- Scheduling
- Viewing the Schedule
Viewing the Schedule
Overview
The Schedule allows you to view all Direct and Group Supports, including non support shifts and breaks within a chosen time frame. The Schedule panel can be toggled to display by either Support Worker or Participant and their shifts can be edited and new ones created.
Viewing the Schedule
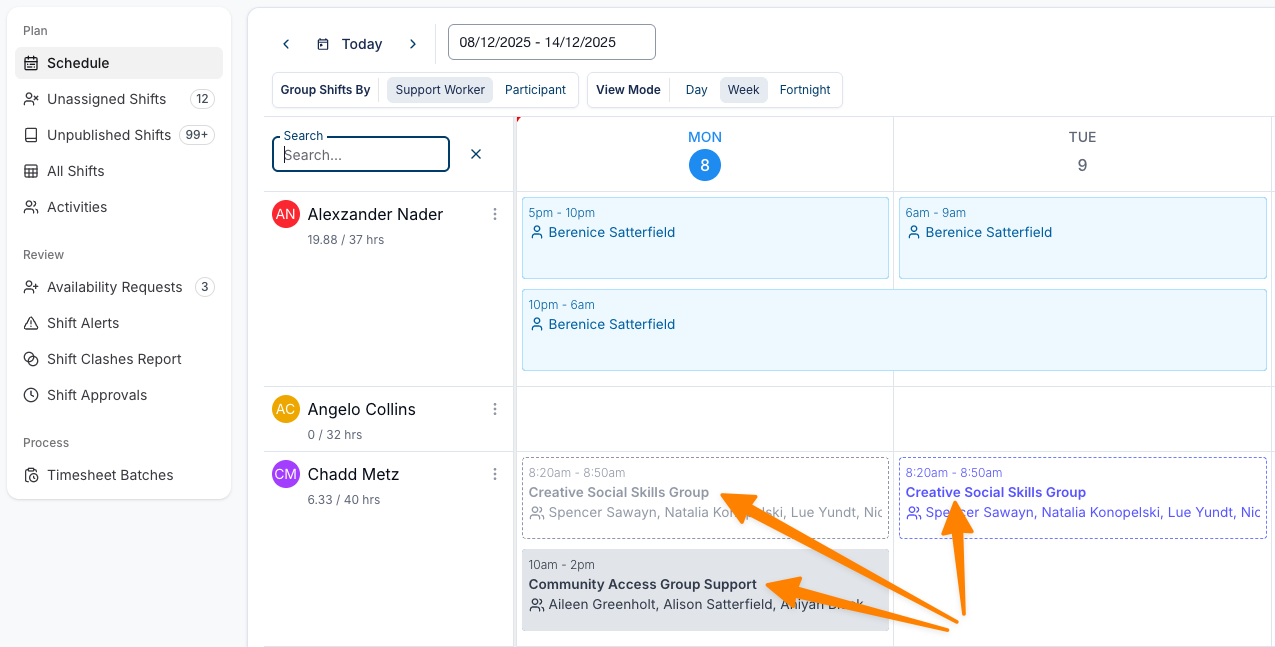
Whether you're viewing by Participants or Support Workers, their shifts will be displayed horizontally, left to right based on the view you currently have set.

You can also see the Activity Name at a glance from this view.
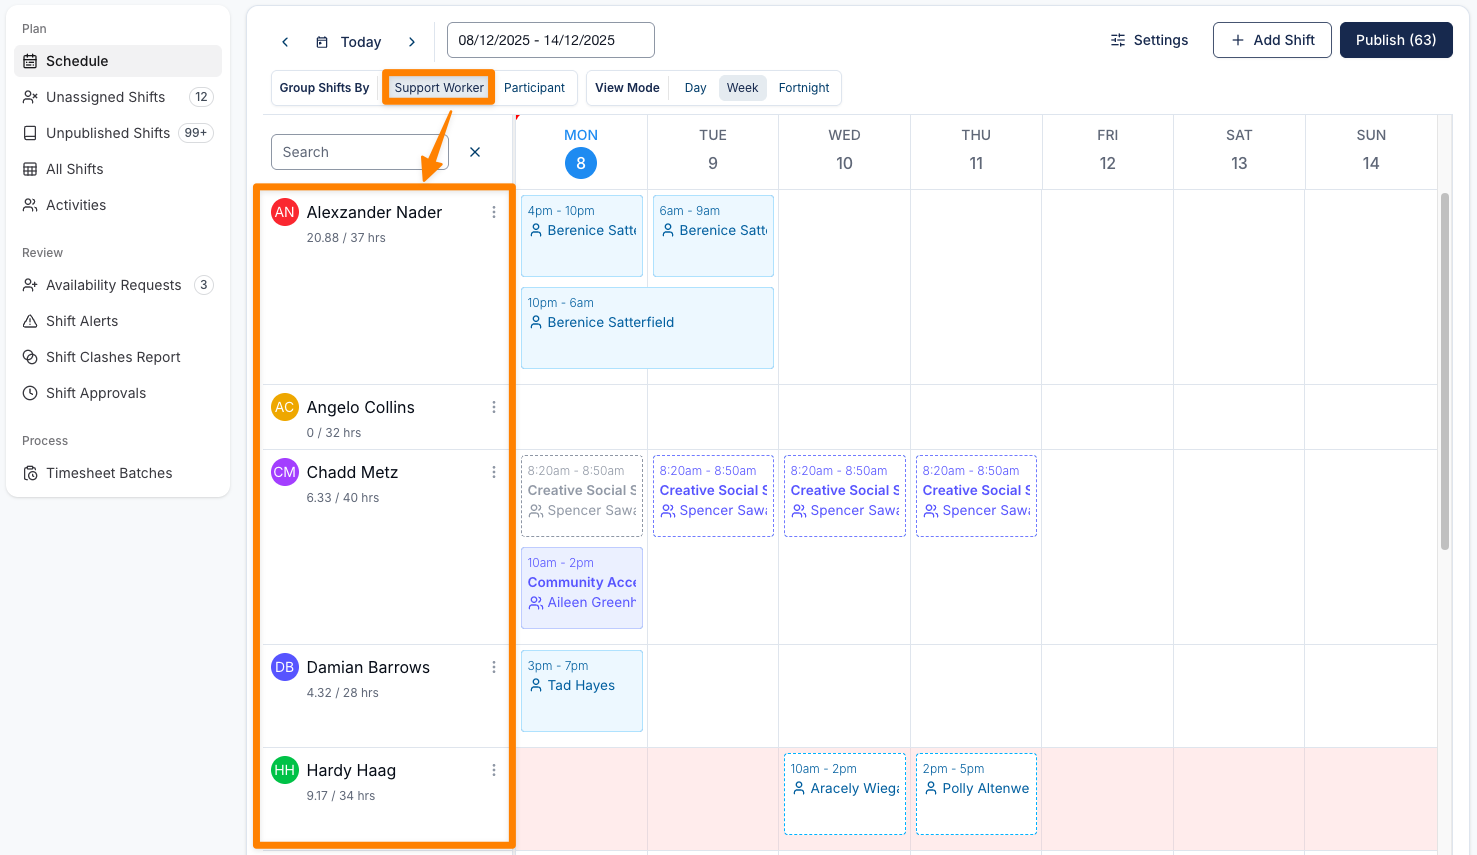
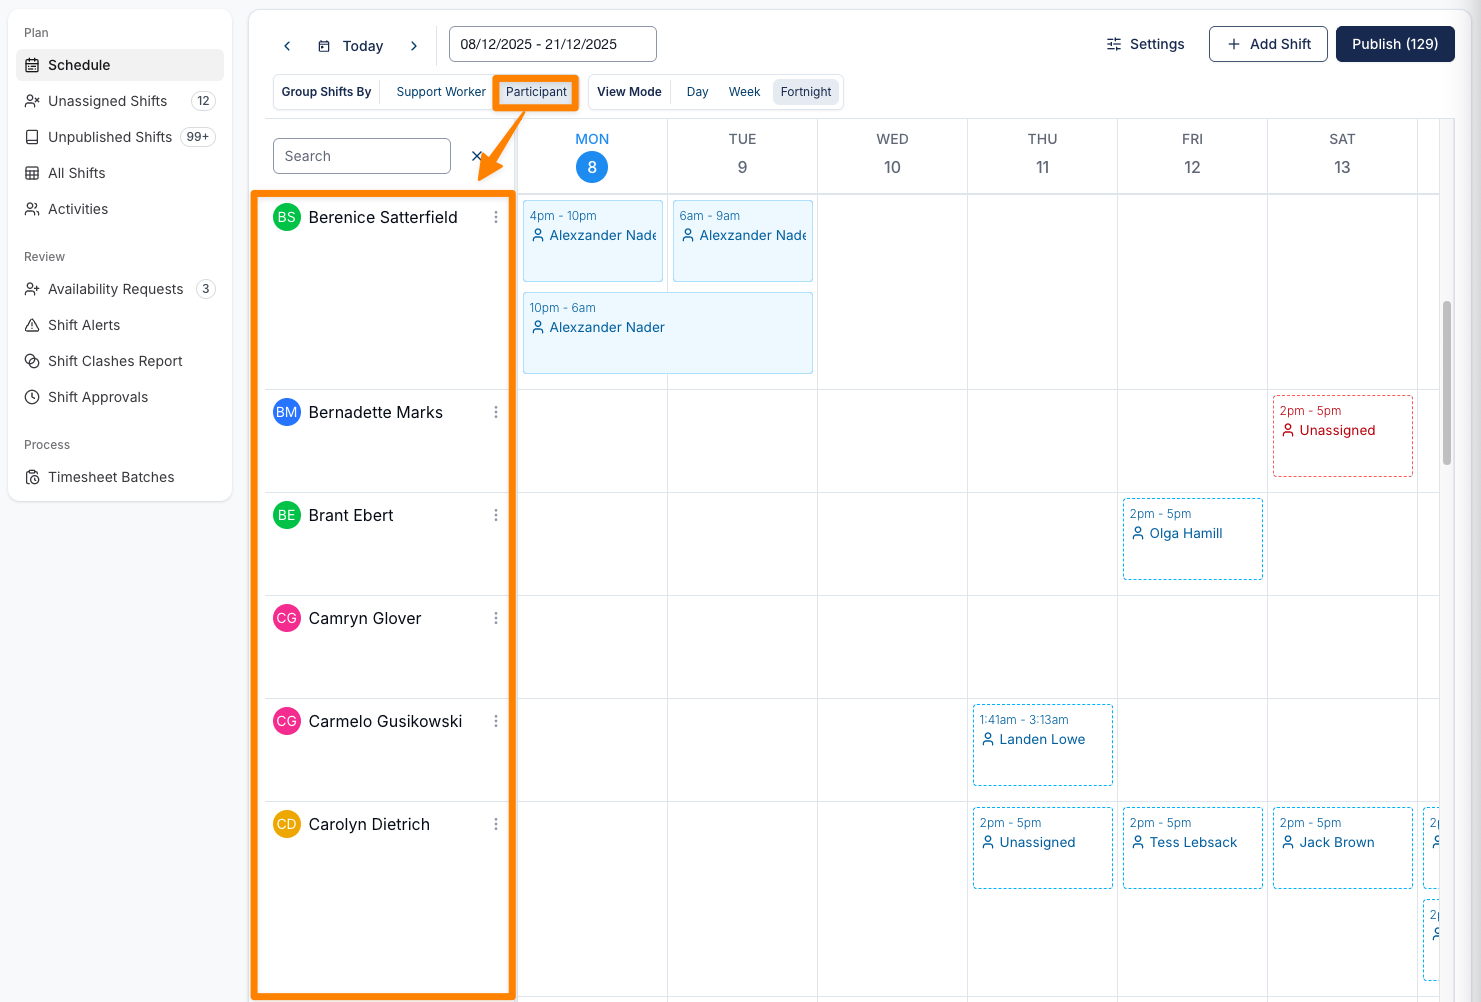
Support Worker or Participant Views
Group shifts by either Support Worker or Participant.

Support Worker View
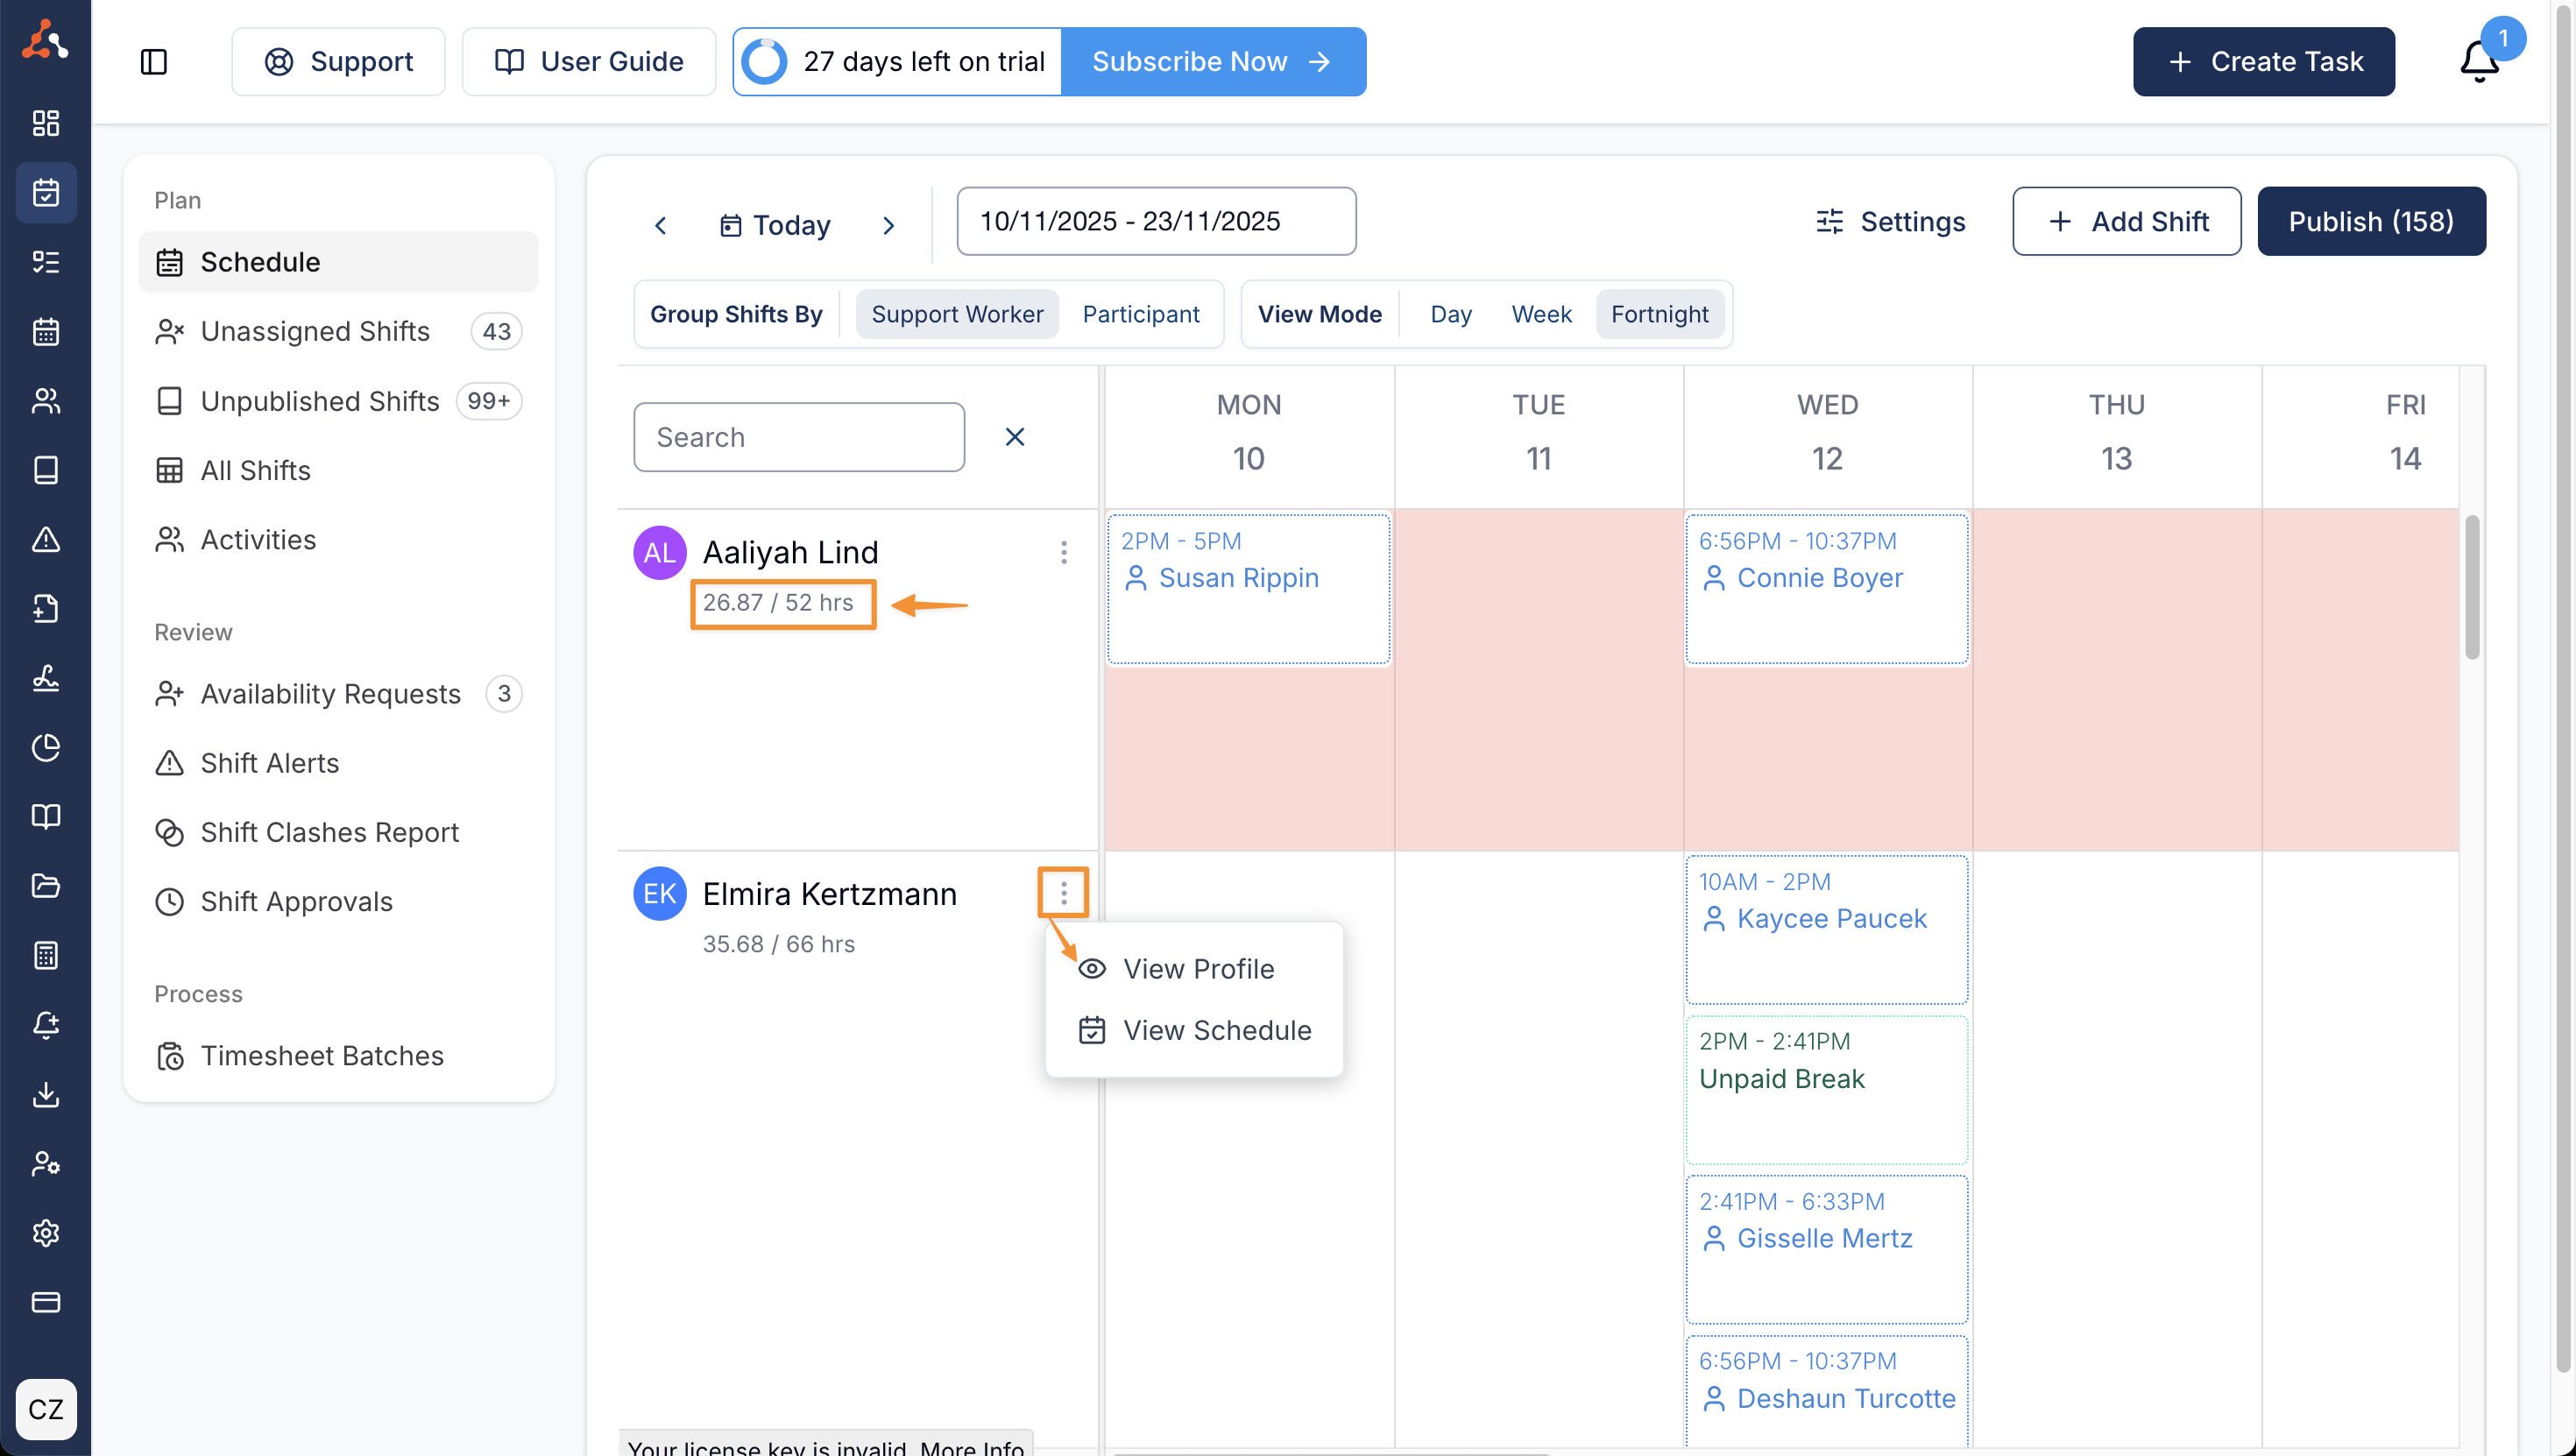
If you are viewing the Support Worker Schedule, you'll be able to see their current hours vs their contracted hours. This will update to reflect whether you are viewing the Schedule by Week or by Fortnight.
- If you are viewing Day or Week, it will display a Weekly total current hours vs Weekly contracted hours.
- However if you are viewing Fortnightly, it will display the total current hours for that fortnight vs a fortnight's worth of contracted hours.
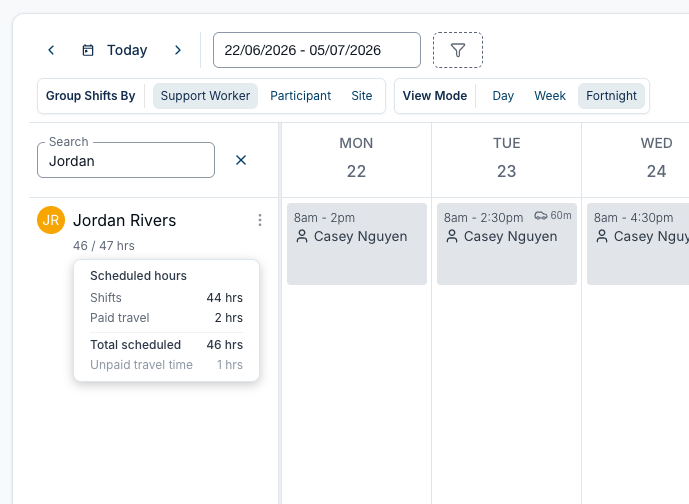
Scheduled hours breakdown
Hover the X / Y hrs counter to see how a worker's scheduled hours are made up. The Scheduled hours tooltip breaks the total down by category:
- Shifts — the time rostered on shifts (excluding unpaid breaks).
- Paid travel — travel that's paid as time.
- Sleepover — the active (awake) portion of sleepover supports.
- Total scheduled — the sum of the categories above. This is the current-hours figure (the
X) shown in the counter, and it only counts hours that are paid as time.
Categories with no hours are hidden, so you'll only see the lines that apply to that worker.
If any travel is paid as a kilometre allowance rather than as time, it appears as a separate, muted Unpaid travel time line. This time isn't included in the Total scheduled figure — it's shown for context, and it's usually what explains a gap between the schedule counter and the pay run.
You can also quickly access a Support Workers 'Profile' or 'Schedule' by clicking the 3 dot menu next to their name.
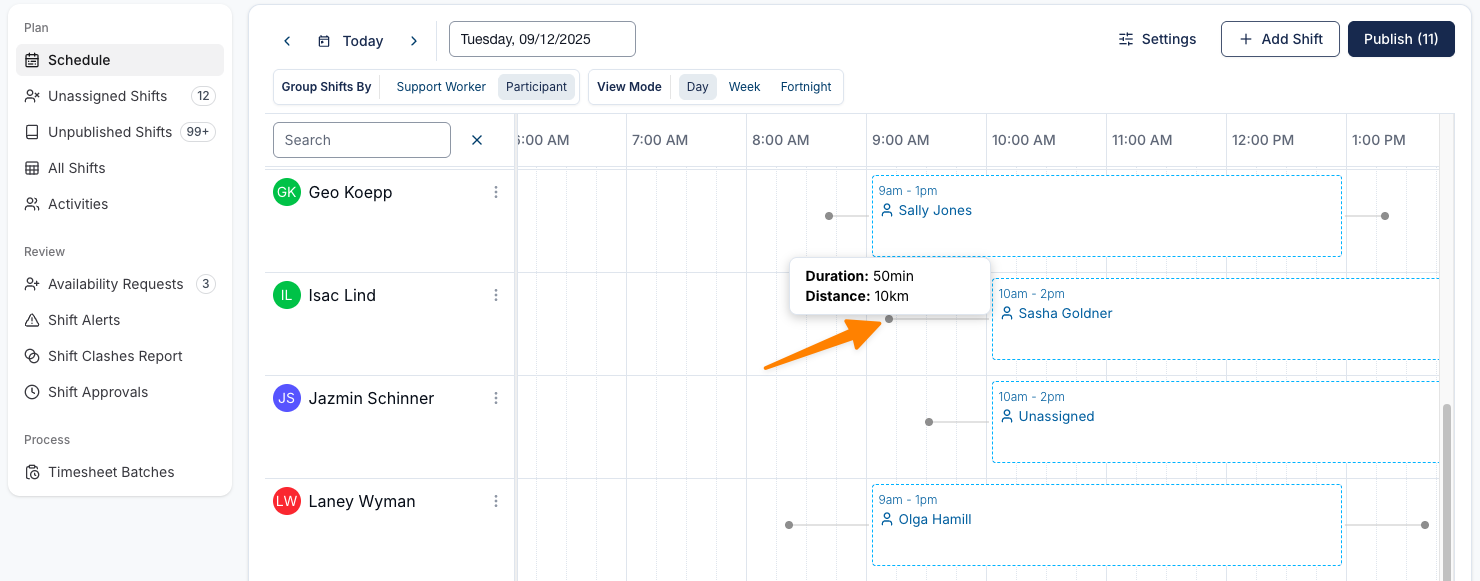
You can easily see how much travel time or distance has been included in the shift by hovering over the dot attached to the line on the edge of the shift. This will help to ensure that supports don't overlap on travel time.
In the rows following each Support Worker, any shifts rostered in this view will show the rostered times and any participants attached. You can add a shift by selecting the blank space within the desired day and row of the Participant or Support Worker. For more on this, view our guide on Adding a 1:1 Shift
Participant View
Any shifts rostered in this view will show the rostered times, and the support worker assigned. If no one is assigned, it will display as 'Unassigned'.
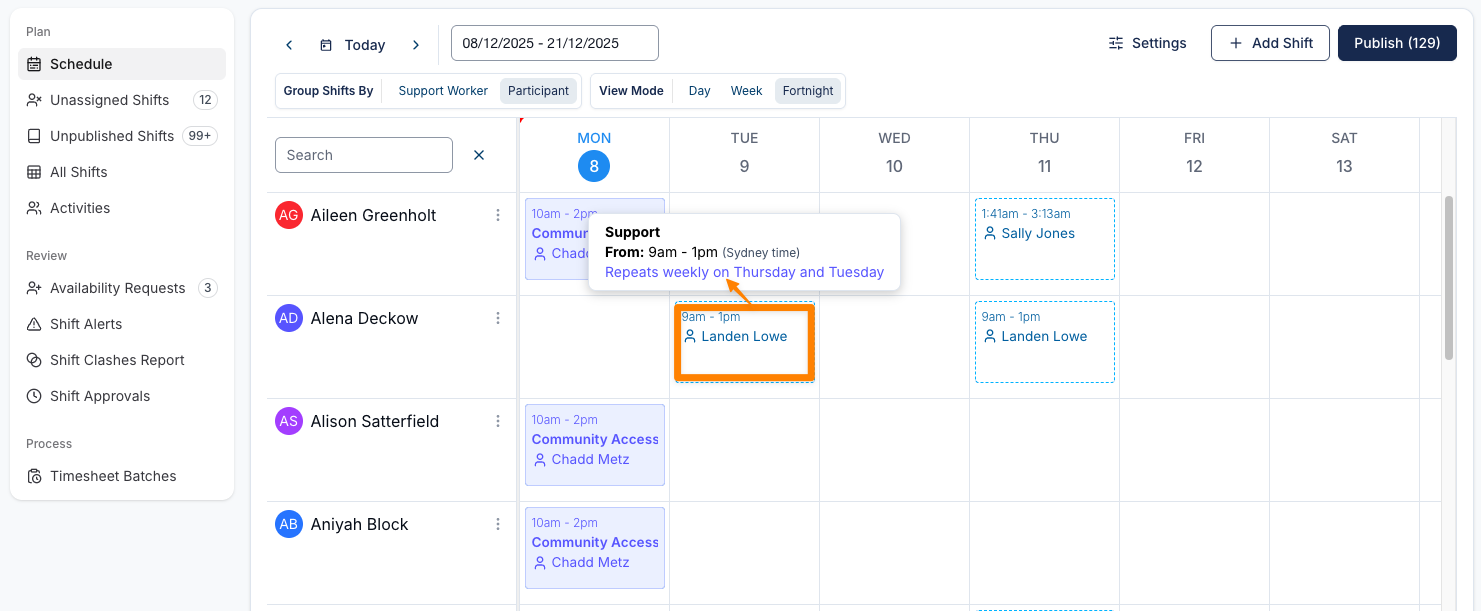
If you hover your cursor over the shift it will display the type of shift (e.g. Support, Group Support, etc), the time with timezone and any details a recurring shift it may be part of.
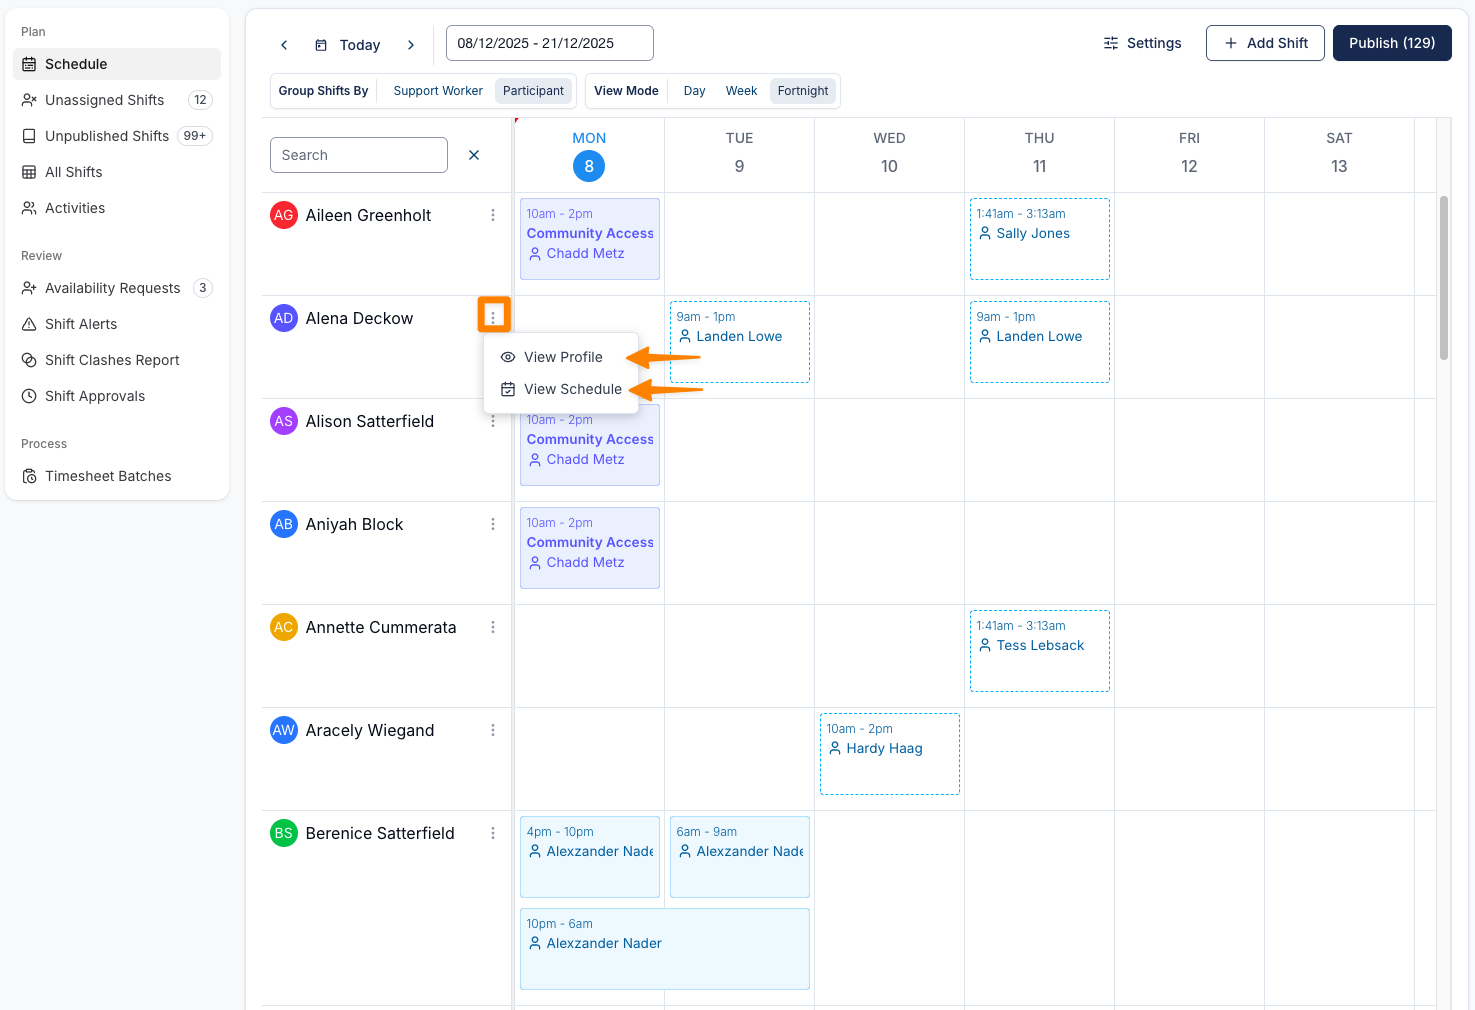
If you are viewing the Schedule by Participant, you can quickly access a Participant’s 'Profile' or 'Schedule' by clicking the 3 dot menu next to their name.
Search
Depending on your current view, you can 'Search' by the name of the Support Worker or Participant.
Adjusting the view
View Date Toggle
Jump to 'Today' or move forwards or backward depending on the View Mode you have selected (Day, Week, or Fortnight).
View Mode
You can adjust the Schedule view by Day, Week or Fortnight.
- If you have selected Day view, it will display in suitable scale that matches the 'Increments' you have set in the Settings at the top of your page.
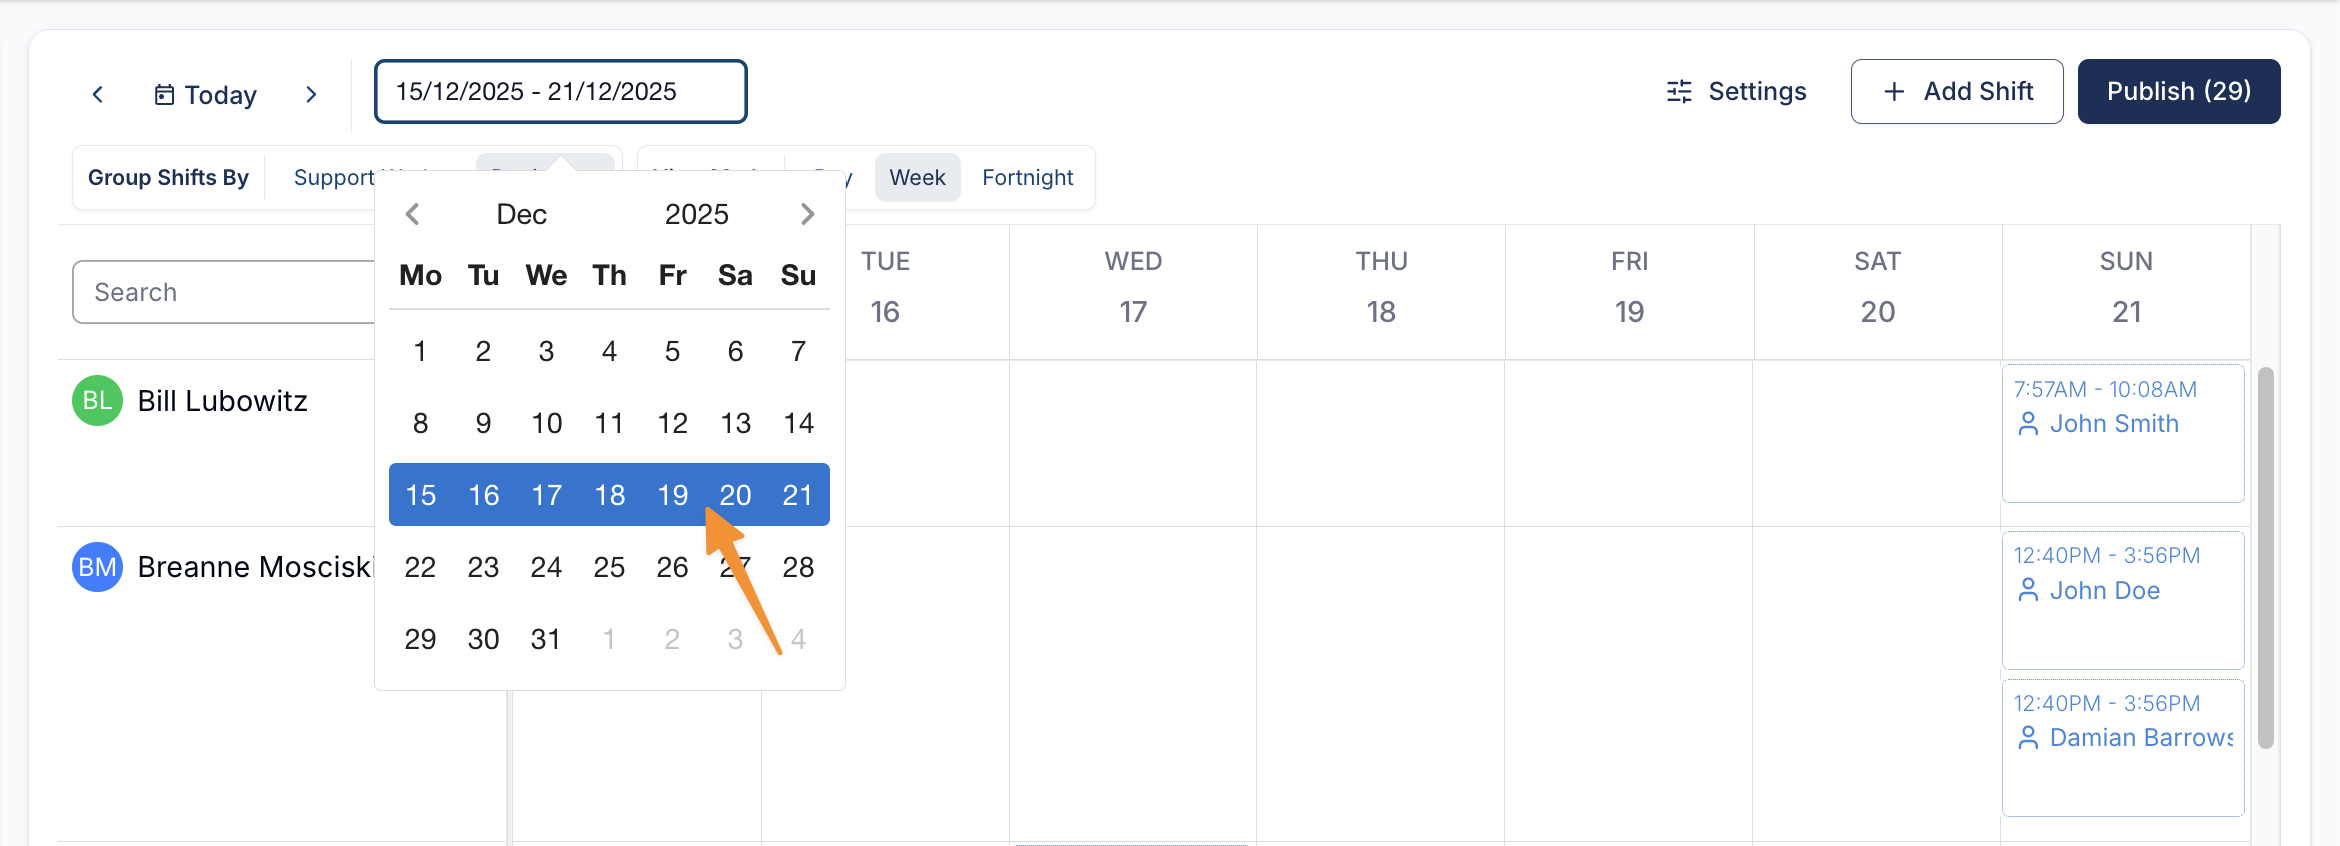
- If you have selected Week view, it will display a full week. By default the week starts on your pay period start day (or Monday if you haven't set a pay period). You can choose a different day for the Week and Fortnight views with the Week starts on setting — see Schedule Week.
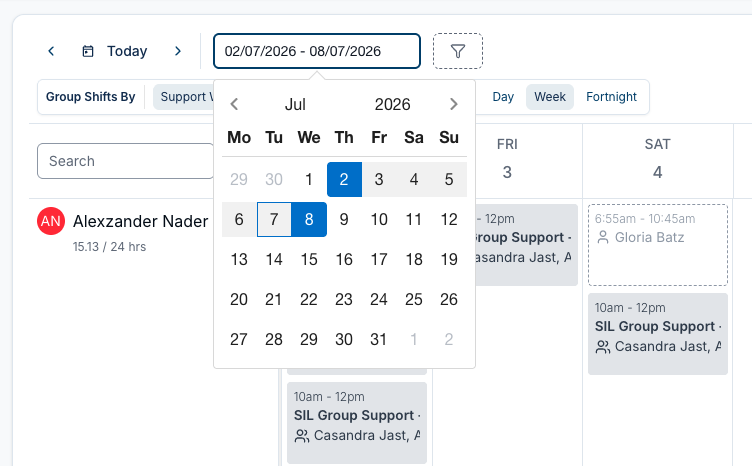
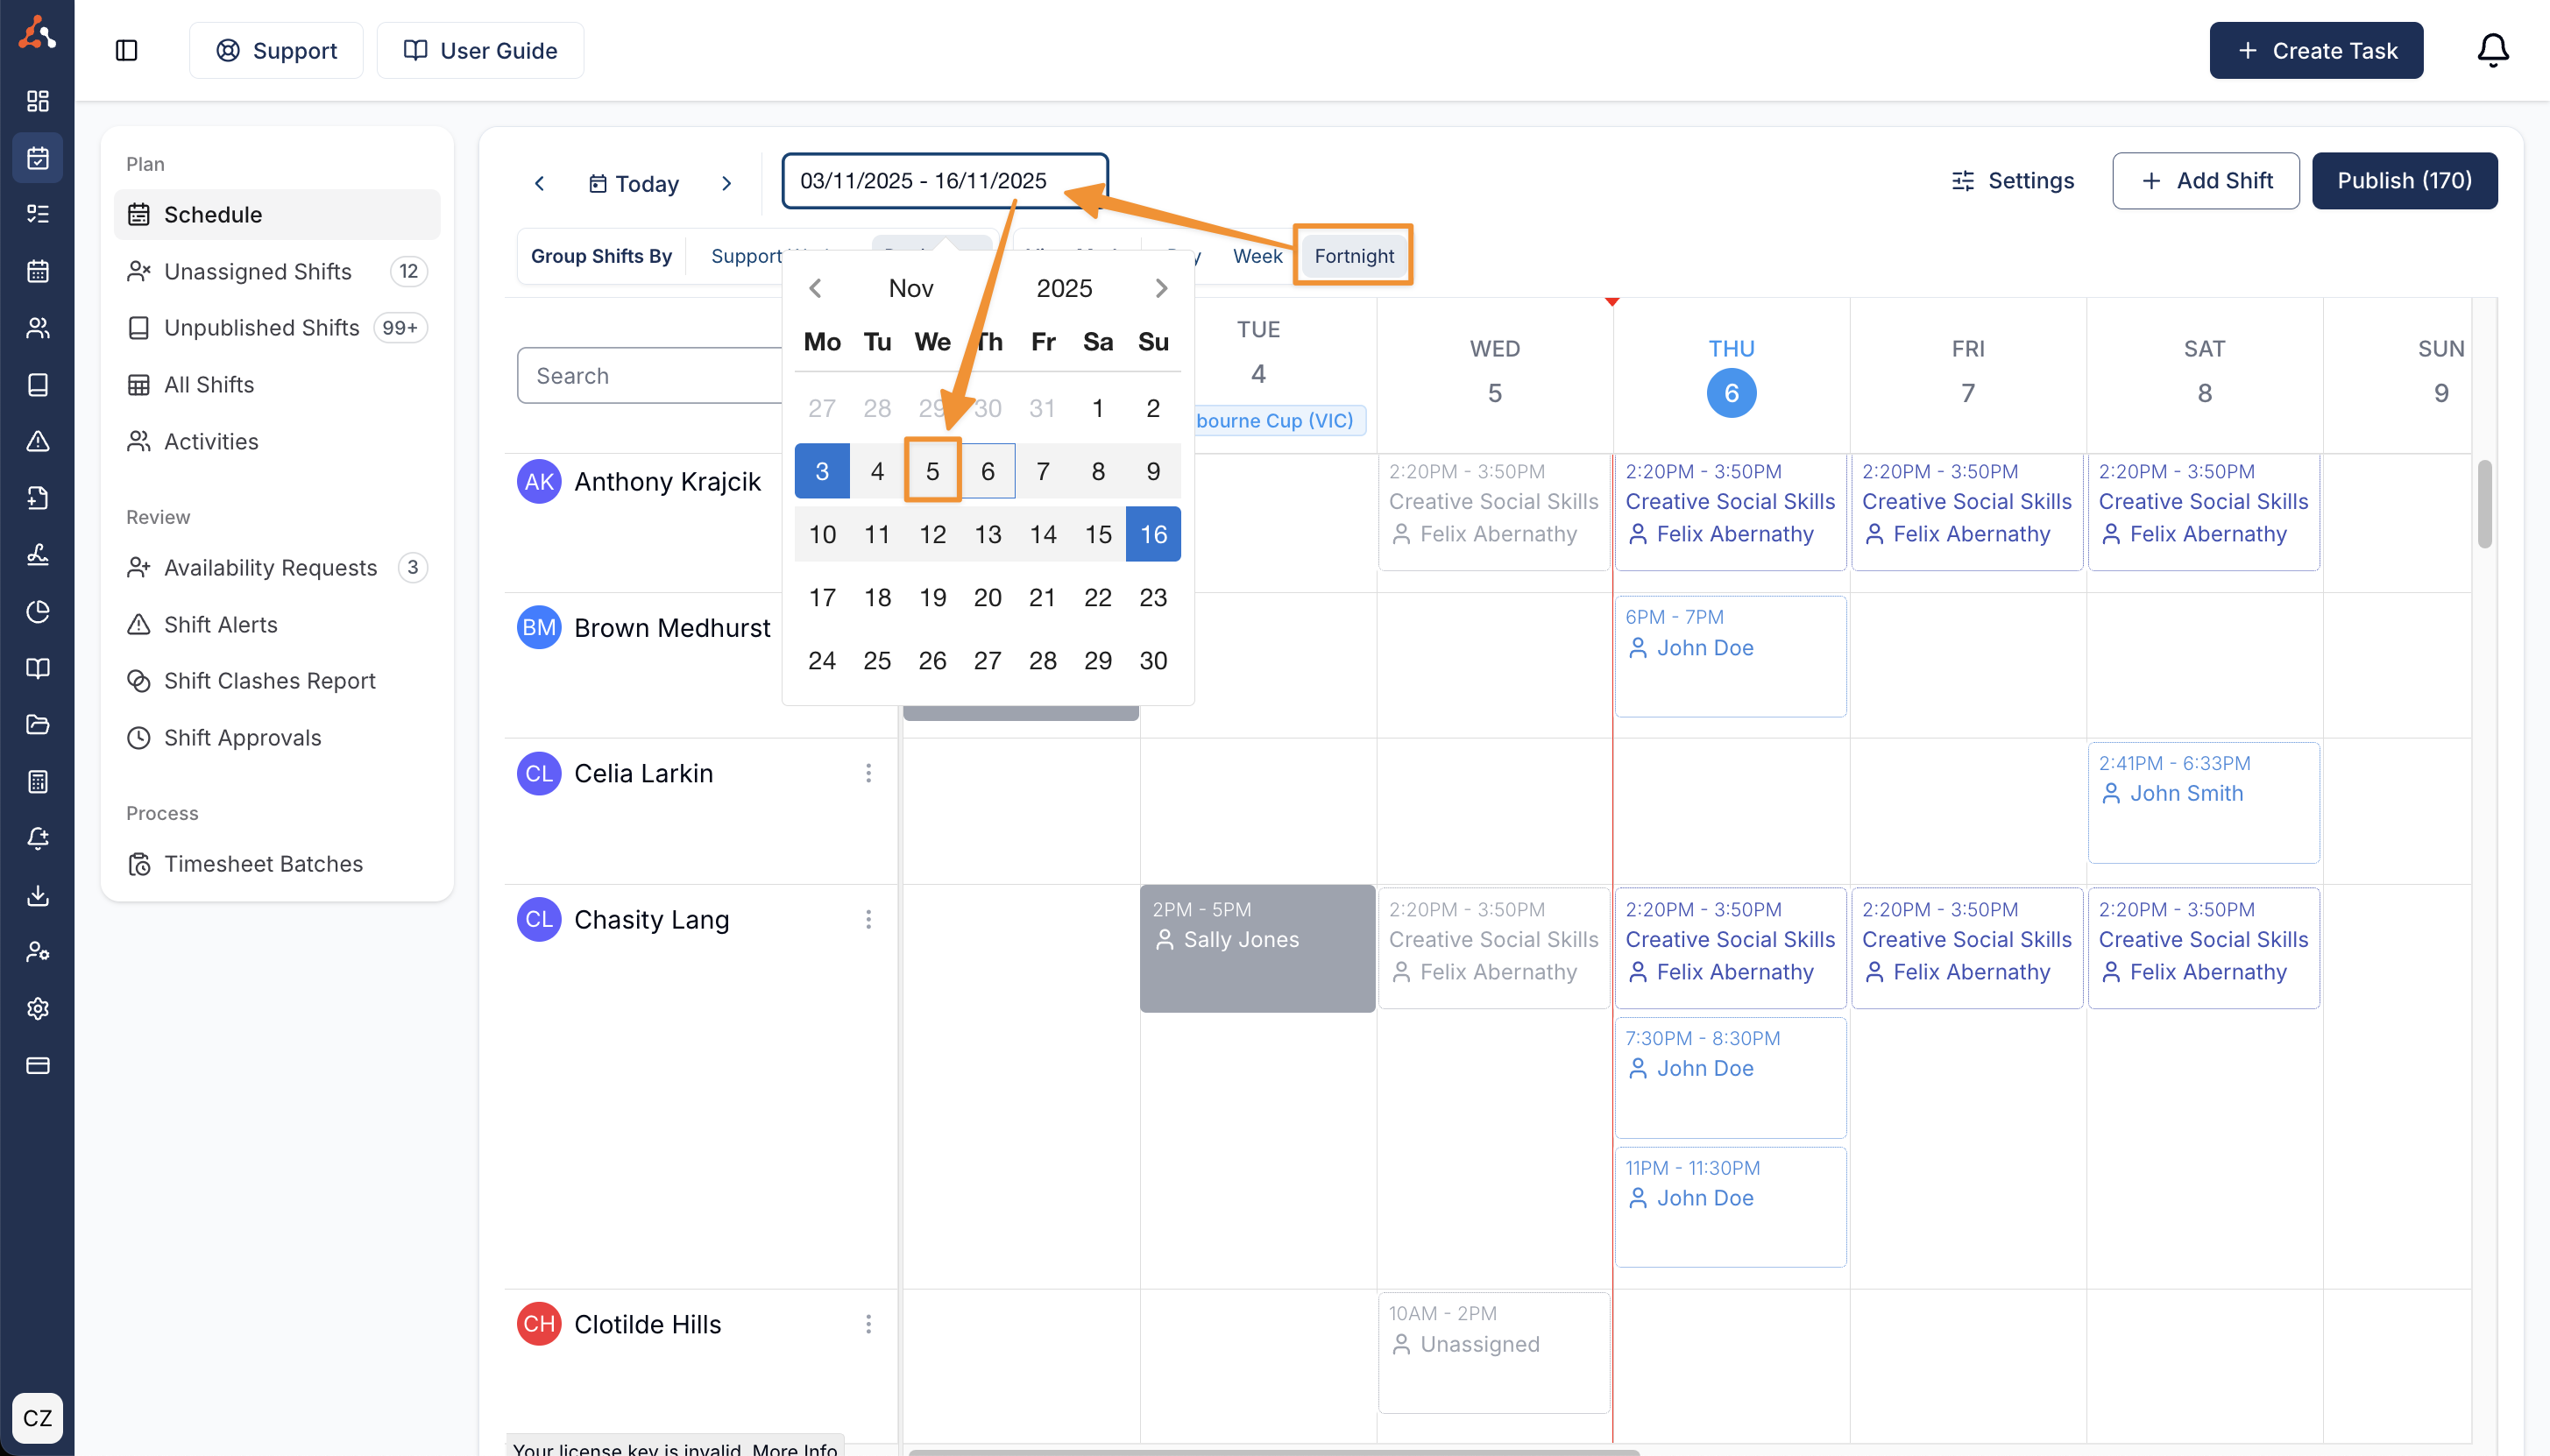
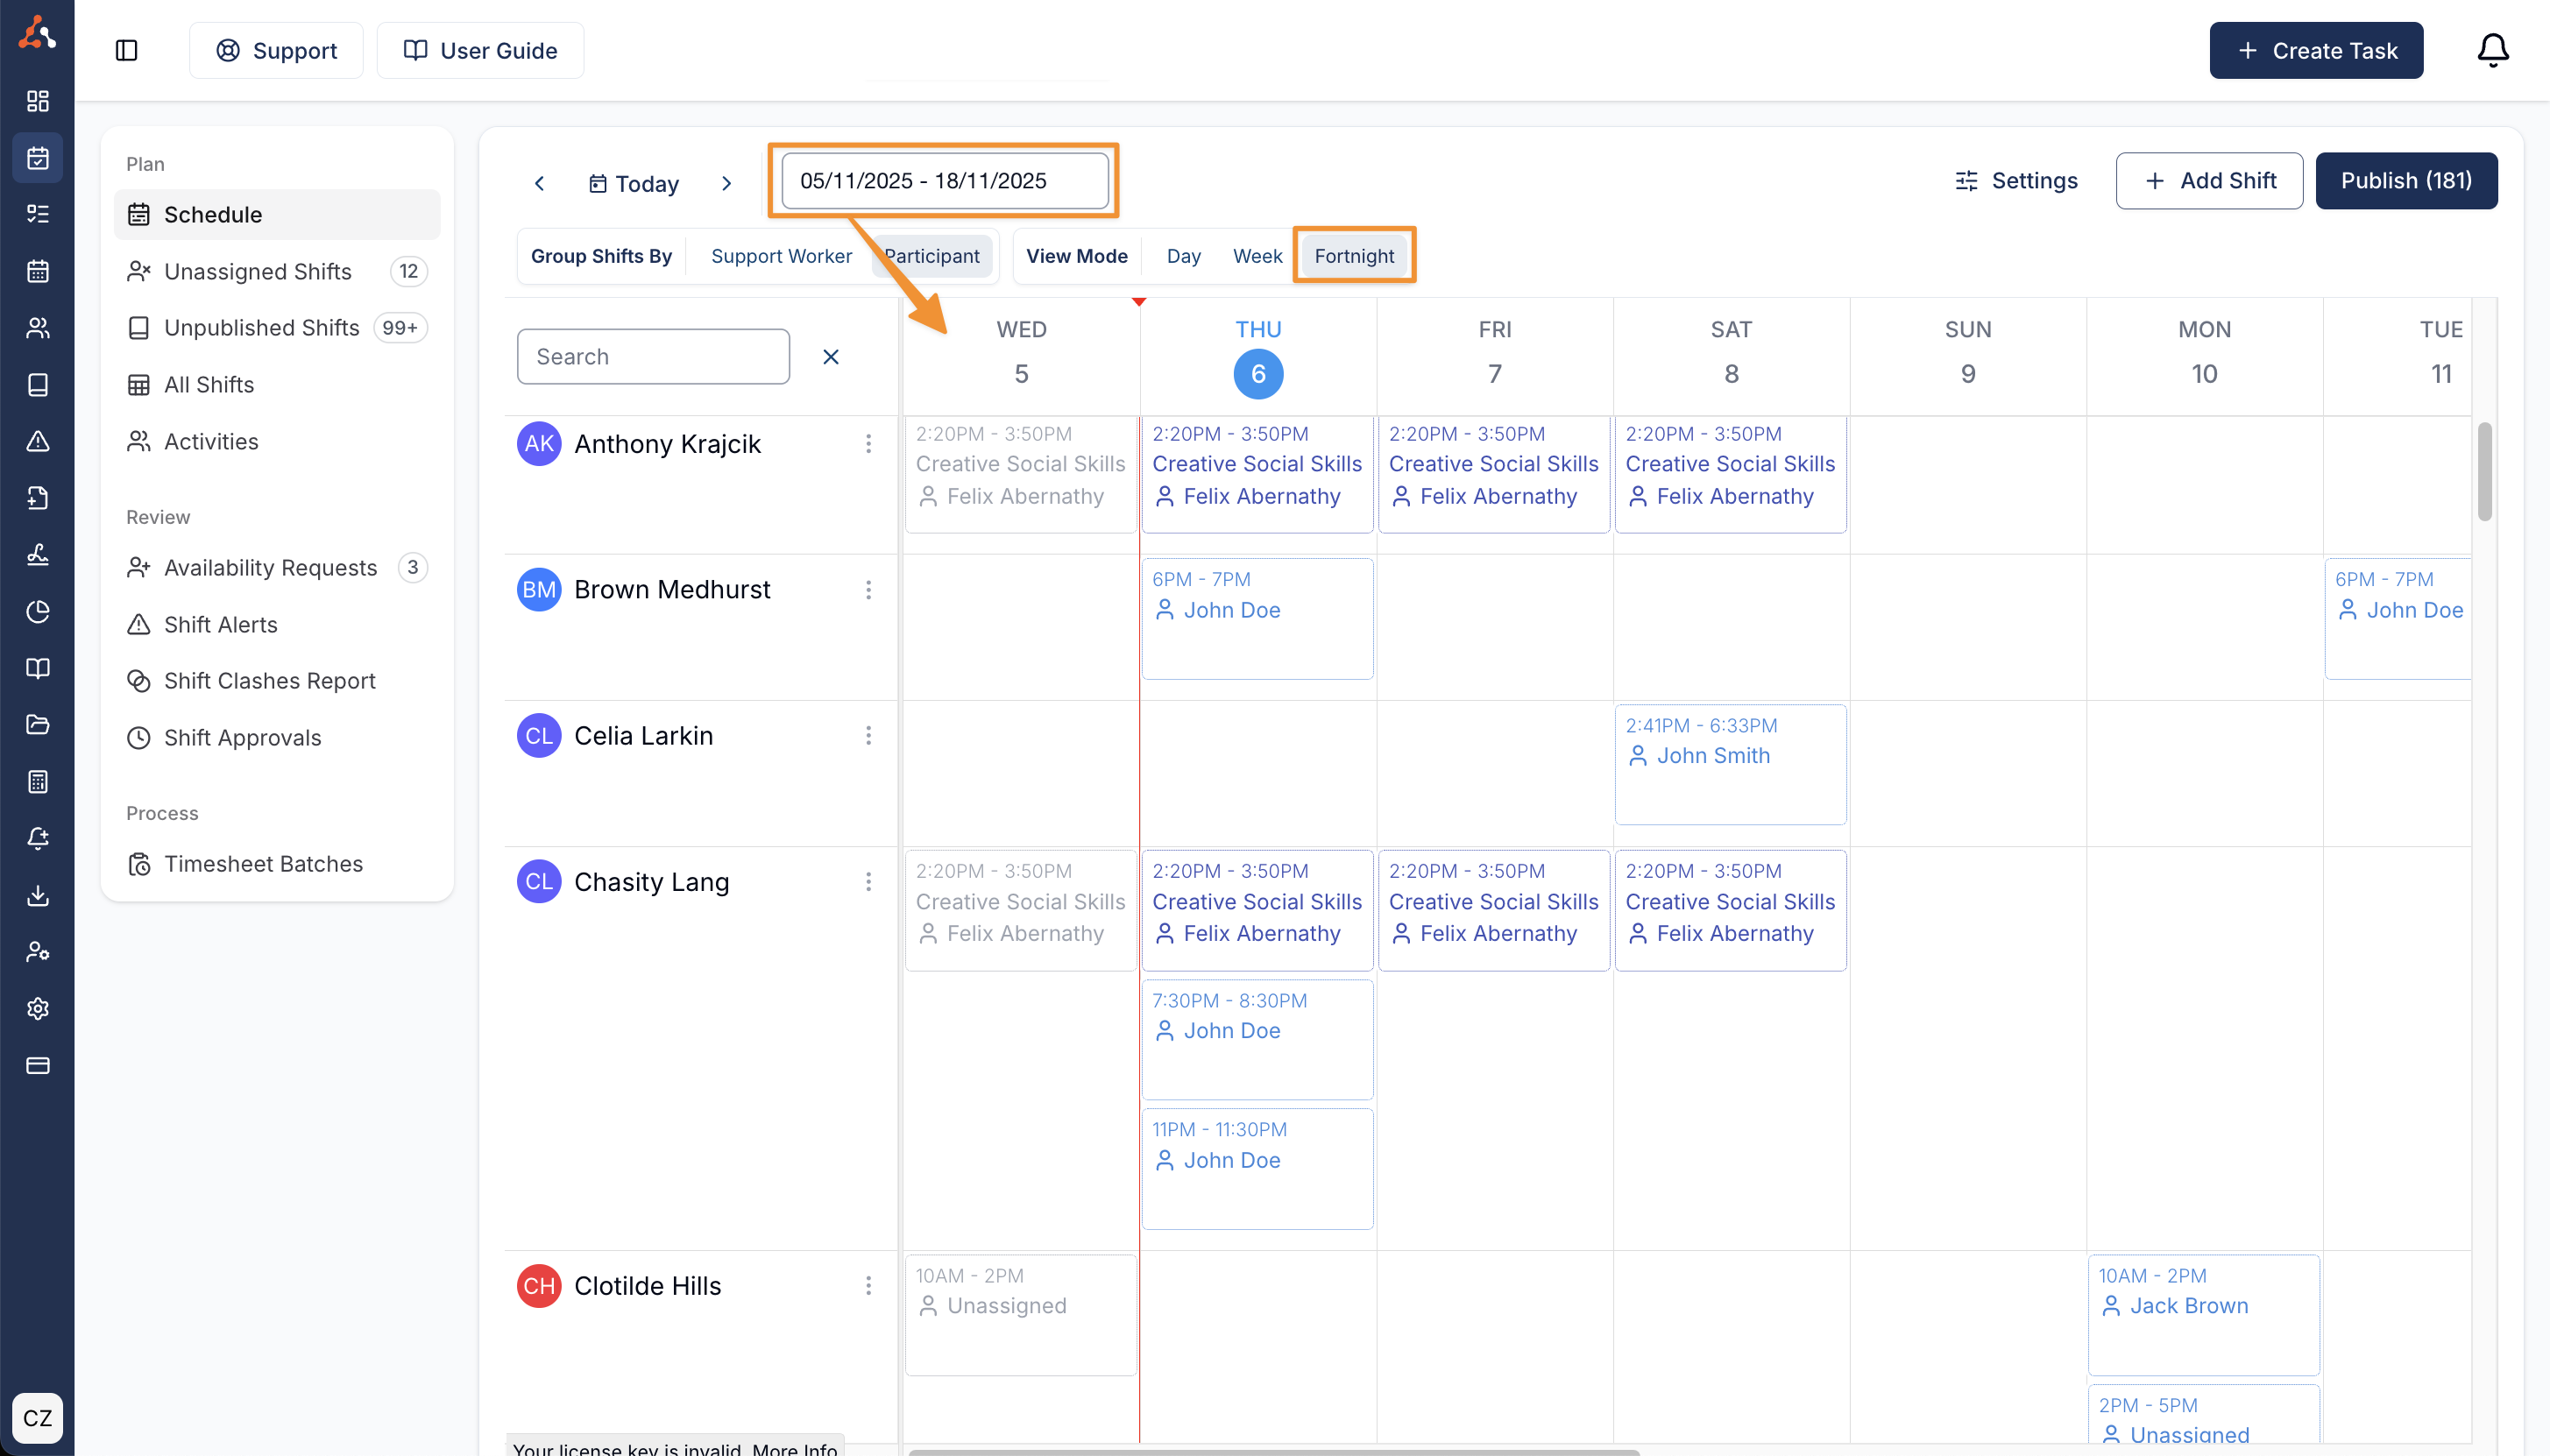
- The Fortnightly view begins on the same start day as your Week view and runs for two weeks. You can also select your fortnight by using the date range to select the day of the fortnight it begins.
- Use the date picker to jump directly to any date outside your current view. For example, if you’re in Week View and choose Wednesday from the previous week, the schedule will automatically shift to that week and display the selected Wednesday.
Adjusting the Fortnight date range
If you have selected Fortnightly view, you can select when you want your fortnight to start by selecting the day of the fortnight it begins.
Adjusting the Week date range
If you have selected Week view, you can select the week by selecting the row within the calendar.
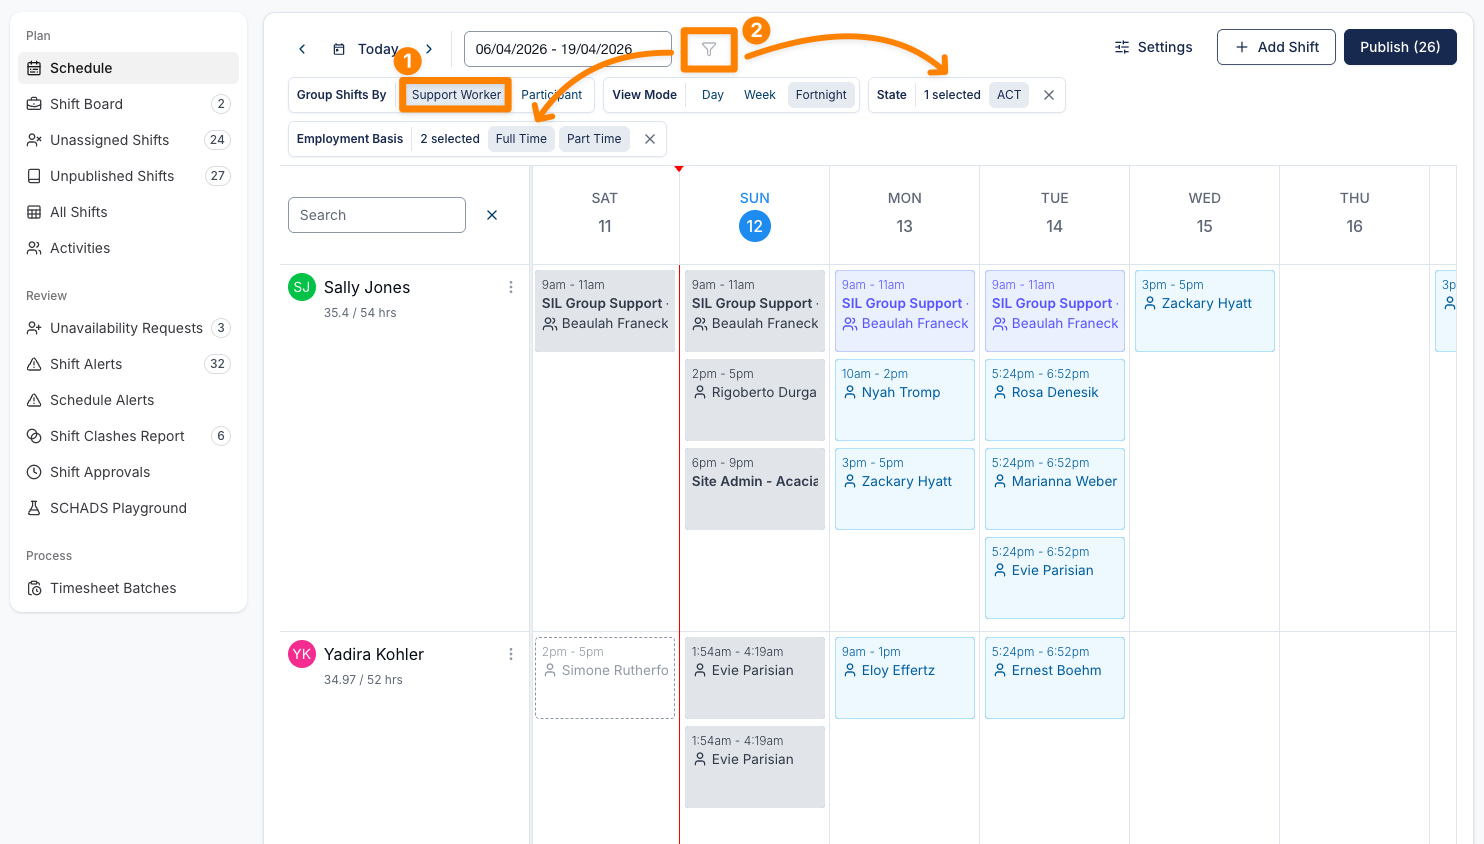
Filters
The Schedule view includes filters to help refine results by location, staff employment type, and charge mode.
How to Use
- Navigate to the Schedule and select the Support Worker view
- Select the filter icon.
- Apply one or more of the following:
- State – Filter by one or more states.
- Employment Basis – Filter by:
- Full Time
- Part Time
- Casual
Both filters support multi-selection.
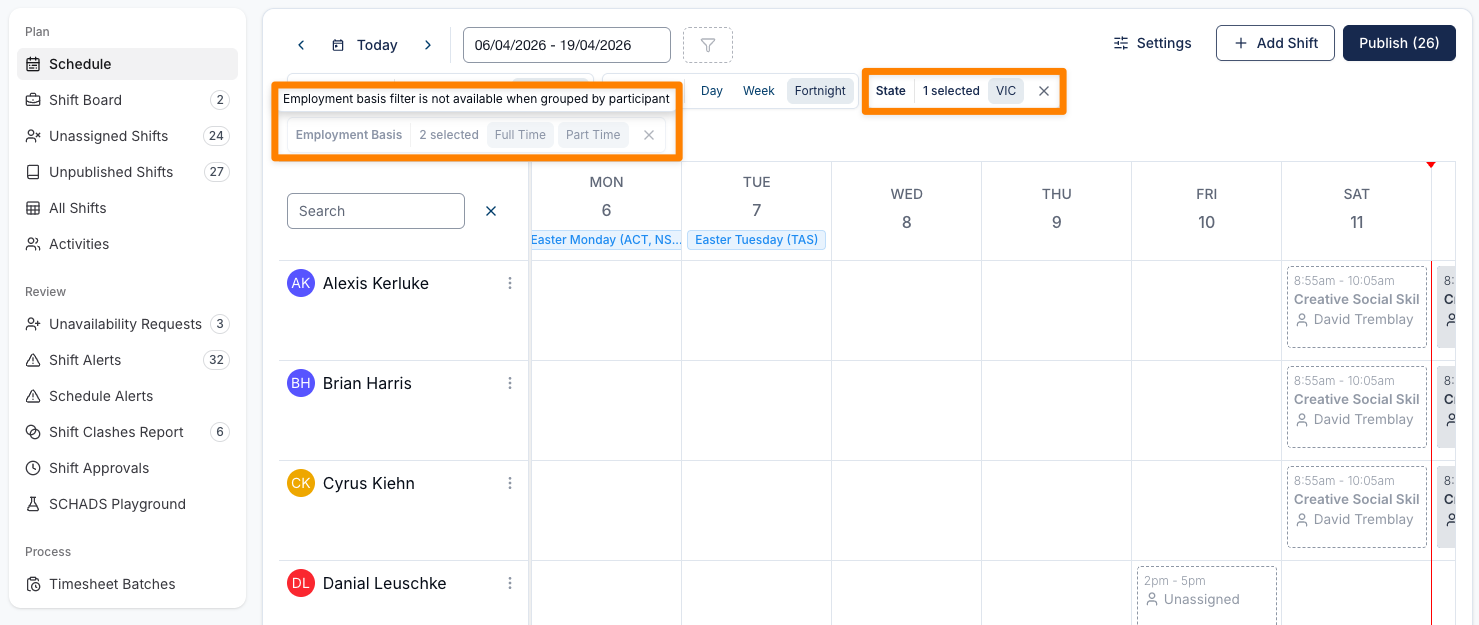
Availability
- State filter: Available in all views, including when grouped by Participant.
- Employment Basis filter: Only available when grouped by Support Worker.
When the Schedule is grouped by Participant, the Employment Basis filter is unavailable. If it was previously applied, it will appear greyed out, with a tooltip on hover explaining that the filter is not available when grouped by Participant.
This ensures users understand why the filter cannot be applied in that view.
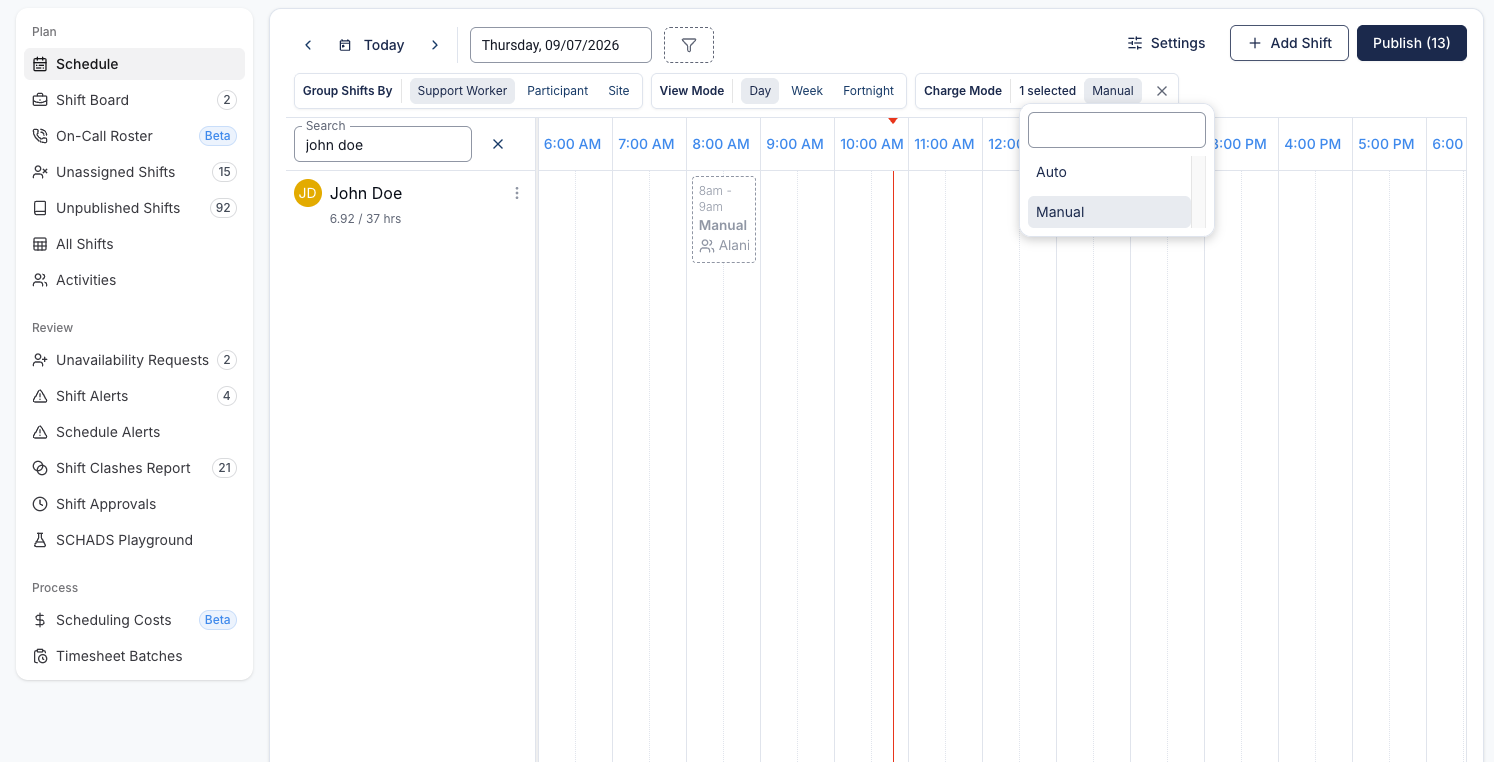
Charge Mode filter
The Charge Mode filter lets you narrow the Schedule to shifts by how their charges are calculated — Auto (charges are calculated automatically) or Manual (charges are entered and controlled manually). For more on the difference, see Managing Manual Charges.
- Select Auto or Manual on its own to show only shifts with that charge mode.
- Select both to show every shift that has a charge mode.
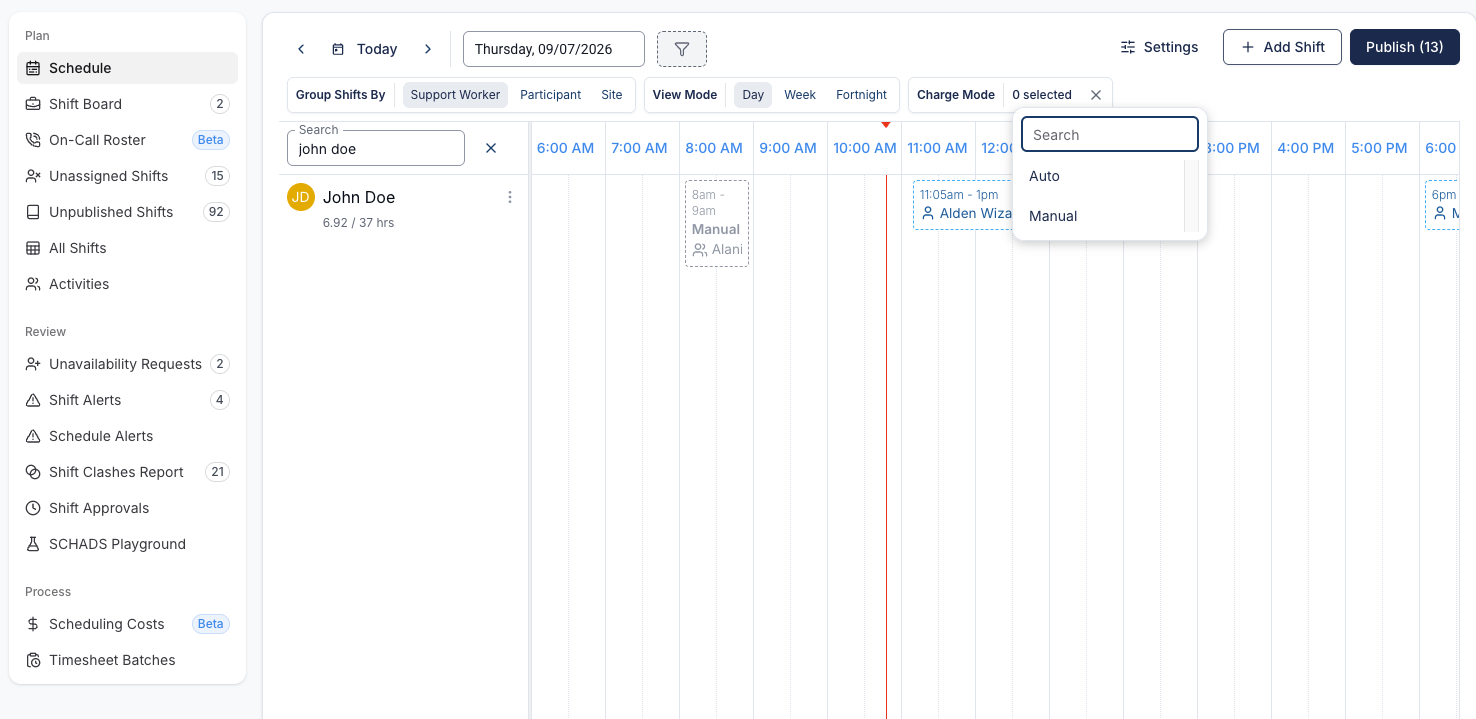
Your selection is remembered, so the Charge Mode filter stays applied the next time you open the Schedule.
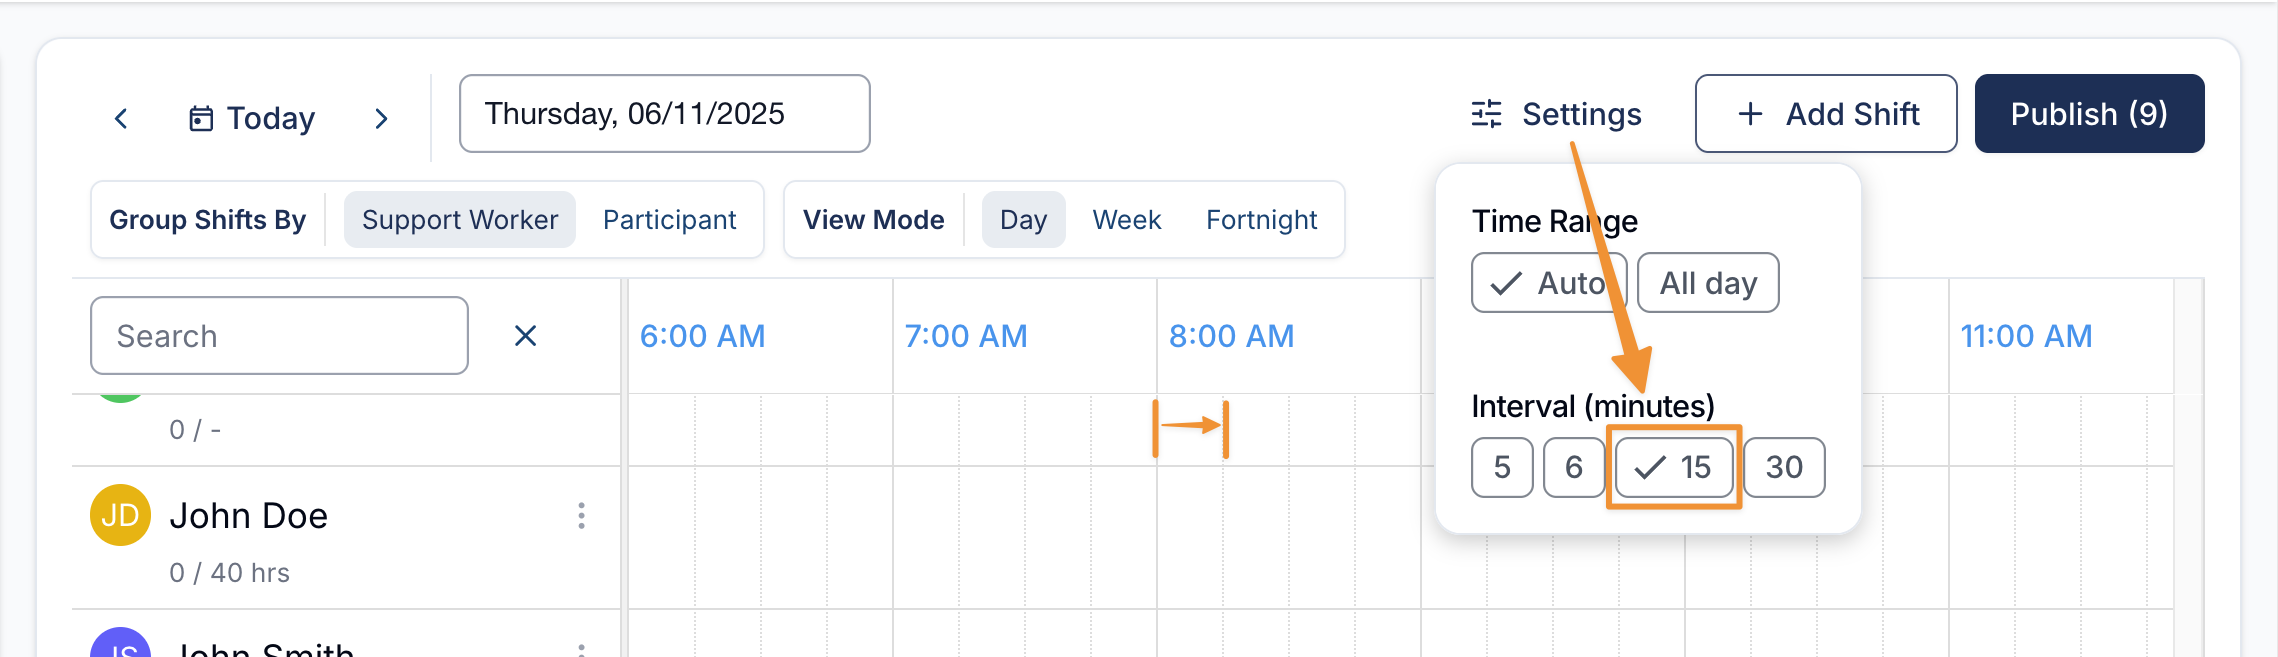
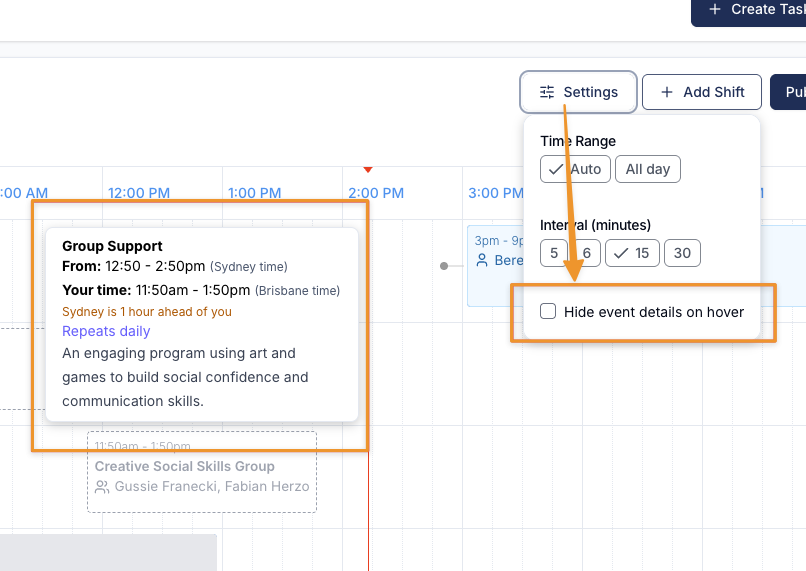
Settings
Time Range
Tailor your view to display All Day (Midnight to Midnight), or Auto which will display a scale of time where your shifts occur between. This provides you with greater flexibility, whether you have a business that operates 9-5 or is a 24hr a day operation.
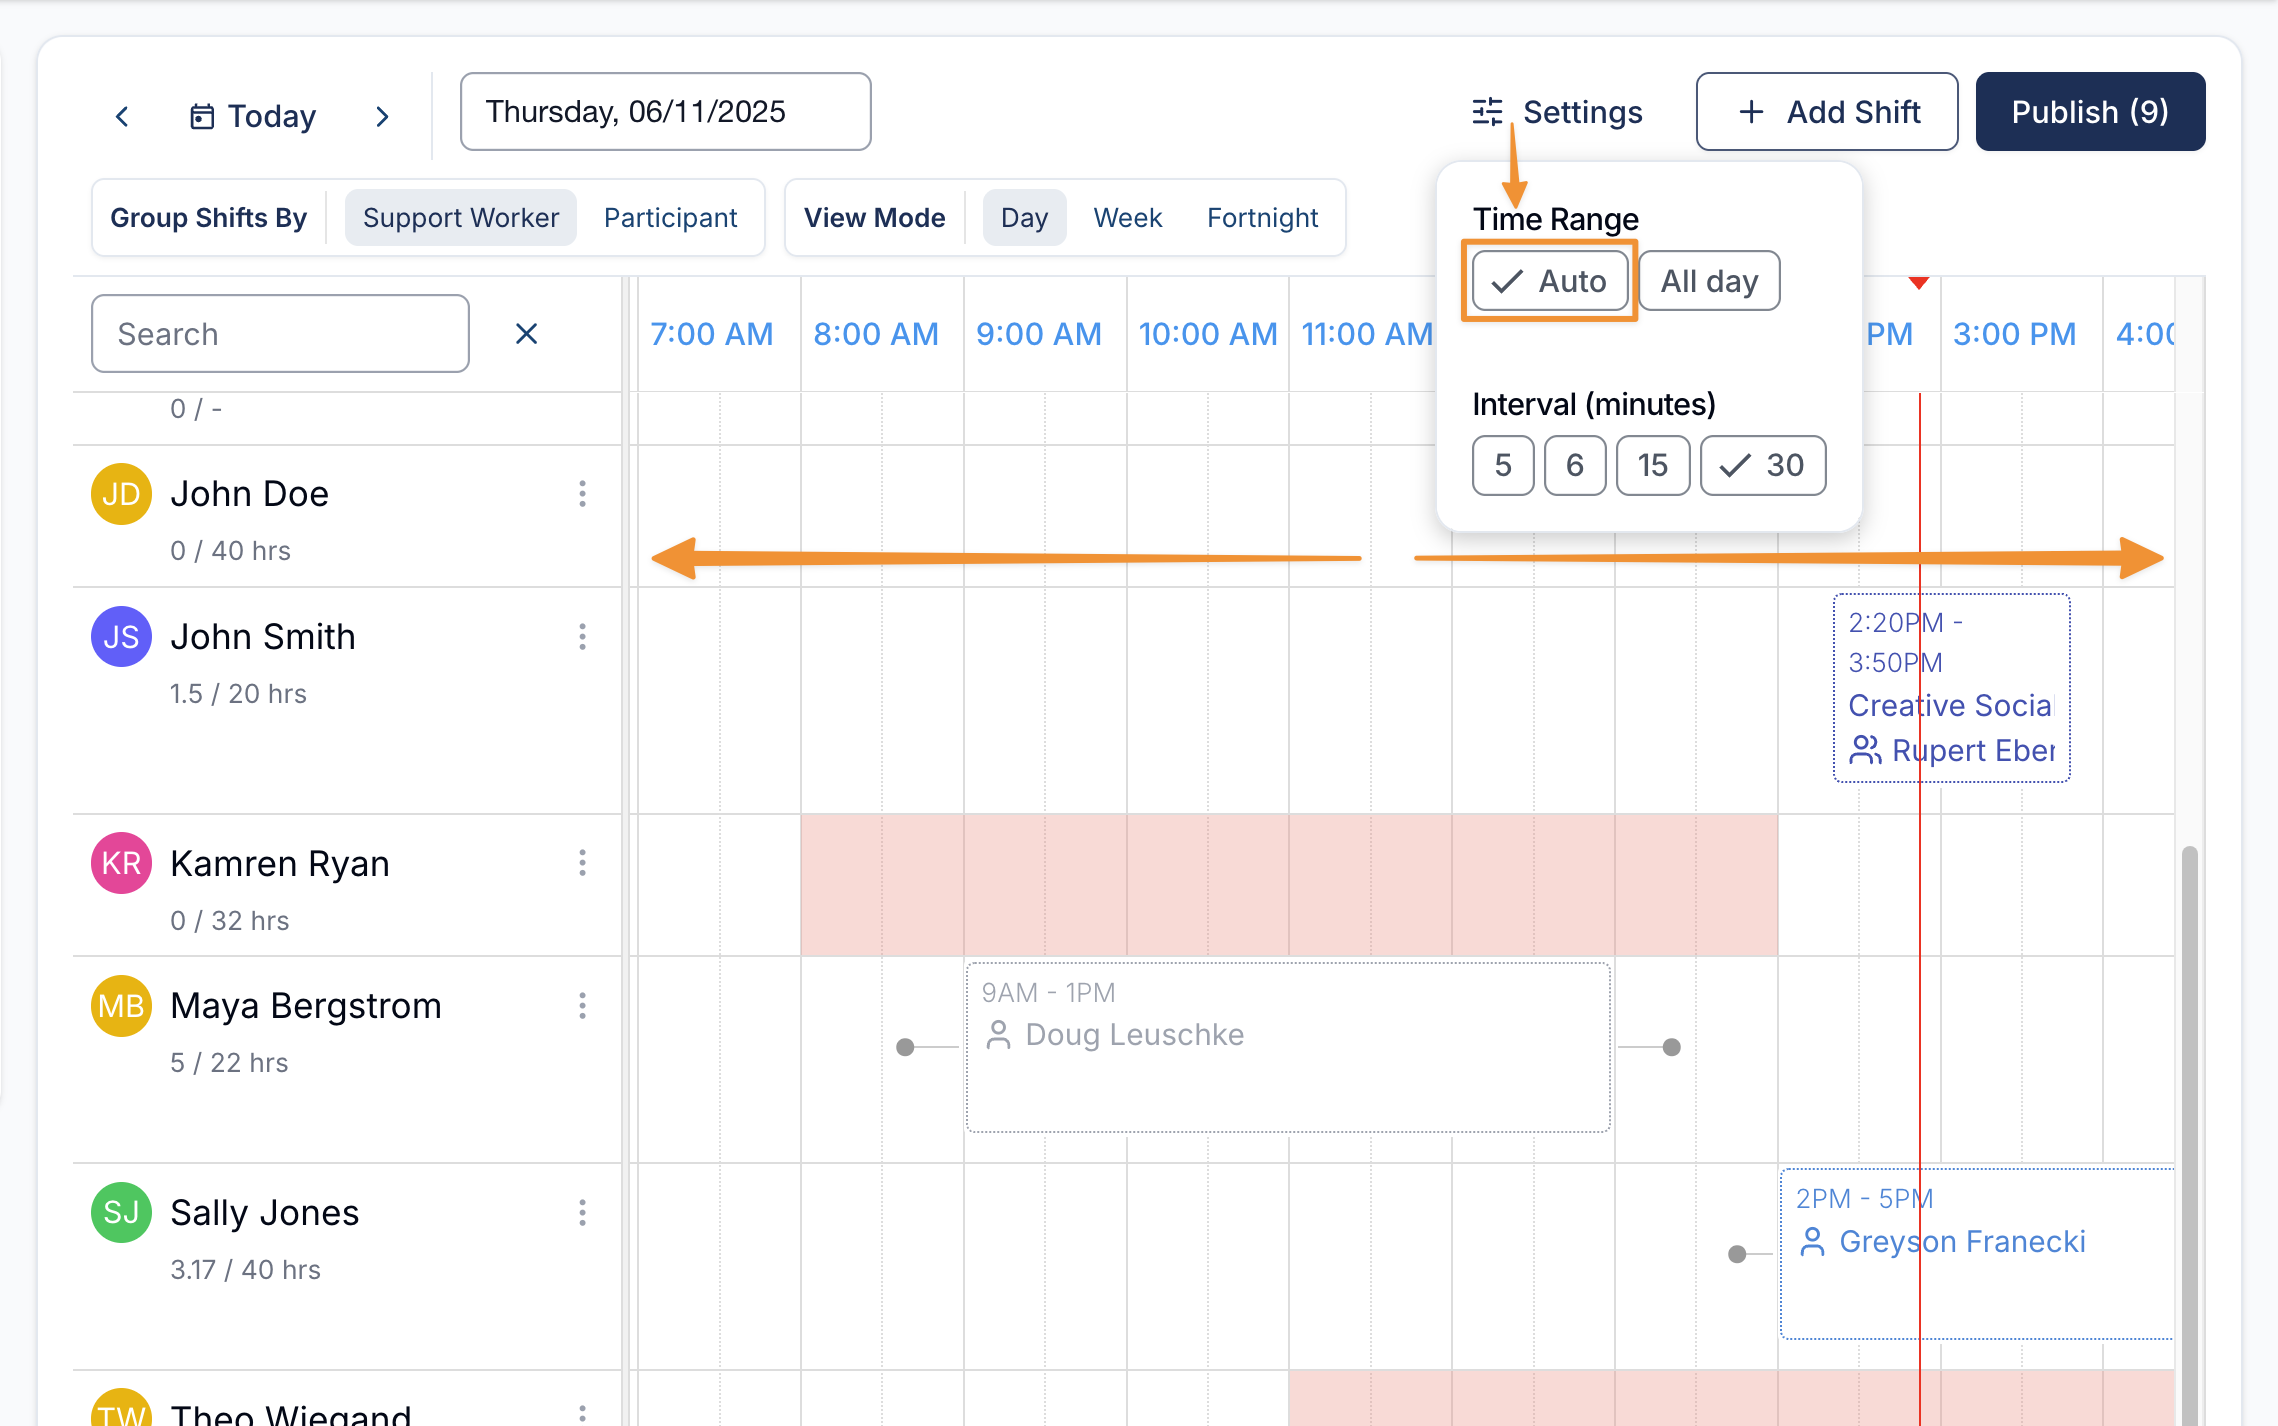
Interval (minutes)
If you have selected Day view, it will display in suitable scale that matches the 'Increments' you have set in the Settings at the top of your page.
Hide Event Details on Hover
Use the “Hide Event Details on Hover” option, to turn off event descriptions from appearing when hovering over events - this is particularly helpful if you have long event details within your support
Other Functions
Other functions in the Schedule include Add Shift and Publish.
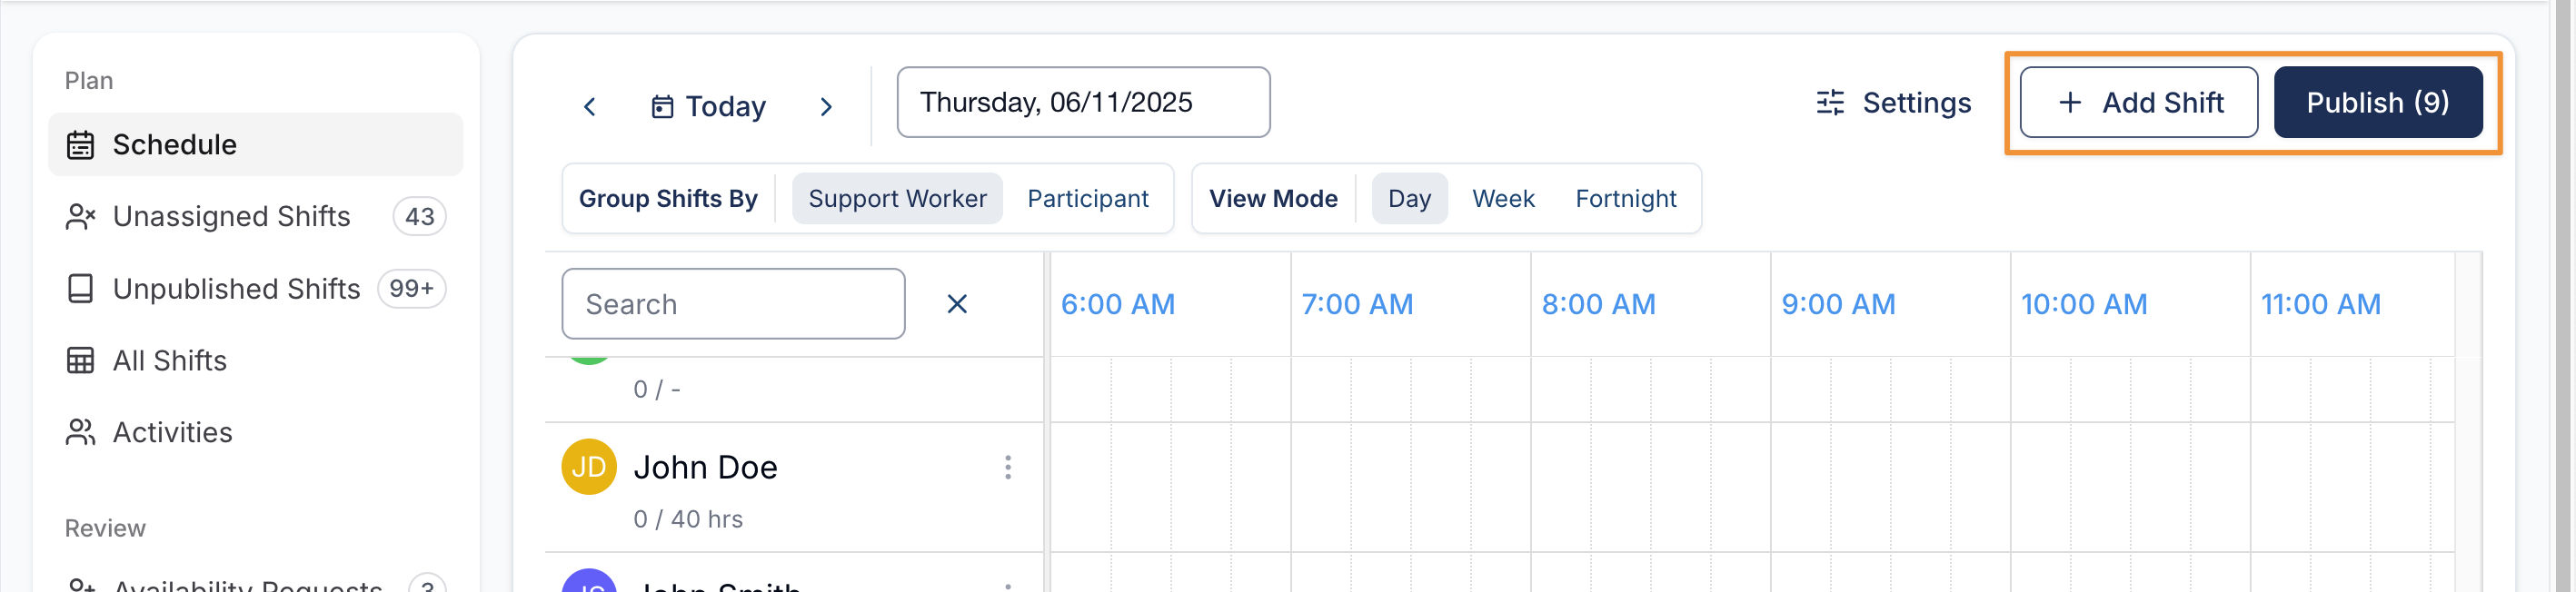
Add Shift Button
You can add a shift by either selecting the + Add Shift button or by selecting the blank space within the desired day and row of the Participant or Support Worker. For more on this, view our guide on Adding a 1:1 Shift.
Publish Button
To publish all shifts in the current view, use the 'Publish' button in the top right hand corner. For more on this, view our guide on Publishing Shifts.
Drag and Drop Shifts
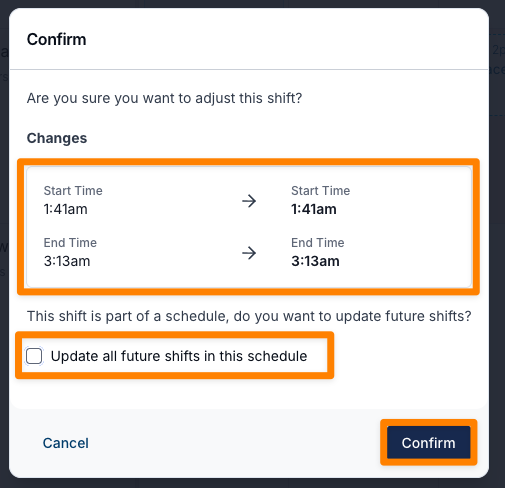
You can easily reschedule a shift for another date/time by clicking and dragging the support to a new time slot. Once the shift has been moved, a pop up will appear confirming the previous and new start/finish times of the shift, and whether you want to Update all support times linked to this activity if this shift is part of a recurring schedule (Example: You would select this option when you want to update all recurring shifts to move from Monday at 4pm to Tuesday at 4pm — if you're only updating this one shift, leave this unticked). You can then click Confirm to make this change.
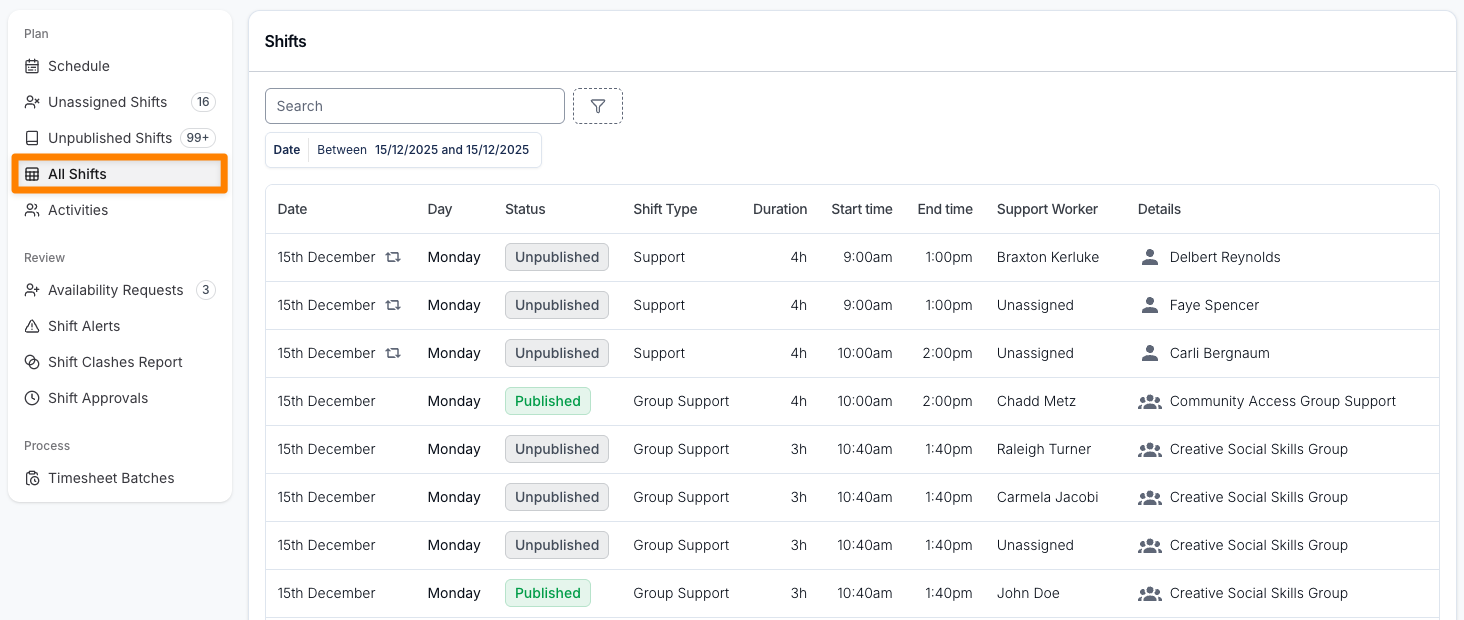
All Shifts View
If you prefer to view upcoming supports in a list rather than a calendar, you can use the All Shifts sub-menu. This view displays a list of all upcoming supports in a clear, easy-to-read format.
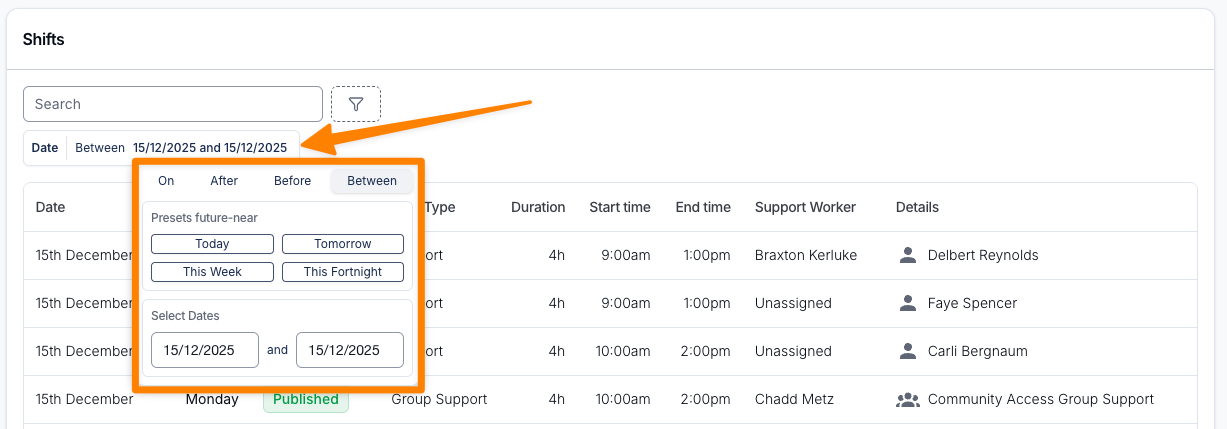
You can narrow your results by clicking on the date filter to add a specific date range or choosing from the preset options:
- Today
- Tomorrow
- This Week
- This Fortnight
You can also filter shifts based on whether they occur On, After, Before, or Between the selected dates.
The Shift Type filter allows you to refine your view by selecting All, Support, Group Support, or Shift.
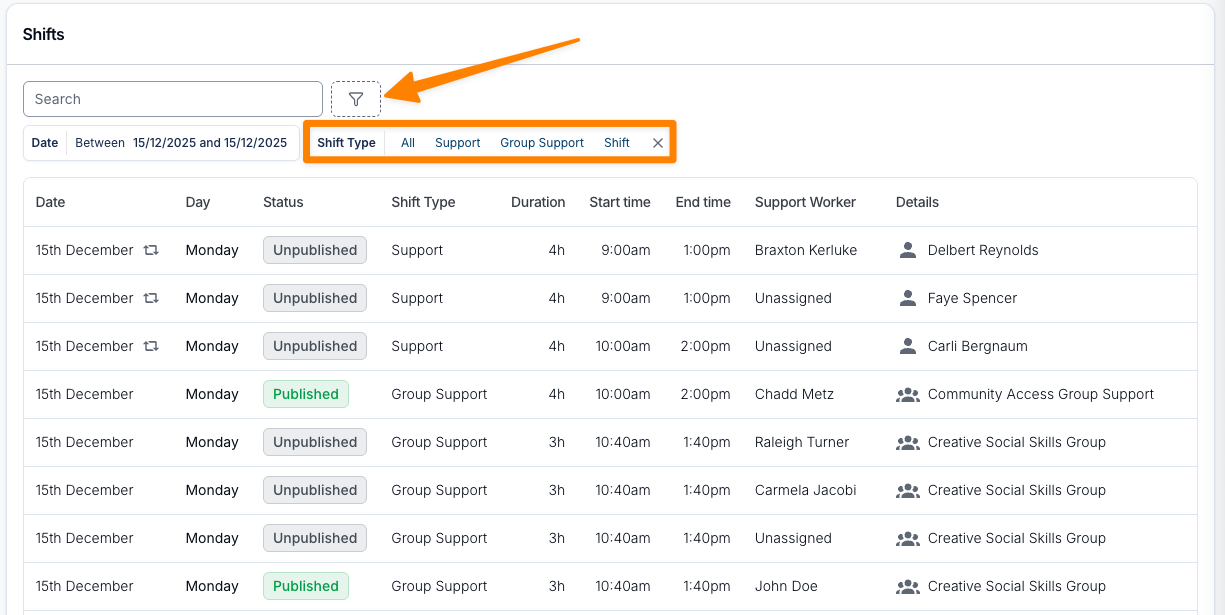
You can also refine the view further to display shifts based on their Status of either Published or Unpublished.
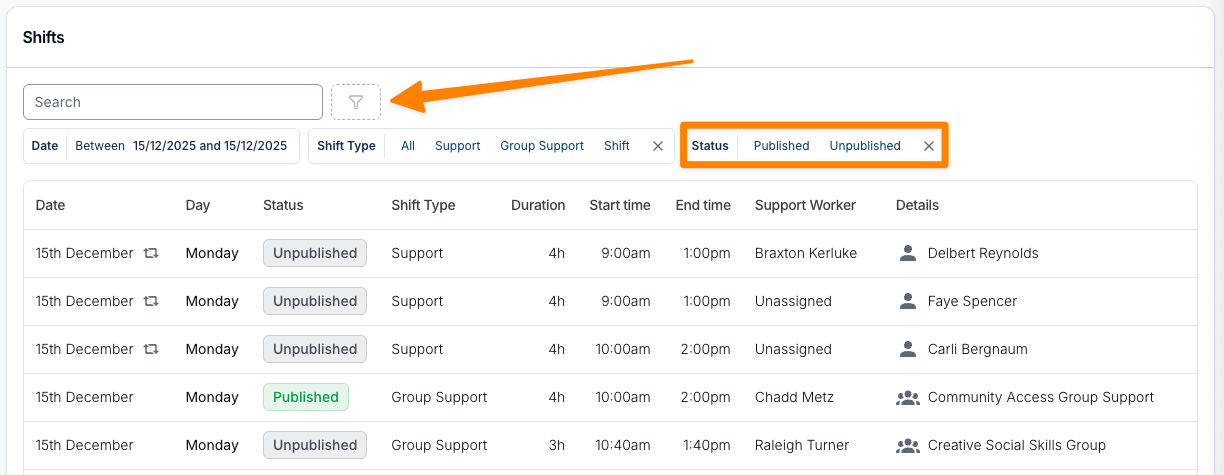
The All Shifts view displays key details for each shift, including:
- Date
- Day
- Status
- Shift Type
- Duration
- Start Time
- End Time
- Support Worker
- Details
The Details column shows the Participant name for direct support sessions, or the Activity name for group supports and shifts. If a support is Recurring, hovering over the recurring icon will display how often it occurs.
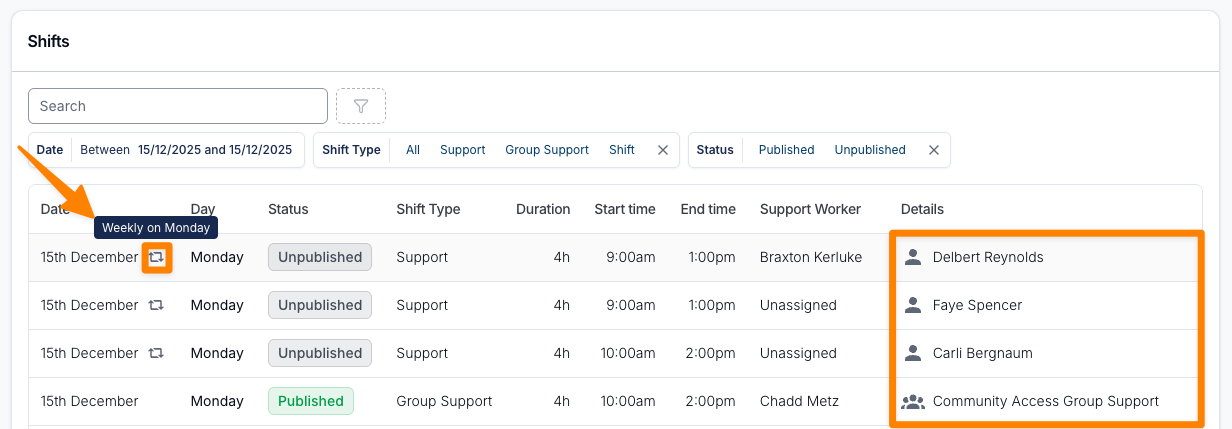
To open a support, simply click anywhere on the row.
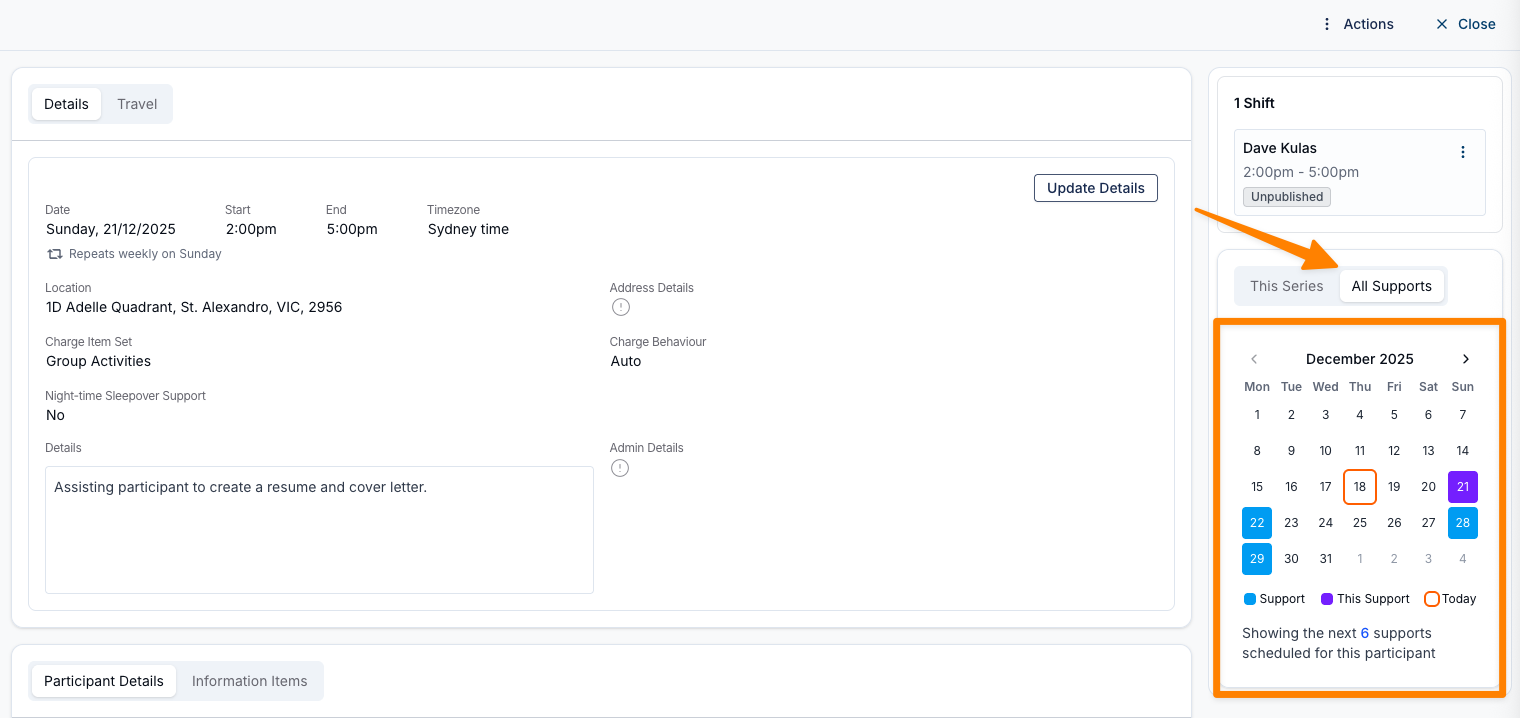
Mini Schedule
Within each Support, a mini schedule is displayed. For individual supports, the default view is set to This Series. The current date is outlined in orange, the selected support is highlighted in purple, and any upcoming supports for the Participant or Group appear in blue.
The mini schedule also includes a written summary indicating how many supports are shown for the displayed month, along with the support frequency and end date.
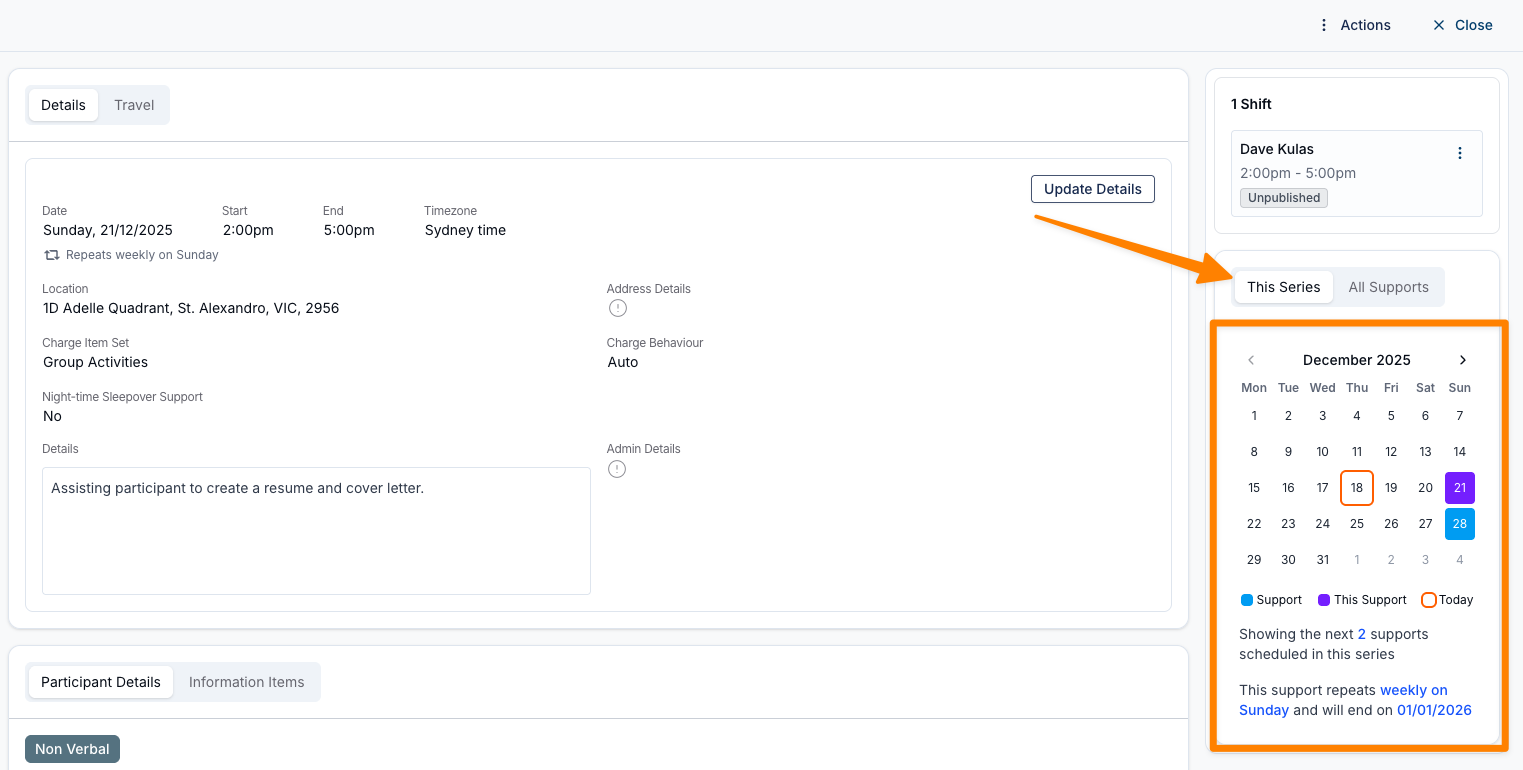
You can switch the view to All Supports to display all upcoming support sessions allocated to the Participant when a direct support is selected.
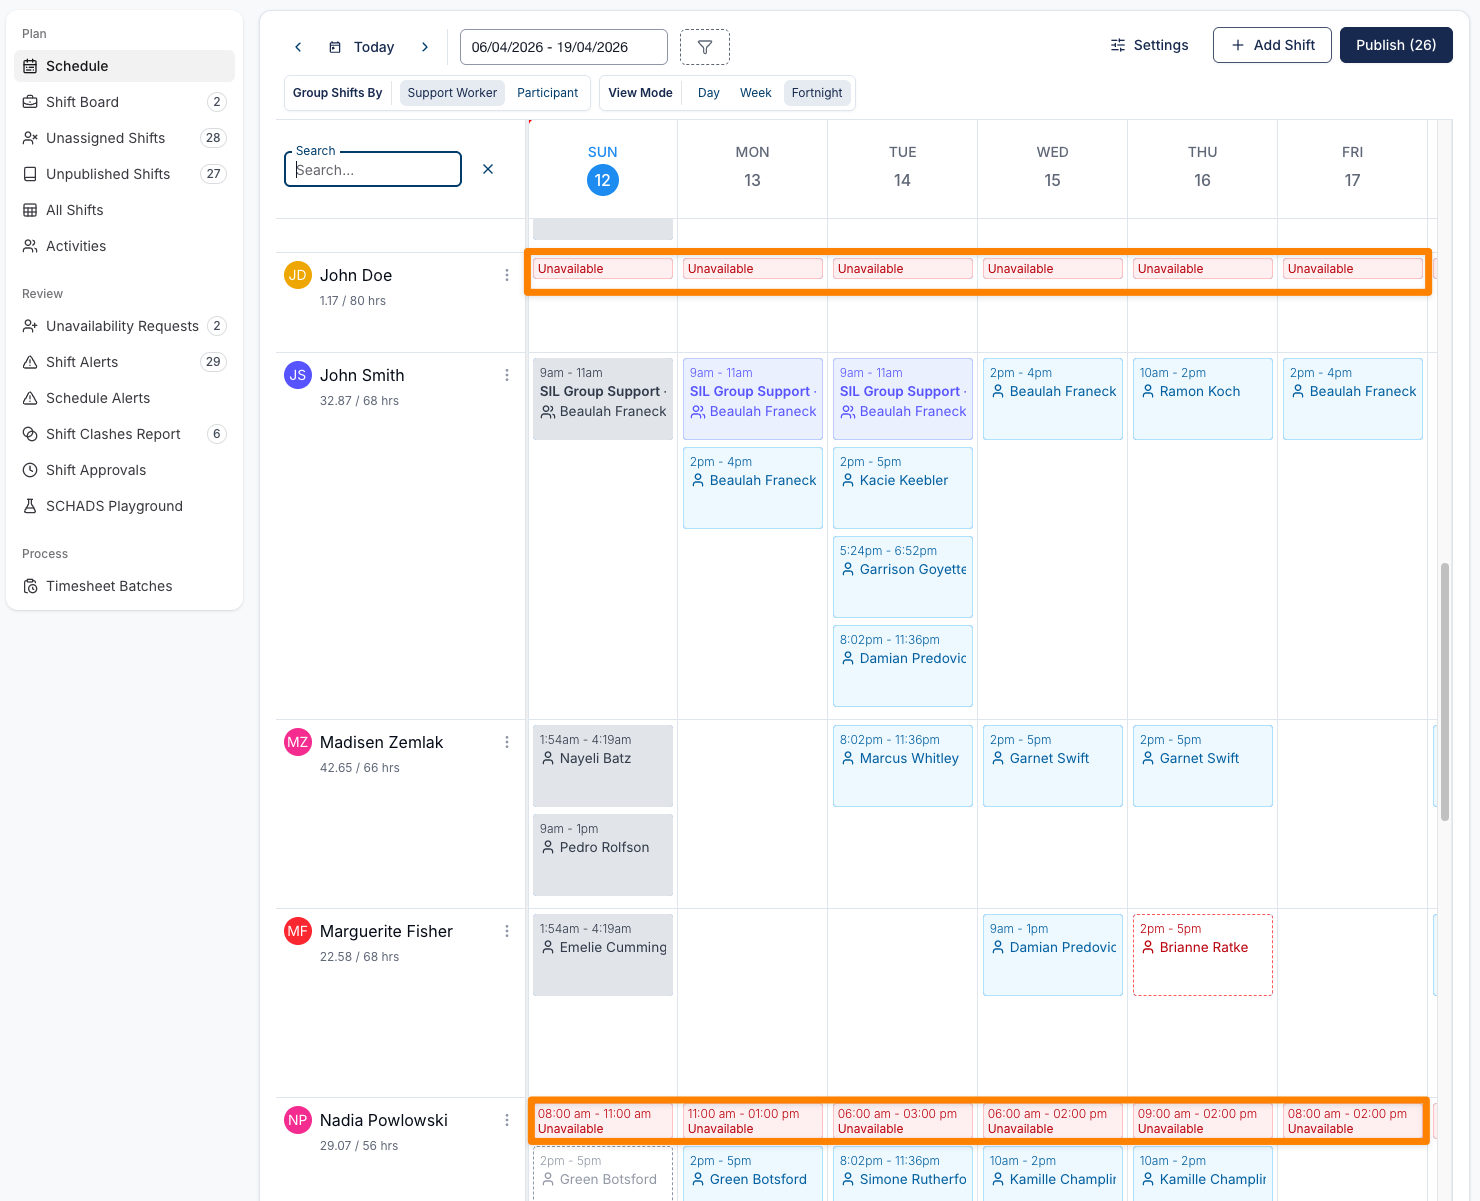
Viewing Unavailability in the Schedule View
Users can view periods of unavailability directly within the Schedule view, providing greater visibility when planning and allocating supports.
Extended periods of unavailability (e.g. multi-day leave) are displayed with an Unavailable chip on the relevant day, with no time shown, indicating the staff member is unavailable for the entire day. Shorter periods of unavailability (such as a few hours) are displayed as individual tiles within the Schedule, with the specific times of unavailability clearly shown.
For more information, visit the Managing Availability guide.
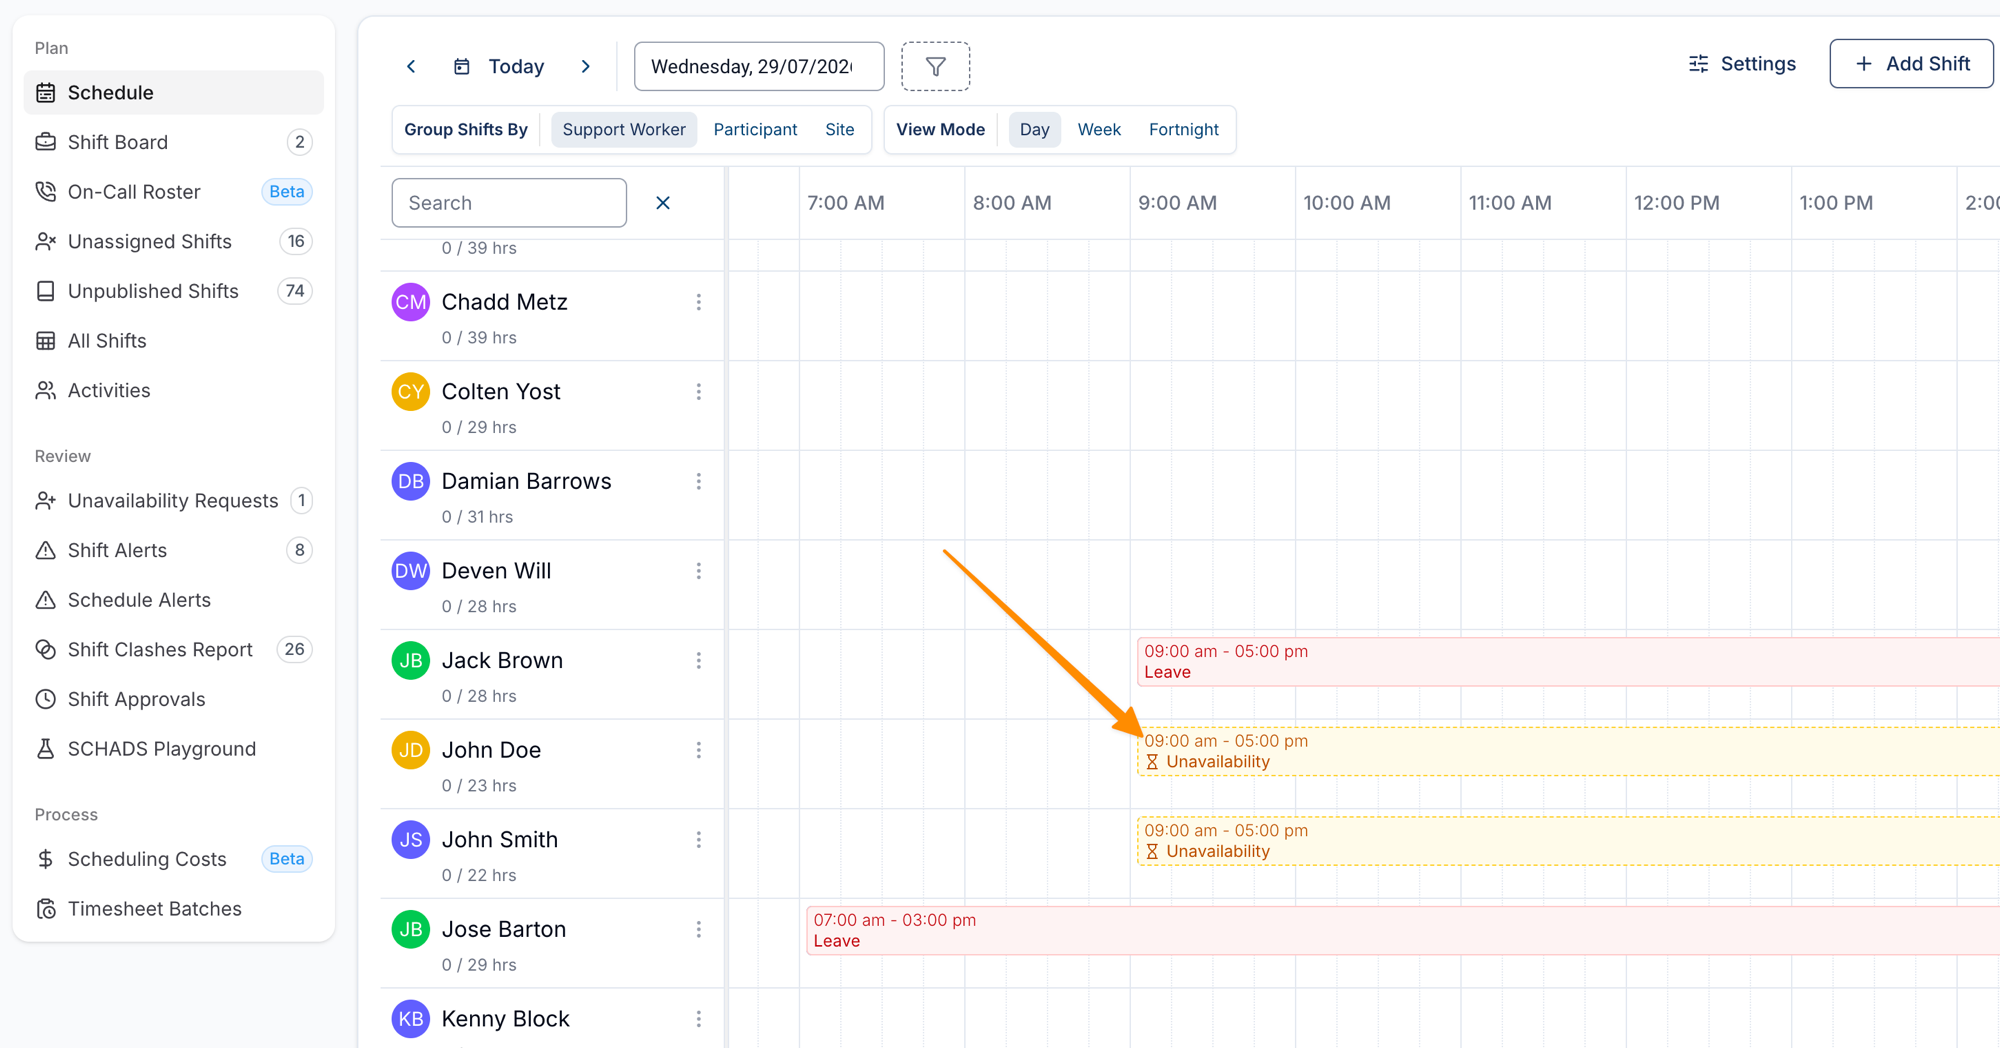
Pending Leave & Unavailability on the Schedule
Pending (unapproved) leave and unavailability requests appear directly on the Schedule, so you can see them while planning and allocating supports — without needing to switch across to the Unavailability Requests tab to check what's still awaiting a decision.
Pending requests are styled so they're easy to tell apart from approved leave:
- Approved leave and unavailability appears as a solid, filled block.
- Pending requests appear in a distinct colour with a dashed outline, and are marked with an hourglass icon. Hovering over the request shows a Pending label so the status is clear beyond colour alone.
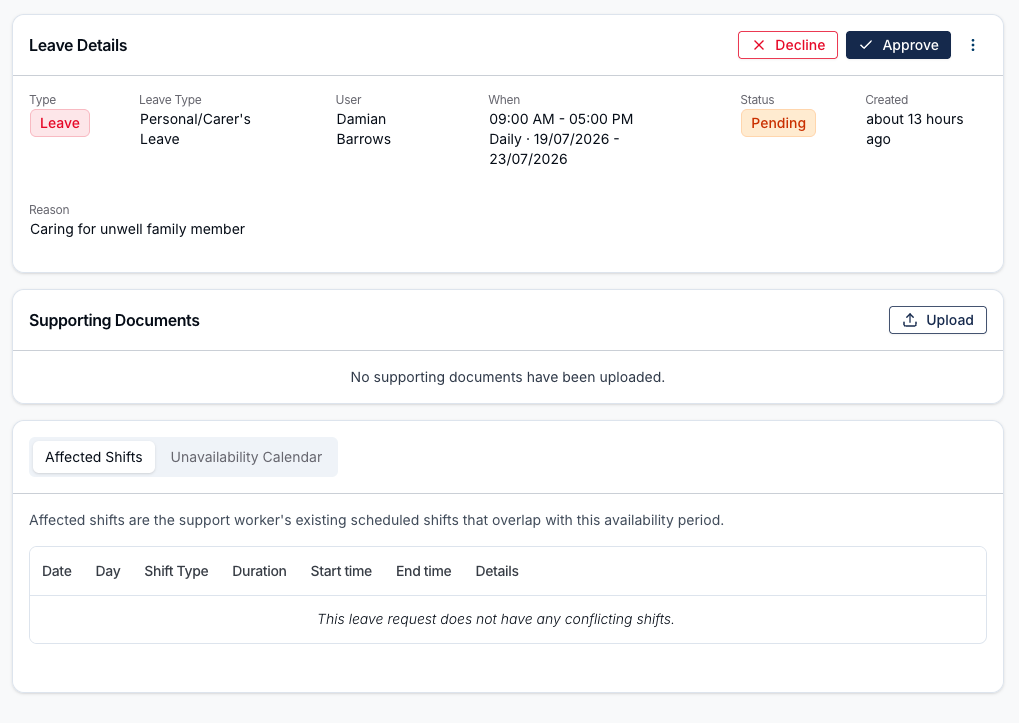
Reviewing a pending request from the Schedule
Clicking a pending request opens the full review panel right on the Schedule, so you can action it without leaving the view you're working in. From this panel you can see:
- The request details (type, dates, times, and the reason given).
- The affected shifts — any rosters or participant supports that may be impacted if the request is approved.
- For Leave requests, the employee's live leave balances and suggested leave hours pulled from your payroll integration.
You can approve or decline the request on the spot (and edit or delete it where needed). Once actioned, the Schedule refreshes automatically to reflect your decision.
For more information on reviewing and approving requests, visit the Managing Availability guide.