- Administration
- Settings
- Template Settings
Template Settings
Overview
Within the Astalty Premium you can add Custom Templates to your Astalty account. What this means is that you can make use of Astalty Placeholders (more on this later) to assist in the ease of generating your Organisations documents!
Once you upload your documents to Astalty you can let Astalty do the data entry for you to free up your time to be more available to your Participants.
Creation Process
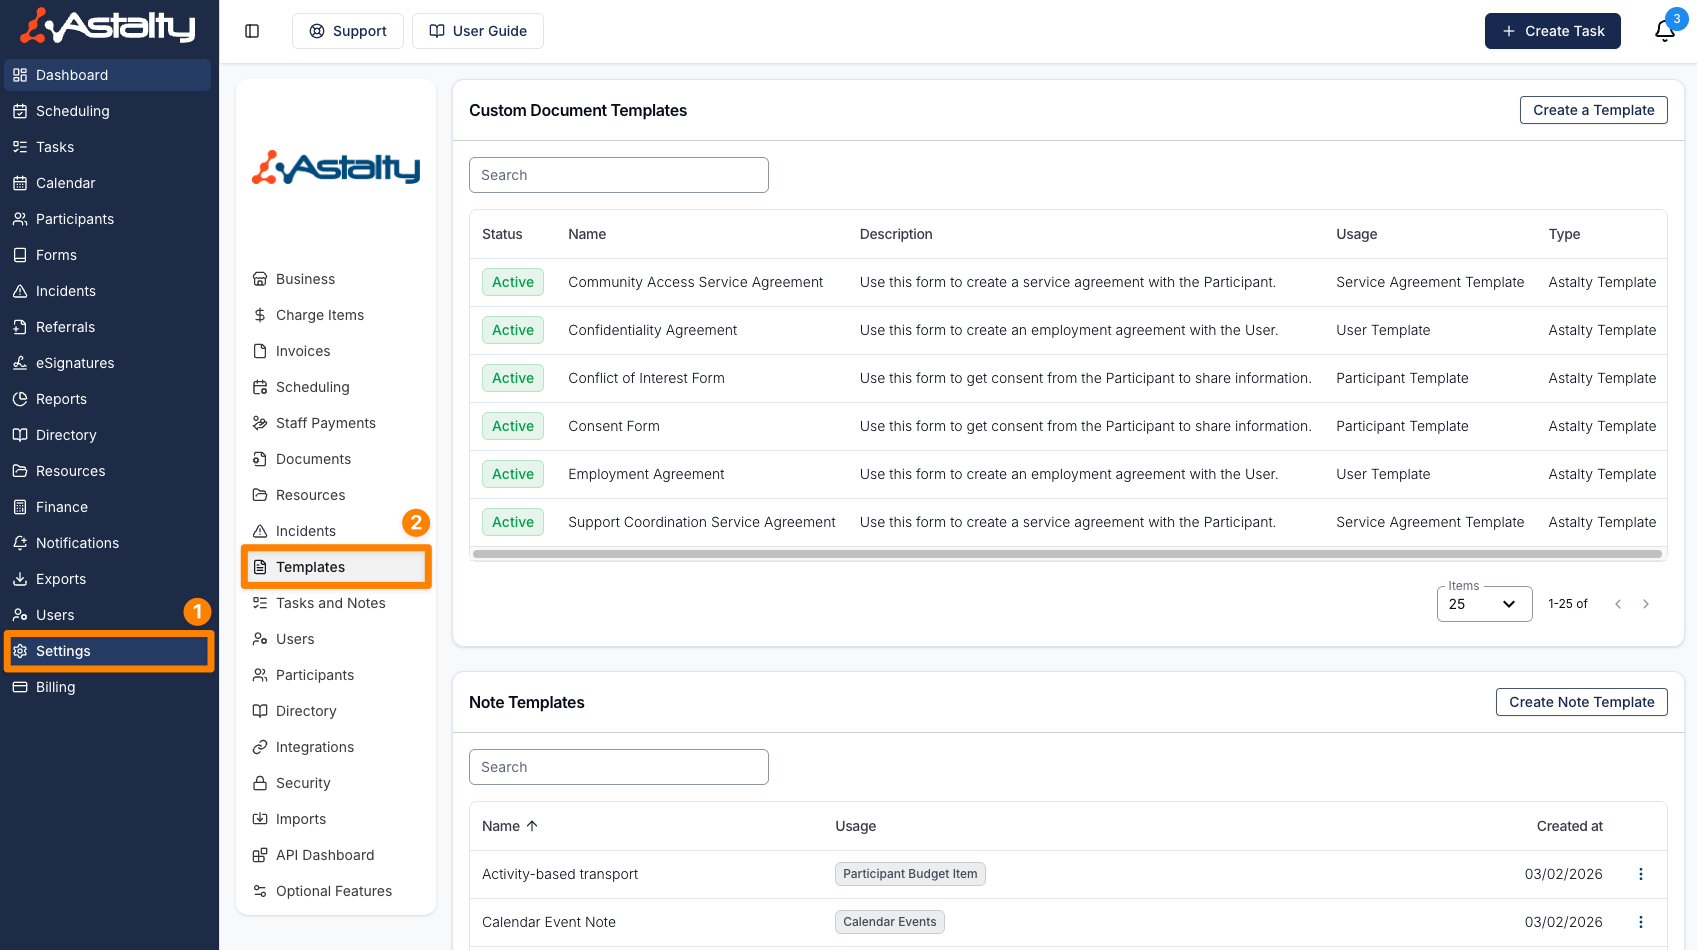
To create a Custom Template within Astalty navigate to the Template Settings. Once in this screen you will see a 'Create a Template' button in the top right. To create a new Template click this button.

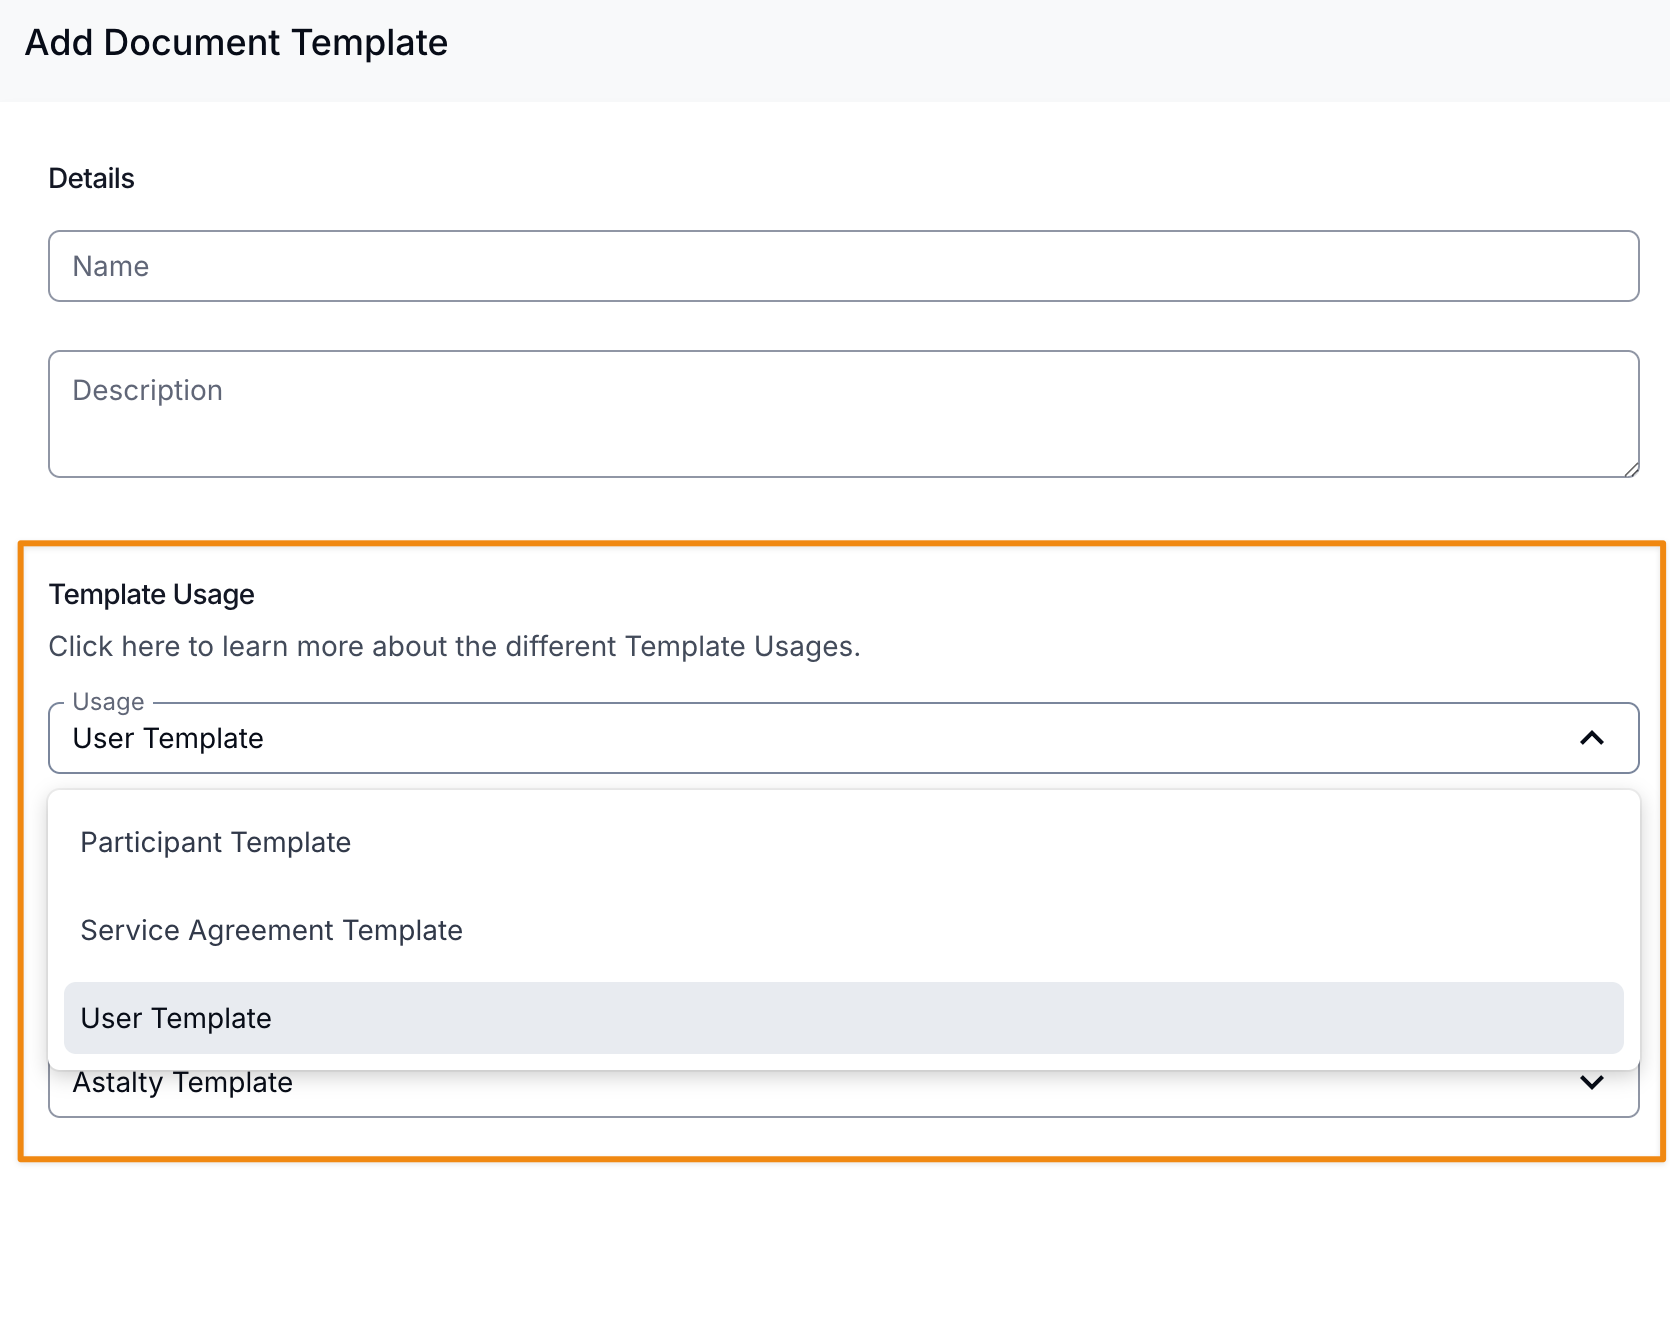
Once in this 'Create a Template' screen you will be prompted to add a Name and Description, and assign a Usage Type to the Template. You'll also be able to choose between an Astalty Template or a Word Template.
Template Usage Types
Choosing a usage type depends on the usage of the template. The usage type defines what Placeholders you can use when editing the contents of the template. There are three usage types available:
- Participant Template — This Template allows you to use the following placeholder groups;
- Business
- Participant
- Primary Coordinator
- Formatting
- Service Agreement Template - This Template allows you to use the following placeholder groups;
- Business
- Participant
- Primary Coordinator
- Service Agreement
- Formatting
- User Template — This Template allows you to use the following placeholder groups;
- Business
- User
- Formatting
User Template Permissions
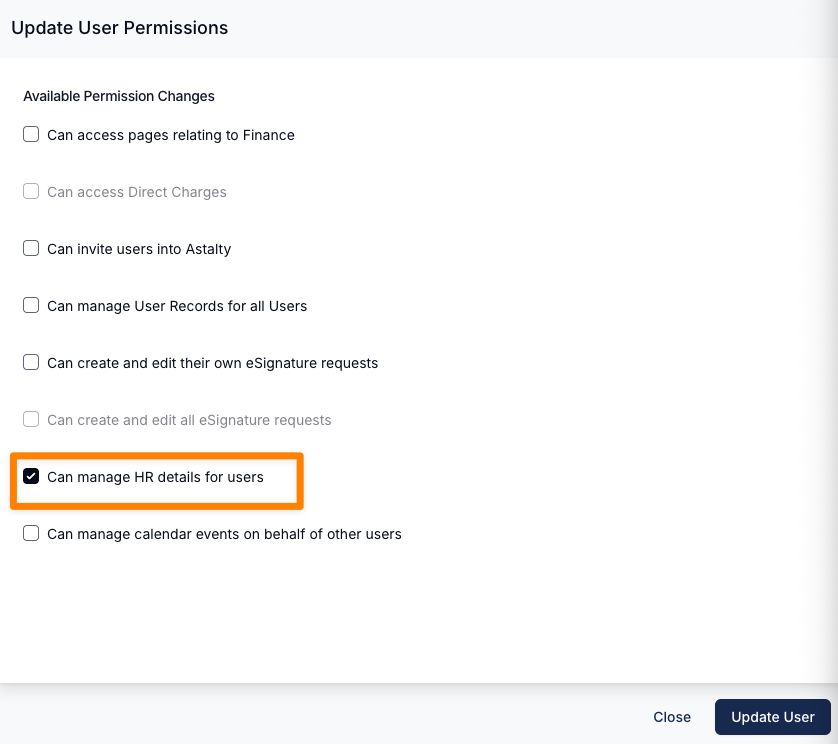
Only the Account Owner and Admin Users with the "Can manage HR details for users" Permission will be able to add and utilise the User Template functions. For more information, check out the Updating Roles and Permissions guide.
Template Format
Astalty Template Vs Word Template
Within the 'Create a Template' screen you will have the choice between two Formatting Types. The Astalty Template and the Word Template.
The Astalty Template unlocks the use of Astalty Placeholders and the ability to edit a generated Template up until generation.
Using the Word template allows you to download the Word document uploaded to this Template selection. You will have to finalise this document through Microsoft Word — finalisation includes, adding Participant Placeholders within the Word document similar to what the Placeholder would do for you.
Our recommendation would be to choose the Astalty Template format option.
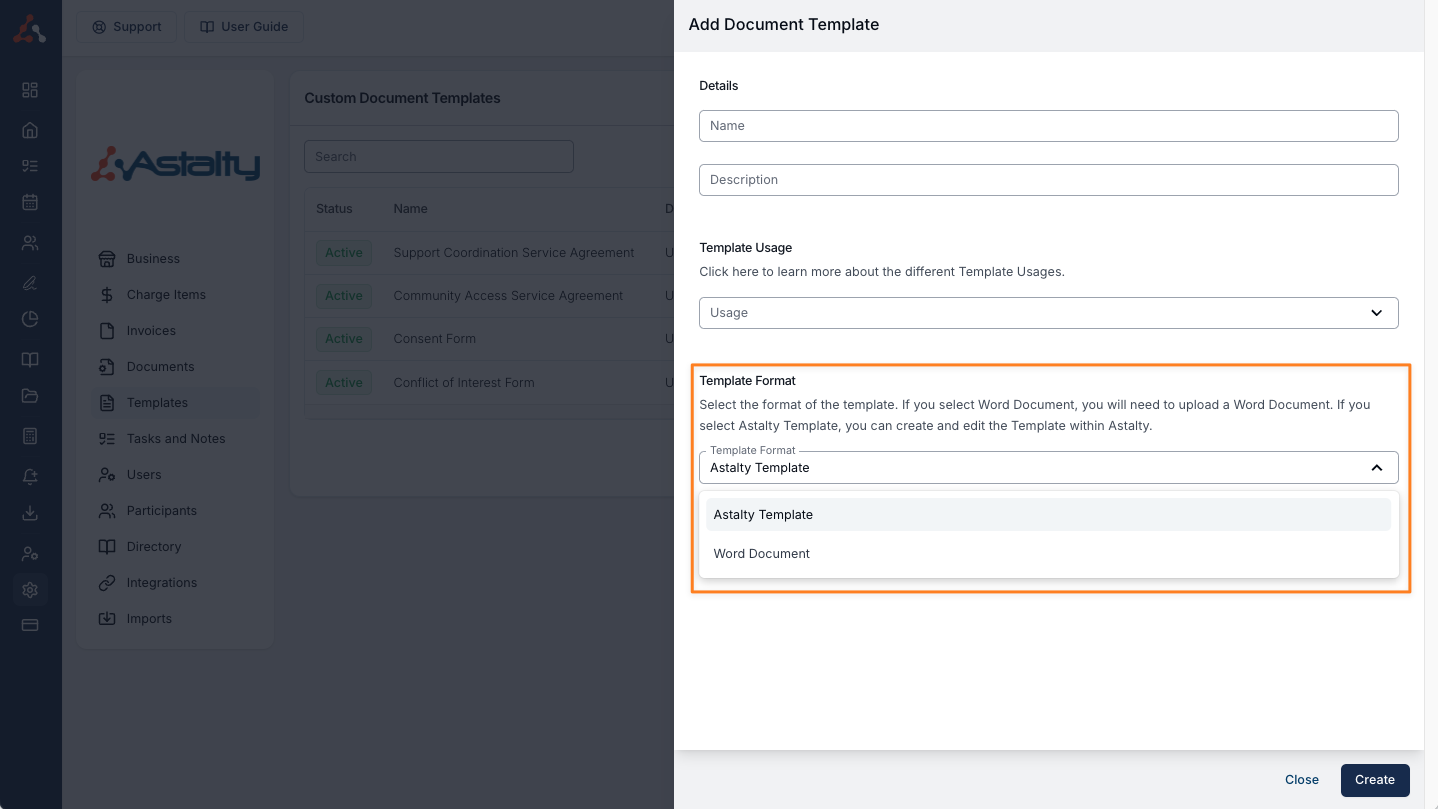
If you select the Word Template option you will be prompted to upload the associated Word document. Prior to this, to make use of the Placeholder functionality, you will need to pre-fill the Word document with the relevant Placeholders as you would with the Astalty Template type. You can view a full list of our available document Placeholders here.
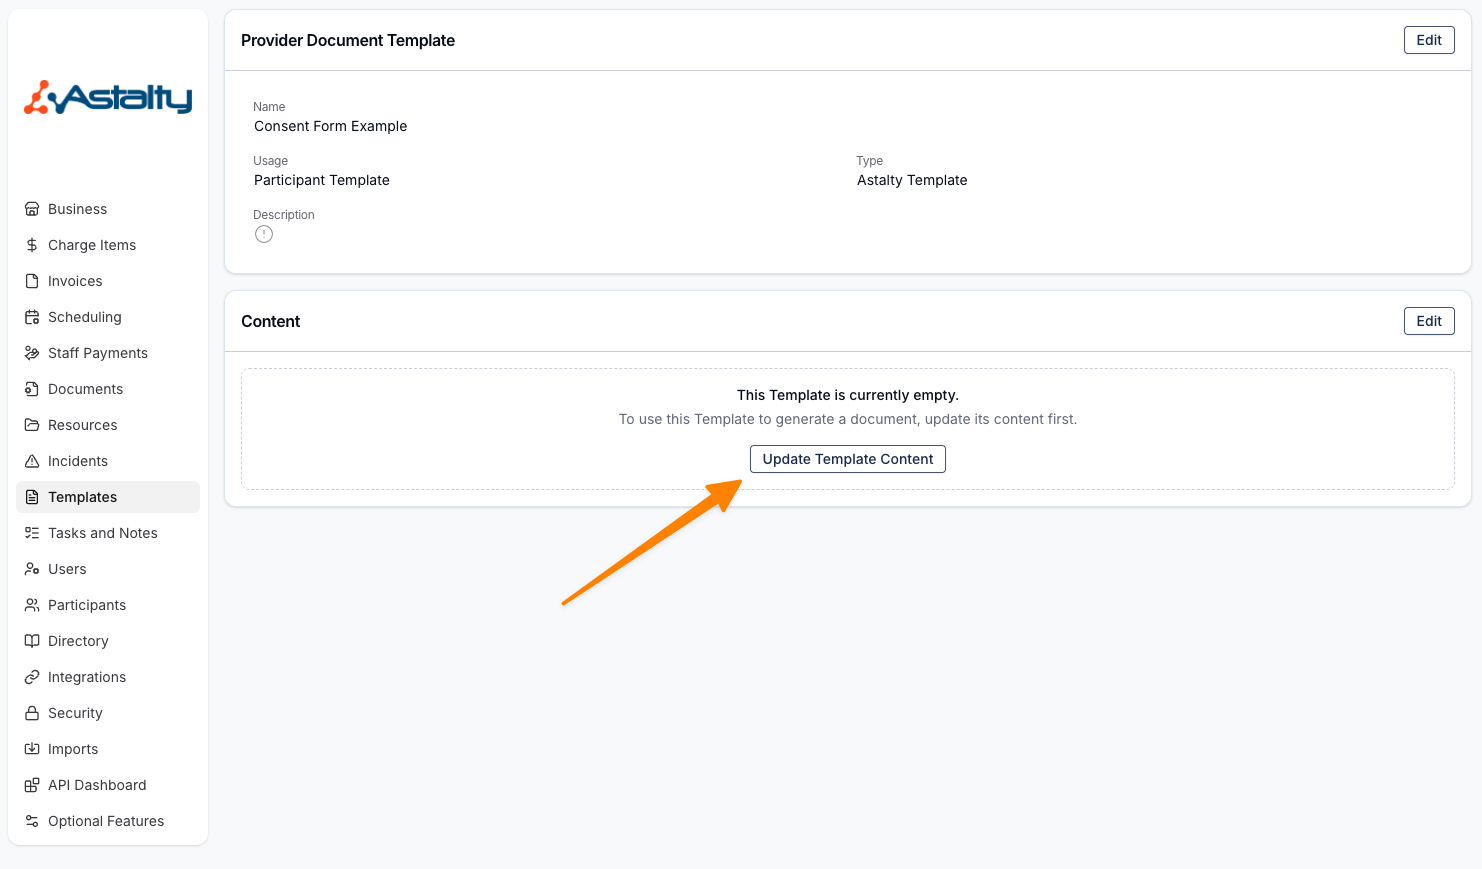
Content Screen
Once you are happy with your selections and click 'Create' you will be brought to this screen below. If you chose Astalty Template you will be prompted to 'Update Template Content'. Click this button and you will be brought to the Template editor screen.
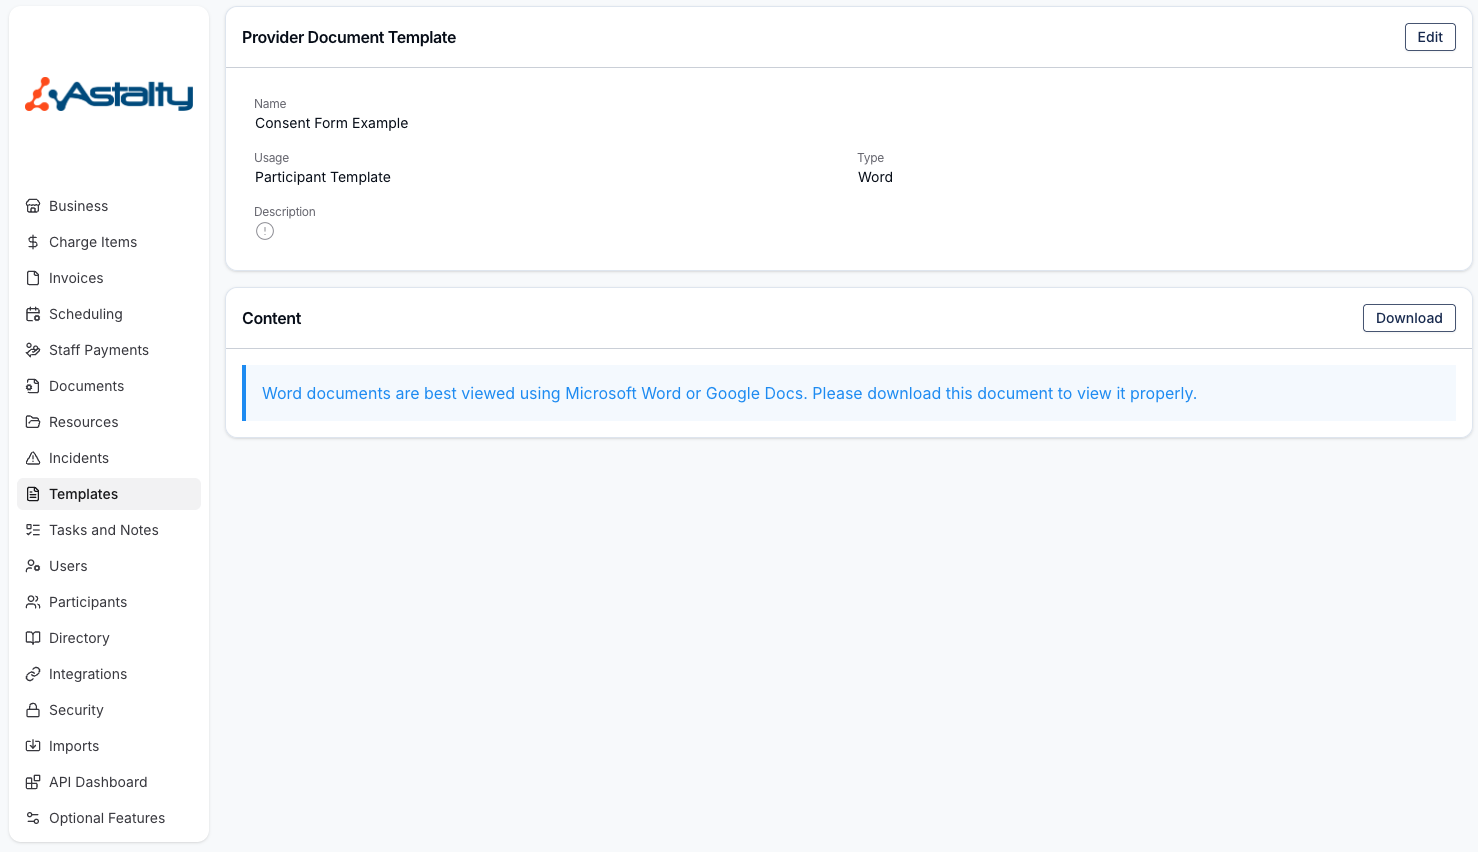
If you selected the Word Template option this is the content screen after you click 'Create'. Within this screen you can download the uploaded Word document.
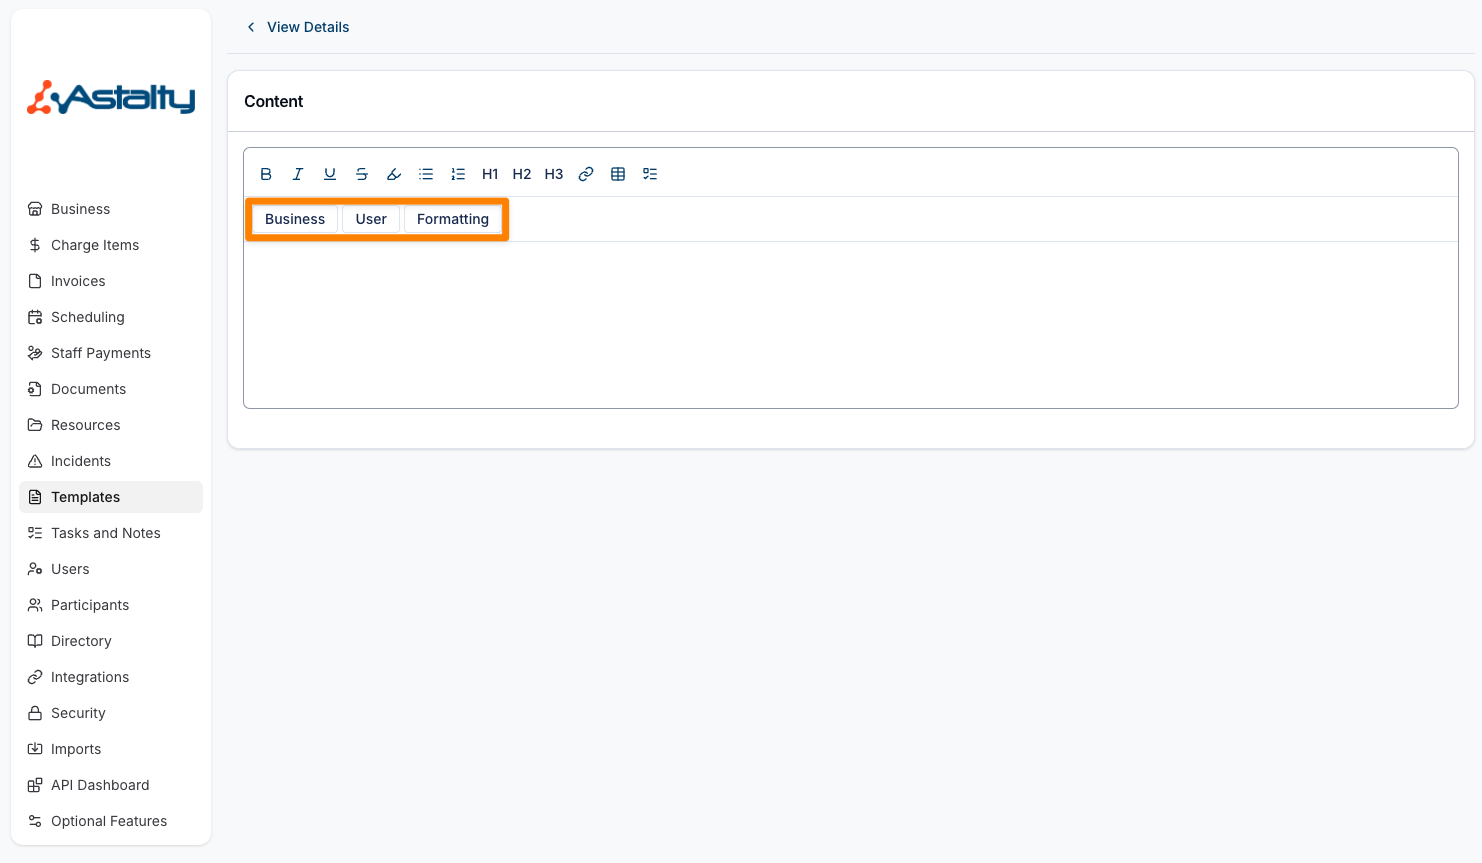
Template Content - Placeholders
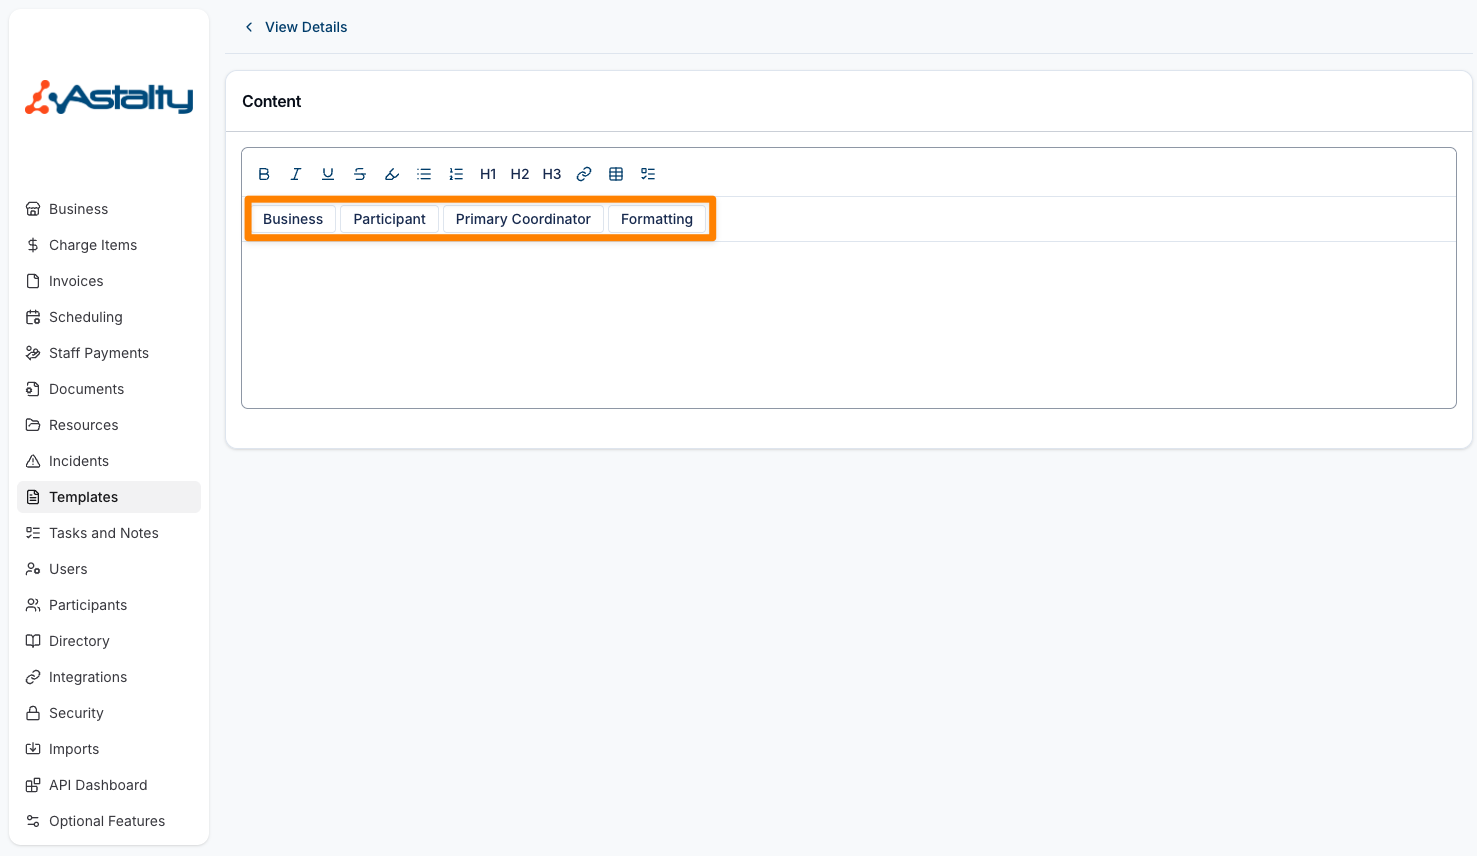
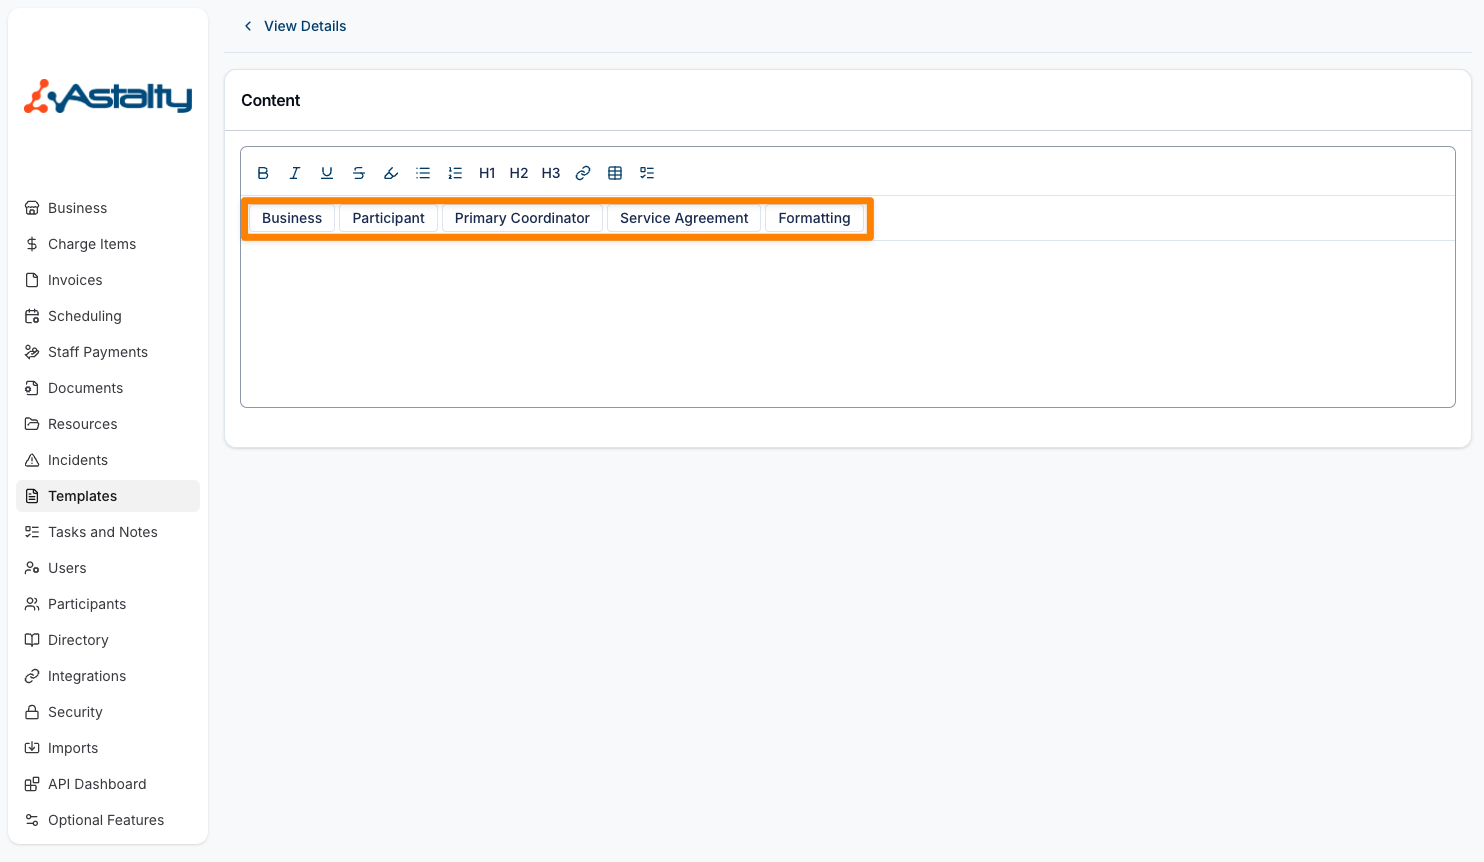
After selecting 'Update Template Content' you will see the screen below. What usage type you selected upon creating the Template will determine what headings you will see in this screen.
Astalty Placeholders and fields that you can enter into your Astalty Template will pull information from within your Astalty Account. Some examples of placeholders include NDIS Number, Participant Name, Primary Coordinator Name, and Schedule of Supports.
For a full list of Astalty Placeholders click this link here.
Participant Template
If you selected the Participant Template, this is what you would see.
Service Agreement Template
If you selected the Service Agreement Template, this is what you would see.
User Template
If you selected the User Template, this is what you would see.
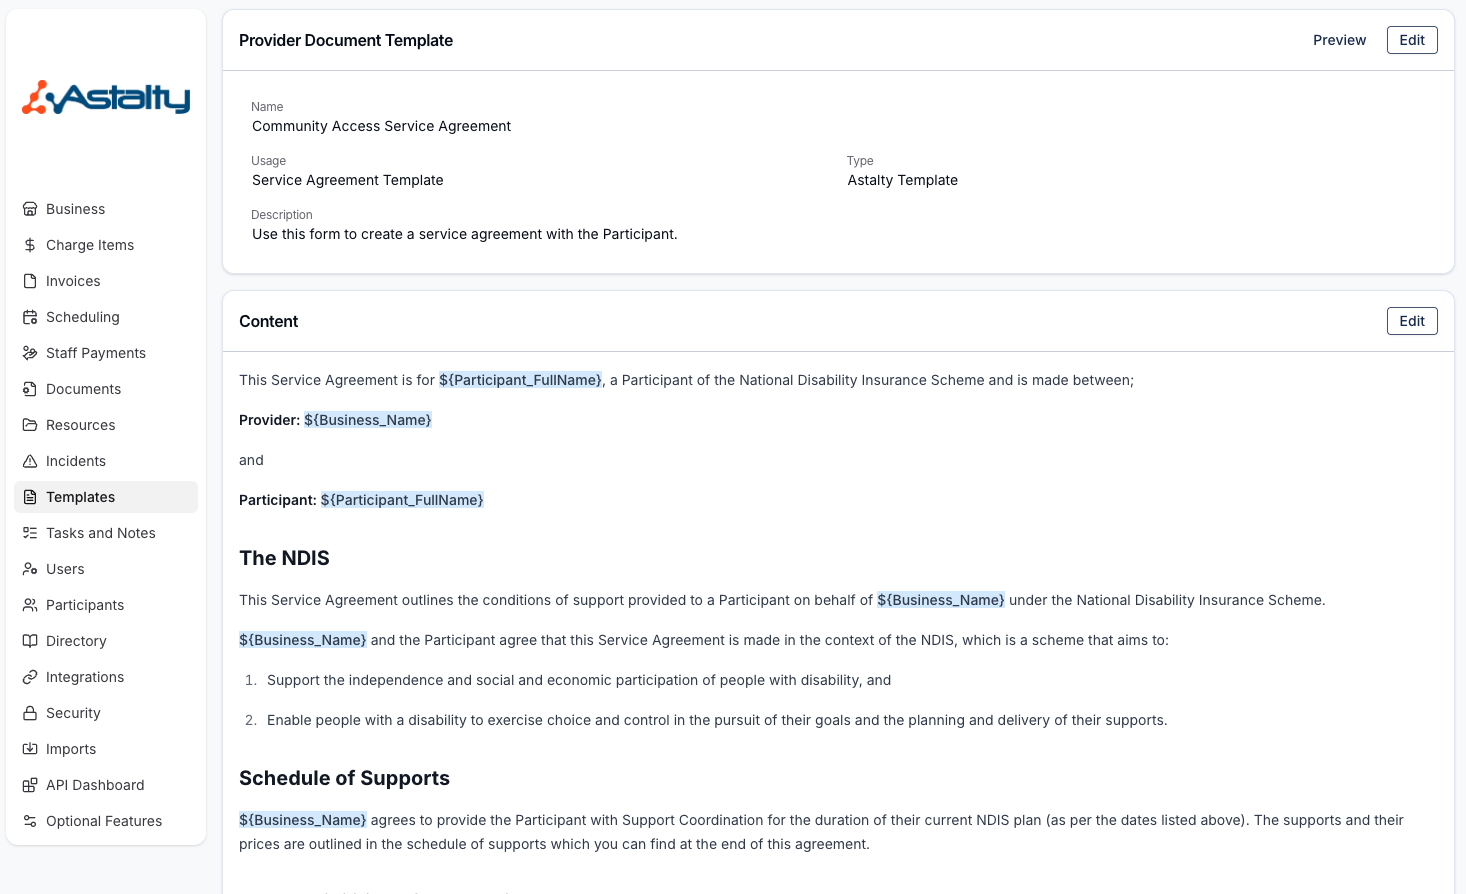
Completed Astalty Custom Template Example
Once you have added your information from any existing organisational documentation or if you created the information from scratch and added it into Astalty, the Template screen would look like this below.
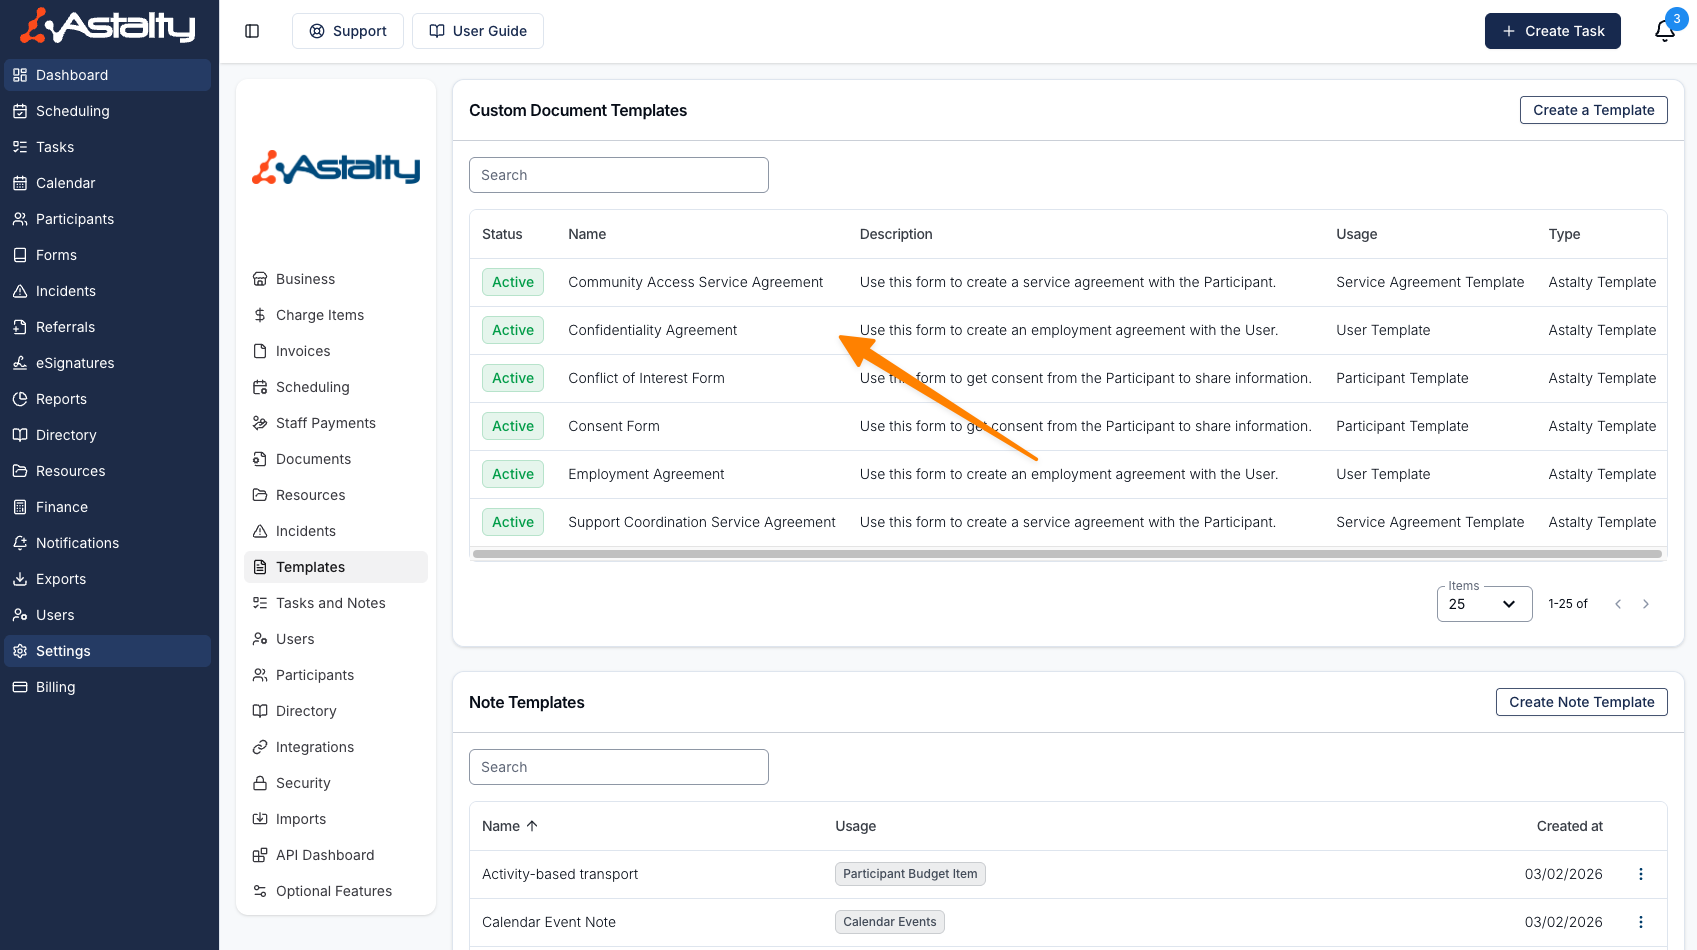
How to edit a Custom Template
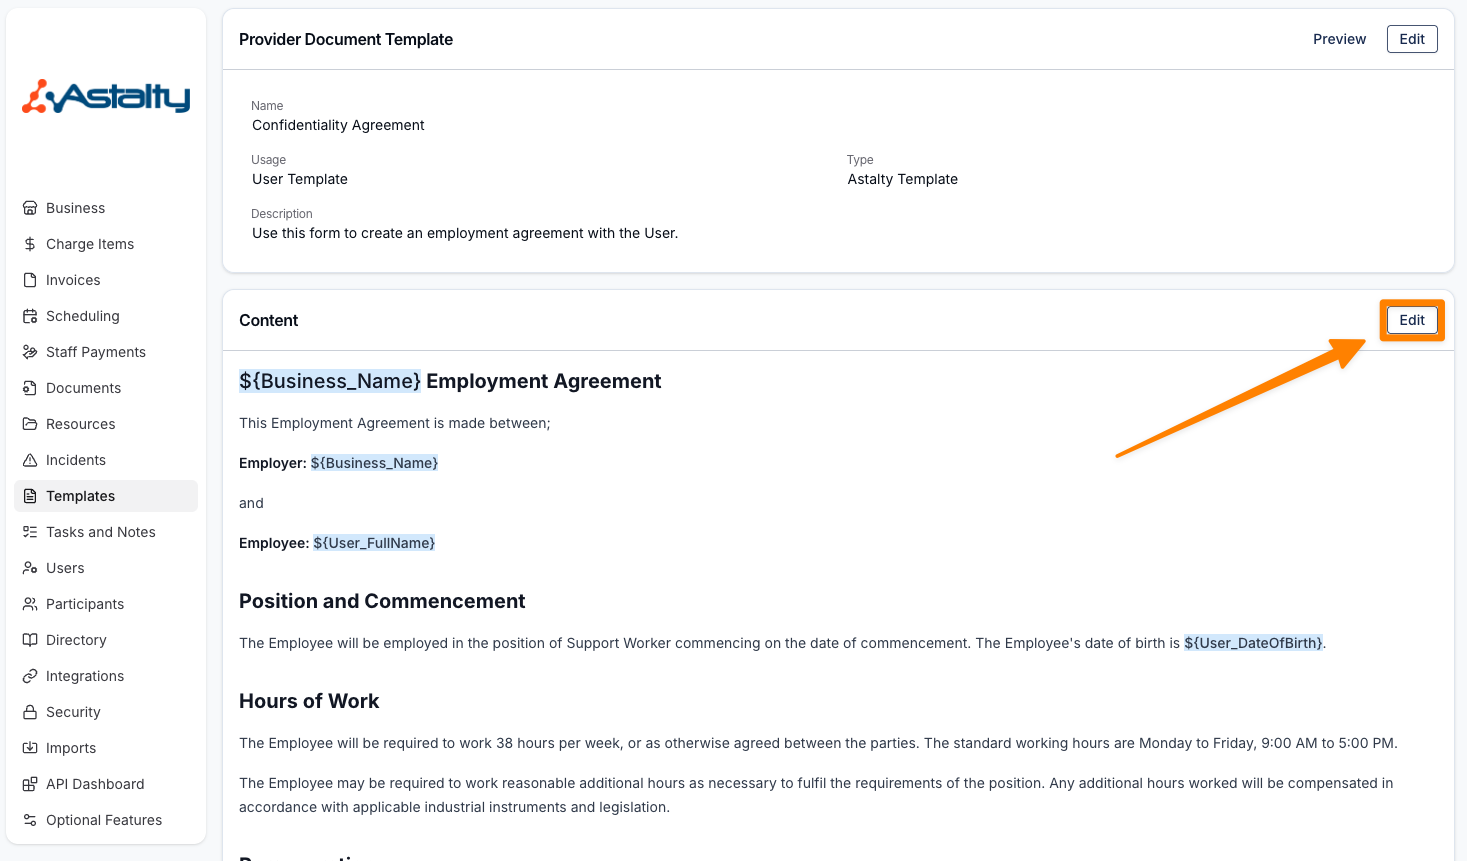
You can edit an Astalty Template Type simply by clicking the entry within the Template settings.
Once within the entry click the Edit option to access the text editor.
For Word Document template types you will need to download the template and edit the document in Word prior to re-uploading with the changes.
Preview or Download a Blank Template
When viewing an Astalty Template, the Actions menu in the top right gives you two ways to check a template before you generate it for anyone:
- Preview — opens a quick on-screen preview of the template's layout.
- Download blank template — downloads an empty PDF of the template without selecting a Participant.
The blank PDF keeps the template's wording, headings, and page breaks, but leaves every Placeholder unfilled — each one is shown as a plain label in square brackets (for example [Participant Full Name] or [Business Name]) instead of being replaced with a Participant's details.
This is handy for previewing a template's structure, or for producing a paper copy to print and fill in by hand — no Participant required.
How to Generate a Custom Template
To generate a Custom Template, simply navigate to:
- Participants — Head to their Participant profile and select Templates from the menu options. See the user guide here.
- Users — Head to their User profile and select Templates from the menu options. See the user guide here.
Once in these menus you will see the Custom Templates uploaded to your Astalty account where you will be able to Generate and complete the documents.