- Participants
- Profile
- Participant Alerts
Participant Alerts
Participant Alerts are used to communicate important information that may directly impact the support provided to a Participant. When creating an Alert, adding a Title is optional; however, the Content field is required.
Creating Alerts
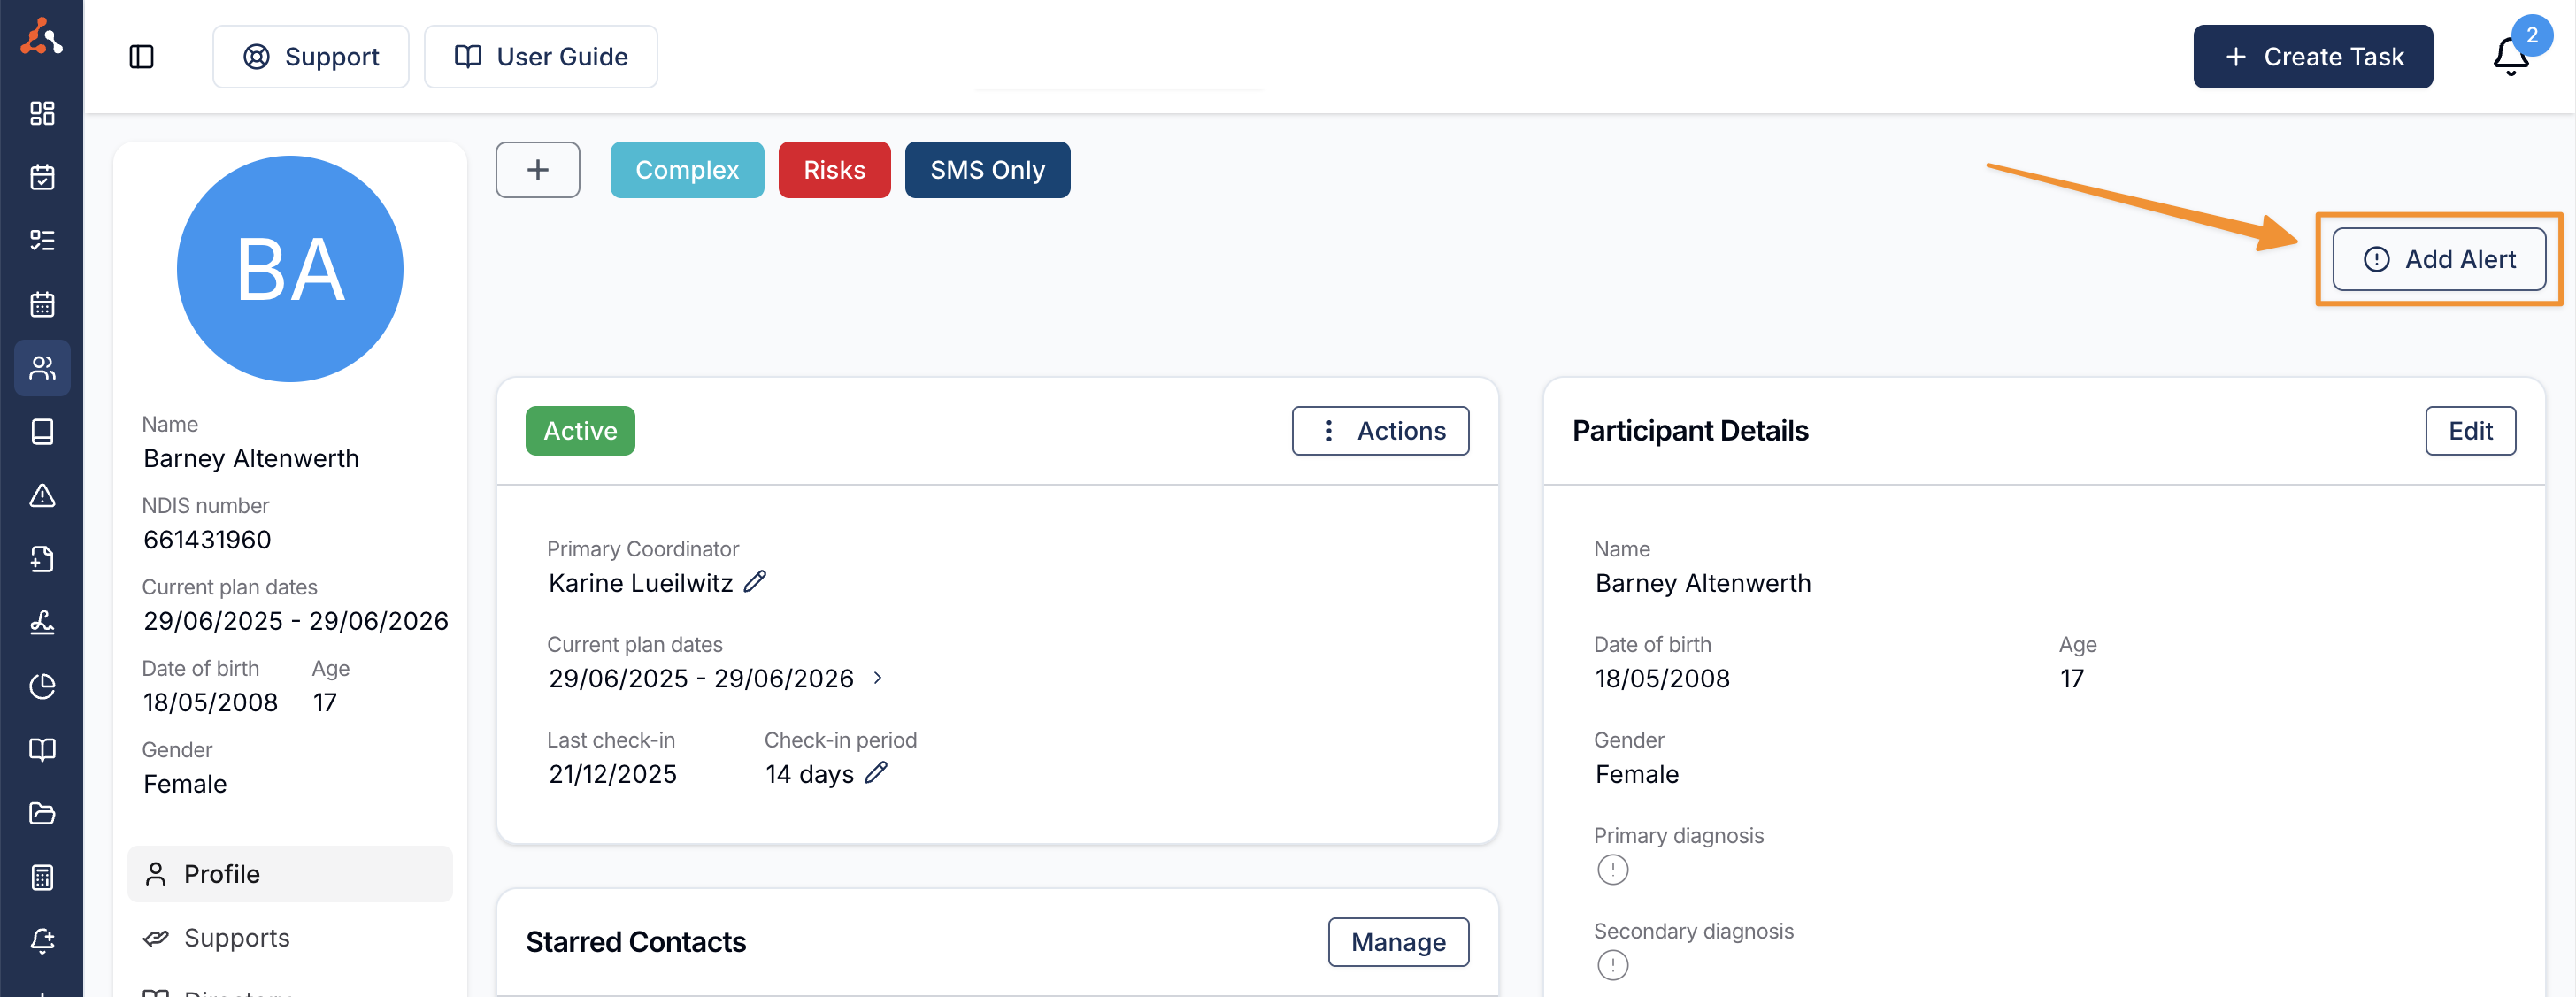
To add an Alert, navigate to the Participant's profile and select Add Alert.
Once the form opens, complete the available fields and select Create when you are ready. The purpose of each field is outlined below.
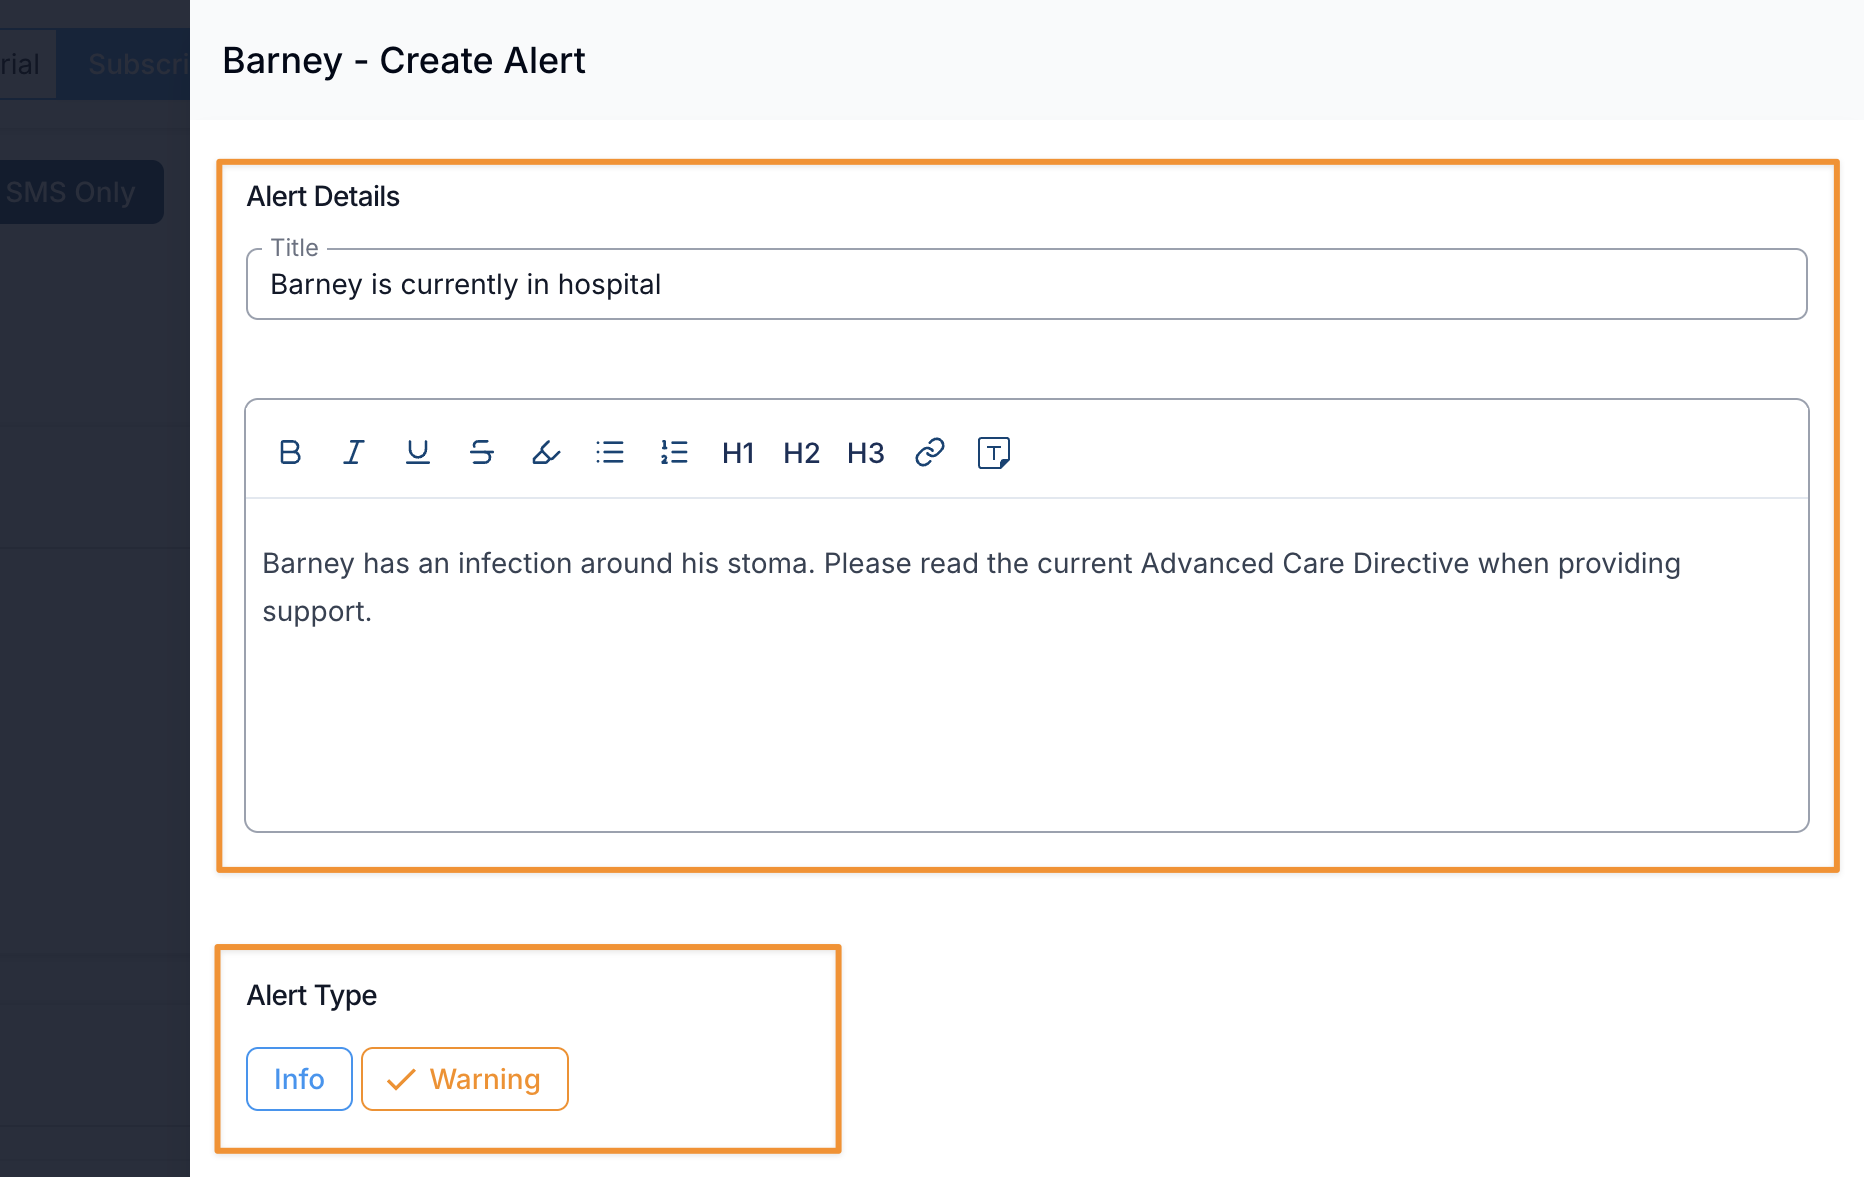
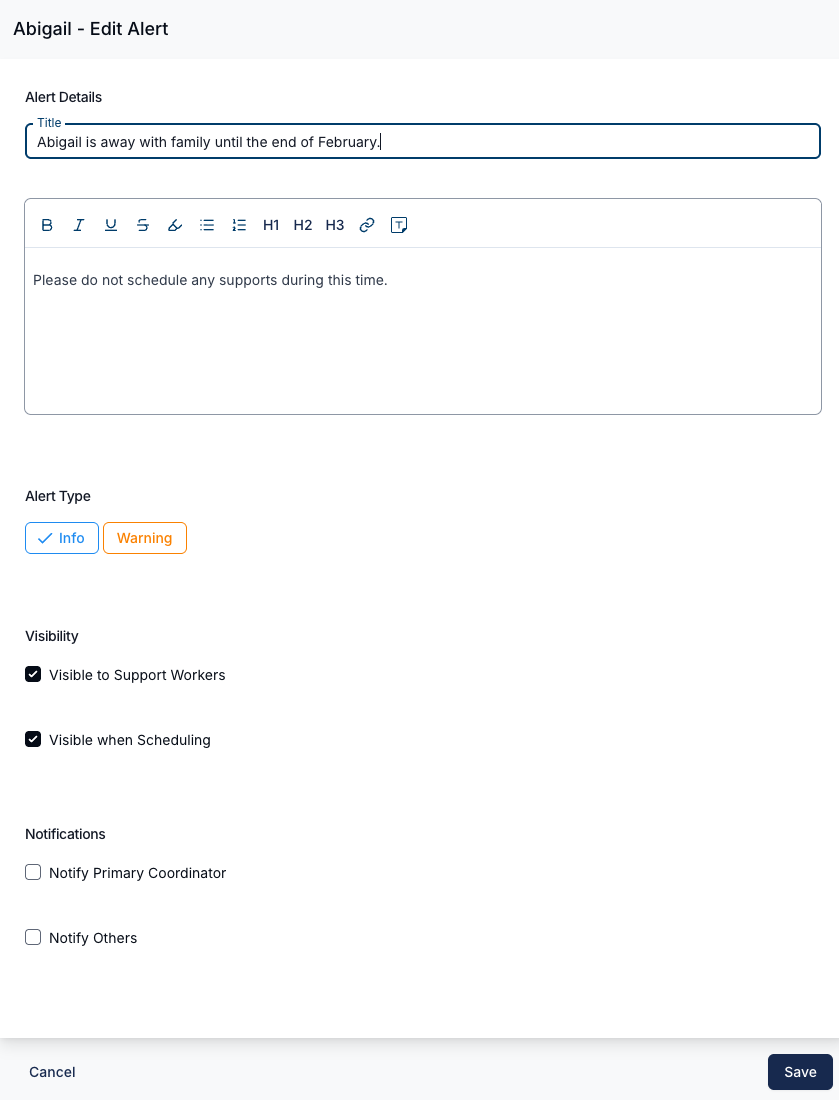
Title
This will be the main heading of the Alert. For example: Barney is currently in hospital.
Content
The Content field allows you to add further details about the Alert. It is best practice to keep this to one or two short sentences.
We also have a Note Template type for Alerts. To learn more about Note Templates click here for the guide.
Alert Type
There are currently two Alert types available:
- Info — displayed in blue
- Warning — displayed in amber
Aside from the colour, there is no functional difference between Alert types.
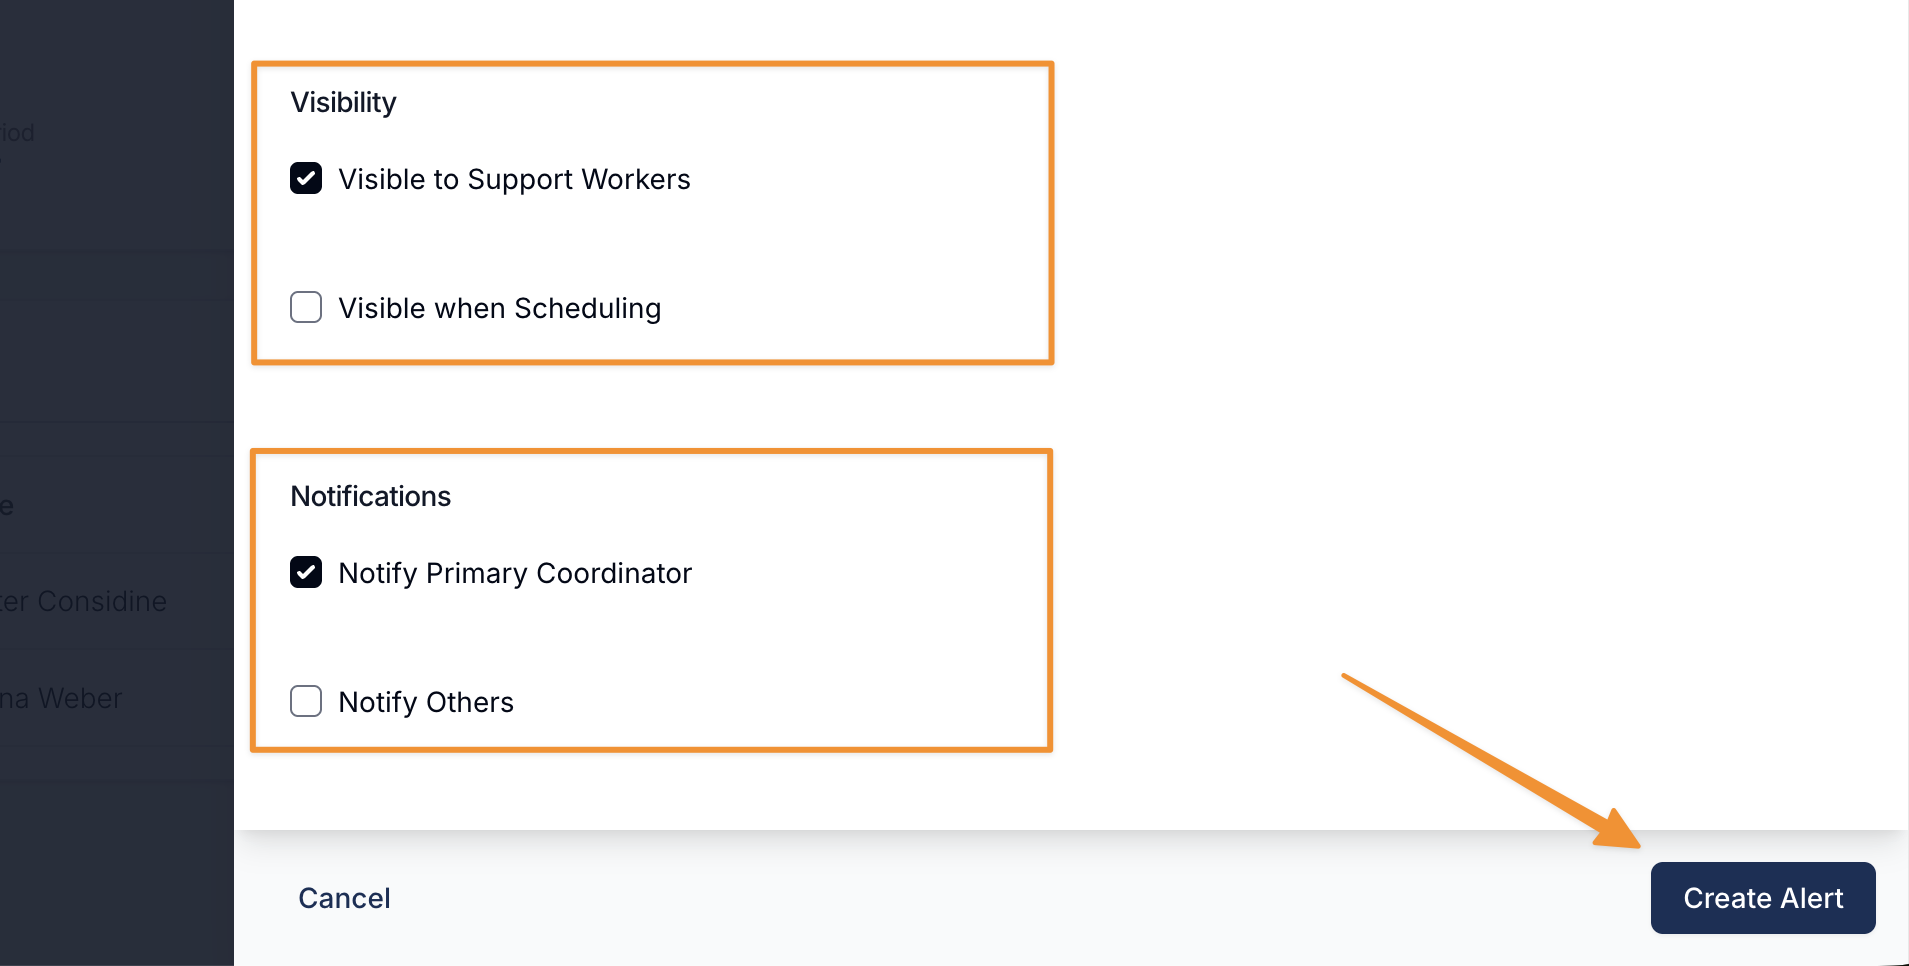
Alert Visibility
If Scheduling is enabled, you can control whether the Alert is visible to Support Workers and/or Standard Users when scheduling.
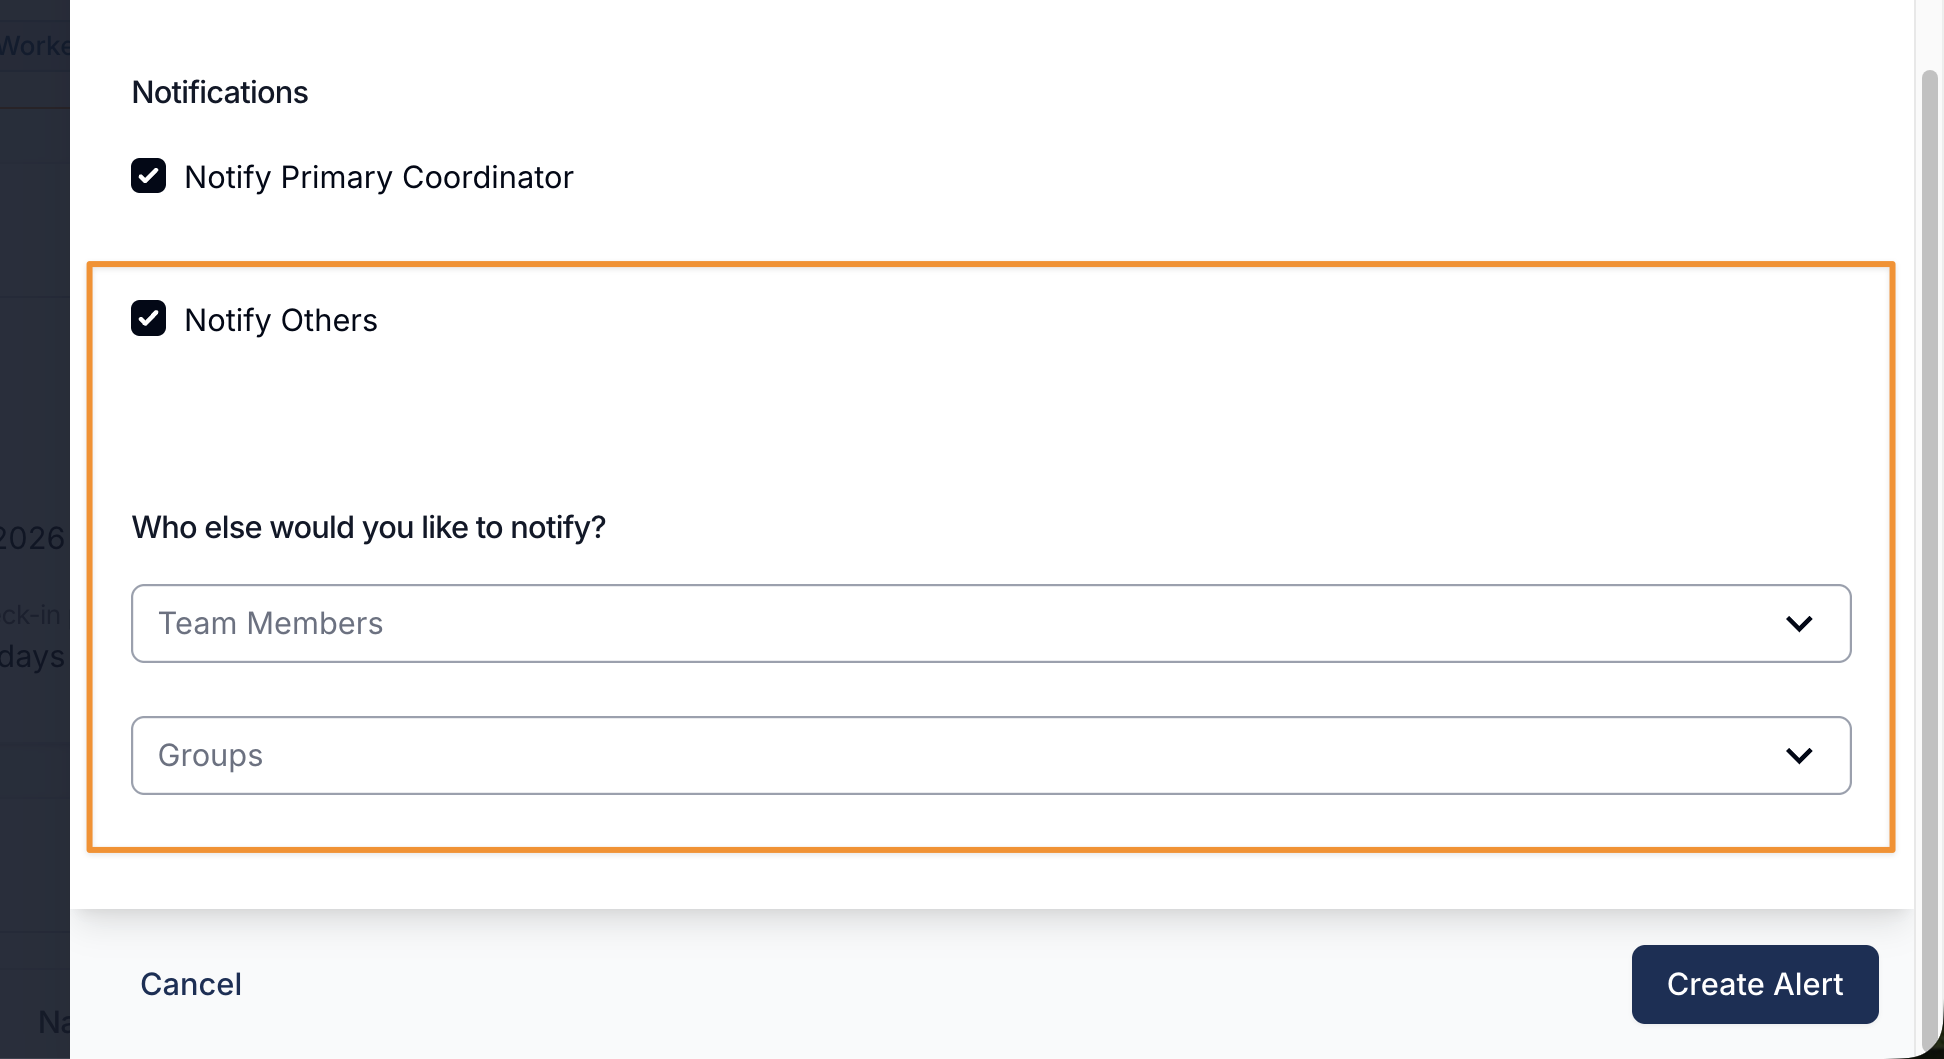
Alert Notifications
When creating an Alert, the Notifications section is located at the bottom of the form, with the following selections available:
Primary Coordinator
Select this option to notify the Participant’s Primary Coordinator when the Alert is created.
Notify Others
If you select Notify Others, you will be prompted to choose additional team members or User Groups to receive a notification when the Alert is created.
After Creating the Alert
Once created, the Alert will appear at the top of the Participant’s profile and will be displayed according to the selected Alert type colour.
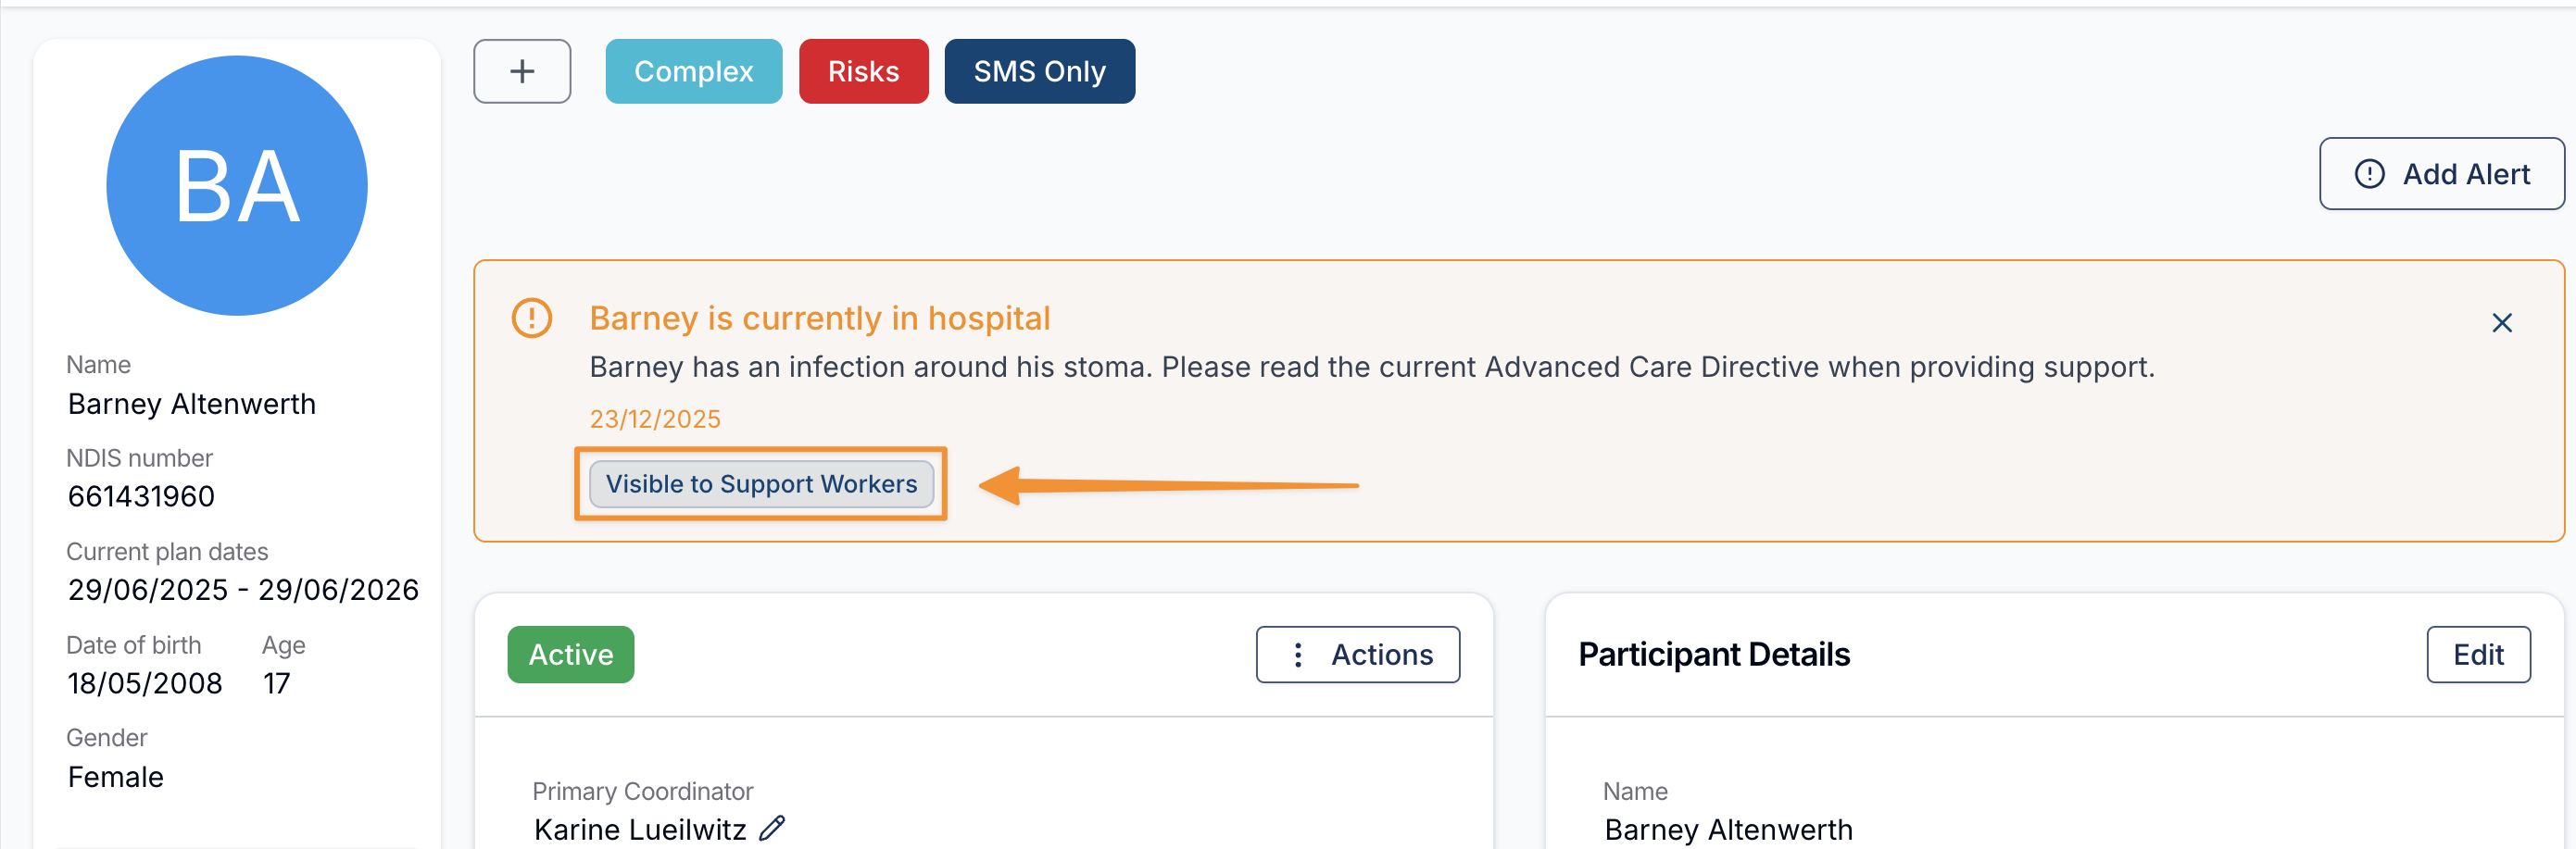
The Alert will include:
- Alert Title and Content
- The date the Alert was created
- Visibility tags, indicating whether it is visible to Support Workers and/or Schedulers
If notifications were enabled, they will be sent immediately to the selected recipients using the chosen notification method.
Updating an Alert
After an Alert has been created, you can update its details by selecting the edit icon.

The Alert form will open, allowing you to update the Alert with any required changes.
Removing an alert
Alerts can be removed by selecting the archive icon.

You will be prompted to provide a reason for archiving the Alert.

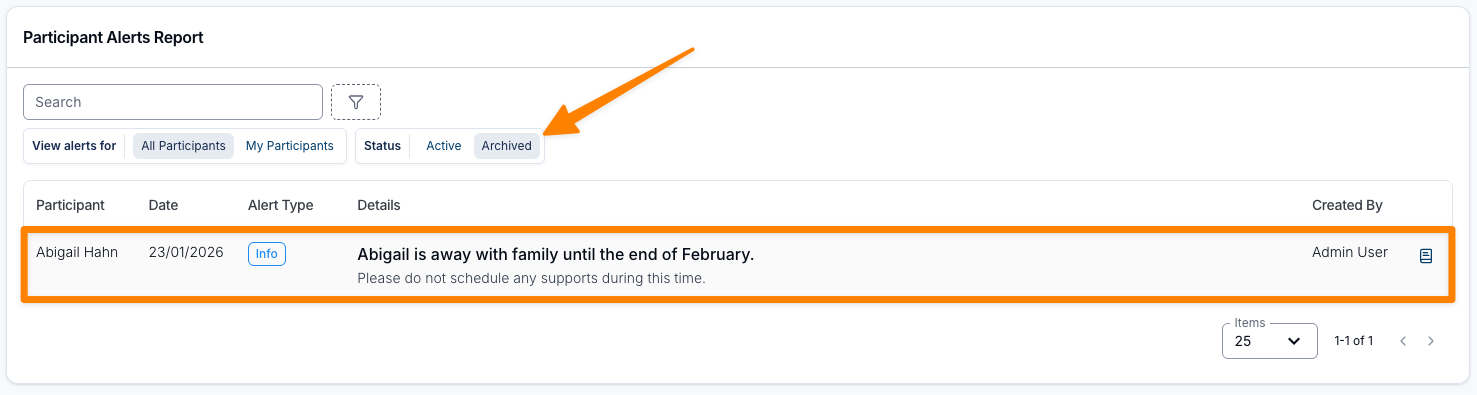
Archived Alerts can be viewed in the Participant Alerts Report by selecting the Archived Status filter. For more information, refer to the Participant Alerts Report guide.