- Administration
- Settings
- Users Settings
- User Records
User Records
How to Set Up and Manage User Records
Introduction
User Records serve as a vital tool for tracking important documents throughout your organisation, ensuring compliance with NDIS standards and other regulatory bodies. This guide will walk you through the process of setting up a User Record system to manage documents, customise expiry dates, and maintain compliance.
Setting Up User Record Types
Access Settings: Start by navigating to the Settings option. This is located in a menu on the left-hand side of your platform.
Navigate to Users: Within the Settings menu, select Users to proceed to the next step in the setup process.
Create User Record Type: Click on Create User Record Type. This action will prompt you to define a new type of Record that your organisation wishes to track.
Name the Record Type: Enter a descriptive name for the Record Type, such as "First Aid Certificate," to easily identify the purpose of the Record.
Customise Options: Utilise the custom tick boxes to specify the attributes of the Record type:
- Document Expiry Date: Indicate whether the document associated with this Record Type has an expiry date.
- Record Requirement: State whether this Record is required for all individuals within your organisation.
- Document Upload Requirement: Specify if Records cannot be created or updated without uploading at least one relevant document. This ensures compliance by verifying that all necessary documents are provided.
- Self-Service Uploads: Decide if Users can upload documents themselves, enhancing User autonomy and efficiency.
- Verification Requirement: If self-service is enabled, determine whether uploaded documents require verification by another team member.
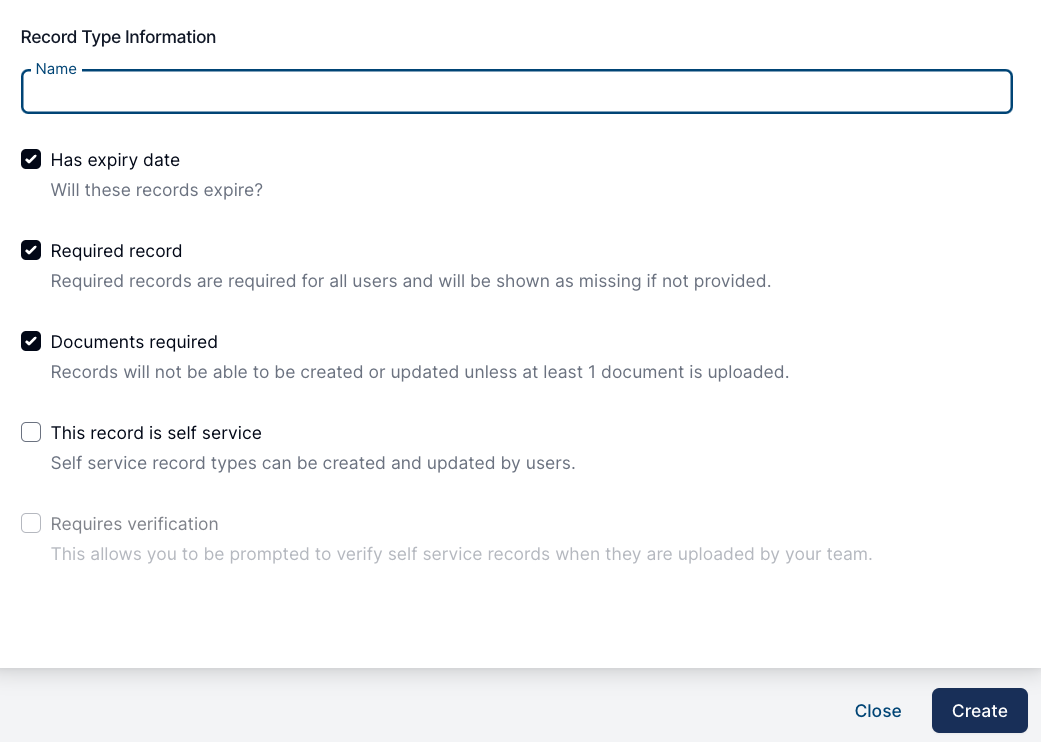
Finalise and Create: After selecting the appropriate options, click Create to establish the new User Record Rype.
Review and Manage Records: Once created, you can view and manage all User Record Types through the User Record Types screen. This area provides an overview of each Record Type, including its status (e.g., required, expired) and whether it allows for self-service or requires document upload.
Utilising User Records
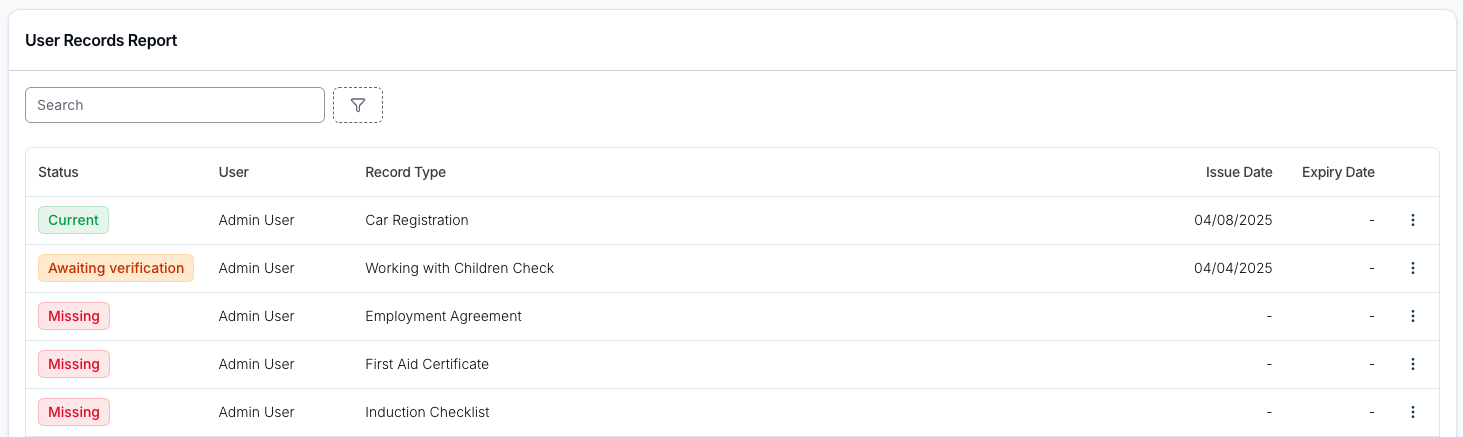
- Running Reports: Generate reports such as Team Records to identify missing documents across your organisation. There's more on this in the User Records Report guide.
-
Setting Up Notifications: Configure Notifications to alert you when documents are nearing their expiry date, ensuring continuous compliance. There's more on this in the User Record Notification guide.
-
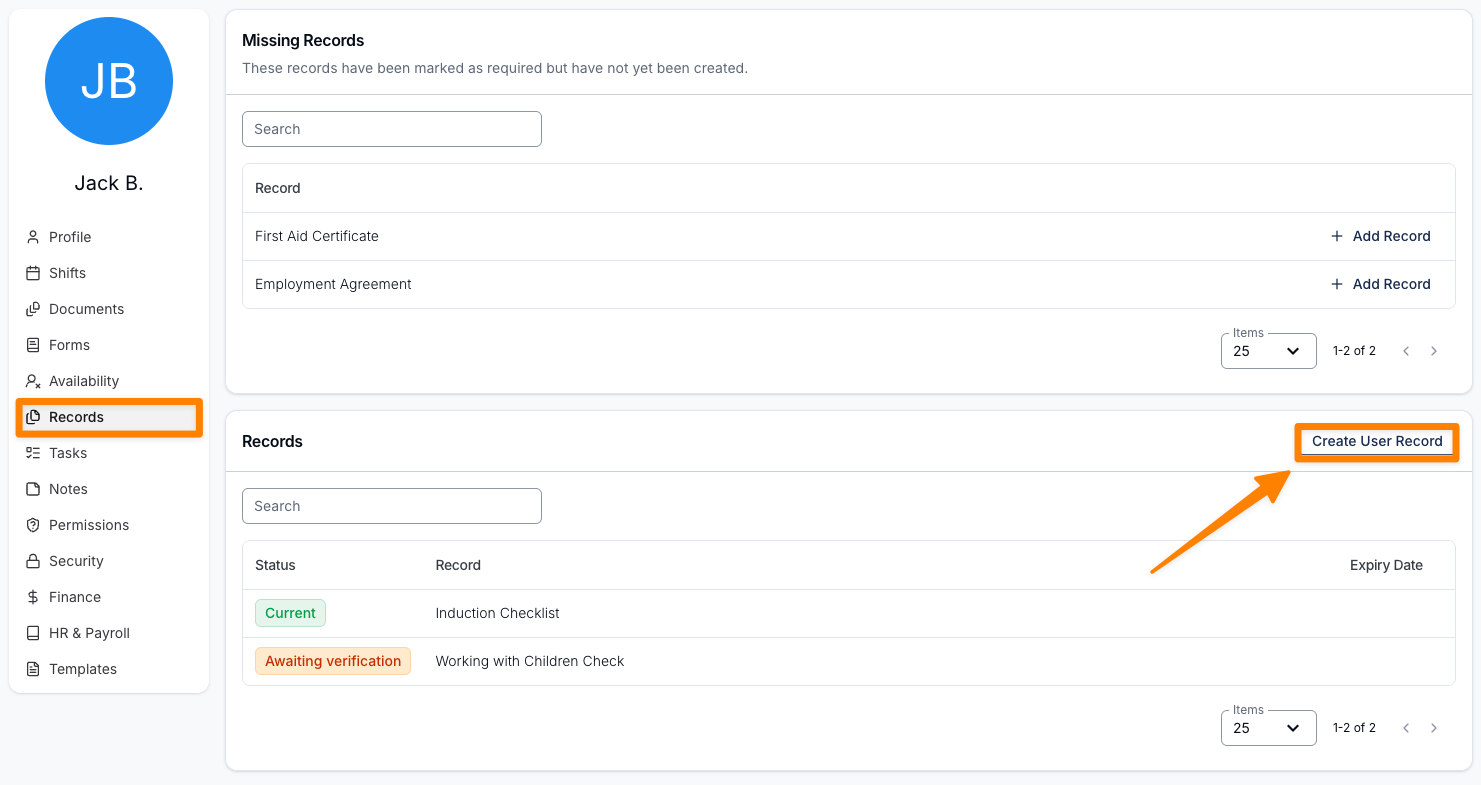
Accessing Records: To view or manage a User's records:
- Click on Users.
- Select a User.
- Navigate to the Records section to review their documents, check expiry dates, and verify compliance status.
Send User Records For Signing
Within a User's User Records, you have the ability to send the document for signing. To find this option, navigate to the Users menu. Once in this menu, select the User for which you would like to send a Record. Navigate to the Records menu option within their User profile and select the Record you would like to send. If the Record has not yet been created, you can upload the Record.
Uploading a Record
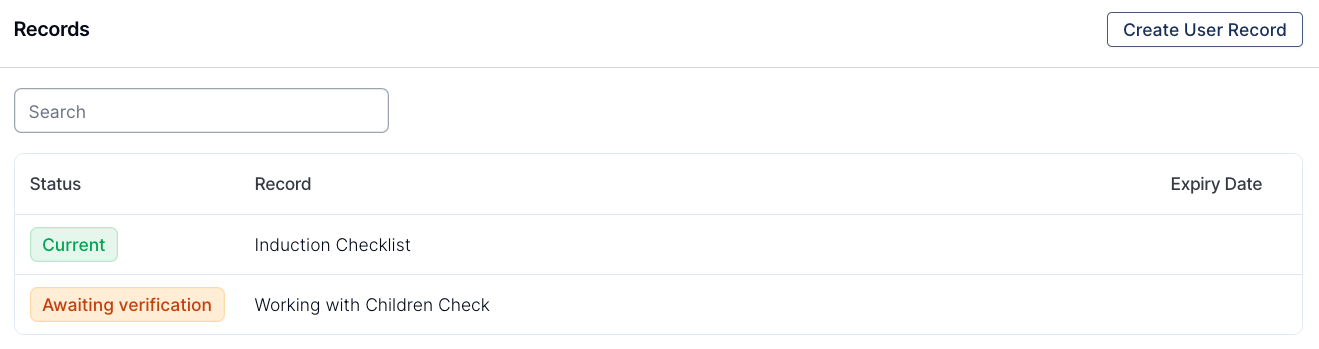
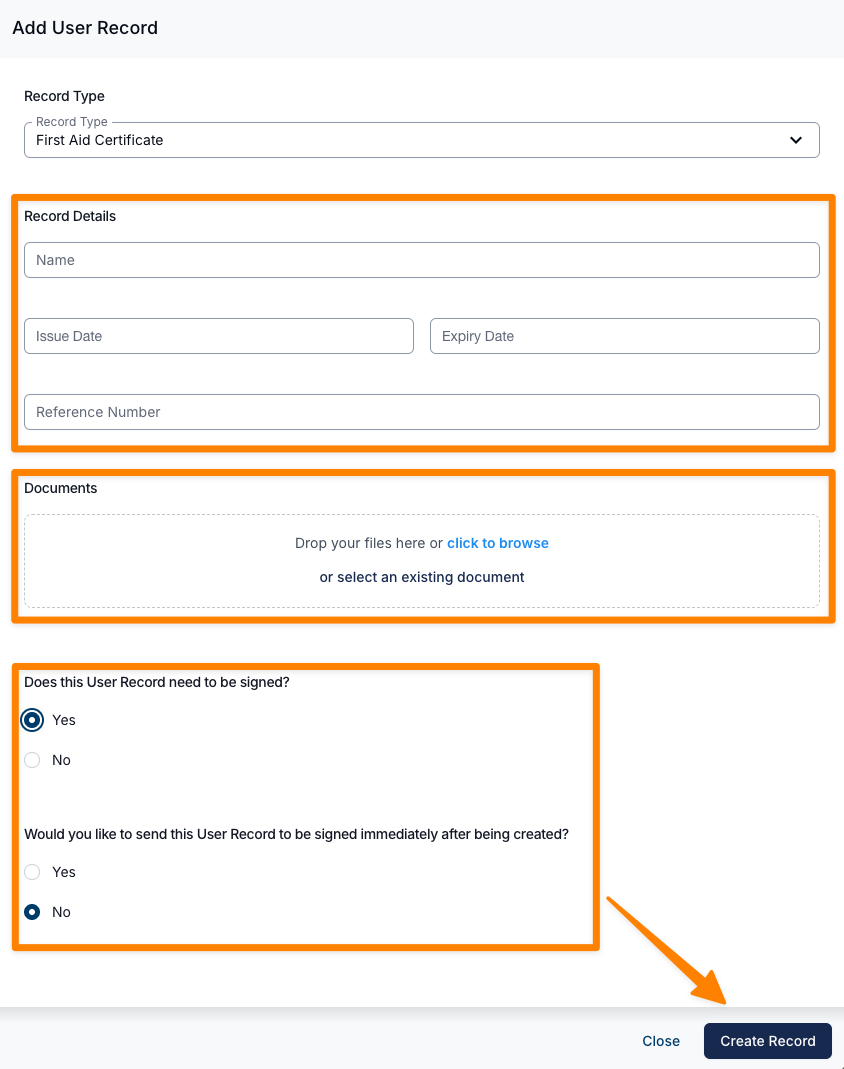
Navigate to the Records page within a Users profile and select Create User Record.
Select the appropriate Record Type from the dropdown menu, then complete the required fields. Upload any relevant files or choose from existing documents already stored in the user’s profile.
If the Record requires a signature, you can choose to send it for eSigning immediately after creation, or select No to send it at a later time.
Once all details are completed, click Create Record.
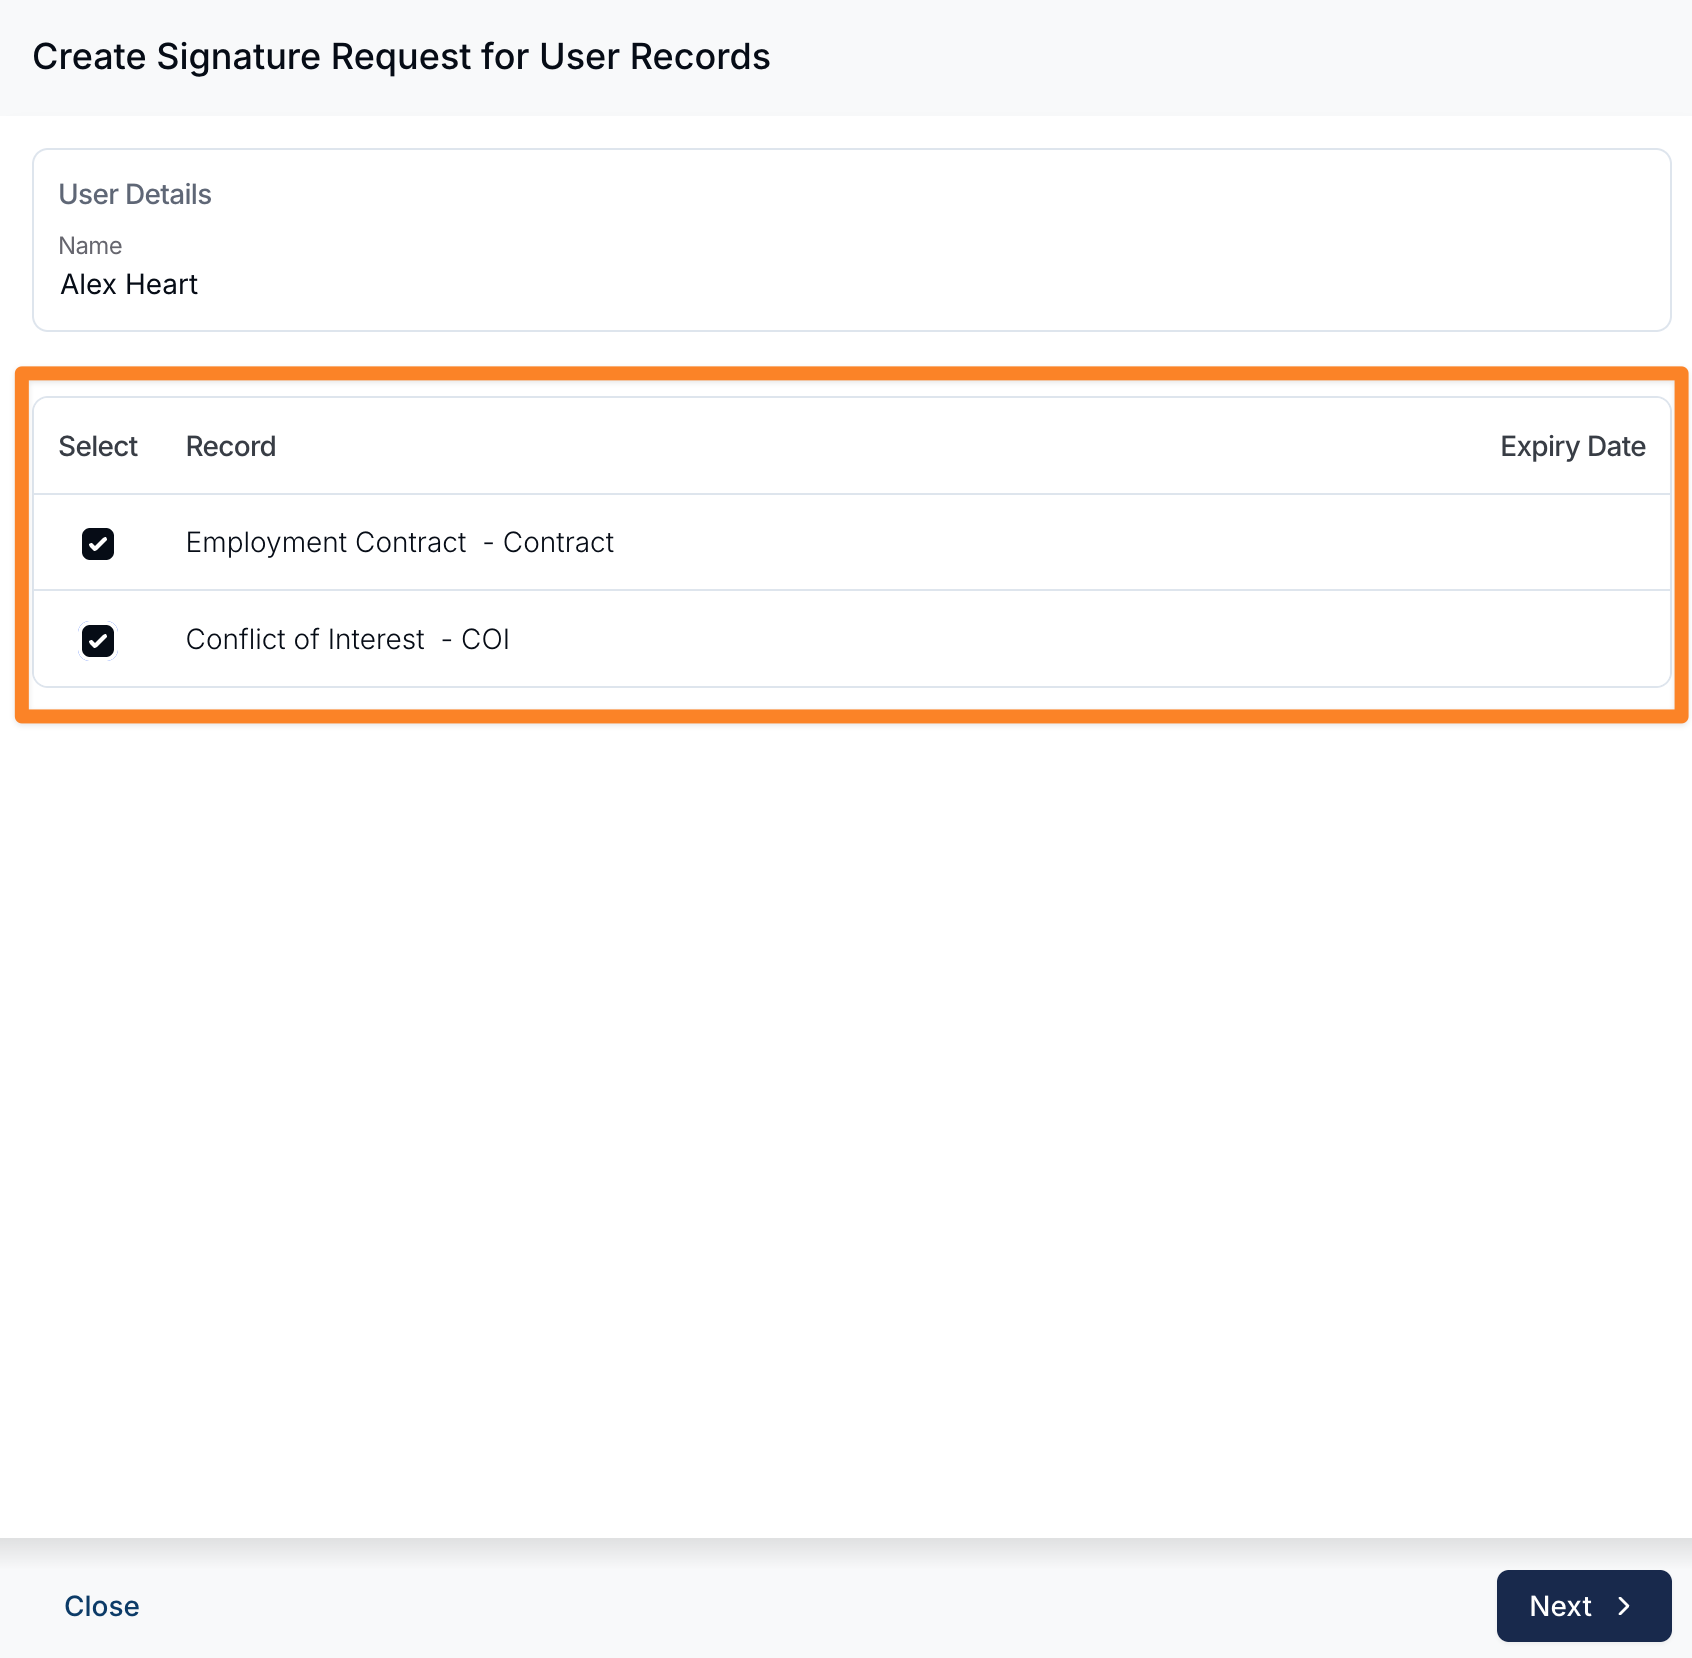
Sending Multiple User Records for Signing
You can send multiple User Records in a single eSignature request, allowing you to streamline the signing process and reduce the need to send individual requests.
This is useful when multiple documents need to be reviewed and signed at the same time. Recipients will receive a single request containing all selected records, improving efficiency and simplifying document management.
Uploading in the Support Worker App
Support Workers can upload their Records directly through the mobile app. To better understand how this process appears from their perspective, refer to the Uploading User Records guide.
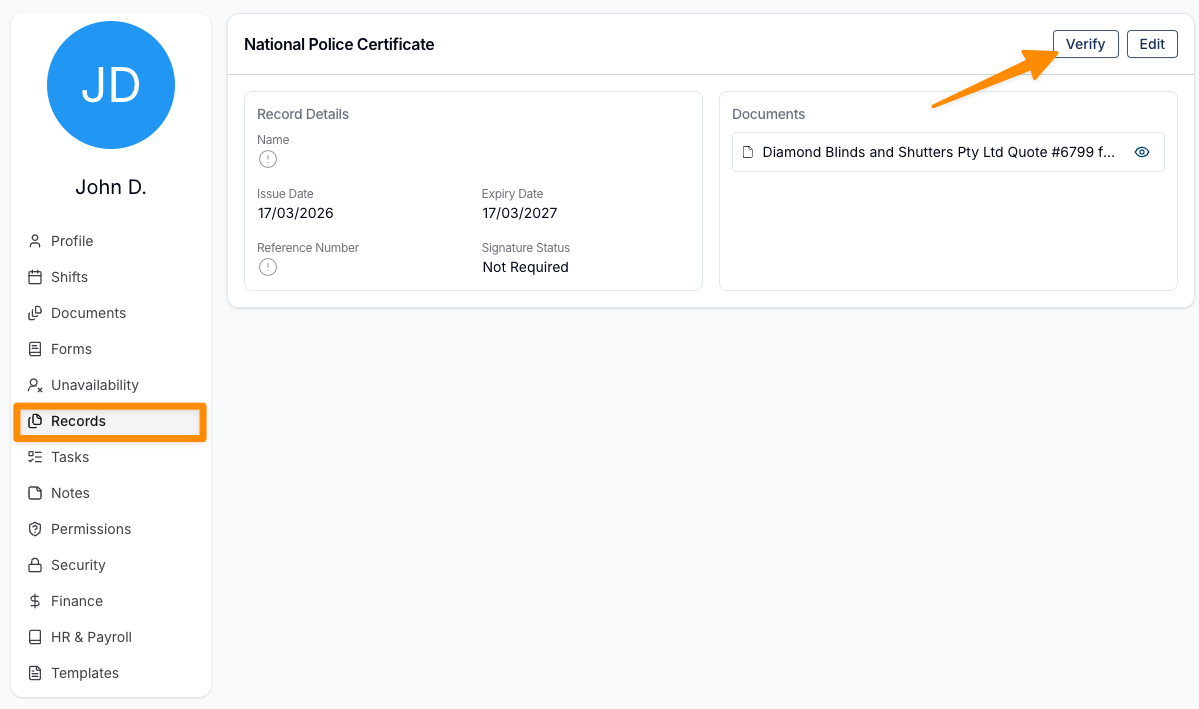
Verifying User Records
When a user submits a Record that requires verification:
Navigate to the Users Profile
- Open the relevant user’s profile in Astalty.
Access User Records
- Go to the Records section within the user’s profile.
Review the Submitted Record
- Select the relevant Record
- View the uploaded document(s)
Verify the Record
- If the document is satisfactory, click Verify
- The Record status will update accordingly
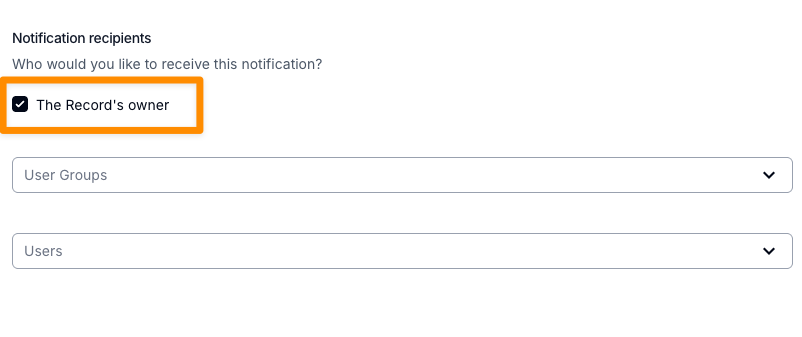
Notifications for User Records
Depending on how notifications have been configured for User Records, alerts can be sent to the Record Owner (the user that the Record relates to).
If notifications are set to notify the Record Owner, the Support Worker will receive a notification on their device when a Record requires attention—such as when it is due to expire or needs to be updated.
This helps ensure records remain current and reduces the need for manual follow-up by admin users.
Users with standard access (team-member, manager, admin) can also receive notifications, depending on how the notification settings have been configured. They are able to upload Records directly through the web browser version of Astalty.
Sending for Signature
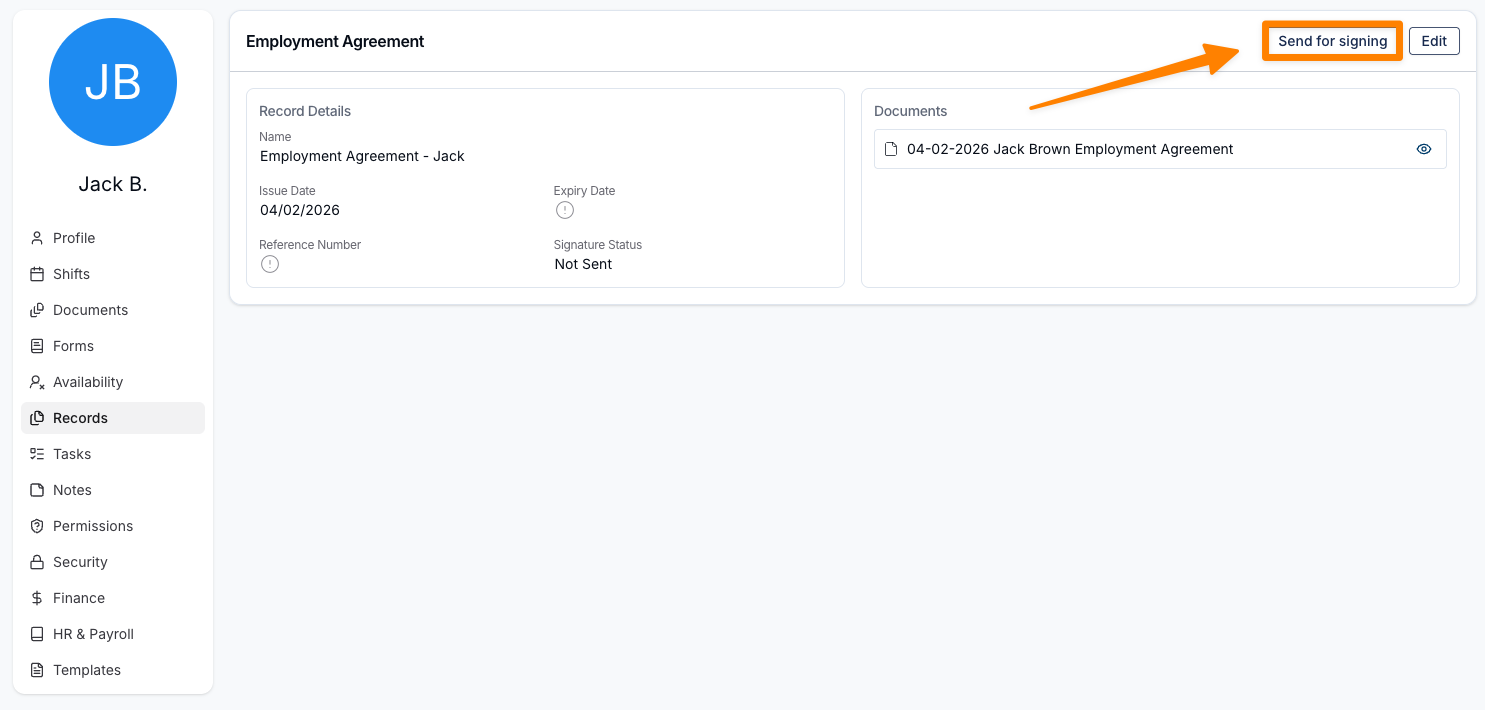
Once you have opened the relevant Record, click on Send for Signing.
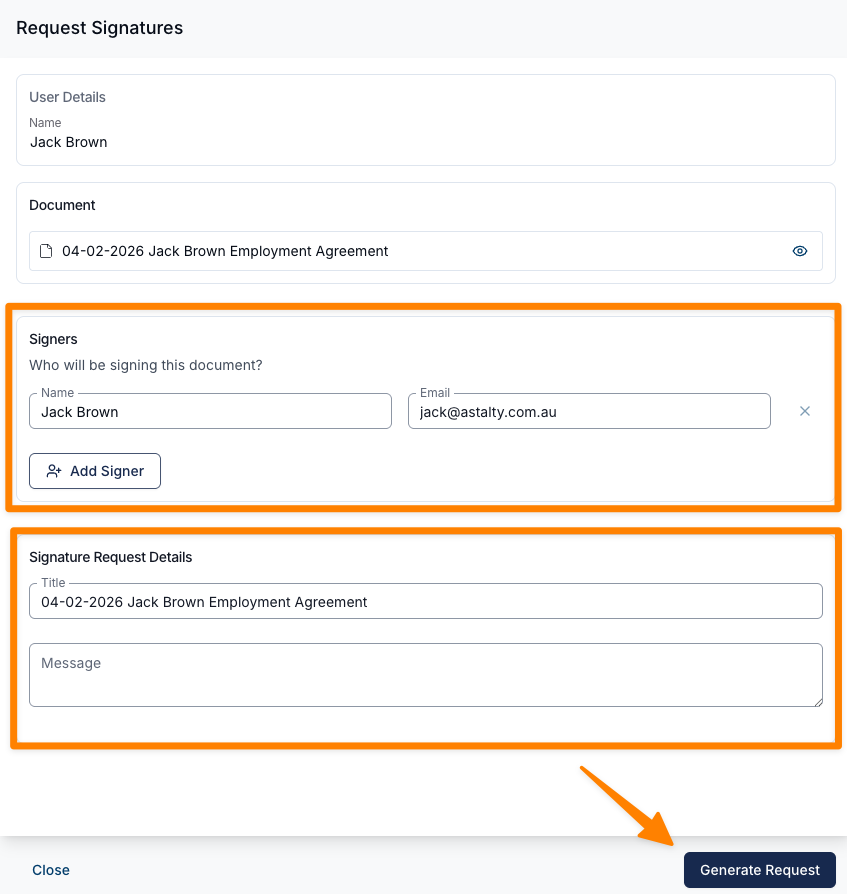
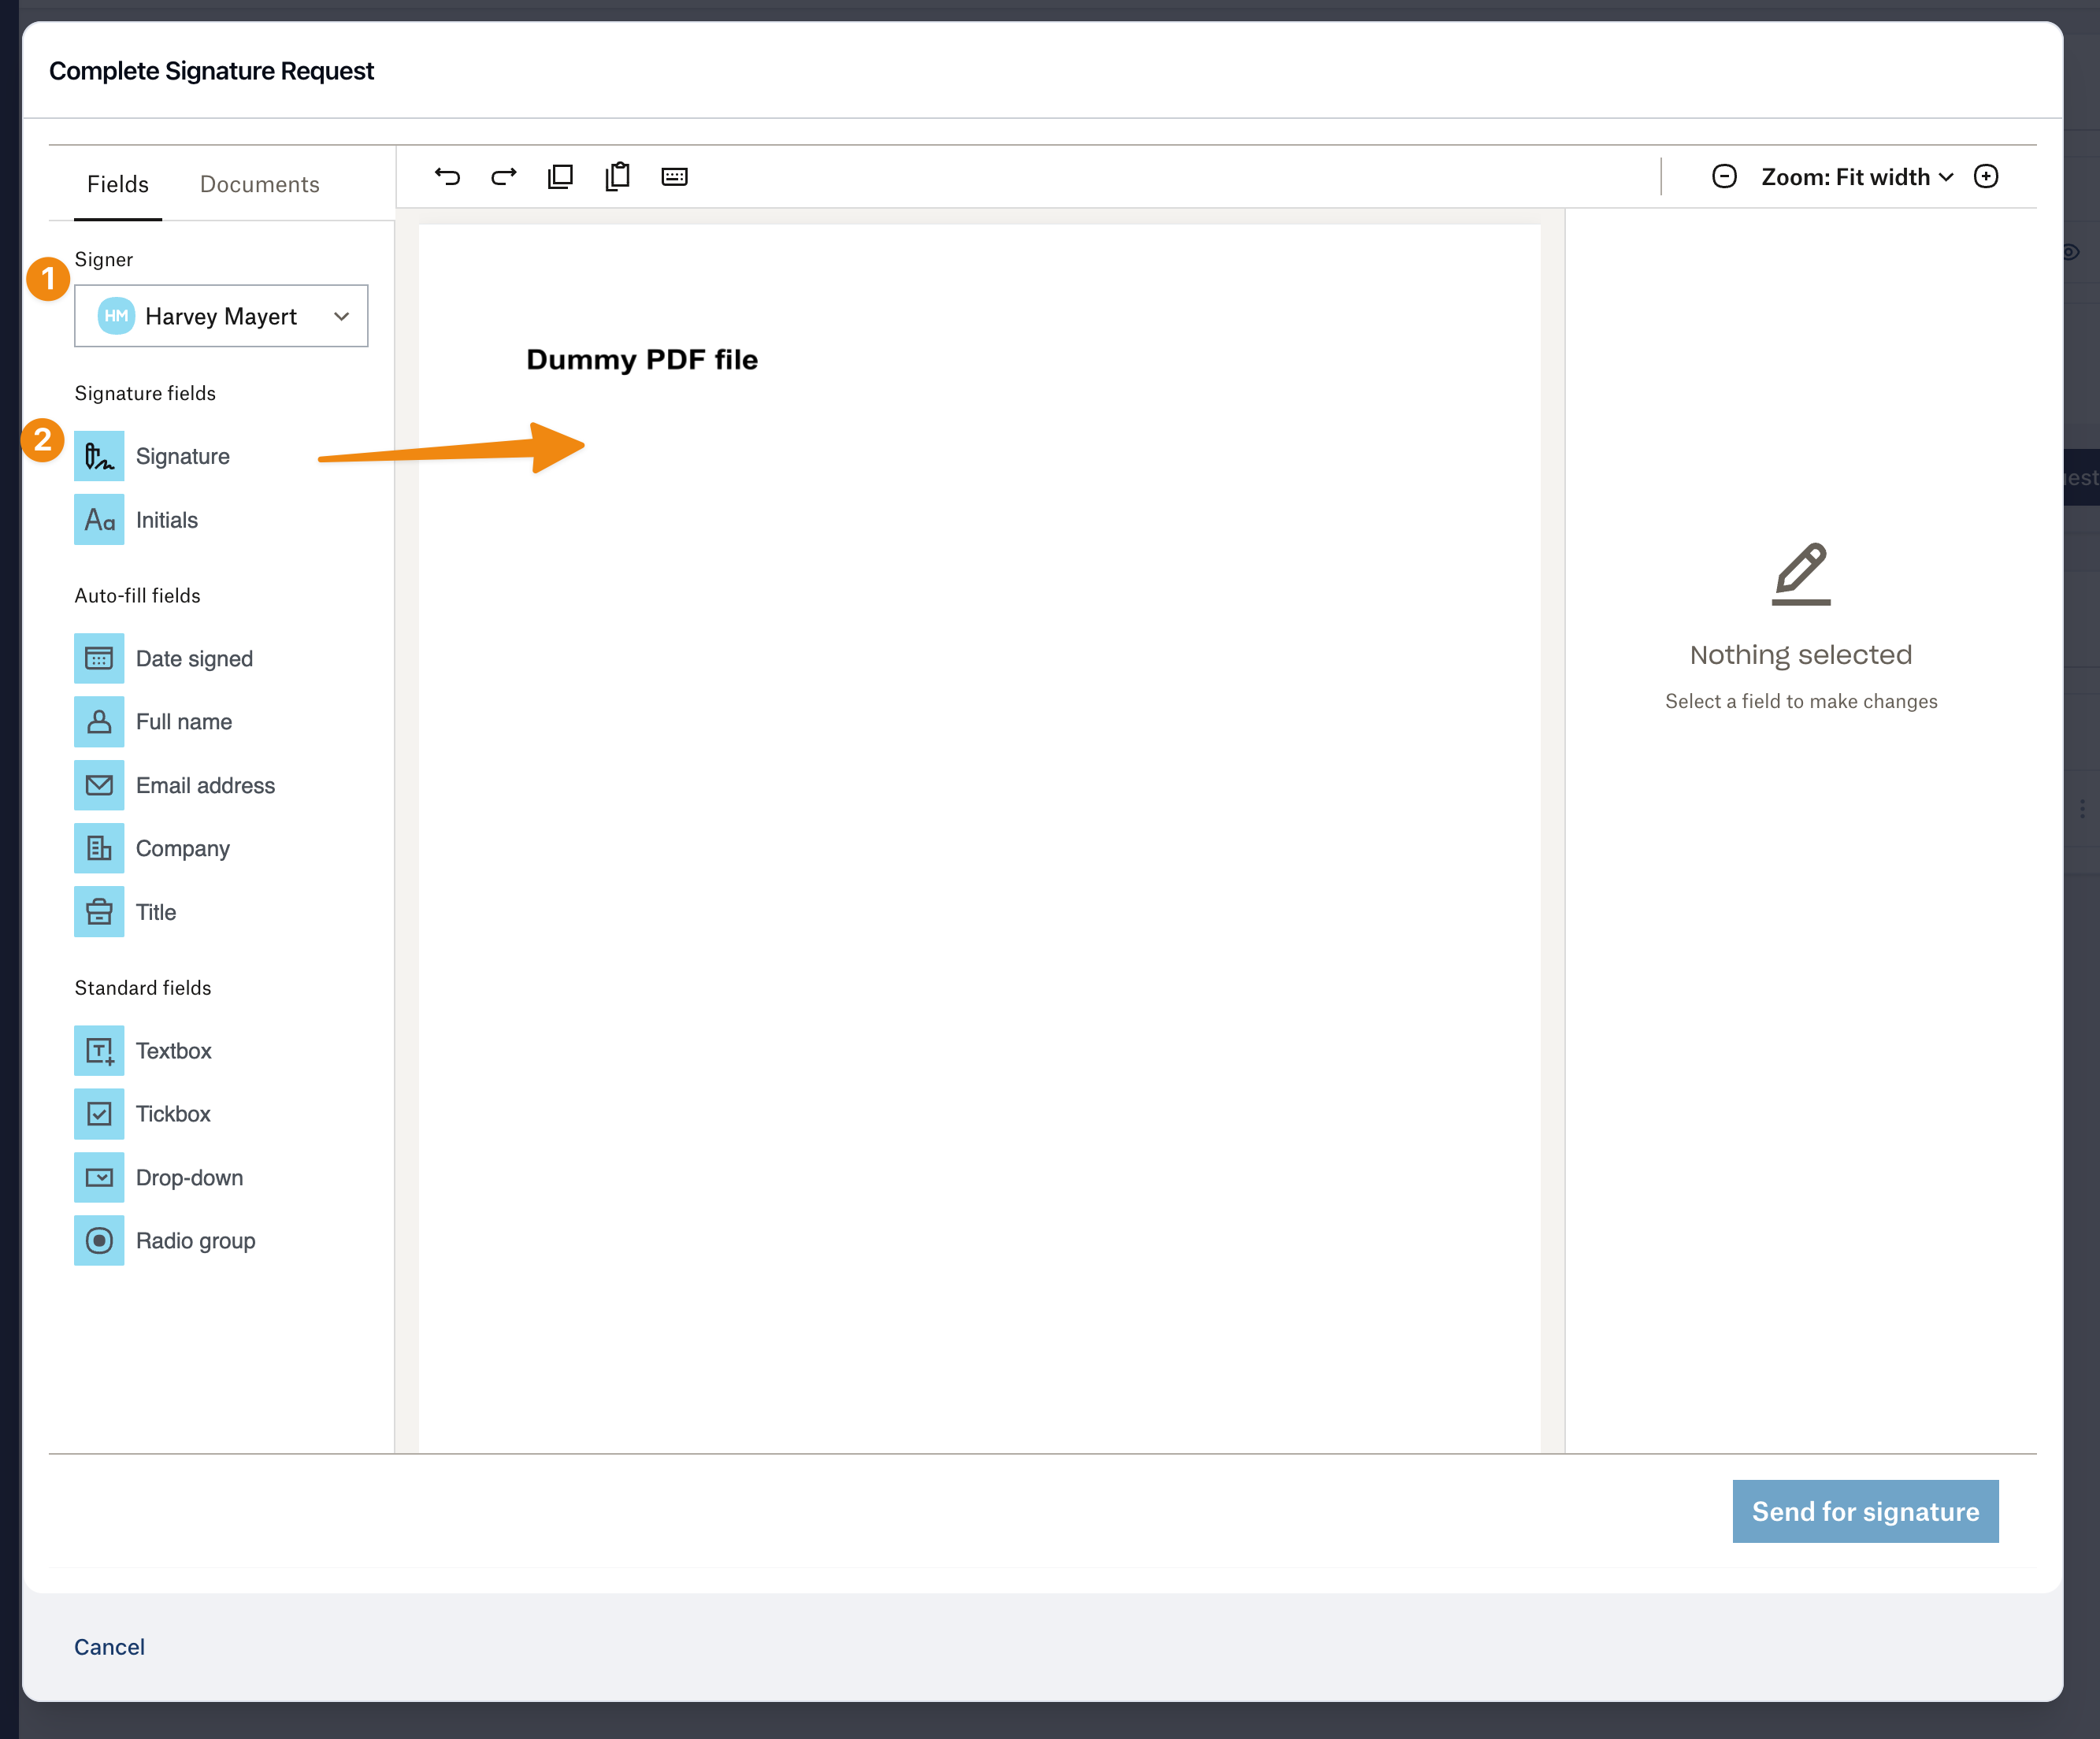
Complete the fields and include a message for the recipient. You can then click on Generate Request and this will navigate you to the DocuSign workflow. You can see more on this in the Requesting Signatures guide.
Video Walkthrough
User Record User Groups
You can now assign a user group to a specific record type. In this video, James walks through the process using the example of the "Car Insurance" record type, which may be required, but only for users who have a car. He demonstrates how to create a user group for those users, assign individuals to the group, and then link the group to the relevant record type. Watch the video below to see how it’s done!