- Participants
- NDIS Plan
- Funding Periods
Funding Periods
Overview
Astalty supports adding services for an NDIS Plan that has funding periods associated with it. For more information about funding periods, please visit the NDIS website. This feature is available for all funding types this includes NDIA, Plan, and Self Managed participants.
Video Walkthrough
For a detailed walkthrough about how to manage funding periods and view utilisation data, please view the video below.
How to add funding periods
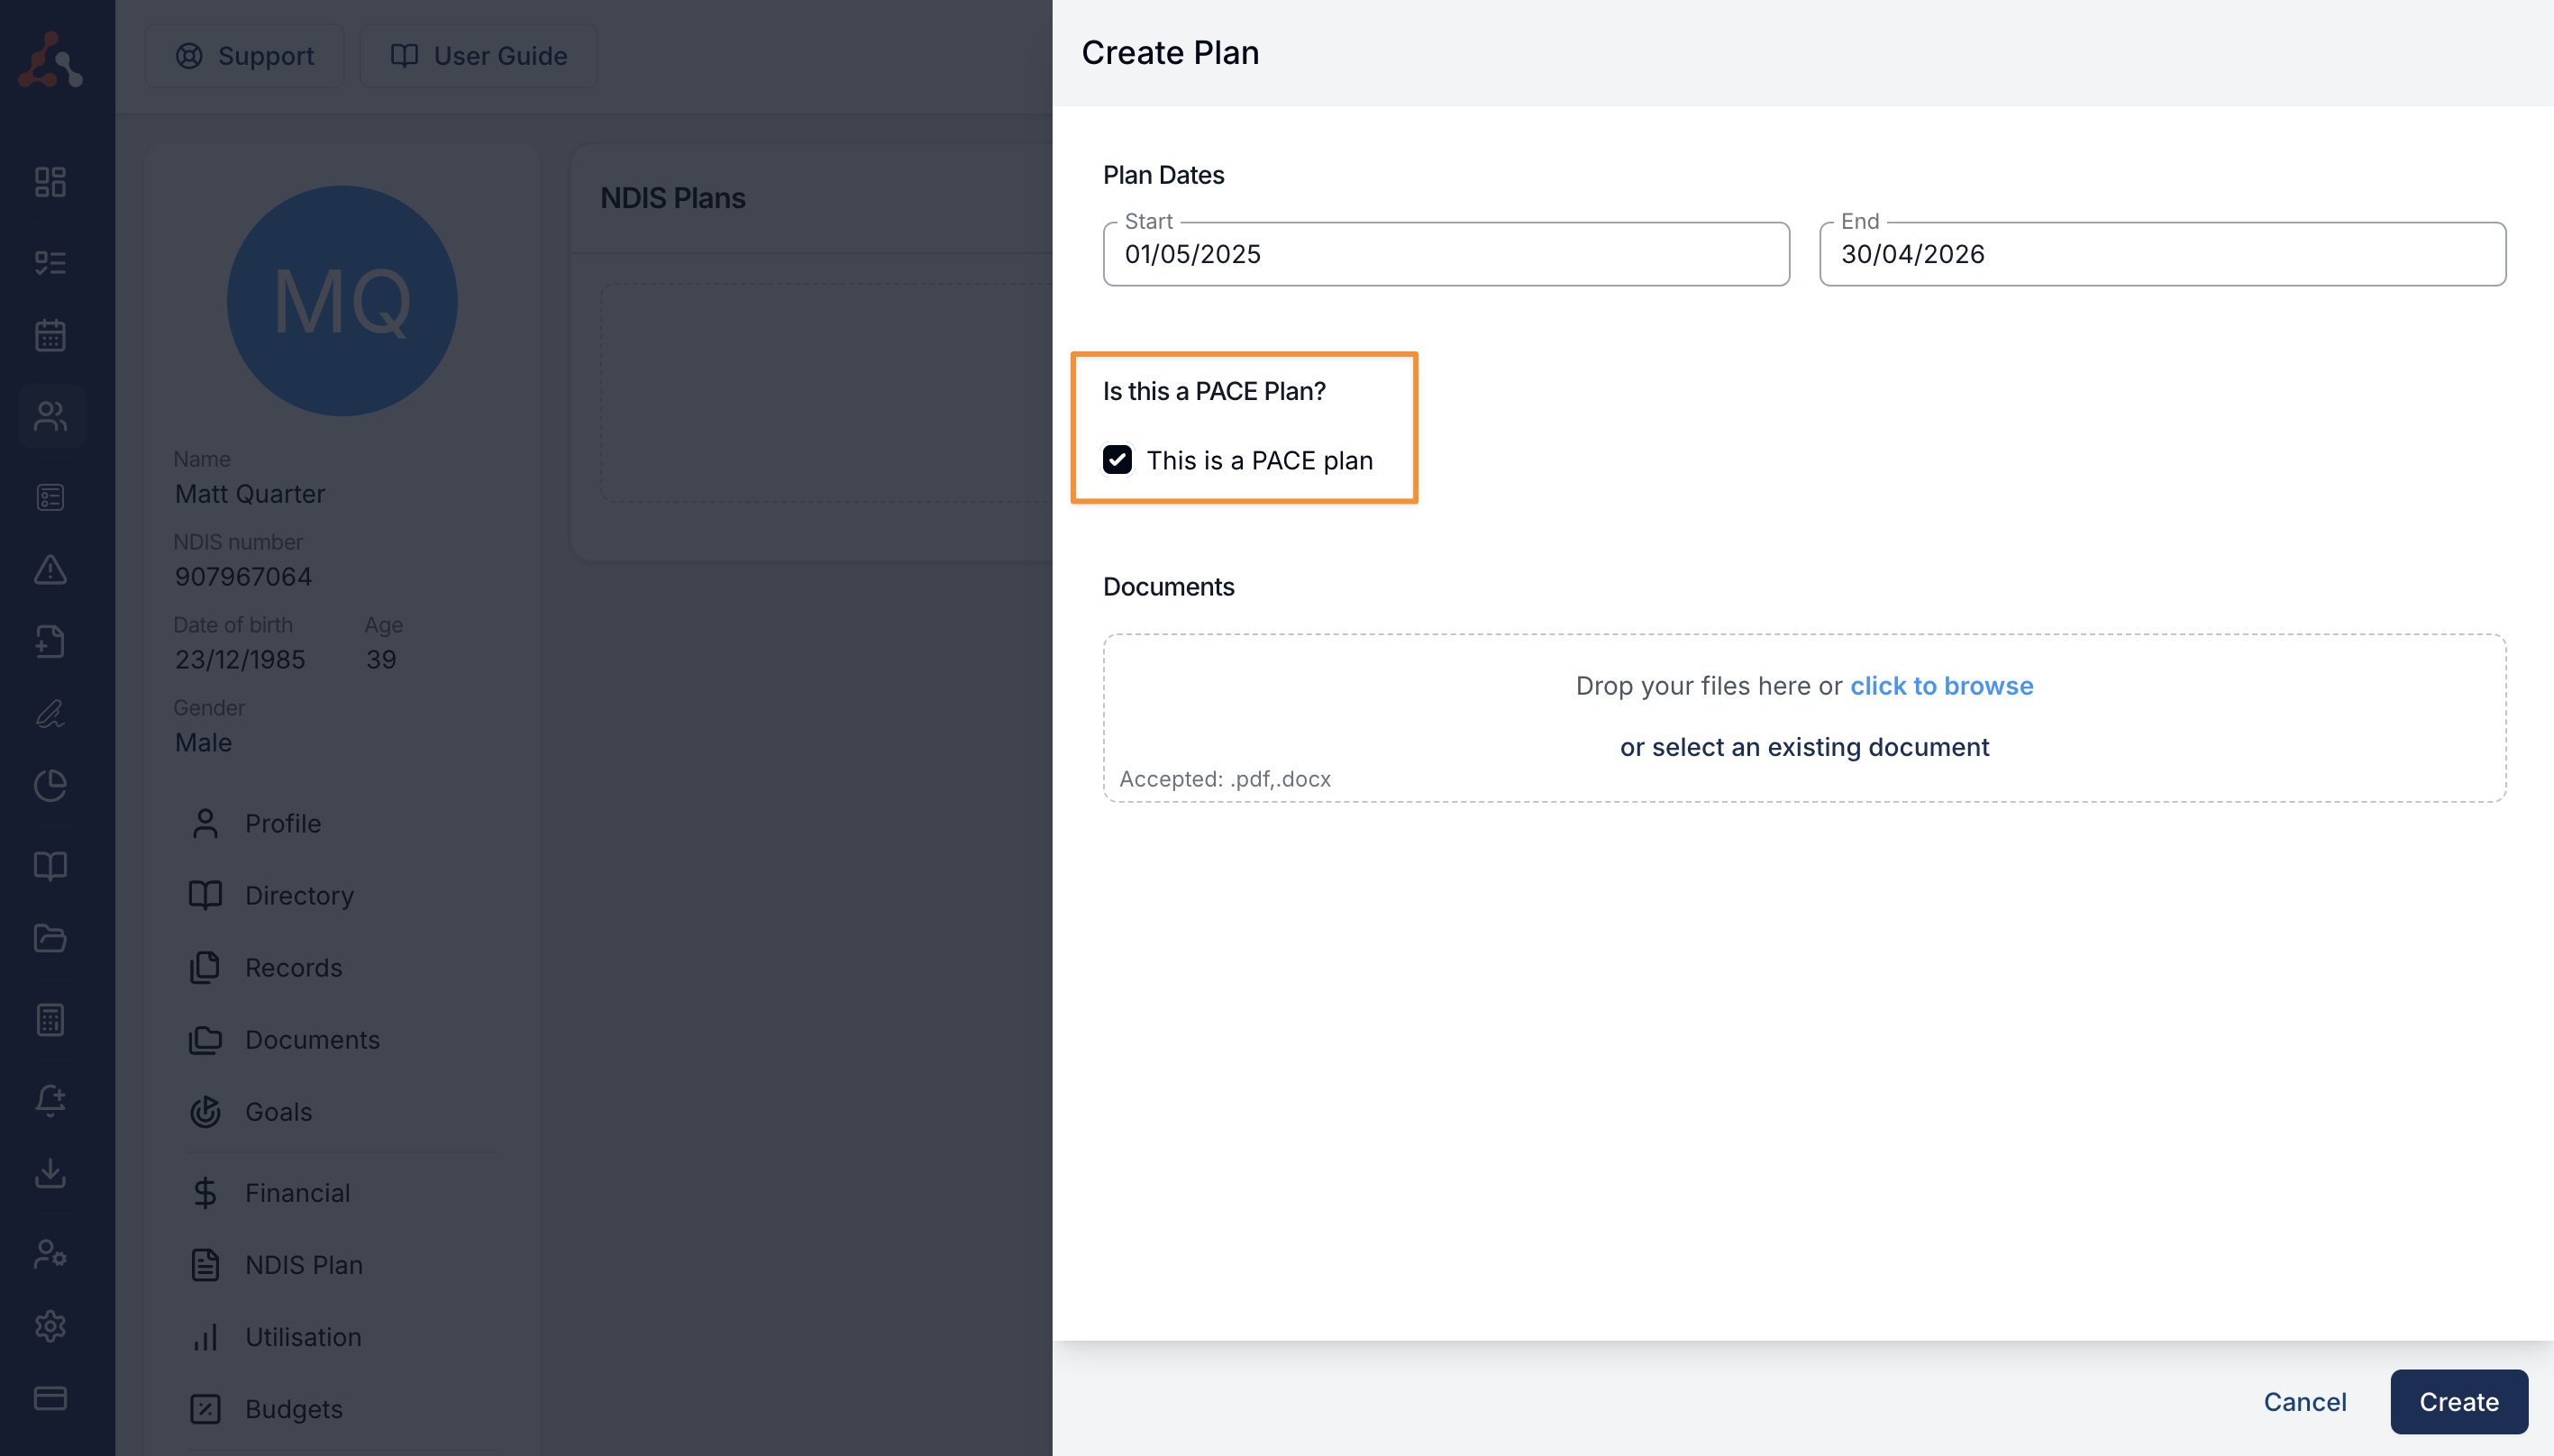
Create a NDIS Plan
The first step is to create an NDIS plan within a Participant's profile - it's important to ensure the "Is this a PACE plan" checkbox has been selected.
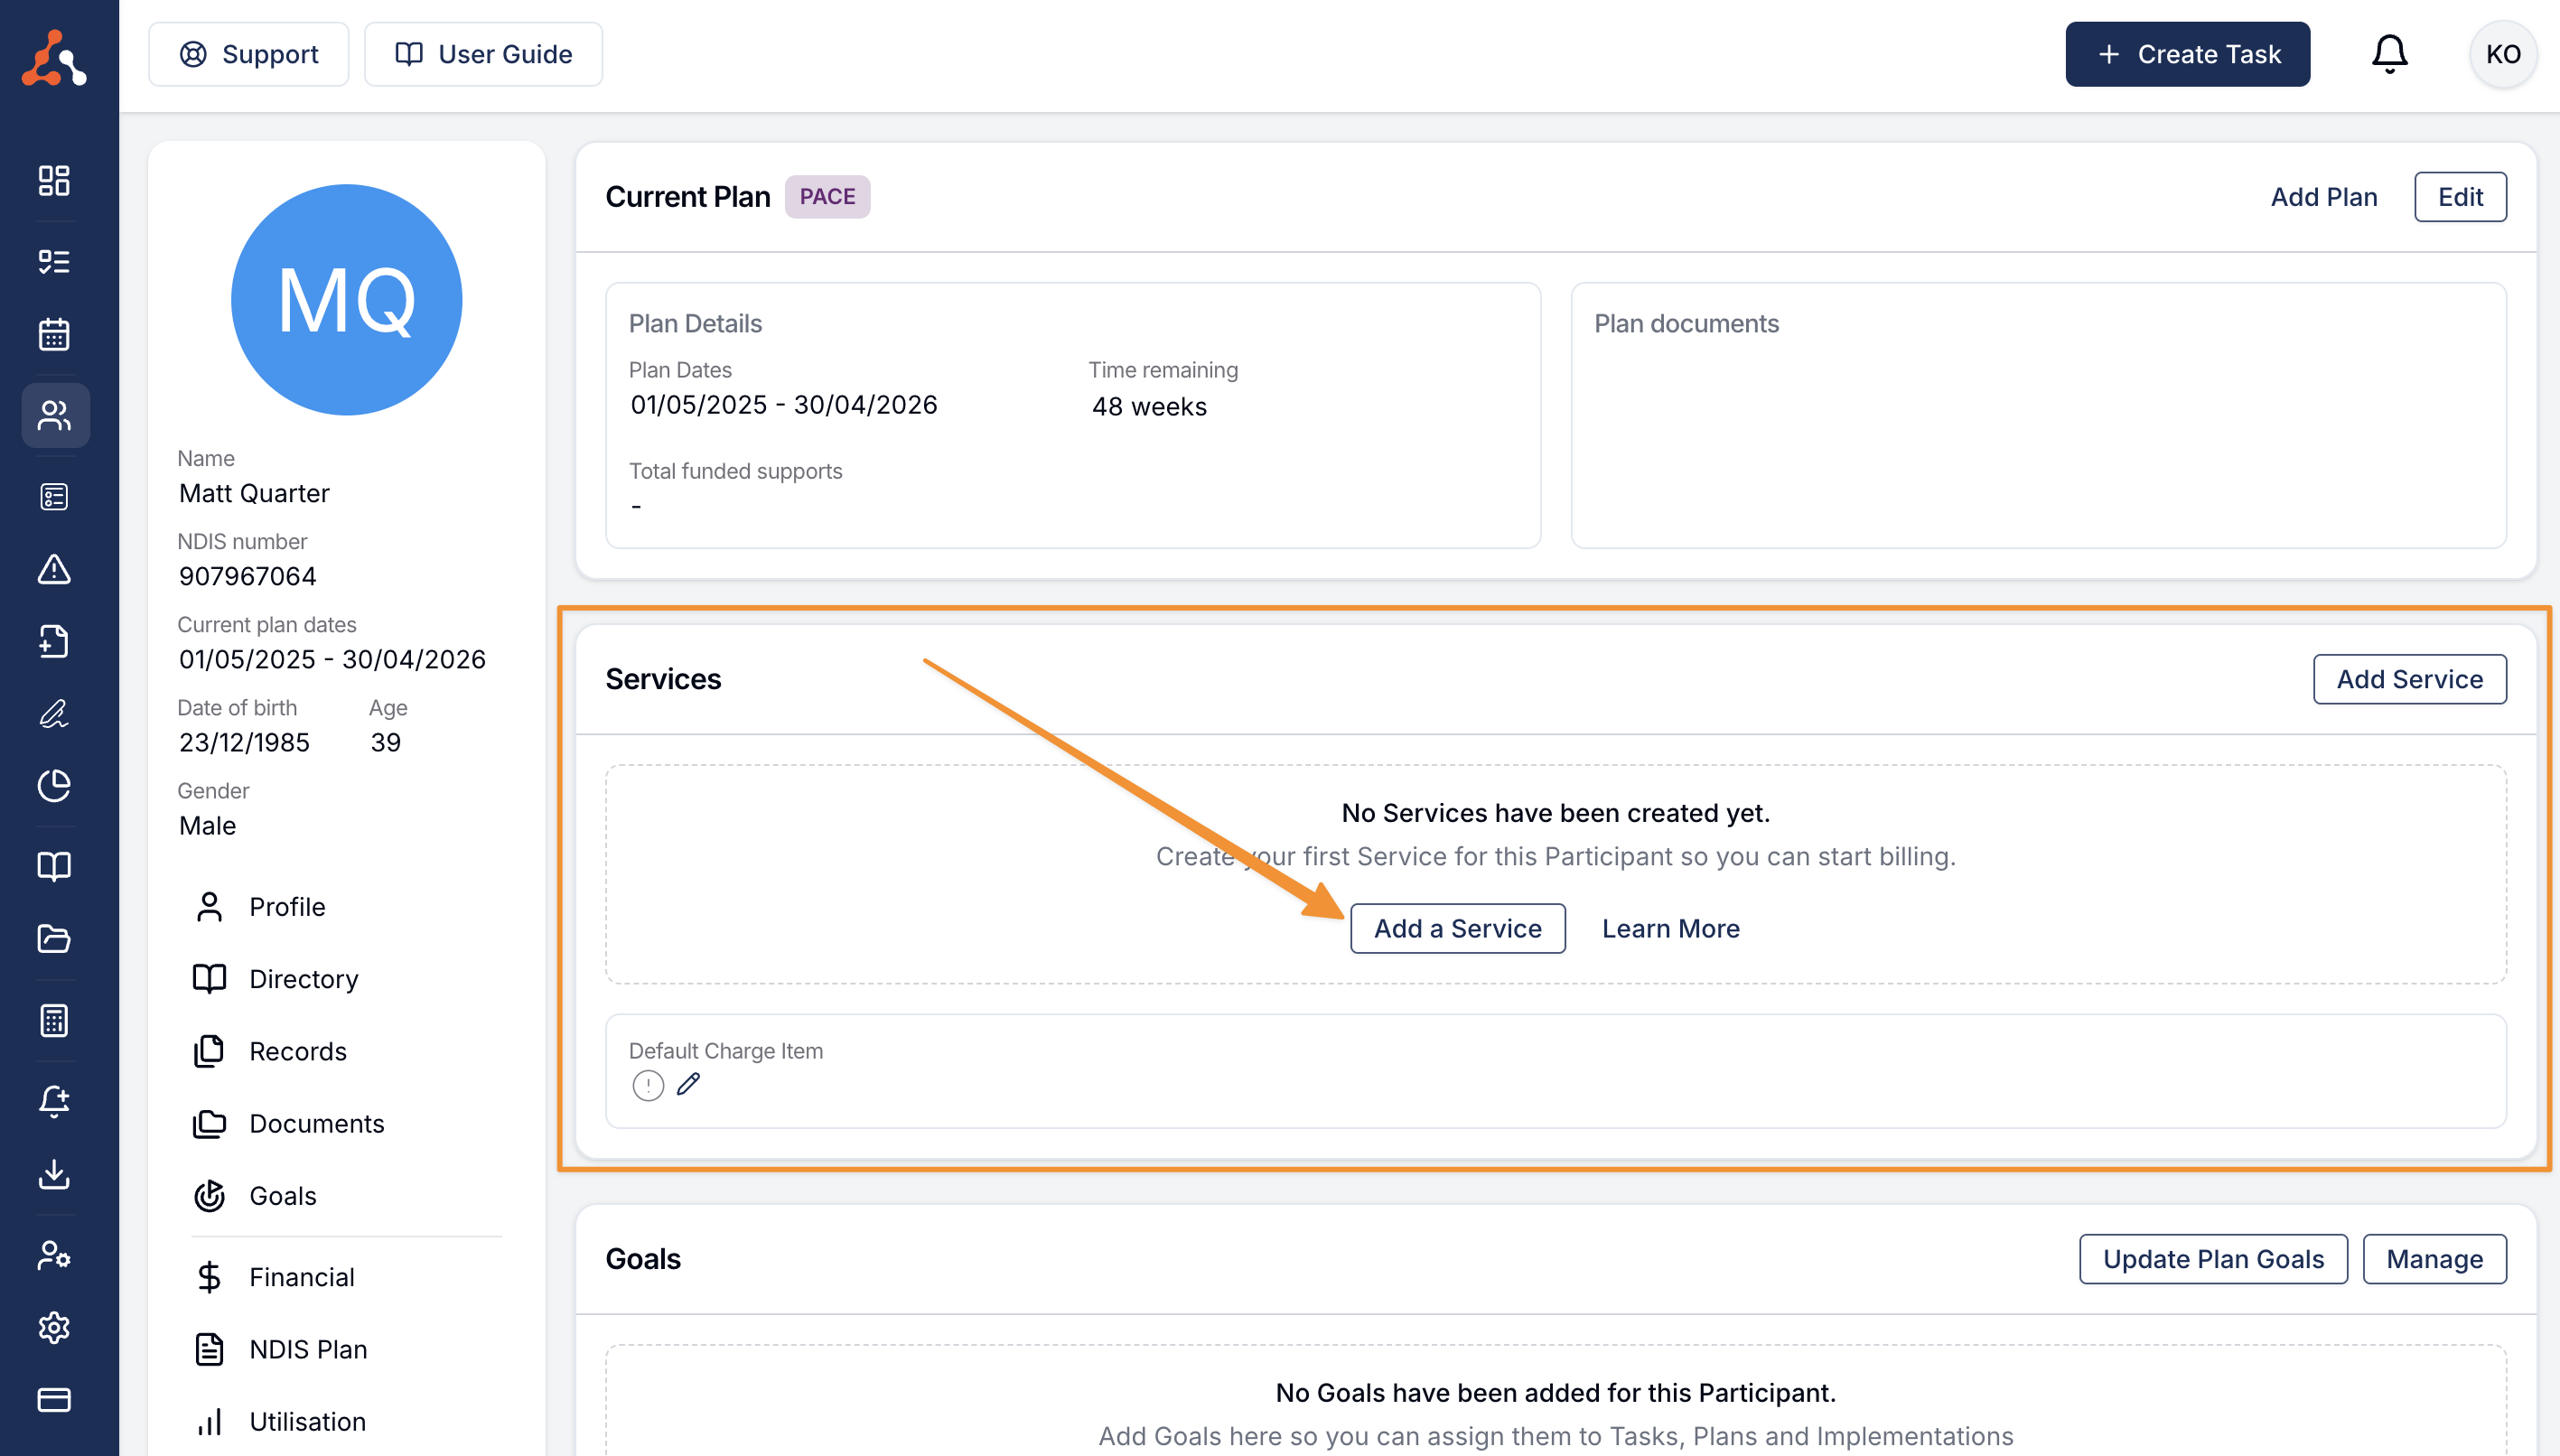
Create a Service
Once the NDIS Plan has been created, navigate into the plan from the Participant's profile and click "Add a Service".
When creating the Service, ensure you click "This service has a funding schedule".
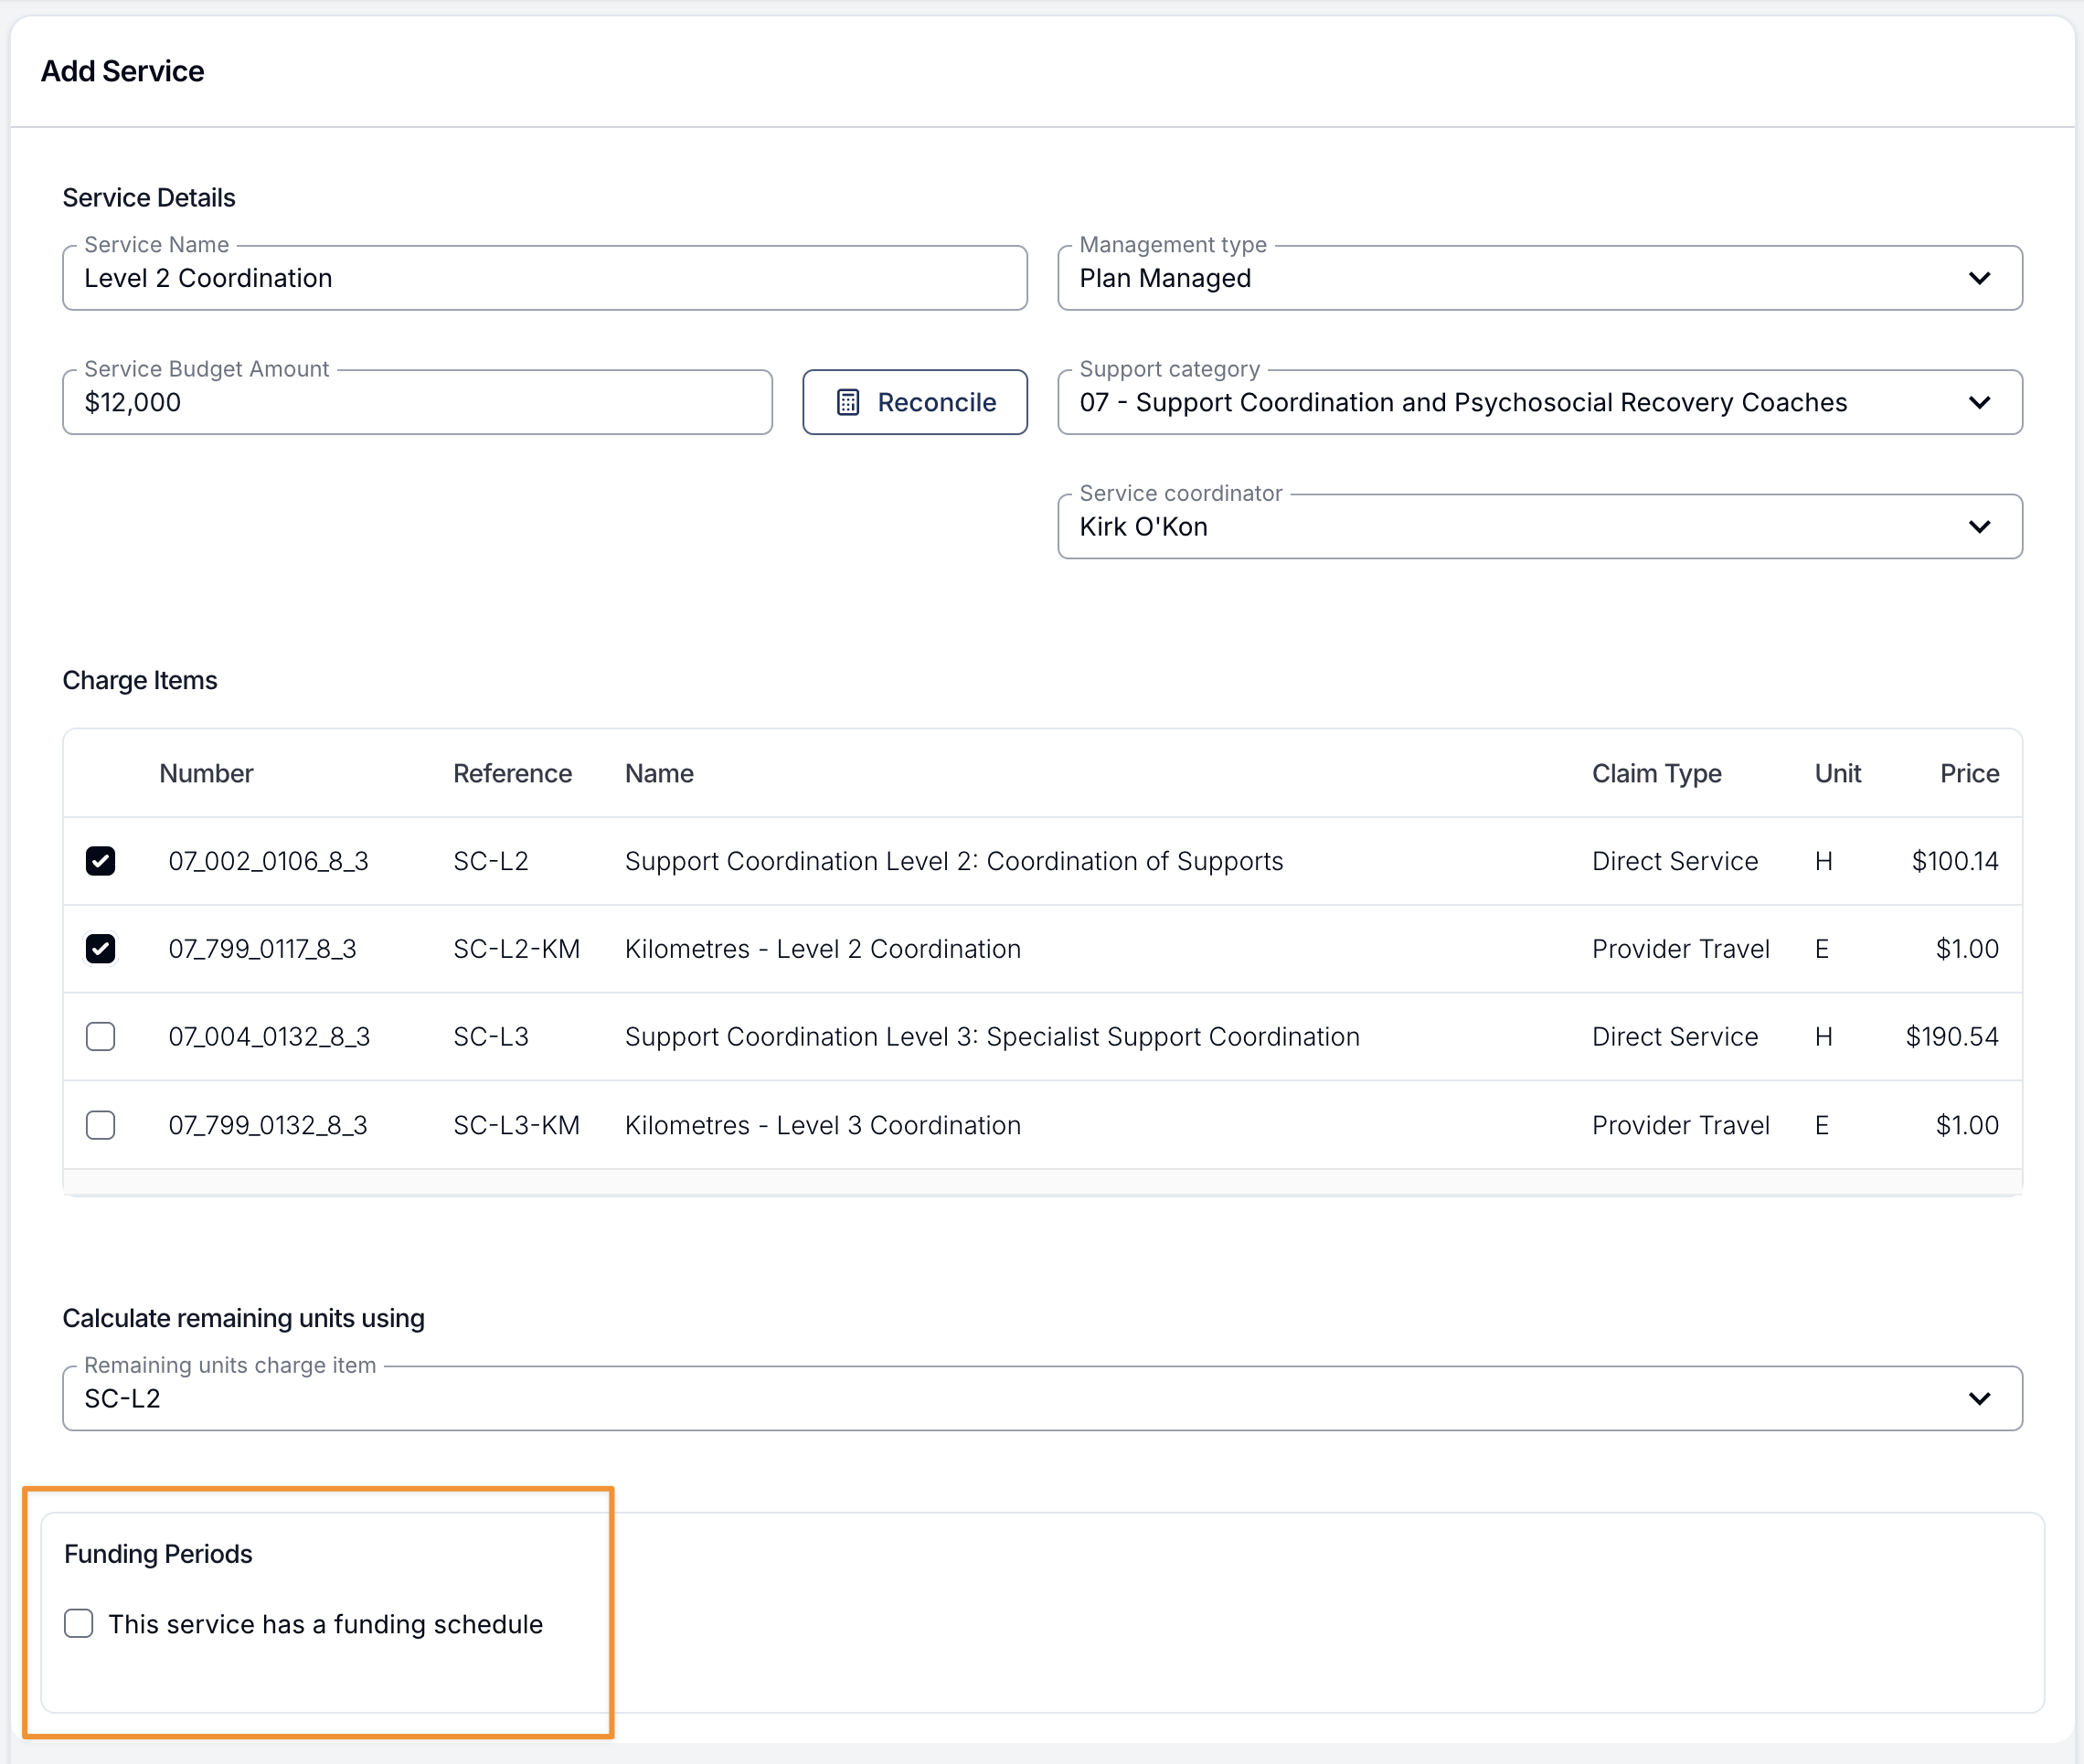
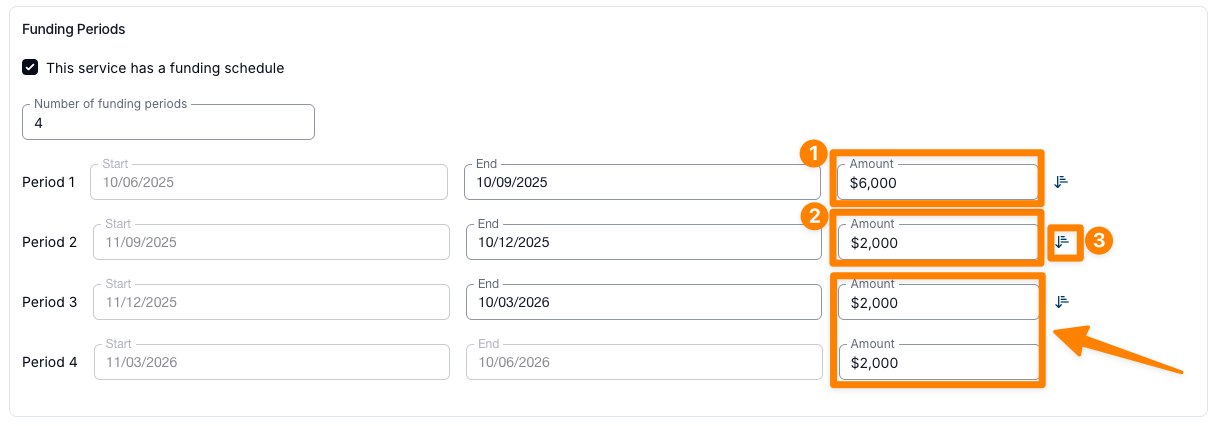
Once you have checked this box, you'll be prompted to add the number of periods within the NDIS plan.
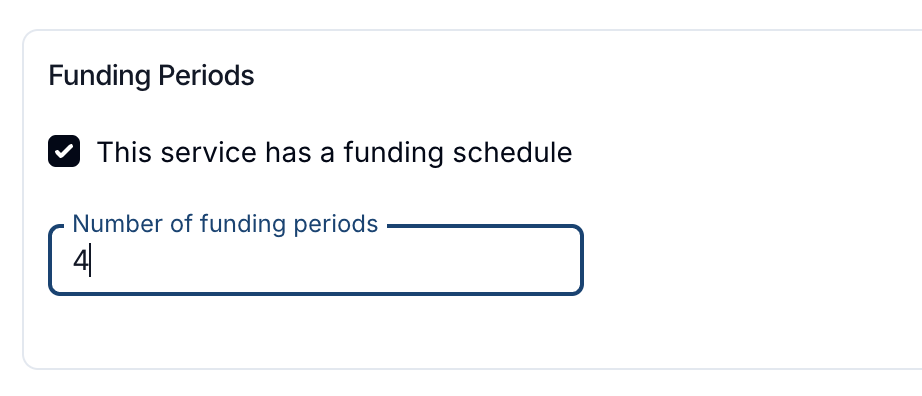
Astalty will create the periods with the default dates and amounts, however you are free to customise these if you need to.
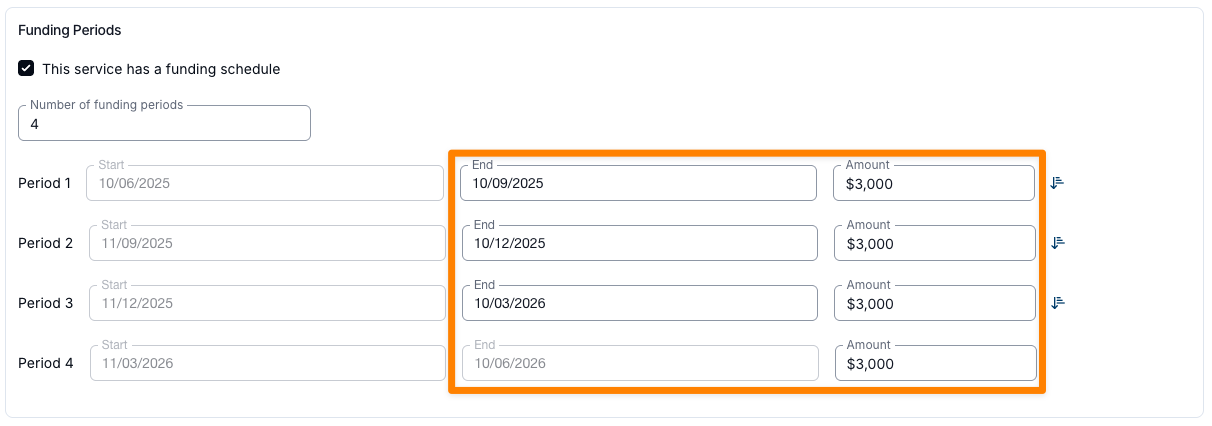
To streamline your workflow, you can copy a single value to all subsequent Funding Periods when a plan includes varying amounts. This is especially useful for plans with many Funding Periods (such as monthly) where the first Funding Period has a differing amount to the remaining periods. To do this, enter the amount in the relevant period, and then click on the copy icon to apply this amount to the remaining periods.
Reconciling Funding Periods to Account for Utilised Funds
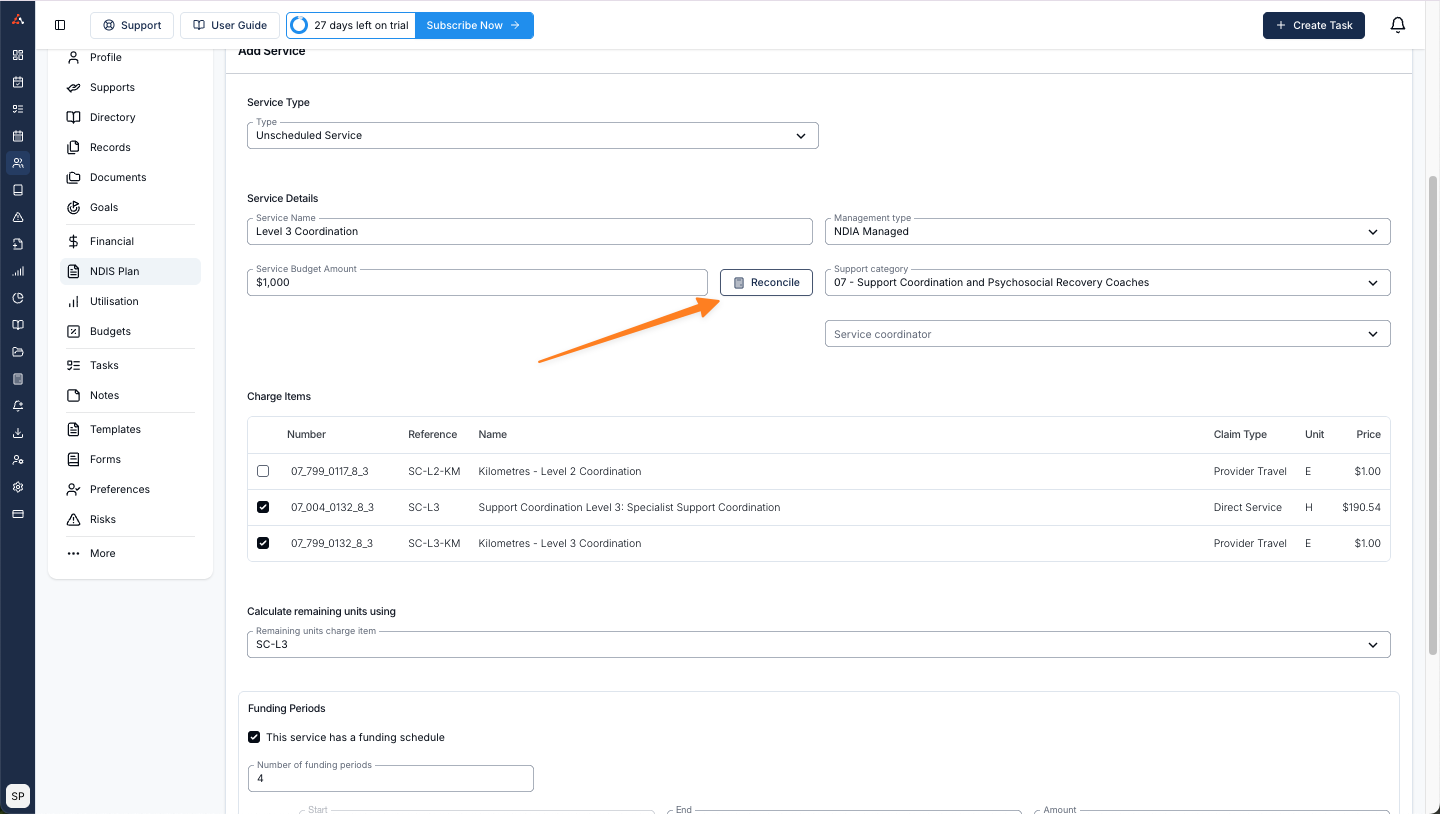
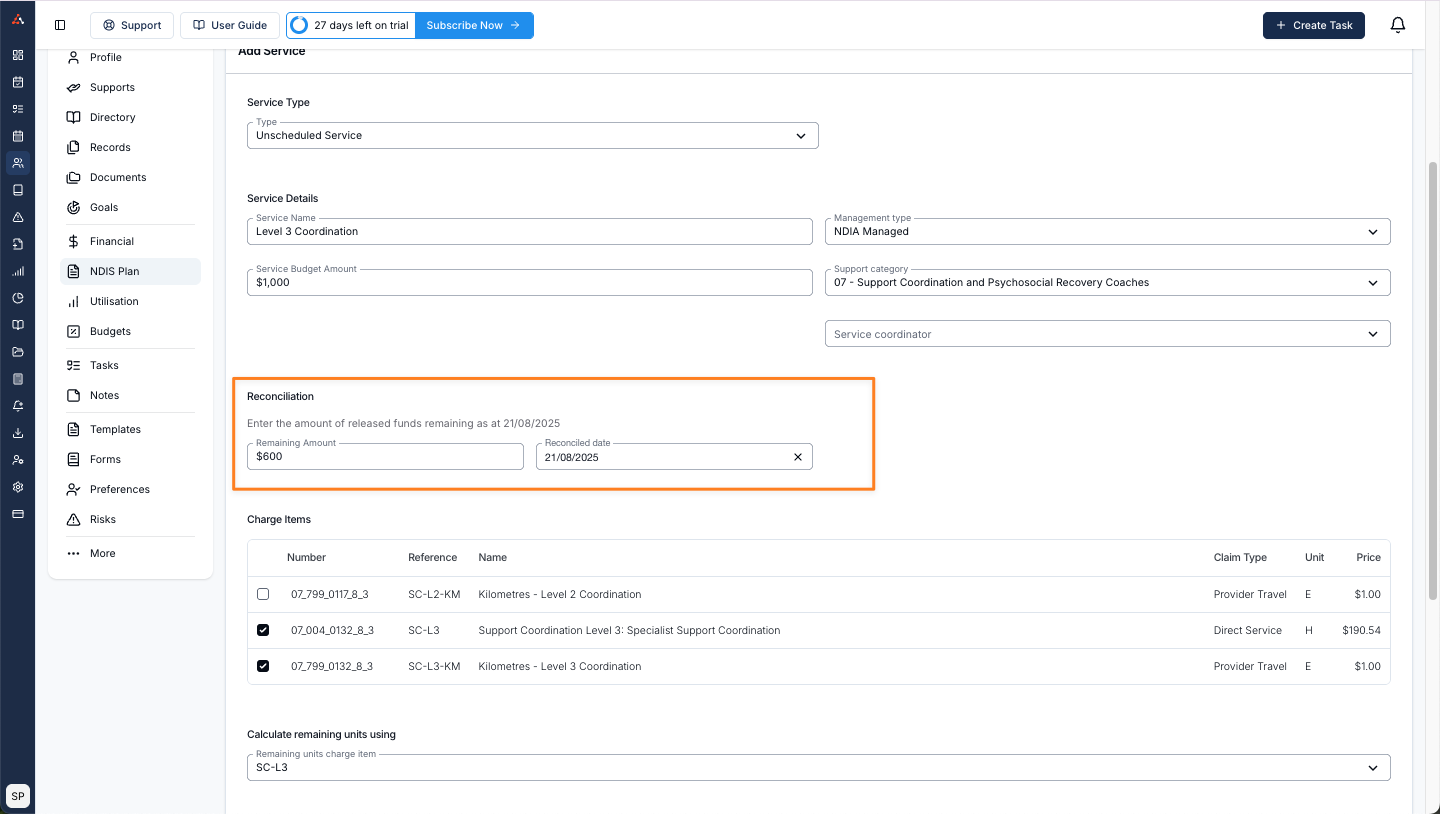
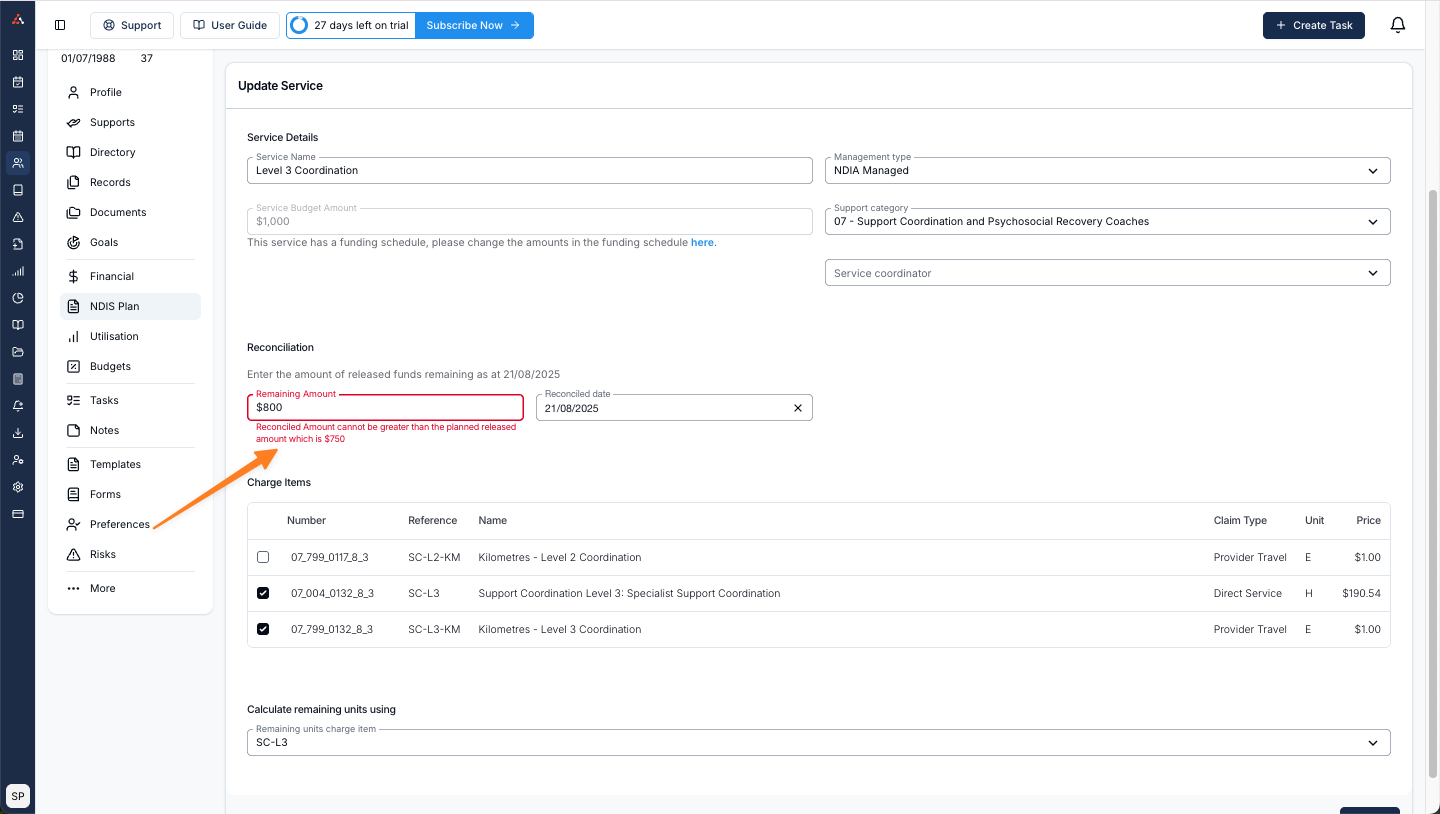
To account for utilised funding prior to creating the funding period service within Astalty you can use the 'Reconcile' option within the service. When reconciling a funding period service, one of the most important points to clarify is the reconciliation date.
- The reconciliation date determines which funding period you are reconciling.
- The reconciliation remaining amount reflects the funds that have been released up to that date.
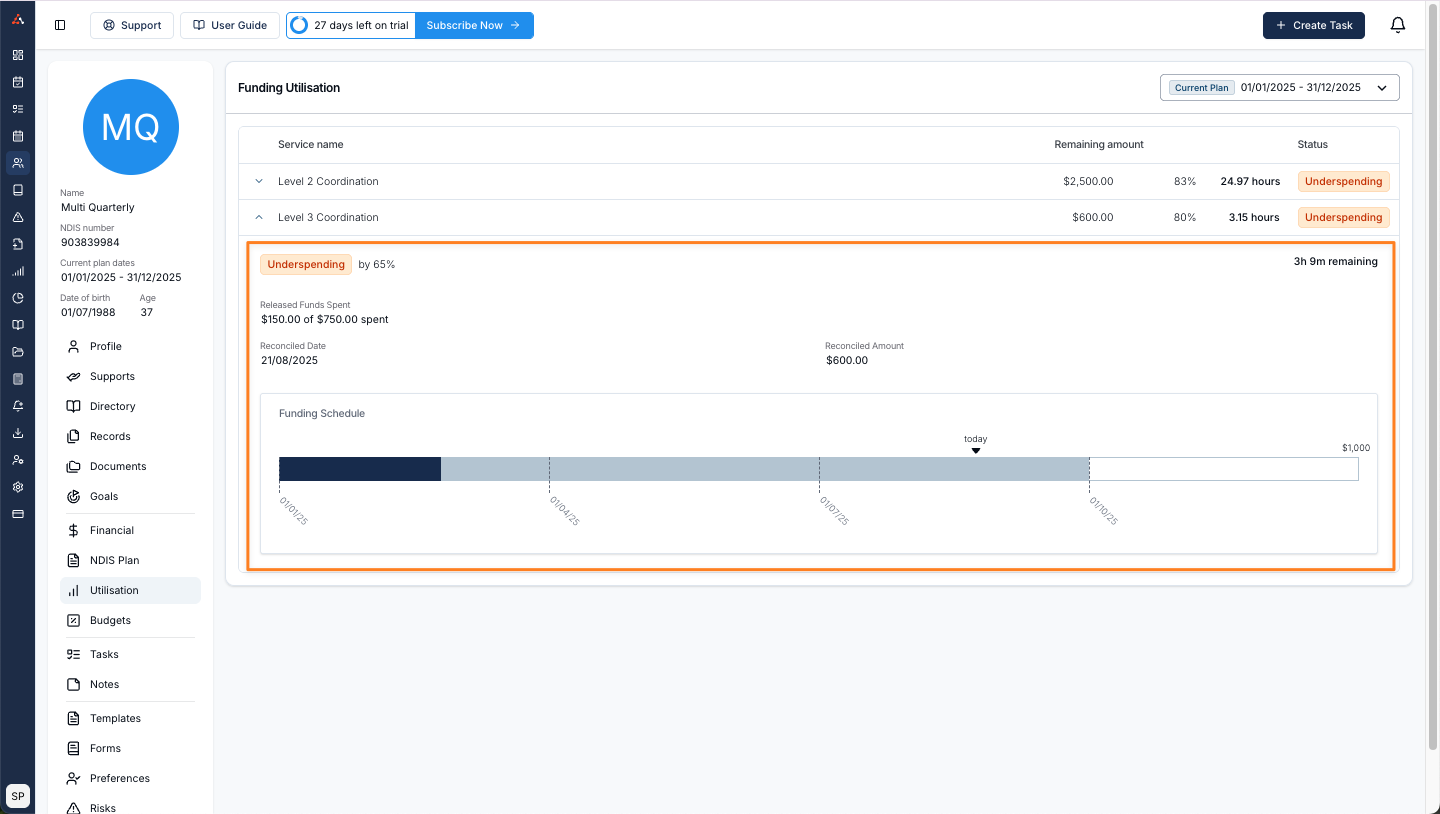
Example
Let’s say:
- The total service budget is $1,000.
- The plan runs across four funding periods.
- By funding period three, a total of $750 has been released.
- You have already used $150 of the participant’s funding.
That means:
- The released funds up to period three is $750.
- Remaining funds = $750 - $150 = $600.
- Therefore, you would record $600 remaining in the participant’s budget.
The utilisation would then reflect this update as seen below.
When adding an amount that exceeds the released funding you will get an error message as seen below and you will not be able to save the funding period reconciliation. This ensures that you cannot exceed the amount allocated within the funding period you are in.
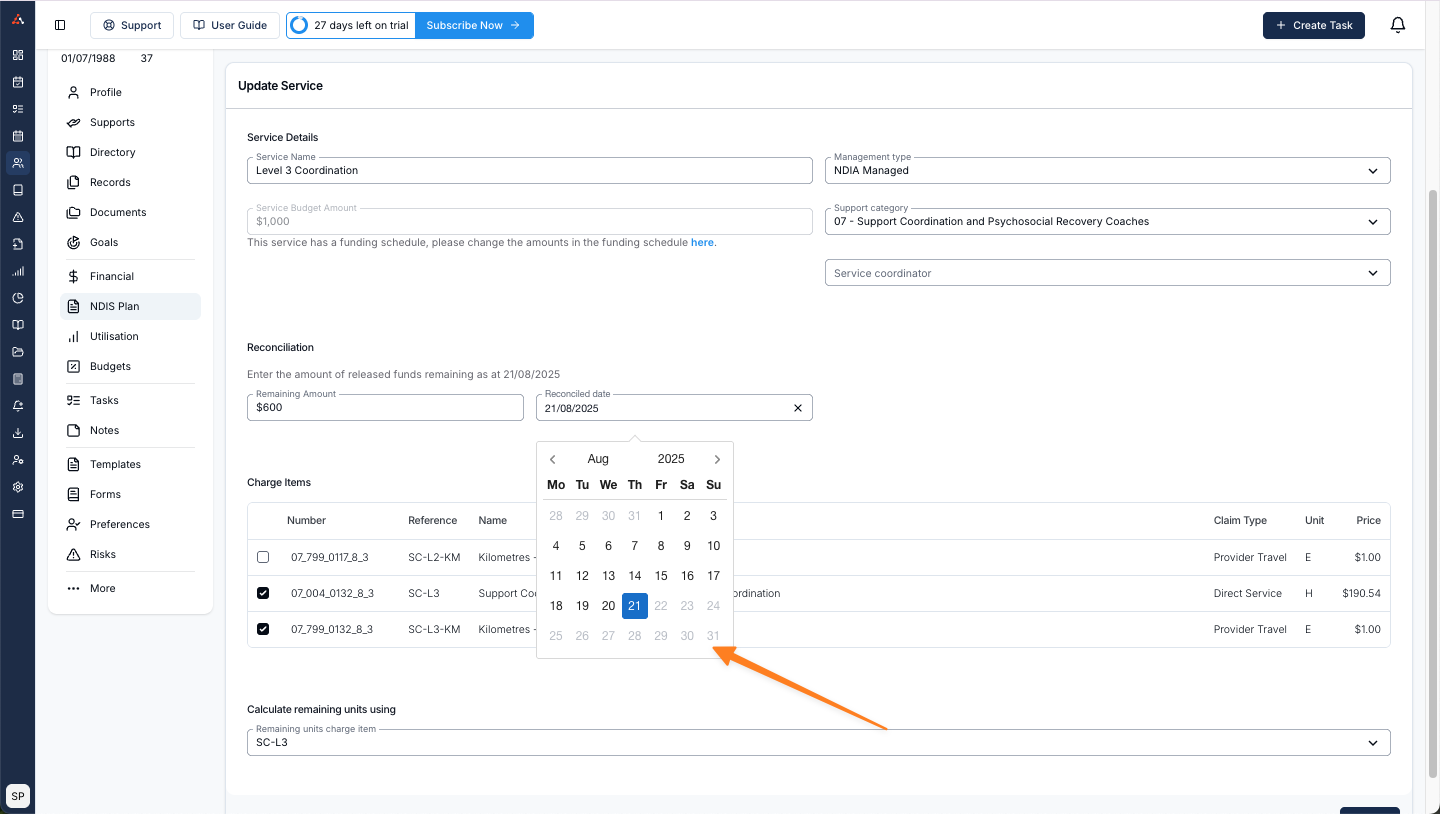
You cannot set the reconciliation date to a future date for the same reason. Notice the 'Greyed' out option in the screenshot below for all future dates.
Editing Services with Funding Periods
If you need to adjust the Funding Periods or Service Budget Amount of an existing Service that has a Funding Schedule, these changes need to be made in the dedicated Edit Funding Periods page as they cannot be edited via the Update Service page. The Service Budget Amount is determined by the funded amounts assigned to the individual funding periods.
To edit a Participant's Service where there is a funding schedule assigned, navigate to the NDIS Plan page within their profile and ensure that you are viewing the Plan you want to edit the Service for - when you're ready, select the Service you want to edit*.*

Editing the Funding Periods or Service Budget Amount
If the changes to the Service relate to the Service Budget Amount or the Funding Periods themselves, then select Edit in the Service Funding Periods.
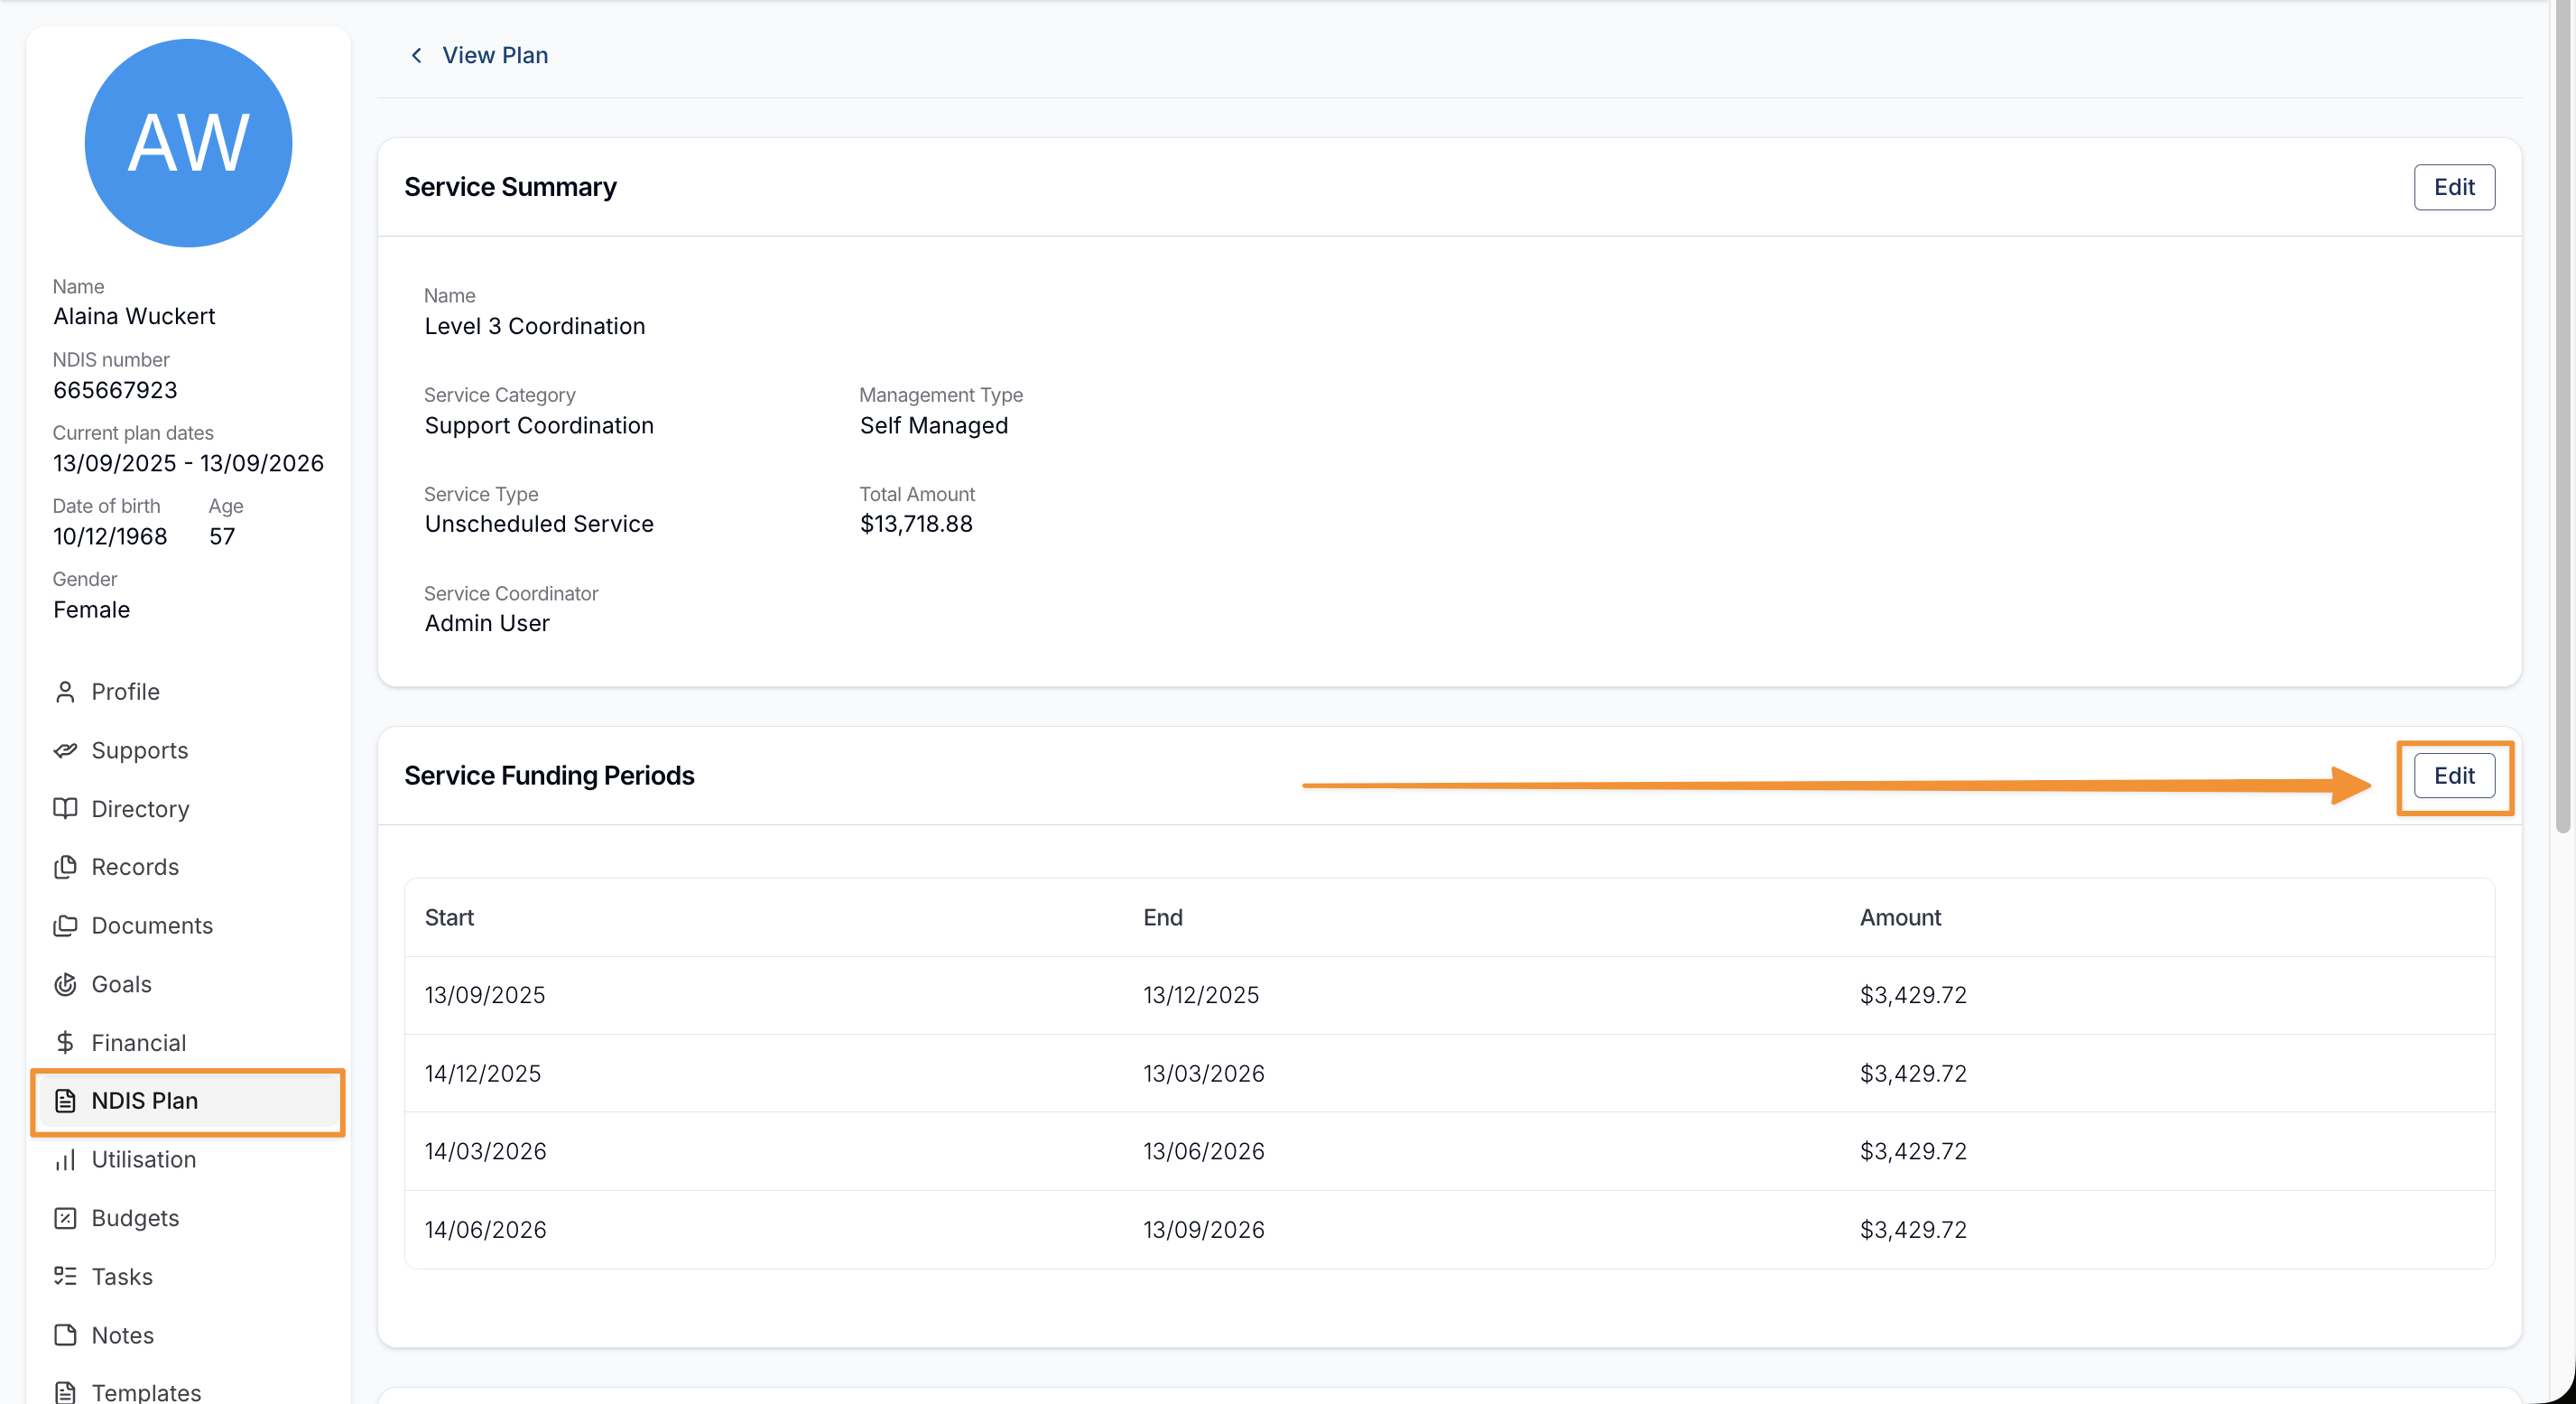
On the "Update Planned Service Periods" page, you can adjust:
- The number of funding periods,
- The dates that each period ends (excluding the last Period - as this is determined by the Plan End Date), and
- The funded Amount per period.
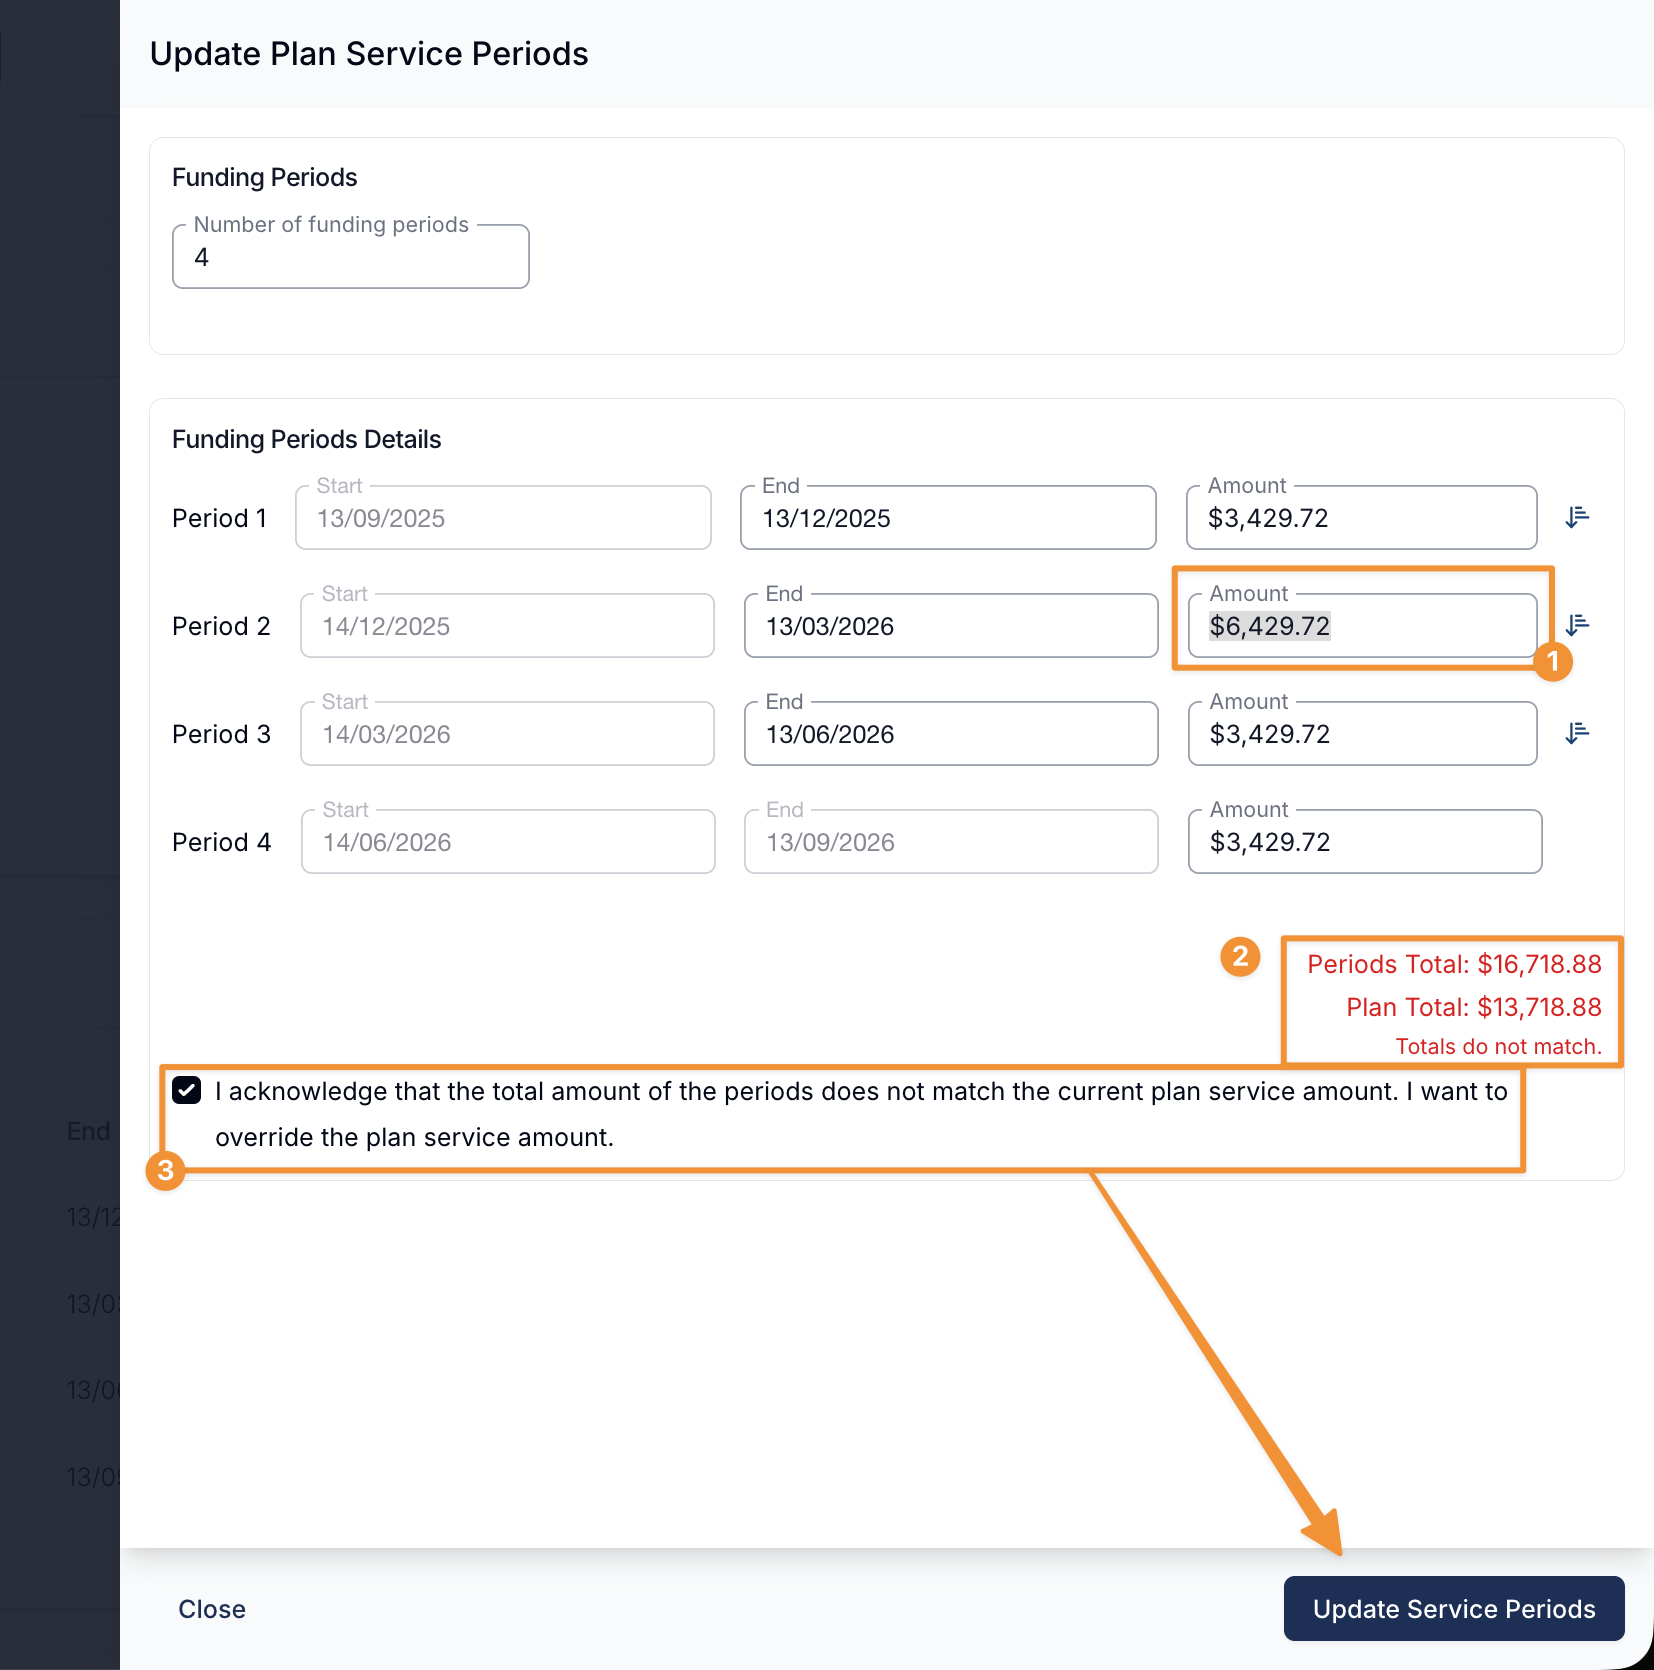
If there are no adjustments to the Plan Total, you'll be able to save your changes to the service periods by selecting Update Service Periods.
If however, the adjustments made to the funded amount per period calculate to a different Plan Total - then Astalty will highlight this difference.
-
If this change to the Plan Total is incorrect, make adjustments to fix the error in your planned period amounts before selecting Update Service Periods.
-
If this change in the Plan Total is correct,
- you will be prompted to acknowledge and confirm that you wish to override the planned service amount.
- Once this option is ticked, you'll be able to update the service periods by selecting Update Service Periods.
- Once confirmed the Service Budget Amount will update automatically.
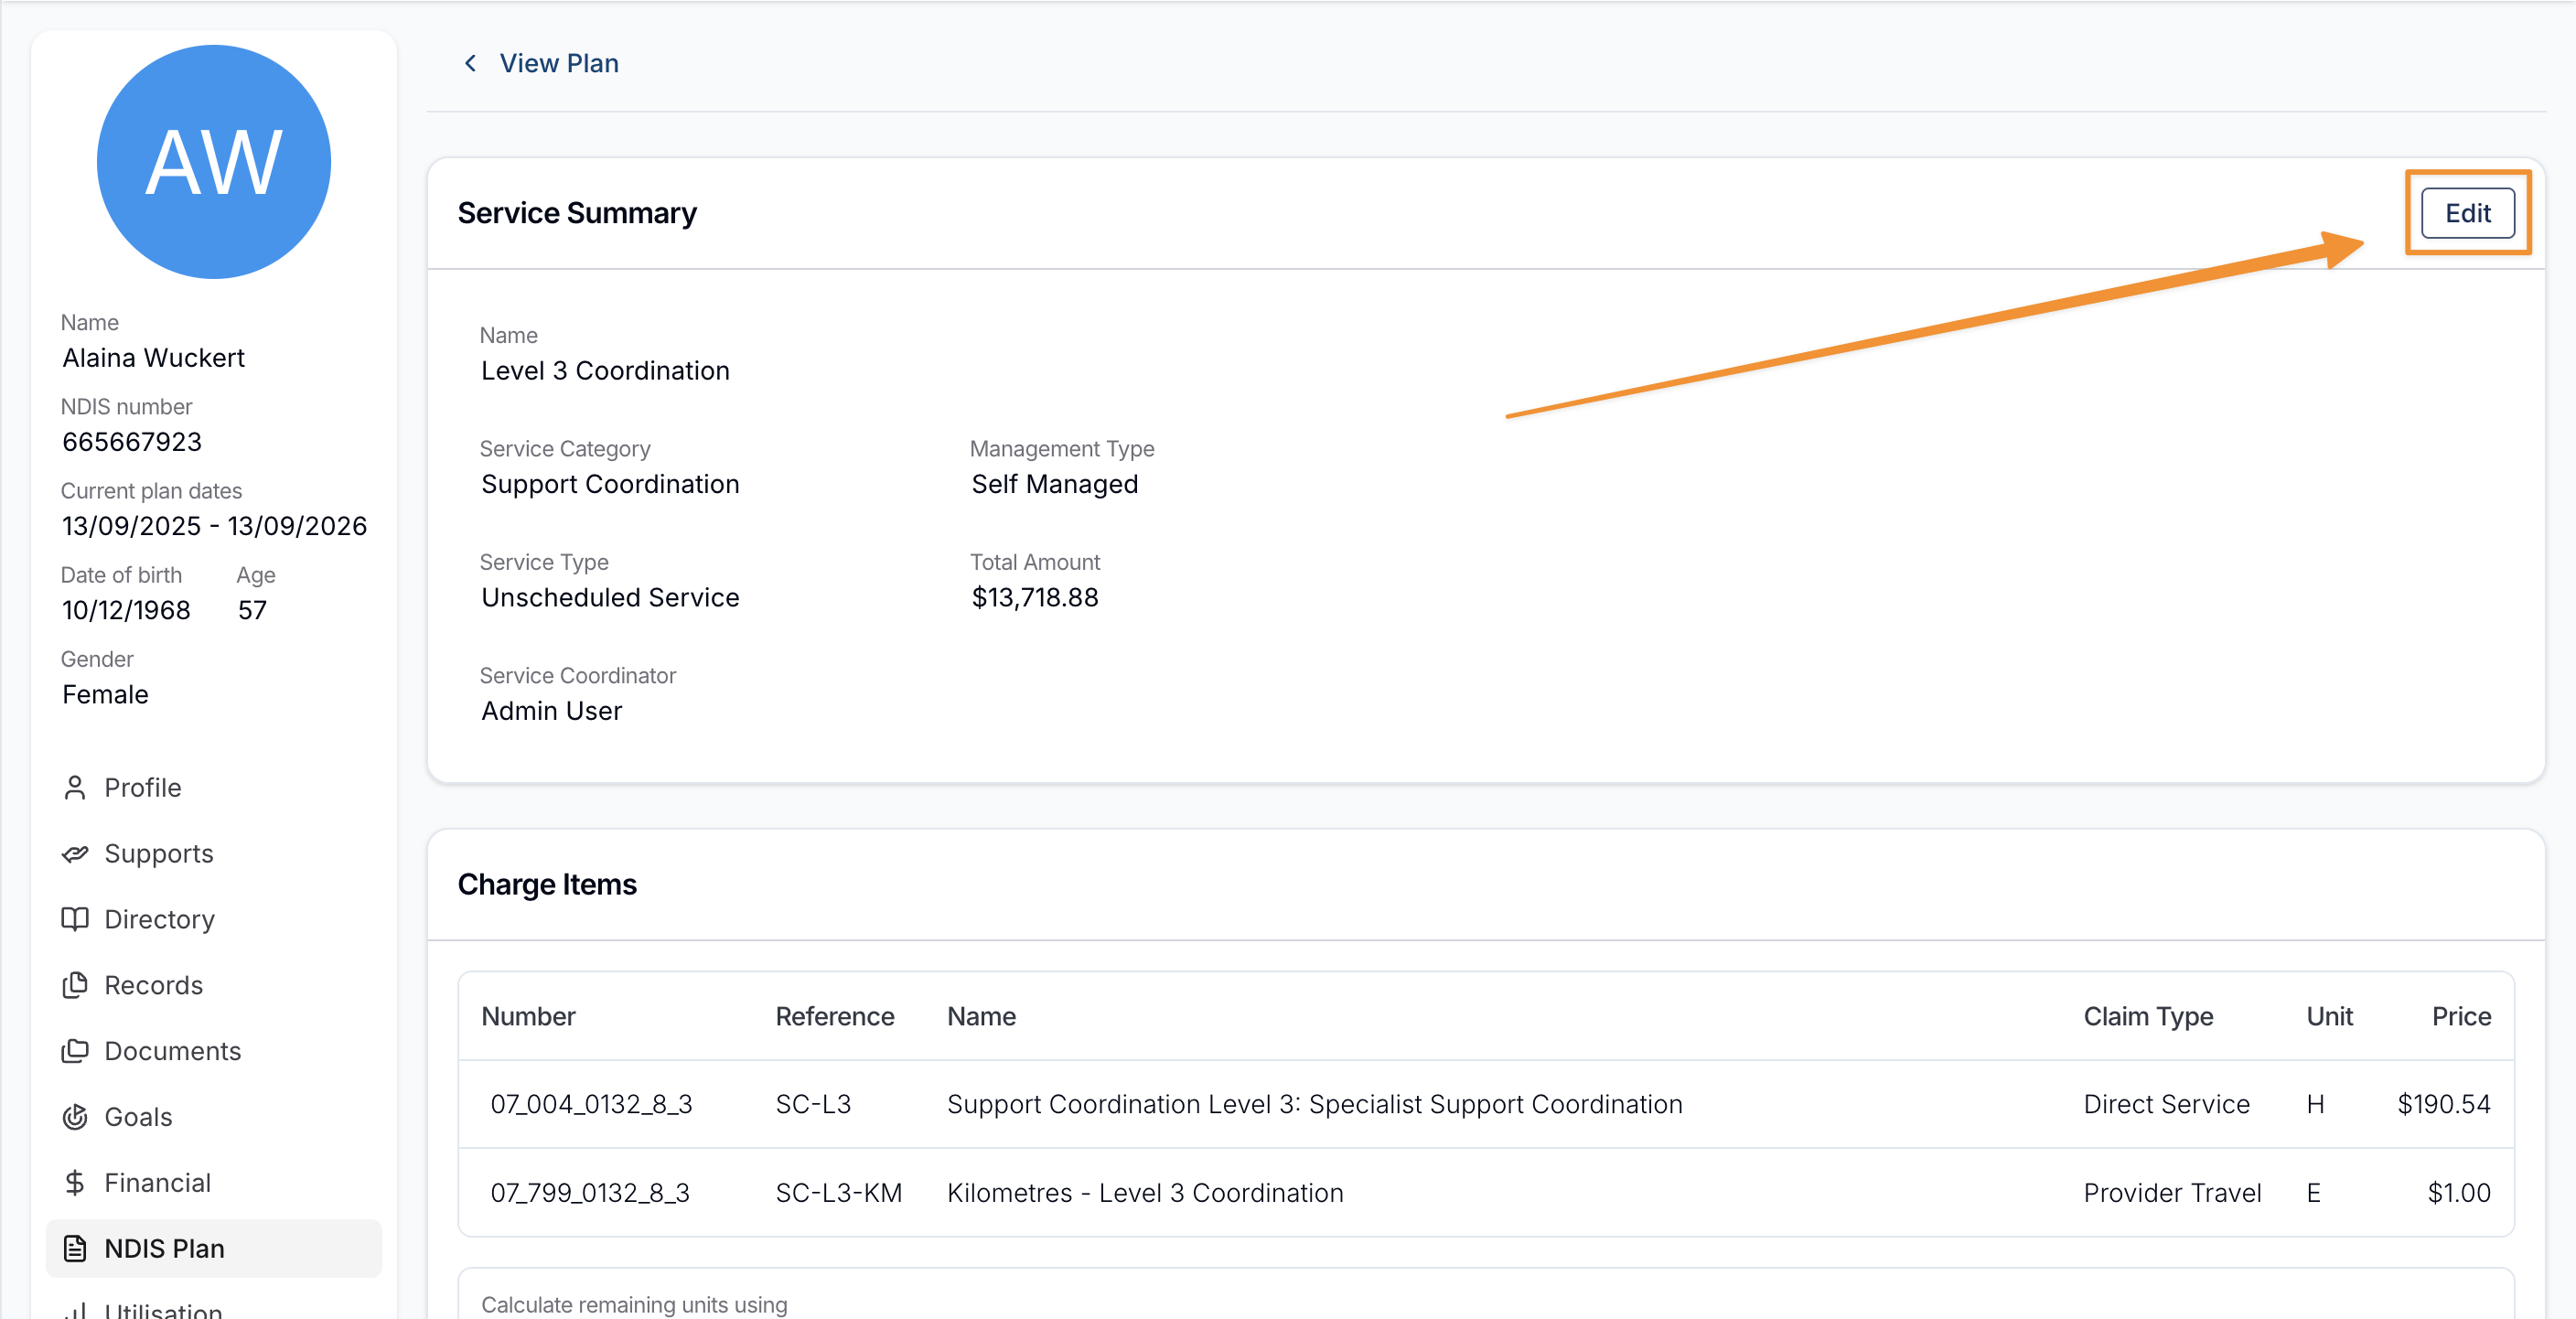
If the Total Plan amount was updated in the Funding Periods, this change will reflect in the Service Summary - as shown below in the Total Amount (Service Budget Amount). If you need to reconcile as well, you'll need to head to the Update Service page by selecting the Edit button within the Service Summary.

Updating the Remaining fields of a Service with Funding Periods
If the changes to a Service do not relate to the Service Budget Amount or the Funding Periods themselves, select Edit in the Service Summary.
Here you can update the service including:
- Service Name
- Management type
- Reconciliation
- Remaining Amount
- Reconciled Date
- Support Category
- Service Coordinator
- Charge Items Assigned
- Charge Item to Calculate Remaining Units
You can also Delete the service, by using the option at the bottom of the page - please note that this cannot be undone.
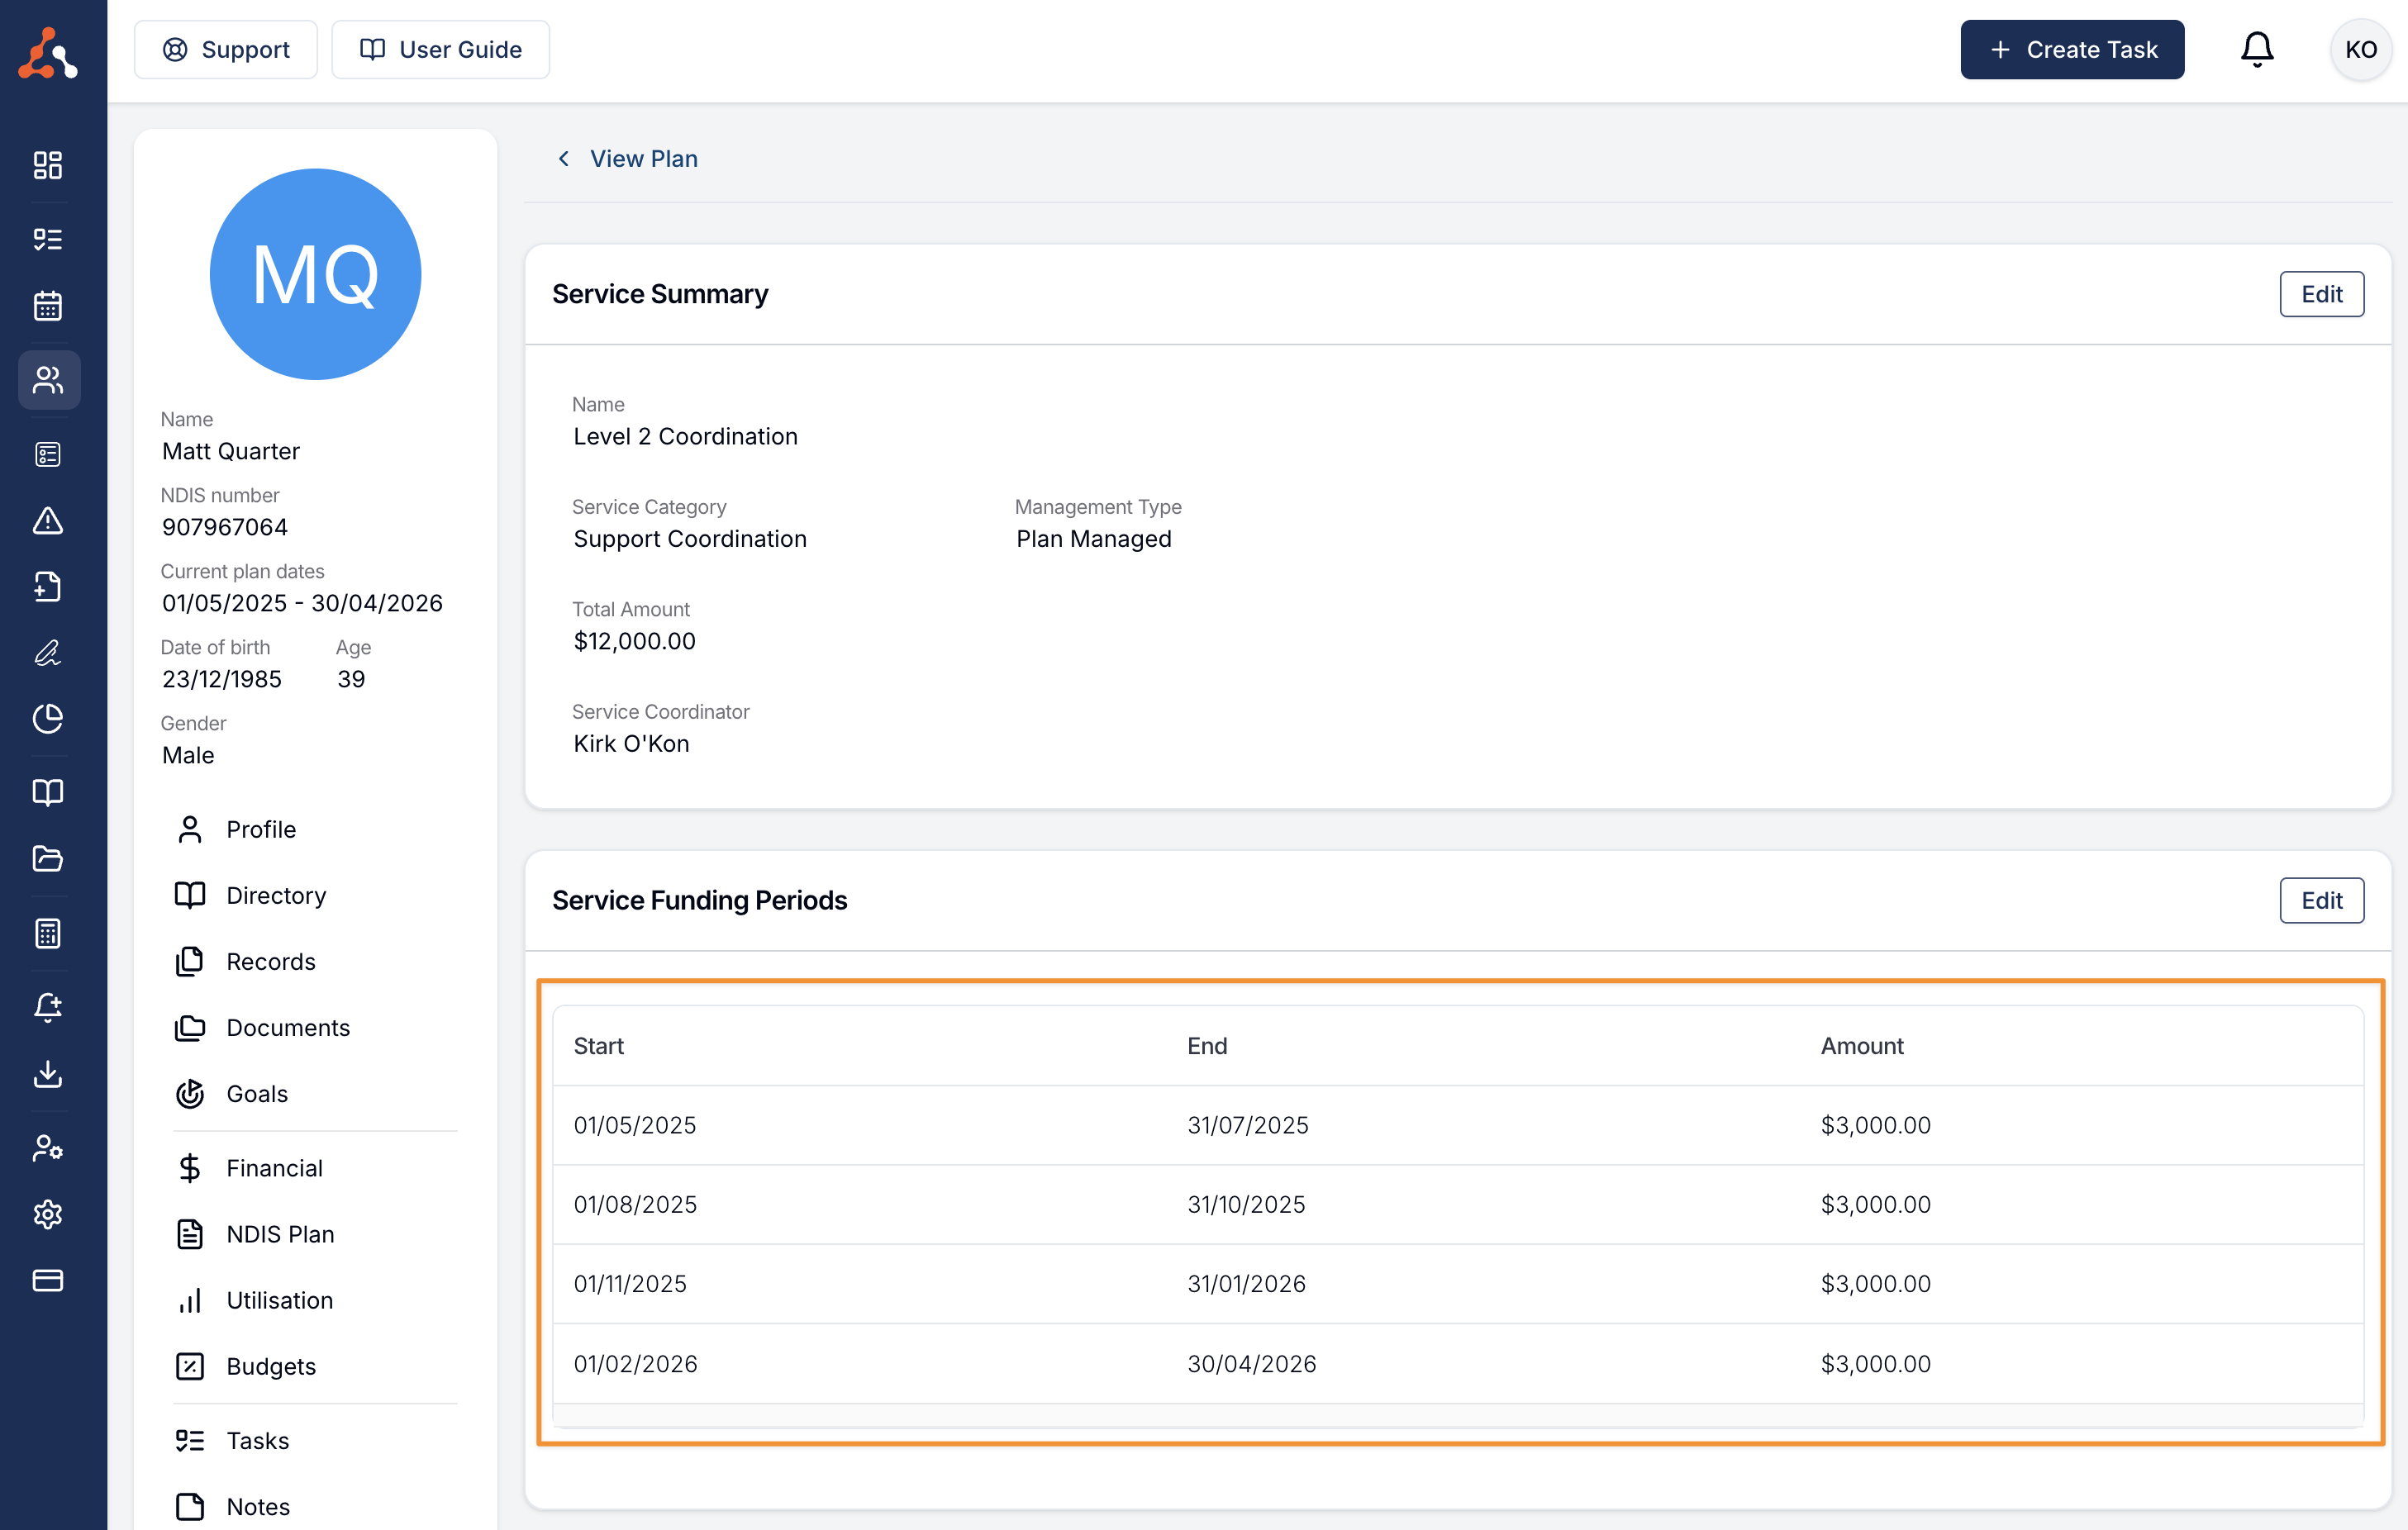
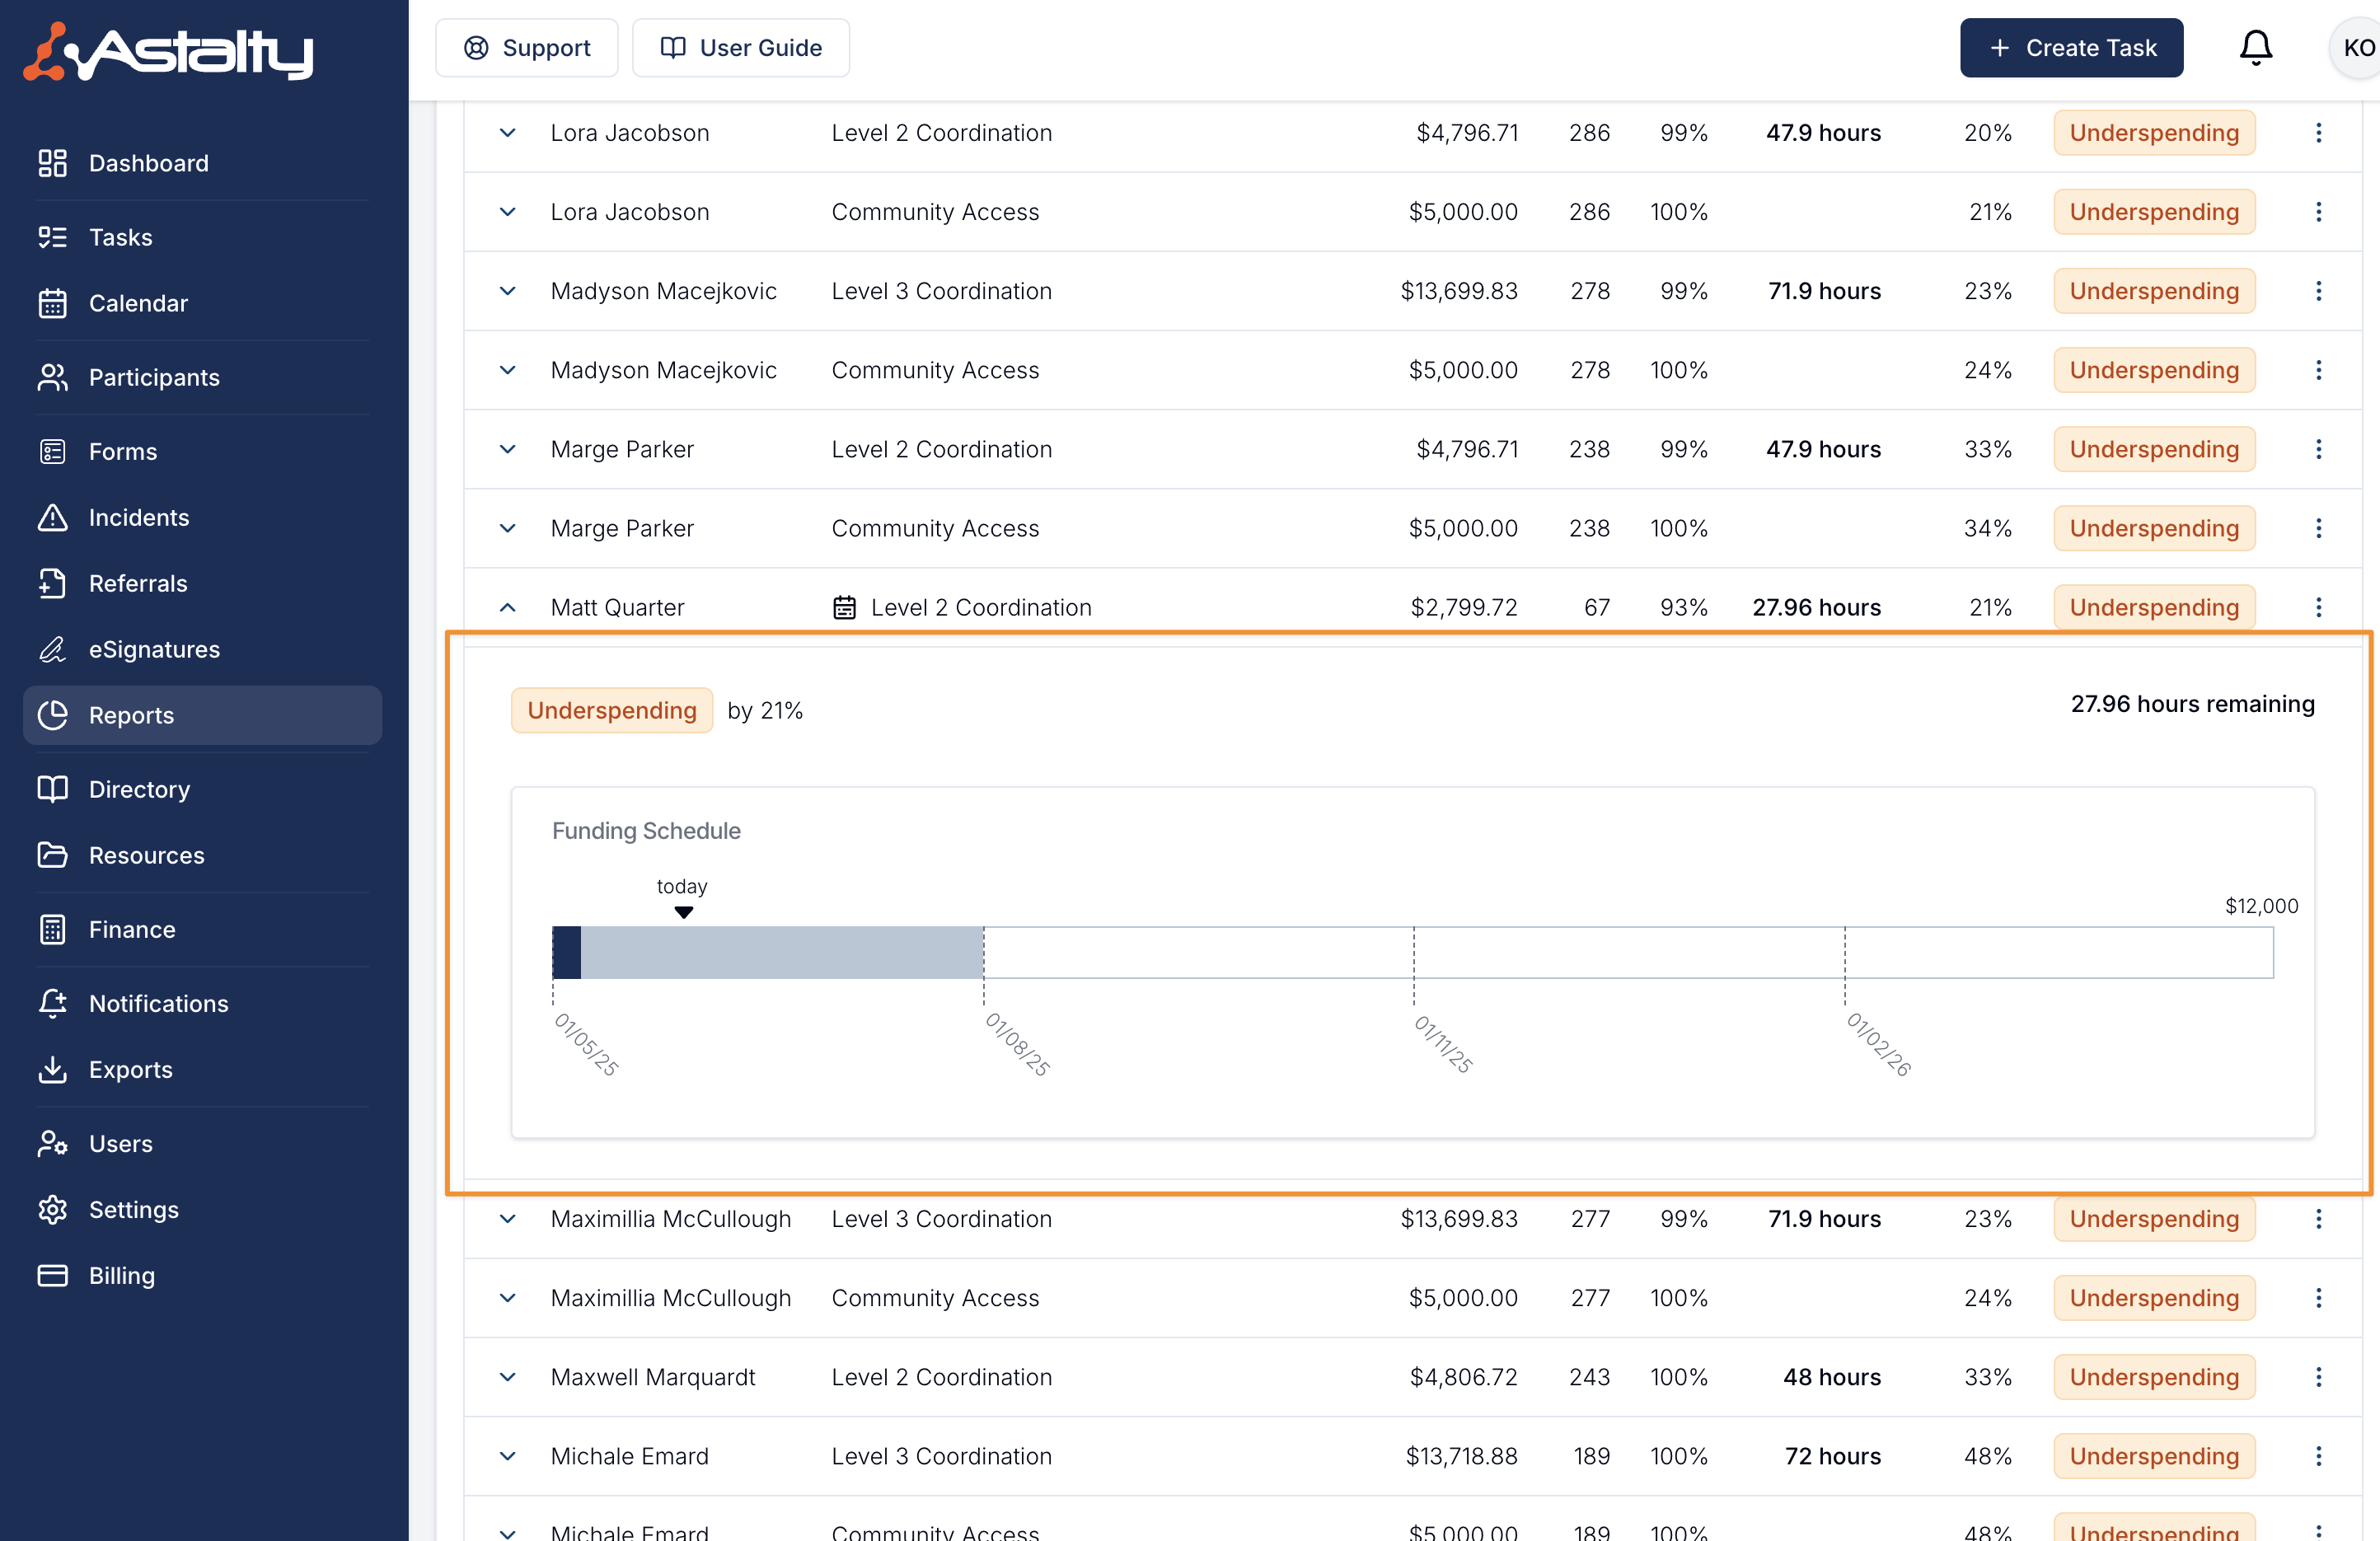
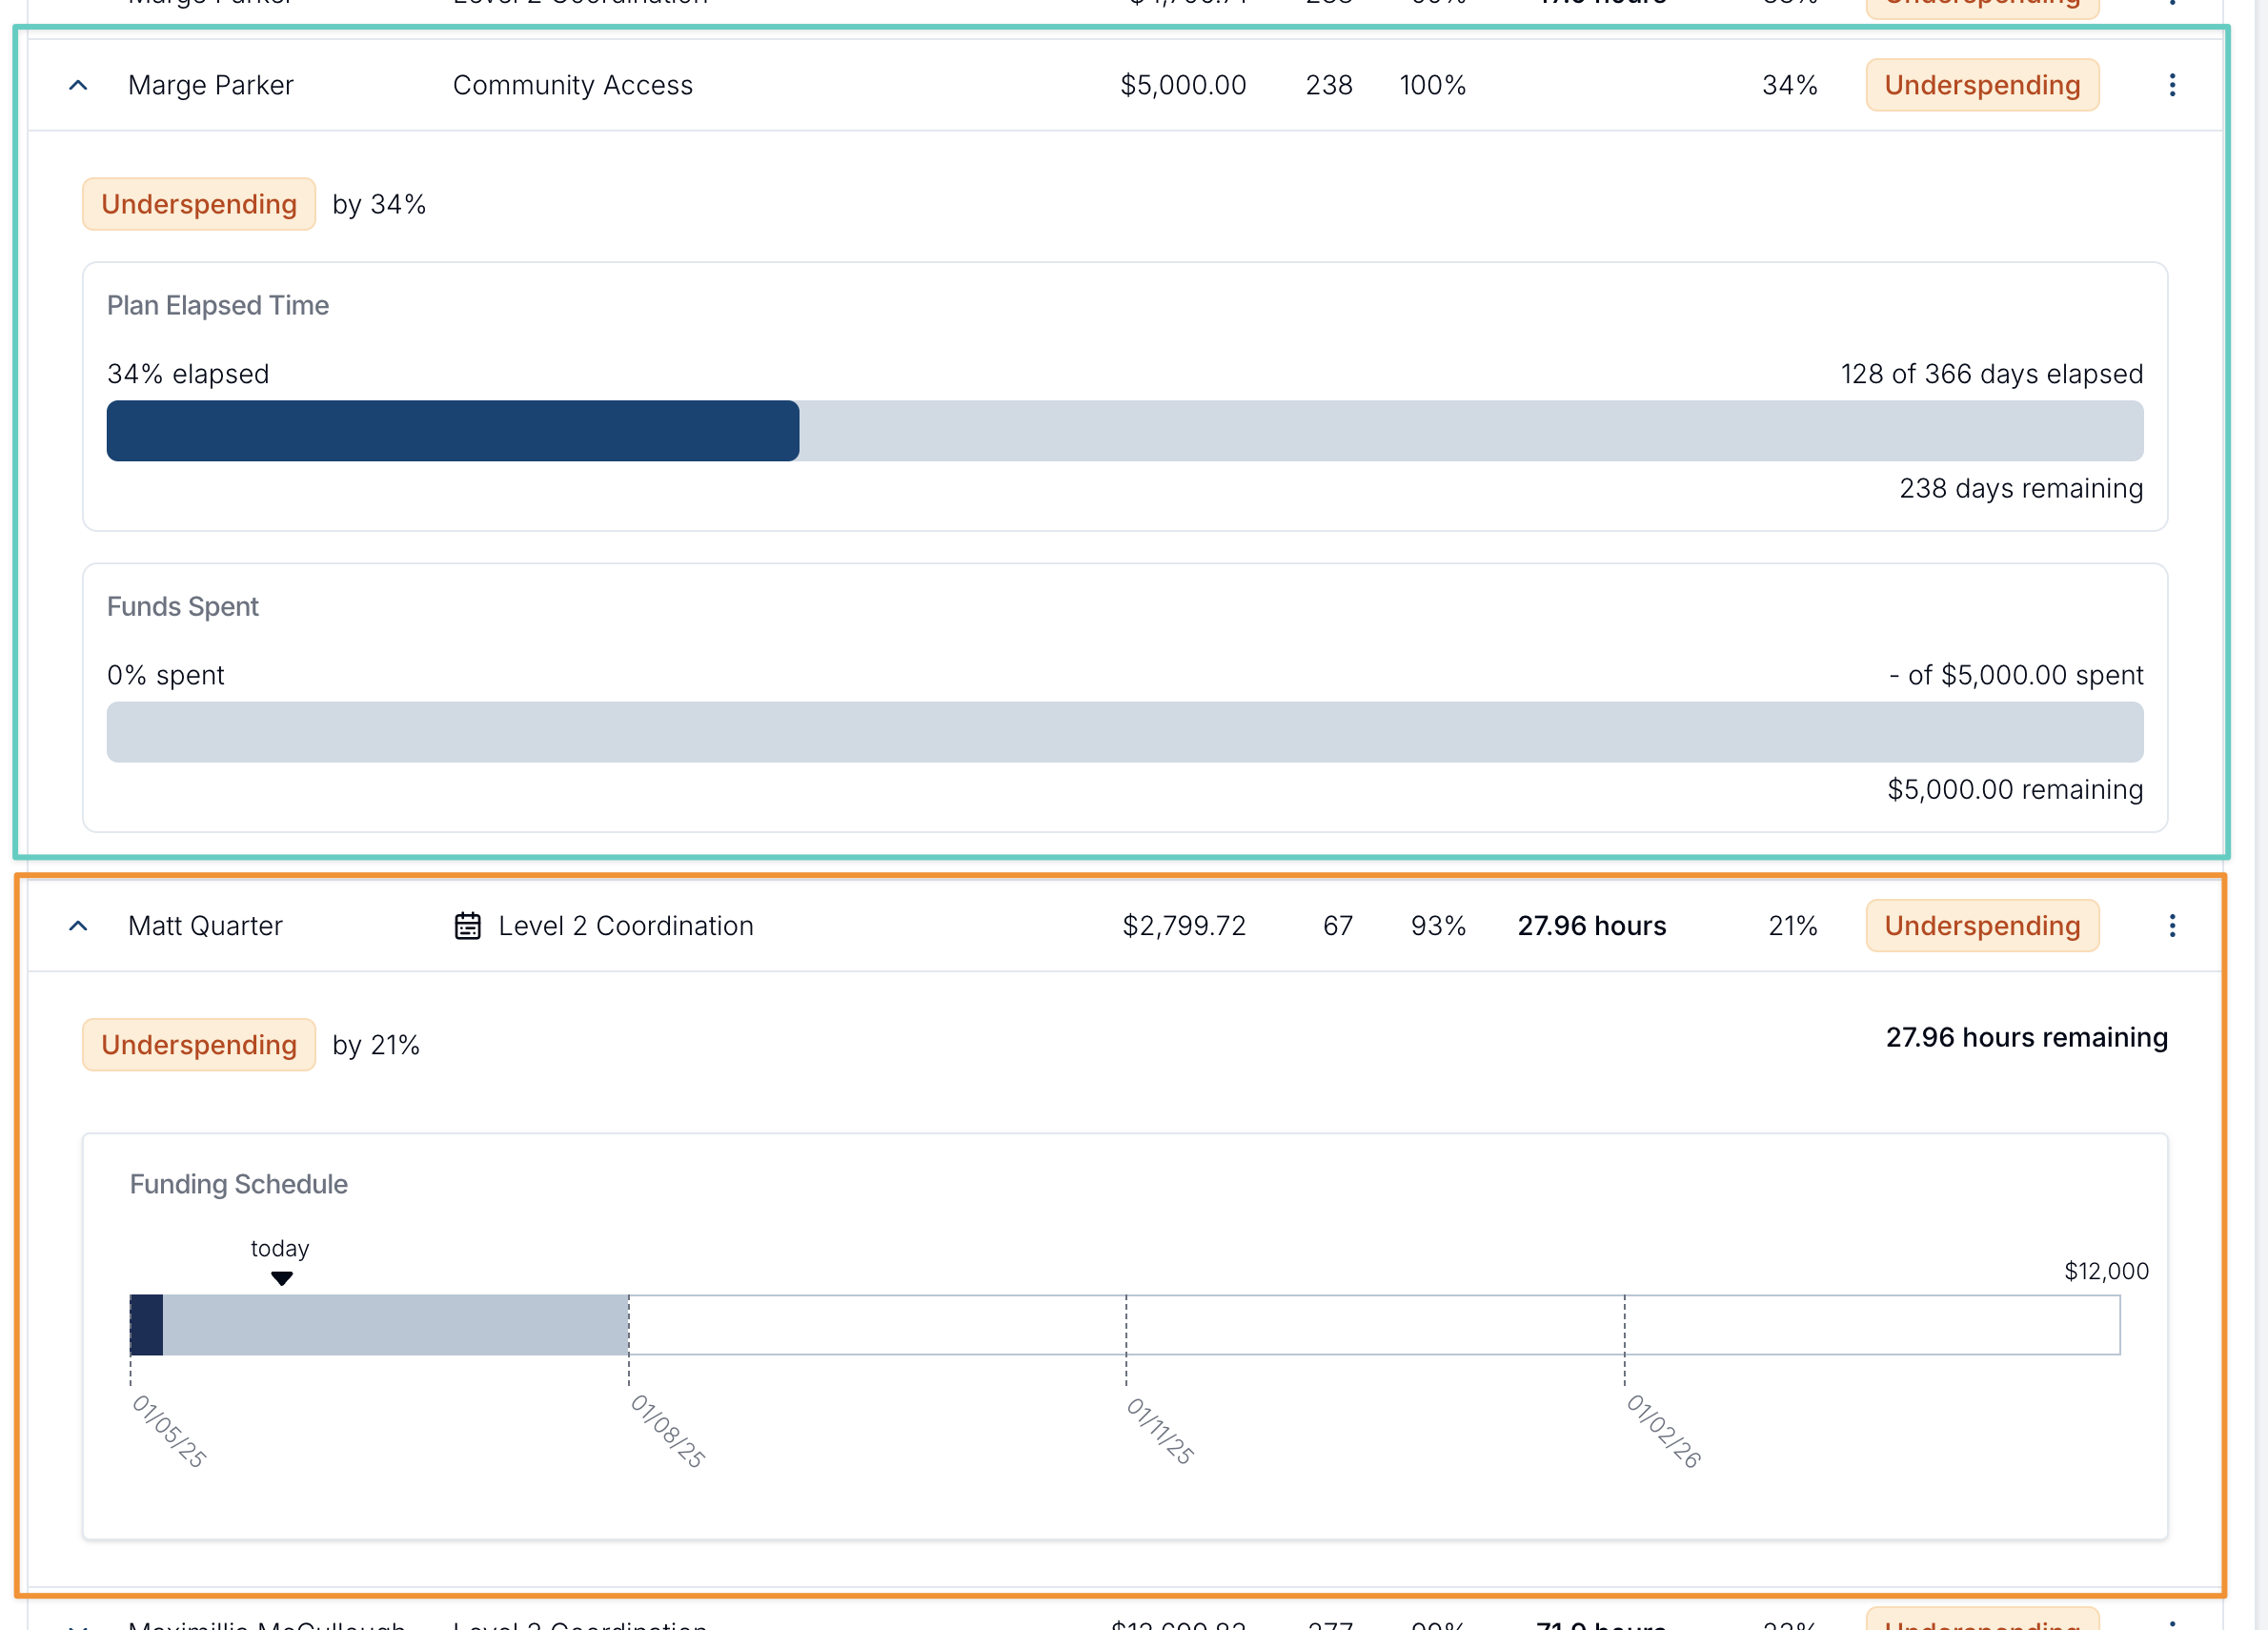
Viewing Funding Periods
Once the NDIS plan and funding periods have been created by following the steps above, you can review the funding periods at any time within the Service.
Utilisation within Participant's page
Within the Participant's profile, you can click "Utilisation" in the sidebar and you'll notice a new chart which is slightly different than the old chart for existing NDIS plans.

The chart includes:
- the start date for each period under the bar chart
- white sections for unreleased funding from future periods
- light blue sections for released funds that are available
- dark blue sections for funds that have been spent
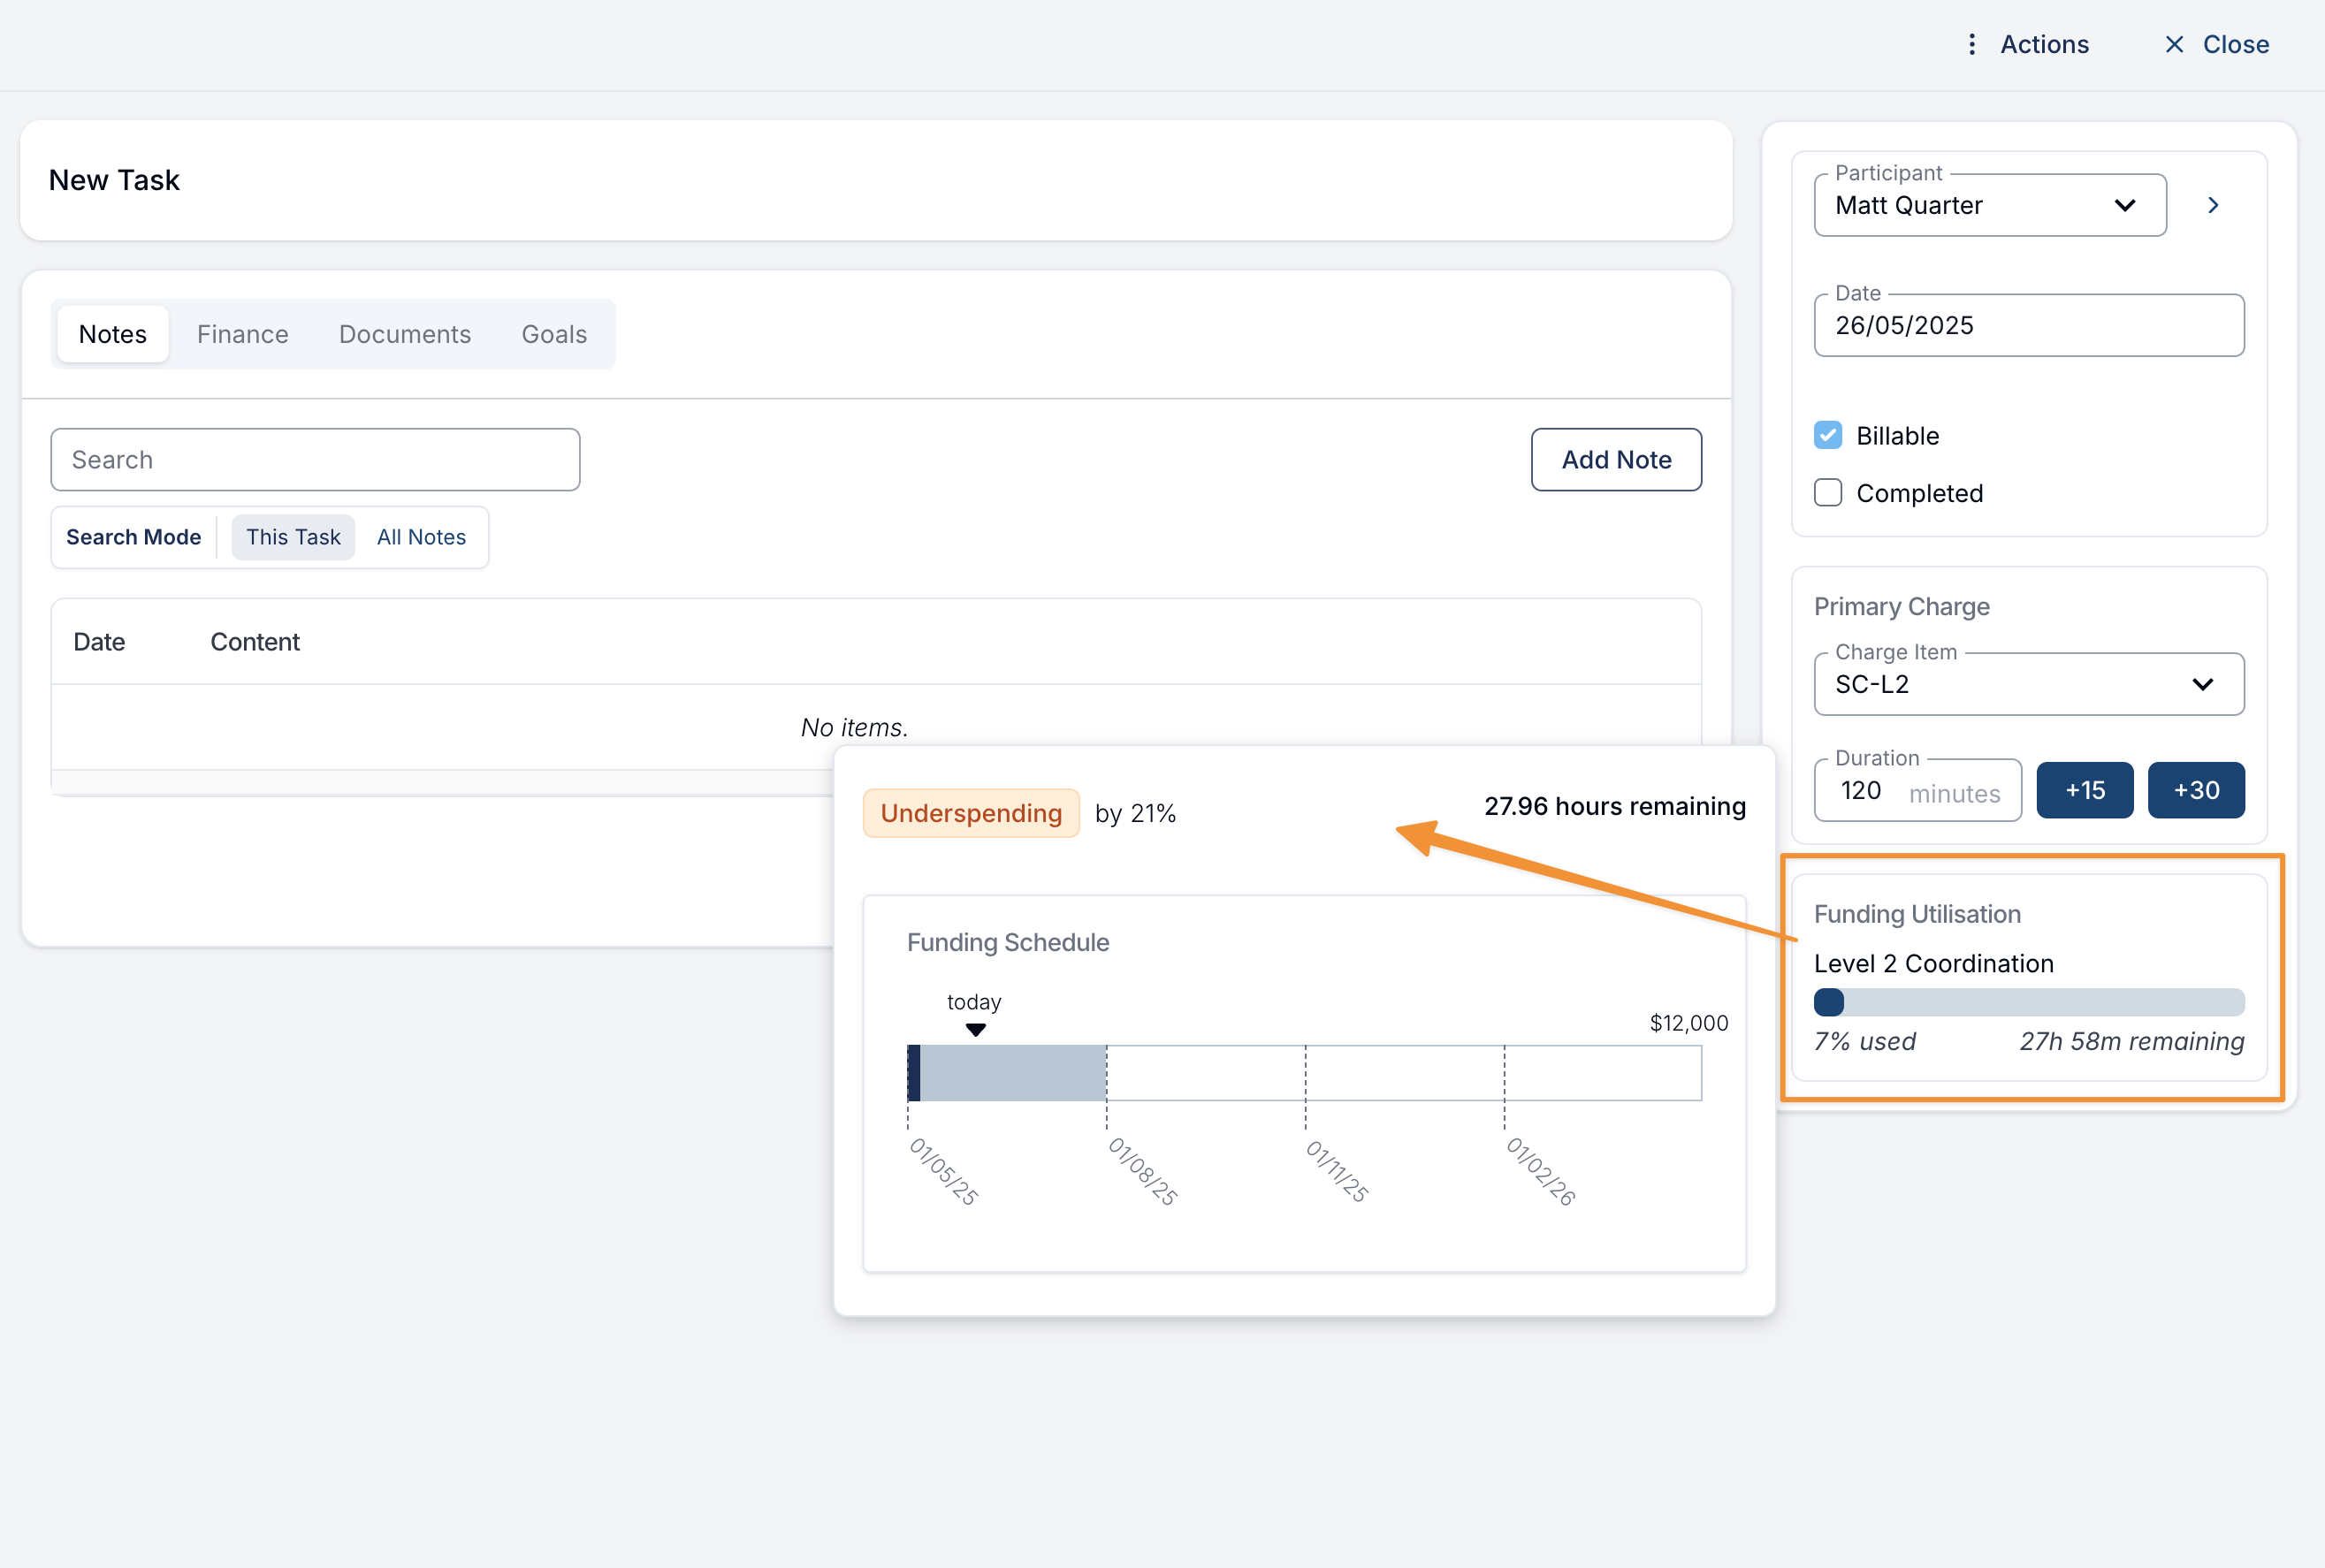
Utilisation within the Task
Within any Task, you will be able to view the utilisation data for the Participant. The sidebar will only show the utilisation data for the current period, however if you hover over this, you will be able to see the full chart for all periods like you would on their profile.
Utilisation Report
To view the utilisation for all Participants, head to the Utilisation Report page. Within this page, when you click the down arrow to the left of a Participant you will be shown the new Utilisation chart for the funding periods.
You'll also notice that old plans without funding periods display using the old layout.
FAQs
I've already added an NDIS plan service before funding periods were supported by Astalty - what do I do?
Astalty now allows you to assign funding schedules to existing services where you may originally not have been able to, or you have forgotten to assign it during initial creation. Simply edit the existing service and select the option 'This service has a funding schedule'.
Once you have checked this box, you'll be prompted to add the number of periods within the NDIS plan.
How will Utilisation Notifications work?
Utilisation and Utilisation Variance notifications will continue to work as normal based on the funding period. For example if you have a Utilisation Notification set up to notify you when 80% of funds are spent, you will now be notified when 80% of funds available in any single period have been spent.
Does Astalty handle funds rolling over from previous periods?
Yes - Astalty will automatically take into account unspent funds from previous periods when calculating available funding.
I don't understand the new utilisation graph.
Please watch the video walkthrough at the top of this page or email support@astalty.com.au for additional support.