- Scheduling
- Viewing a Participants Schedule
Viewing a Participants Schedule
Overview
Open a Participant's Supports tab to review their supports in a list or calendar for a chosen date range.
Viewing Participants Schedule
Open Participants, select the Participant, then open Supports.
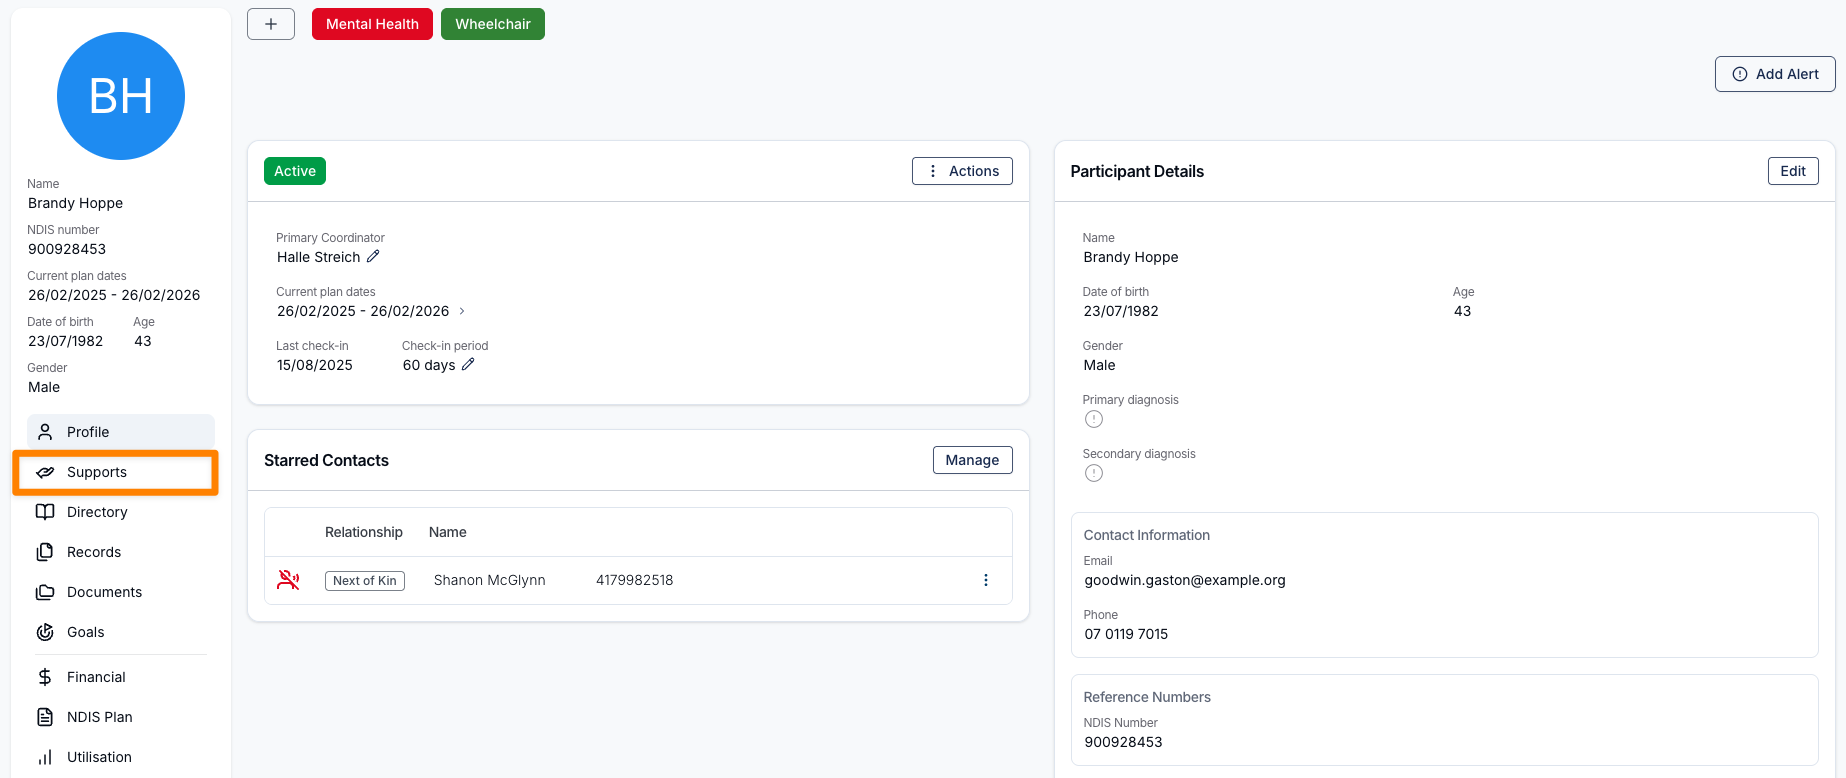
From here, you can toggle between date ranges such as Today, Tomorrow, This Week, Next Week, This Month, Next Month, or select a custom date range.
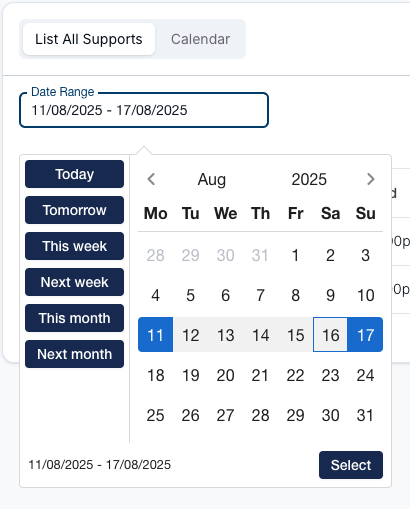
The schedule can be displayed in either List View or Calendar View, allowing you to choose the format that best suits your needs.
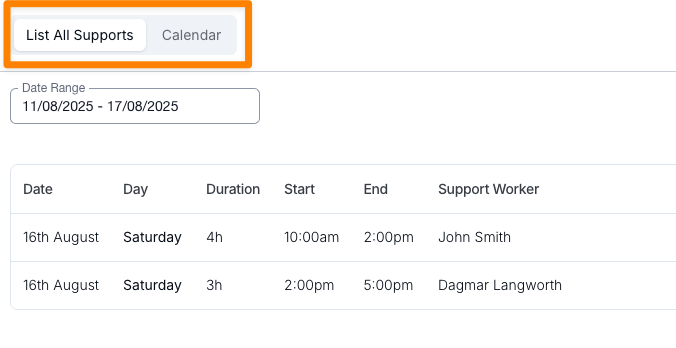
Both views list a support by the day it starts, so a support running 4:00 PM Sunday to 9:00 AM Monday appears in a range ending on the Sunday. Calendar View then draws it across both days. See Date Ranges and Overnight Supports.
Emailing a Participant's Support Schedule
This is how you share a Participant's schedule with someone outside Astalty - a family member, carer, guardian, support coordinator, or the Participant themselves. They do not need an Astalty account; the schedule arrives as a PDF attached to an email.
To email the schedule from the Participant's Supports page:
- Select Actions in the top-right corner of the Schedule section, and then Email Supports as PDF.
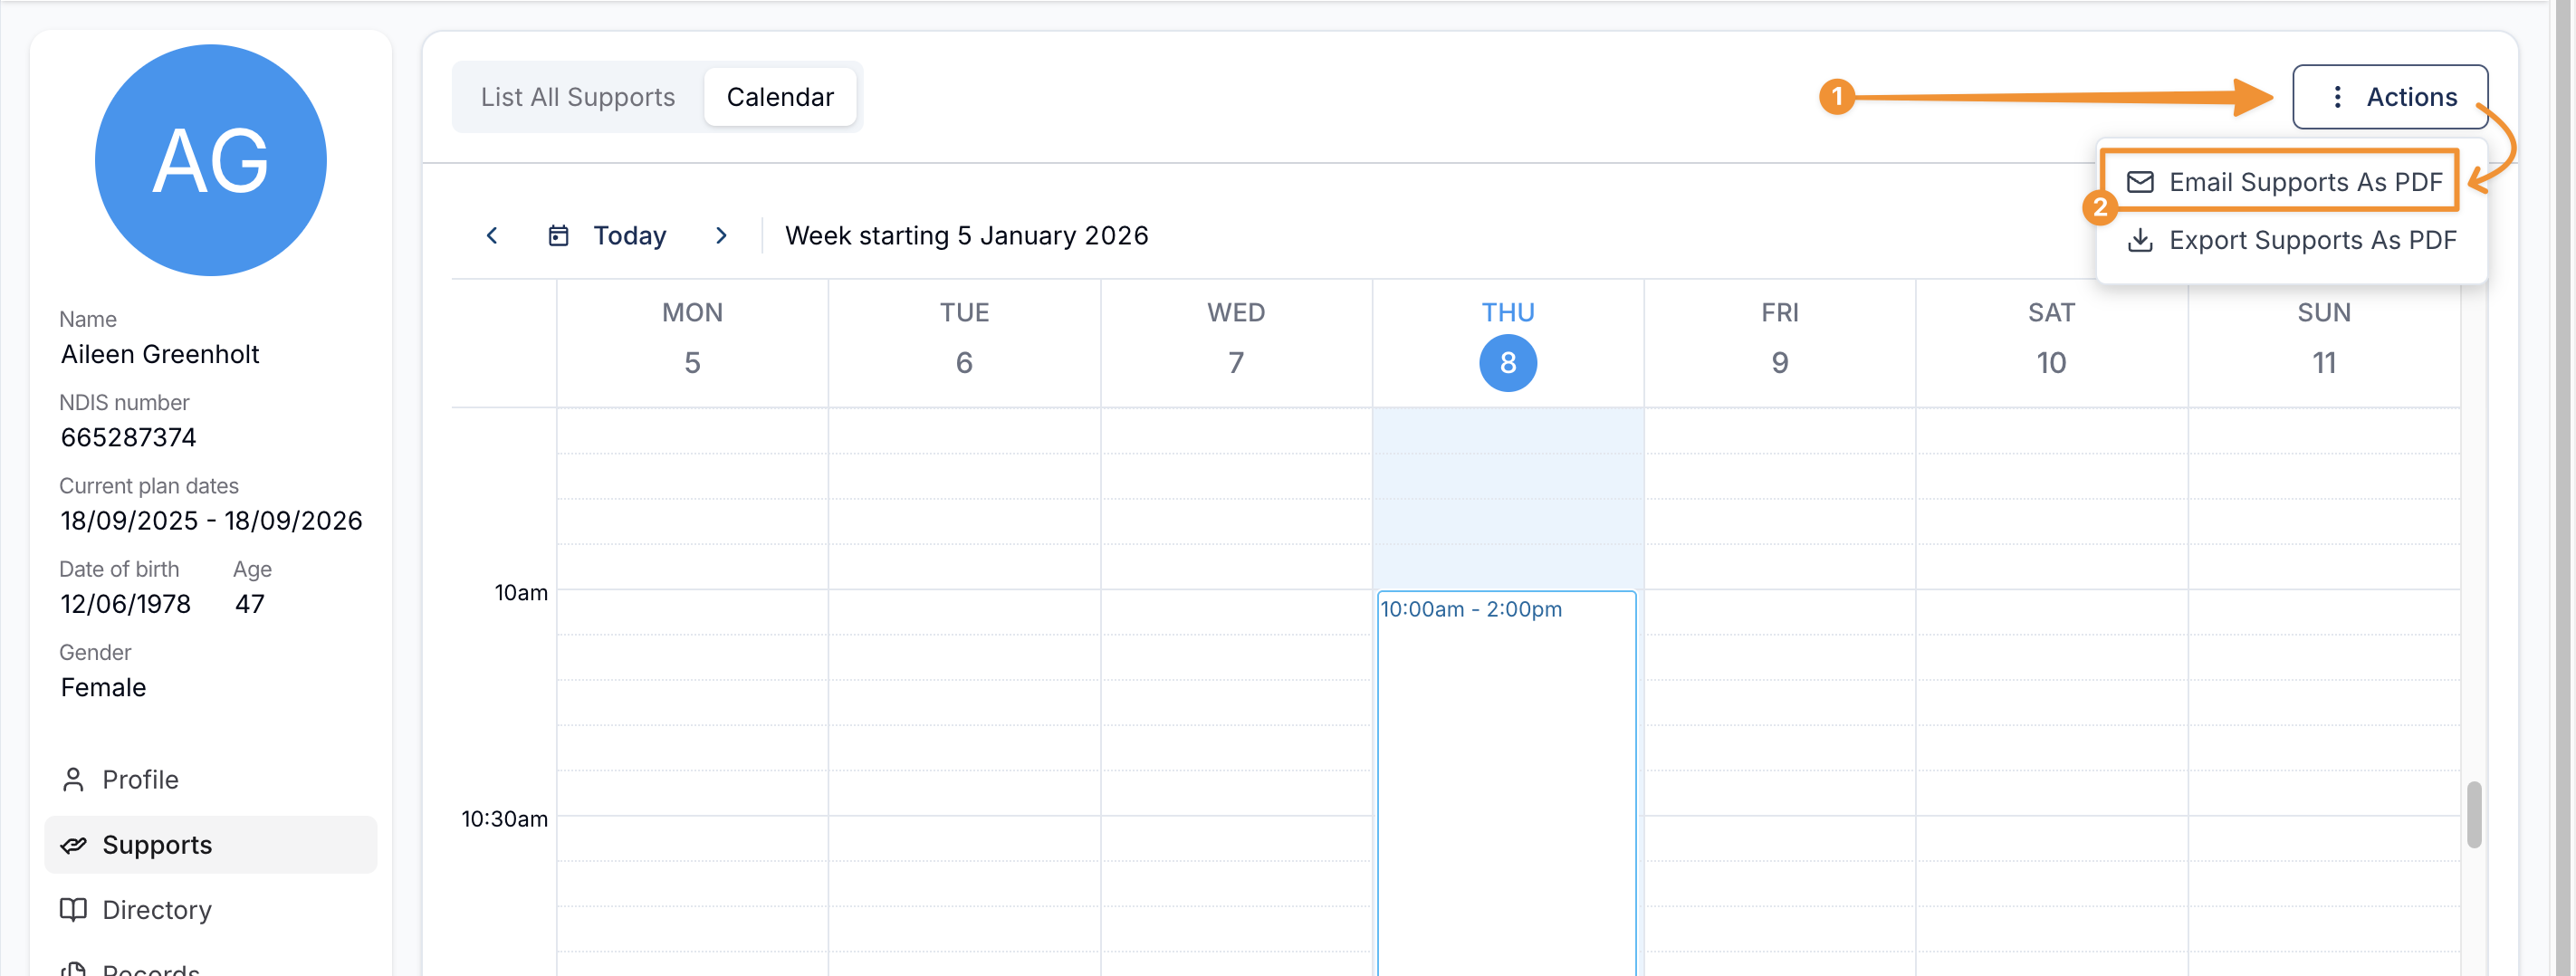
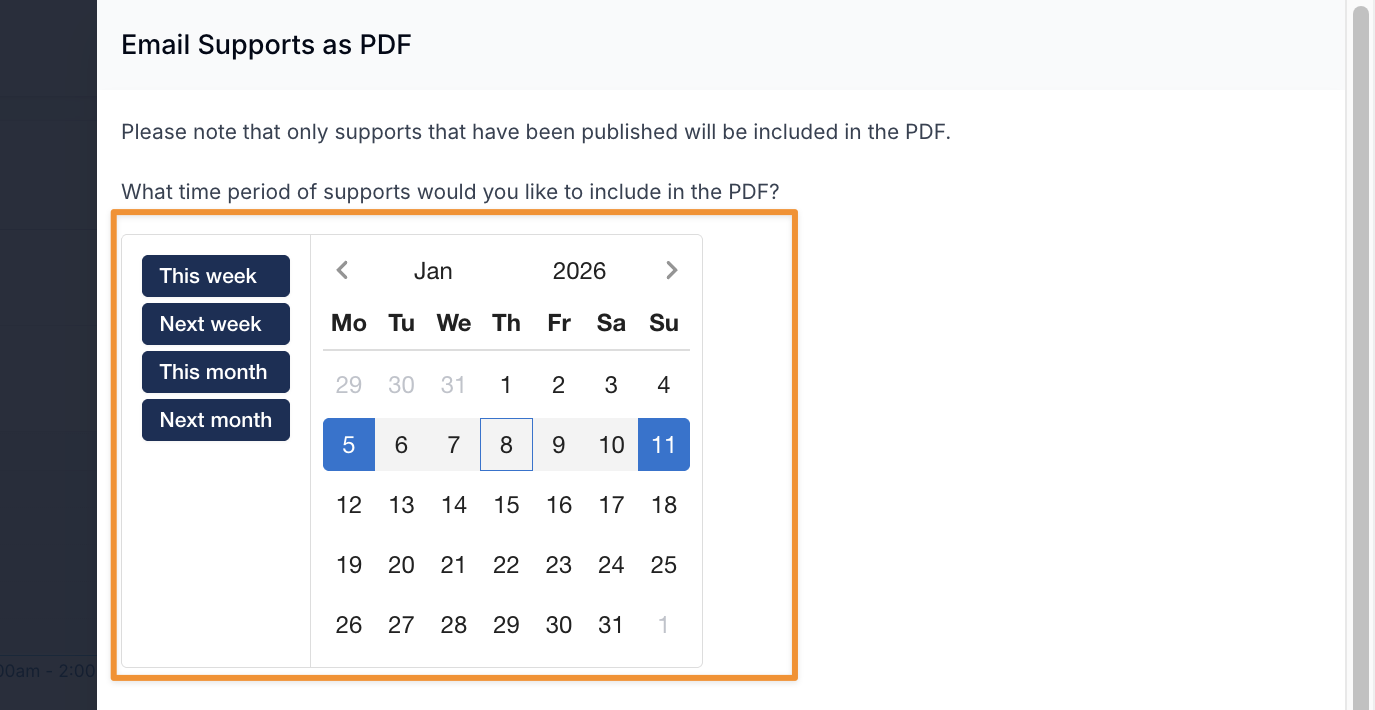
- Use the date picker to choose the date range you want to include - pick the dates on the calendar, or use the presets by choosing This or Next, then Week, Fortnight, Month, Quarter or Year.
- Check the Export Filters - these decide which supports are listed, including whether cancelled ones appear. See Choosing What Goes on the PDF.
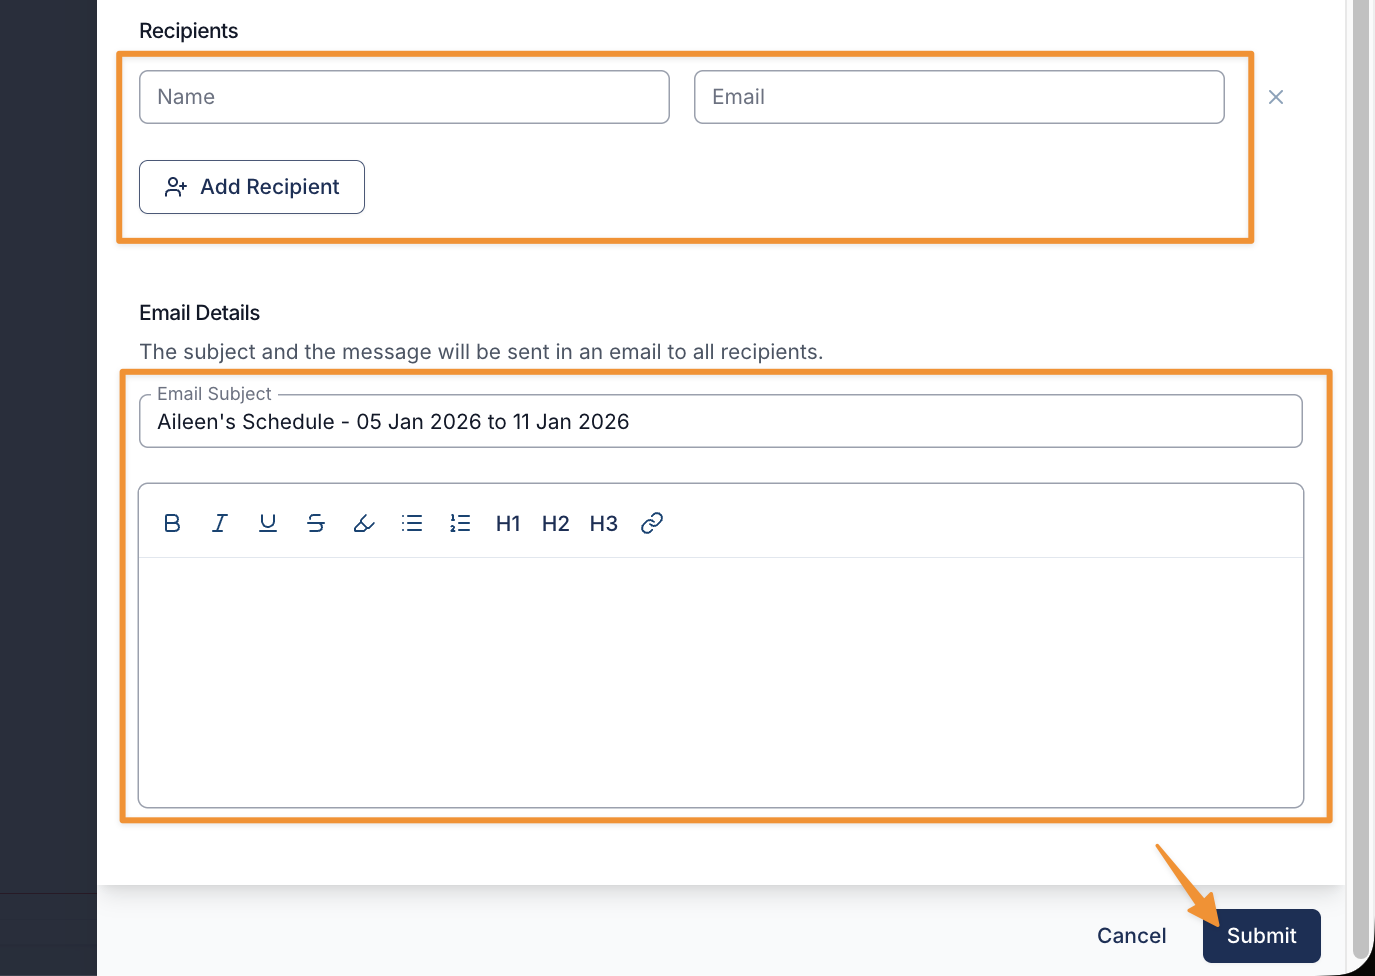
- Add in your recipients. Use the "Add recipient" to add more than one recipient.
- Astalty will suggest likely recipients (the Participant and their contacts), however, you can enter in a recipient manually.
- Enter in the email details, which includes your email subject and message via the field included for the body of text.
- When you're ready to send, select Submit. Everything above sits on the one panel, so the date range, filters, recipients and email details are all sent together - there is no separate step in between.
- An email will be sent immediately to all the recipients listed above with the PDF of support attached
Viewing Participant Schedule Email History
To confirm whether and when a Participant's schedule was sent:
- Go to the Participant's Supports page.
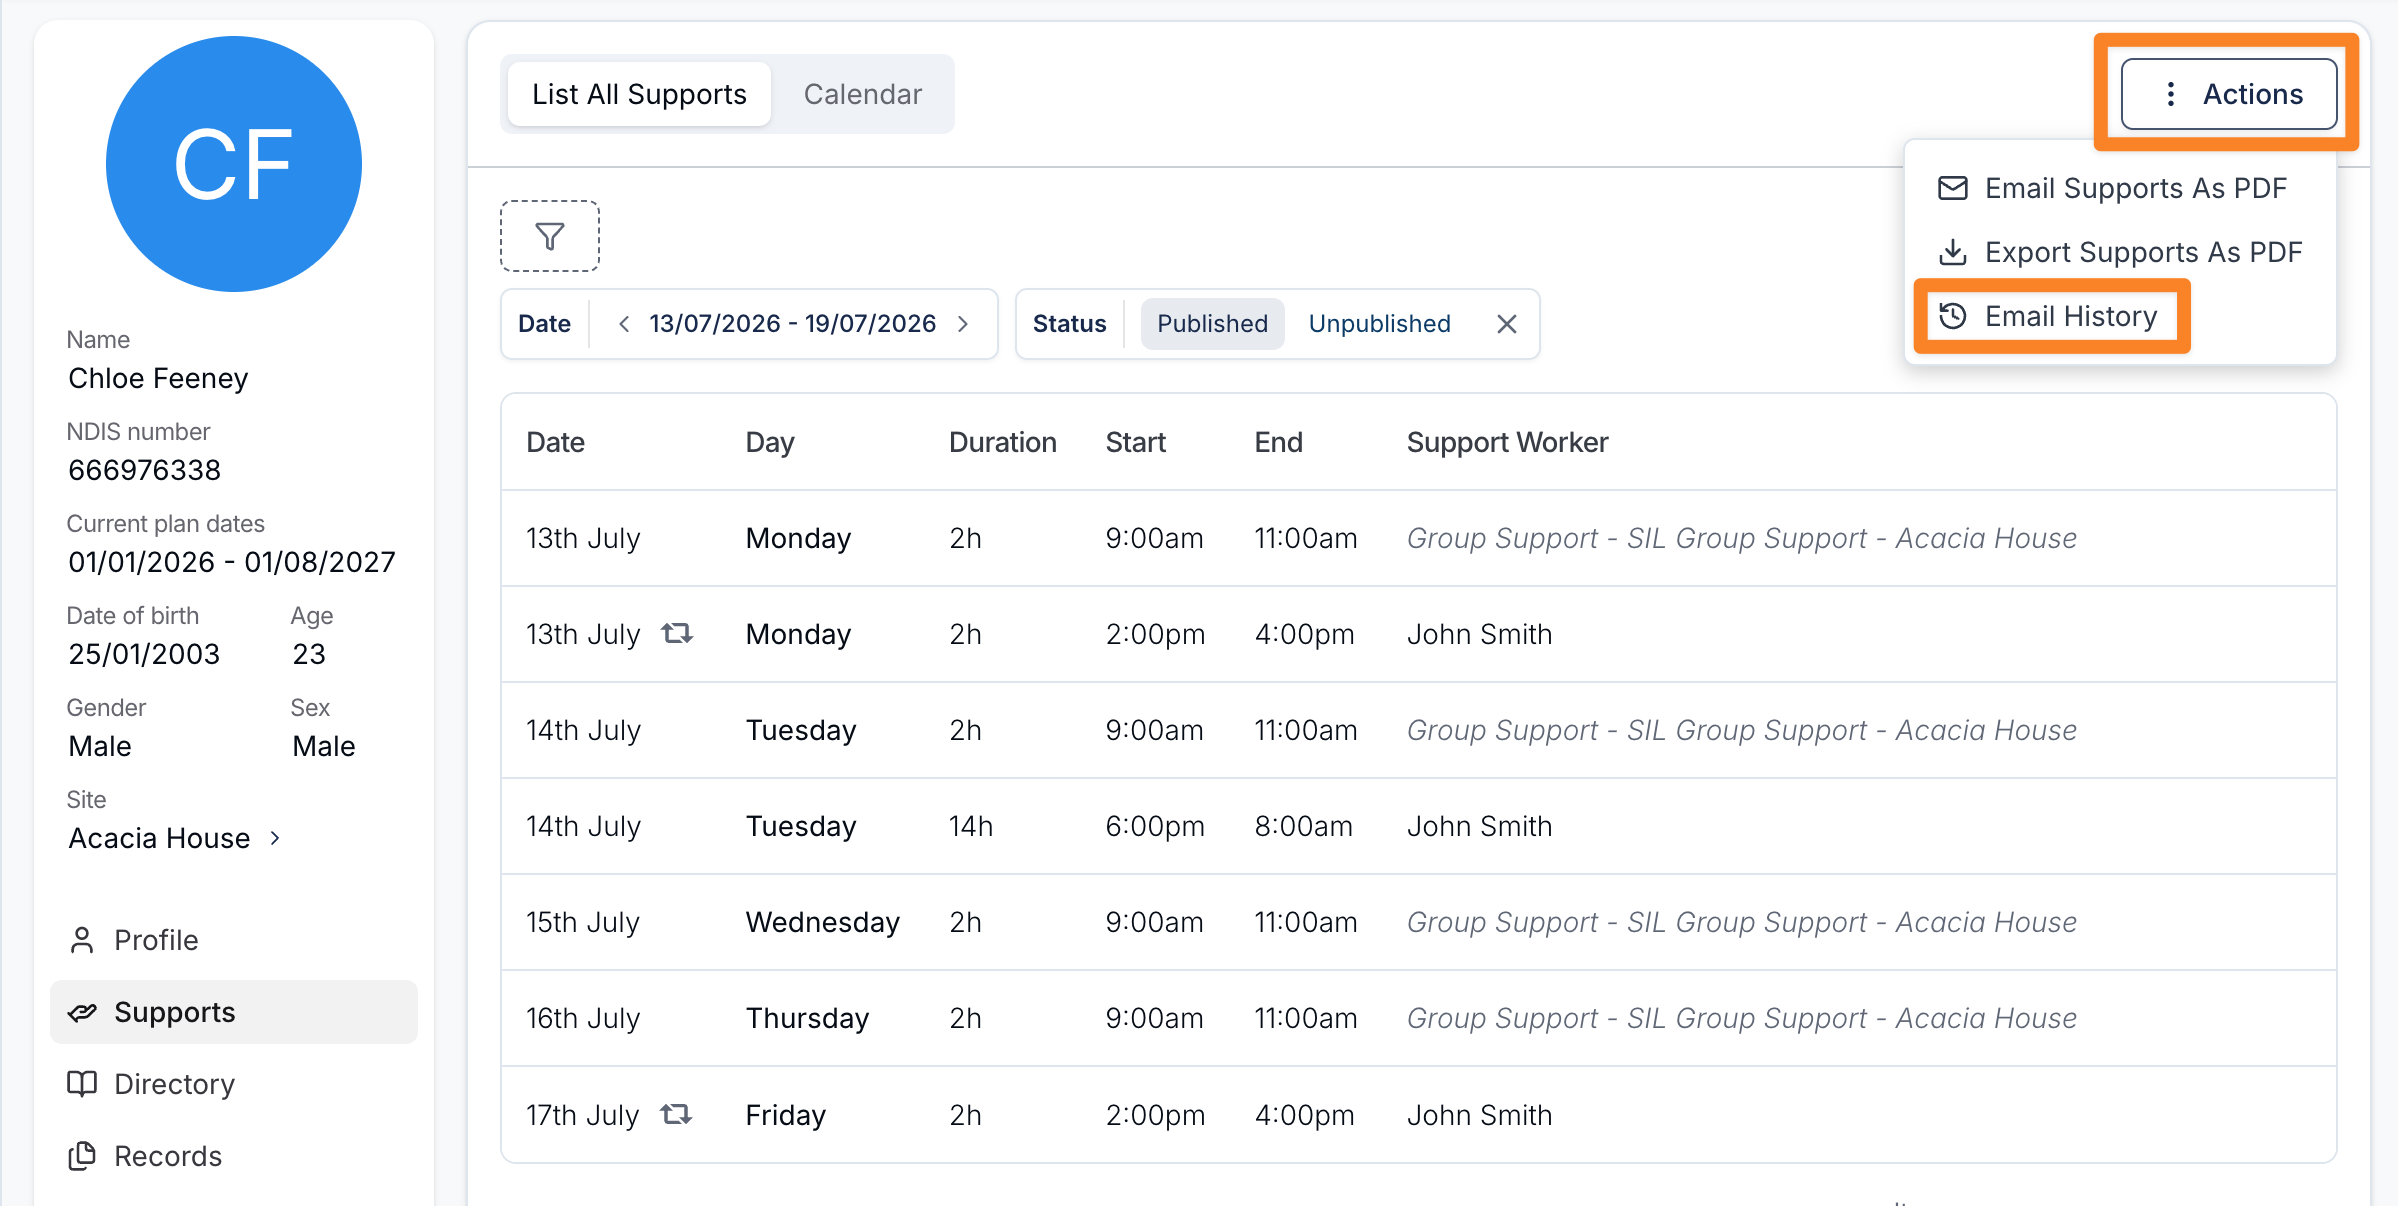
- Select Actions in the top-right corner of the Schedule section, then select Email History.
- Review the Email Log. The most recently sent schedule appears first.
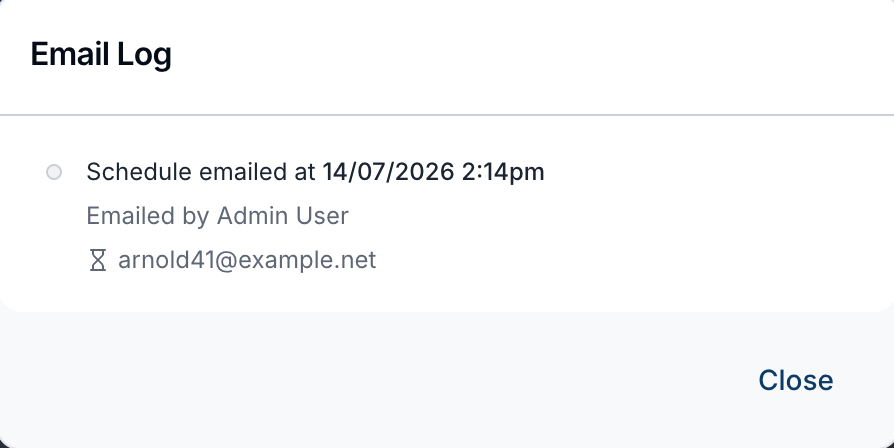
Each entry shows:
- The date and time the schedule was emailed
- The person who sent it
- Each recipient's email address
- A status icon showing whether the email is being processed, was delivered, or failed
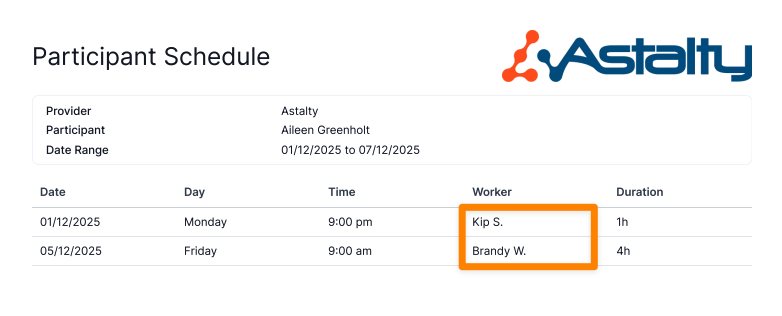
Note - To protect the privacy of your support staff, only their first name and the initial of their surname will appear on the PDF schedule. Here's an example of what it will look like:
Participant Support Schedule Export
To download the schedule from the Participant's Supports page:
- Select Actions in the top-right corner of the Schedule section, and then Export Supports as PDF.
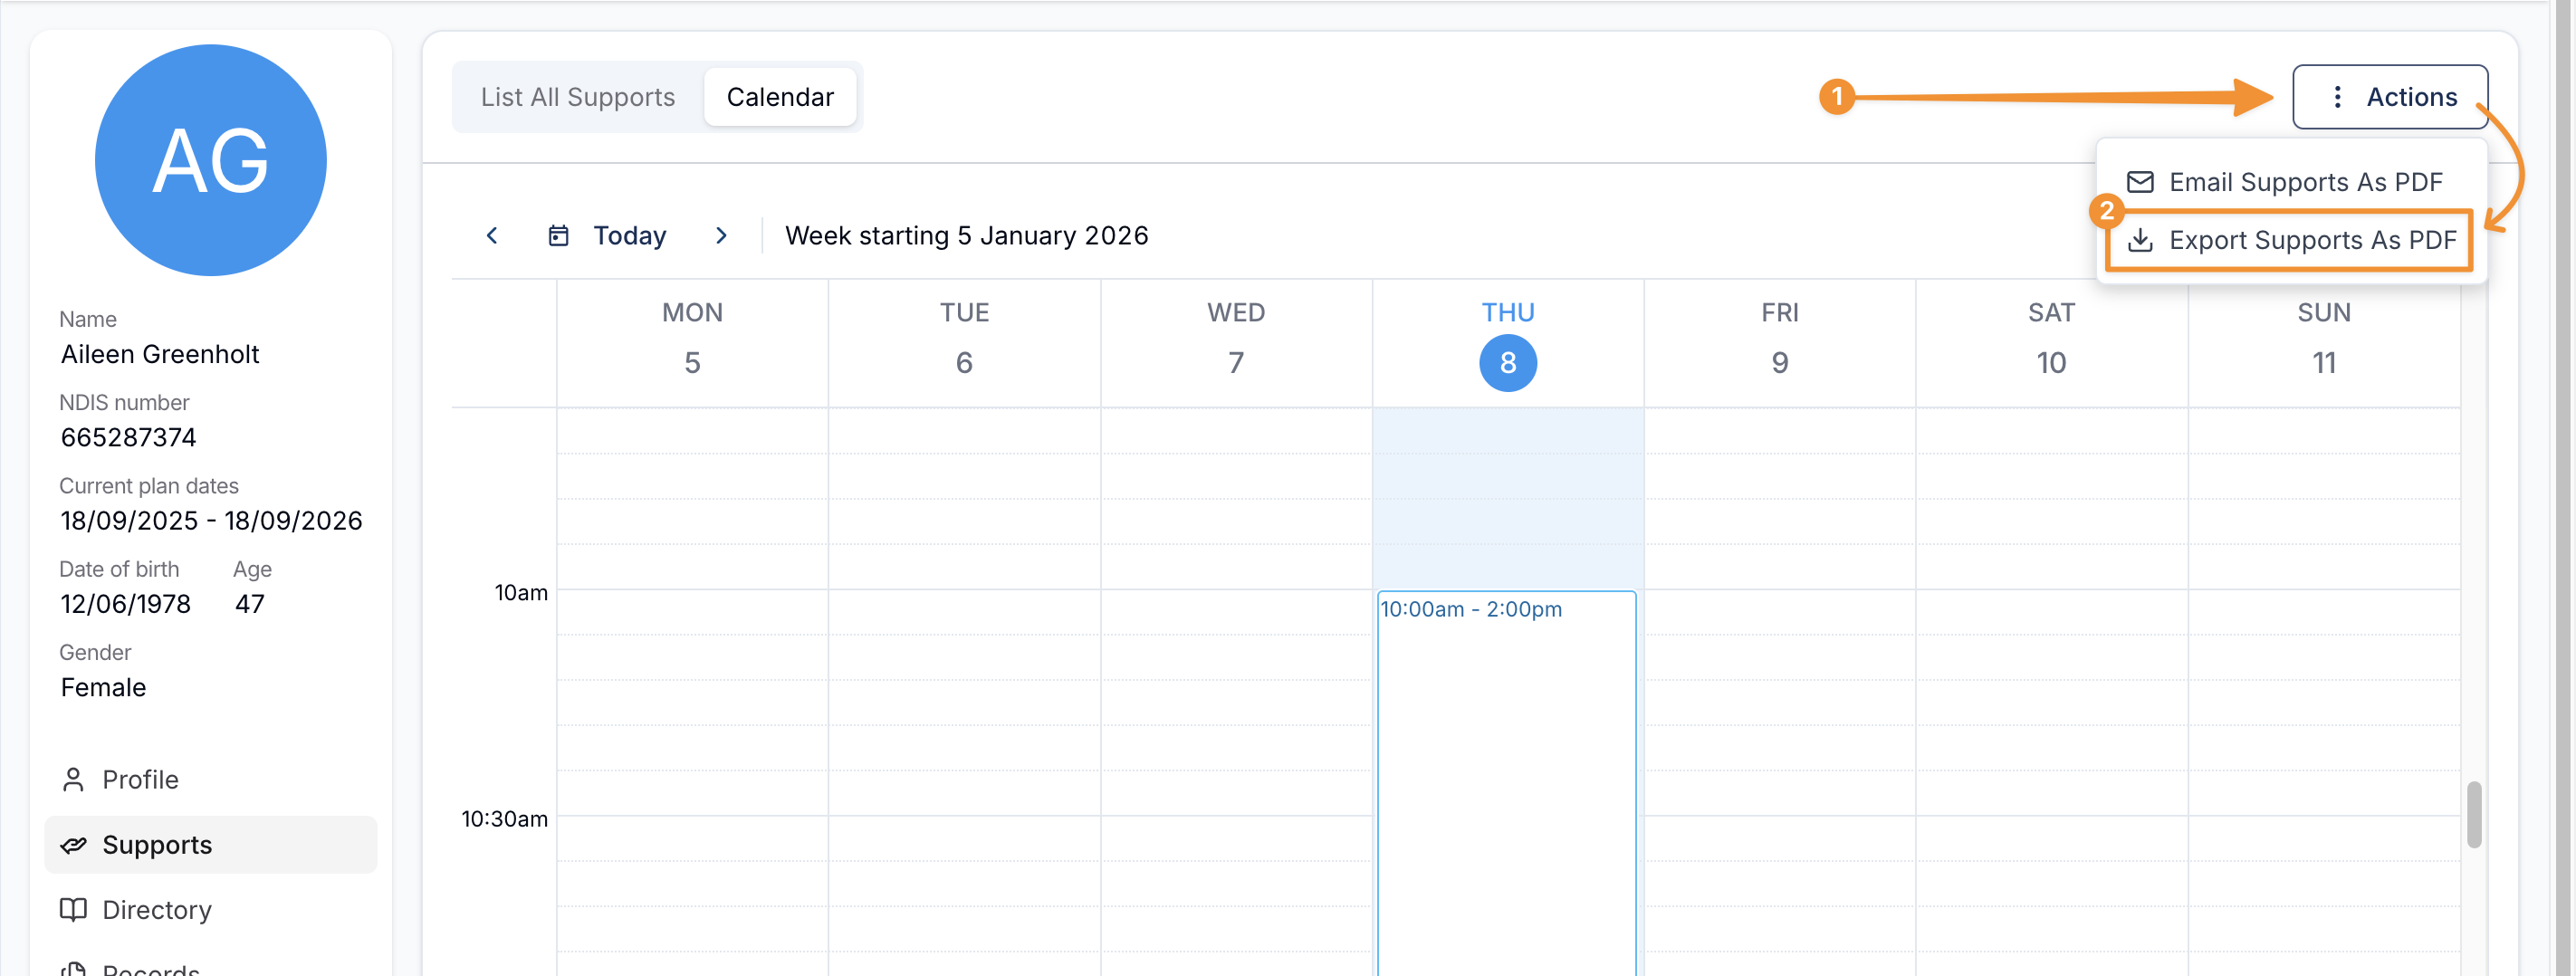
- Use the date picker to choose the date range you want to include - pick the dates on the calendar, or use the presets by choosing This or Next, then Week, Fortnight, Month, Quarter or Year.
- Check the Export Filters before you continue - these decide which supports are listed, including whether cancelled ones appear. See Choosing What Goes on the PDF.
- Select Submit.
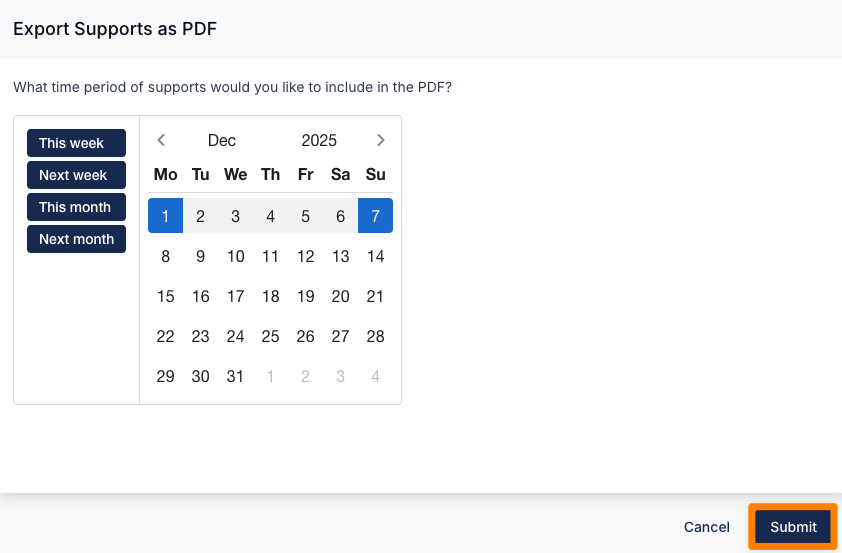
- The PDF export will download to your device's Downloads folder, ready to be shared with the appropriate recipient. Note - To protect the privacy of your support staff, only their first name and the initial of their surname will appear on the PDF schedule. Here's an example of what it will look like:
Choosing What Goes on the PDF
Export Supports as PDF and Email Supports as PDF both have an Export Filters section that decides which supports are listed. Select a chip to change its setting, or use the + button beside the heading to add a filter that isn't showing.
| Filter | Options | What it controls |
|---|---|---|
| Status | Published / Unpublished | Whether the PDF lists published or unpublished supports. Remove the filter altogether to include both. |
| Cancelled supports | Exclude / Include | Whether cancelled supports are listed. |
| Has notes | Yes / No | Narrows the PDF to supports that do, or don't, have a progress note. |
The filters open pre-set to match the Supports page you came from, so it is quickest to filter that page first and then open Actions. From calendar view they open as Status: Published and Cancelled supports: Include. From list all supports view they inherit the filters on the table, so if you have set the table's Cancellation Status filter to Not Cancelled, the export opens on Cancelled supports: Exclude instead.
Reinstating a cancelled support removes its cancellation entirely, so it is treated as an ordinary support by every one of these filters from that point on.