- Administration
- Xero
Xero
Our industry leading Xero integration is a 2-way integration with Xero. No more exporting and importing of CSV files - invoices and payments will be synced in the background automatically.
Data Flow
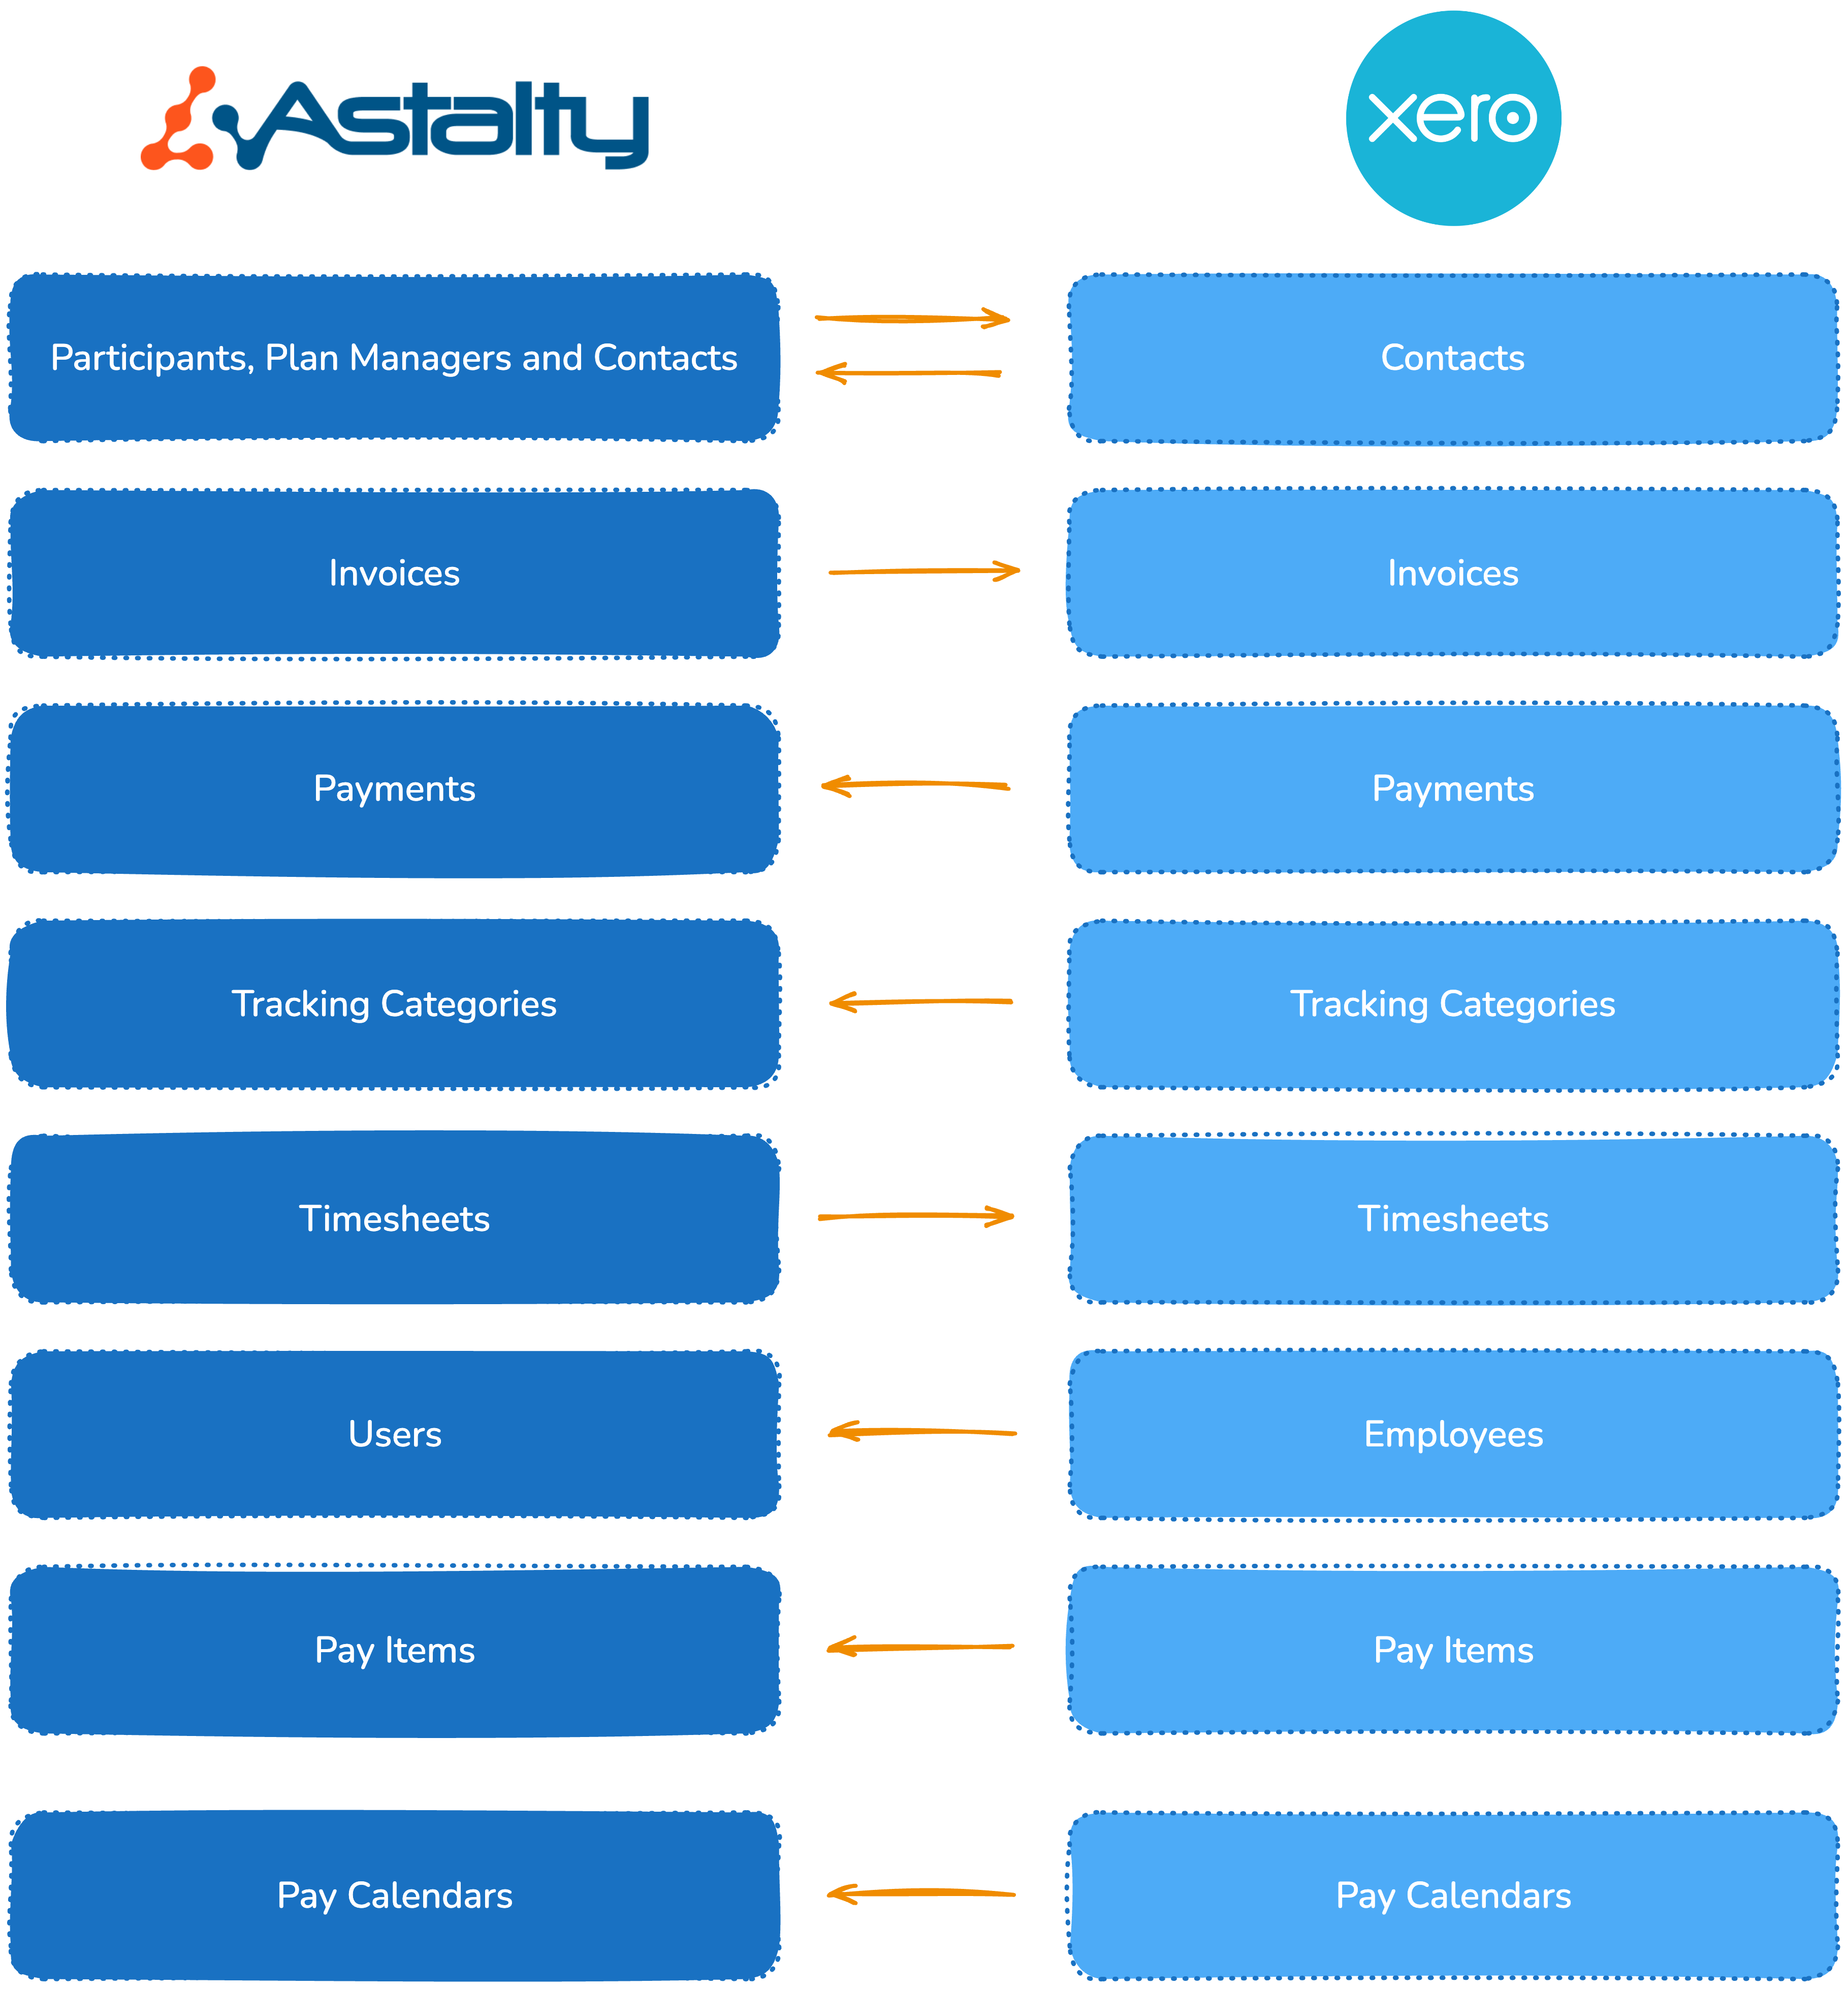
The diagram below shows the direction of flow of data between Astalty and Xero.
What can it do?
Syncing Invoices
Each time you finalise an Invoice Batch in Astalty, we will automatically create those invoices in Xero for you - no more export/import via CSV.
Syncing Payments
When you reconcile payments in Xero against an invoice, we will automatically assign that payment to the invoice in Astalty meaning it will be marked as paid in both systems, with a single click.
Connecting and disconnecting your Xero account
You can learn how to connect and disconnect your Xero account to Astalty here.
Configuring the integration
Once connected, you'll need a valid configuration for the integration to work properly. Learn how to set this up here.
Integration Flow
.png)
Video Walkthrough
This video will talk you through the Xero Integration process.