- Administration
- Settings
- Users Settings
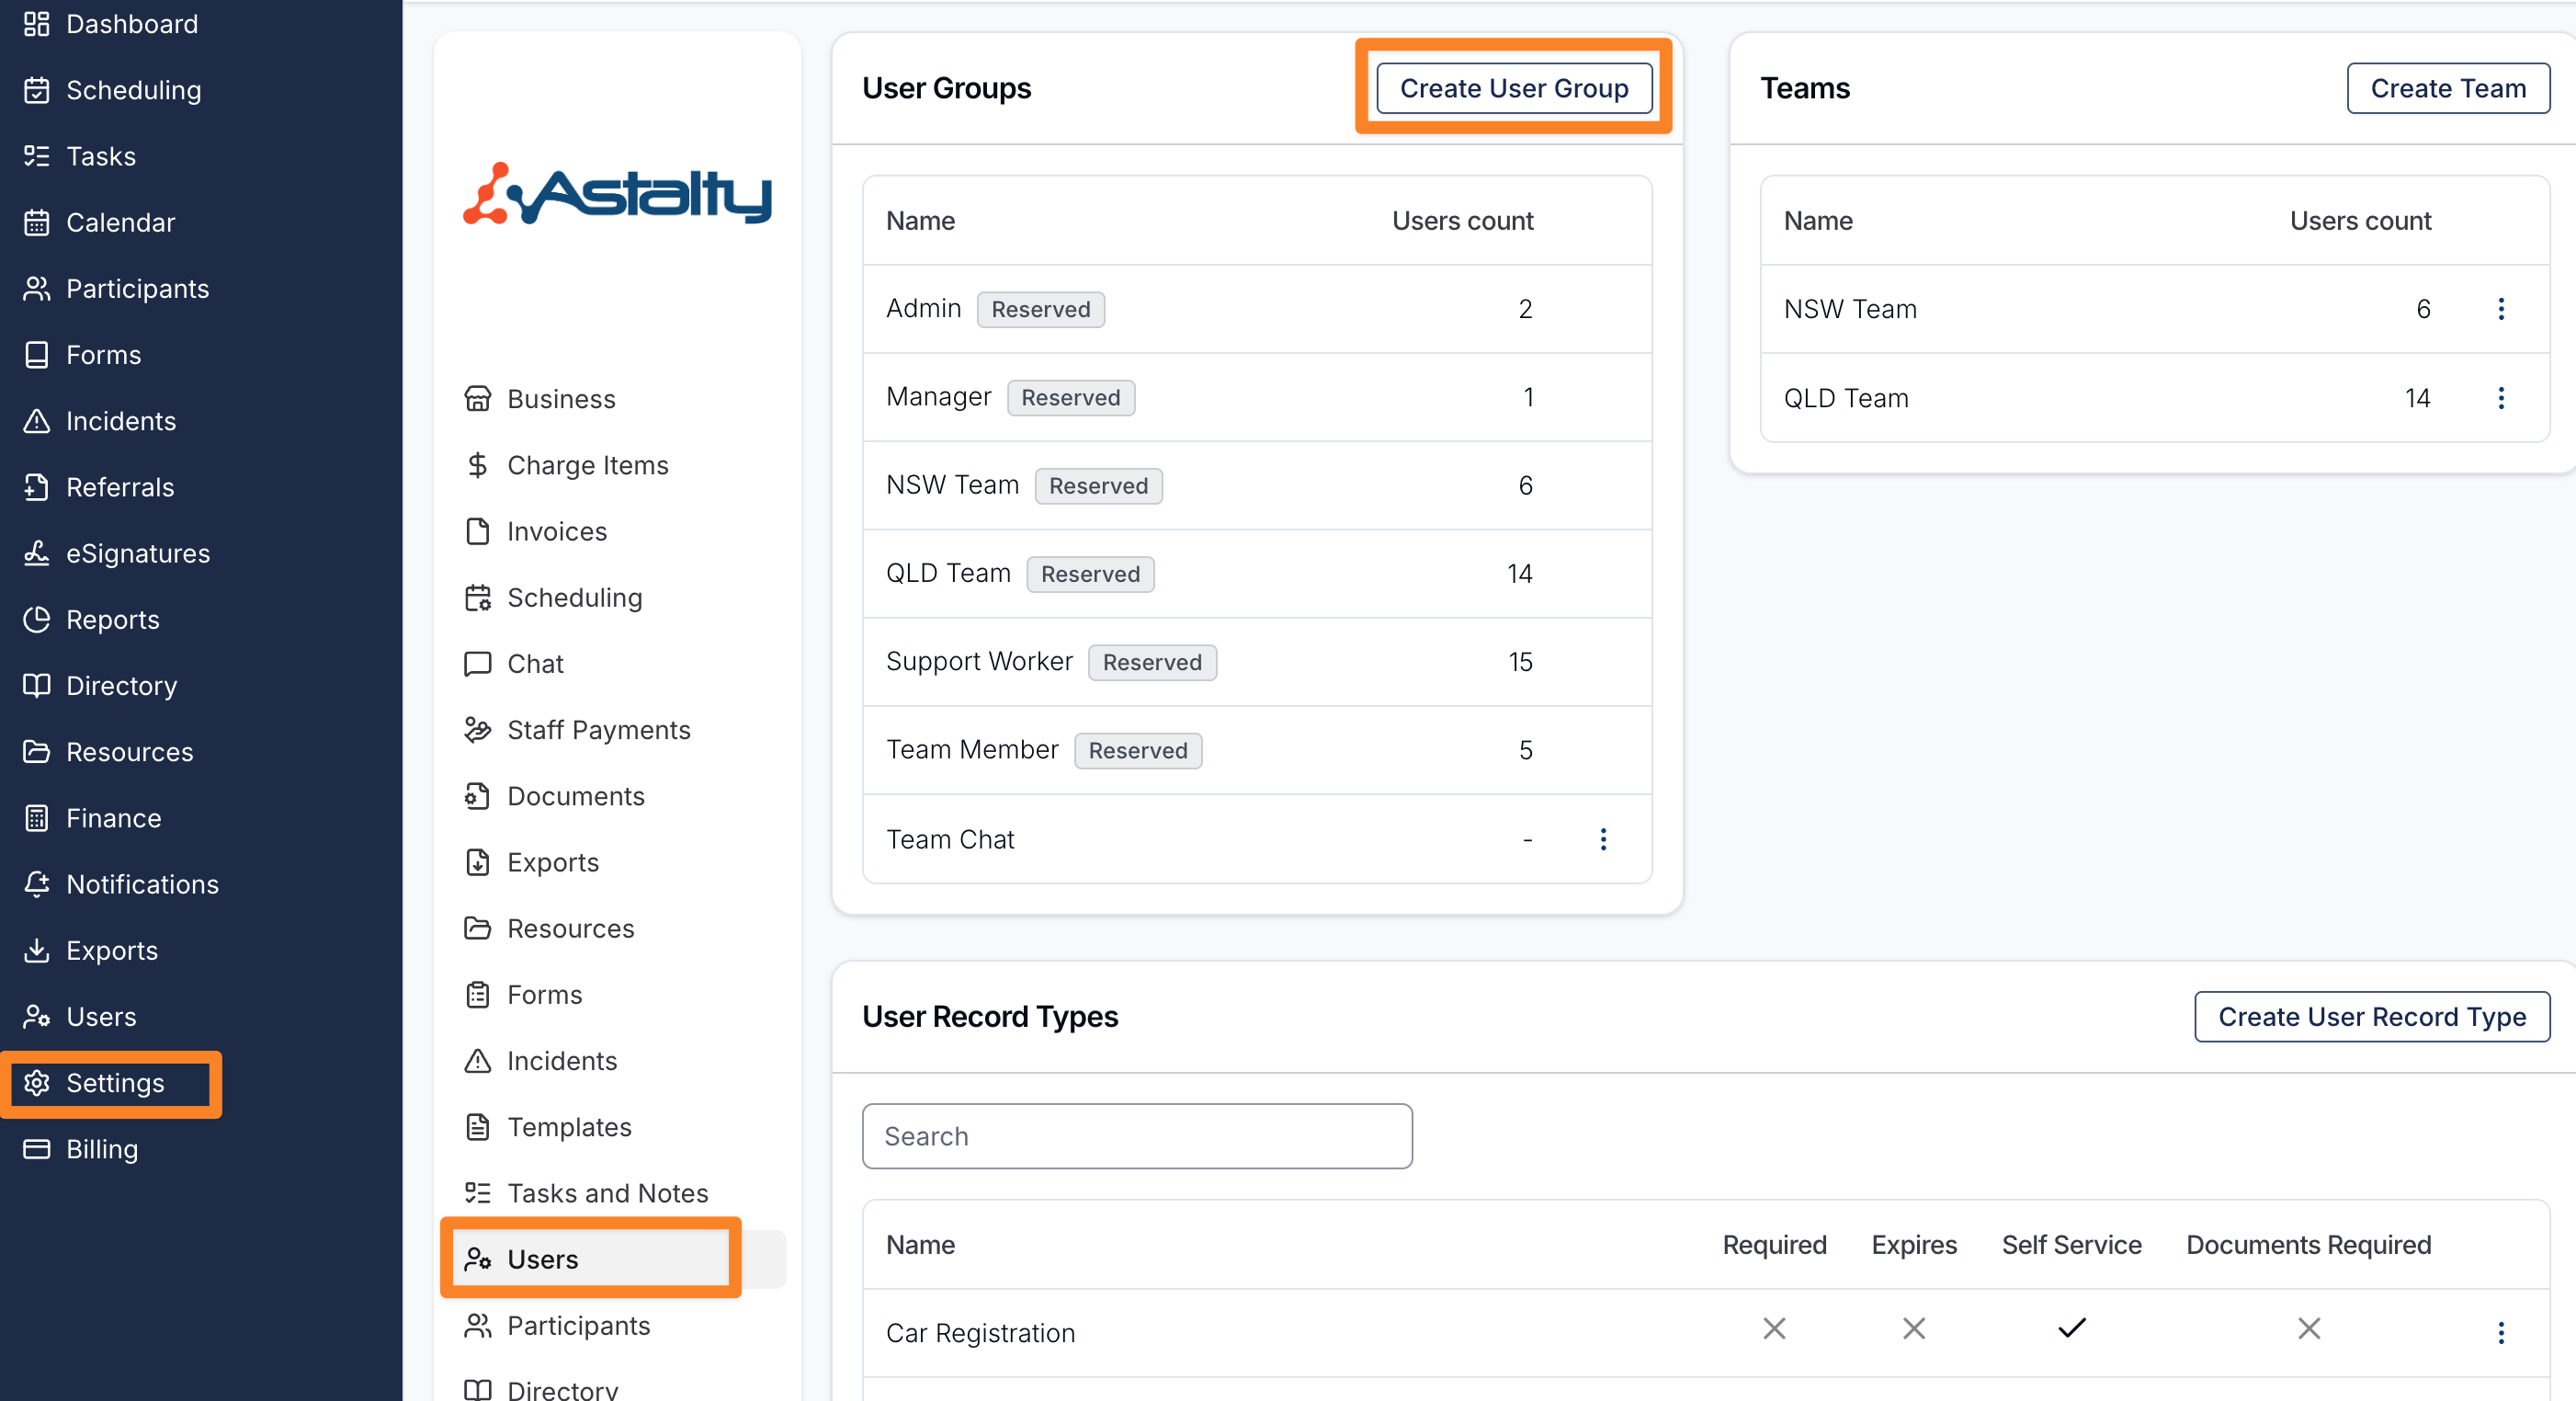
- User Groups
User Groups
User Groups allow you to define how your business is structured and the groups of users that make up your business. You will see there are 3 pre-defined groups that will update automatically when you change a user's role.
User Groups can be managed in the Users settings page.
When to use User Groups
The main purpose of User Groups is to have the ability to notify a certain group of users when configuring our automated notifications.
User groups can also be used for our Chat functionality.
Reserved User Groups
User Groups for Roles
Admin
The Admin user group will be automatically assigned whenever a user is given the Admin role.
Manager
The Manager user group will be automatically assigned whenever a user is given the Manager role.
Team Member
Every user in Astalty will have the Team Member User Group.
User Groups for Teams
If you are utilising Teams in Astalty a reserved User Group will be created for each team. When you assign a user to a team, they will also be part of the matching User Group.
Creating User Groups
To create a User Group, navigate to the Users settings page.
Click on Create User Group and enter the name of the group - you can not use a name that is already in use.
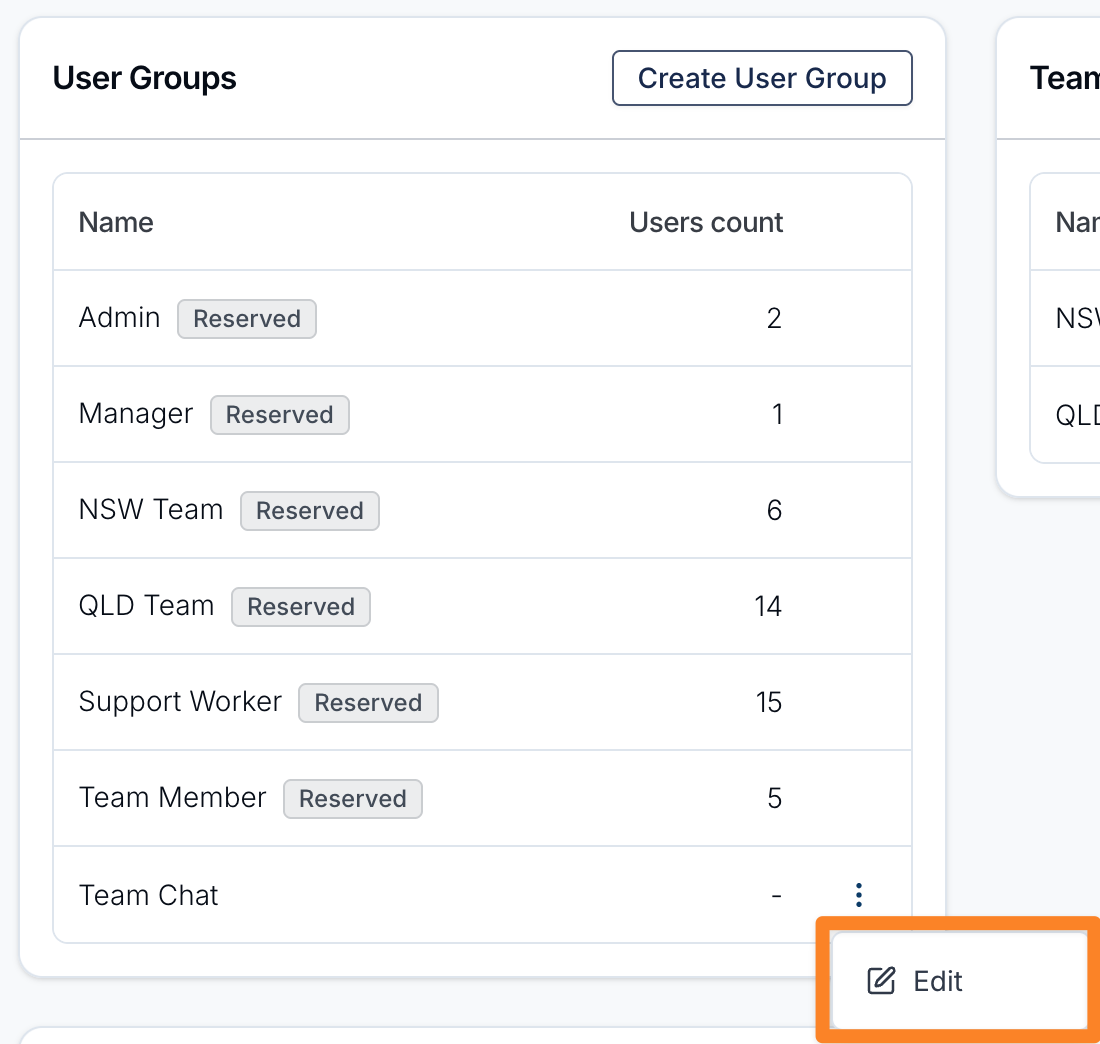
Updating User Groups
To update a User Group navigate to the Users settings page.
Click the 3 dots next to the User Group and click *Edit. *This will give you the option to update the name of the group.
Adding a User to a User Group
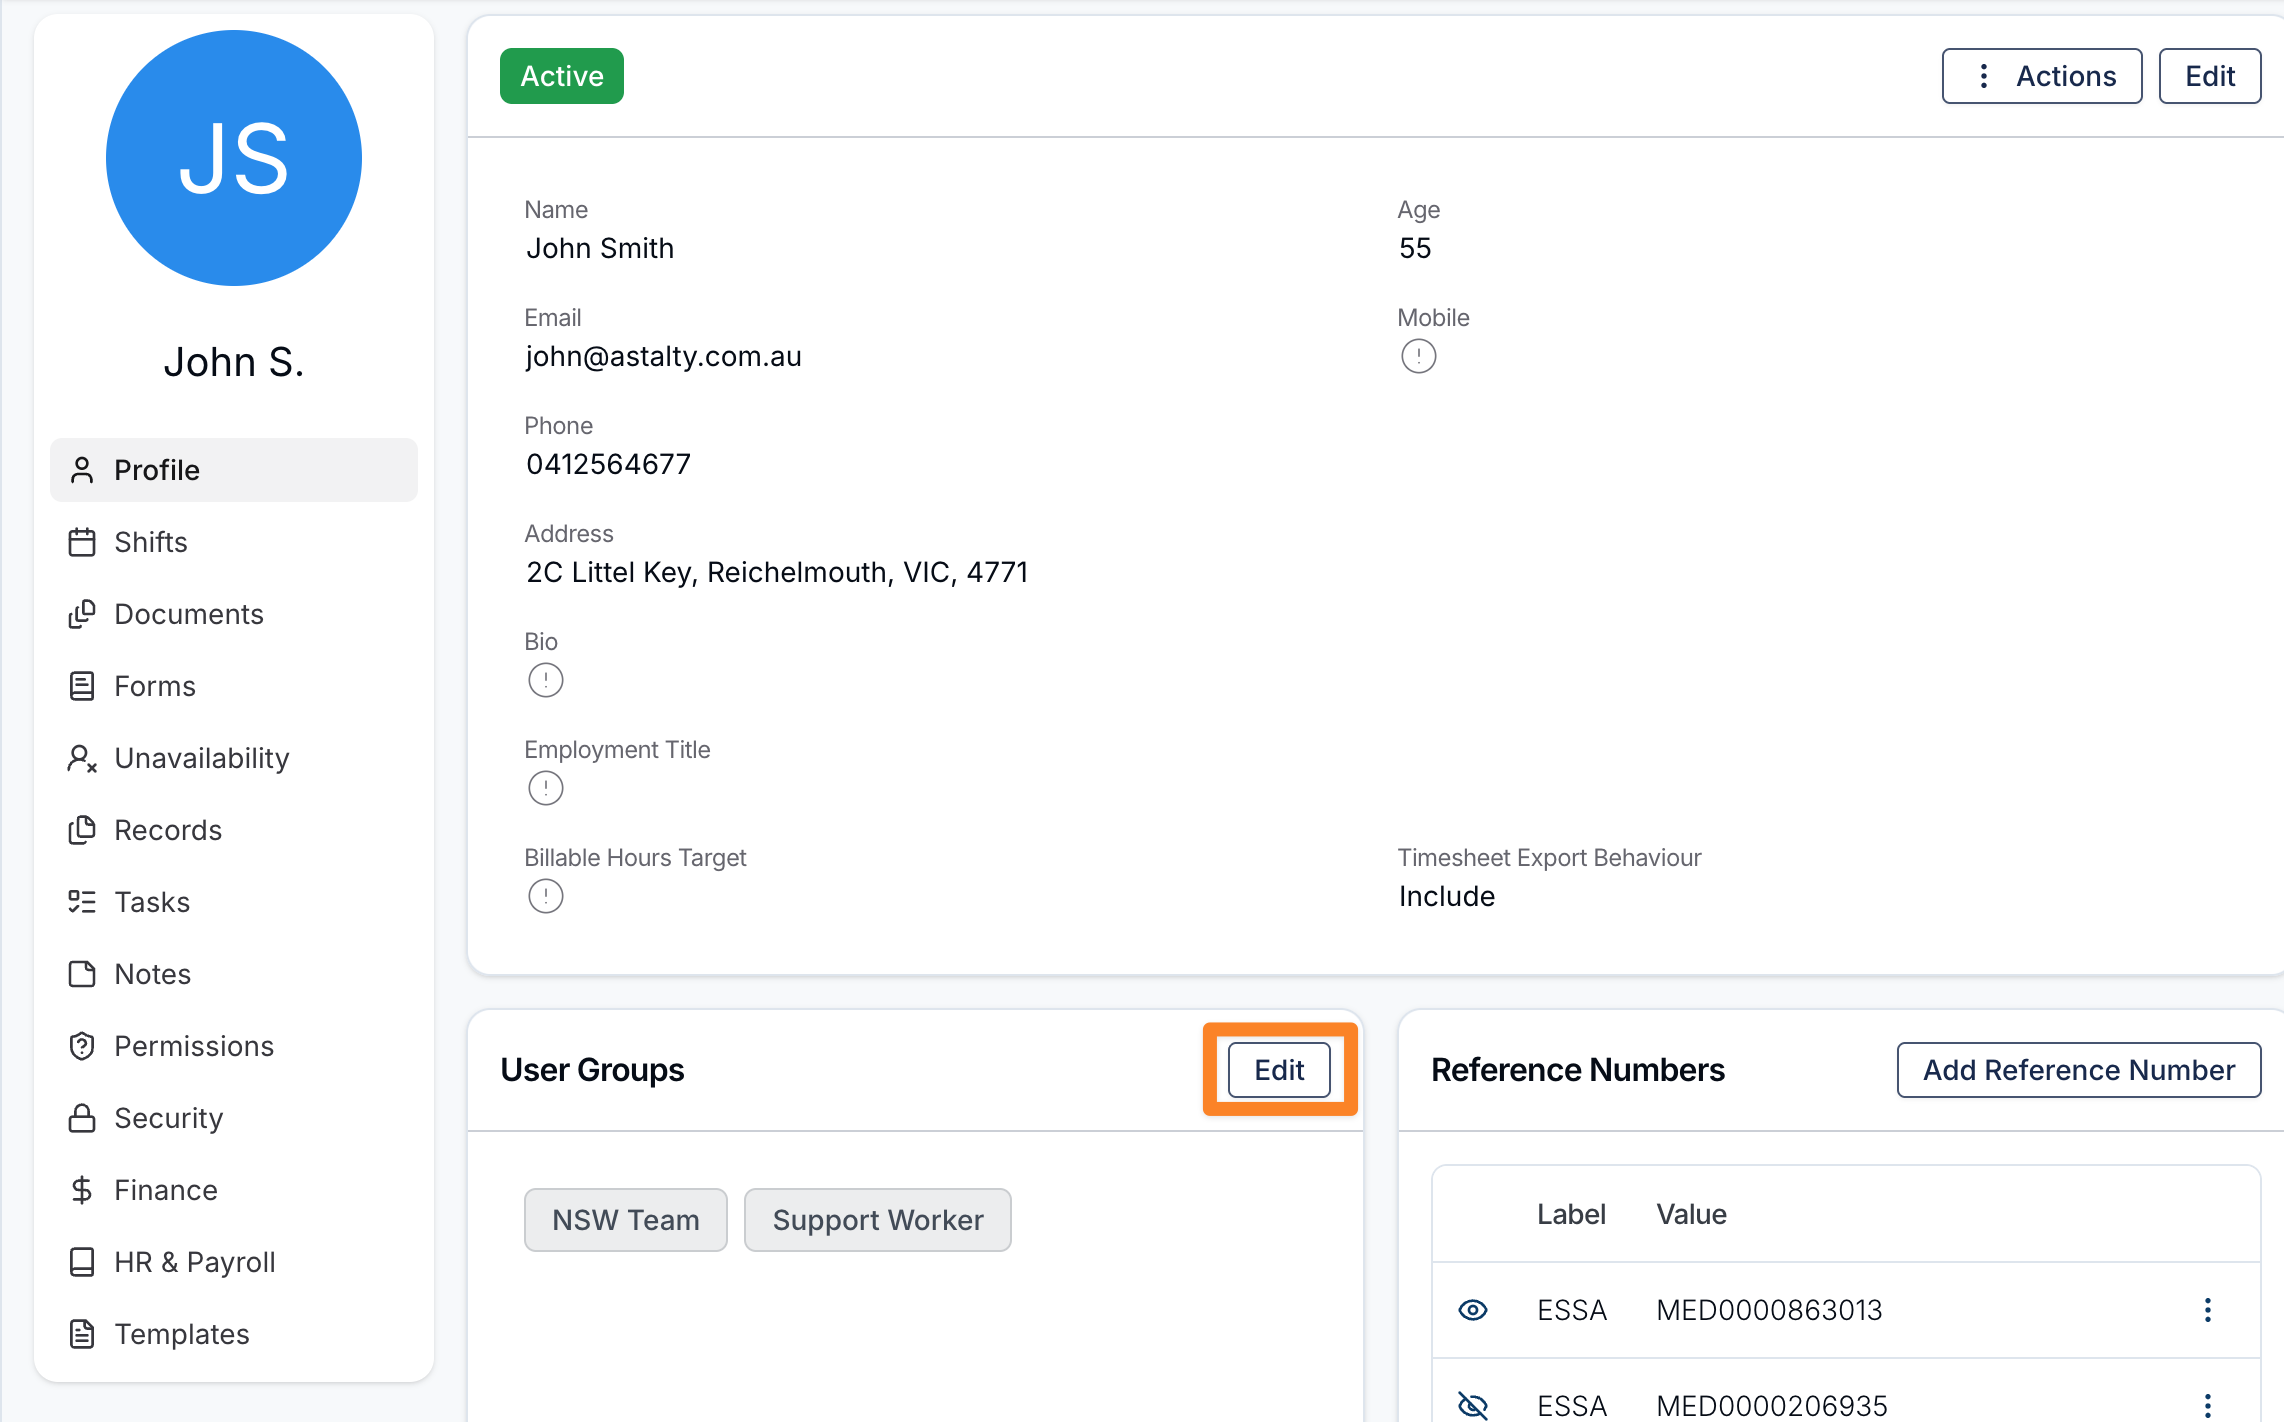
Once you have created your User Groups, you can assign users to them from the user's profile.
- From the left-hand menu, navigate to Users.
- Select the user you want to add to a group.
- On their profile, scroll down to the User Groups section.
- Click Edit.
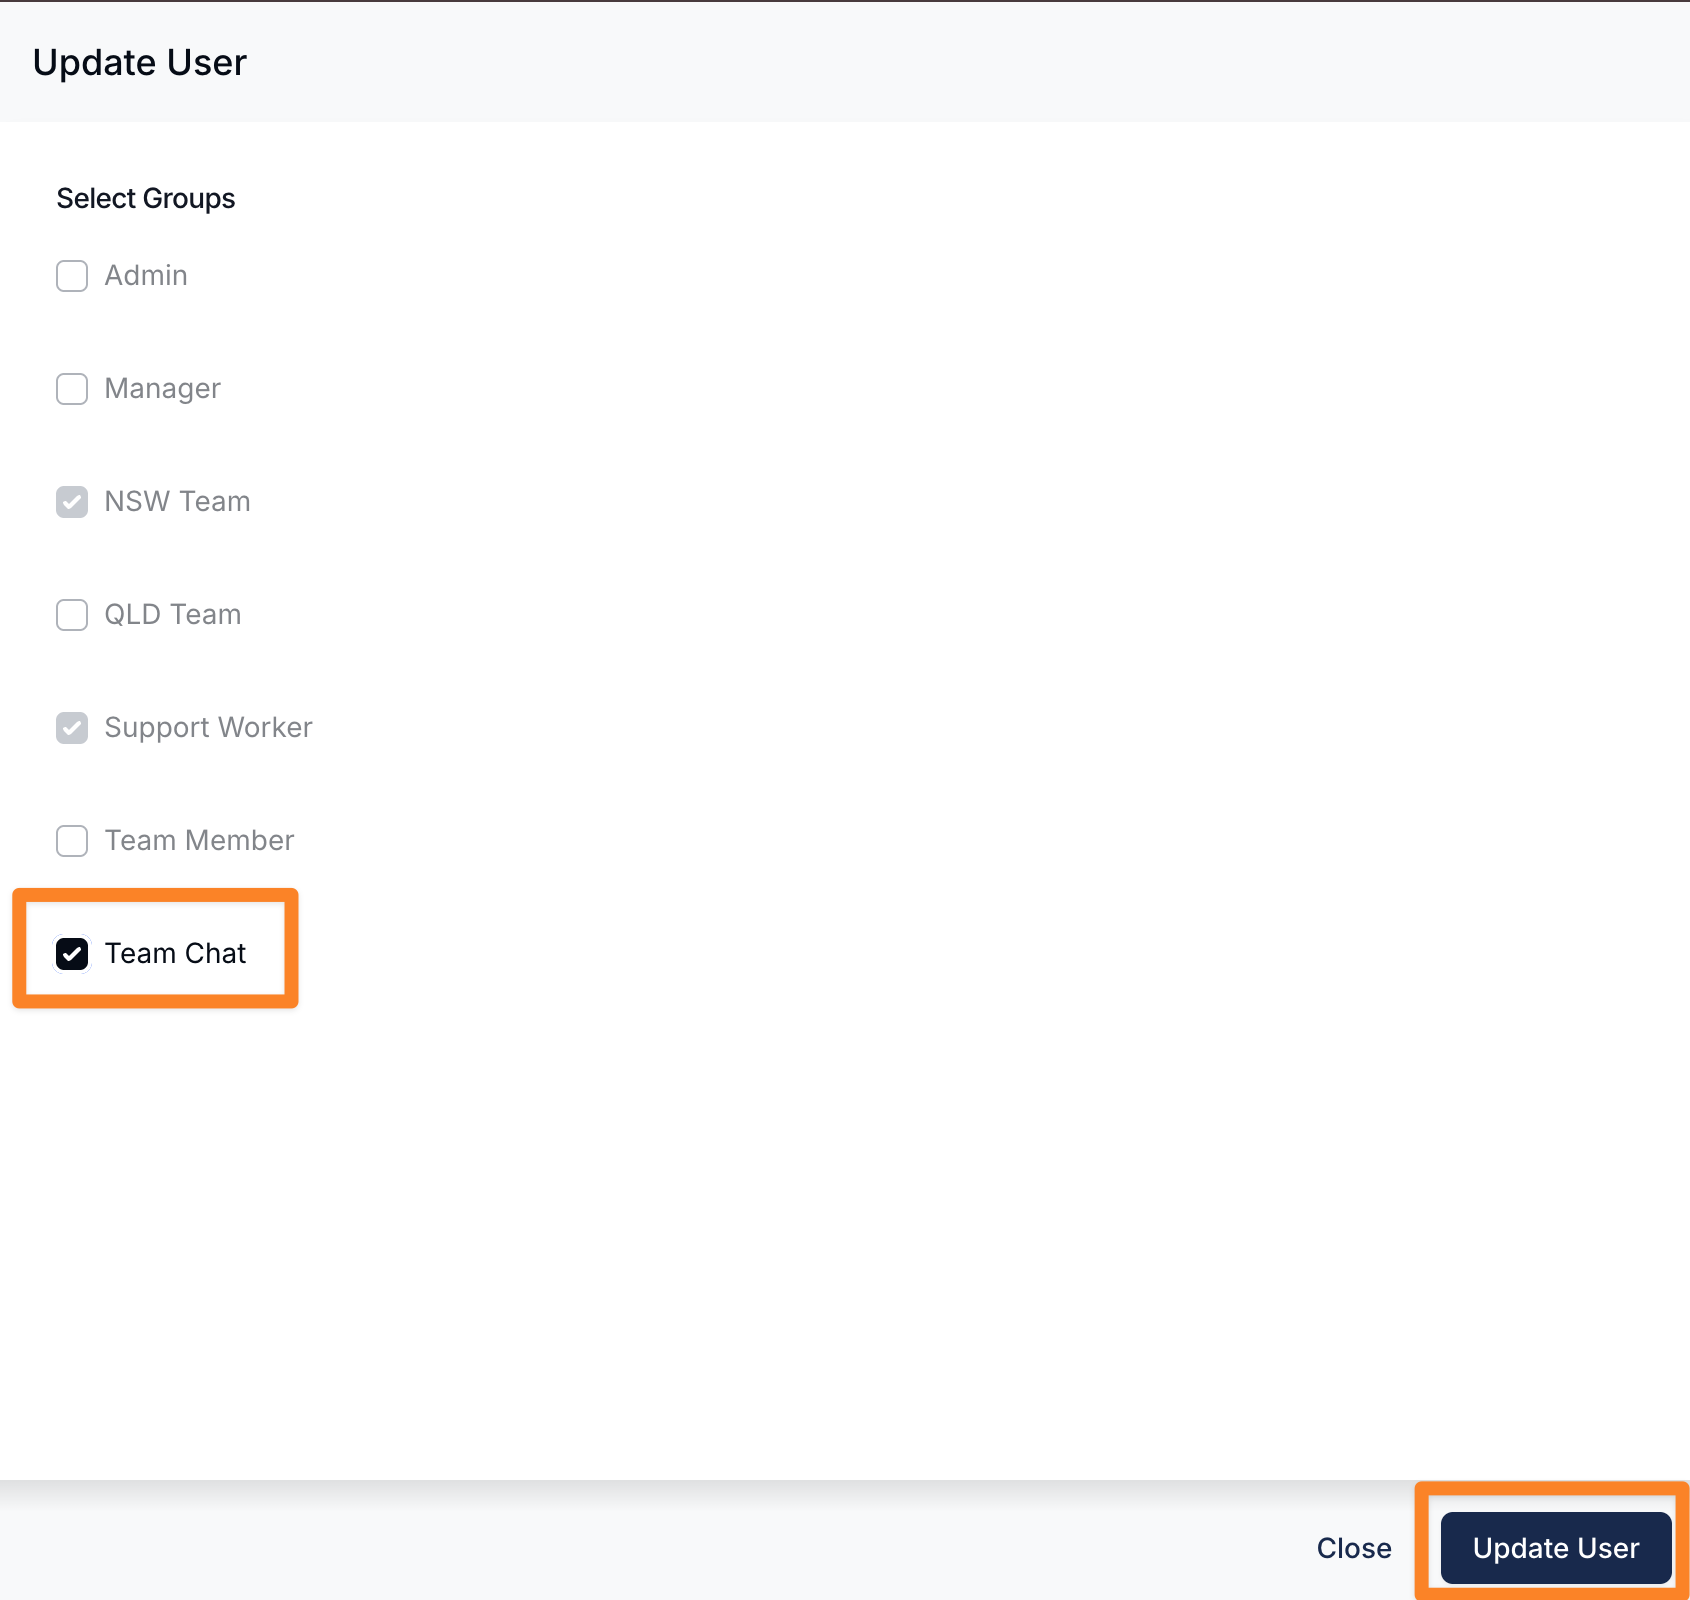
- Tick the checkbox next to the group you want to add the user to. You can select multiple groups at once.
- Click Update User to save the changes.
The user will now be a member of the selected group and will be included in any notifications or chat functionality configured for that group.
Deleting User Groups
To delete a User Group, navigate to the Users settings page.
Click the 3 dots next to the User Group and click Edit. From within the edit view, click the Delete button in the bottom left corner to permanently delete the group.
If a User Group is marked as reserved, it can not be edited or deleted.