Profile
A Participant's profile is broken down into a few sections.

Profile Picture
A Participant's initials appear at the top of their profile until a profile picture is uploaded. If you can update the Participant, hover over their initials, select Upload Profile Picture, then choose a JPG or PNG image from your device. The picture uploads immediately.
To replace an existing picture, hover over it and select Change Profile Picture, then choose another image. To return to the Participant's initials, hover over the picture, select the delete icon, then confirm Delete.
Tags
The top of the Participant's profile shows their Tags. See Participant Tags to add, remove, or manage them.
Alerts
Current alerts appear in the Participant profile header. You can edit an active Alert, archive it with a reason, or unarchive an archived Alert. See Participant Alerts.
Key Information
The Key Details card is show in the top left of the Participant's profile. This includes things like their Primary Coordinator, their current plan dates and latest check-in information.
Site
If a Participant is assigned to one or more sites, each site is listed in the details on the left-hand side of their profile, beneath their current plan dates. The label reads Site for a single site or Sites when the Participant is assigned to more than one.
Next to each site name is a shortcut arrow. Clicking it takes you straight to that site's view, no matter how deep you are within the Participant's profile (budgets, notes, documents, support items, and so on). Because this shortcut is part of the profile sidebar, it stays available on every page of the profile - so you always have a single click back to the site level when you're working across multiple Participants at the same site.
Participant Details
The Participant Details card shows all of the primary details for a Participant such as their name, Primary Diagnosis and other Contact details. You can edit any of these details by clicking the Edit button.
Personal Information:
In this section, you can update the following details:
- First Name
- Middle Name
- Last Name
- Preferred Name
- Date of Birth
- Gender
- Sex
- Pronouns
- Ethnicity
- Language
- Primary Diagnosis
- Secondary Diagnosis
Contact Information:
Here, you can add or update:
- Mobile
- Phone
- Preferred Contact Method
(Options: SMS, Email, Call (Mobile), Call (Phone), Video Call) - Preferred Way to Sign Documents
(Options: In Person, Electronically)

Reference Numbers:
Add or update identification numbers, including:
- NDIS Number
- Aged Care ID
- Medicare Number
- Centrelink Number
- External ID
You can also add your own custom reference numbers here - such as an internal reference or a Plan Manager's client number - and choose which of them show on the Participant's invoices. See Reference Numbers for the full details.
Other Details:
Manage service-related dates:
- Service Commencement Date
- Service Exit Date
Important Notes on Contact Information:
Participant email and mobile details must be unique. The Phone field does not use this uniqueness check.
See Handling Participants with the Same Contact Details for the shared-contact workflow.
Starred Contacts
The Starred Contacts table shows Contacts starred on the Participant's Contacts page. See Participant Contacts to manage them.
Address
Use the address card to add or edit the Participant's address. Select Add Address, then search for the address or enter it manually. The first address becomes the Primary Address. You can choose a different Primary Address after adding more addresses.
Multiple Address
Once you have assigned an address it will be nominated as the primary address. You can then add additional addresses to a Participants profile, if the Participant has a different postal address or if they are between multiple addresses this can now all be captured in Astalty. You can also provide more detail about an address within the Address Label and Details fields.

Viewing Address Details
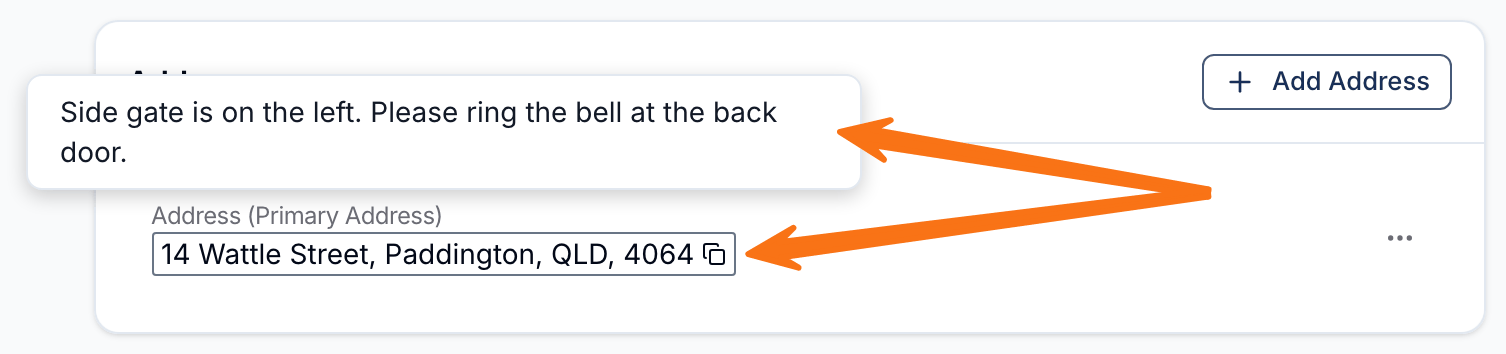
Hovering over the Address field will display the information entered in the Details field for that address.
This allows you to quickly view additional notes or important context without opening the full address record.
Updating the Address
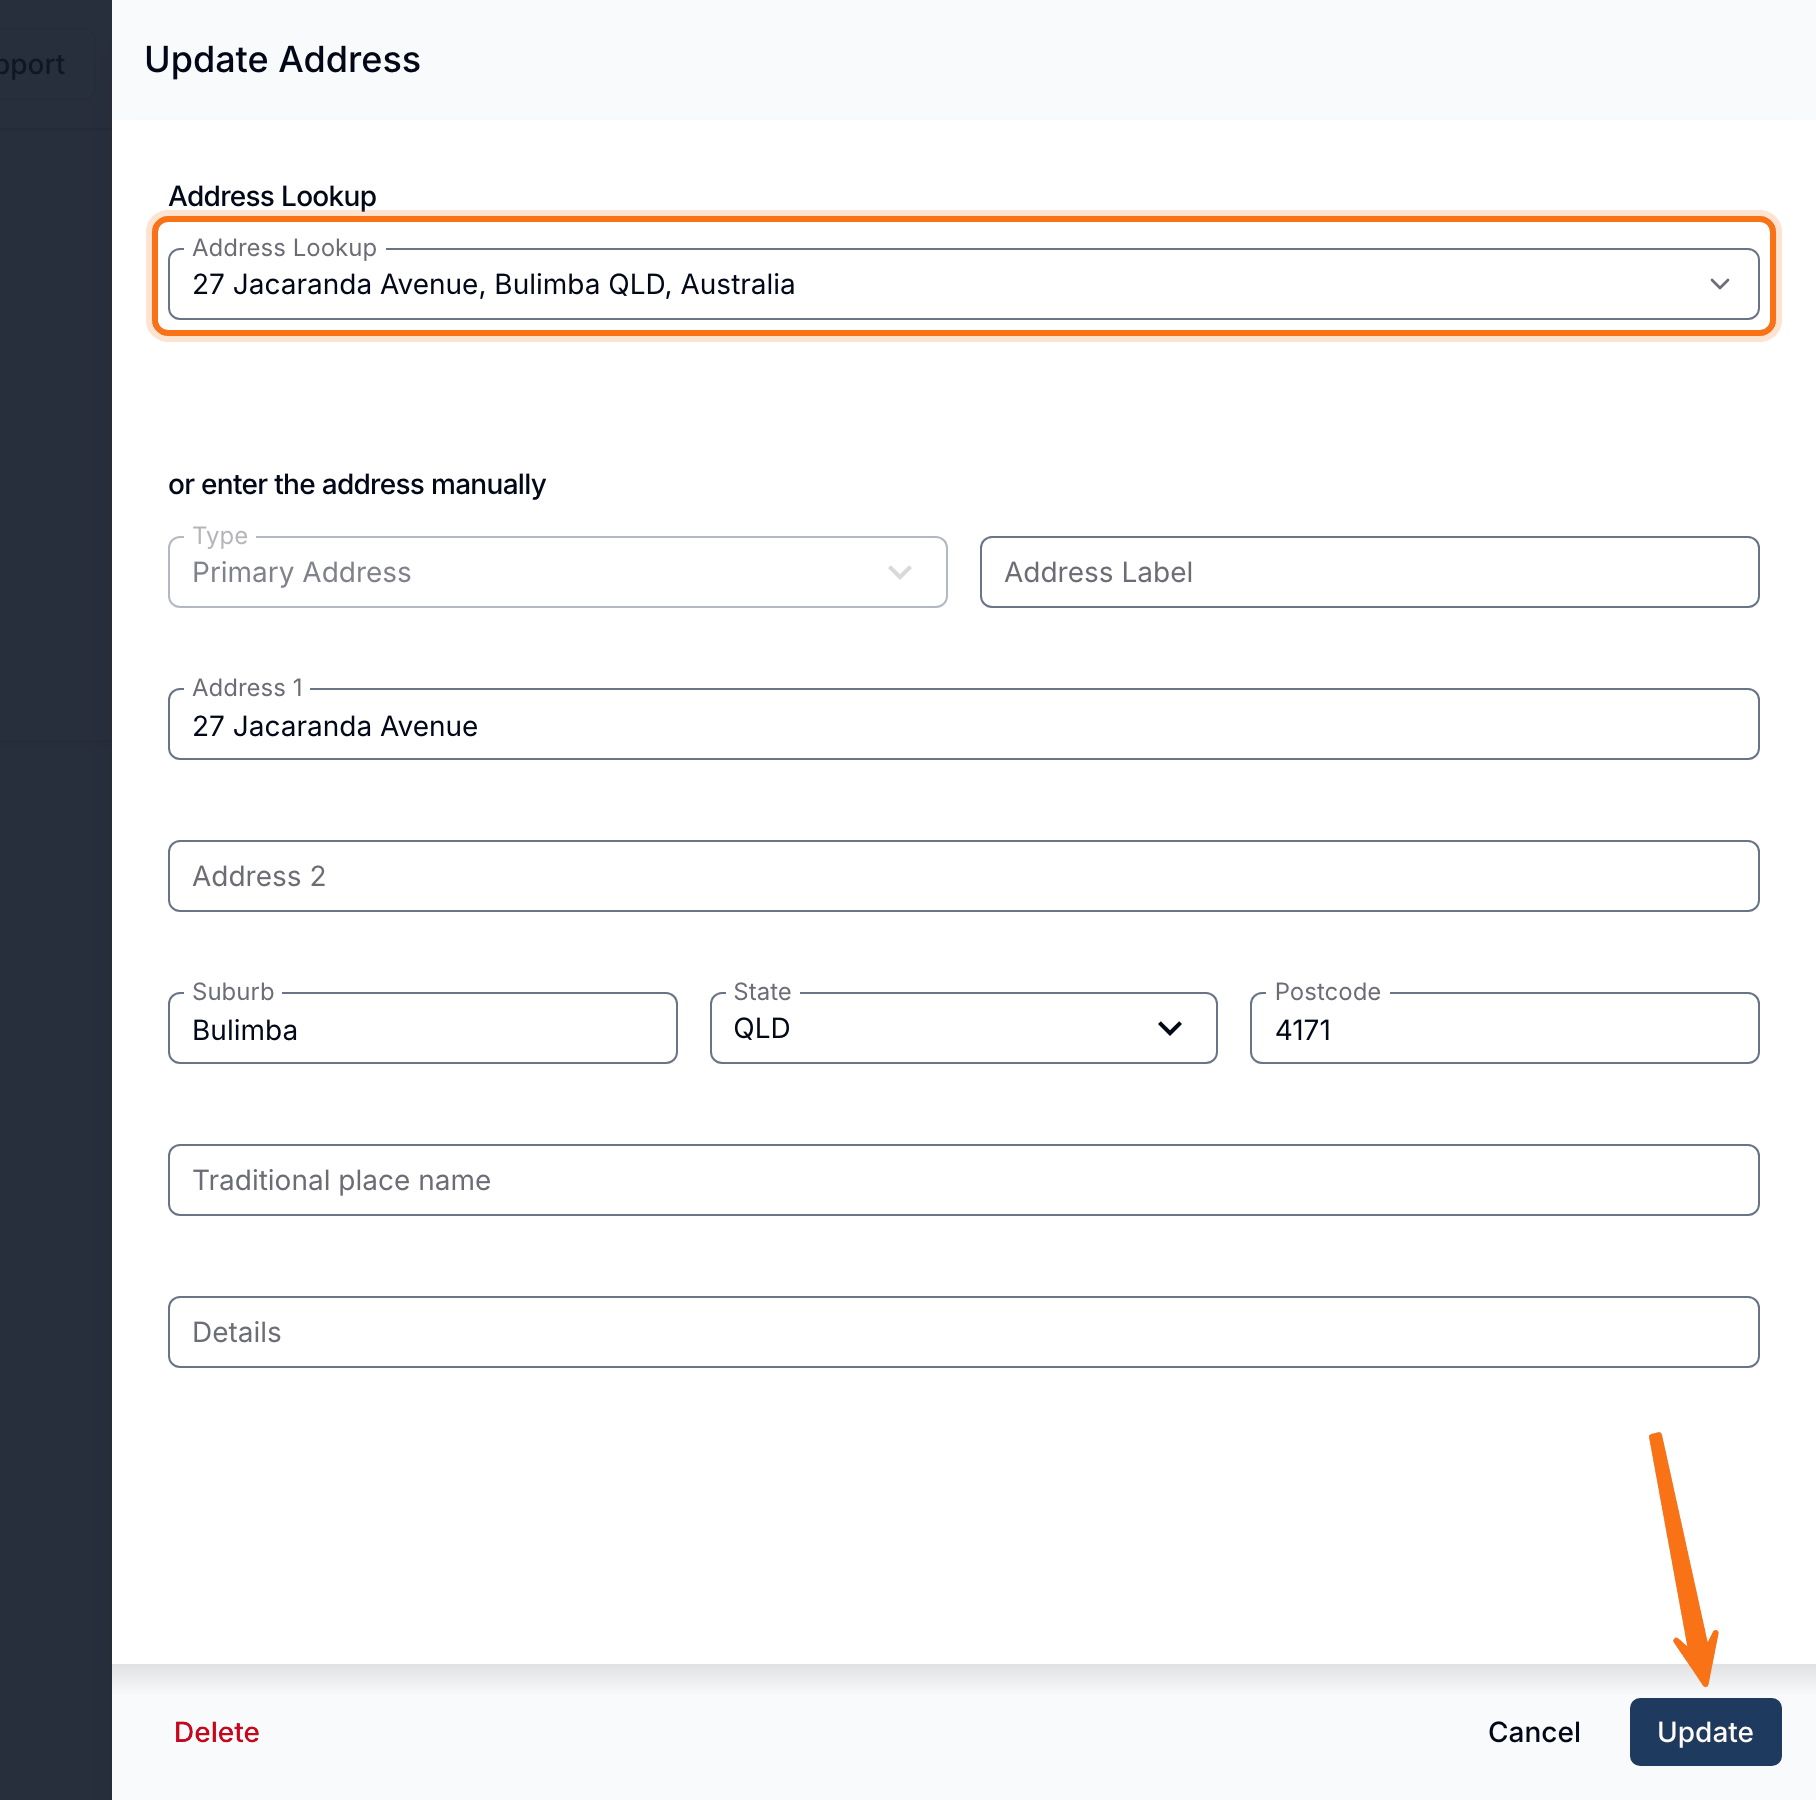
If a Participant's address (or Other) changes, you can edit it by selecting the three-dot menu beside the address, and select Edit.

This will open up the Update Address page where you can look up and select an address or enter it in manually. Once you've entered in your address, select Update.
Switching the Primary Address
In some situations, a Participant may move between addresses, which requires updating their Primary and Other addresses.
To change an existing Other address to the Primary address:
- Click the three-dot menu next to the address.
- Select Edit.

- From the Type dropdown, choose Primary Address. Click Update to save your changes.

- Confirm the prompt to update the Primary Address.

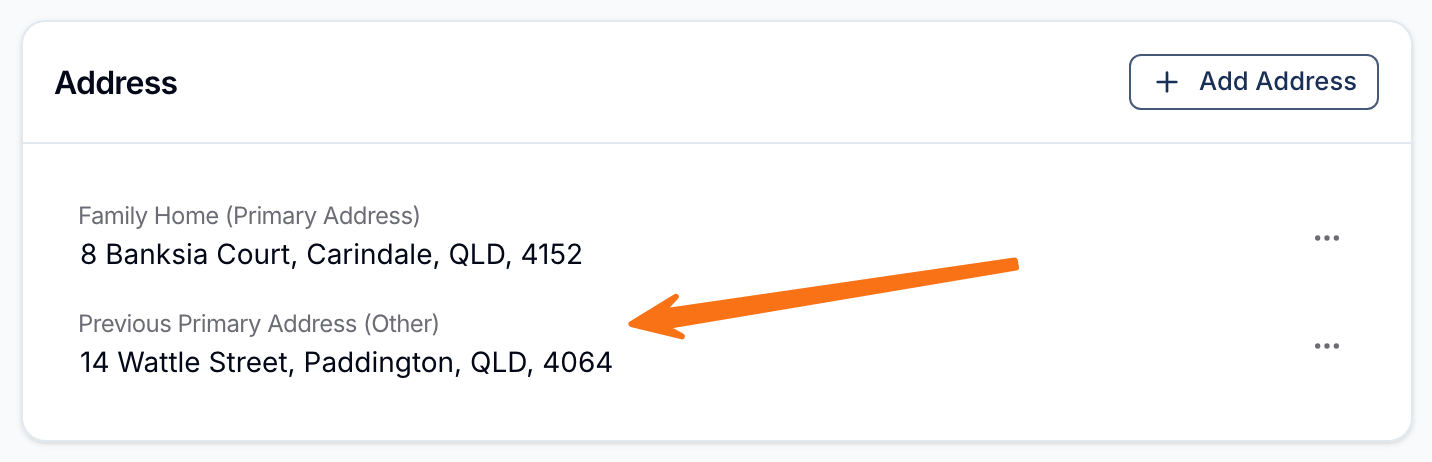
The Previous Primary Address will automatically be updated to an Other address and will be labelled accordingly.
Adding a New Primary Address
If the Participant has moved somewhere that isn't already on their profile, you can add the new address instead of editing an existing one. Click Add Address, enter the address, and choose Primary Address from the Type dropdown.
Because a Participant can only have one Primary Address, you'll be asked to confirm the change. The existing Primary Address is not deleted - it stays on the profile as an Other address, labelled Previous Primary Address.
If you have the scheduling feature enabled and the Participant still has upcoming supports booked at the old Primary Address, the confirmation will also tell you how many, along with a tick box: Also update the address on these future supports.
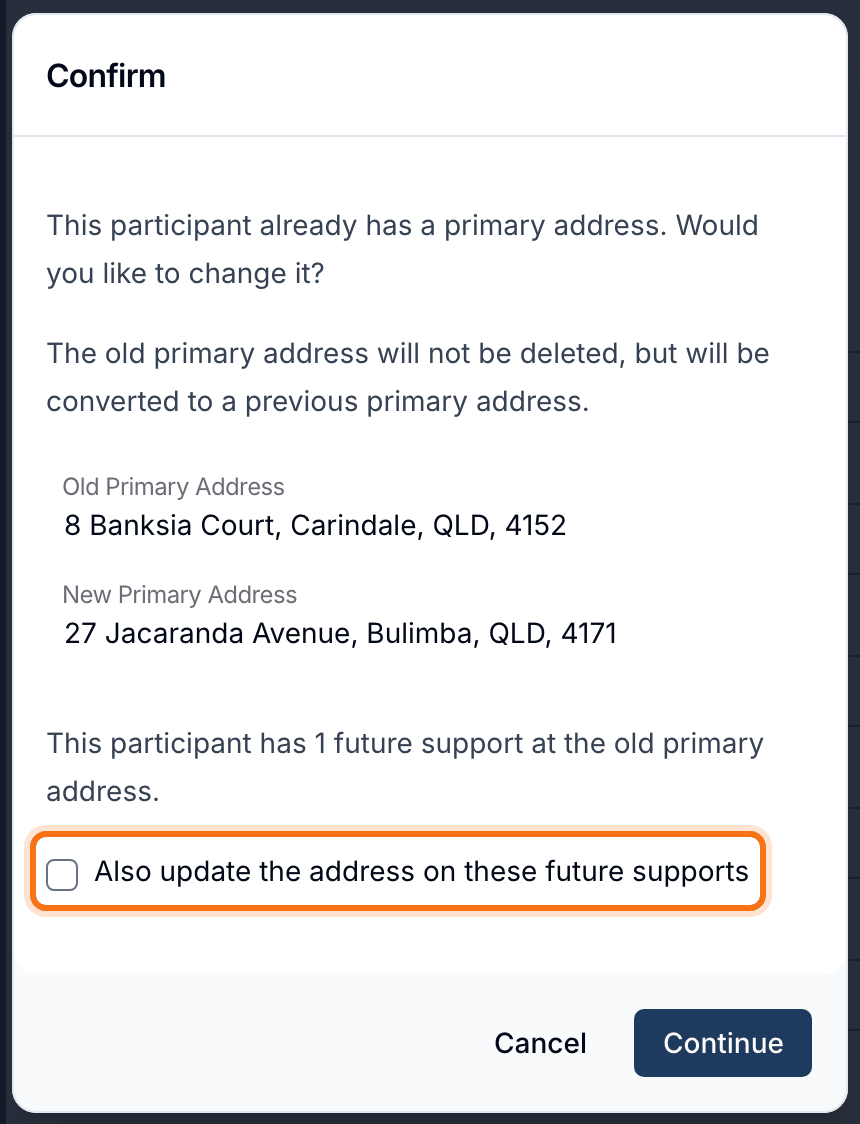
- Leave the tick box unticked (the default) to change the address only. Every existing support keeps the address it was booked with.
- Tick the box before clicking Continue to move those upcoming supports to the new Primary Address.
The count and checkbox only appear when at least one upcoming support uses the old Primary Address. If there are none, Astalty asks you to confirm the Primary Address change.
Updating Addresses Used in Scheduled Supports
If you have the scheduling feature enabled, you may be prompted to confirm whether you also want to update the address on future supports. Which prompt you see depends on how you made the change:
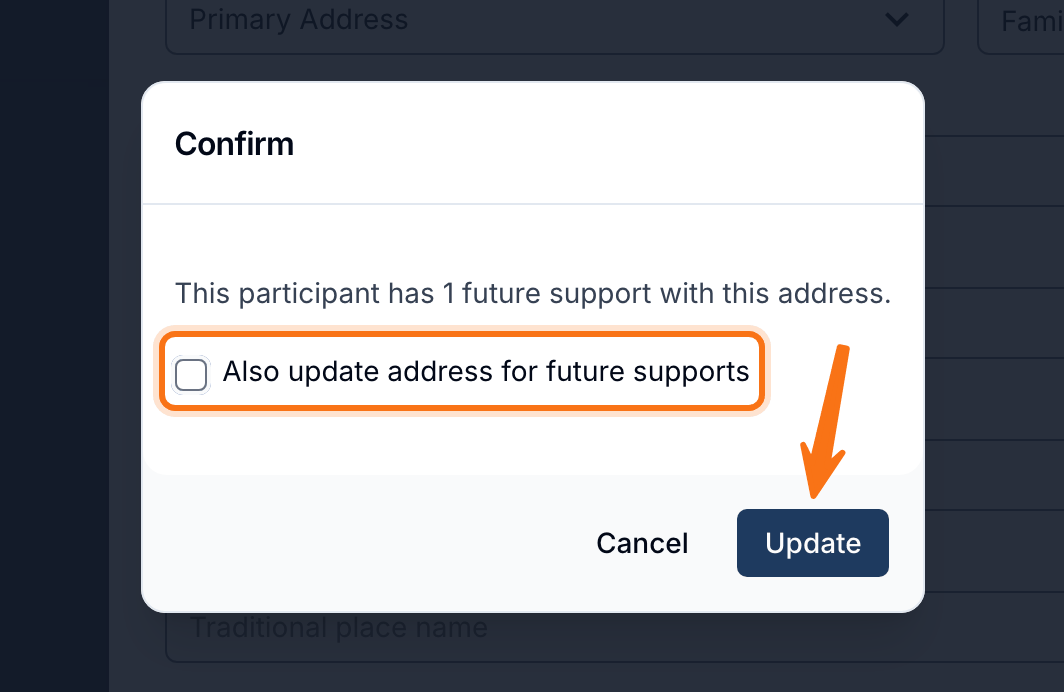
- Editing an existing address (including switching an Other address to Primary): after confirming, you'll be told how many future supports use that address and can tick Also update address for future supports. Ticking it applies the updated address details to those supports.
- Adding a new Primary Address: the tick box appears on the confirmation prompt itself, and moves upcoming supports from the old Primary Address to the new one. See Adding a New Primary Address above.
In both cases the tick box starts unticked, so nothing on a support changes unless you choose it, and past supports are never affected.
Information Items
The Information Items section shows the Participant's current and missing required items. See Participant Information Items to manage them.