Service Agreement Workflow
Creating a Budget and Generating a Service Agreement in Astalty
This Workflow guide will walk you through the steps of creating a budget, assigning it to an Astalty custom template, and sending the agreement for signature using Astalty's eSignature functionality. Follow the steps below to see how much time you can save by using this workflow.
This is ideally happening right after you complete a referral submission profile creation. Learn more about that via this link here.
First Step
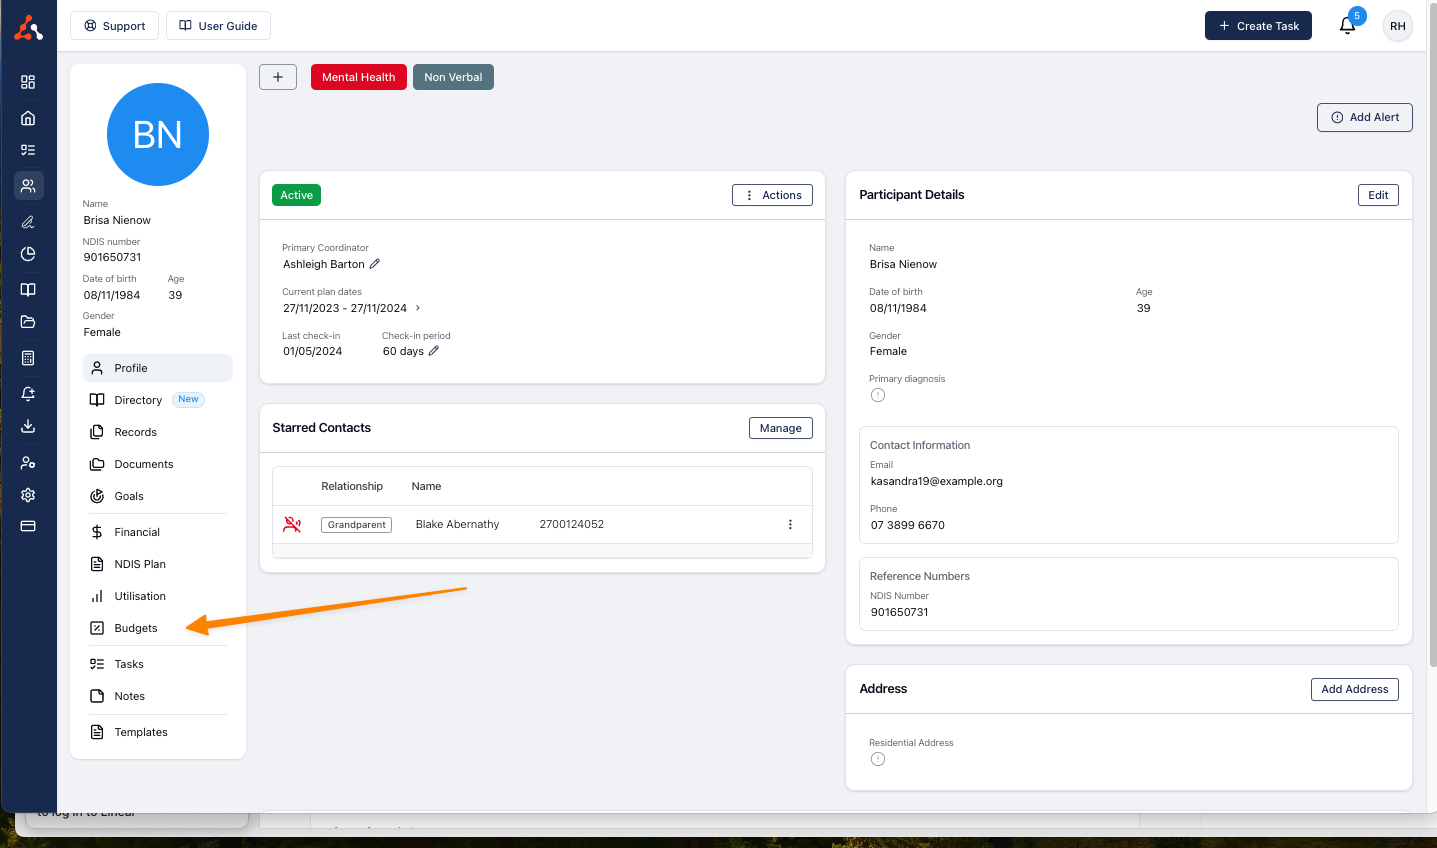
Go to the profile of the participant for whom you want to create a budget.
On the left side menu under Utilisation, click on the Budget selection.
Creating a Budget
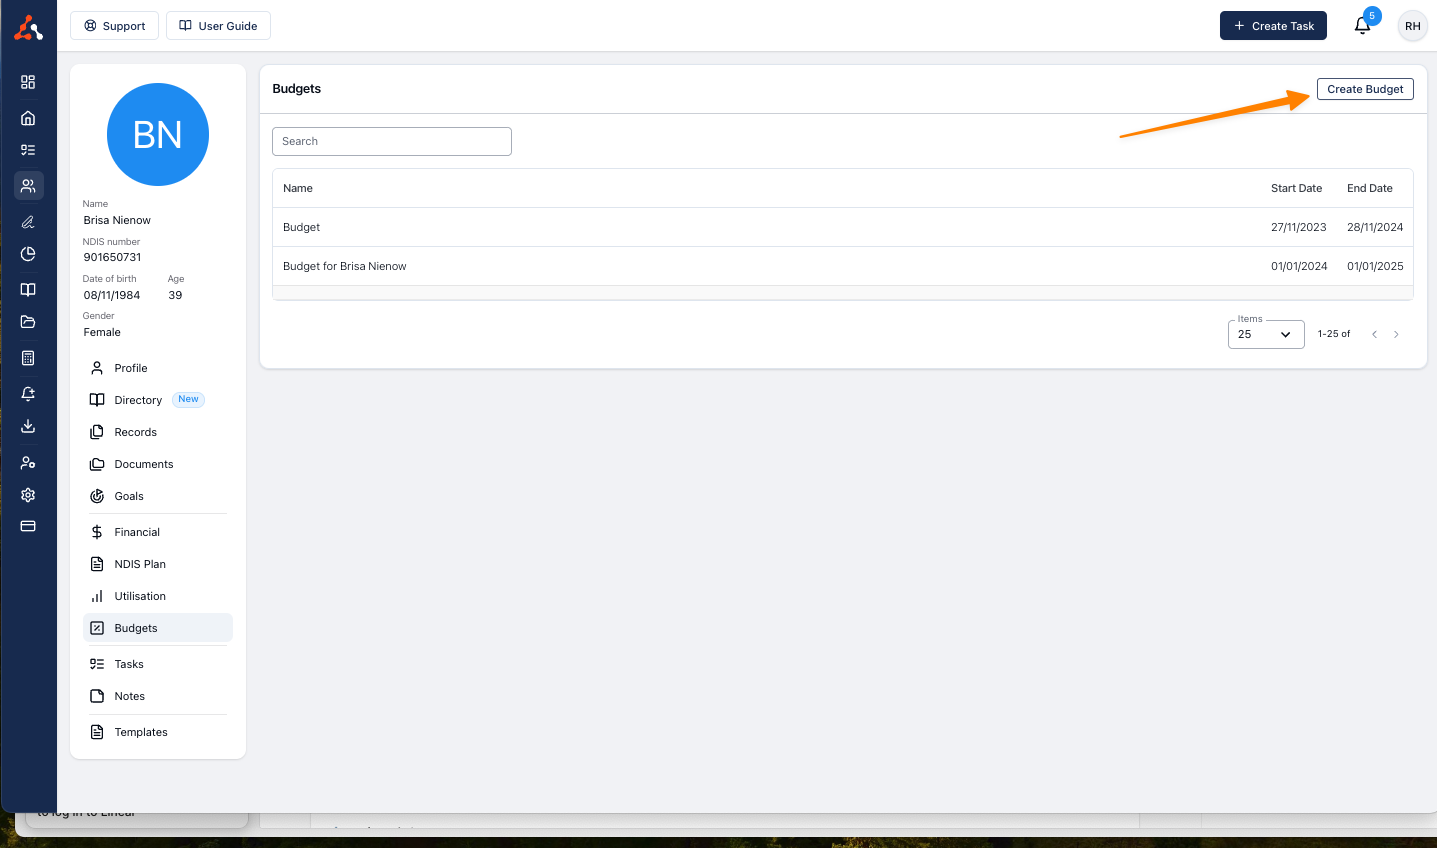
Click on Create Budget in the top right corner of the screen.
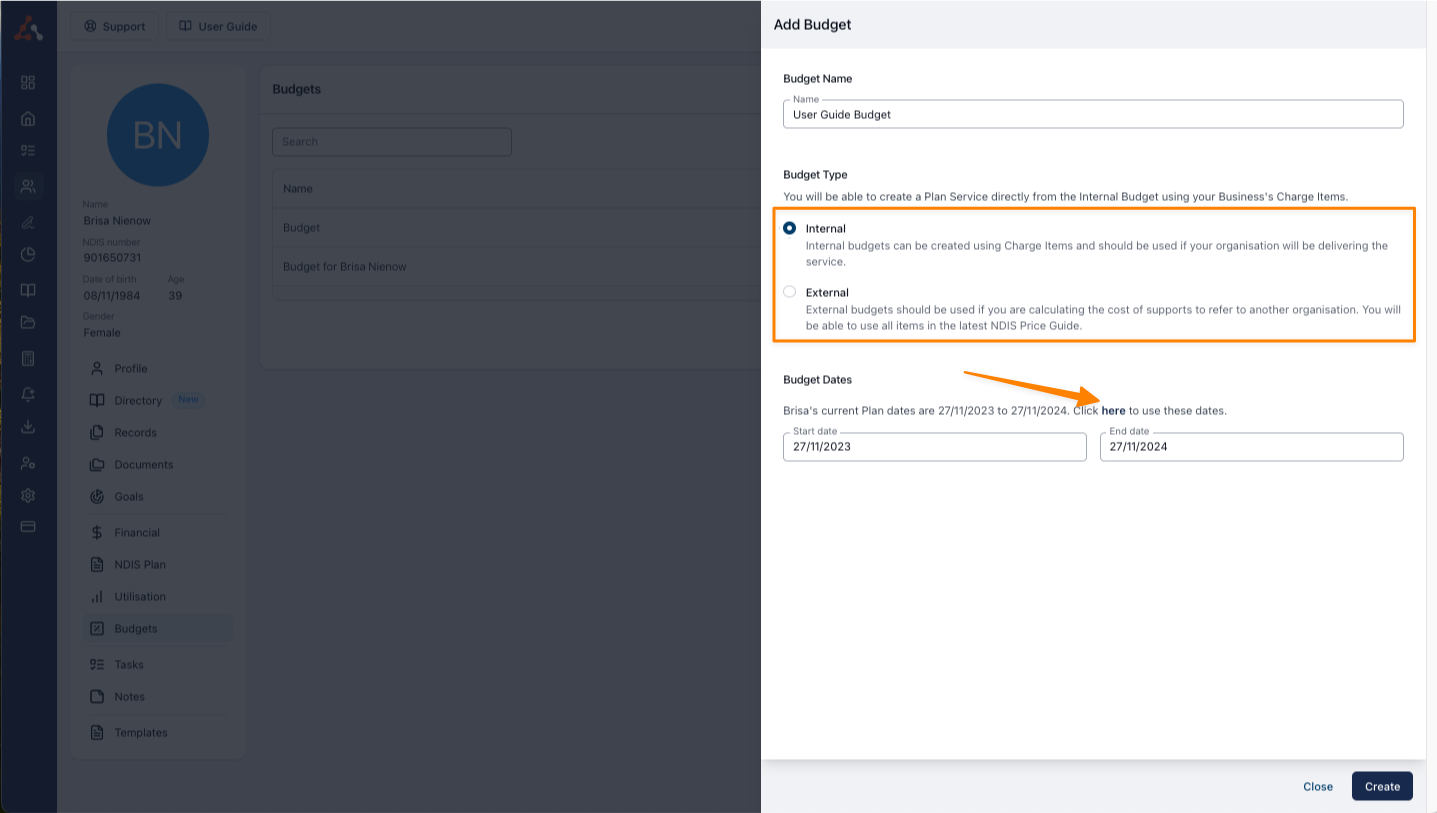
Name your budget and select the type of budget:
Internal Budget: Use this for charge items already assigned within your organisation. Suitable if your organisation will deliver the service.
External Budget: Use this for sending quotes to external providers and/or to include items from the NDIS price guide.
Select the budget dates. You can use the current plan dates by clicking on the bold here selection link, which will populate the plan dates from the participant's profile.
Click Create at the bottom right corner to save the budget.
Enter Budget Details
On the budget details screen, you can see the information you entered on the previous screen.
Select the type charge item (depending on the budget type you have selected, this dropdown will contain different charge items outlined above).
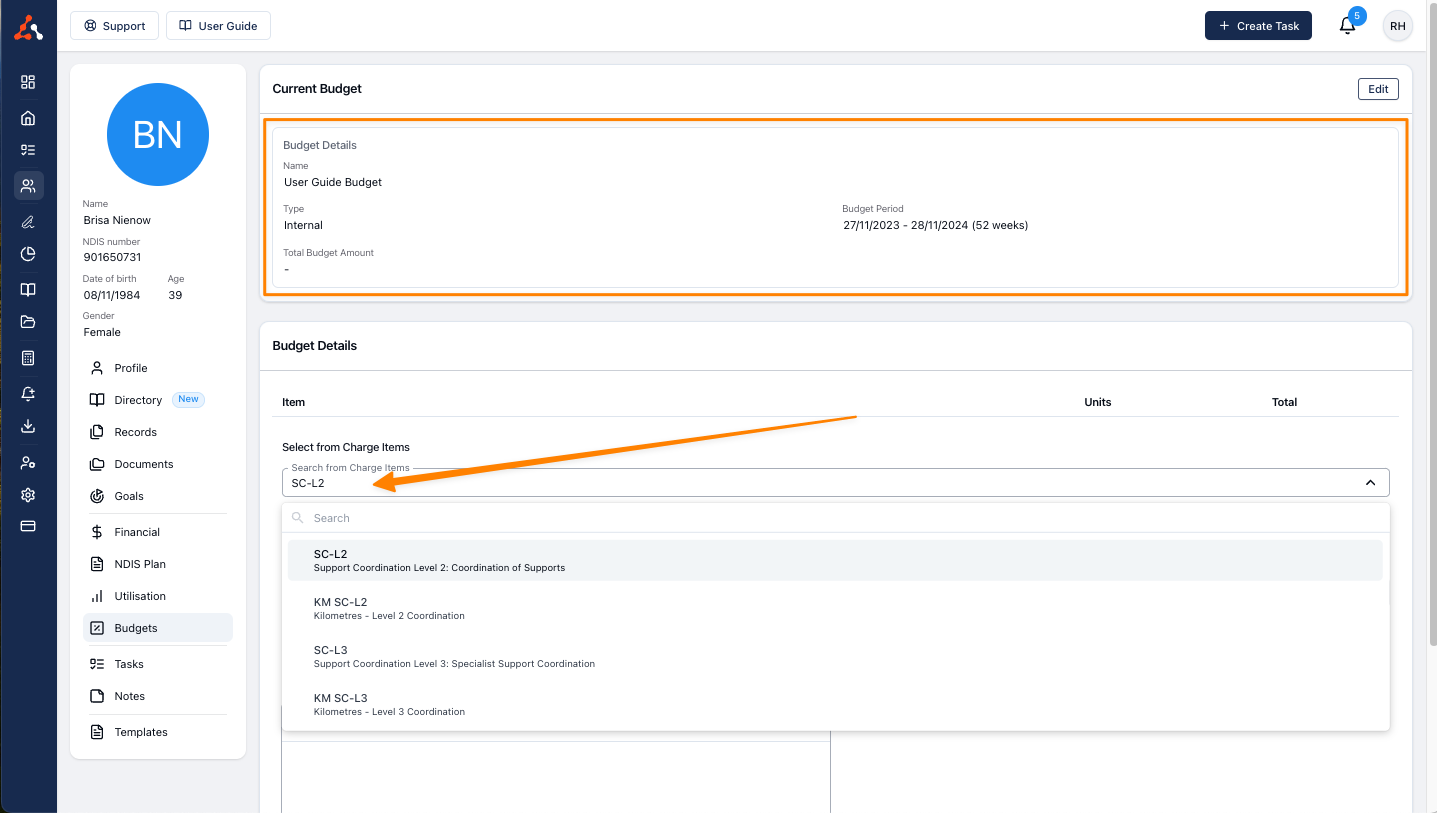
Enter the units and time period you would like to budget for the amount for the line item and add a description if needed.
Click Create to add the budget line item.
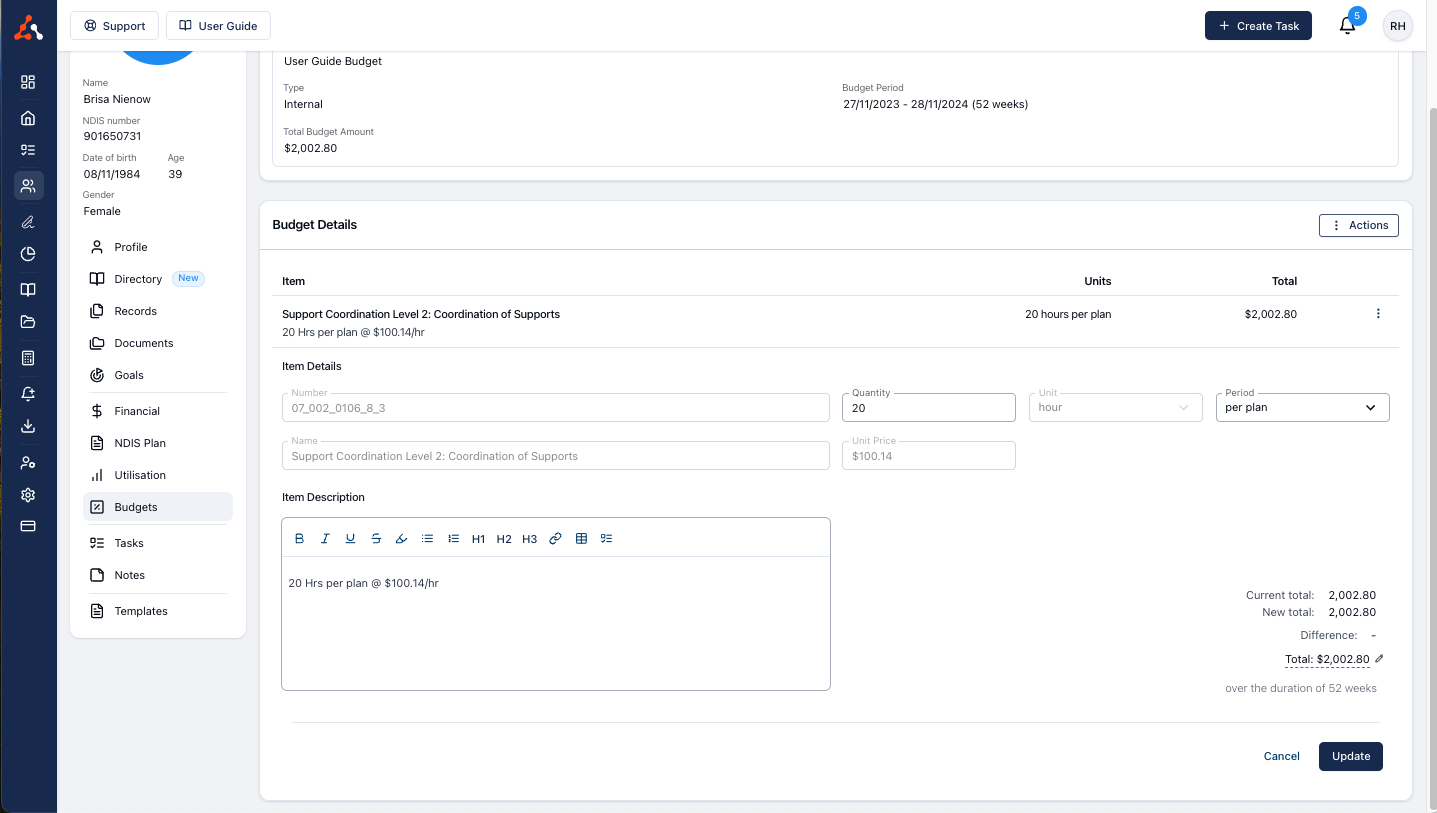
Repeat the process to add more budget items as needed.
To remove a budget item, click the three dots to the right and select Remove.
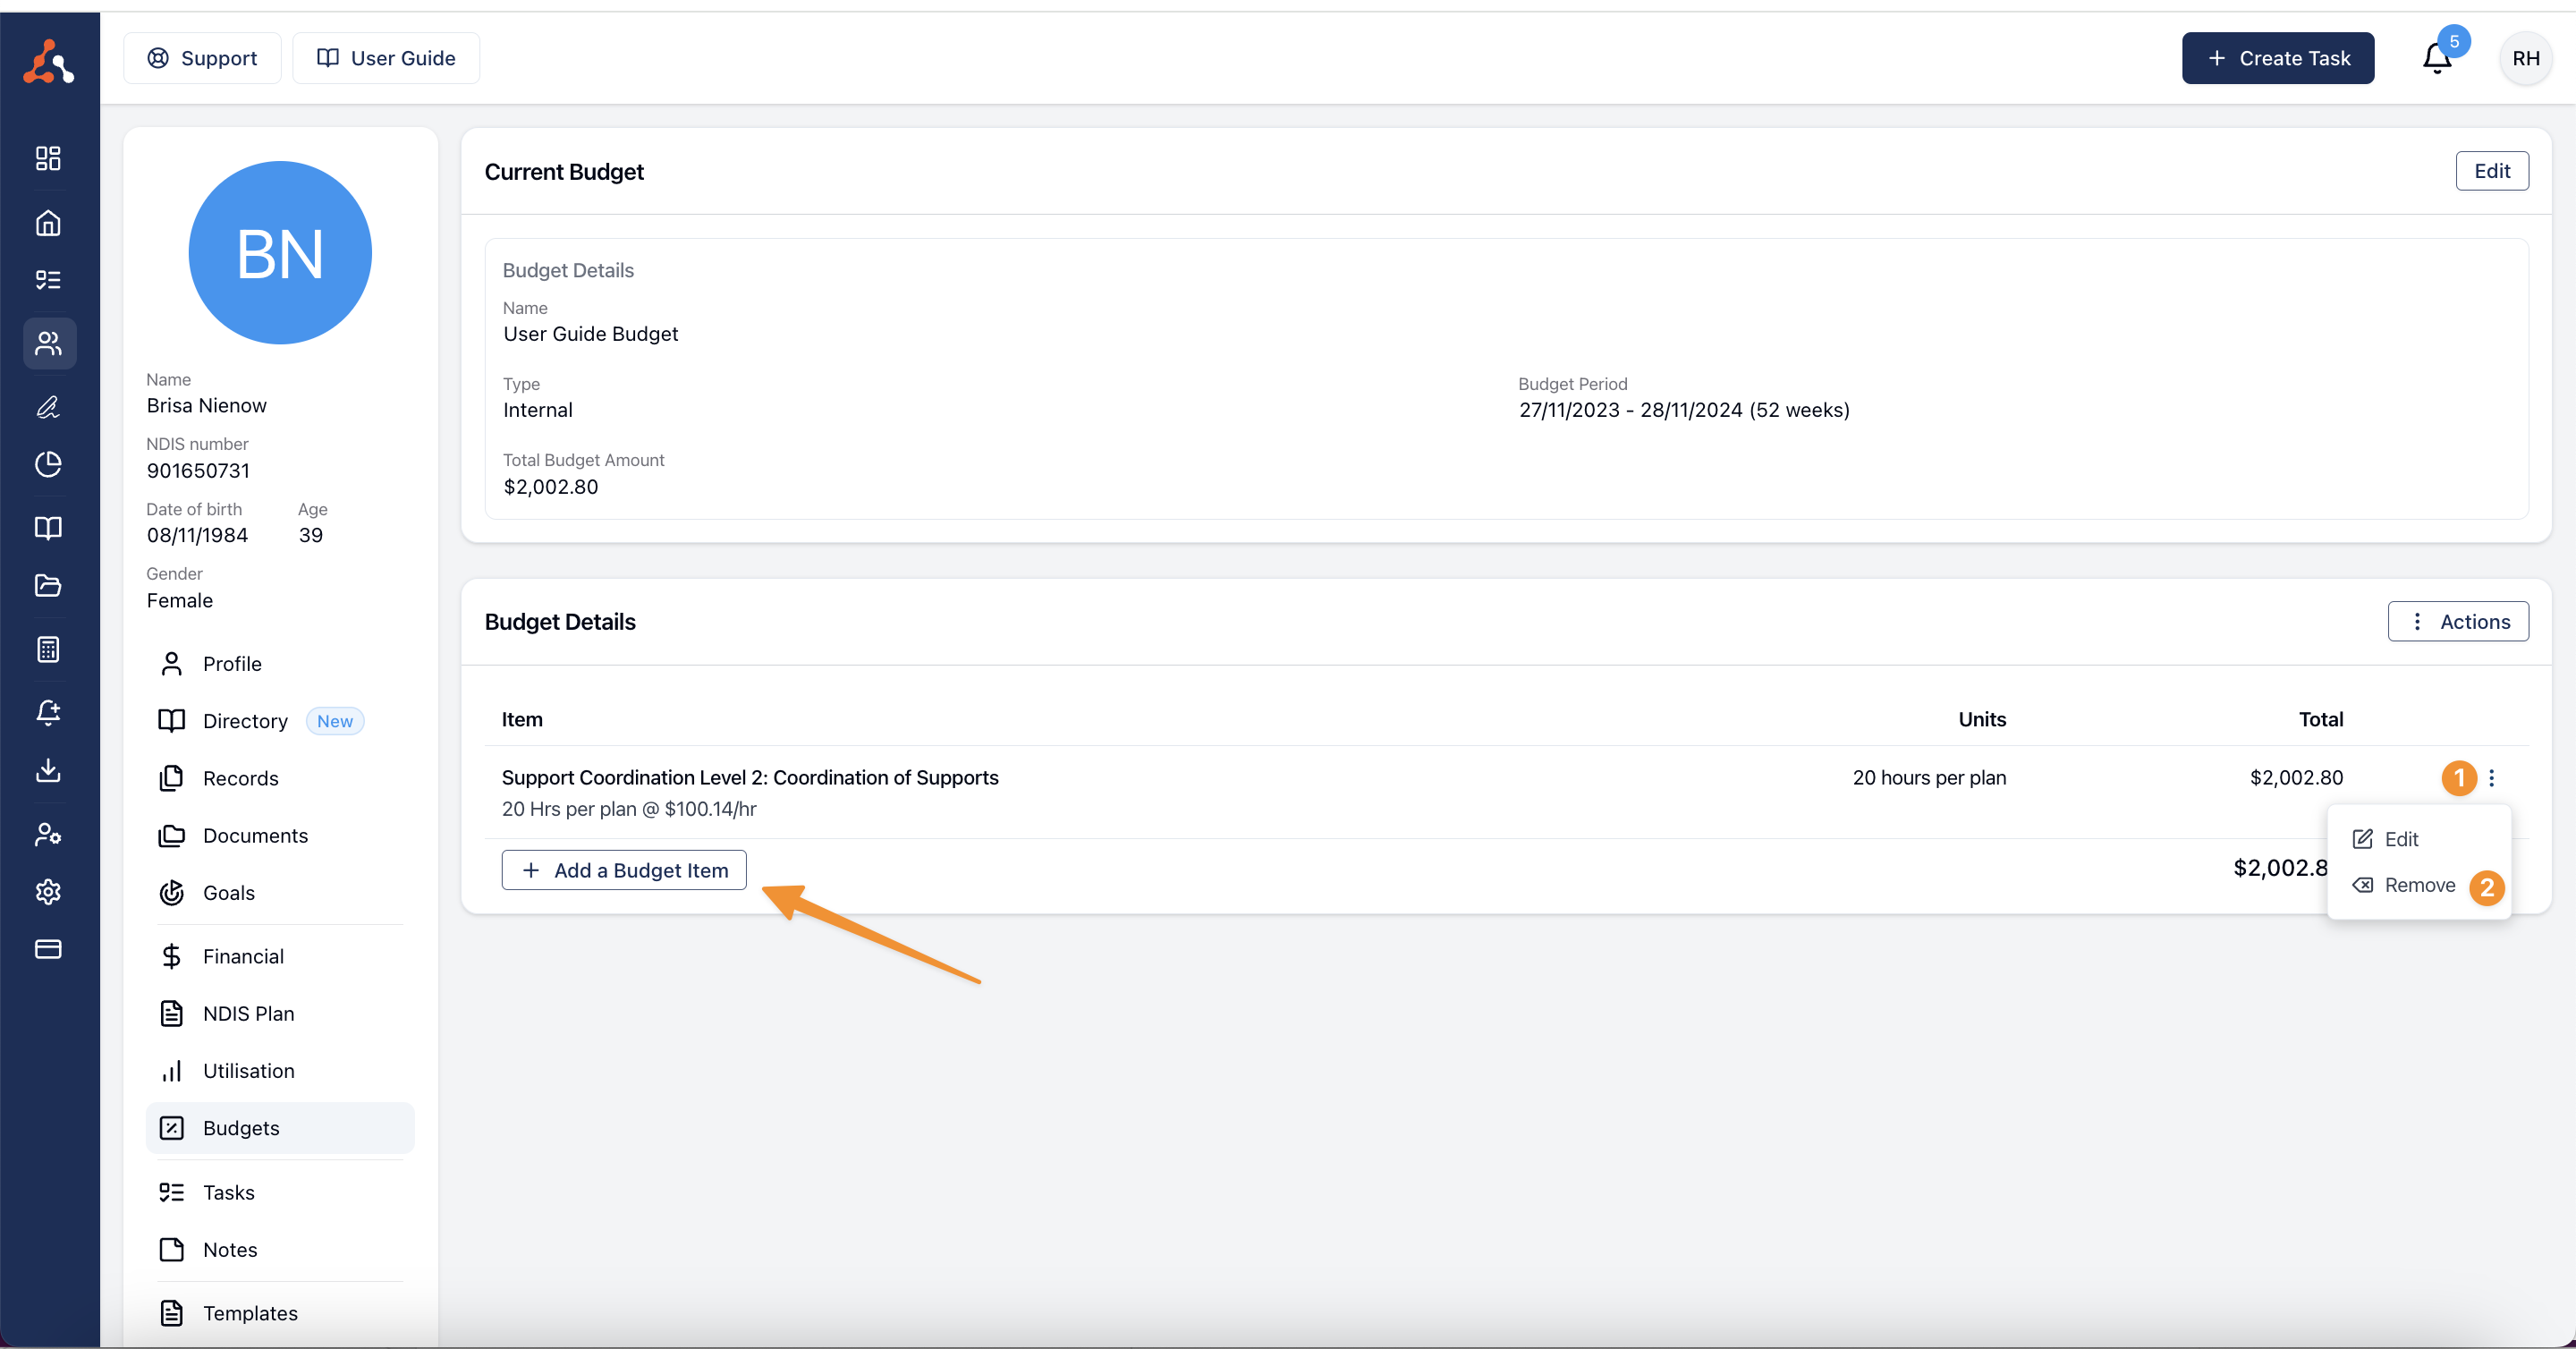
Once a budget is complete you can do one of 3 things you can;
Create a Service
Generate a Service Agreement
Export as PDF
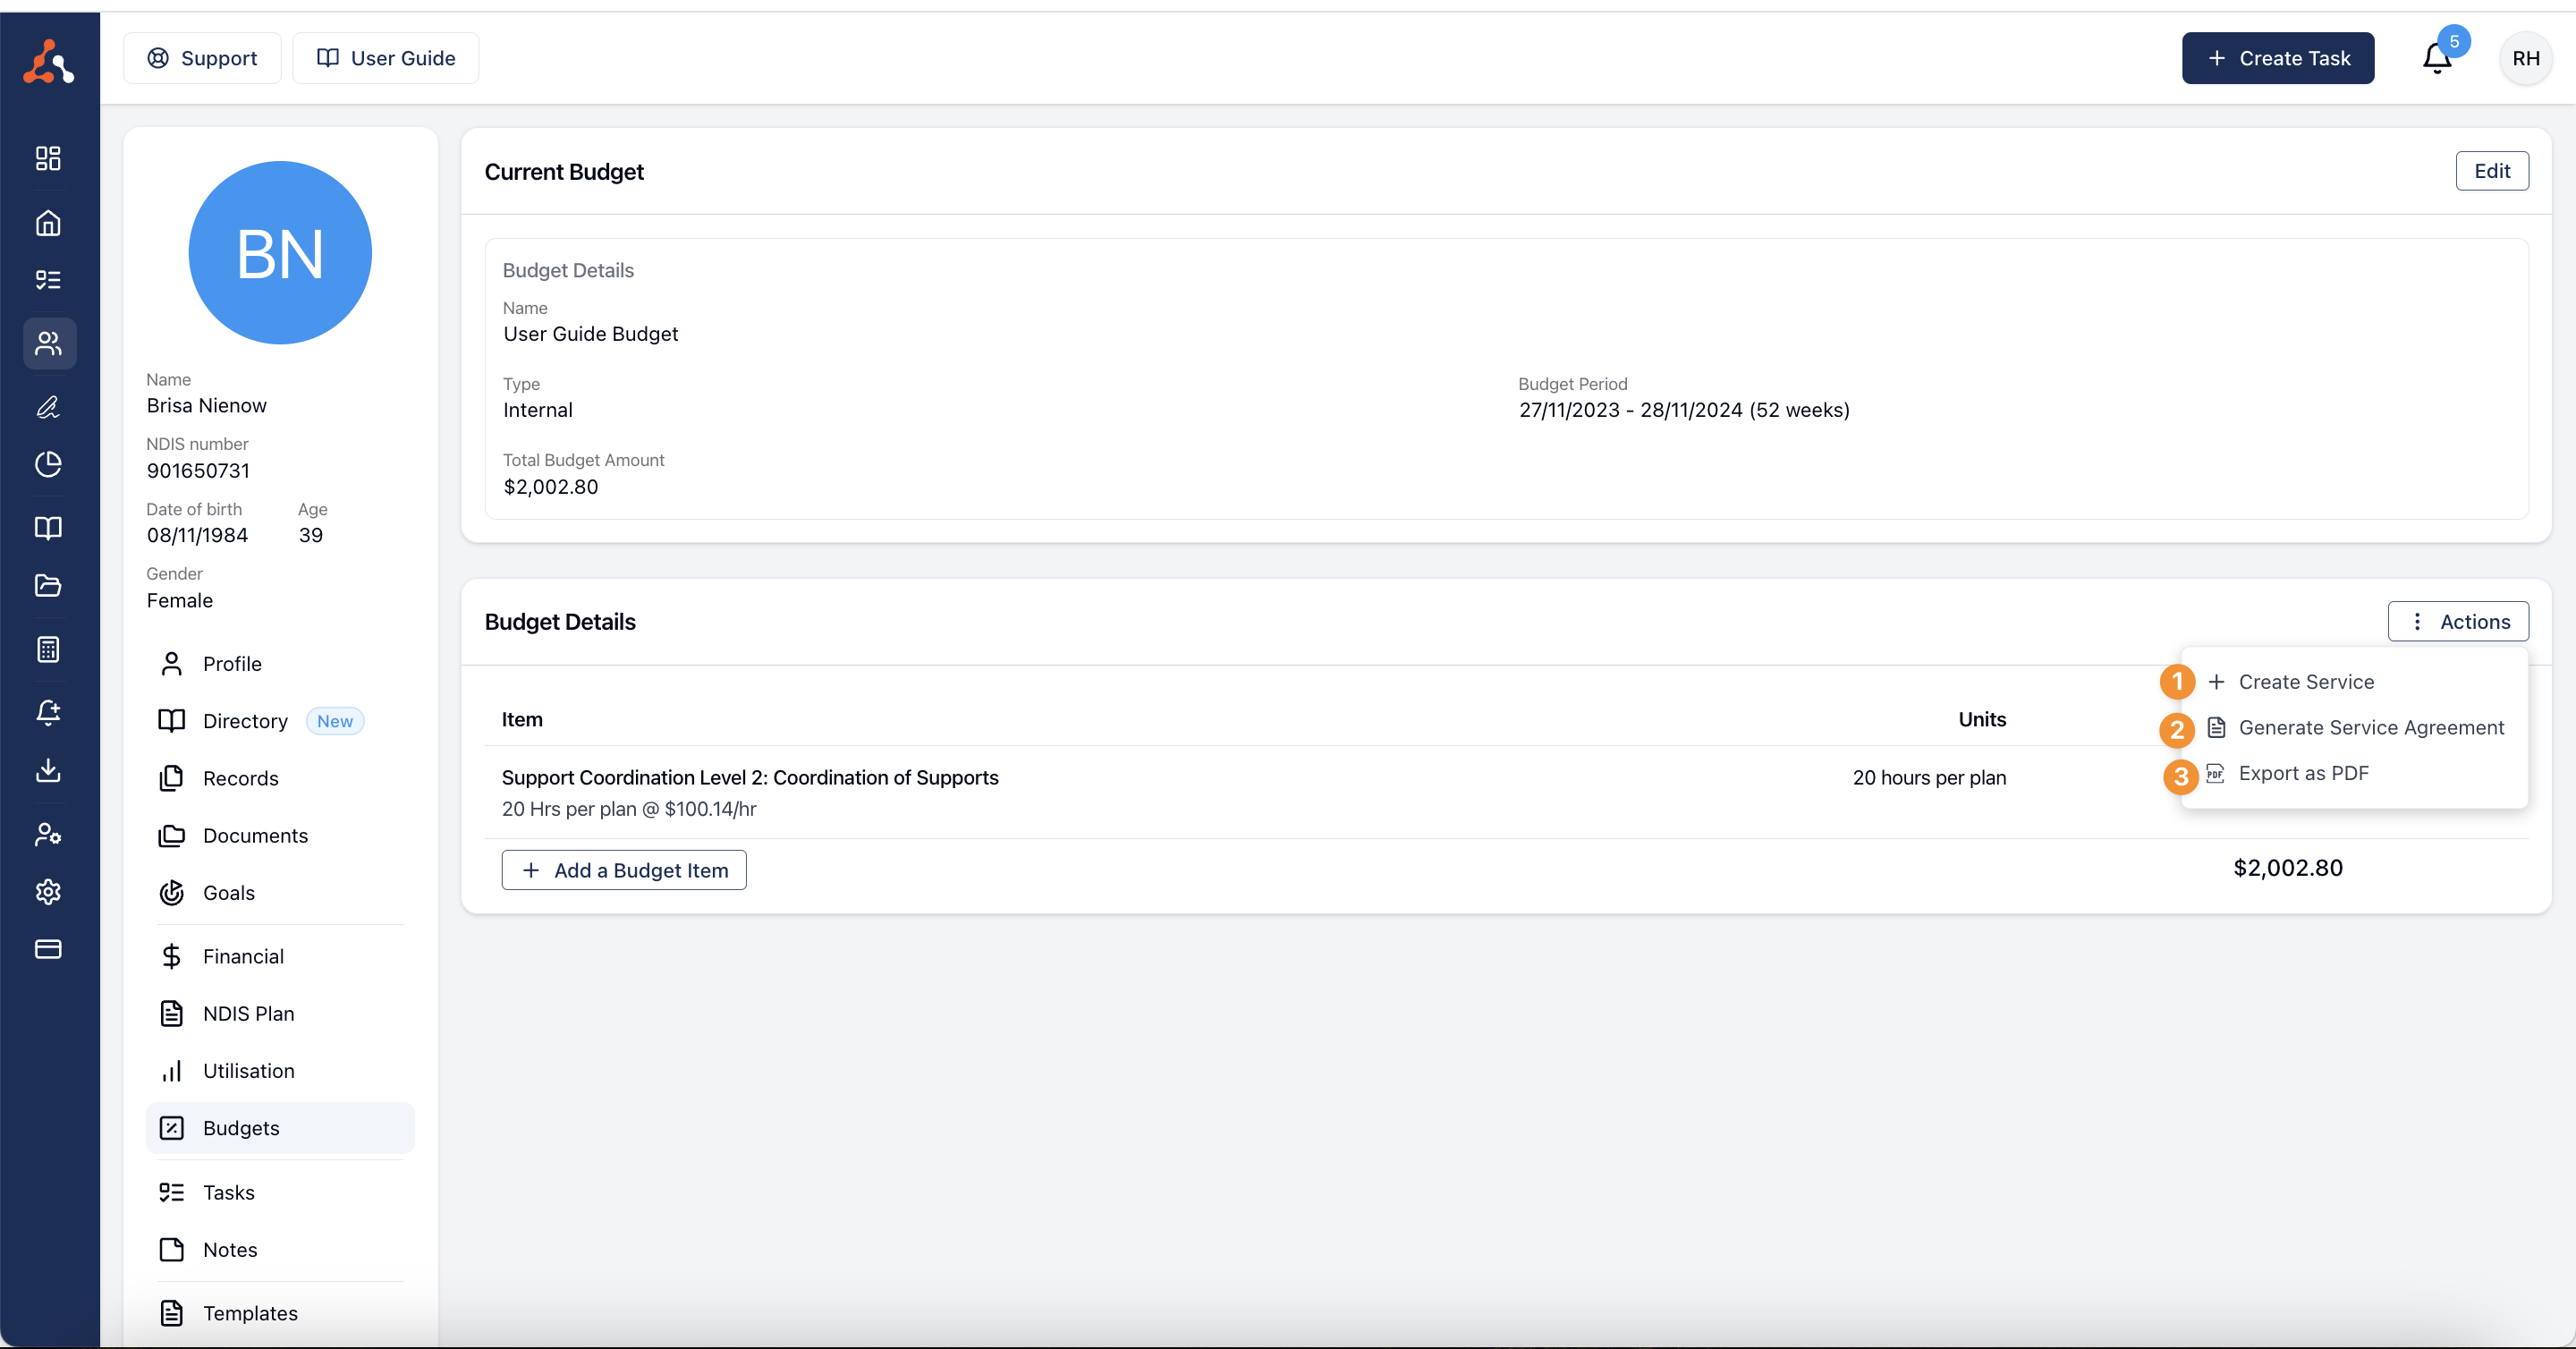
Export as PDF for a Quote
This option is best if you are looking to generate a quote to send to new participants or to external providers for your services.
Create a Service
This option will create a service using the budget data allowing you to bill this participant from Astalty using this budget. More on creating a service can be found through this link here. We have created a detailed walkthrough on the service creation process.
Generate a Service Agreement Using Astalty Templates
Once the budget is complete, you can create a service agreement.
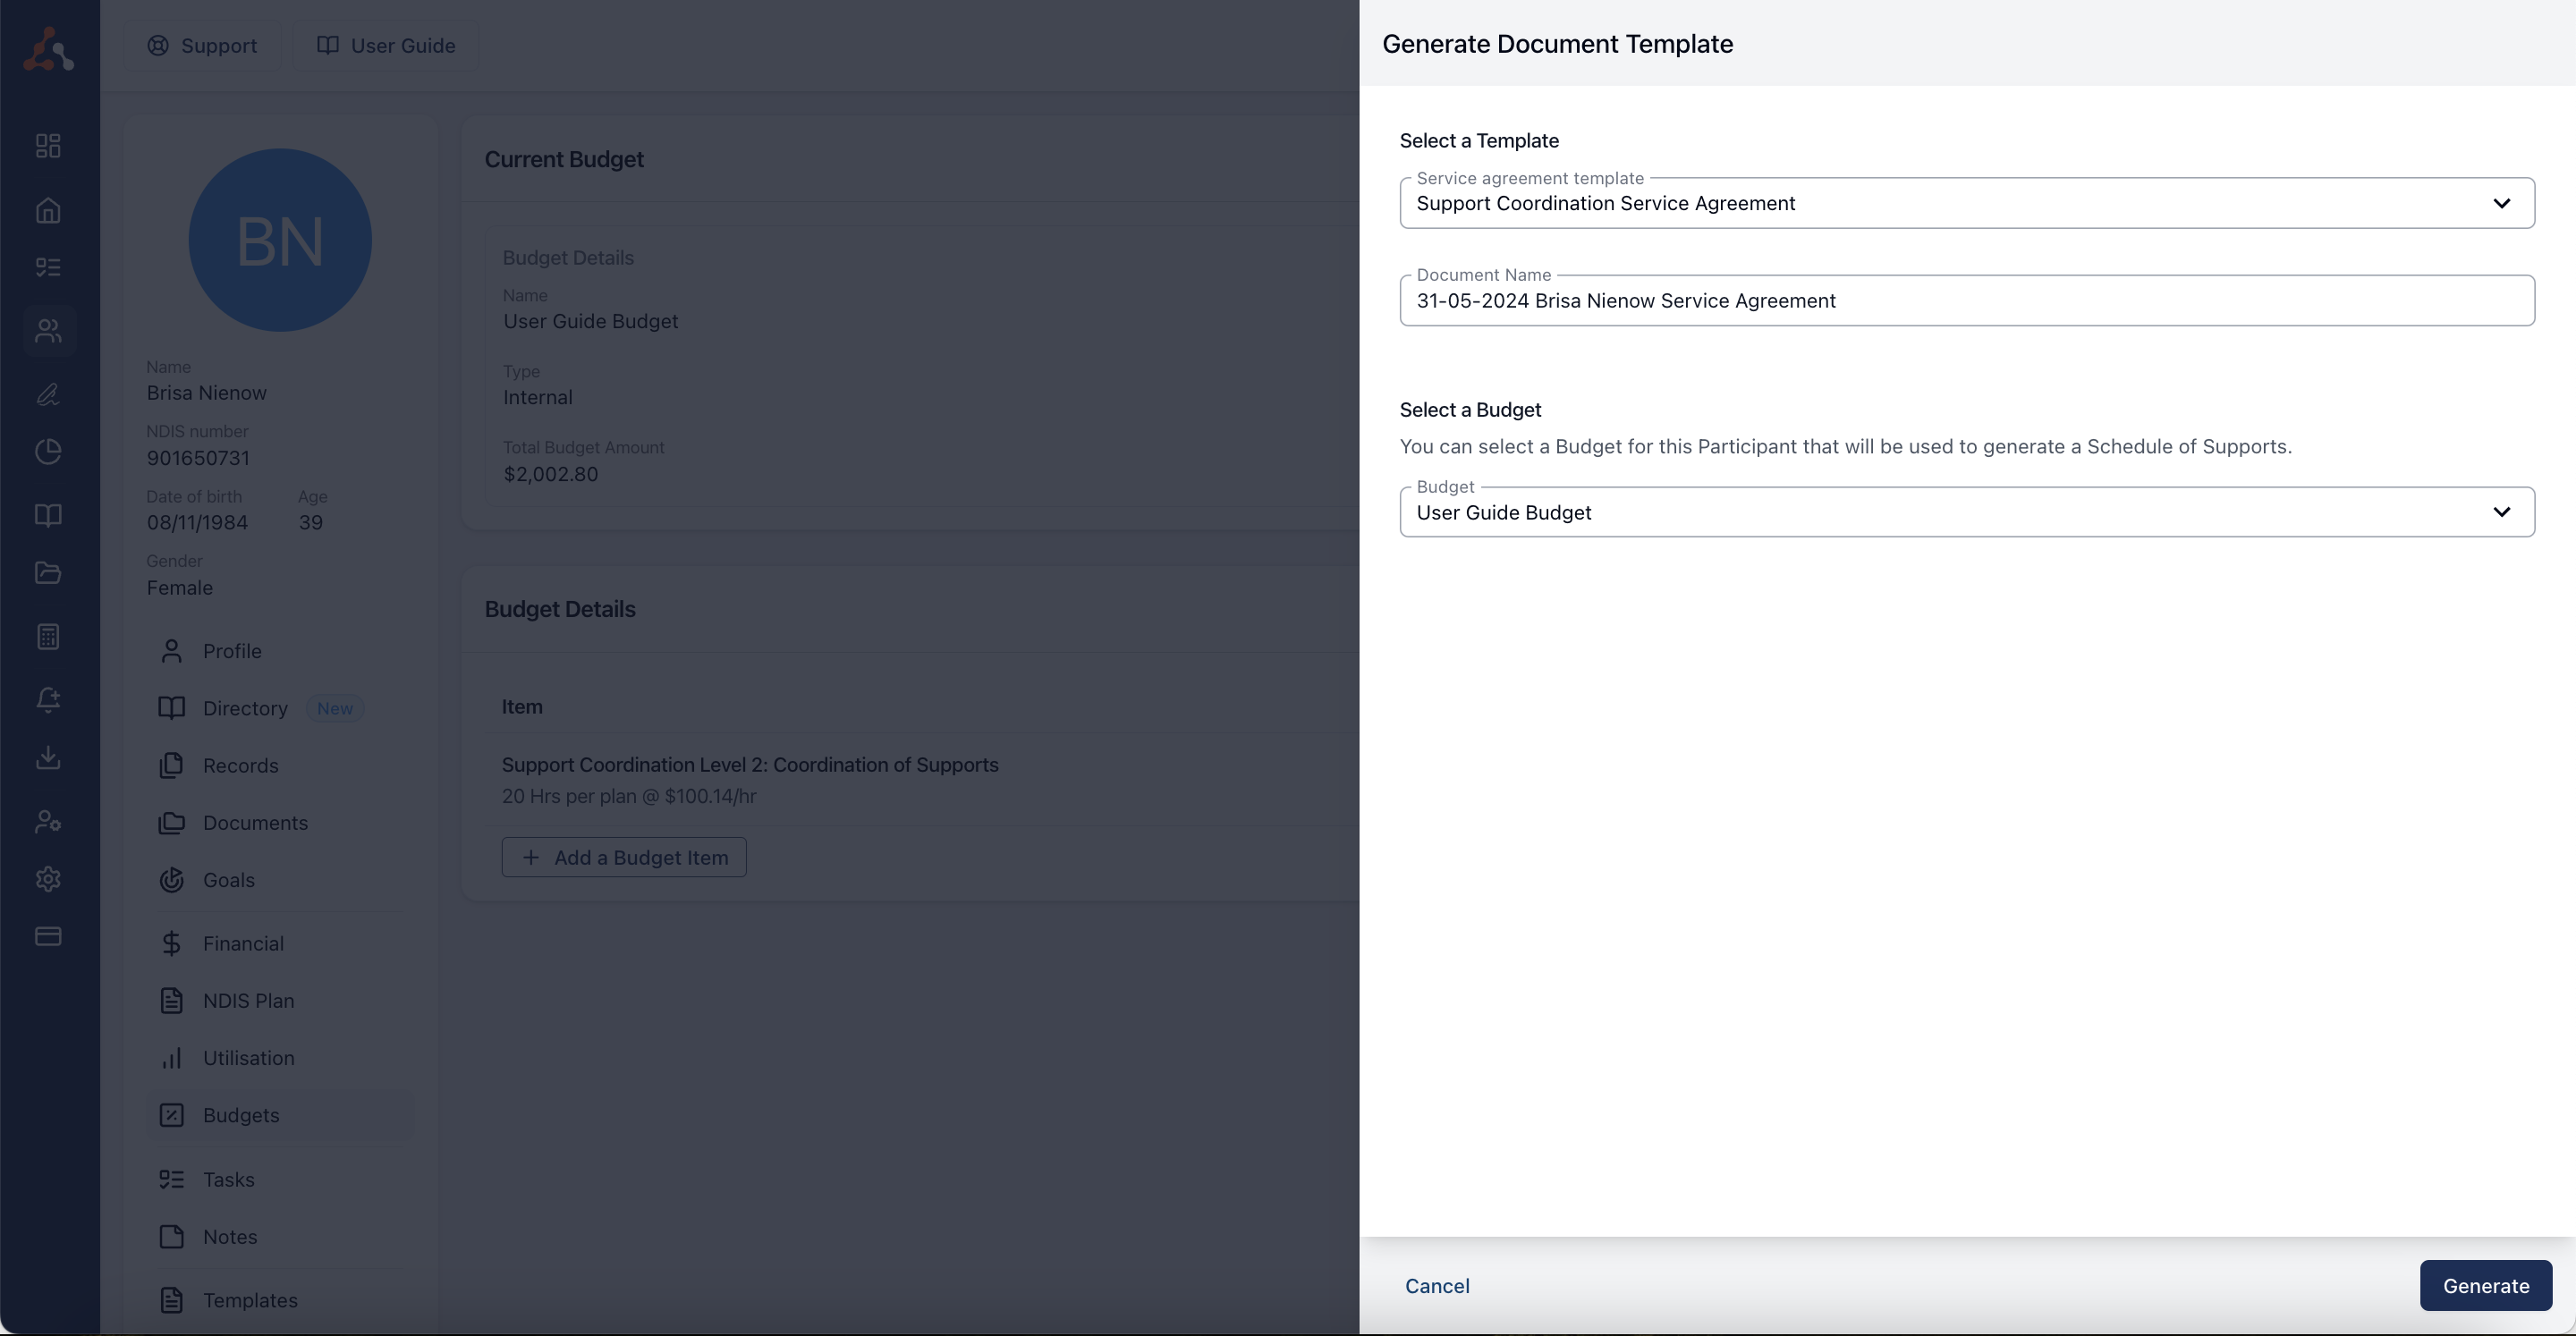
Click Generate Service Agreement.
Select a template. You can use an existing template within your organization or upload a Word document. Astalty recommends using the Astalty template with placeholders for dynamic information.
Select the budget you just created. You can also include past budgets in this section if needed.
Click Generate to create the service agreement draft.
Edit and Finalise the Service Agreement
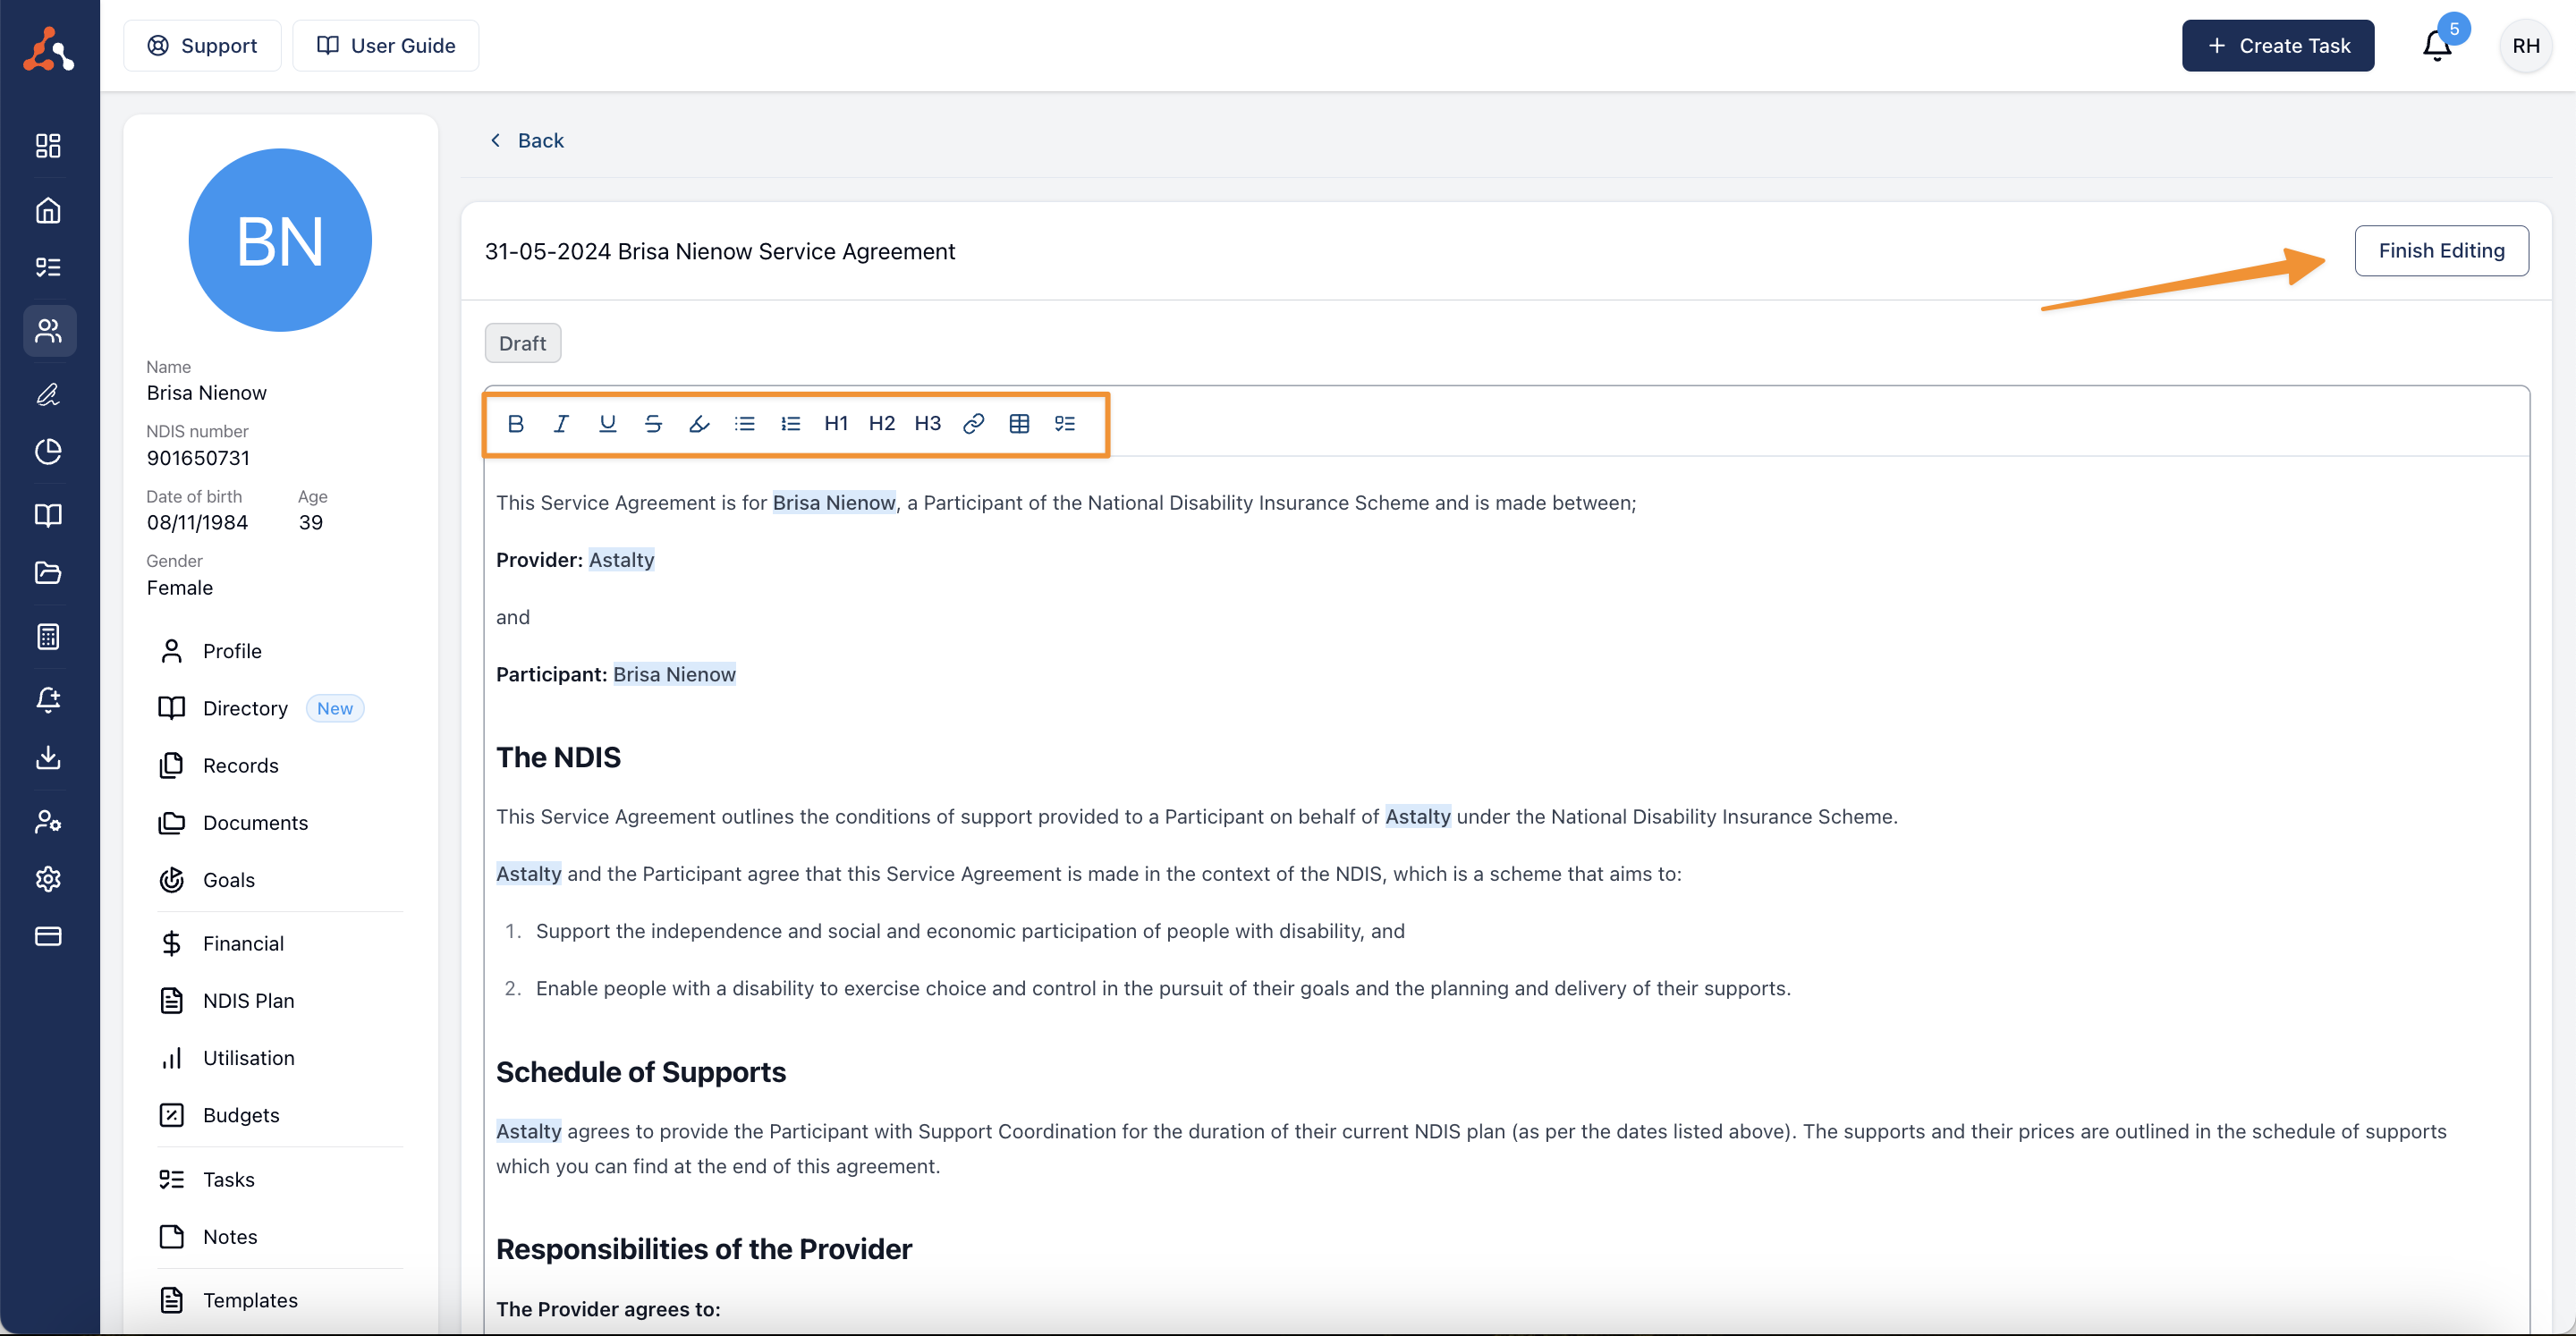
Once a service agreement is generated you will see the following screen. This screen is fully customisable document, meaning that you can delete or add information, update clauses, and make other modifications. Customise the service agreement as needed.
Click Finish Editing when you are done.
Click Finalise to create the document.
The Schedule of Supports placeholder pulls the data entered into the Budget into the Service Agreement and is displayed in a table format, including the Item Description, Details (frequency), Unit Amount, and Total.

Sending for Signature
Choose whether to download the service agreement for in-person signing or create a record for e-signature.
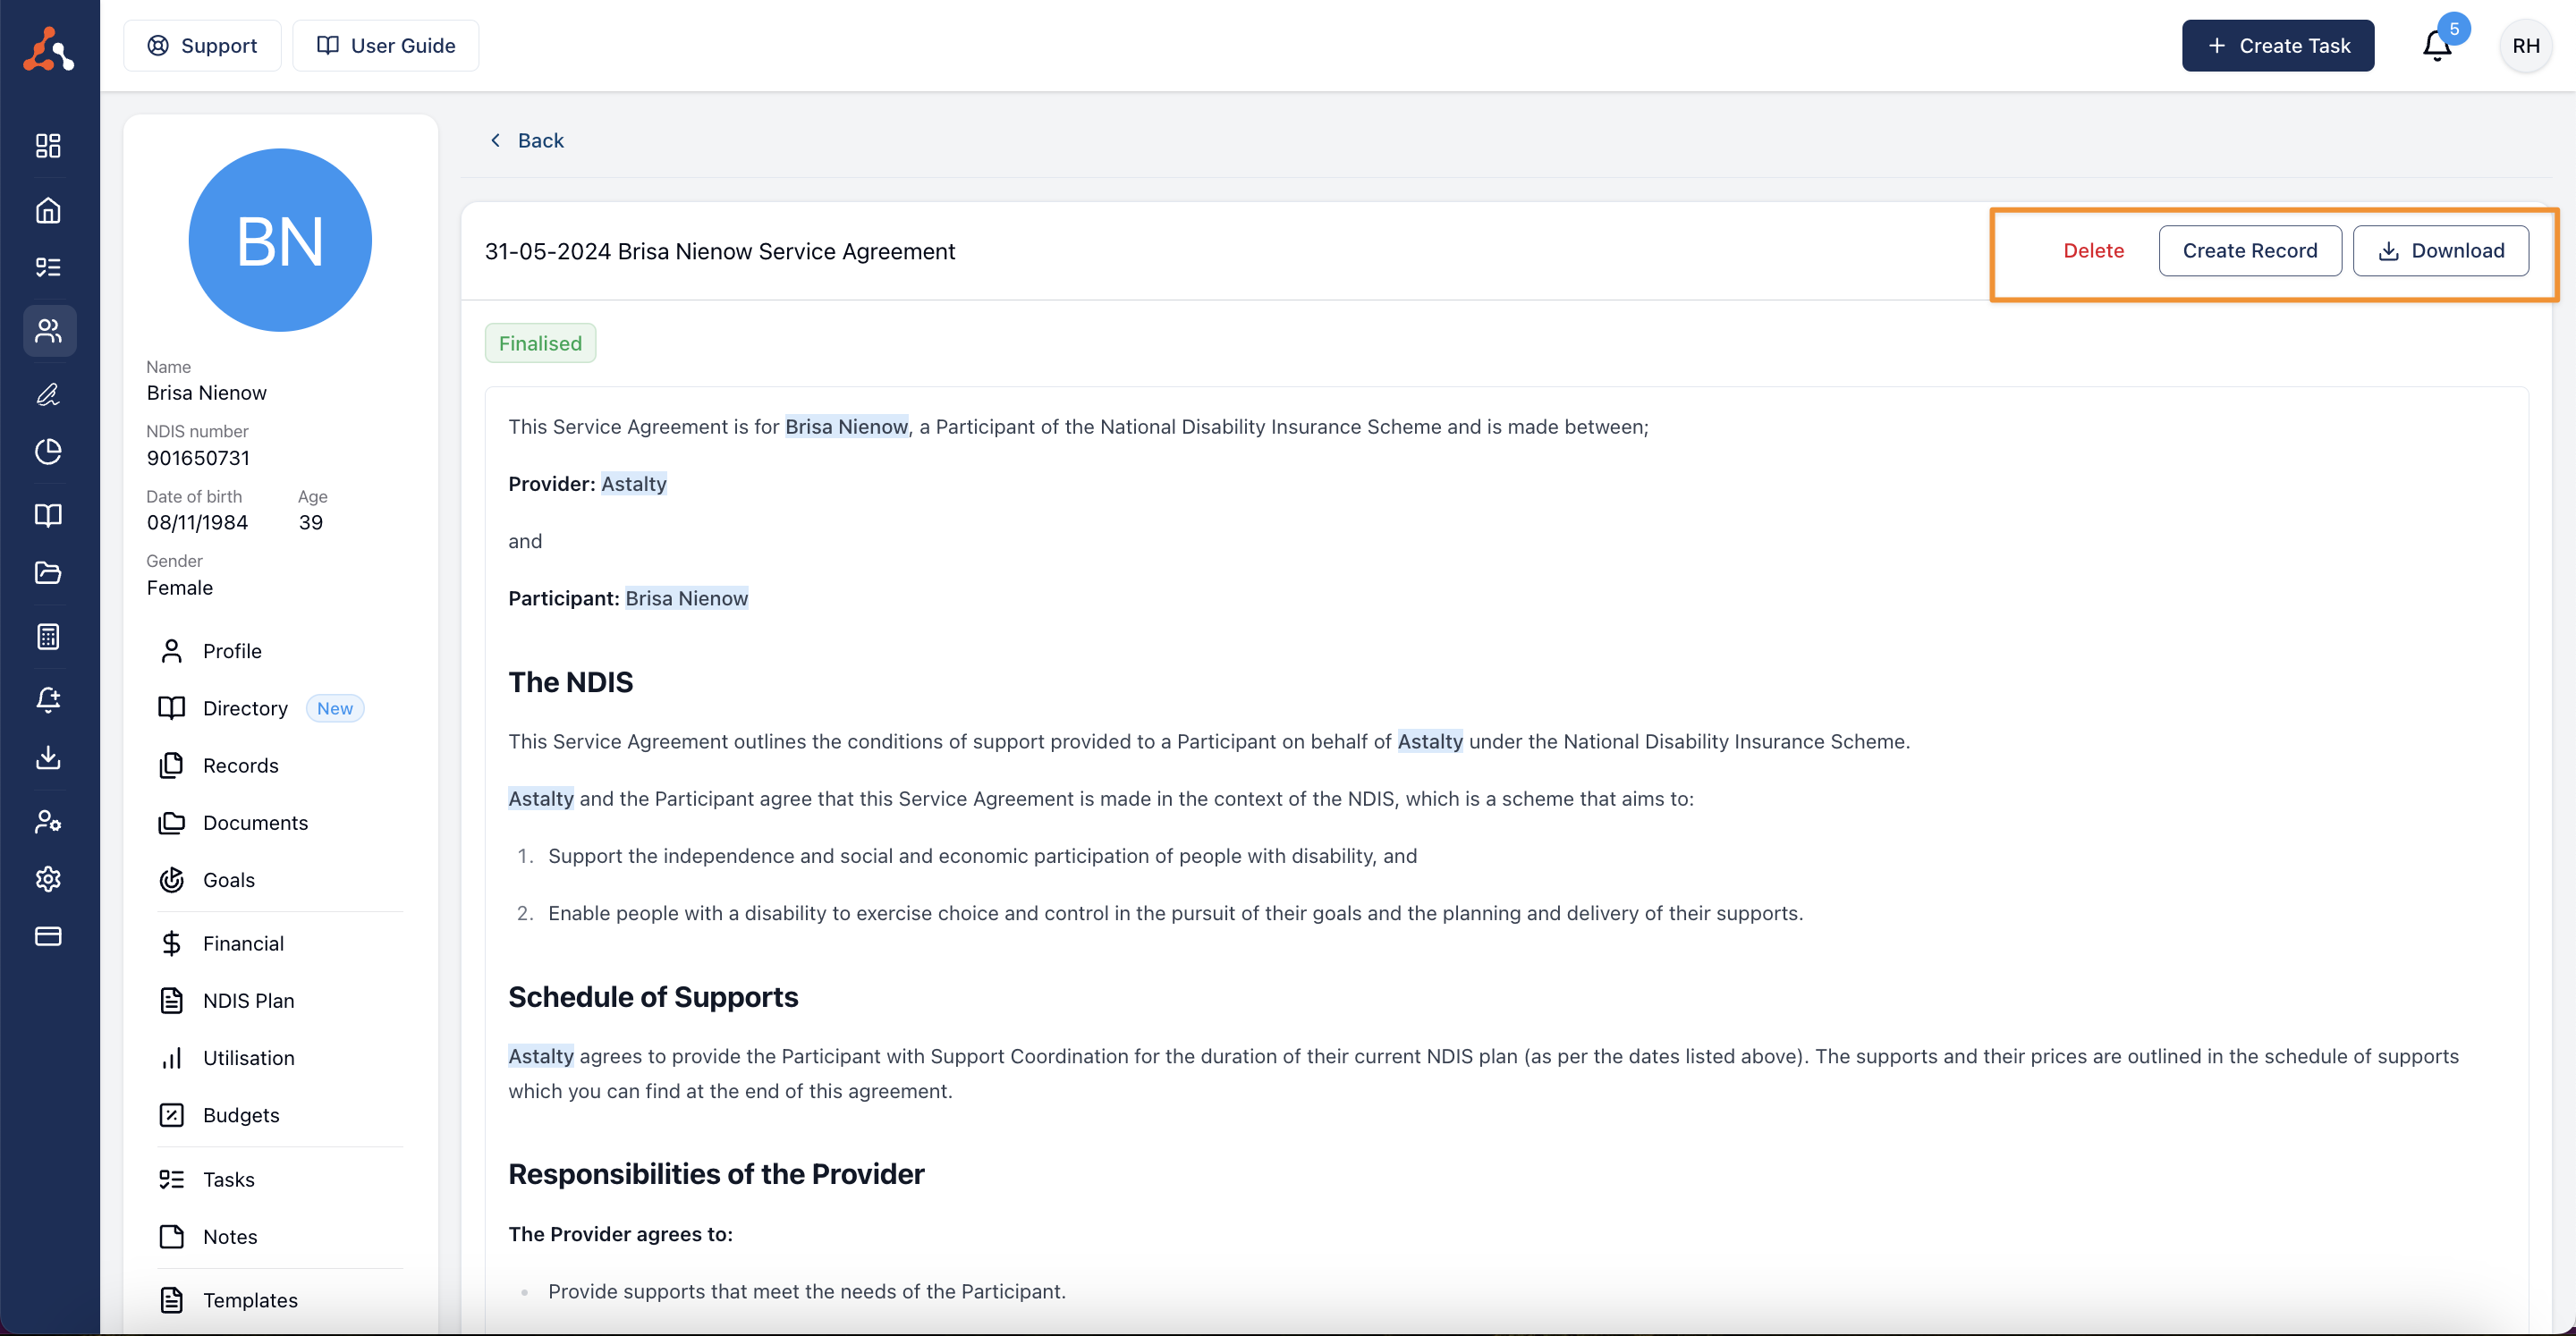
If you choose to create a record, you can add descriptions, reference numbers, and expiry dates.
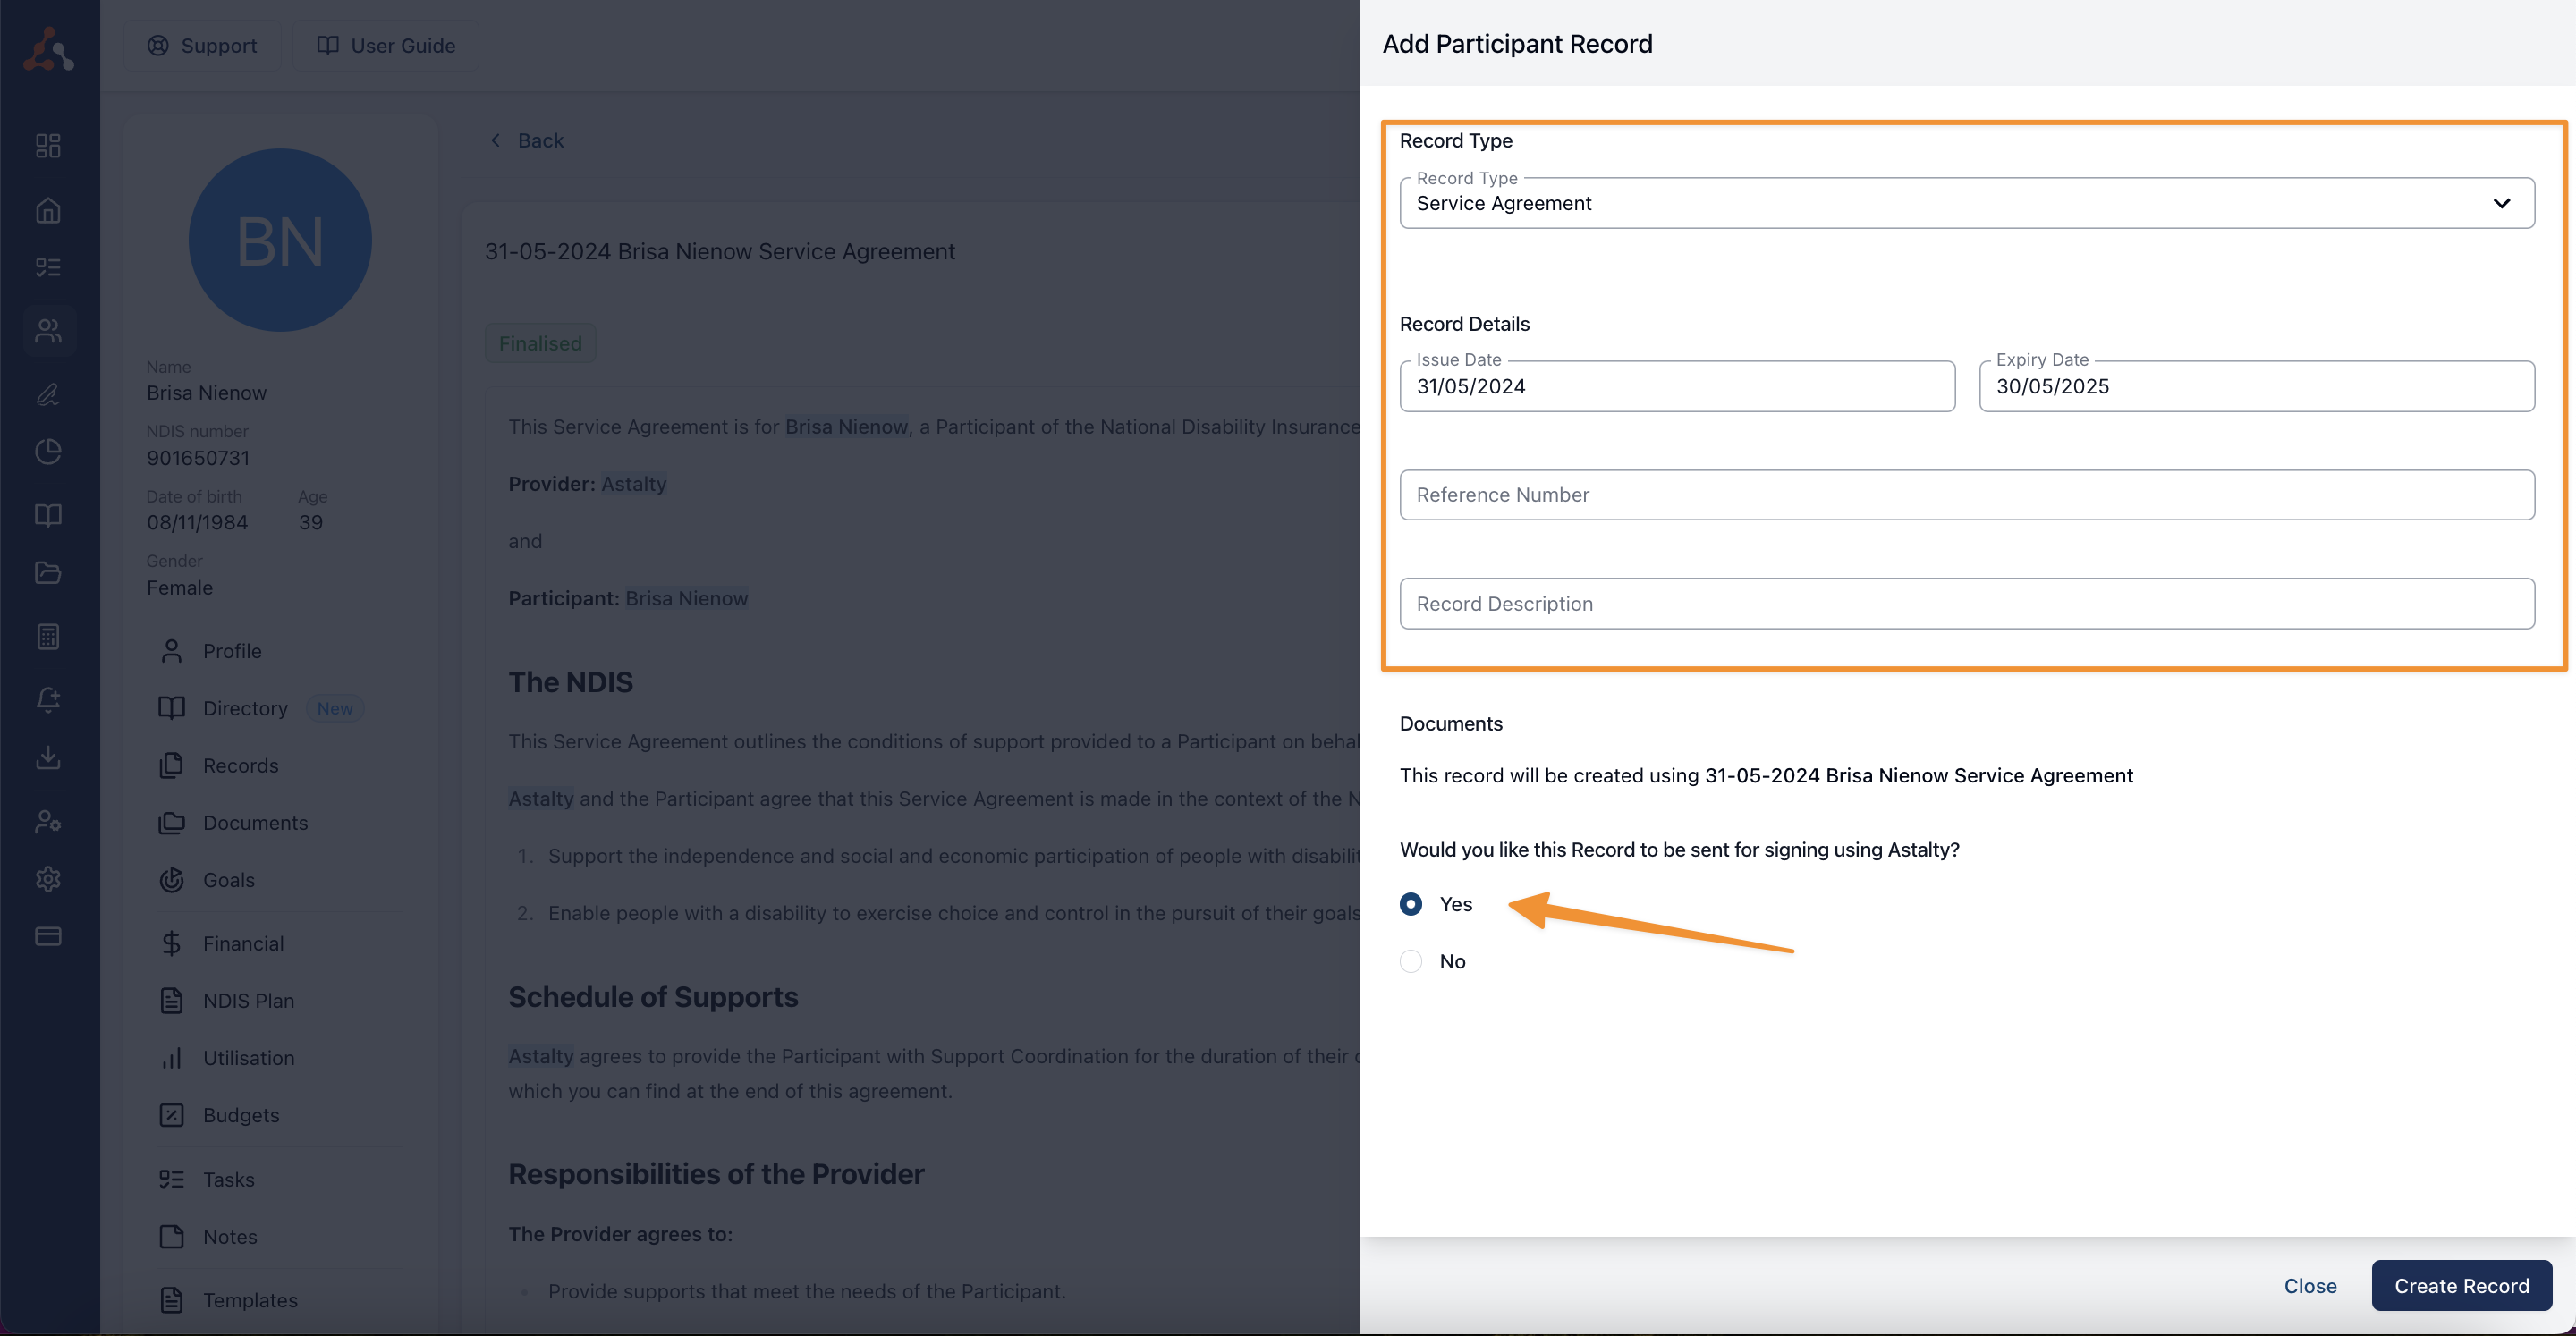
Select Yes for signing to initiate the e-signature process.
The Dropbox e-signature functionality will appear. Pre-populated signer information will be shown, but you can add or modify as needed.
Add a message for the email request, specifying the signing deadline.
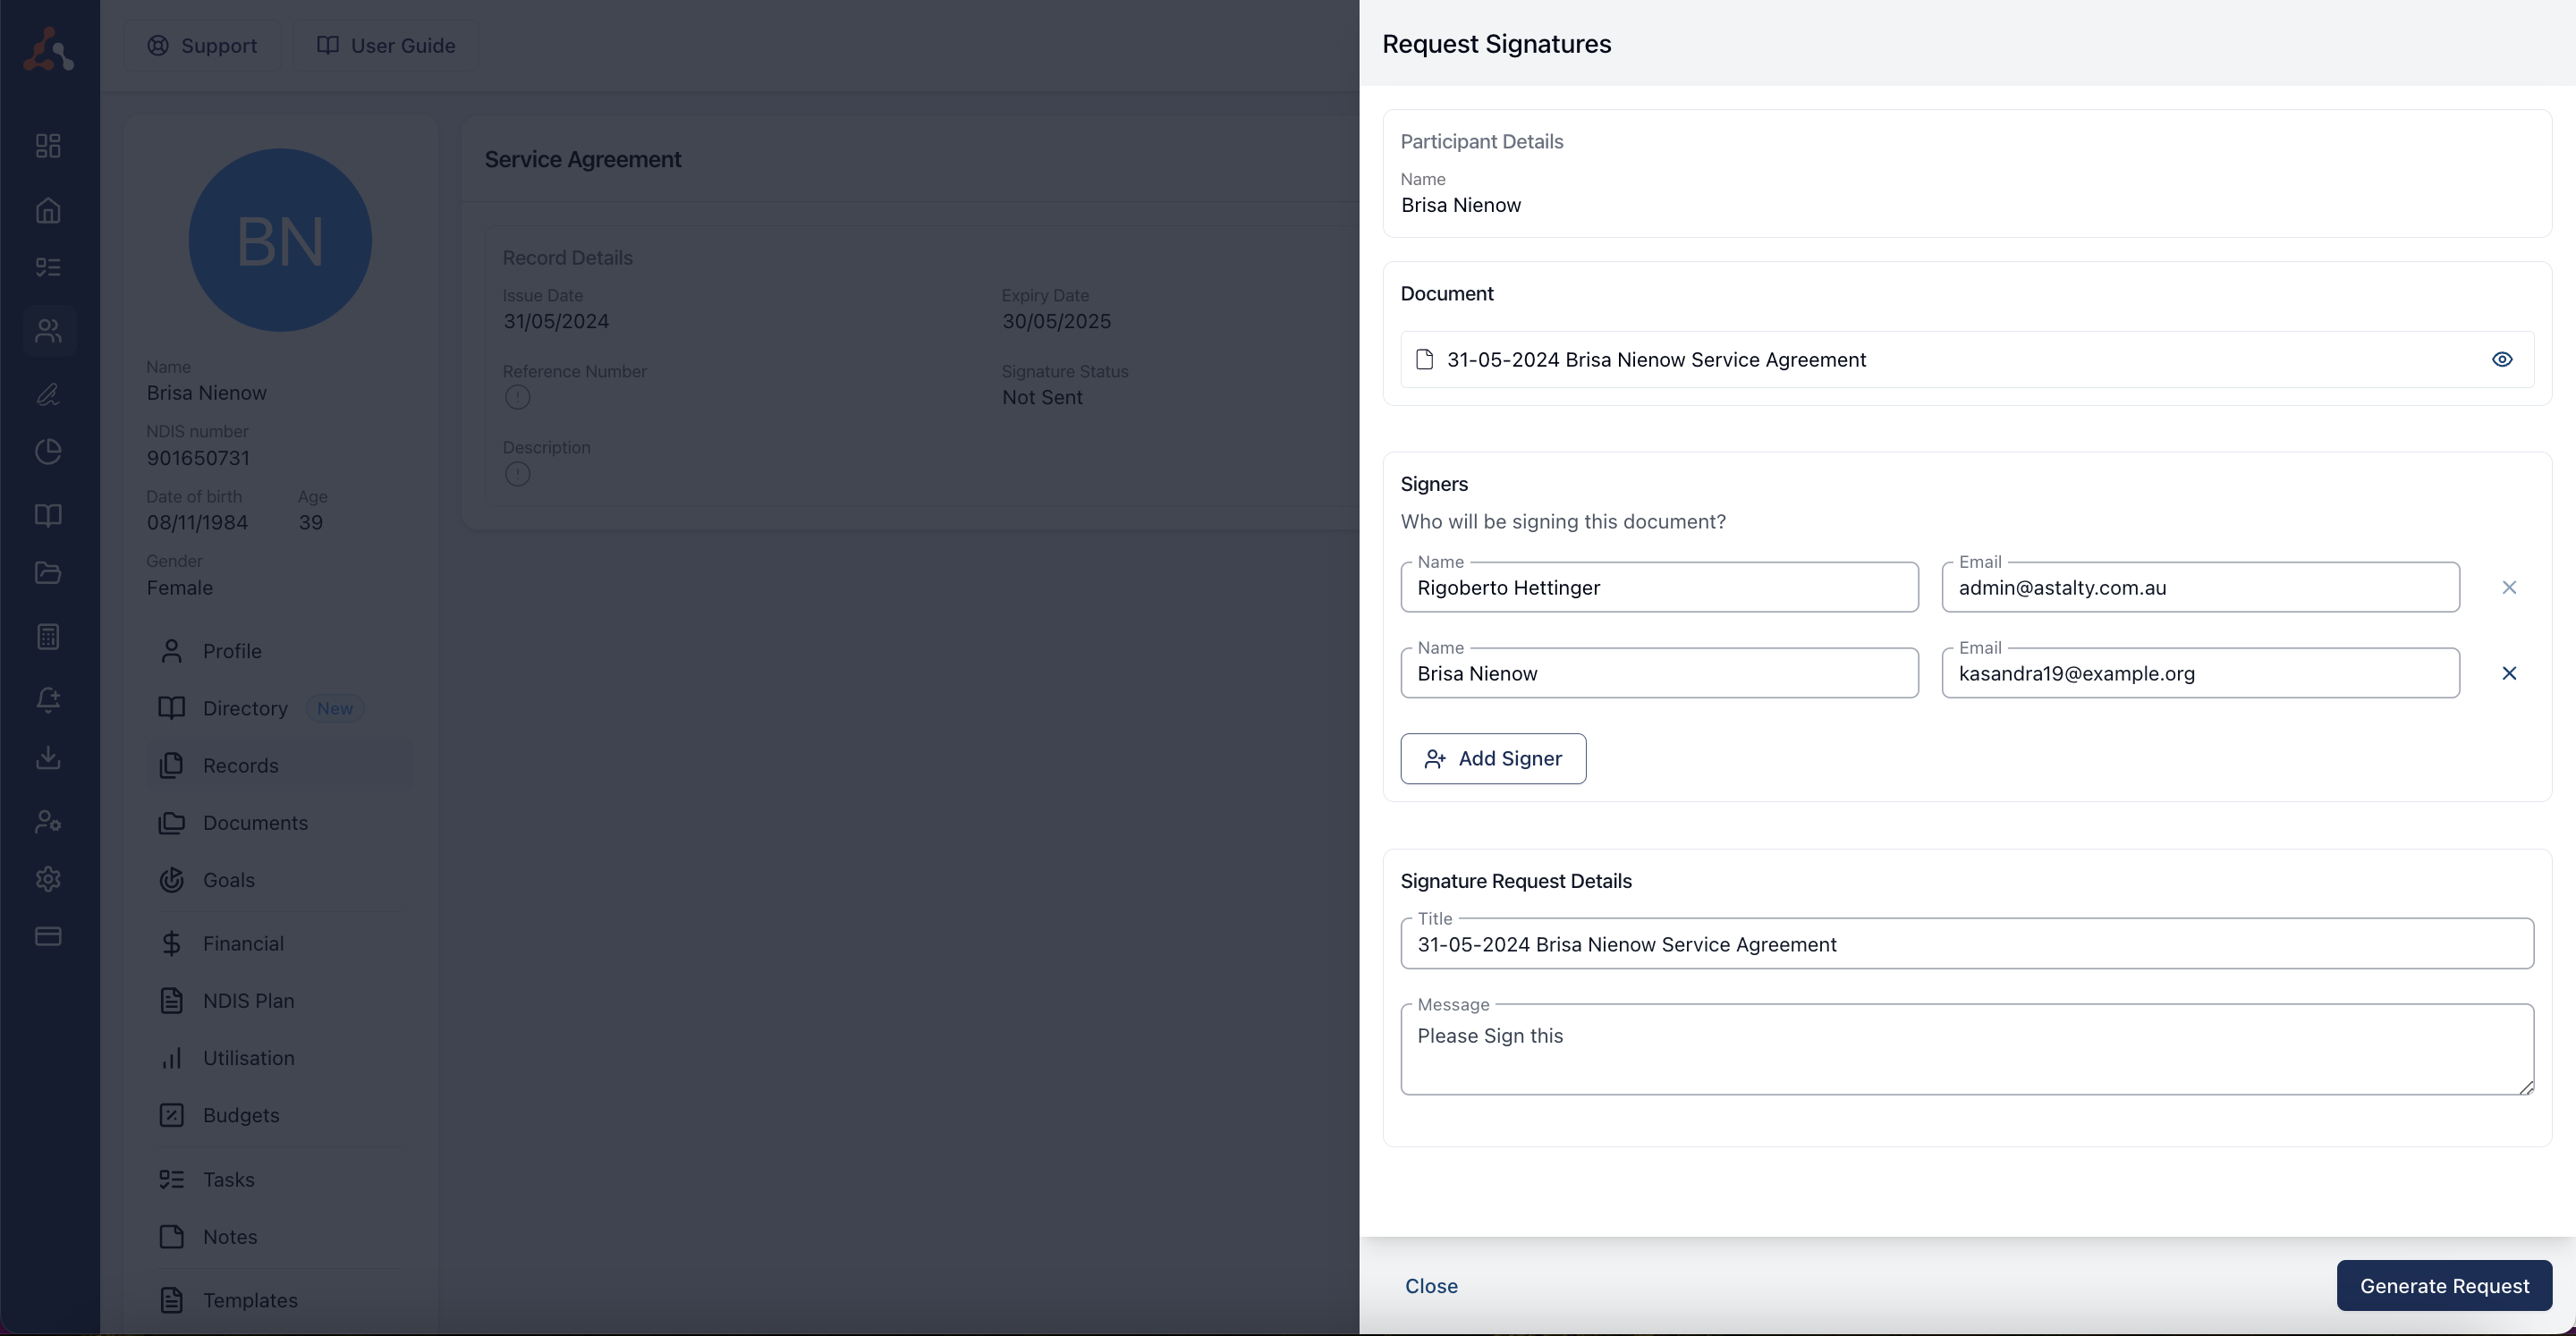
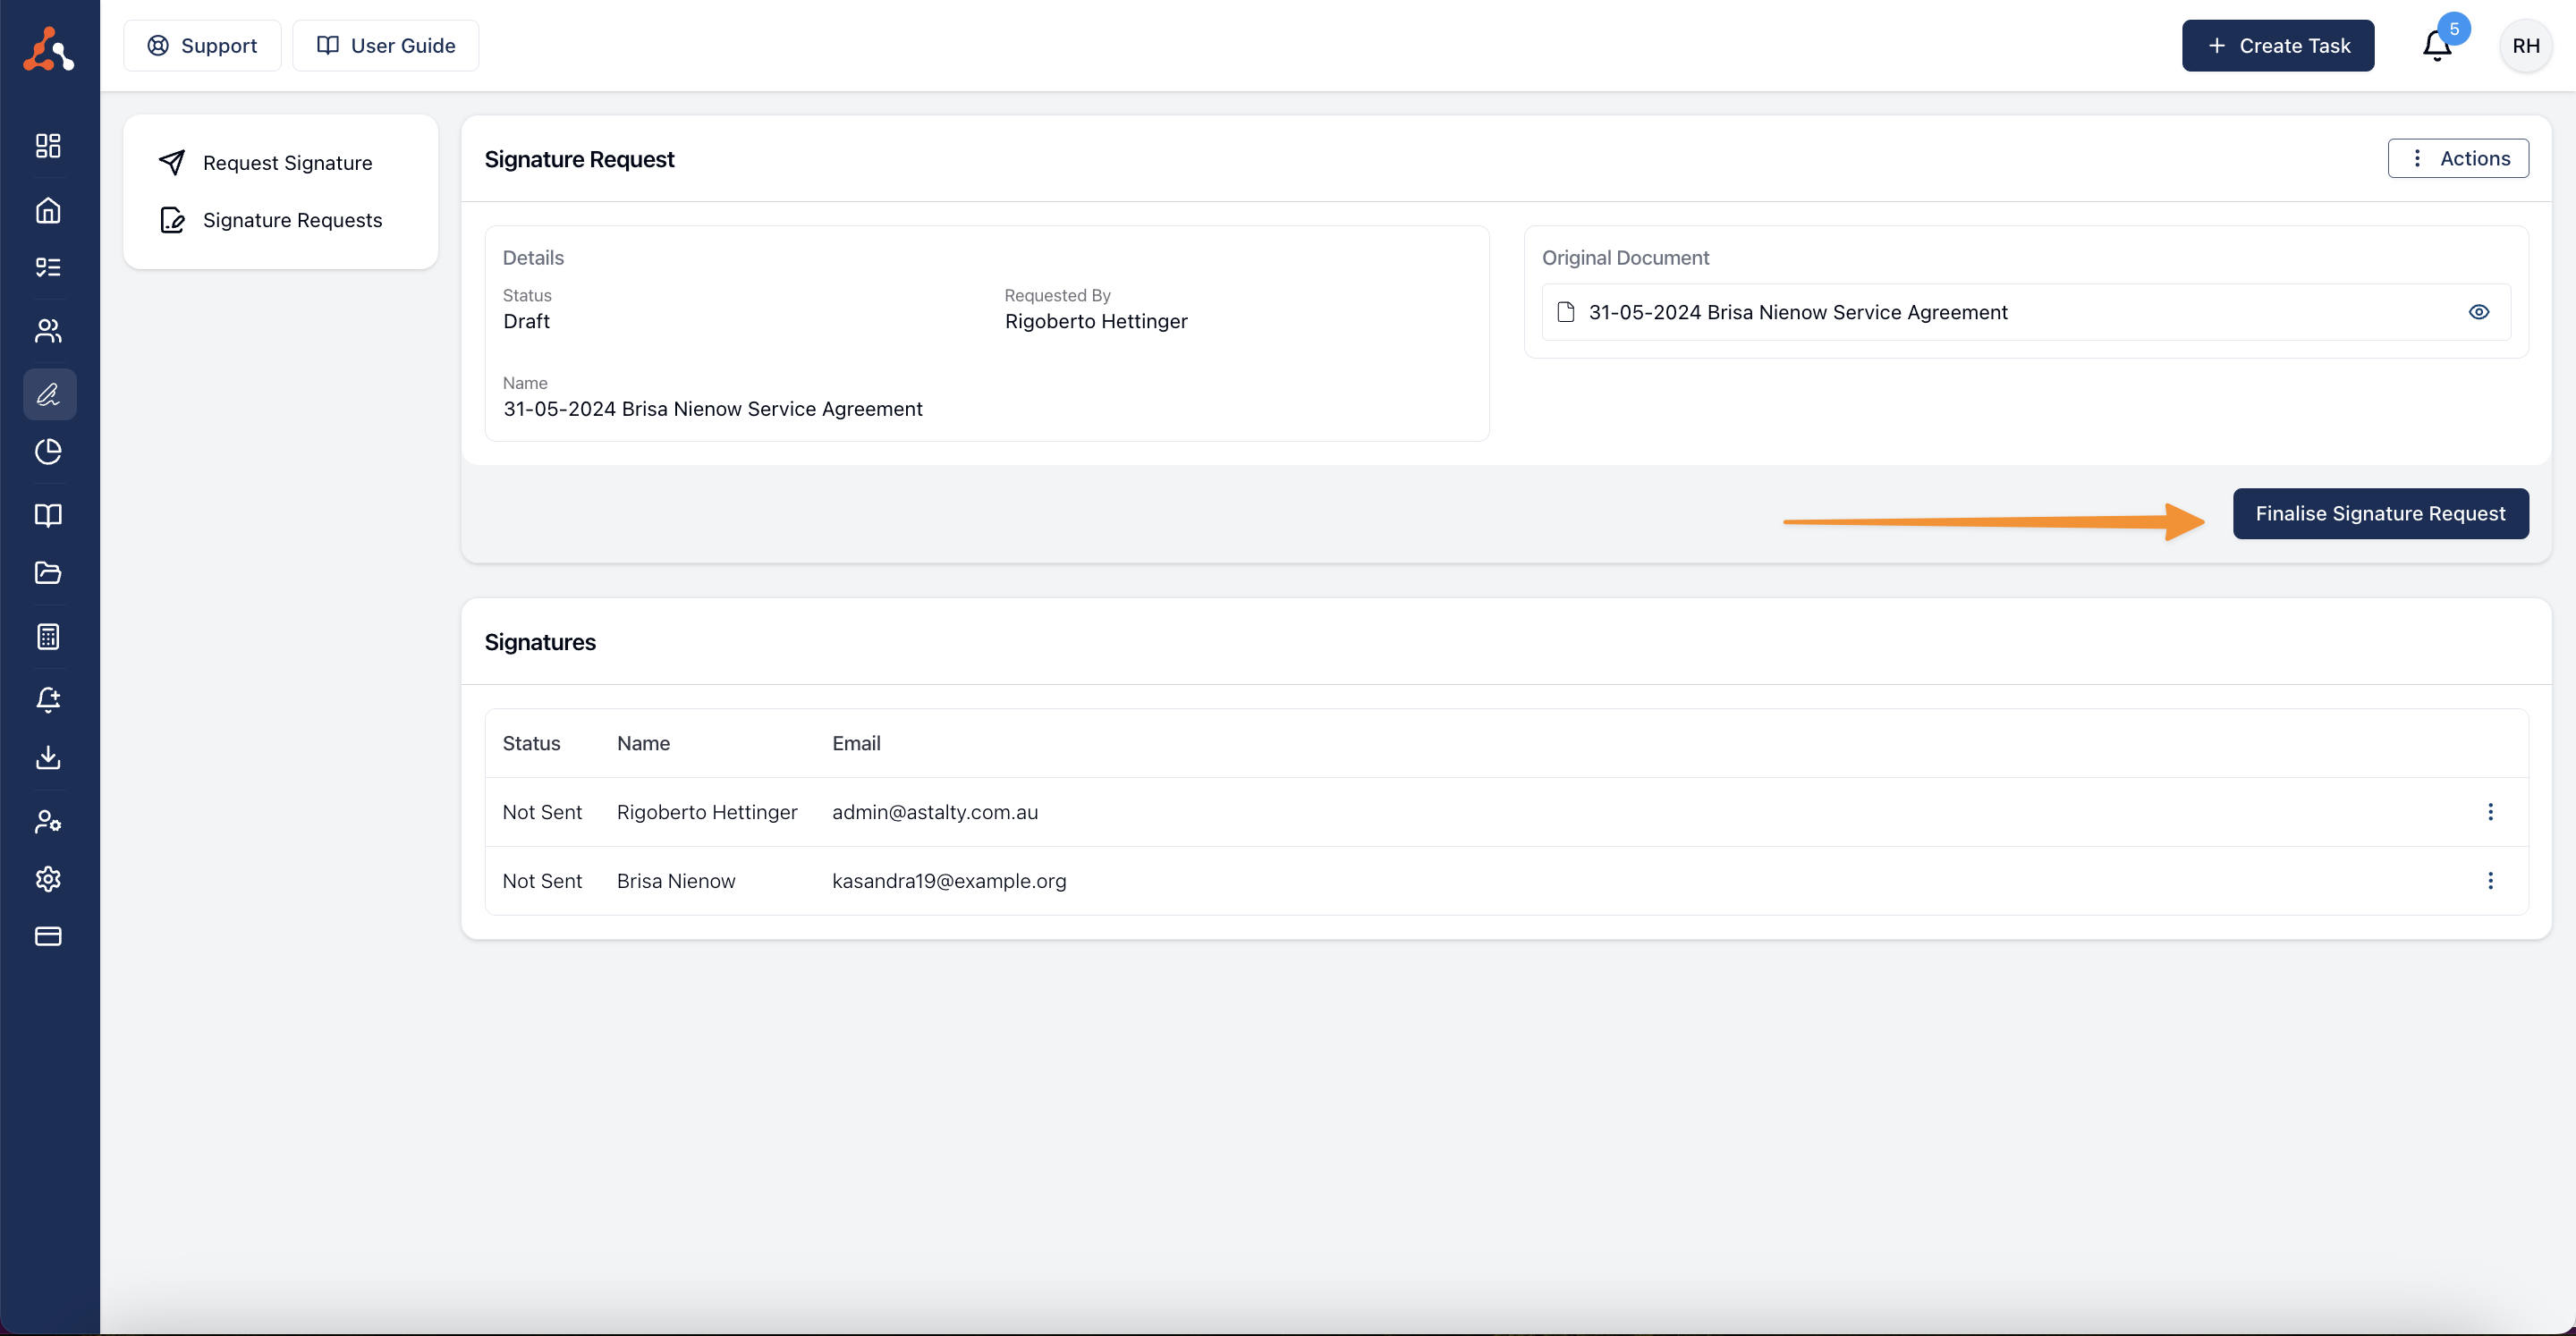
Click Generate Request to send the e-signature request. From here you will be directed to a window within Astalty that you can add signature fields for the signature to occur. Once you click finish you will be directed to this screen below where you will finalise the signature request.
Completing the Signature Process
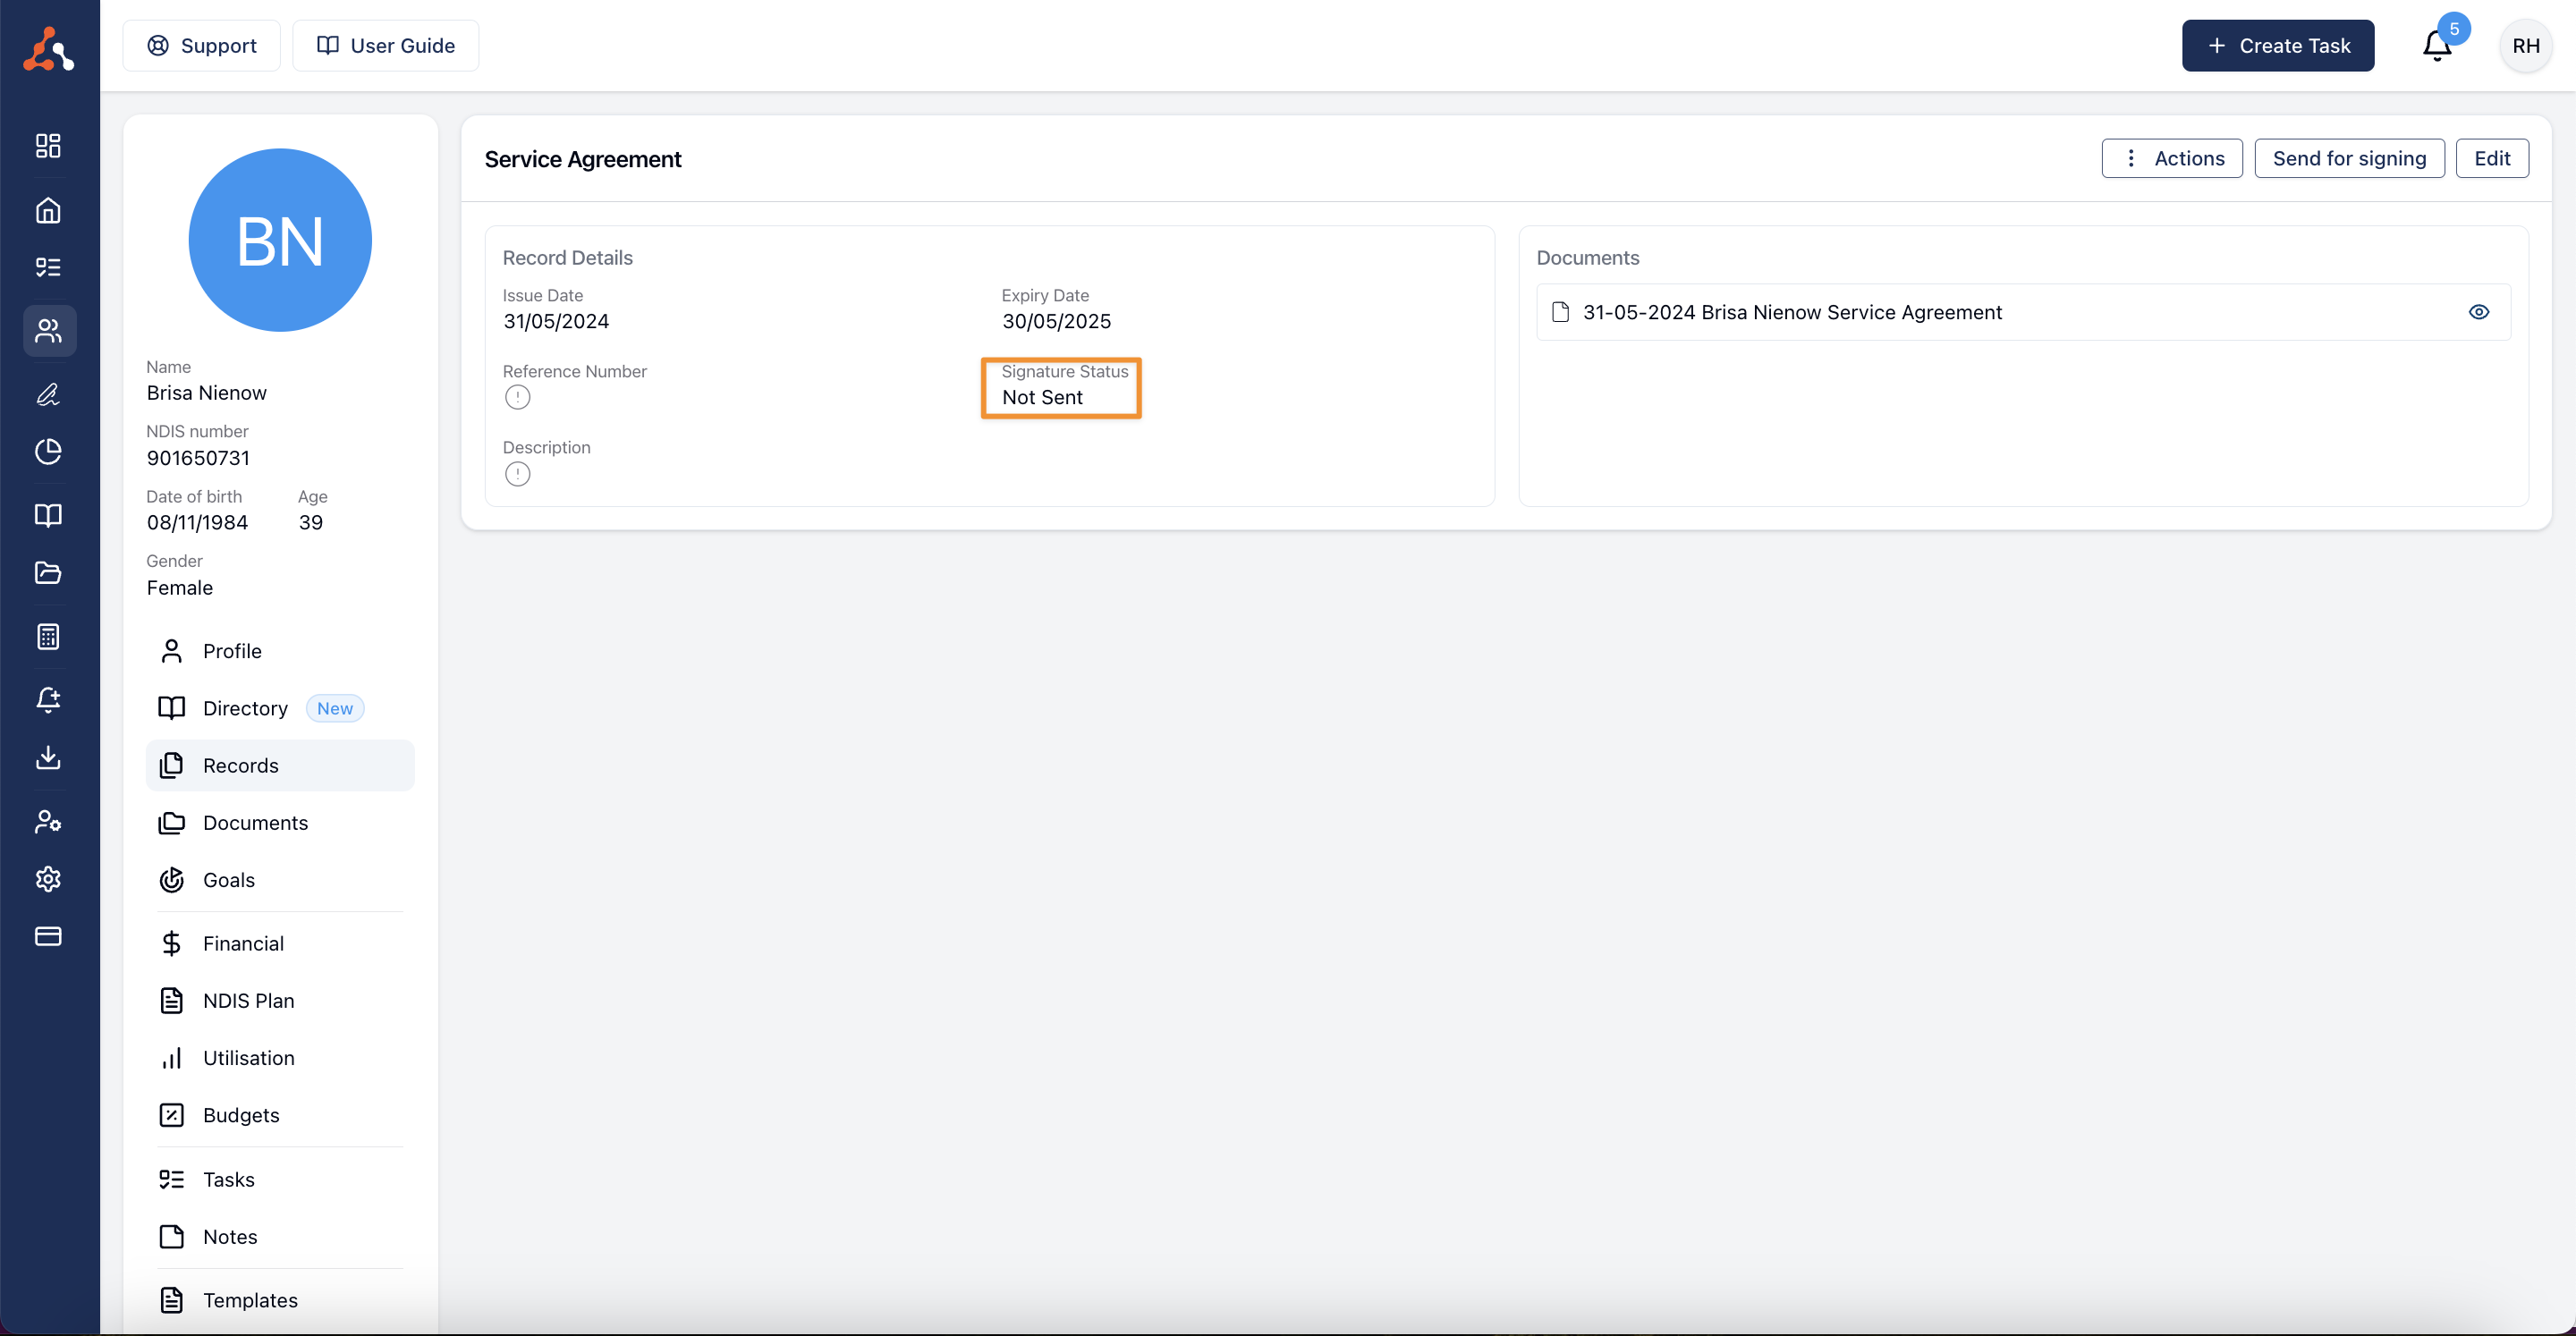
After the record is sent to be signed, the record will show 'Awaiting Signatures'
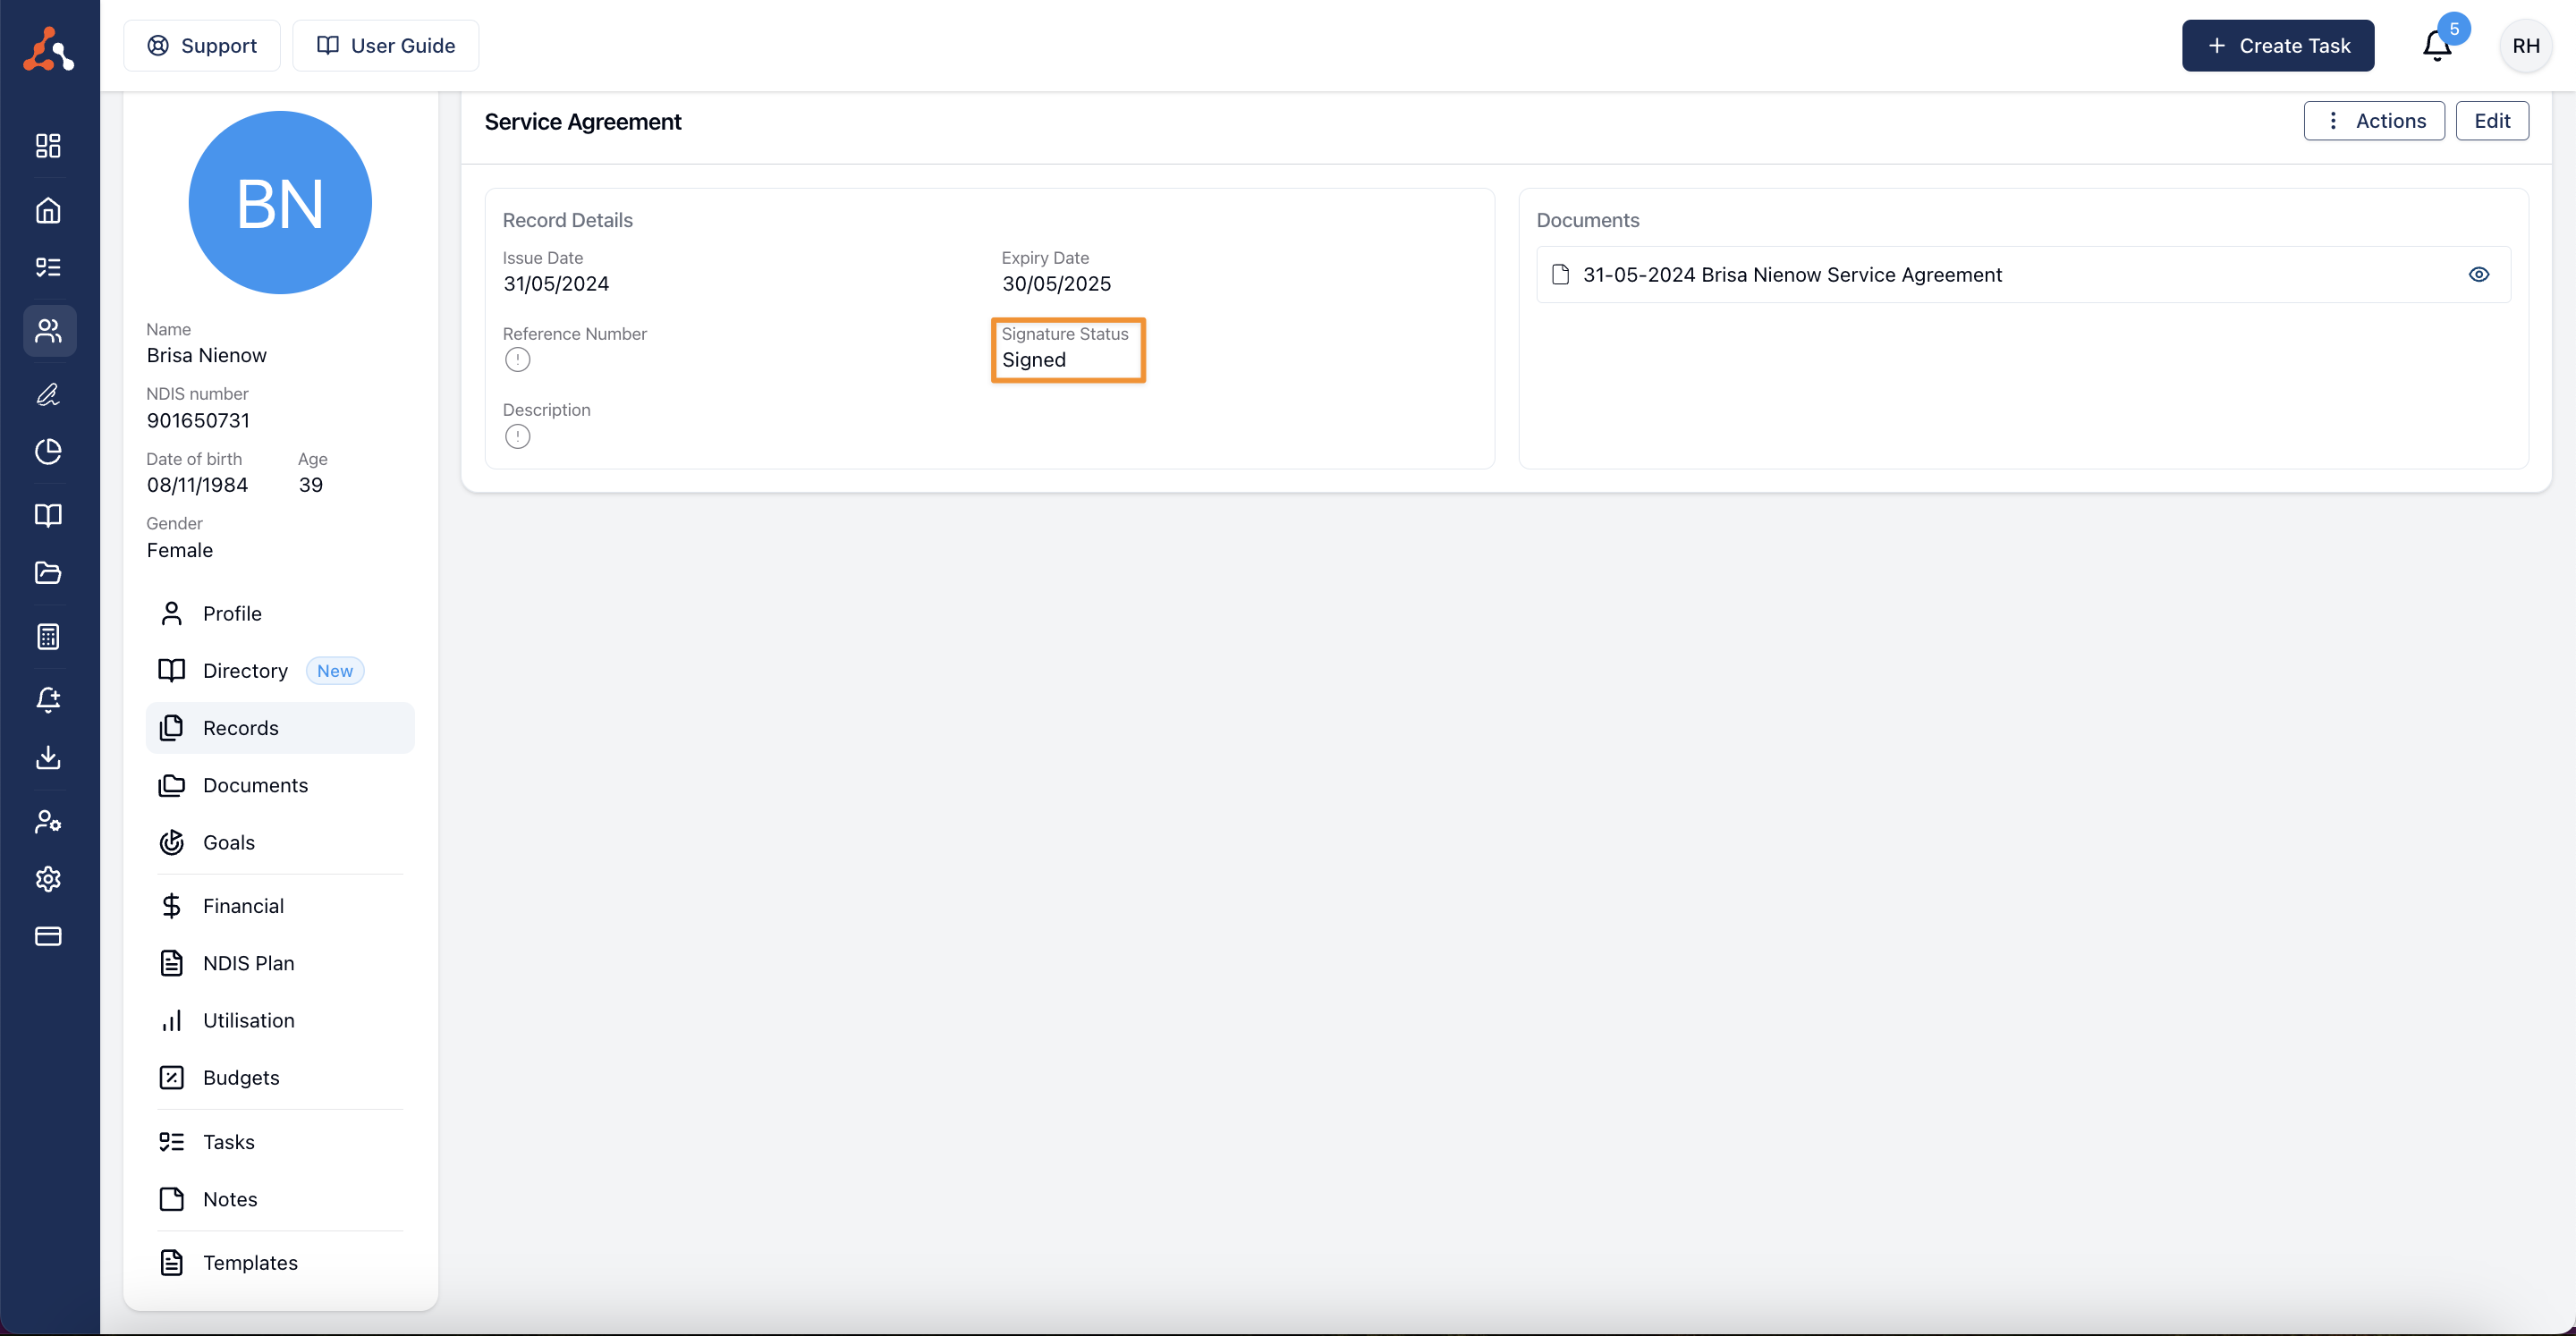
Once both parties sign, Astalty will retrieve the signed document and update the status to "signed."
The signed document will be automatically uploaded to the corresponding record in Astalty.
This guide should help you smoothly create budgets, generate service agreements, and handle signatures within Astalty. For further assistance, refer to Astalty's support resources or contact their support team.

.png)