- Participants
- Participant Templates
- Participant Custom Templates
Participant Custom Templates
How to Generate a Custom Template
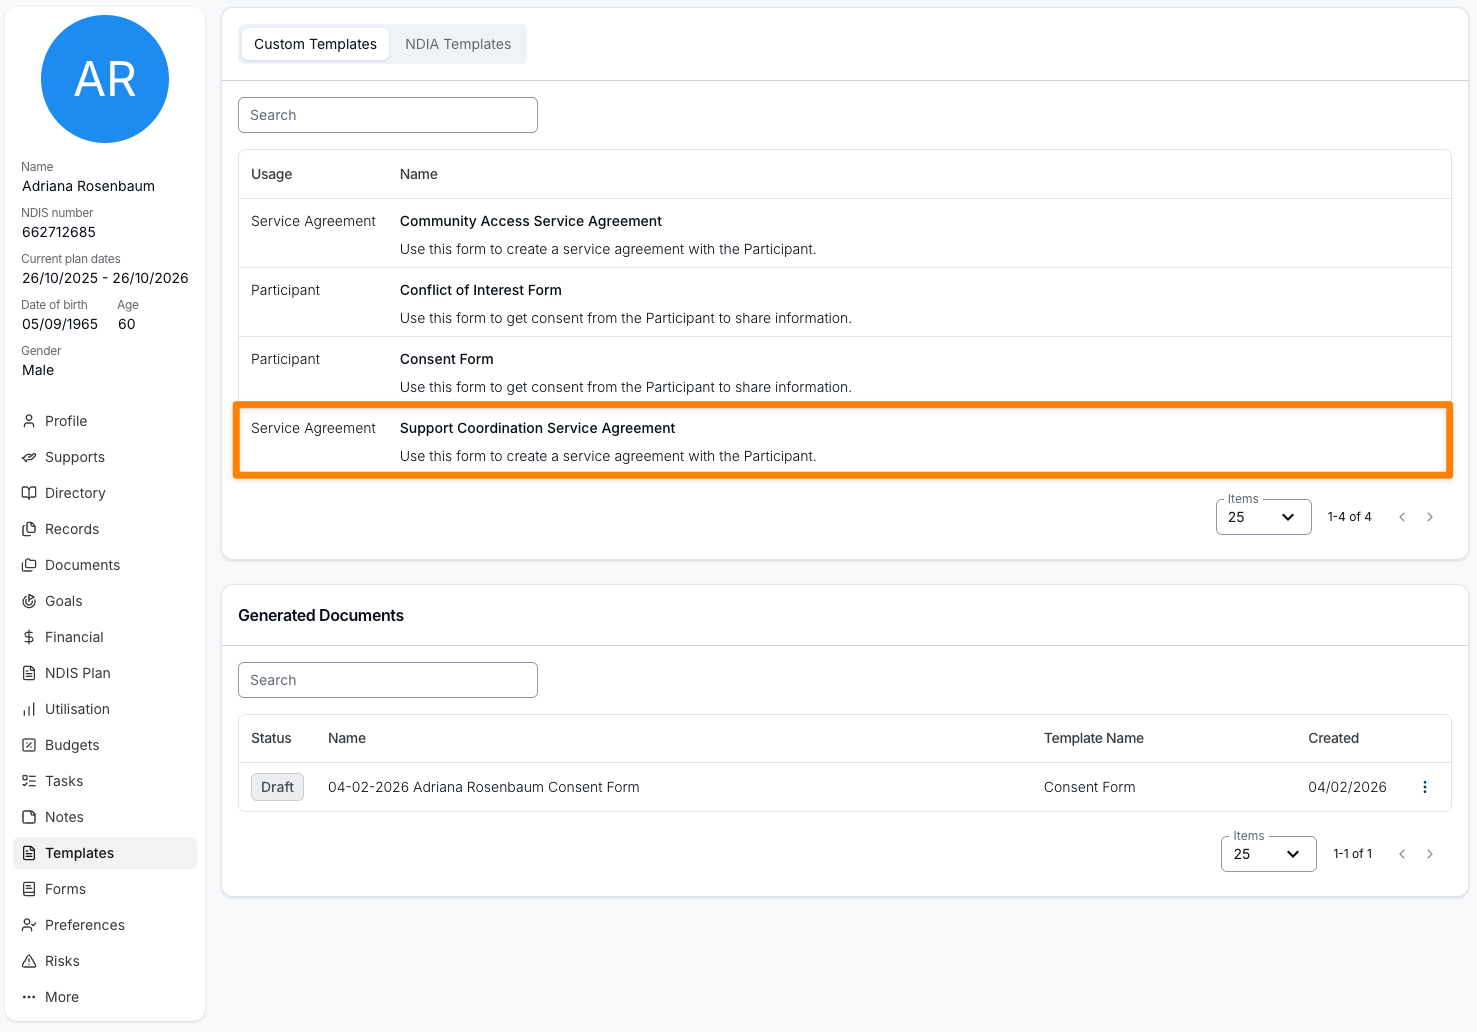
To generate a Custom Template, simply navigate to a Participants profile and select Templates from the menu options. Once in this menu you will see the Custom Templates uploaded to your Astalty account. If you do not see any you will first need to create the Custom Template. To learn how to create a new Custom Template, read our user guide here that outlines that process. To generate a Template for this Participant, simply select a Template from the list of options.
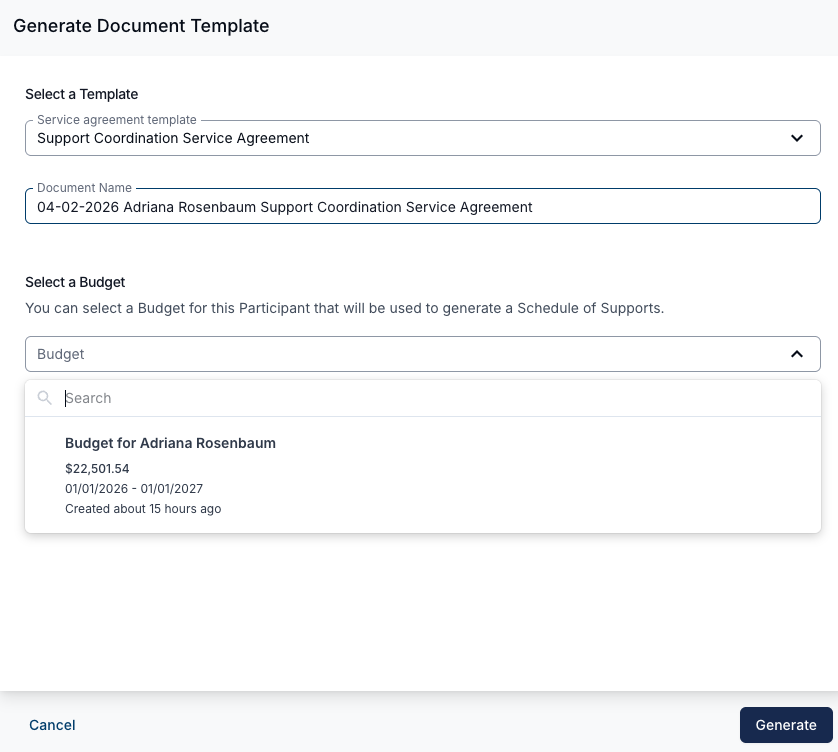
Once you do this you will see the following screen. Within this screen you can name your document. If you have selected the Service Agreement Template Usage Type you will see a screen similar to this. You can select a Budget to use to inform the Schedule of Support Placeholders. More on how to create a budget can be found here. If you have selected the participant usage type you will only see the document naming option. Once you are satisfied click 'Generate'.
Editing a Generated Template
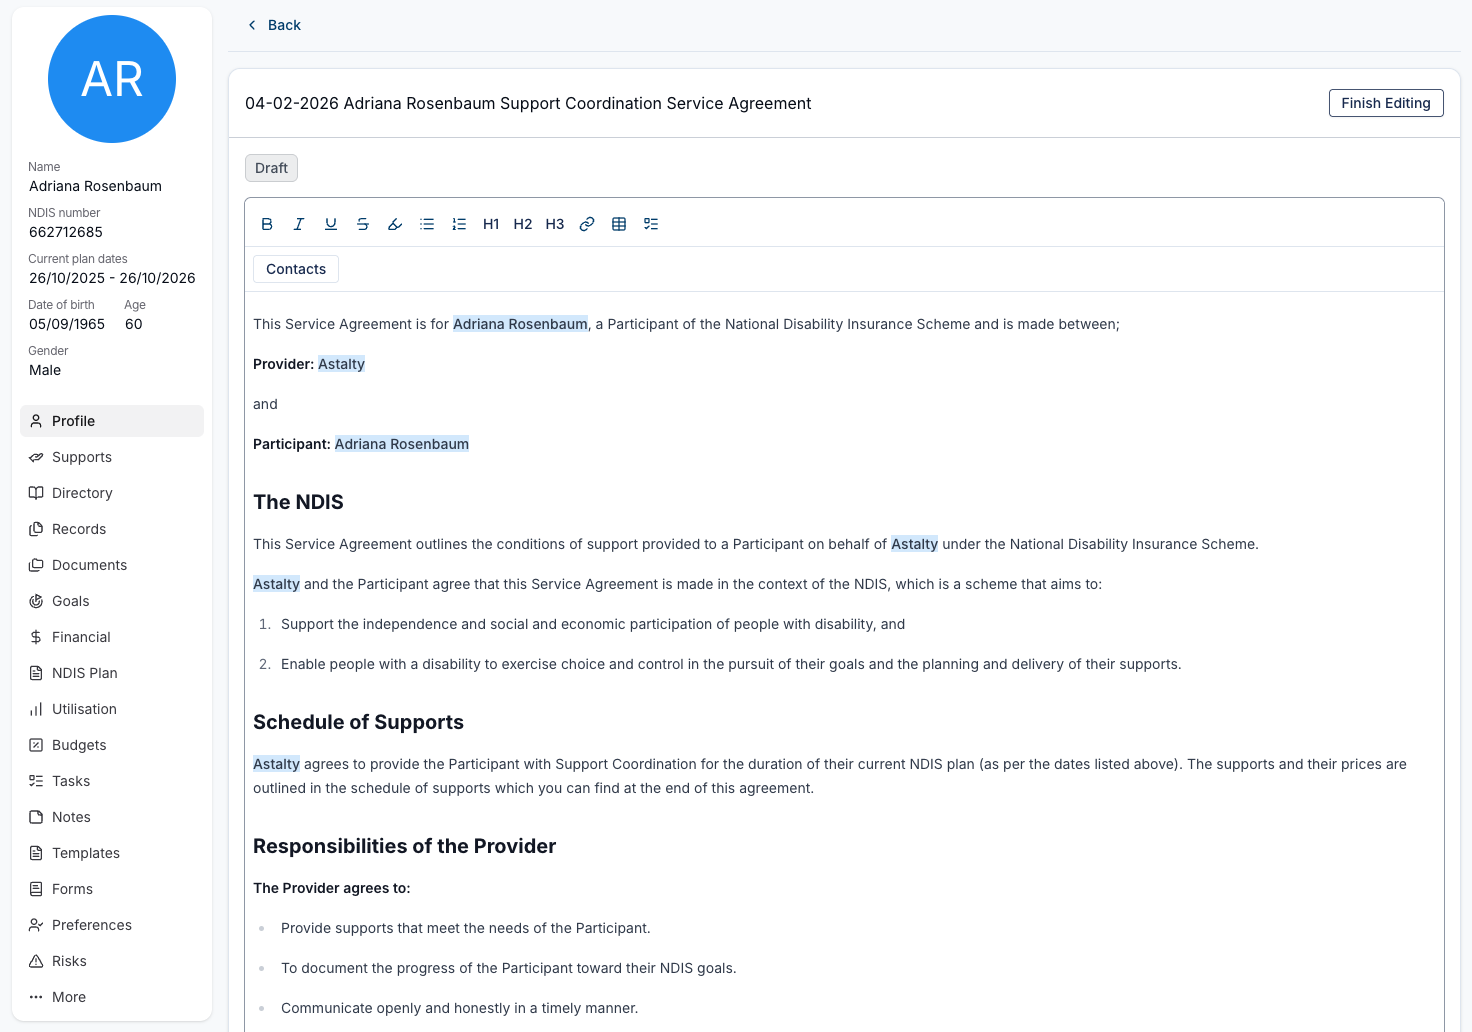
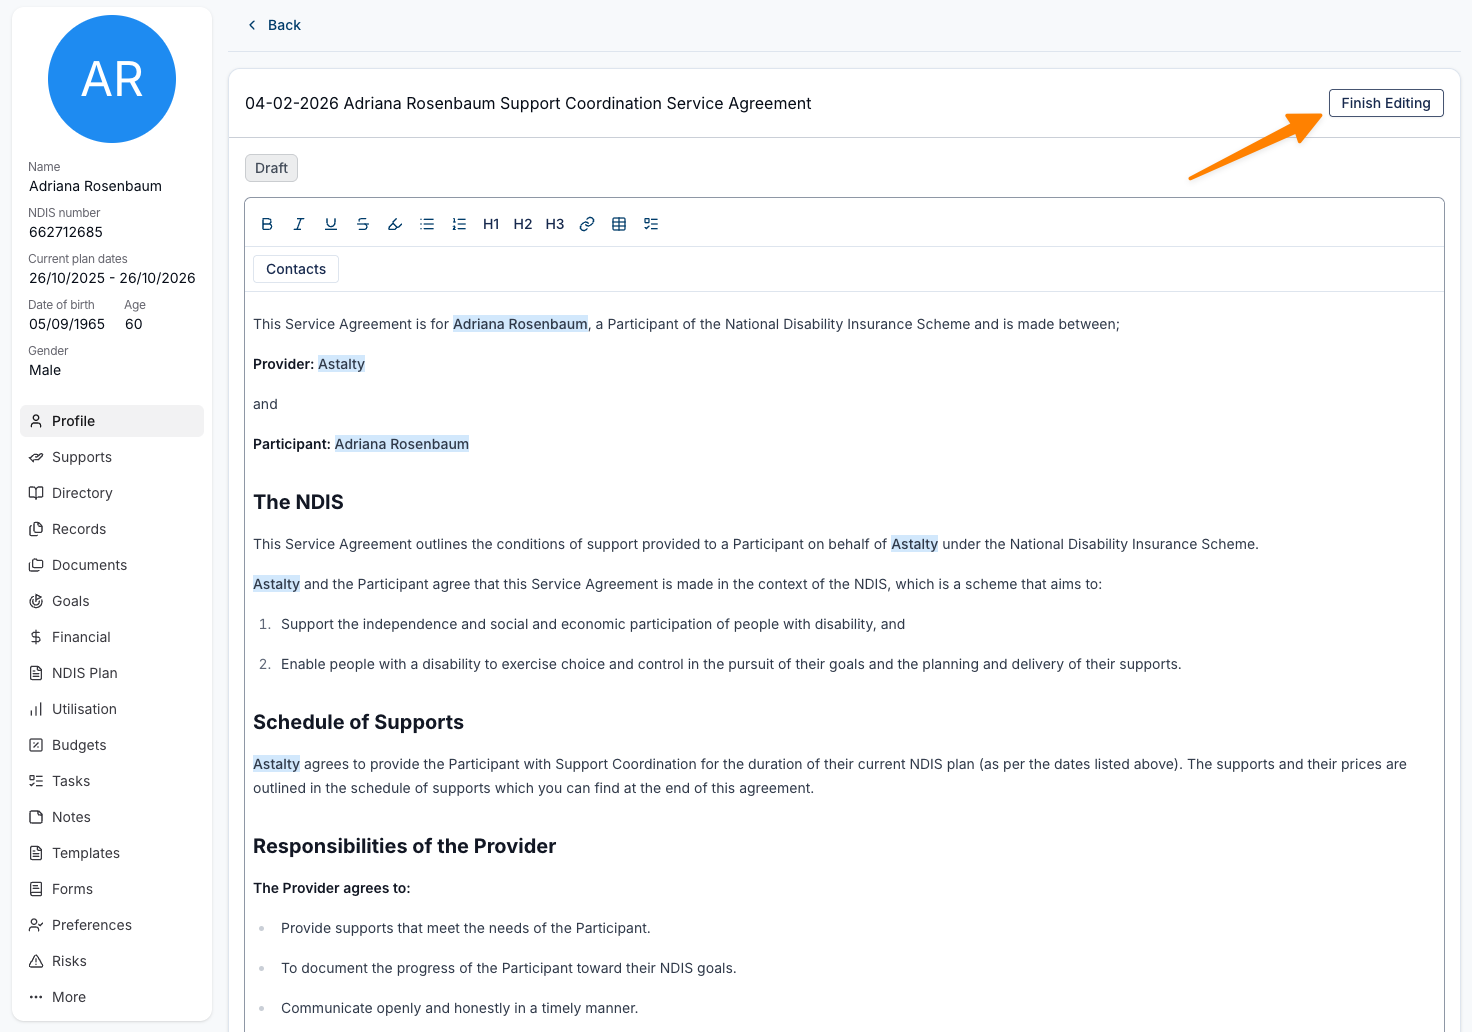
Once you have clicked 'Generate' you will be brought to the document edit screen. In this screen you can see the Placeholders at work. The document in this state can be edited. You can update, add, or delete information here.
Adding a Contact to a Generated Template
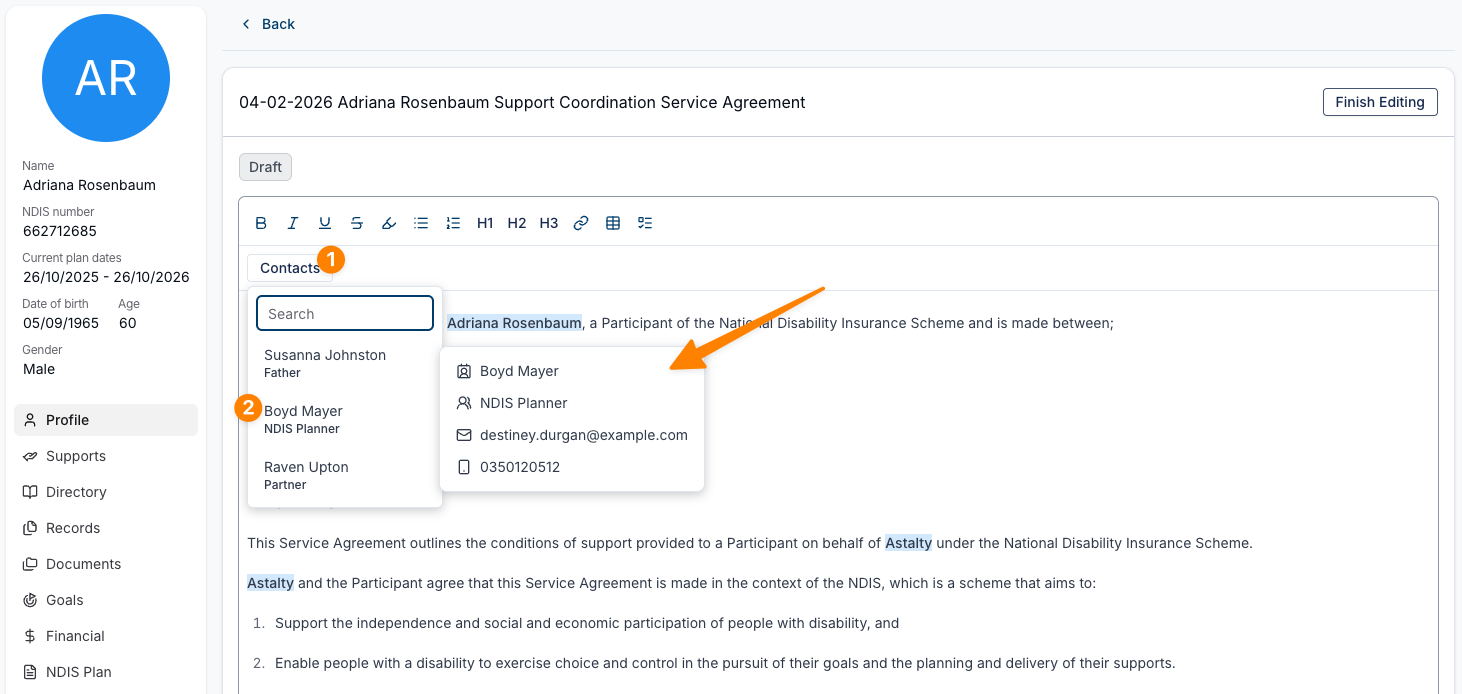
Within this screen you can also add any additional contact information using the new Contact option as seen below. Simply select the 'Contact' dropdown, then select the contact, and then the method of contact from the menu. Once you select the method Astalty will inset this contact information into the document wherever the document has been selected
Finalising A Generated Template
Once you are happy with the edited document click Finish Editing. From here, the Actions button allows you to Download or Email as Draft, or Delete the document. You can also make changes to the document by selecting the Edit button, or if no more changes are required, simply select 'Finalise'. This will prepare the document to be completed and move to the next stage in its status.
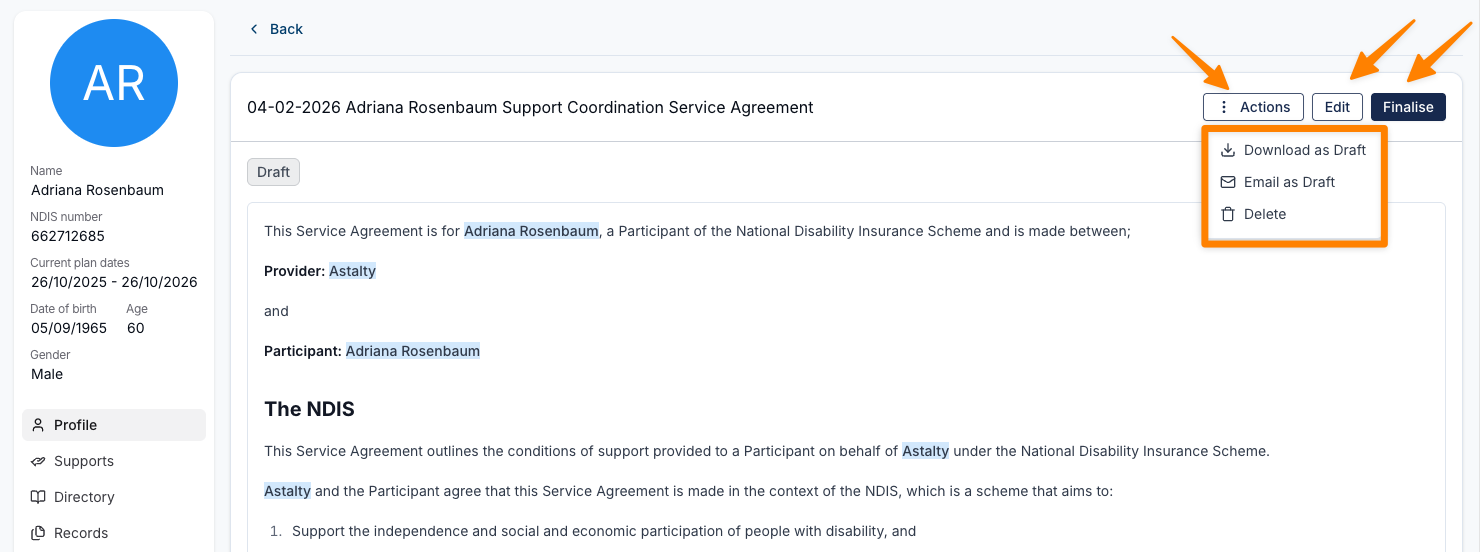
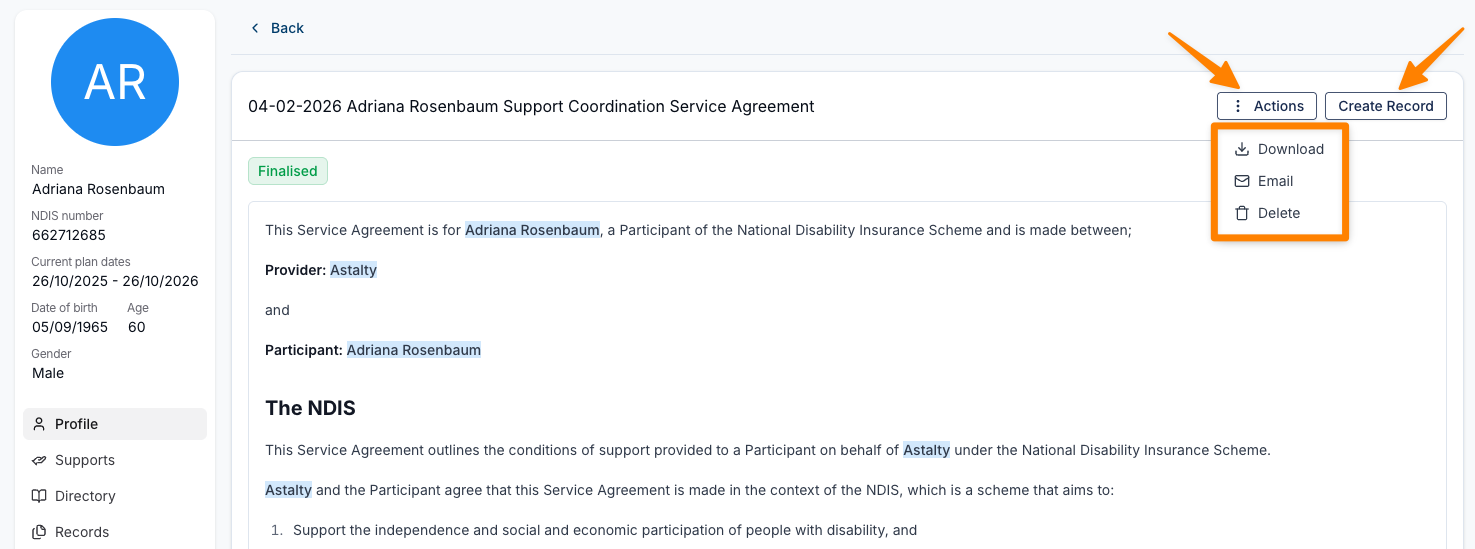
After clicking finalise you will be prompted to either 'Create a Record' or you can select the 'Actions' button to Download, Email, or Delete the document.
To Create the Record, you will need to select the Record Type, enter the Record Details, and confirm whether the Record needs to be signed — if you select No, you will be able to send this for signing at a later date through the Participant's Records page.
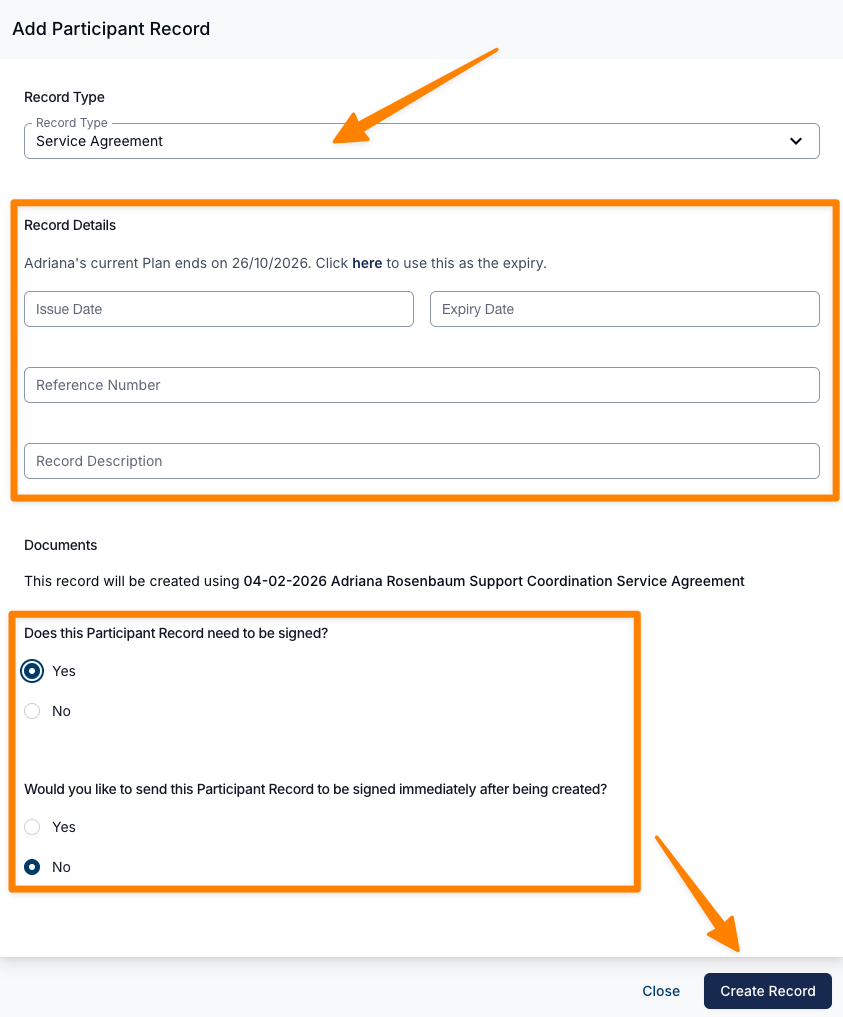
Within the Record screen, you can send the document for signing through our eSignature functionality. Click here to find out more about the record process and here for more on our eSignature functionality.
Alternatively you can select Download to receive a PDF of the document that you can print and sign in person.
Custom Template Settings
To learn how to set up a new Custom Template, read our user guide here that outlines that process!