- Administration
- Settings
- Tasks & Notes
- Note Templates
Note Templates
Creating Note Templates
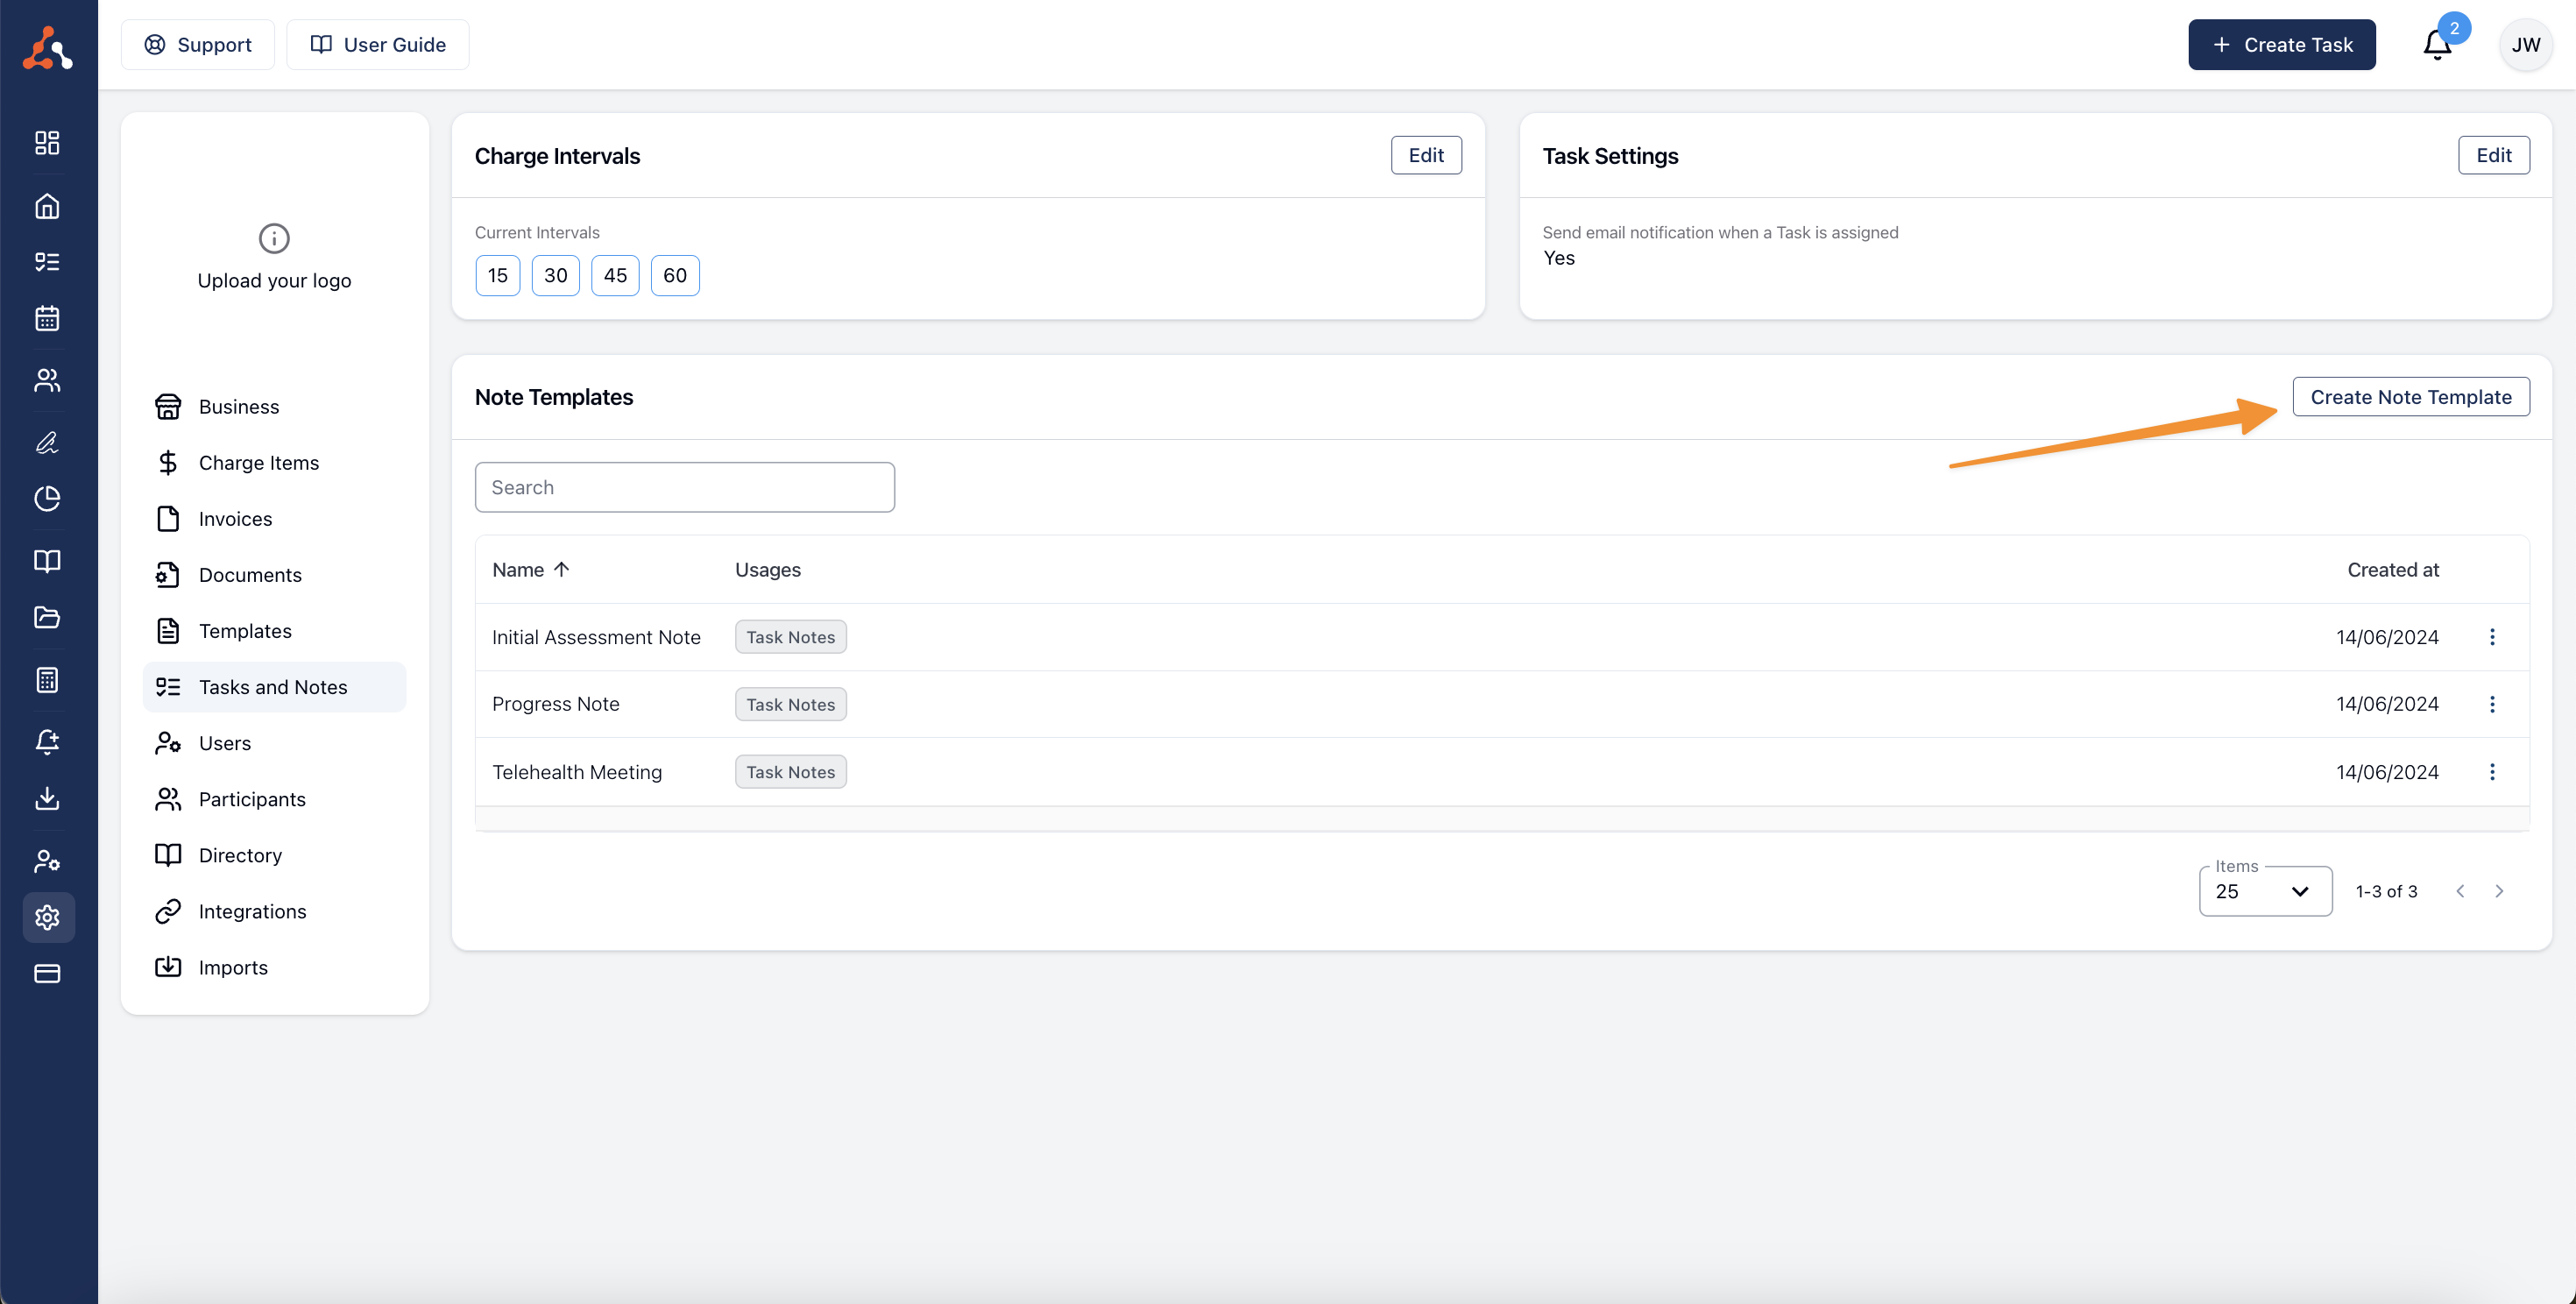
Open Settings > Tasks & Notes, then select Create Note Template.
By default, only Admins can create and update note templates. Managers and Team Members can view them.
Template Details
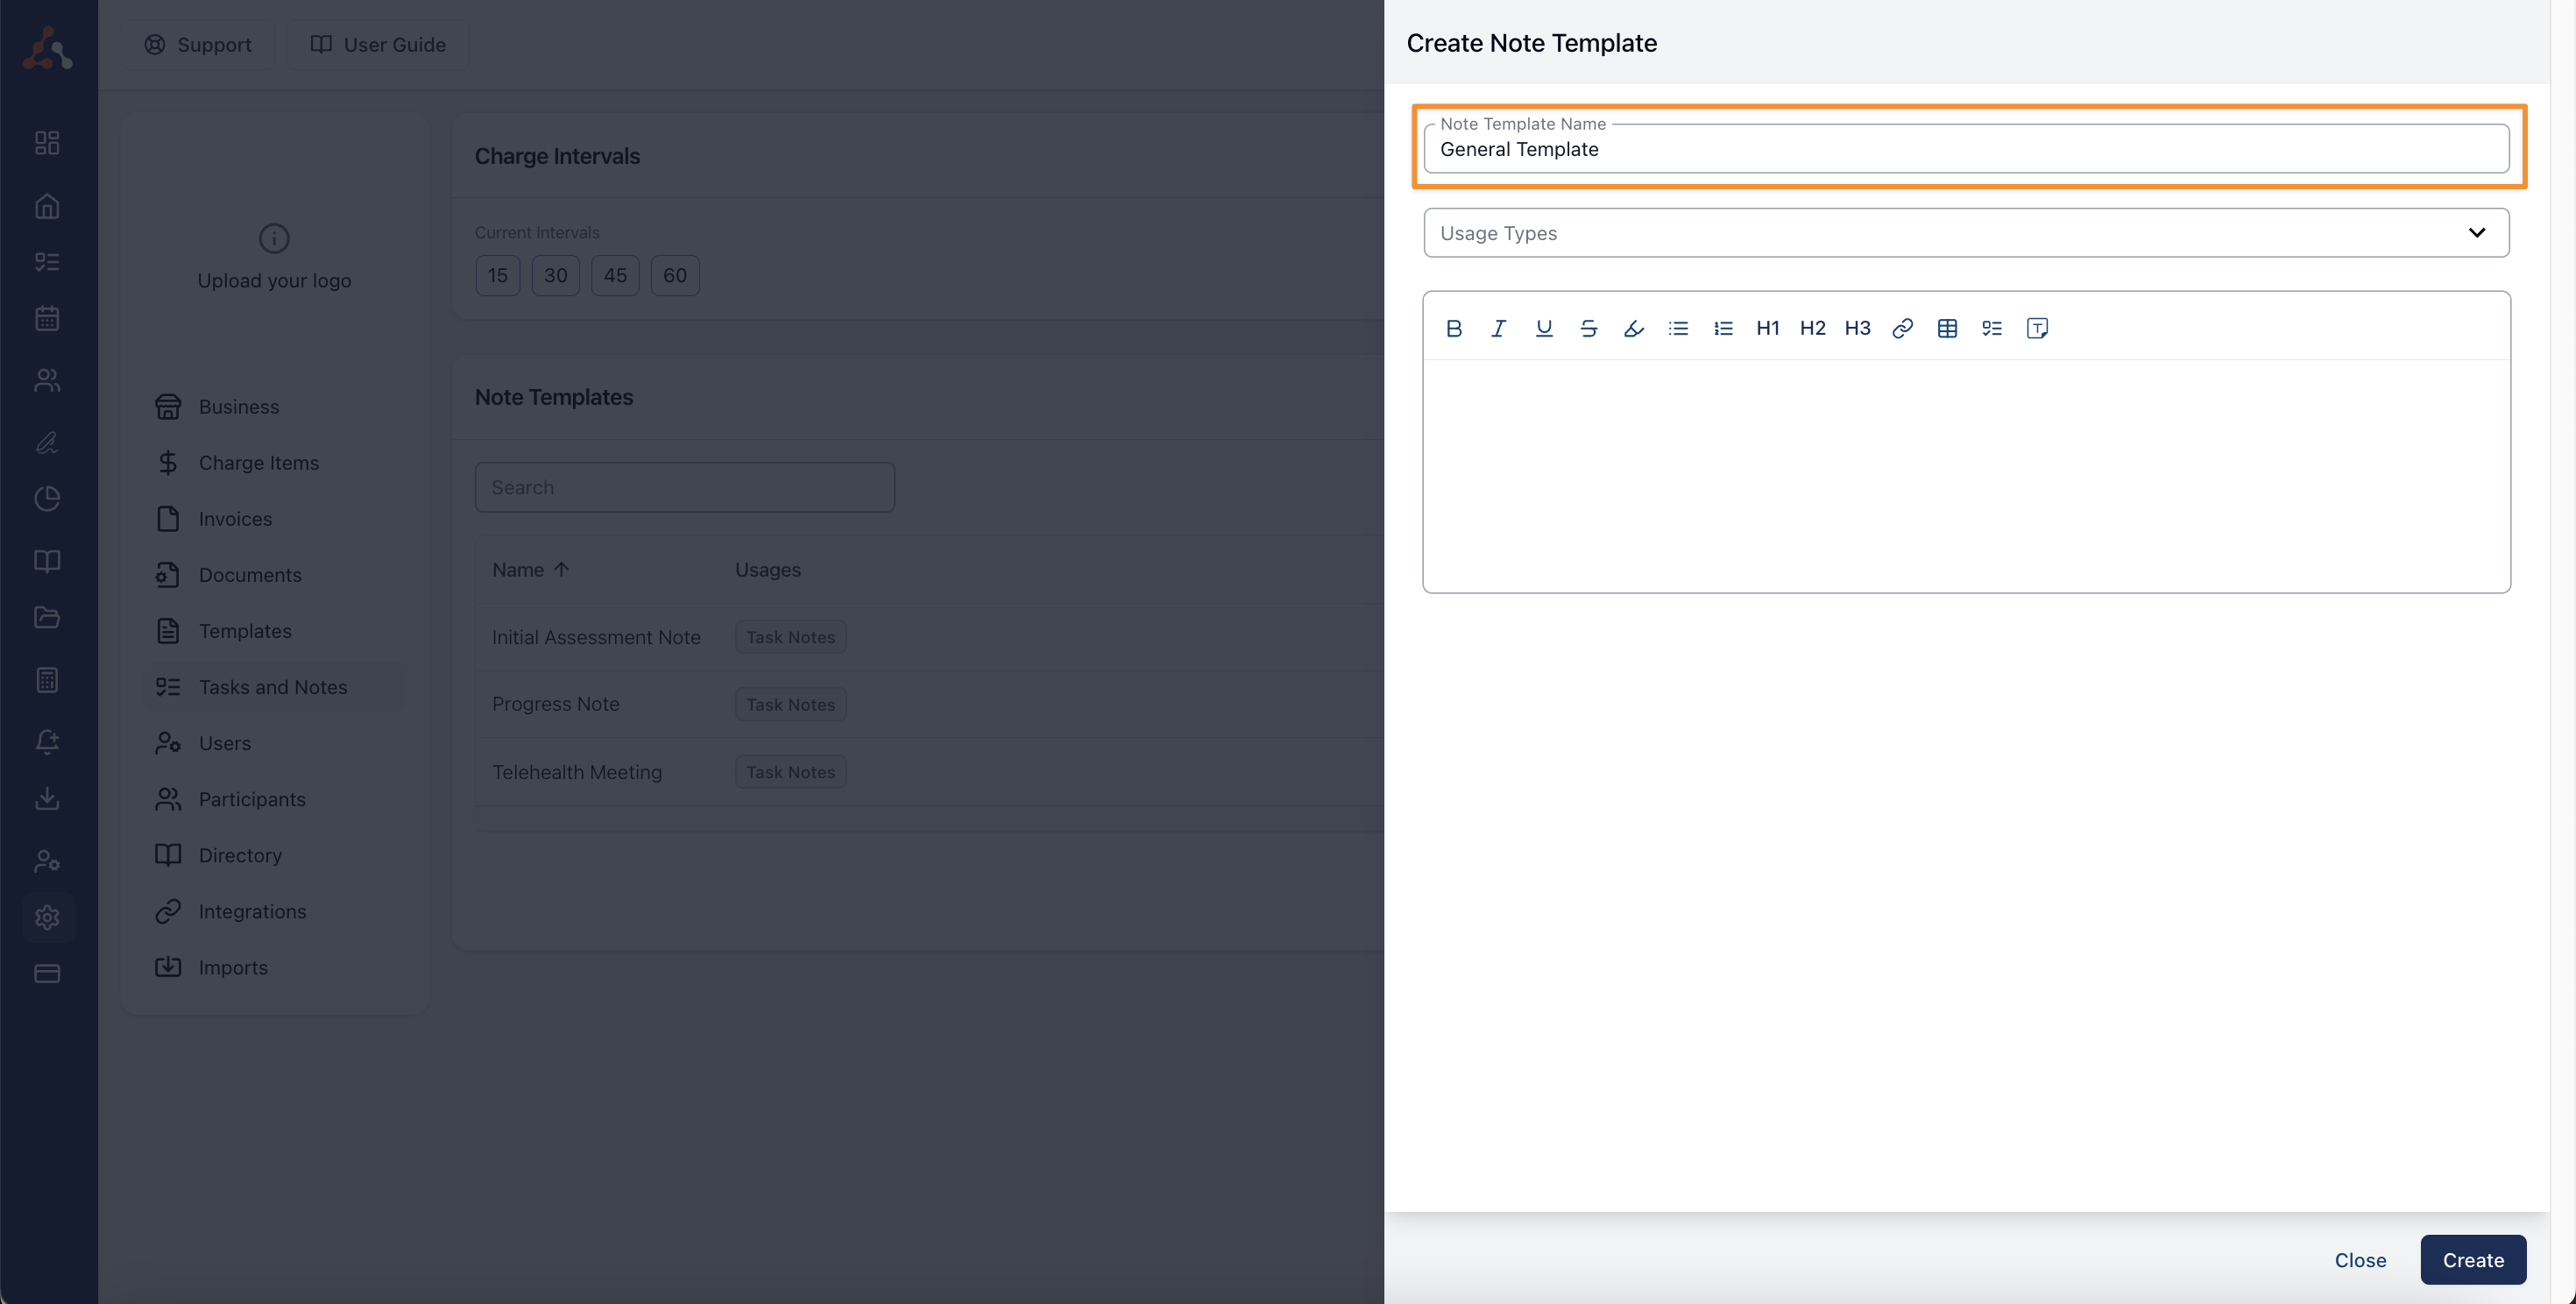
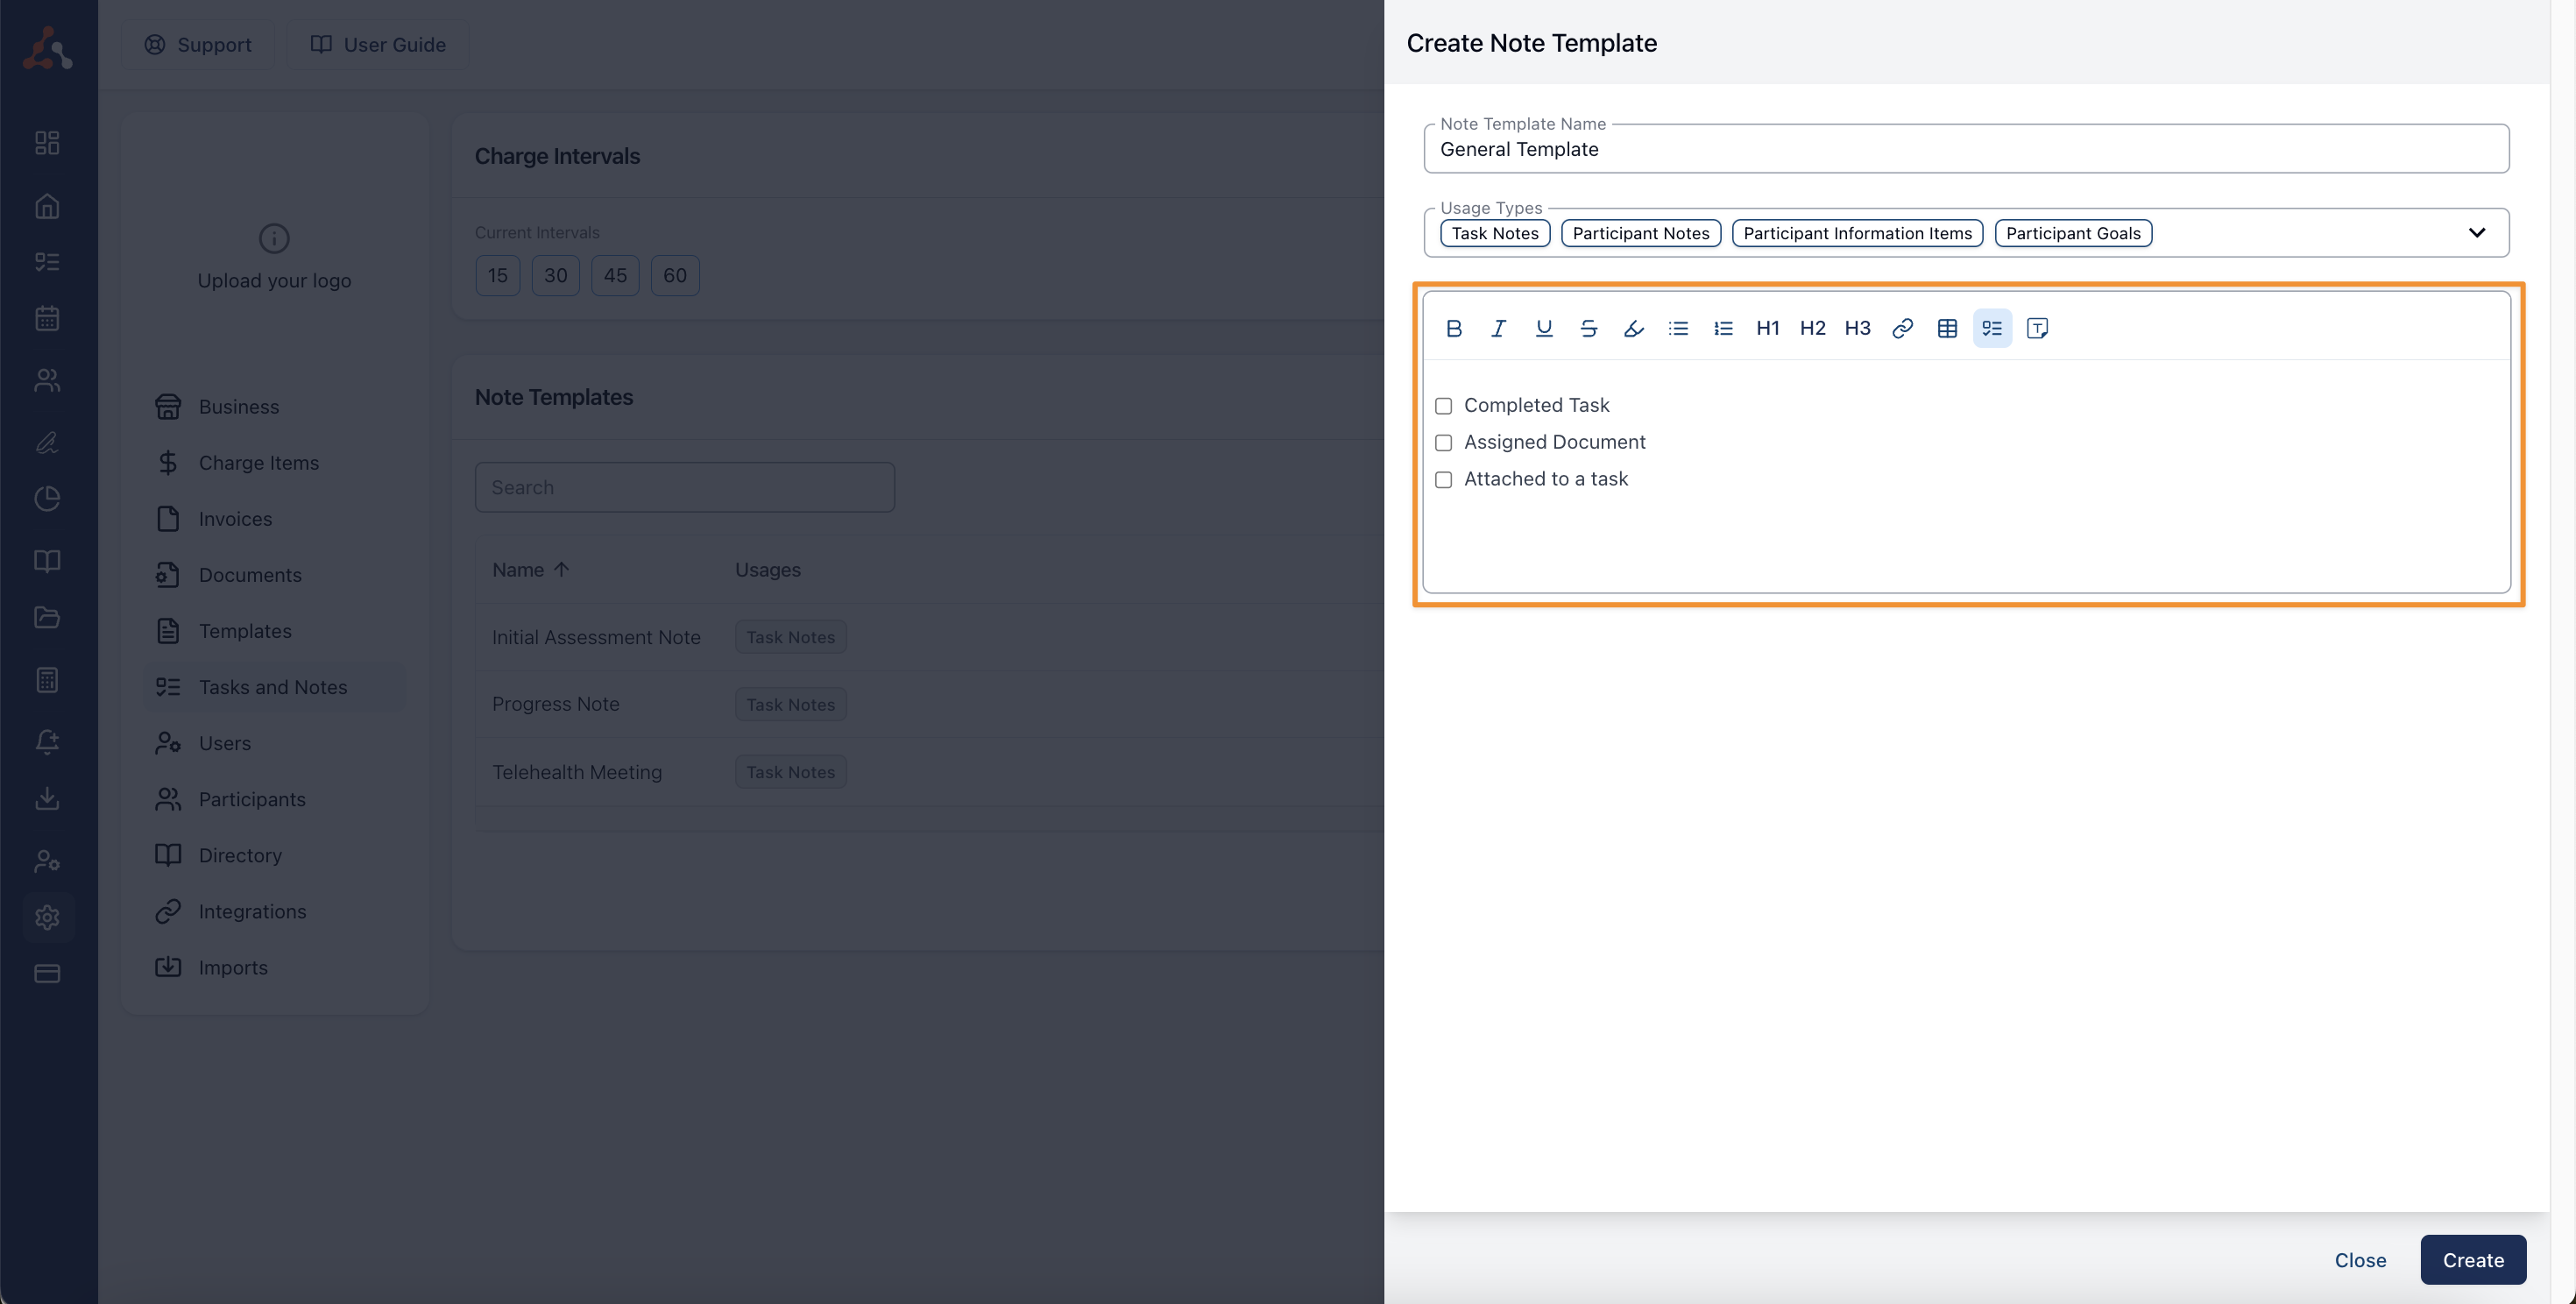
Note Template Name
Enter a unique name that makes the template easy to recognise.
Note Template Usage Type
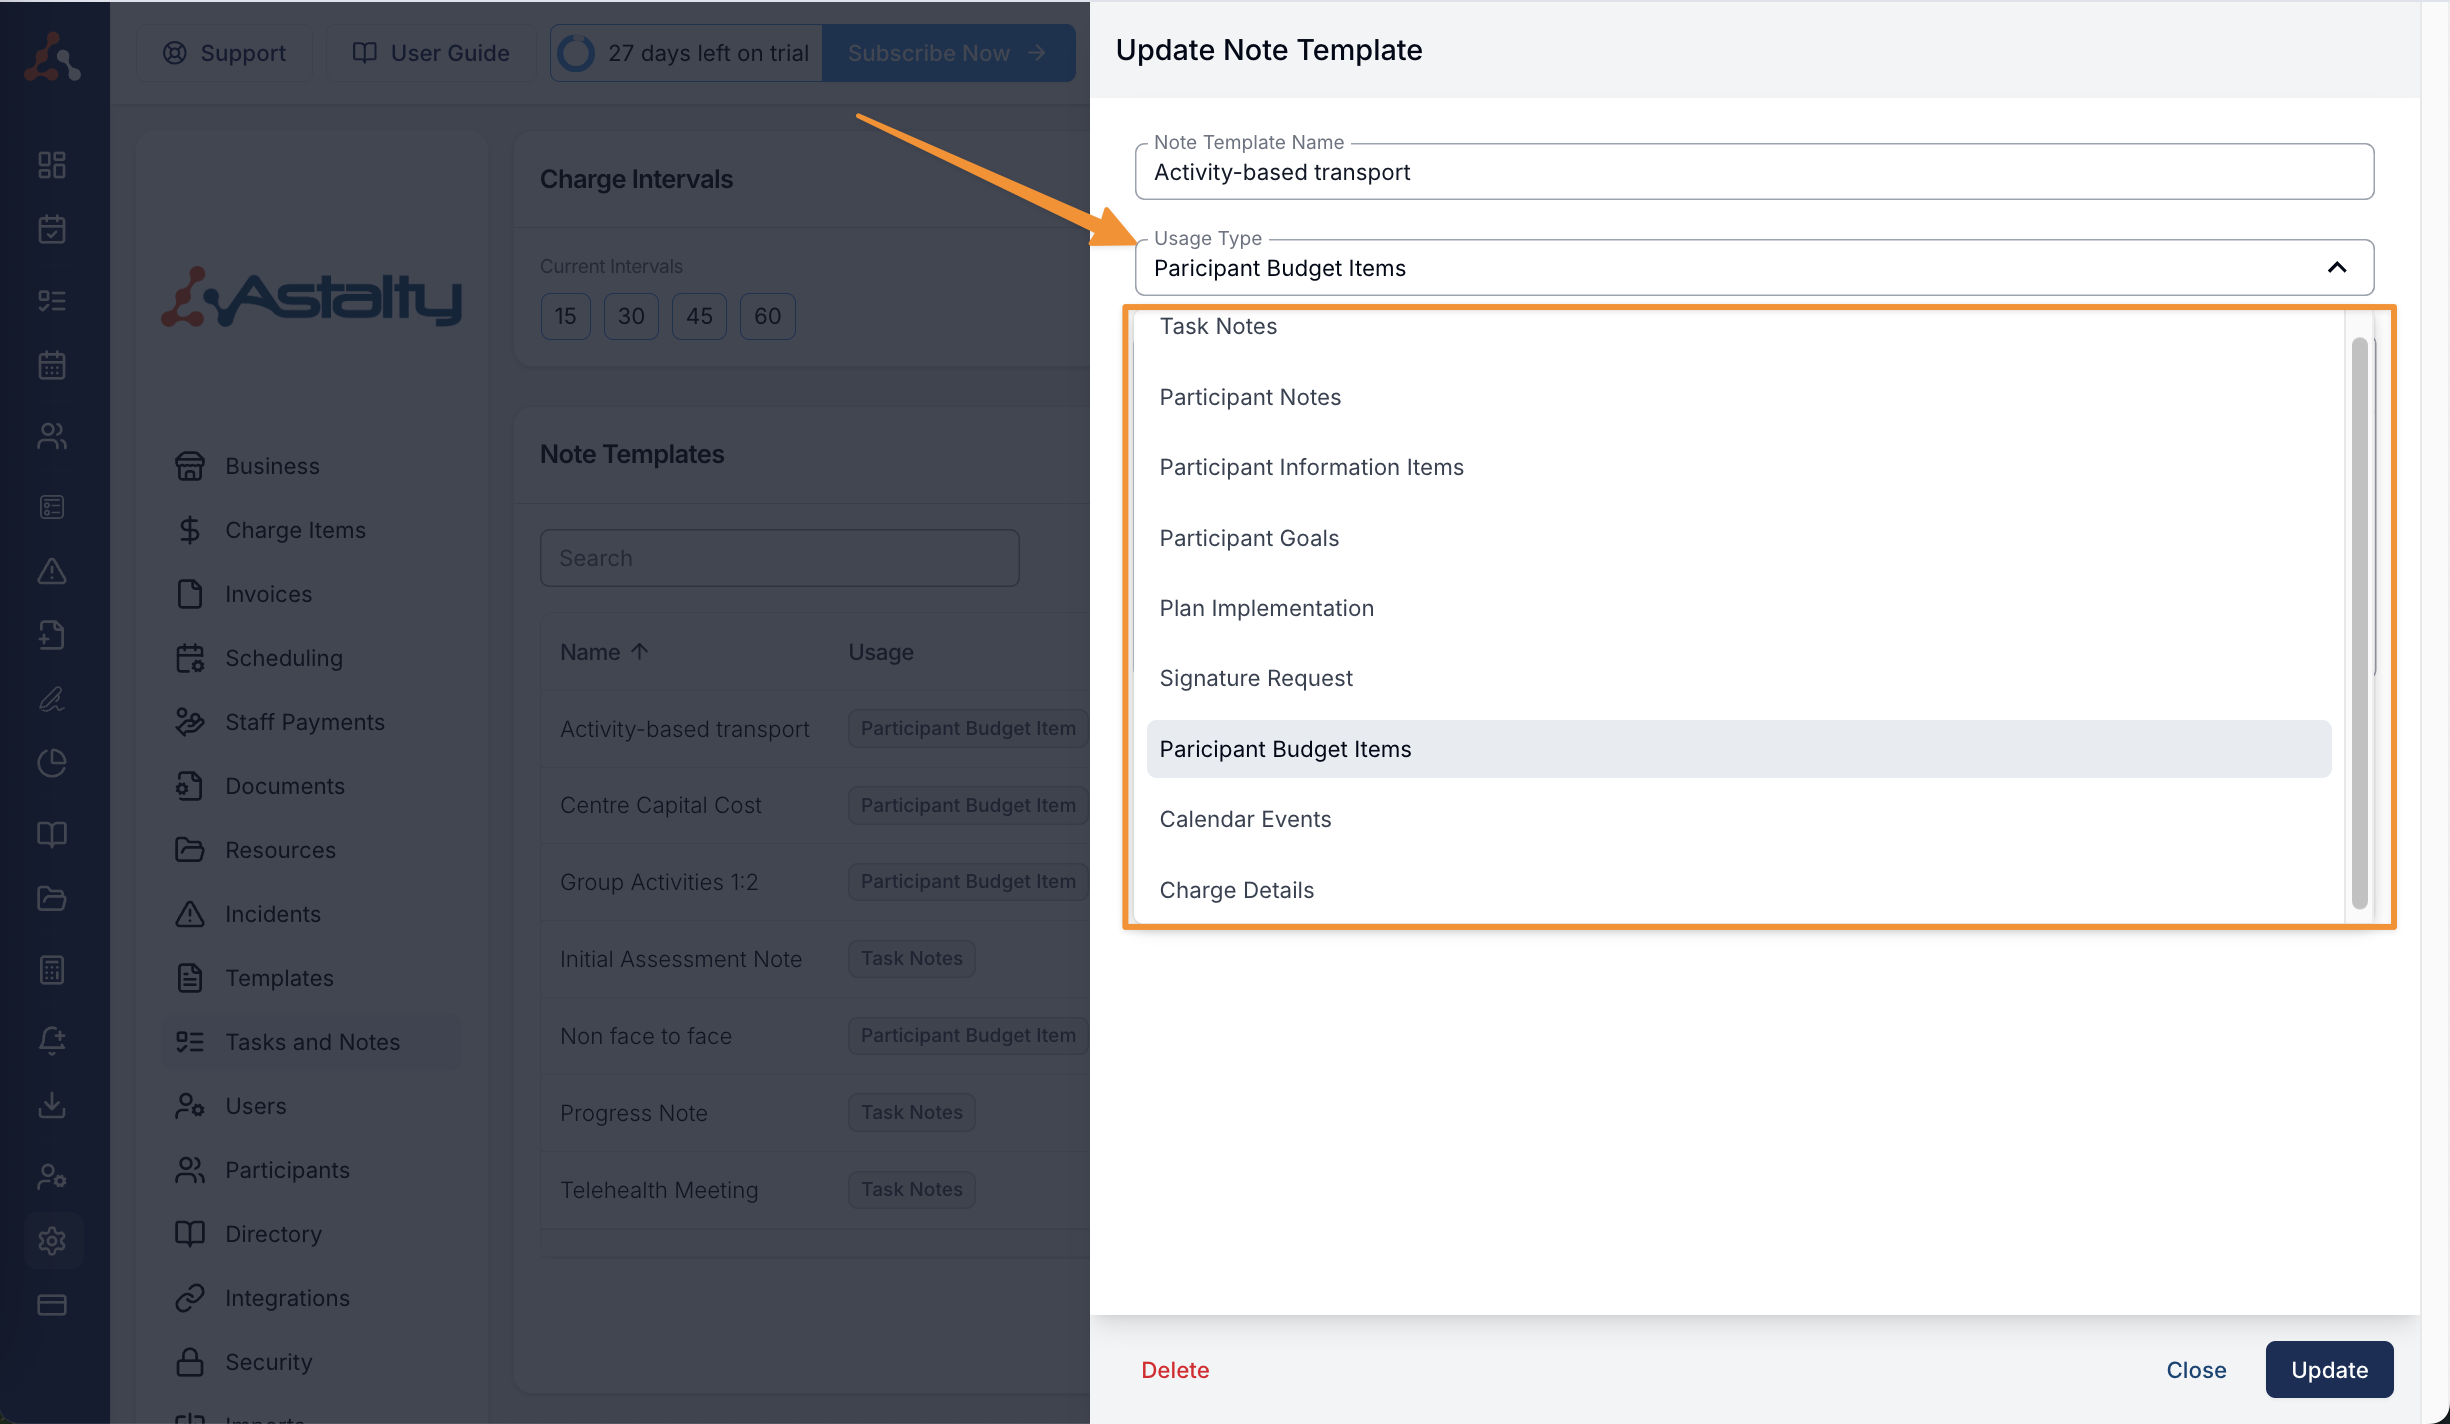
Select one usage type. The usage type controls where Astalty offers the template. When you select the note template icon on a field, you only see templates saved for that field's usage type.
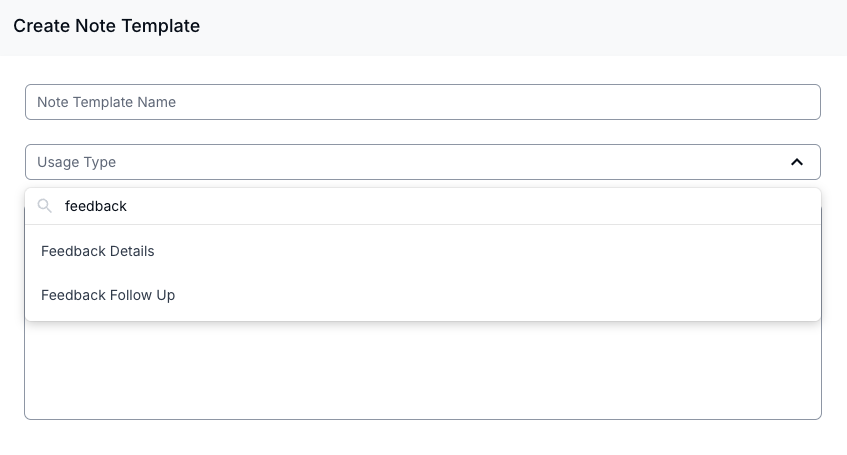
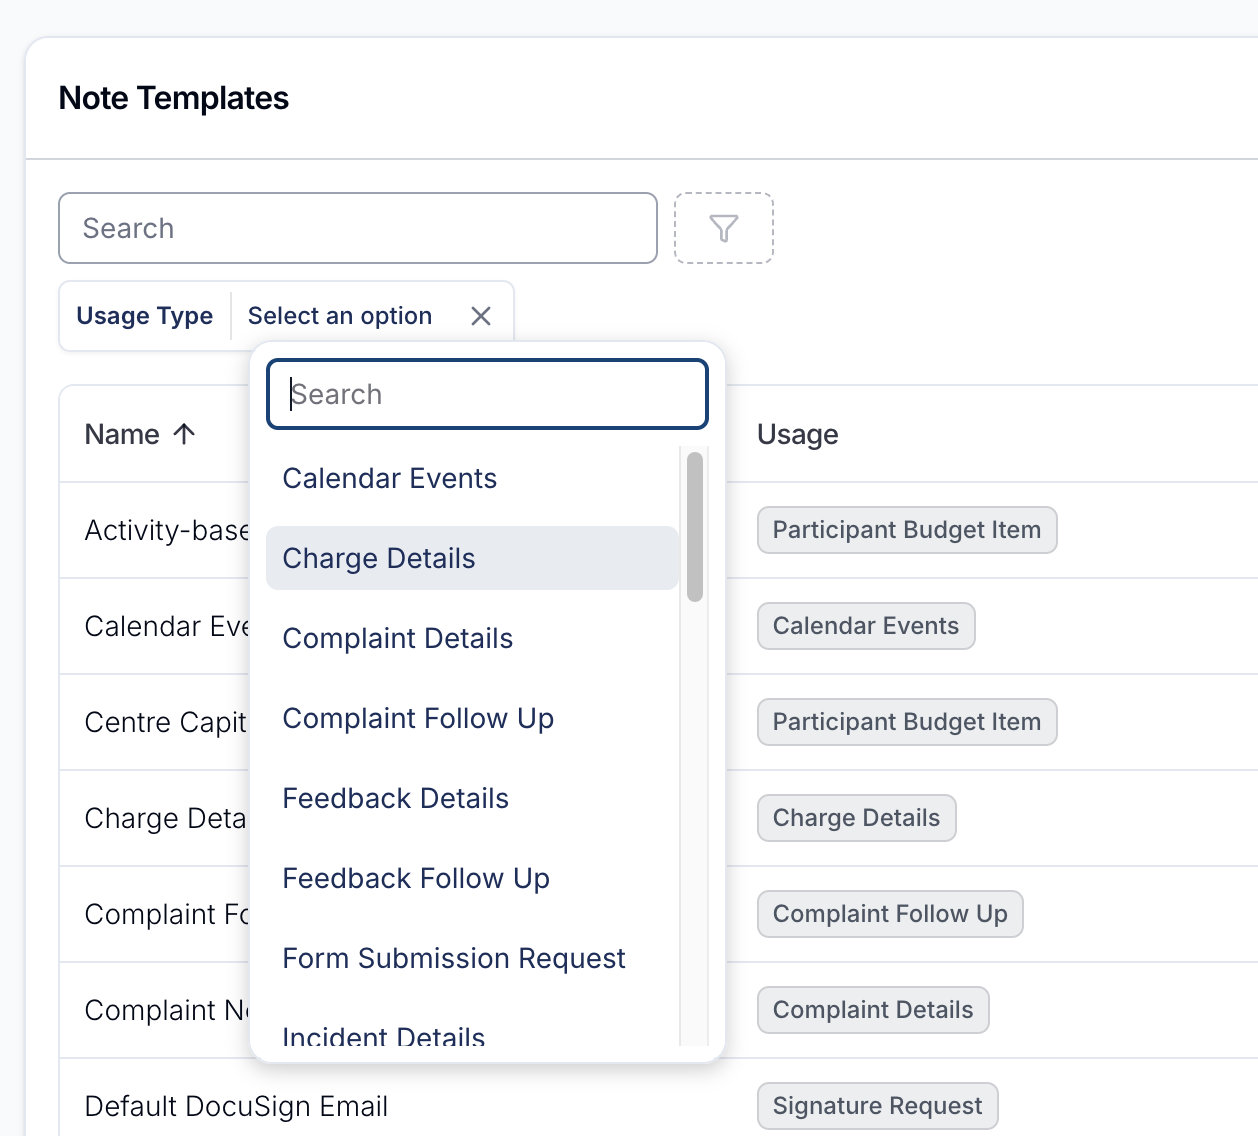
Pick one usage type from the Usage Type list. Each usage type comes with a short description of where templates saved against it appear, and the list has its own search box so you can narrow it down instead of scrolling - searching feedback, for example, brings up the feedback usage types.
The usage types are:
| Usage Type | Where this template appears |
|---|---|
| Calendar Events | When creating a Calendar Event. |
| Charge Details | When creating or viewing a charge (direct, support or recurring). |
| Complaint Details | On the details field of a Feedback record of type Complaint. |
| Complaint Follow Up | On the follow-up field of a Feedback record of type Complaint. |
| Feedback Details | On the details field of a Feedback record. |
| Feedback Follow Up | On the follow-up field of a Feedback record. |
| Form Submission Request | When requesting a form submission. |
| Incident Details | In the details field of an Incident. |
| Incident Follow Up | In the follow-up field of an Incident. |
| Participant Alerts | When creating or editing an alert on a Participant. |
| Participant Budget Description | In the Budget Description field when creating or editing a Participant Budget. |
| Participant Budget Items | When creating or editing a Participant Budget Item. |
| Participant Goals | When adding or editing a goal on a Participant's plan. |
| Participant Information Items | When adding a Participant Information Item, and when configuring Information Item types in Settings. |
| Participant Notes | When adding a note from a Participant's Notes tab. |
| Participant Records | When emailing a Participant's record documents. |
| Participant Risk Description | When creating or editing a Participant Risk. |
| Participant Schedule Email | When emailing a Participant their schedule of supports. |
| Plan Implementation | When updating the Implementation section of a Participant's plan. |
| Referral Details | In the details field of a Referral. |
| Shift Details | When creating a Shift or an unpaid break. |
| Signature Request | When requesting a signature on Participant or User records. |
| Site Information Items | When adding a Site Information Item, and when configuring Site Information types in Settings. |
| Support Admin Details | In the admin details field when creating or editing a Support, including group supports. |
| Support Details | In the details field when creating or editing a Support, including group supports. |
| Support Notes | When adding a note to a Support from the schedule. |
| Task Notes | In the note field when creating, editing or adding a note to a Task. |
| User Bio | In the bio field when creating or editing a team member. |
| User Notes | When adding a note about a team member. |
| Voided Invoice Notification | Appears in the message sent to the original recipients when voiding an Invoice. |
| Voided Invoice Reason | Appears in the internal reason field when voiding an Invoice. |
| Bulk Participant Message Email | When messaging many Participants from Communications > Email Participants. |
| Bulk Participant Schedule Email | When emailing schedules to many Participants from Communications > Send Schedule. |
| Chat Messages | When writing a message in Chat. Keeps bold, italics, underline, strikethrough, lists and links; headings and highlighted text come through as plain text. |
Feature Requirements
The usage types available to you depend on the features enabled for your account:
- Complaint Details, Complaint Follow Up, Feedback Details and Feedback Follow Up need Feedback & Complaints.
- Participant Schedule Email, Shift Details, Site Information Items, Support Admin Details, Support Details and Support Notes need Scheduling.
- Charge Details needs Direct Charges.
- Participant Risk Description needs Participant Risks.
- Bulk Participant Schedule Email needs Scheduling and Bulk Communications.
- Bulk Participant Message Email needs Bulk Communications with Email Participants enabled.
- Chat Messages needs Chat.
If a usage type you expect is missing, check that the relevant feature is included and enabled for your account.
Feedback and Complaint Usage Types
If you use the Feedback & Complaints register, four usage types let you standardise how your team records and follows up entries:
- Feedback Details - appears on the Details field of a Feedback entry.
- Feedback Follow Up - appears on the Follow-up & Resolution Notes field of a Feedback entry.
- Complaint Details - appears on the Details field of a Complaint entry.
- Complaint Follow Up - appears on the Follow-up & Resolution Notes field of a Complaint entry.
To find these quickly, type feedback (or complaint) into the search box on the Usage Type list.
Astalty chooses which templates to offer based on the entry's Type. An entry recorded as Feedback is offered your Feedback Details and Feedback Follow Up templates, while an entry recorded as a Complaint is offered your Complaint Details and Complaint Follow Up templates. This means a template saved as Feedback Details will not appear on a complaint, so create both if you want a template available across the whole register.
To use one, open an entry from the Feedback register, click Edit, then click the note template icon in the toolbar of the Details or Follow-up & Resolution Notes field and select your template. See Follow Up for more on the follow-up process.
The video demonstrates how to select a usage type.
Content
Enter the reusable structure or content for the note, such as headings, prompts or standard wording.
Save your Note Template
Select Create to save the Note Template. Repeat the process for each template your team needs.
Updating Note Templates
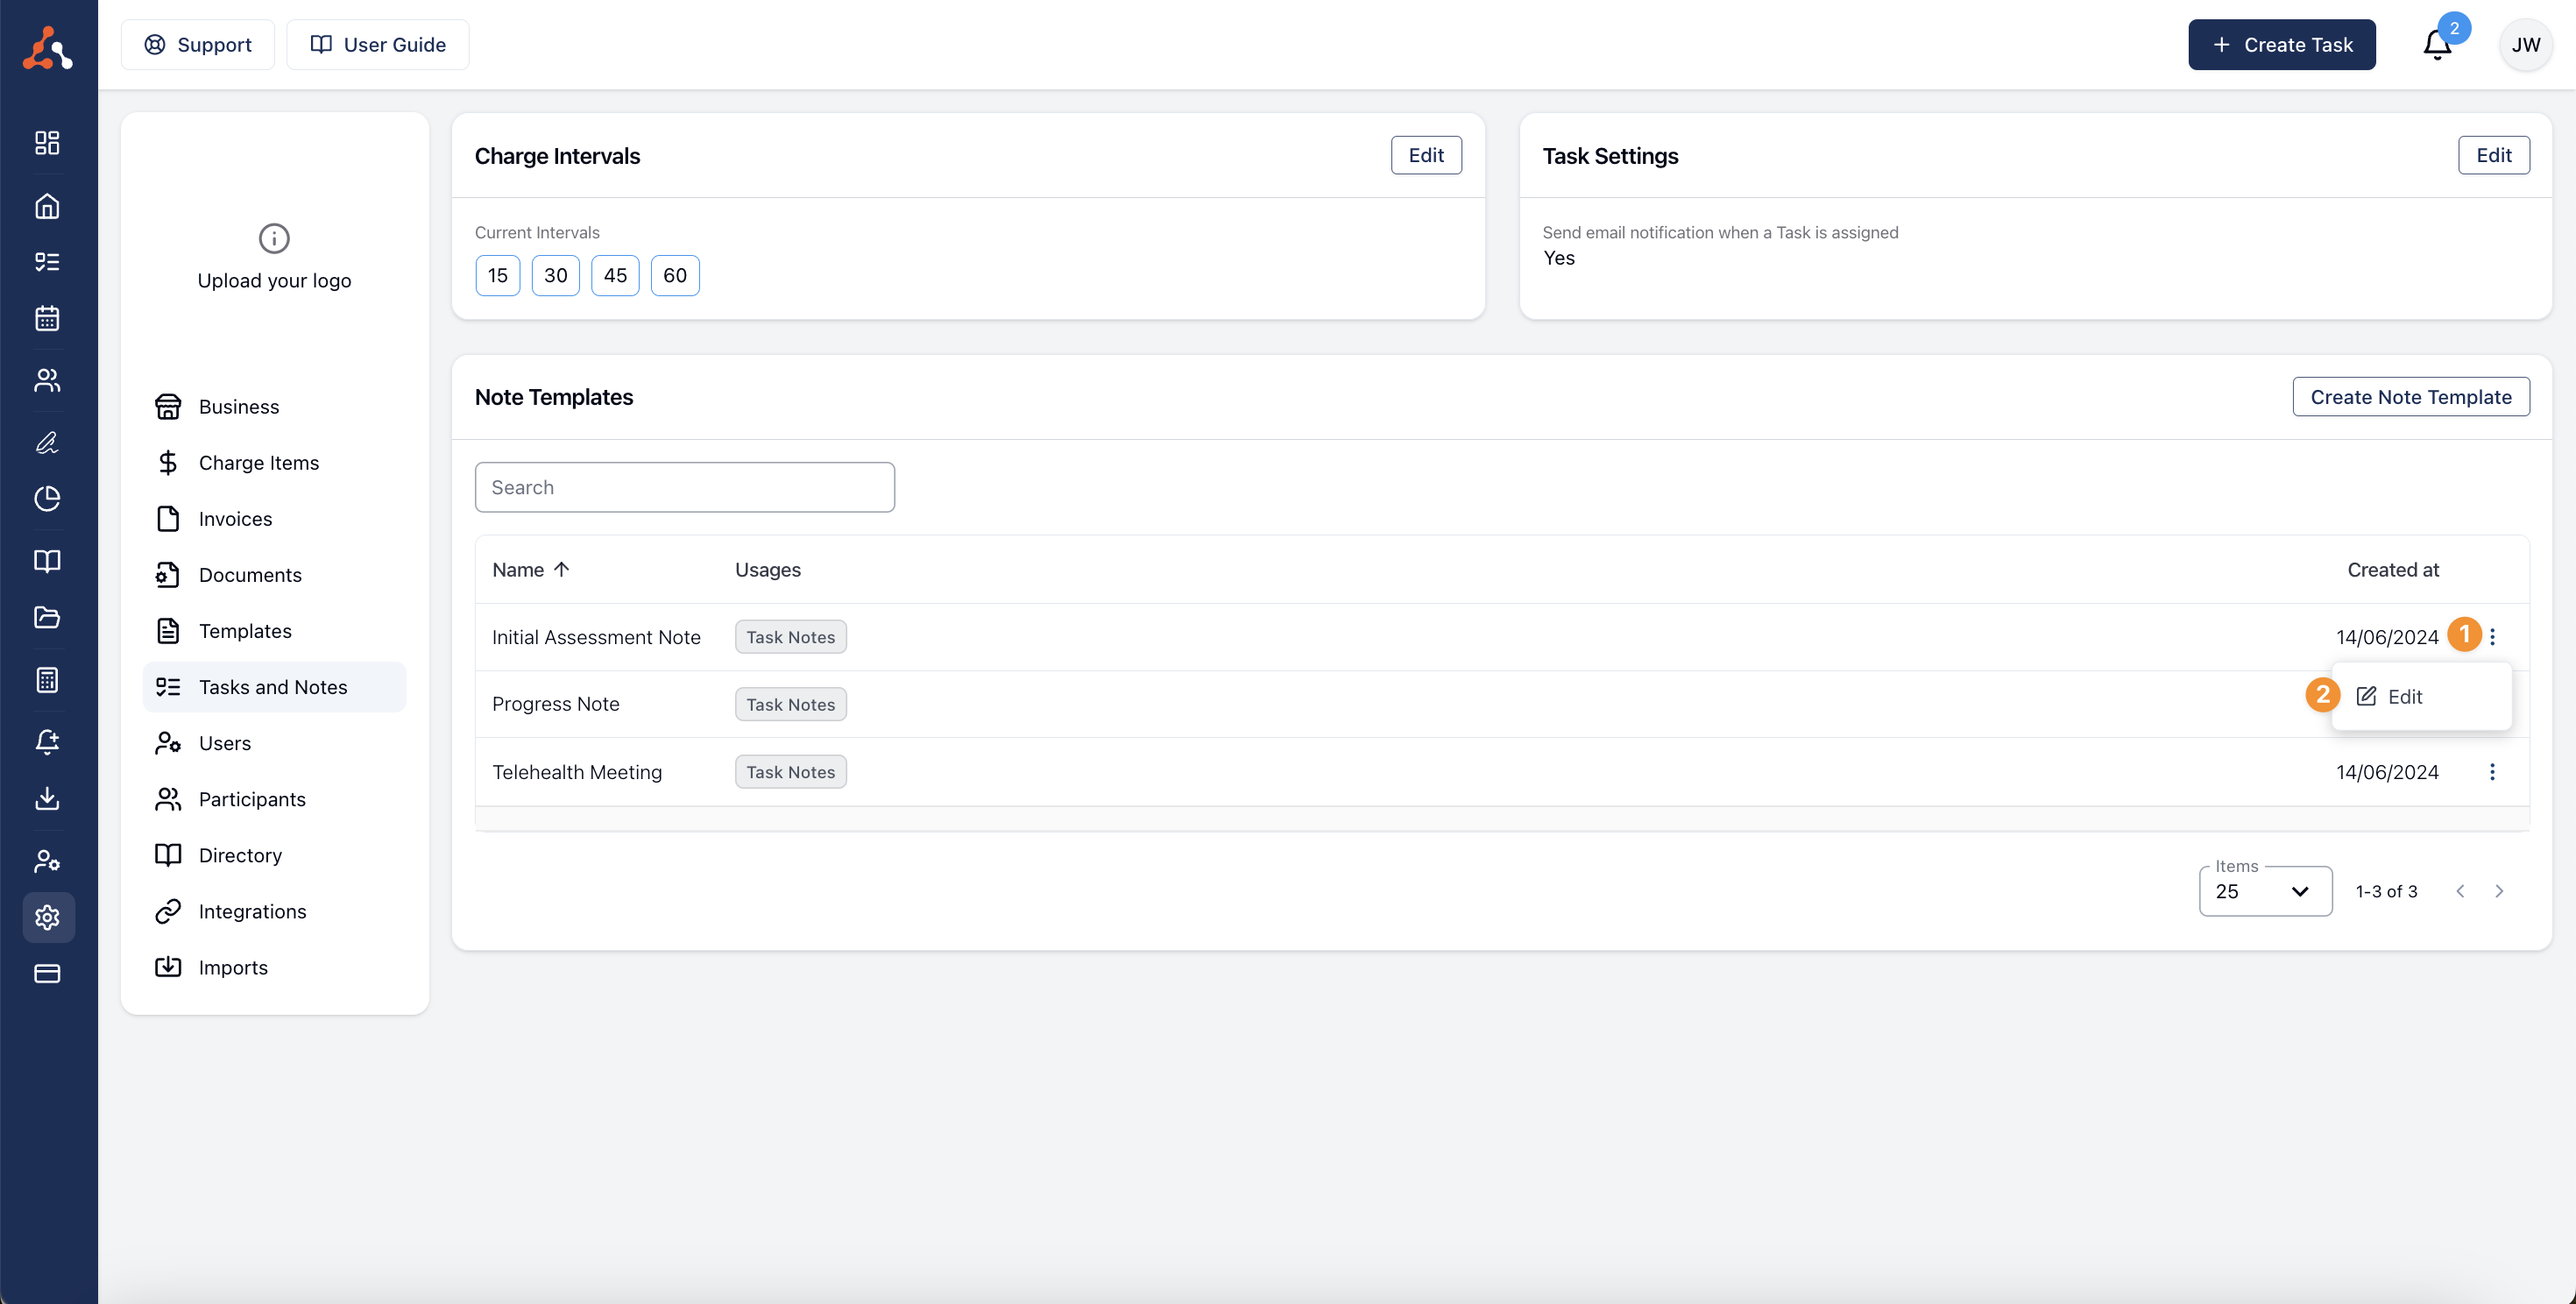
Open the three-dot menu beside a Note Template, then select Edit. Update the details and save the template.
Filtering Note Templates by Usage Type
If you're looking for a specific template, you can filter the note templates list by usage type. Use the Usage Type filter above the table and select the usage type you're after - the list will only show templates with that usage type.
The dropdown has its own search box, so you can quickly find a usage type without scrolling the full list. To go back to seeing every template, clear the filter using the X next to the selected usage type.
Using a Note Template
Note Templates can be used in Tasks. See Creating Tasks.
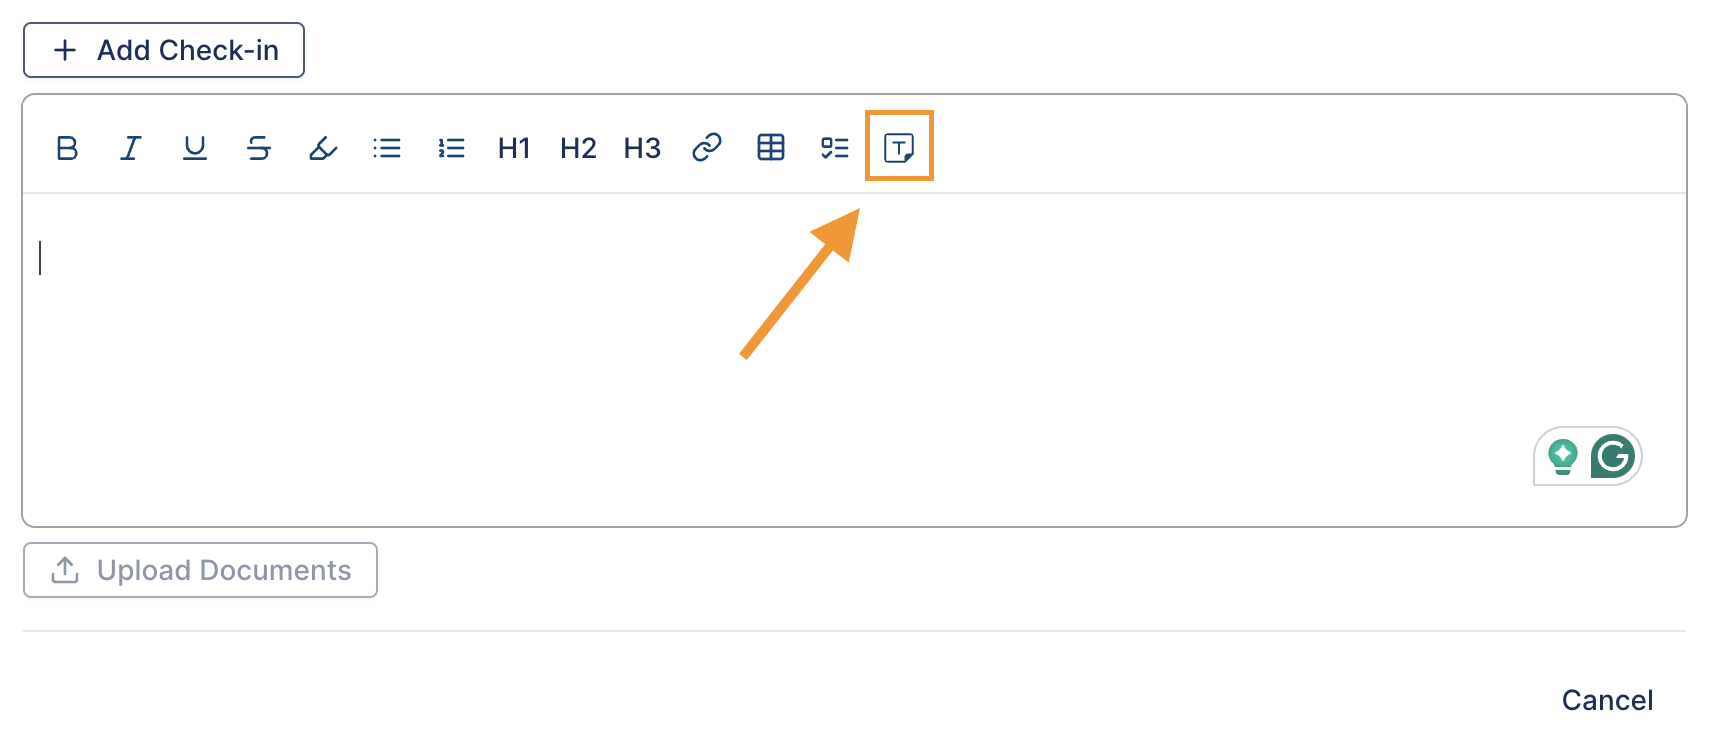
Open a Task, then select the note template icon in the Added Notes field.
Select a Template
A list of Note Templates for that usage type appears. Select the template you want to use.
Automatically Populate Note
Astalty inserts the template into the note field. Edit the text for this Task before saving the note.
Video Walkthrough
The video demonstrates the Note Template creation process.