- Participants
- Risks
Risks
Overview
You can record specific risks related to an individual Participant directly within their profile in Astalty. This acts as your risk register and works alongside the Risks Report to help you track and manage potential issues. In this guide, we’ll walk through how to create a risk entry, including details such as the risk description, likelihood, consequences, potential impact, existing controls, and the adjusted likelihood after controls are in place. Once added, all risks are calculated using a risk matrix, and are summarised in an overview section in the Risks menu.
Risks Menu
Head to the Participants profile and click the Risks menu to be taken to the Risks functionality.
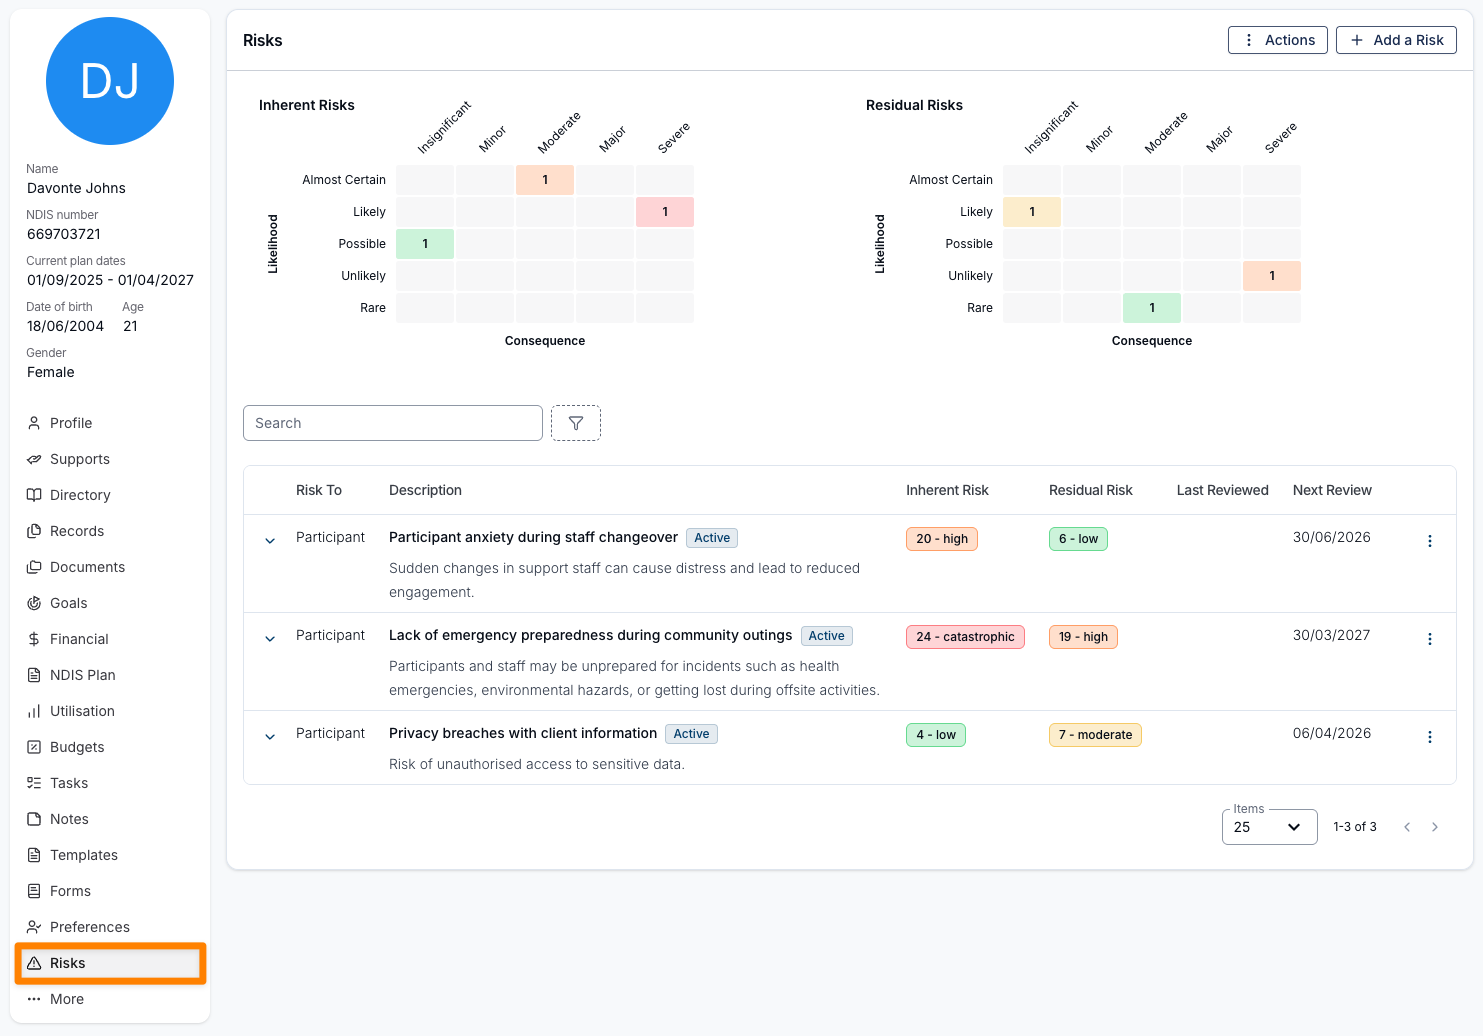
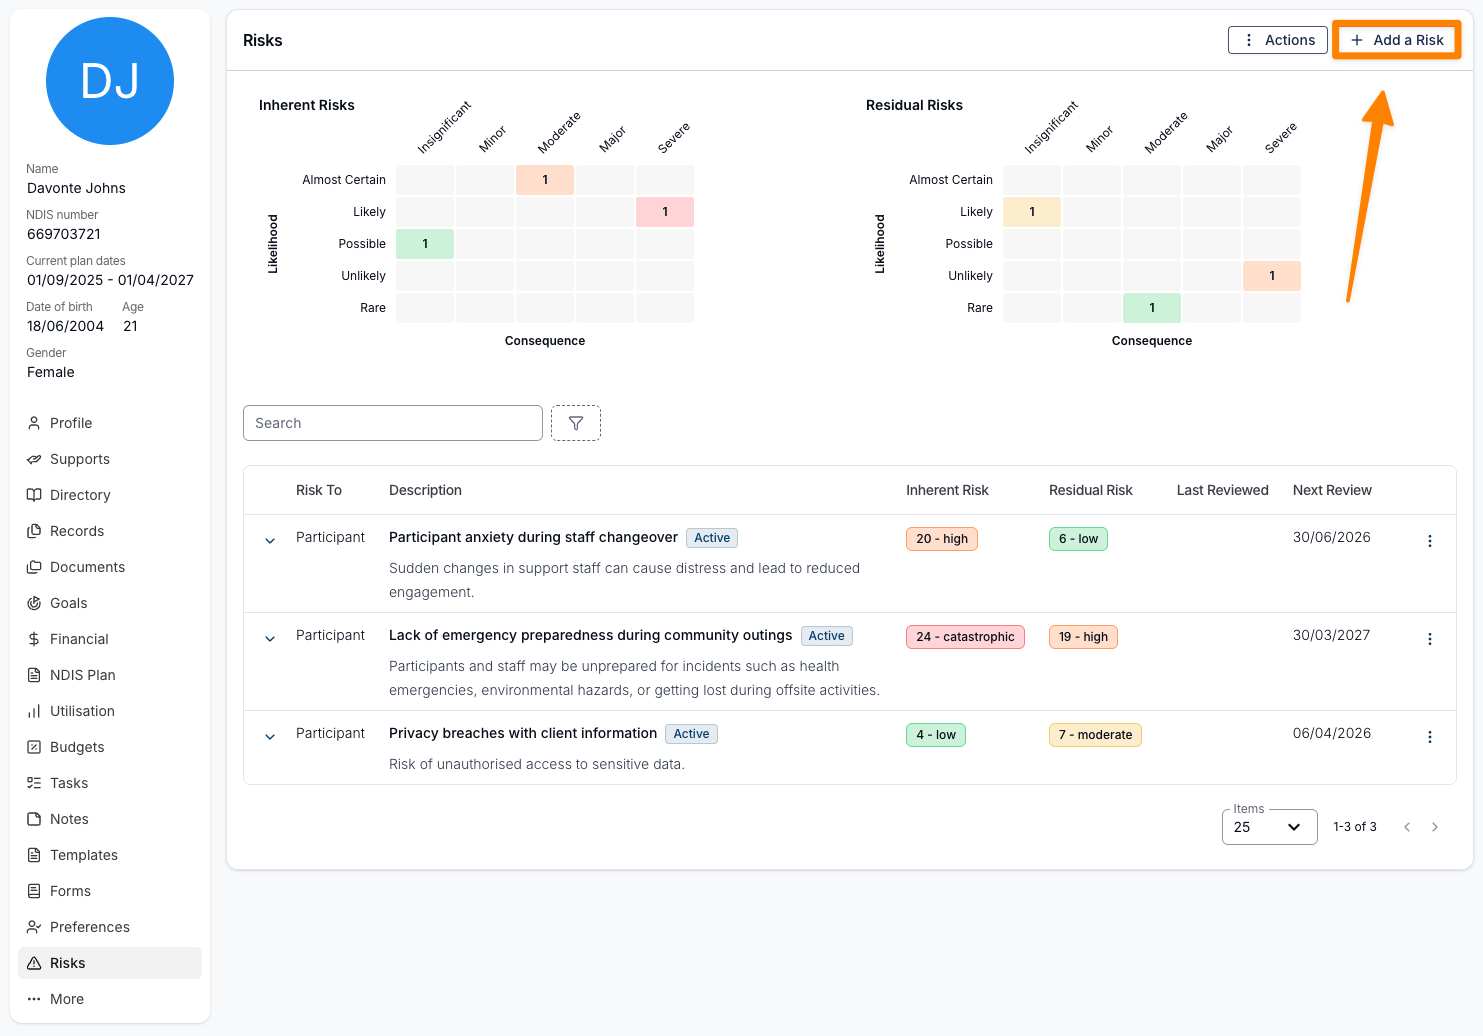
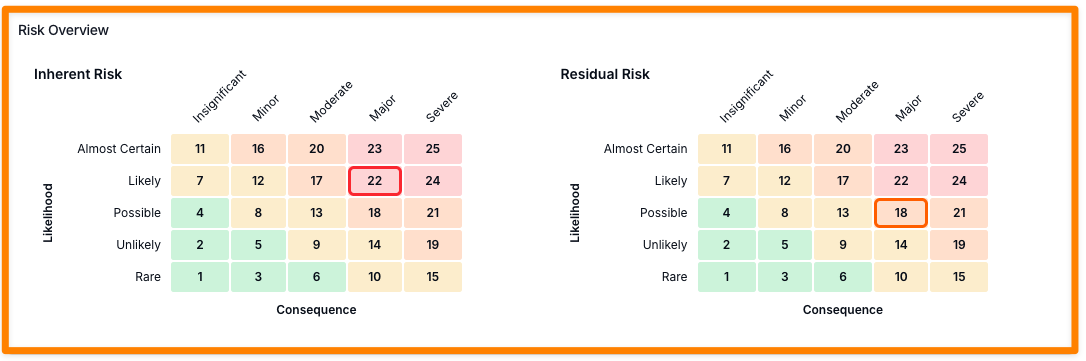
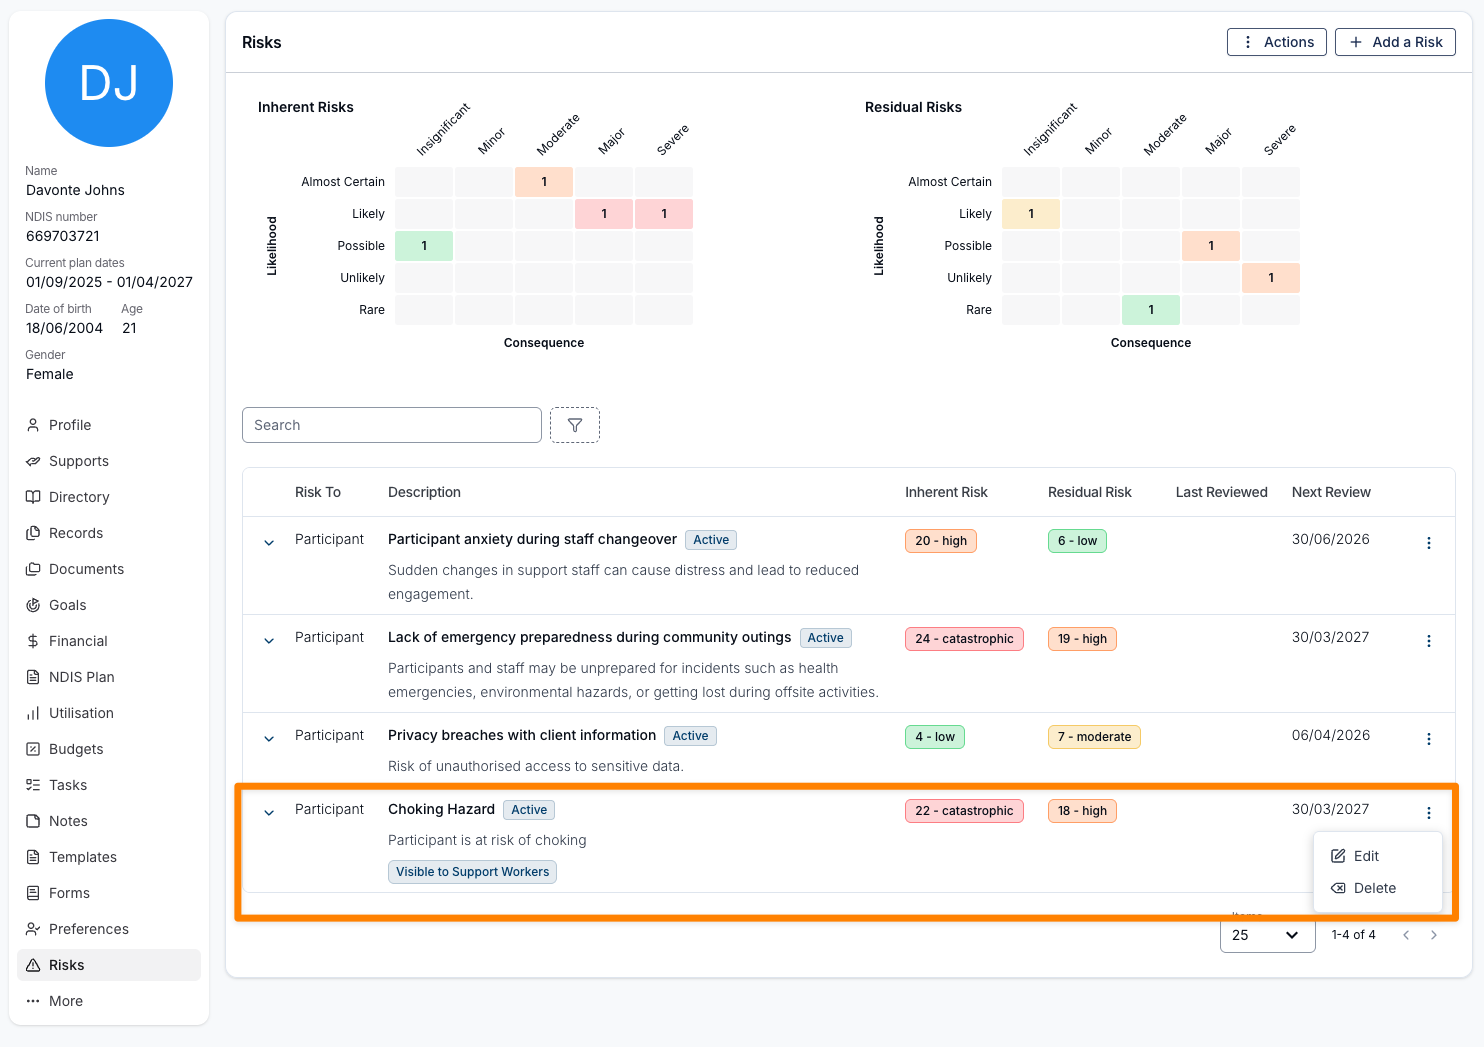
Within this menu you can see the overview of this Participants Inherent and Residual risks within the risk matrices. You will also see the list of all current entered risks for this Participant. You can also 'Add a Risk' by clicking the 'Add a Risk' button in the top left corner. You can also edit, clone, archive or delete exisiting Risks by clicking on the three dots next to the Risk.
Sorting
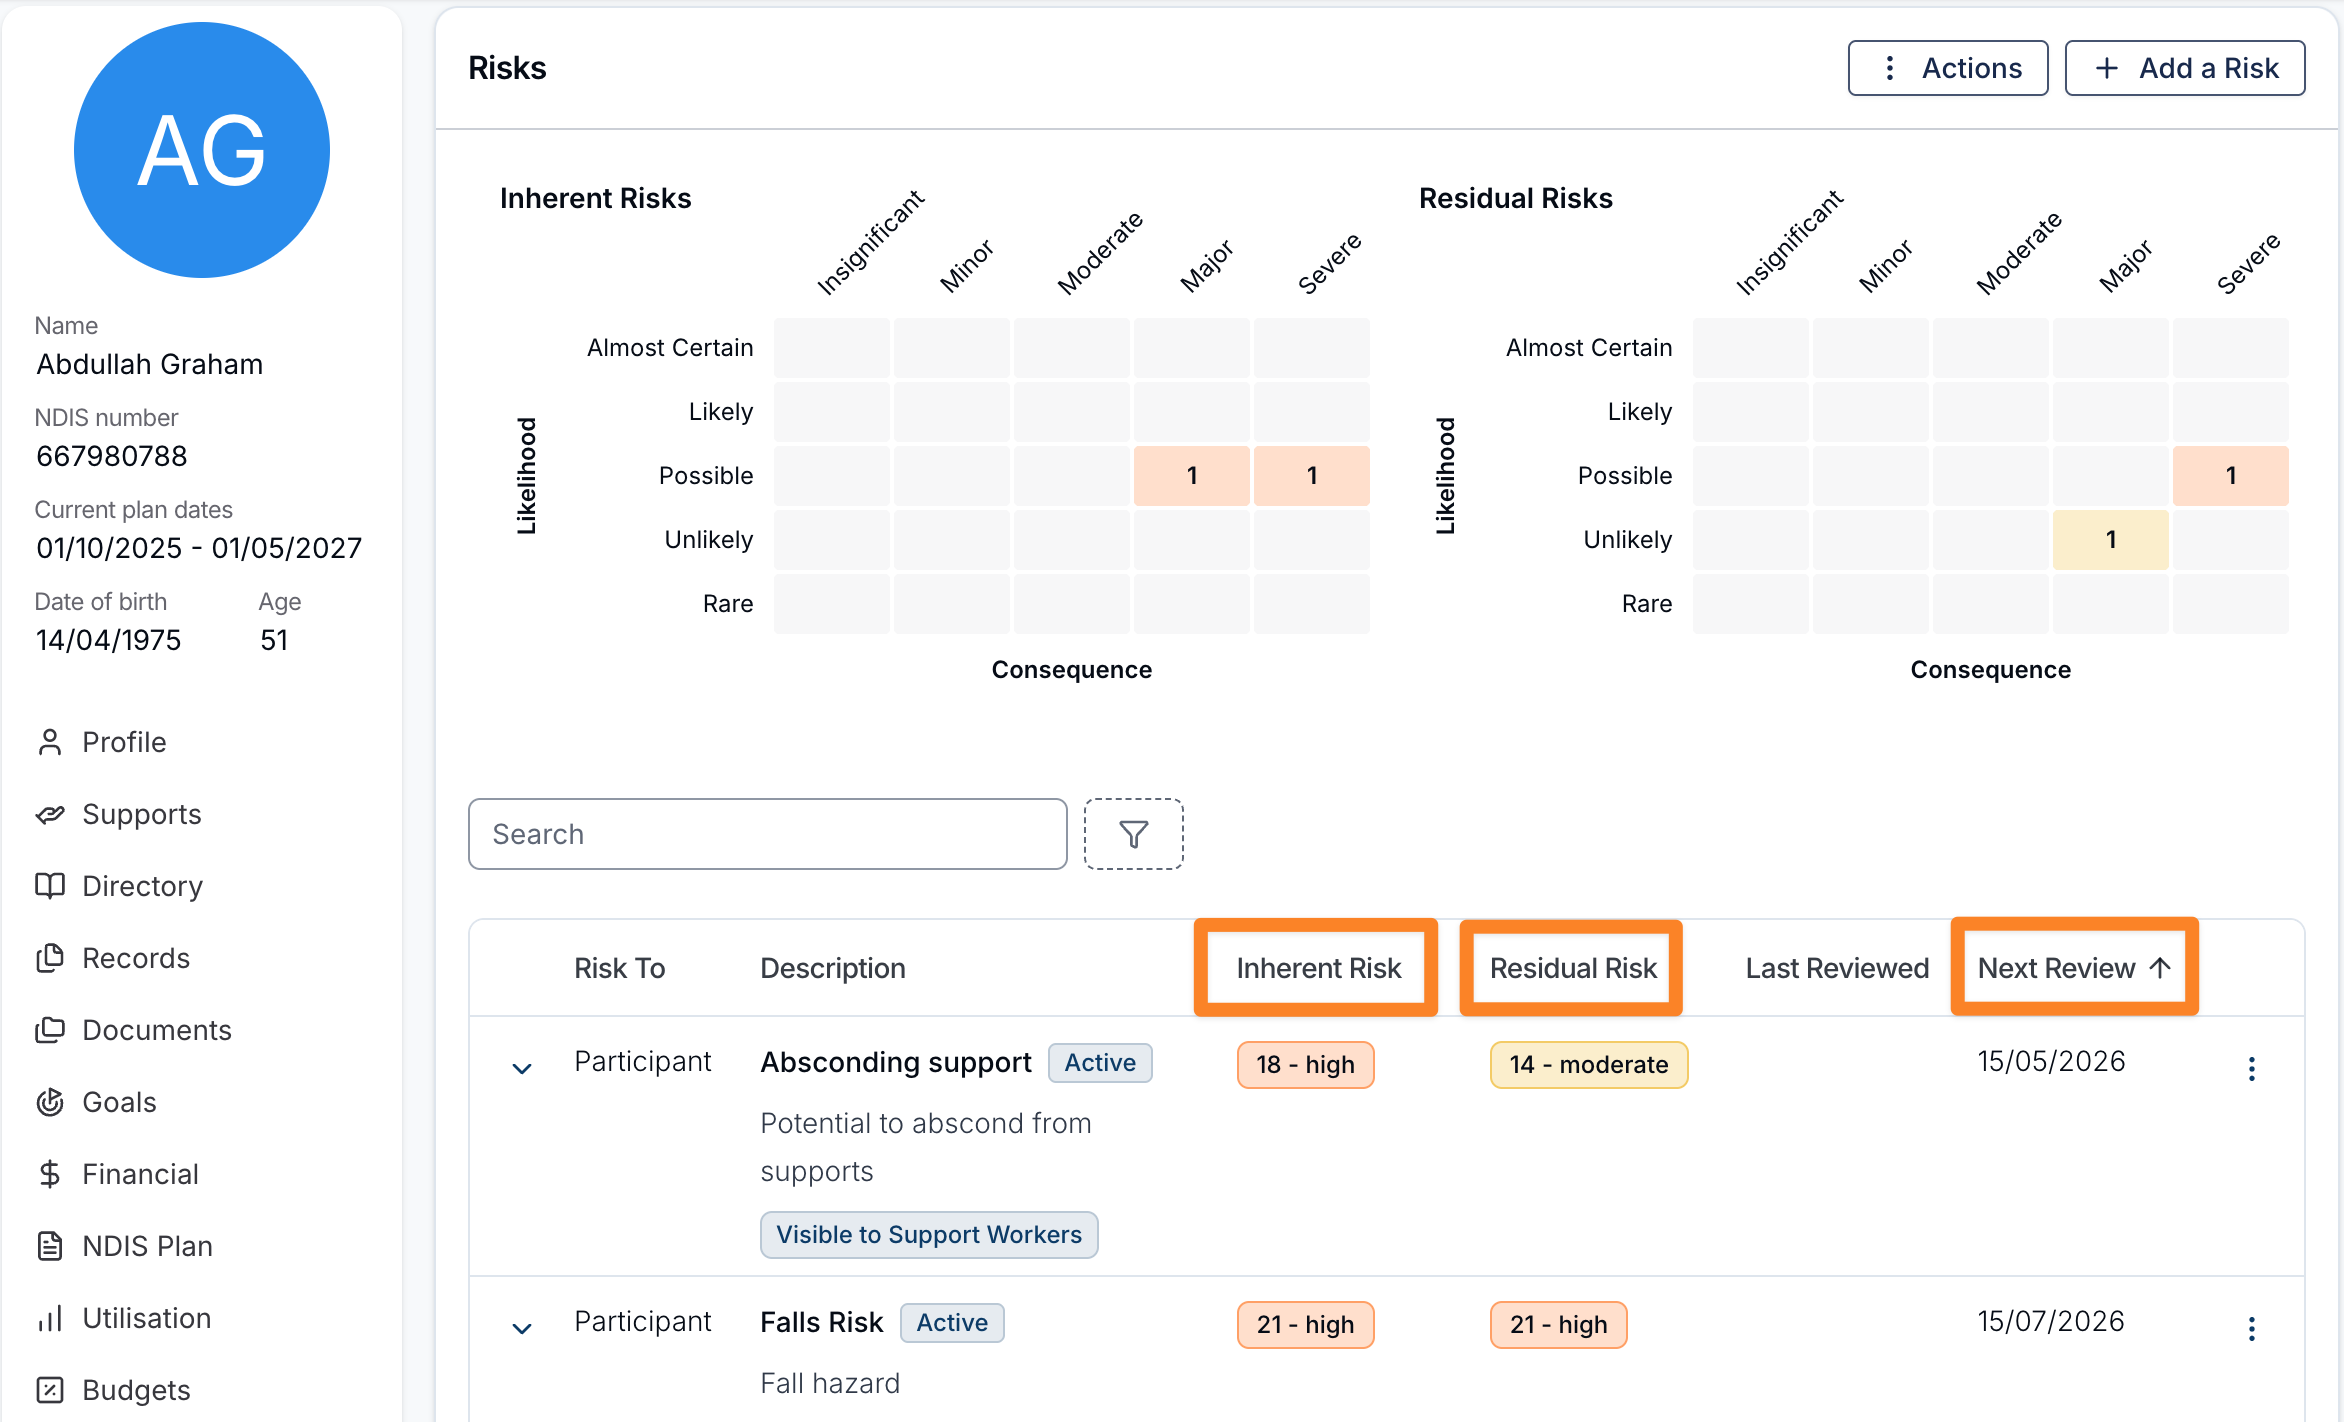
You can now sort records within the Risks menu to help organise and review risk information more effectively.
The following sorting options are available:
- Inherent Risk – Sort risks based on their initial risk level before any controls are applied.
- Residual Risk – Sort risks based on the remaining level of risk after controls have been implemented.
- Next Review – Sort risks by their upcoming review date.
Sorting allows you to quickly prioritise and review risks based on severity or upcoming review requirements.
Risk Details
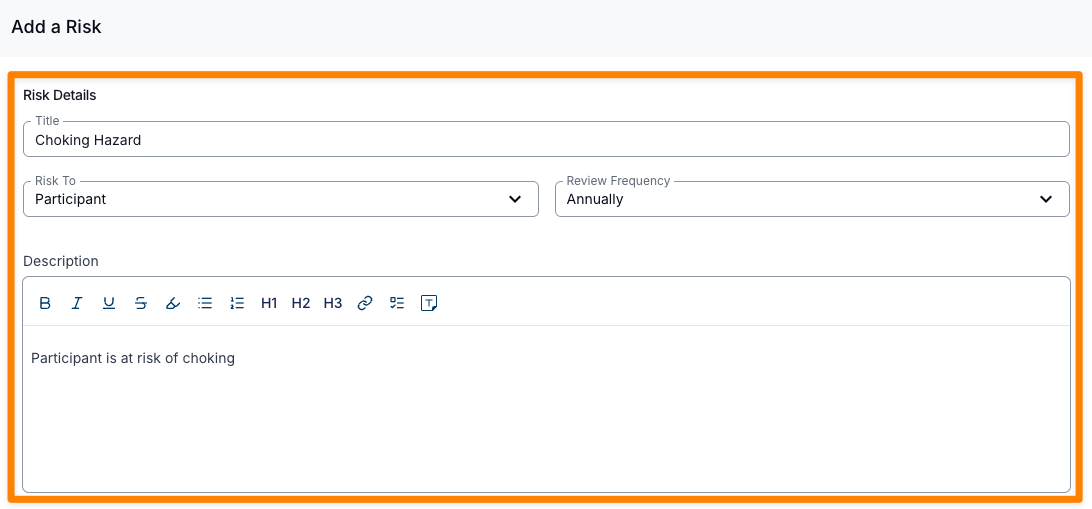
Upon adding a risk you will be taken to the Risk pop up menu where you can complete the risk details and perform the risk assessment.
- Title
- Risk To (Participant, Business, or Staff)
- Review Frequency (Monthly or Annually)
- Description
Assessment
Once you have entered the risk details you will then perform the risk assessment this is broken down into the following sections
- Likelihood
- Consequence
- Control
Likelihood
This outlines the likelihood of the risk occurring for the Participant and is broken down to a selection of the following frequencies;
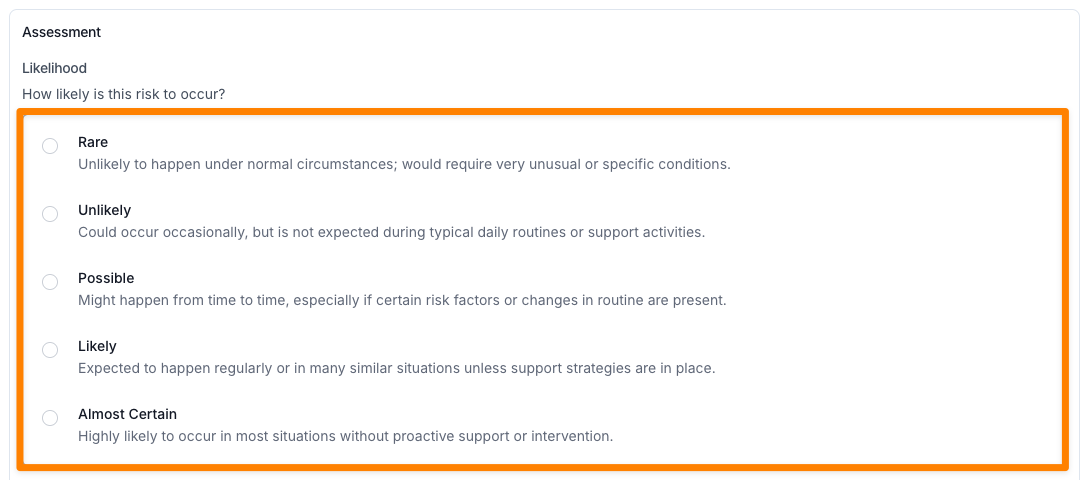
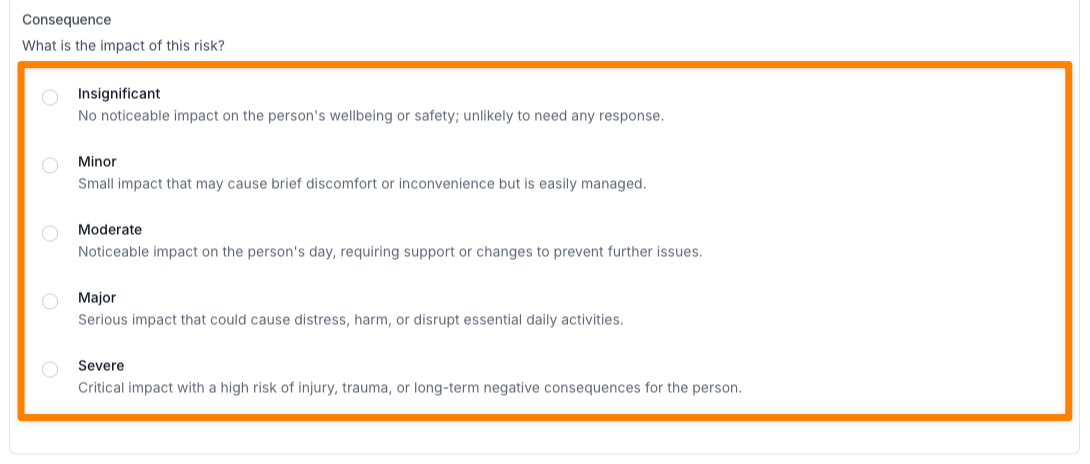
Consequence
This section outlines the impact of the risk on the person outlined in the details section. The consequence of a risk does not change regardless of any entered controls.
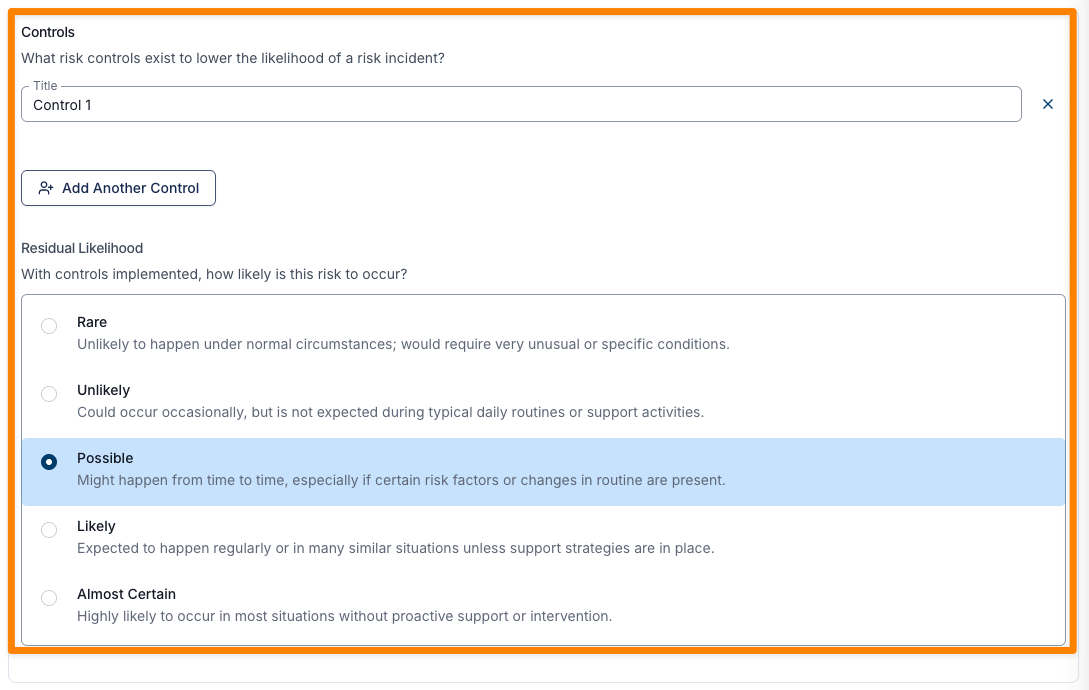
Control
This section allows you to add a control, by clicking 'Add Control' to outline what risk controls exist to lower the likelihood of the risk incident. Once you have added a control them you can select the likelihood of the risk occurring with the control in place.
Keep in mind, this likelihood rating is for all controls for this risk not a specific control.
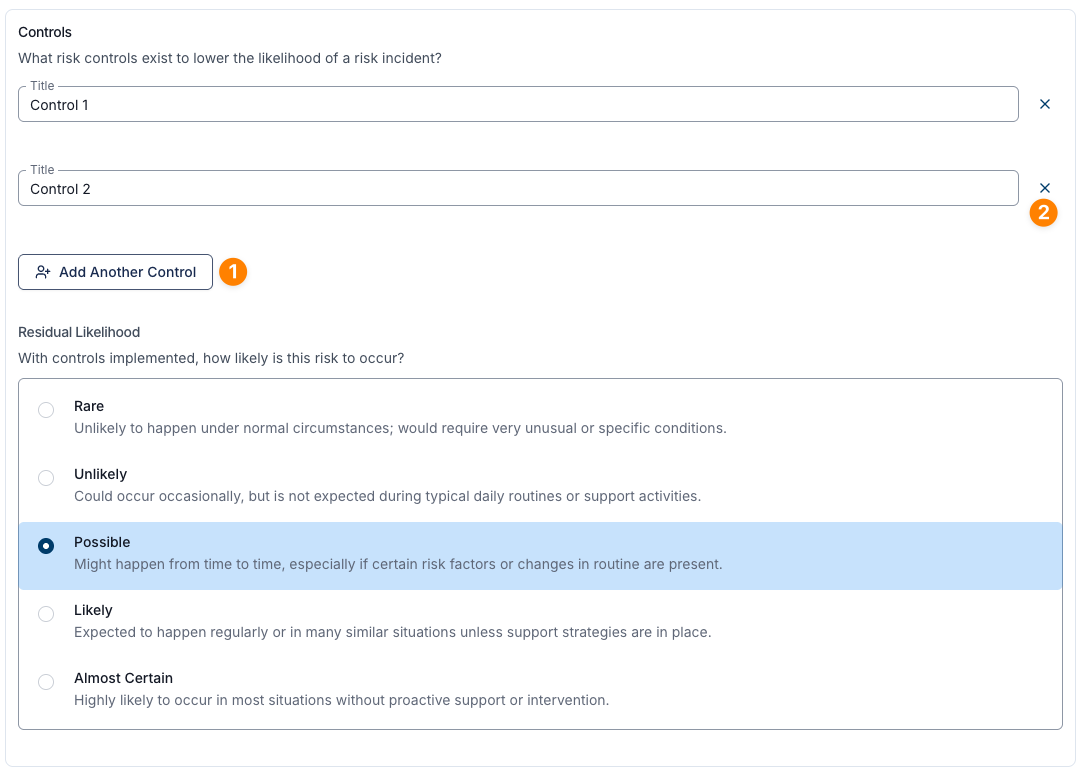
You can add multiple control options to this risk entry (1), and you can also remove a control by clicking the 'X' to the right of the control (2).
Risk Overview
Once you have completed the above information Astalty will input the information to the Risk matrices and will give you a risk score for the Inherent (pre control) and Residual (post control) risk.
Cloning a Risk
If you need to record a variation of a risk you have already assessed, you can clone an existing risk to save time instead of building it from scratch. Cloning is most useful when the risk itself is largely the same but a few details differ — for example, who the risk is to, or the controls that need to be implemented. Cloning copies a risk within the same Participant's profile; it does not copy the risk across to other Participants.
In the Risks menu, click the three dots next to the risk you want to copy and select Clone.
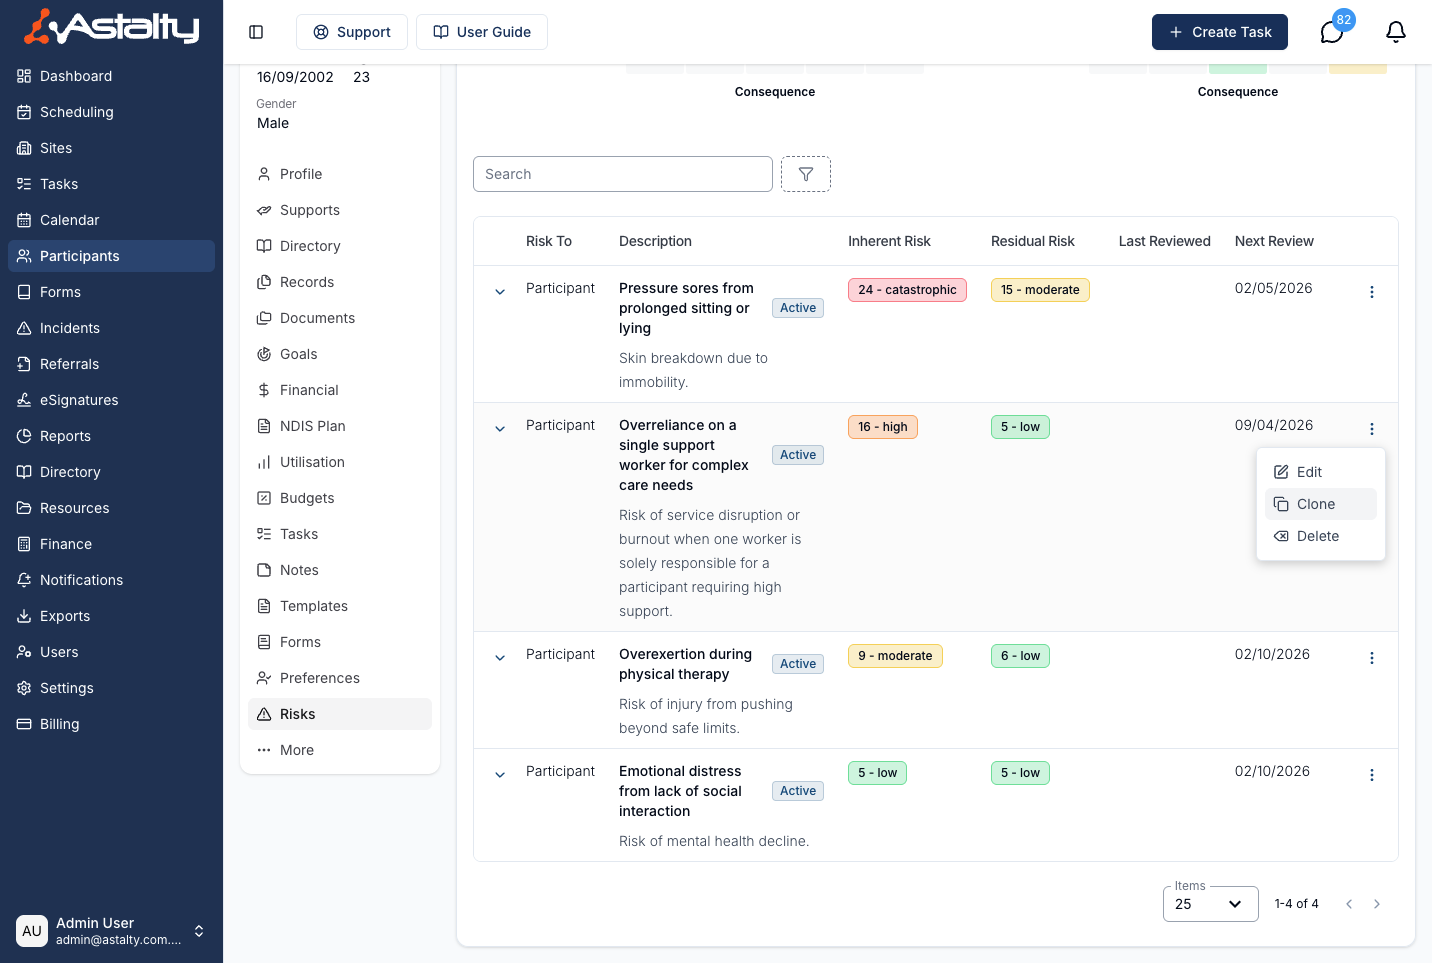
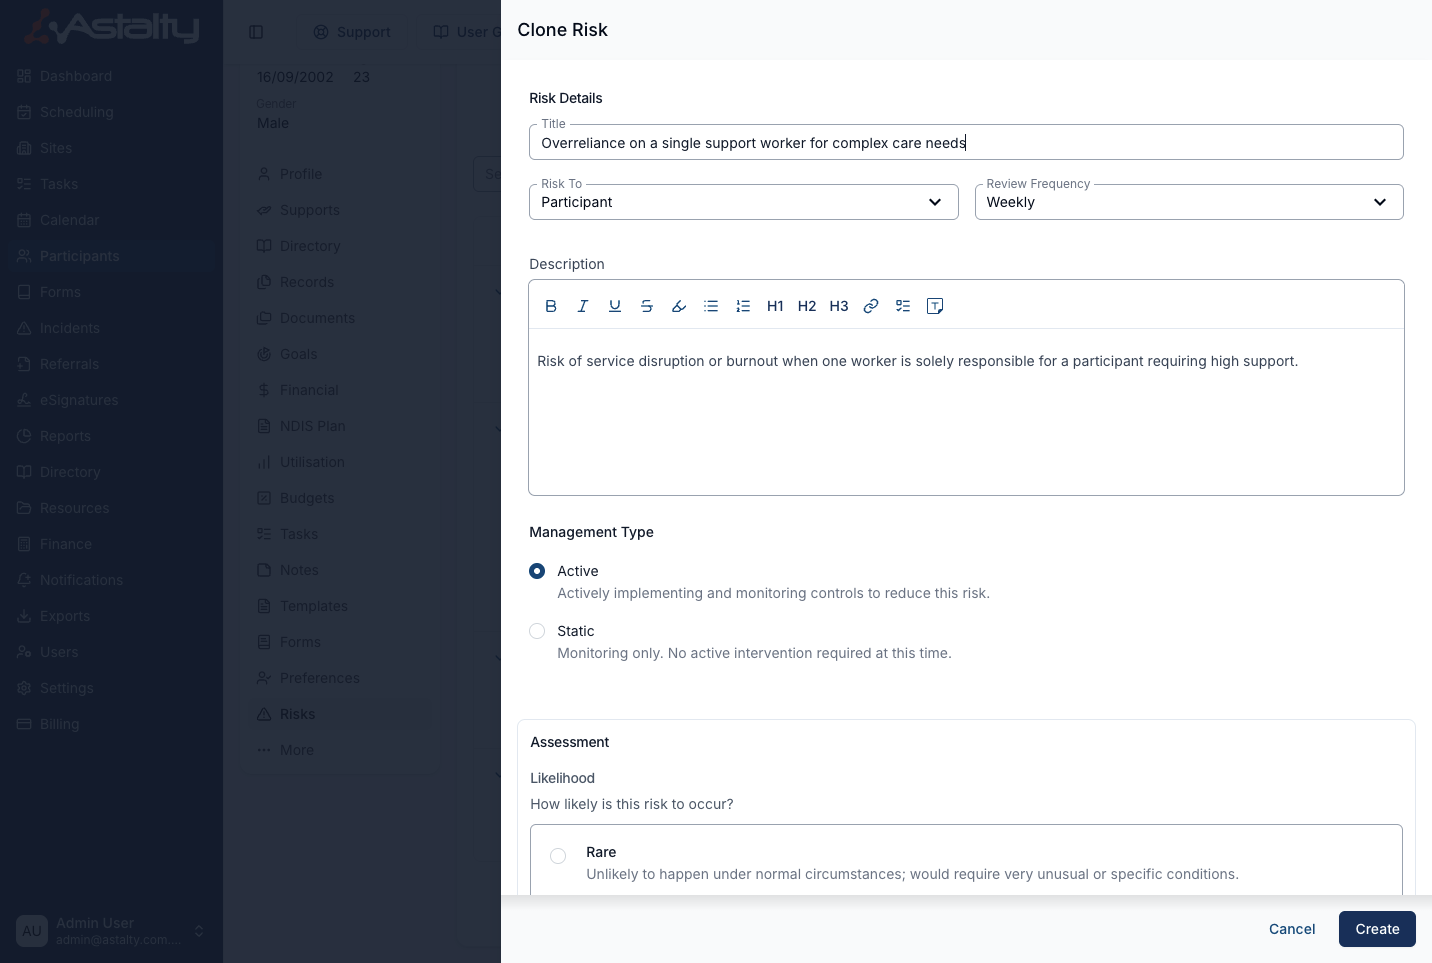
This opens the Clone Risk drawer, pre-filled with the details of the original risk — including the Title, Risk To, Review Frequency, Description, Management Type, Likelihood, Consequence, any Controls, and the Support Worker visibility setting.
Adjust any of the details as needed, then click Create to save it as a new risk. The cloned risk is a separate, standalone entry — editing or deleting it has no effect on the original risk it was copied from.
Archiving a Risk
When a risk is no longer relevant to a Participant — for example, the circumstances behind it have changed, or the risk has been fully resolved — you can archive it instead of deleting it. Archiving keeps the full risk record and its audit trail, but removes the risk from day-to-day view so your risk register only shows what you are actively managing.
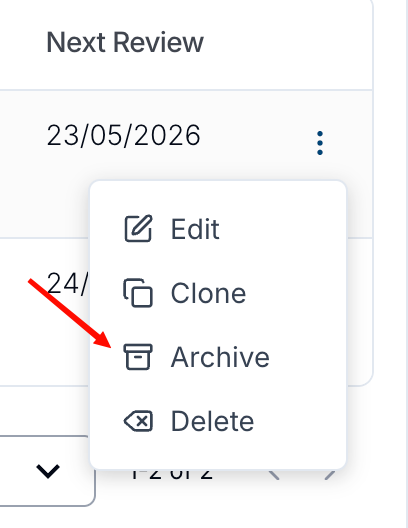
To archive a risk, go to the Risks menu on the Participant's profile, click the three dots next to the risk, and select Archive.
Astalty will ask you to confirm before archiving. Click Archive in the confirmation window to complete it, or Cancel to leave the risk as it is.
You can also archive a risk while you have it open — the Archive button sits at the bottom left of the Edit Risk drawer, next to Cancel and Update.
What Changes When a Risk is Archived
Once archived, the risk is treated as no longer active. It is excluded from:
- The Participant's Inherent and Residual risk matrices on the Risks menu.
- The Participant's Export as PDF risk report.
- The Participant Risks Report and its risk matrices.
- The Risks Export (CSV and PDF).
- Participant Risk Review notifications — you will no longer be reminded to review it.
- The Support Worker app, even if the risk was set as visible to Support Workers.
Viewing and Restoring Archived Risks
By default the Risks menu shows only active risks. To find an archived risk, click the filter button above the risk list and select Archived.
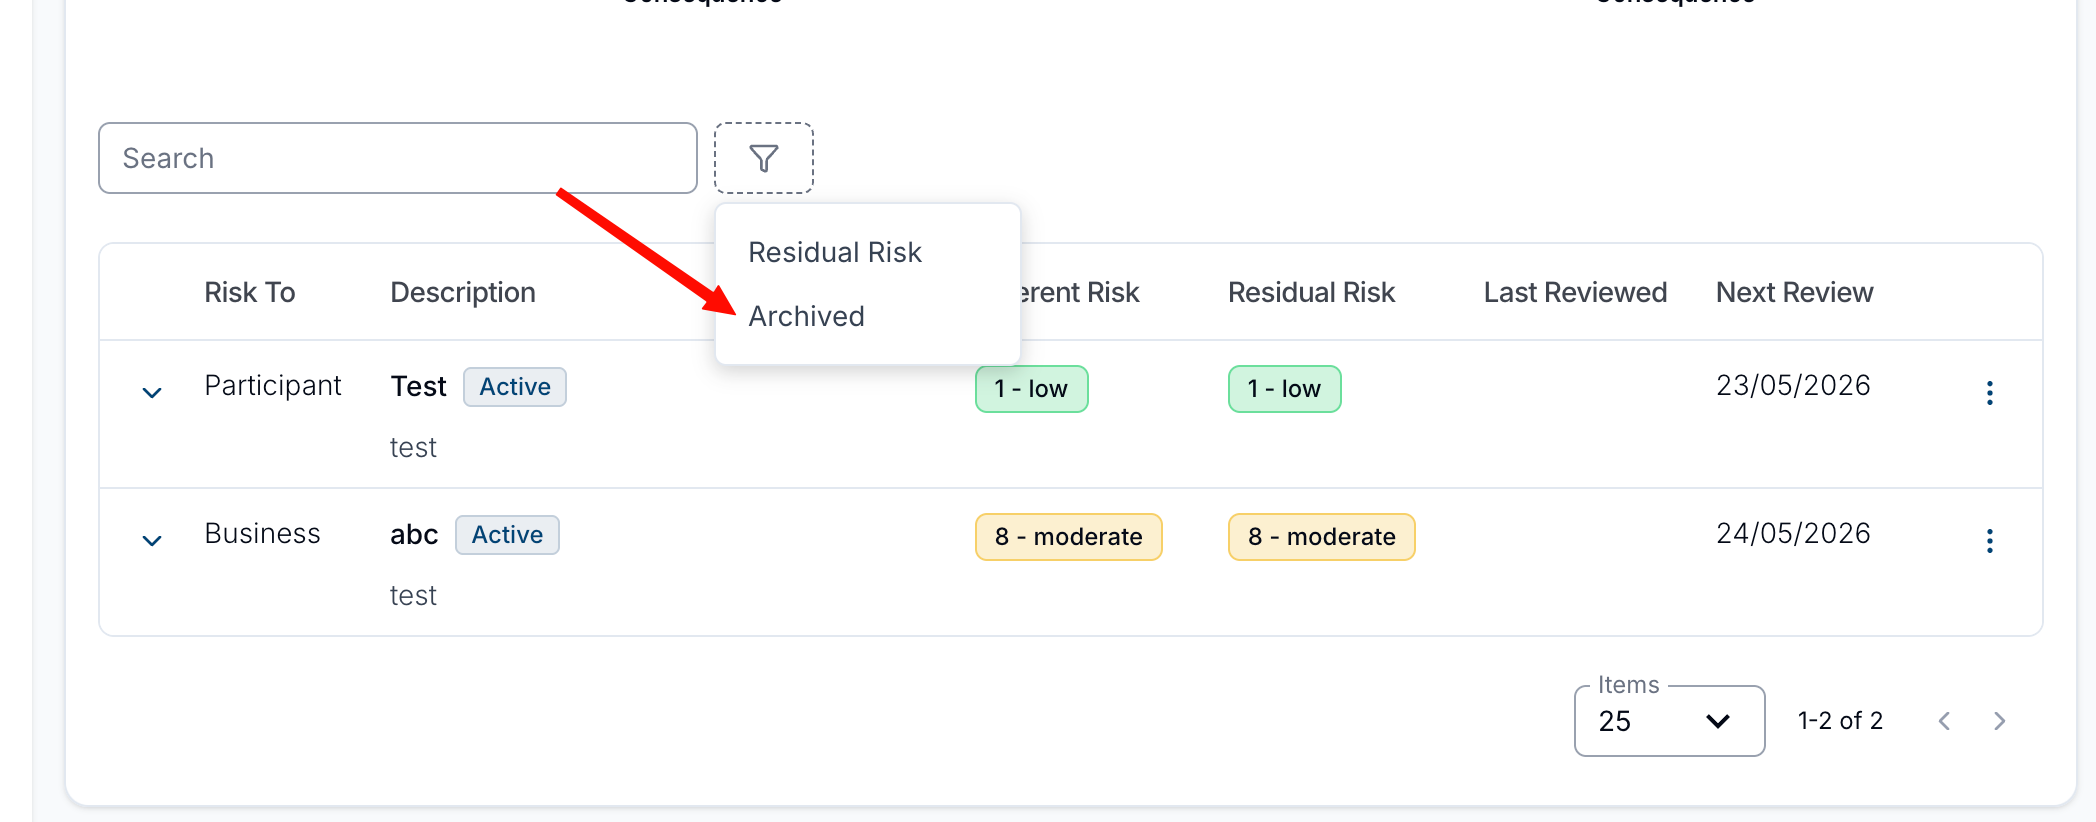
The filter can be set to Active (the default) or Archived. Switch it to Archived to list the Participant's archived risks — each one is marked with an Archived label next to its title.
To restore a risk, click the three dots next to the archived risk and select Unarchive, then confirm. The risk returns to the active list and is included in the matrices, reports, exports and review notifications again.
Making Risks Visible to Support Workers
You can set the visibility of specific Risks by selecting the Visible to Support Workers option. By default, Risks will not be visible to Support Workers, and this option can be selected either when creating the Risk, or by editing the Risk later.

To see how Risks are displayed to Support Workers, visit the Participant Details App View guide.
Risk Review
Once you have added risks to a Participant profile, Astalty will give you an overall risk score for the Inherent (pre control) and Residual (post control) risks for this Participant. This will display on the Risks menu on the Participant's profile.
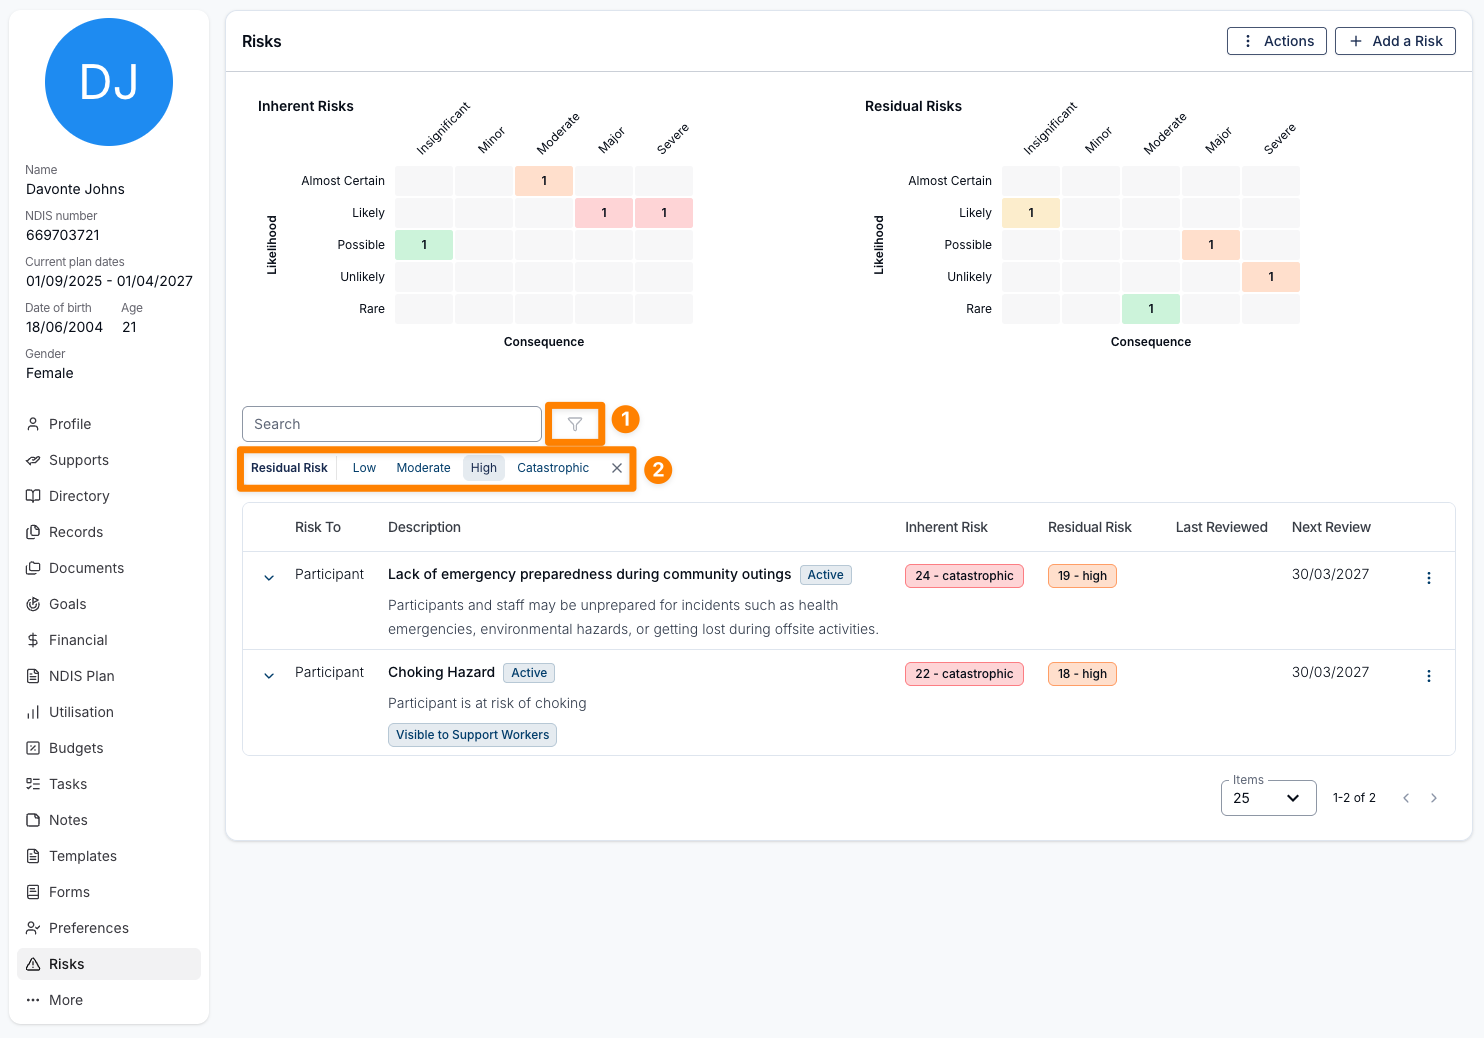
You can filter this menu by the residual risk factor as seen below. To do this, select the filter button, and then select the Residual Risk option. The same filter button is also where you switch between active and archived risks — see Archiving a Risk.
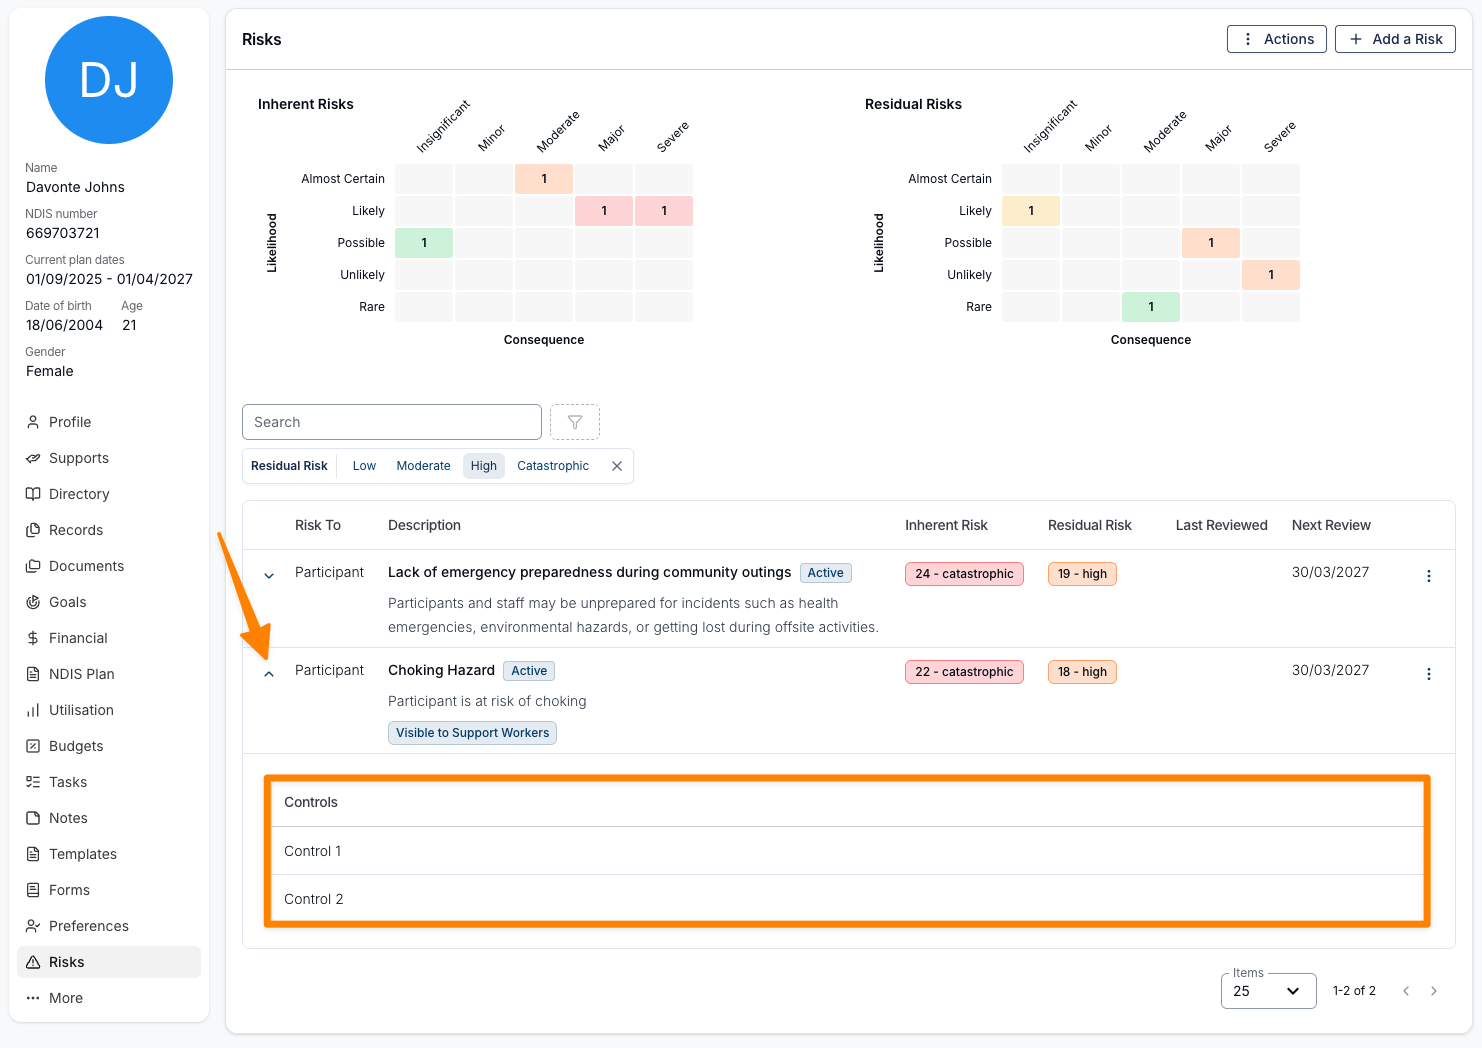
By clicking the arrow to the right of the entered risk you can view any entered controls for this risk for ease of viewing as seen below.
When you need to review the risk, based on the frequency outlined for the risk — simply click the 3 dots and select edit to review the risk (you can also delete the risk from this menu as well).
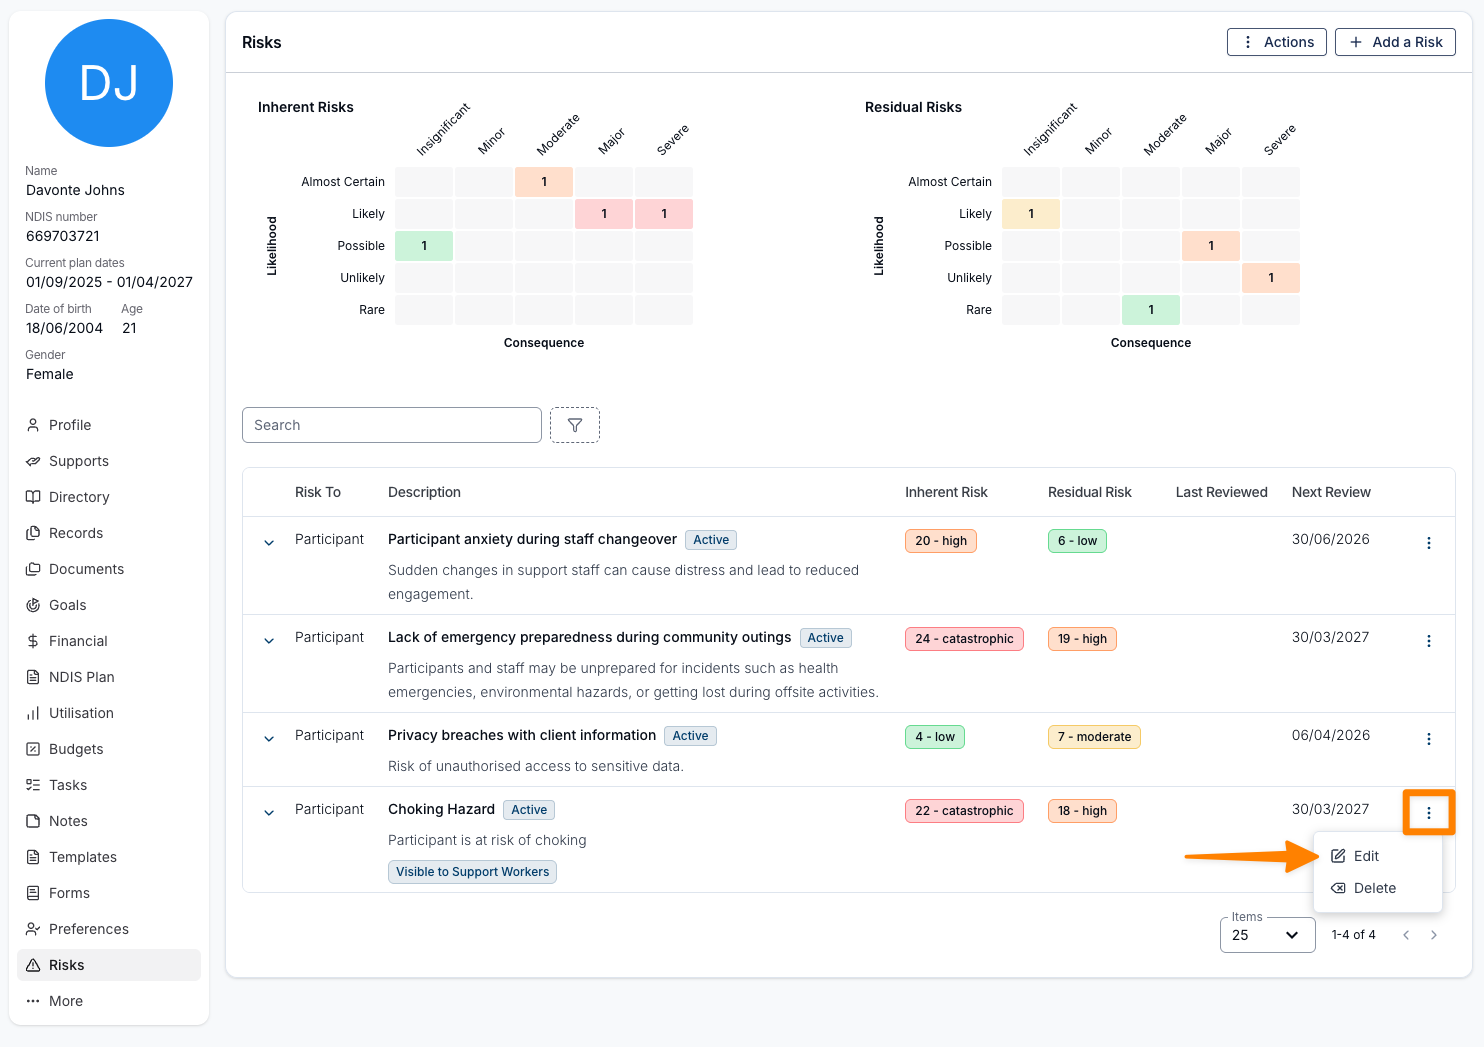
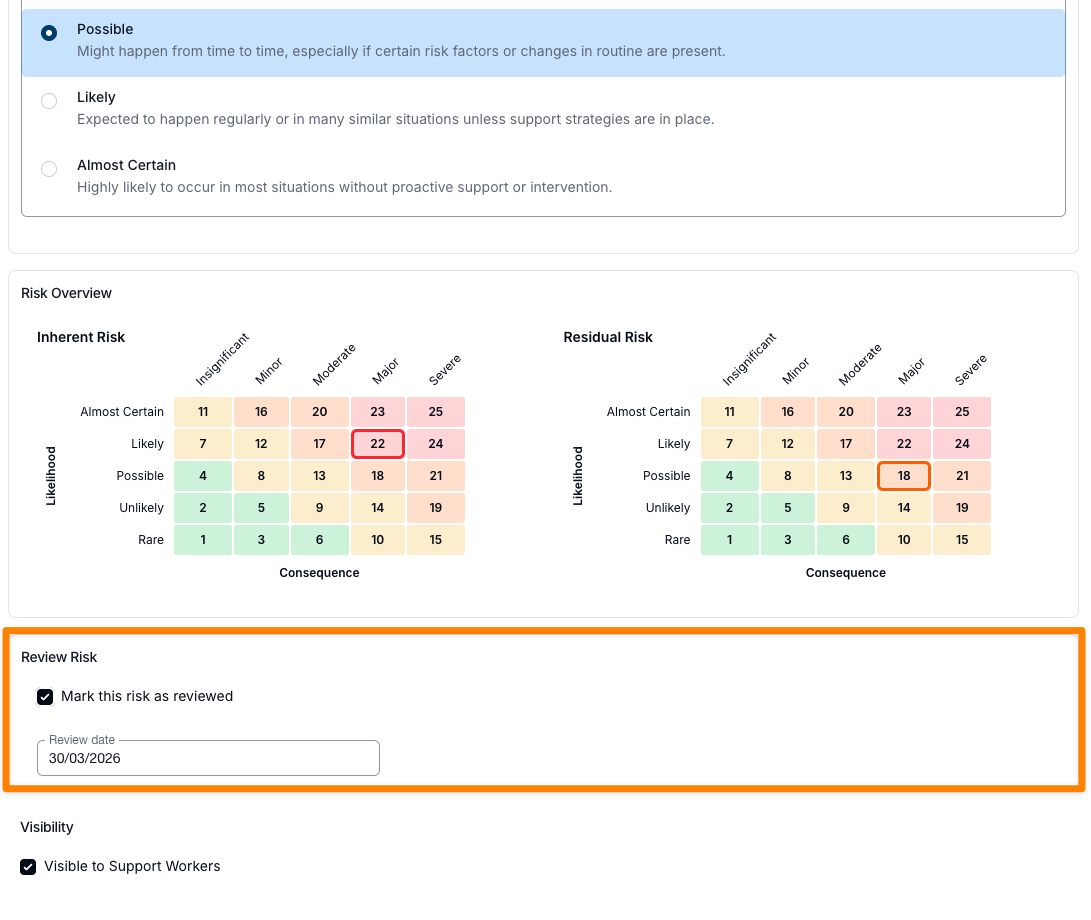
You will now see a 'Review Risk' option toward the end of the risk entry. By clicking the checkbox for 'Mark this risk as reviewed' and updating, this will save the risk as being reviewed.
Audit Trail
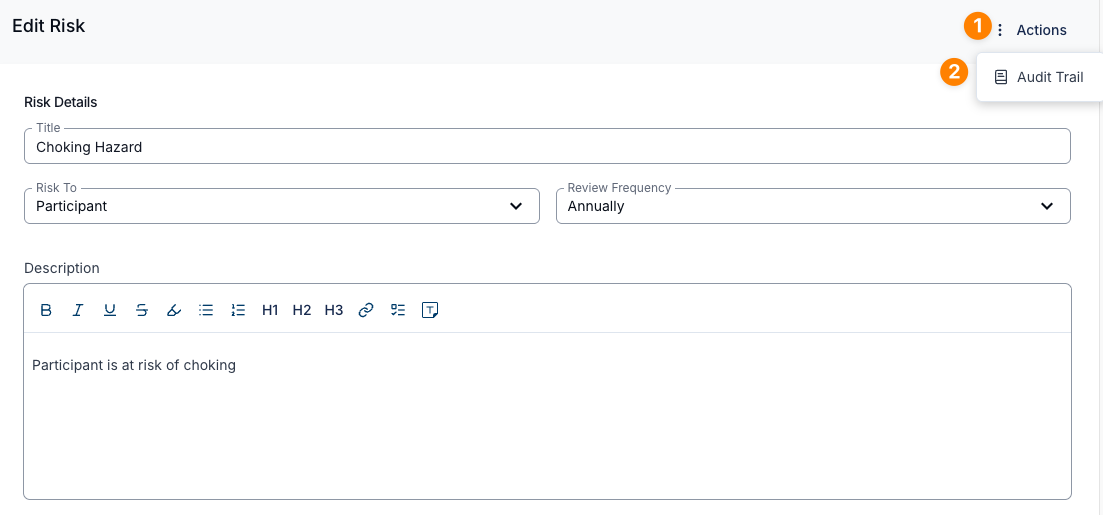
To view the audit trail of any reviews or edits to the risk entry, click the 'Actions' button at the top of the risk edit screen and select 'Audit Trail' from the option.
Exporting Risks
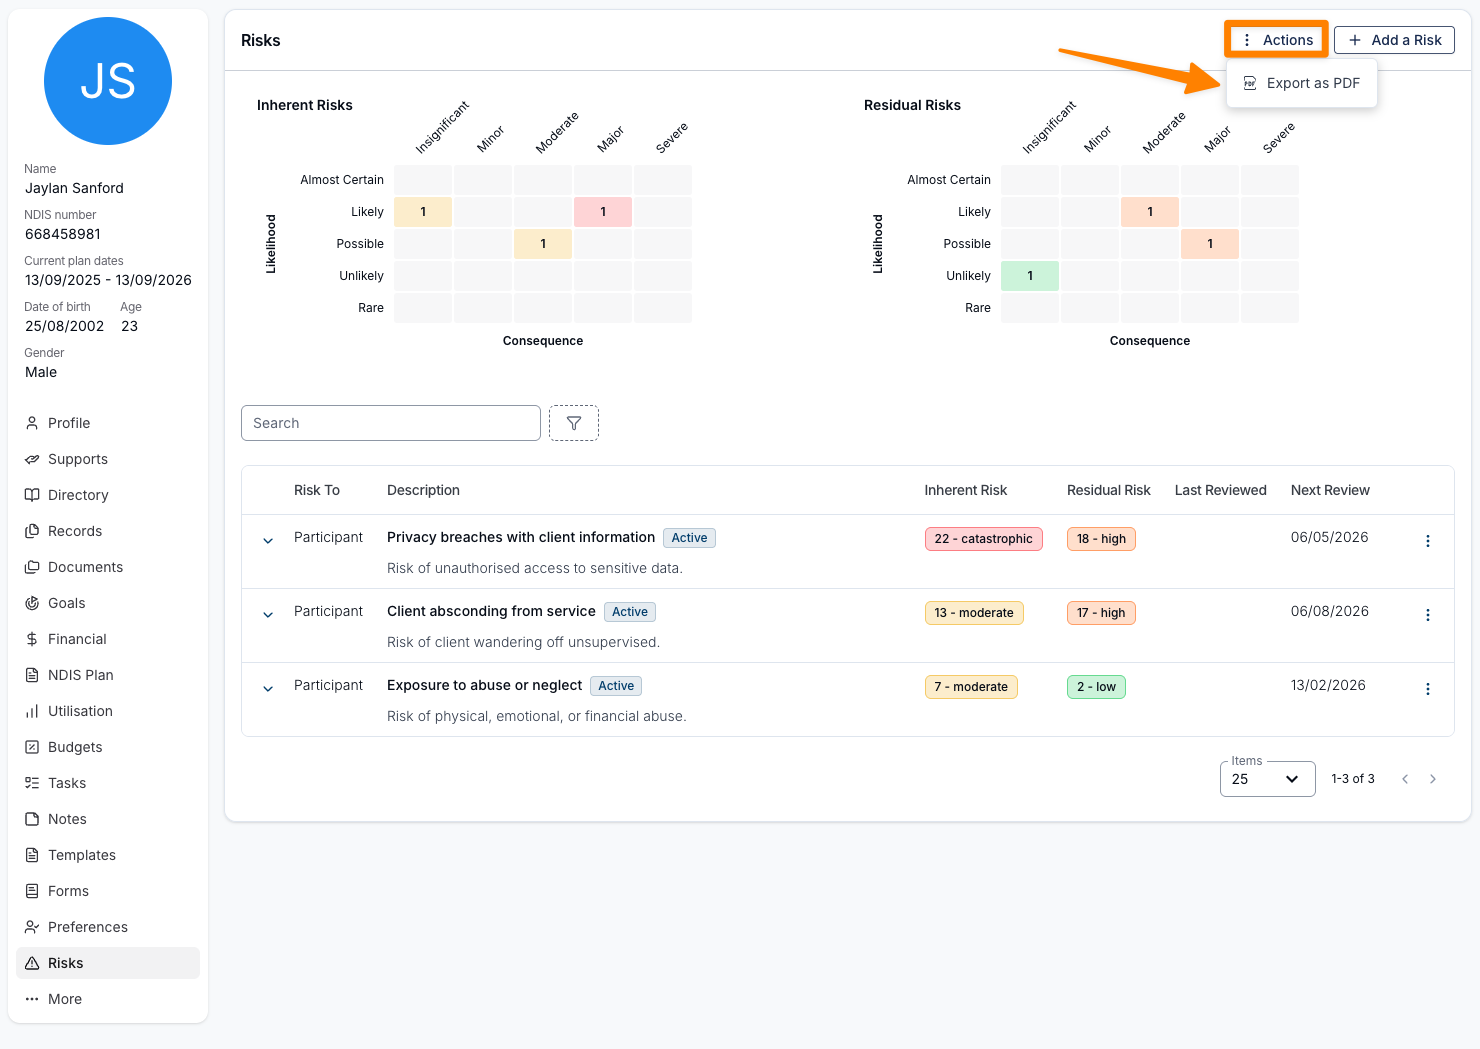
To export a Participant's Risk Report, simply click the Actions button and select 'Export as PDF'.
You will then have the option to deselect Risks that may not be relevant to the stakeholder(s) you are sharing the Risk Assessment with. The Glossary will also be included by default, but you can deselect this if you do not require this to be included in the PDF. To download the file, click 'Download'.
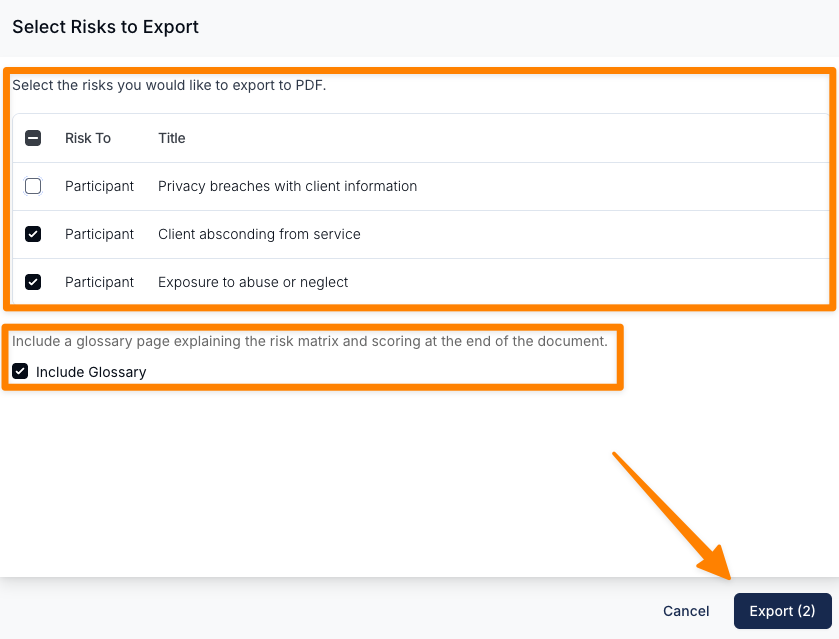
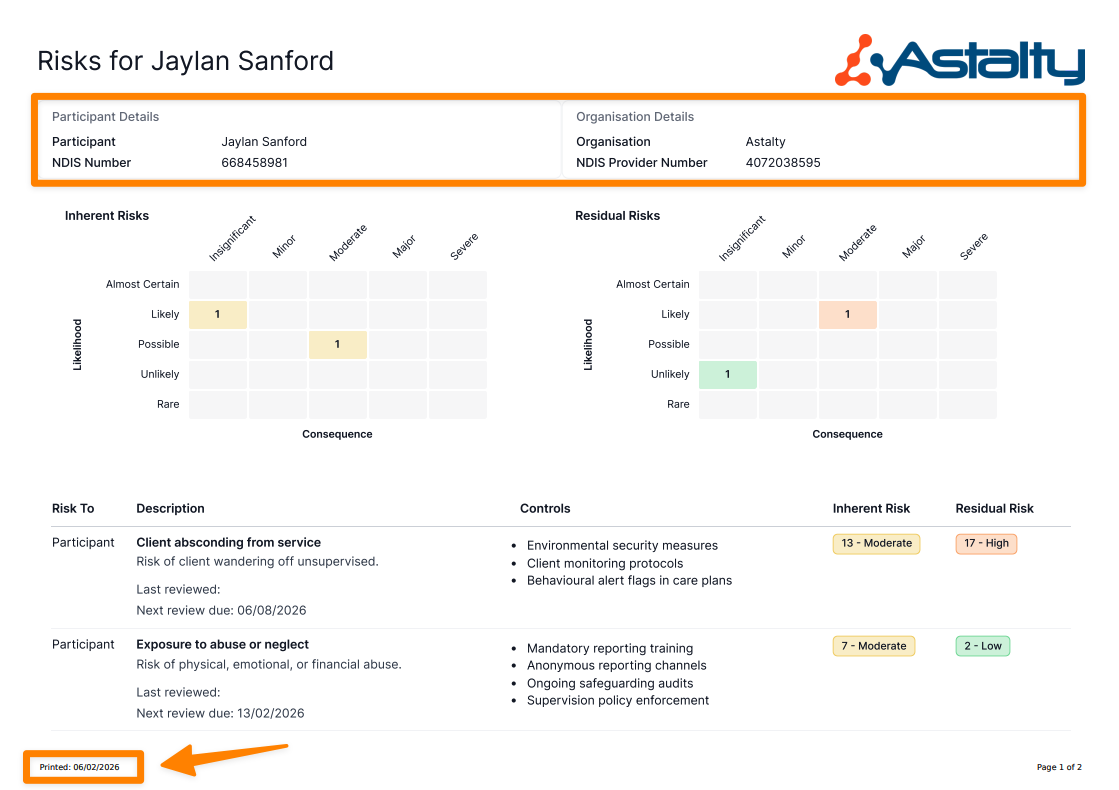
The PDF will contain key information in the header including;
Participant Details
- Participant Name
- Participant NDIS Number
Organisation Details
- Organisation Name
- NDIS Provider Number
The date that the Risk Report has been printed will be displayed on the bottom left hand side of each page in the report.
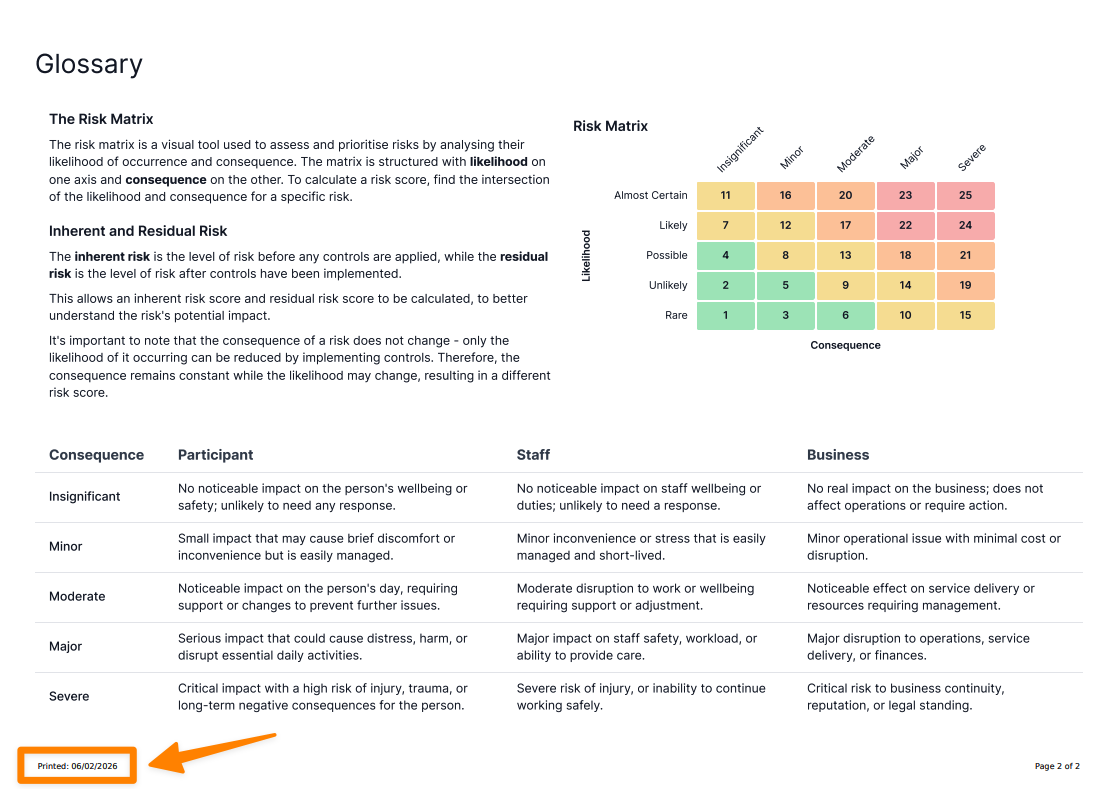
The Glossary page helps explain the Risk process to anyone unfamiliar with the terms used.
The naming convention of this export aligns with Templates downloaded from Astalty:
DD-MM-YYYY *Participant Name *Participant Risks.
Risks Report
We also have a Participant Risks Report (click here) that will display all of the Risks you have entered for your Participants and will display the risk score for the number of specific levels of risk for Inherent (pre control) and Residual (post control) risks for all Participants. To learn more about this, click here to view our user guide article.