- Participants
- Documents
Documents
You can view all Documents for a Participant within their Documents page on their profile.
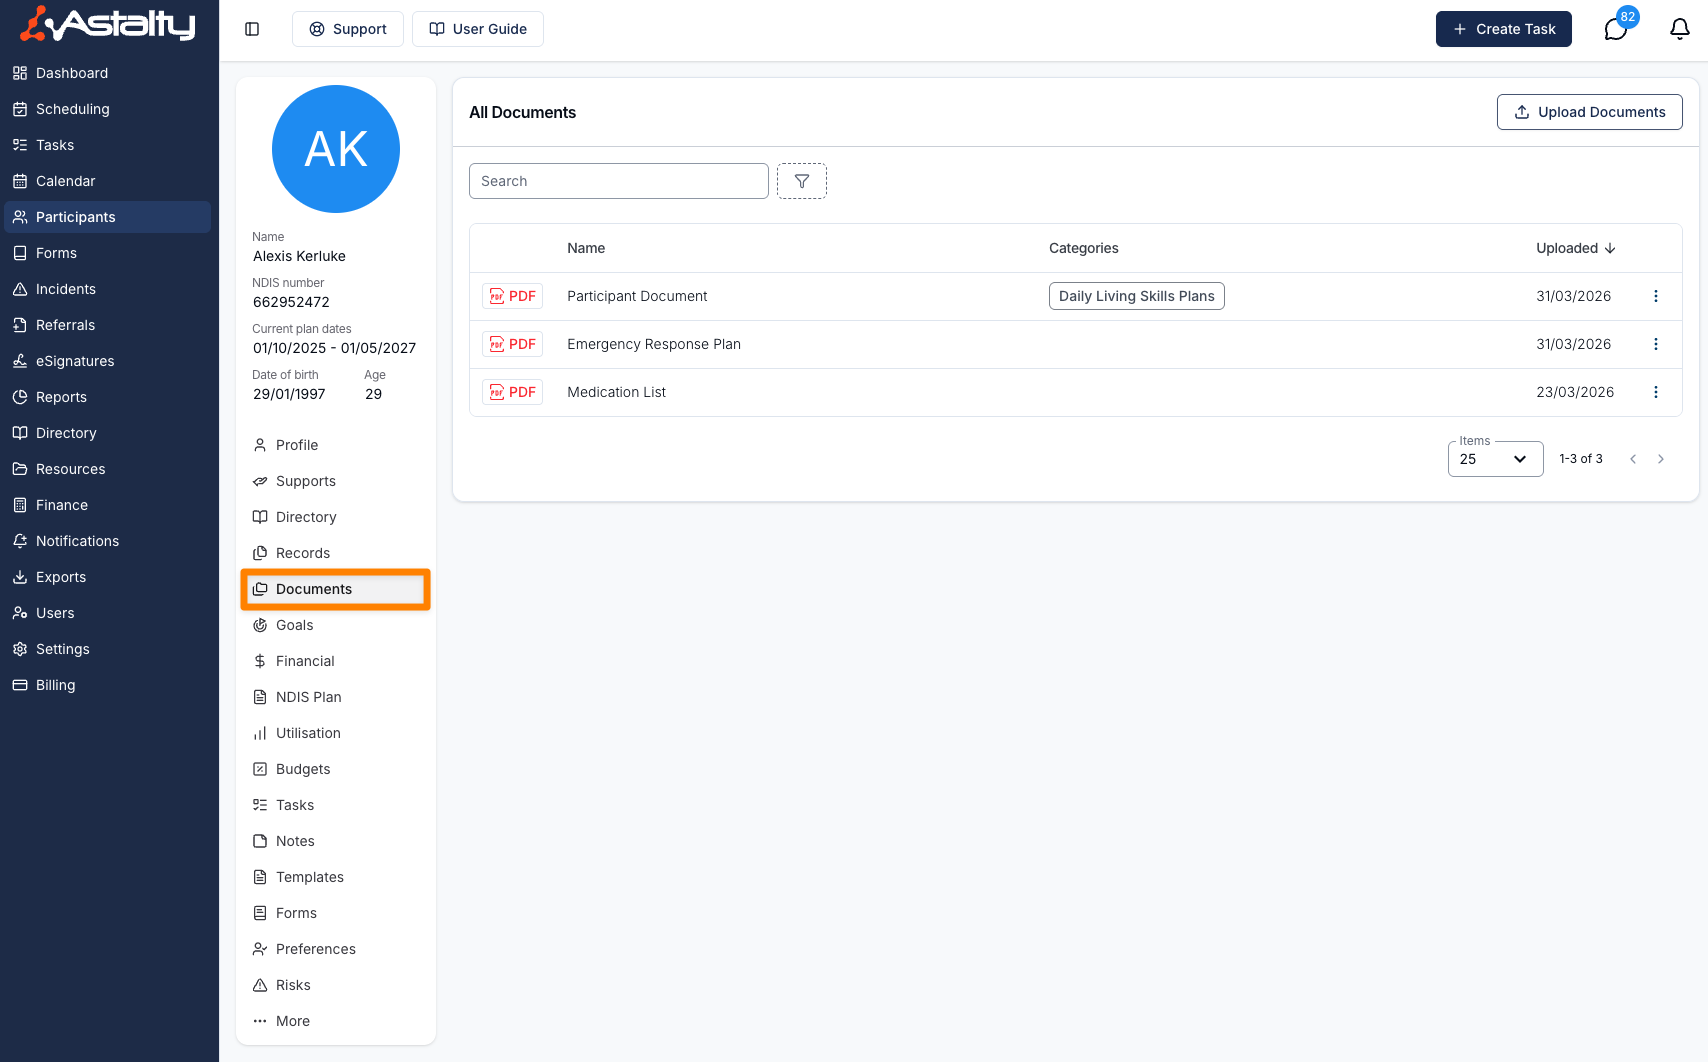
You can also view Documents assigned to Contacts, Organisations, and Plan Managers by heading to the Directory and opening their profile. There's more information on viewing Documents in each of the following guides:
Viewing Documents
In Astalty you can attach documents to;
- a Task
- a Note
- a Support
- a Participant
- a Plan
- an Implementation
- a Record
- an Information Item
- a Plan Manager
- an Organisation
- a Contact
On the Participant's Documents page, Astalty will show all Documents for a Participant, regardless of the place where they were uploaded.
Support Documents can be uploaded from a Support's Documents tab. If the Support is part of a recurring series, you can add the same Document to the current Support and selected future Supports in one action. See Support Goals and Documents.
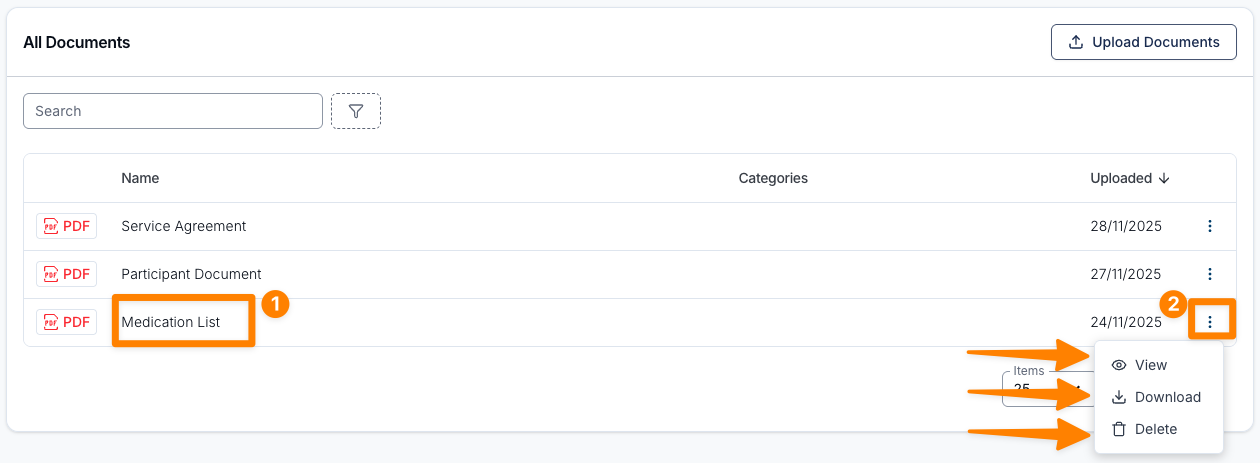
To view a Document head to the Participant's Documents page and click on the Document itself (1) or click the 3 dots to the right hand side (2) and click View. You also have the option to Download, or Delete the Document from here.
Uploading Documents
To upload a Document directly to a Participant's profile, click Upload Documents. This opens the upload form, where you can browse or drag files into the outlined area. You can add up to 50 files in one upload.
Editing the Document Name before Uploading
Once you've selected your file, you can edit the name of the Document — this is what will display in Astalty.
Categorising Documents
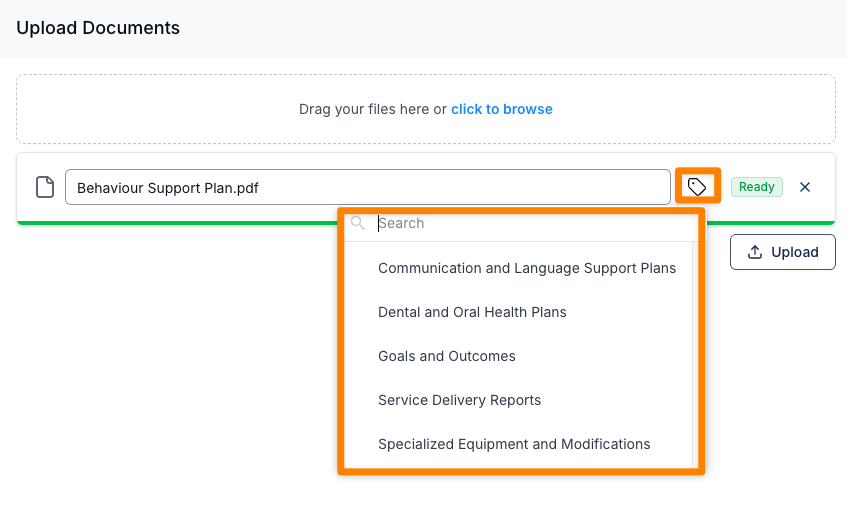
You can add Categories to your Documents by clicking on the Tag icon prior to uploading. This allows you to Categorise your Documents for easy searching.
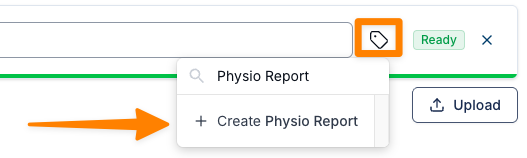
If the Document Category you want to use is not found in the drop down (hint: you may need to search the first few letters), you can create a new Document Category 'on the fly' by clicking the Create button when prompted.
Editing Documents
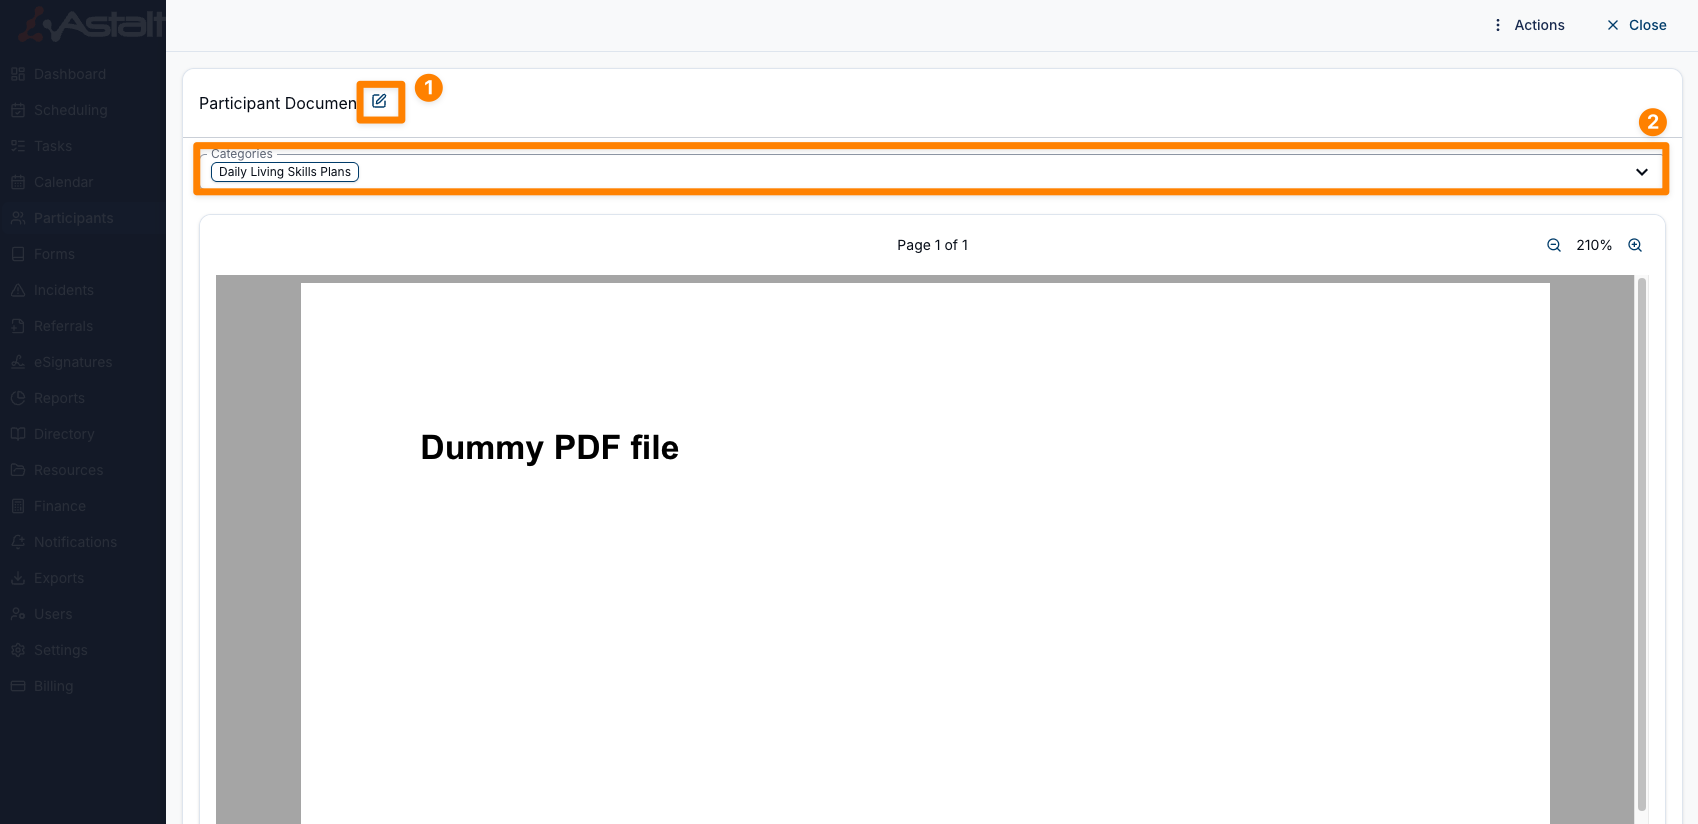
Once a Document has been uploaded, or if you are viewing an existing Document, you can edit the Categories and Document name.
To edit the Document name, hover of the Document name and click the edit icon (1).
You can also use the Categories input (2) to edit the Categories for the Document.
Download Documents
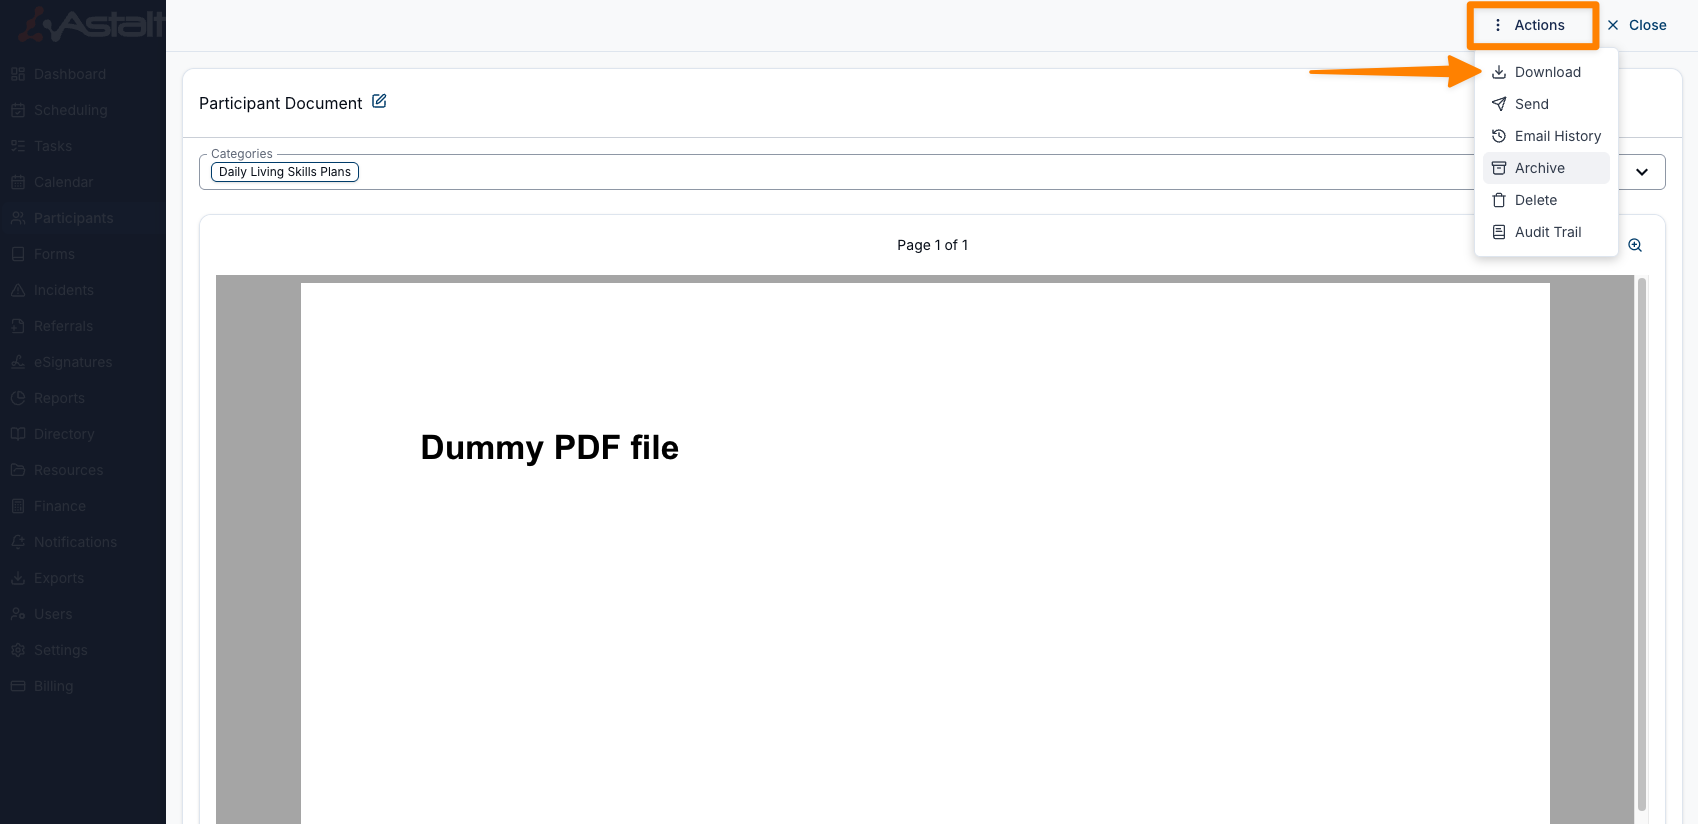
To download a copy of the document, click Actions and select Download from the menu options. The document will be saved to your device’s Downloads folder in your file explorer.
Sending Documents
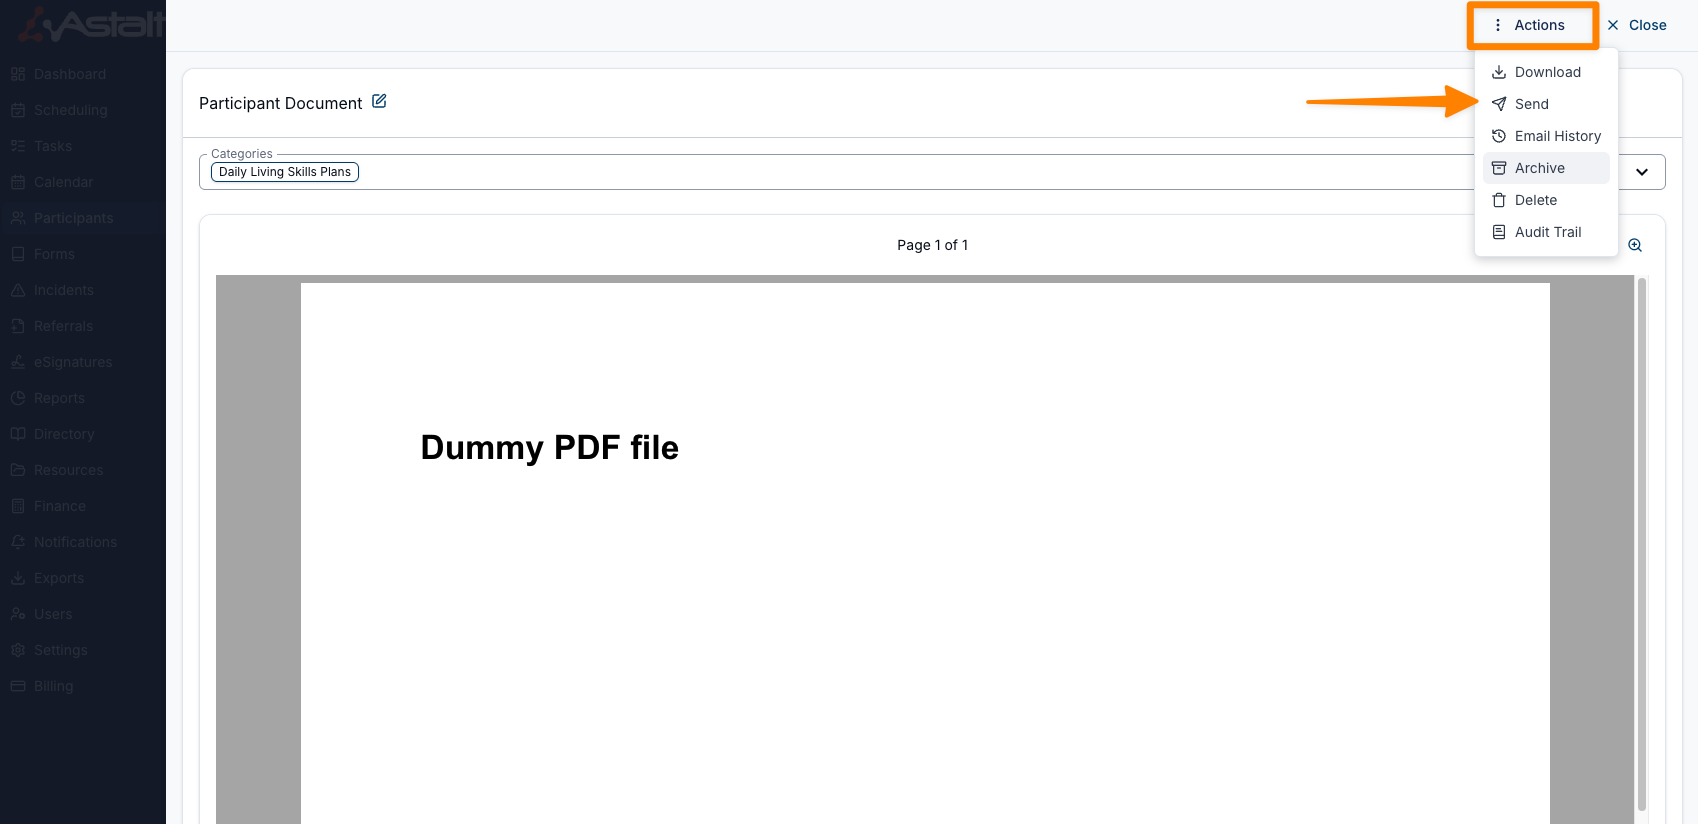
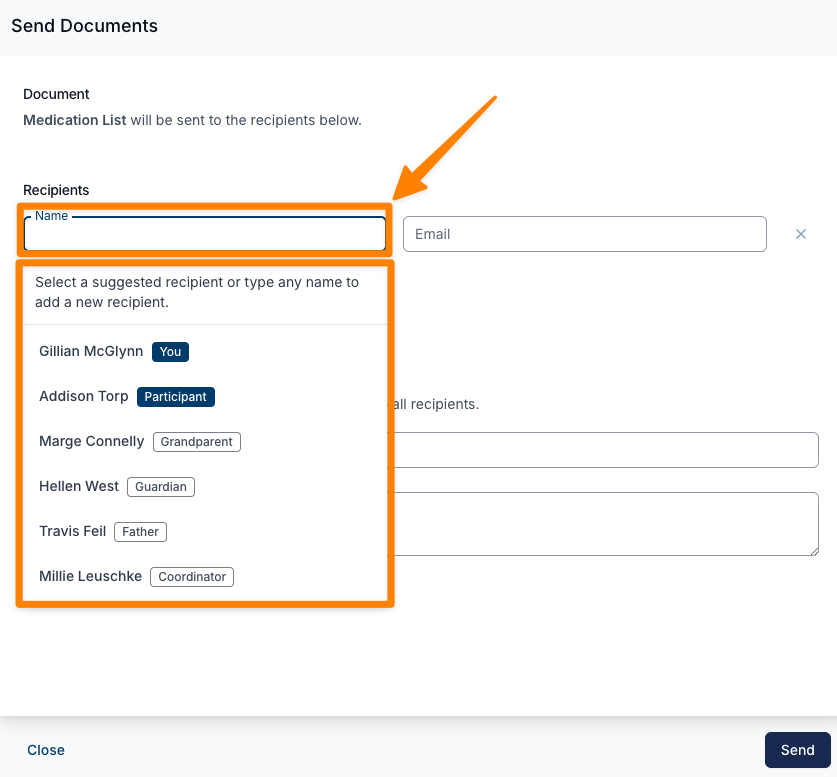
You can send Documents from within the 'Documents' page within a Participants profile. Previously you would have had to assign a Document to a Record to send — now you can do this from within the Documents page, further streamlining your workflow. To do this select the 'Actions' button and select 'Send' from the dropdown menu. You will be prompted to enter an email address to send the Document to — the Participant's email and any Contacts that are linked with the Participant will be available to choose from.
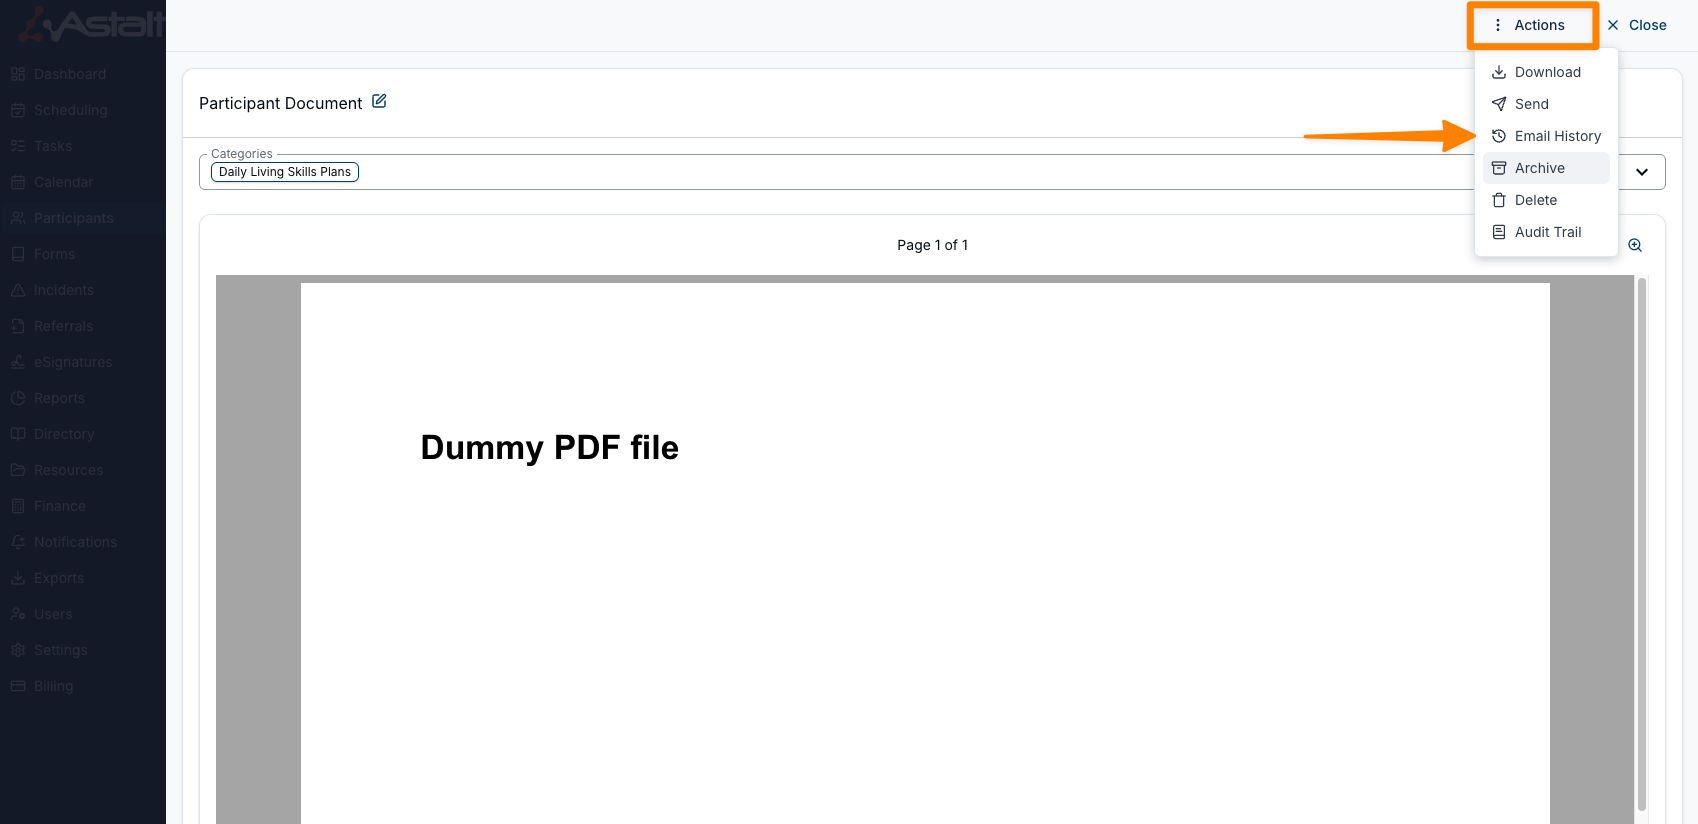
Email History
When email tracking is enabled, open the Document's Actions menu and select Email History to see emails sent for that Document.
Archiving Documents
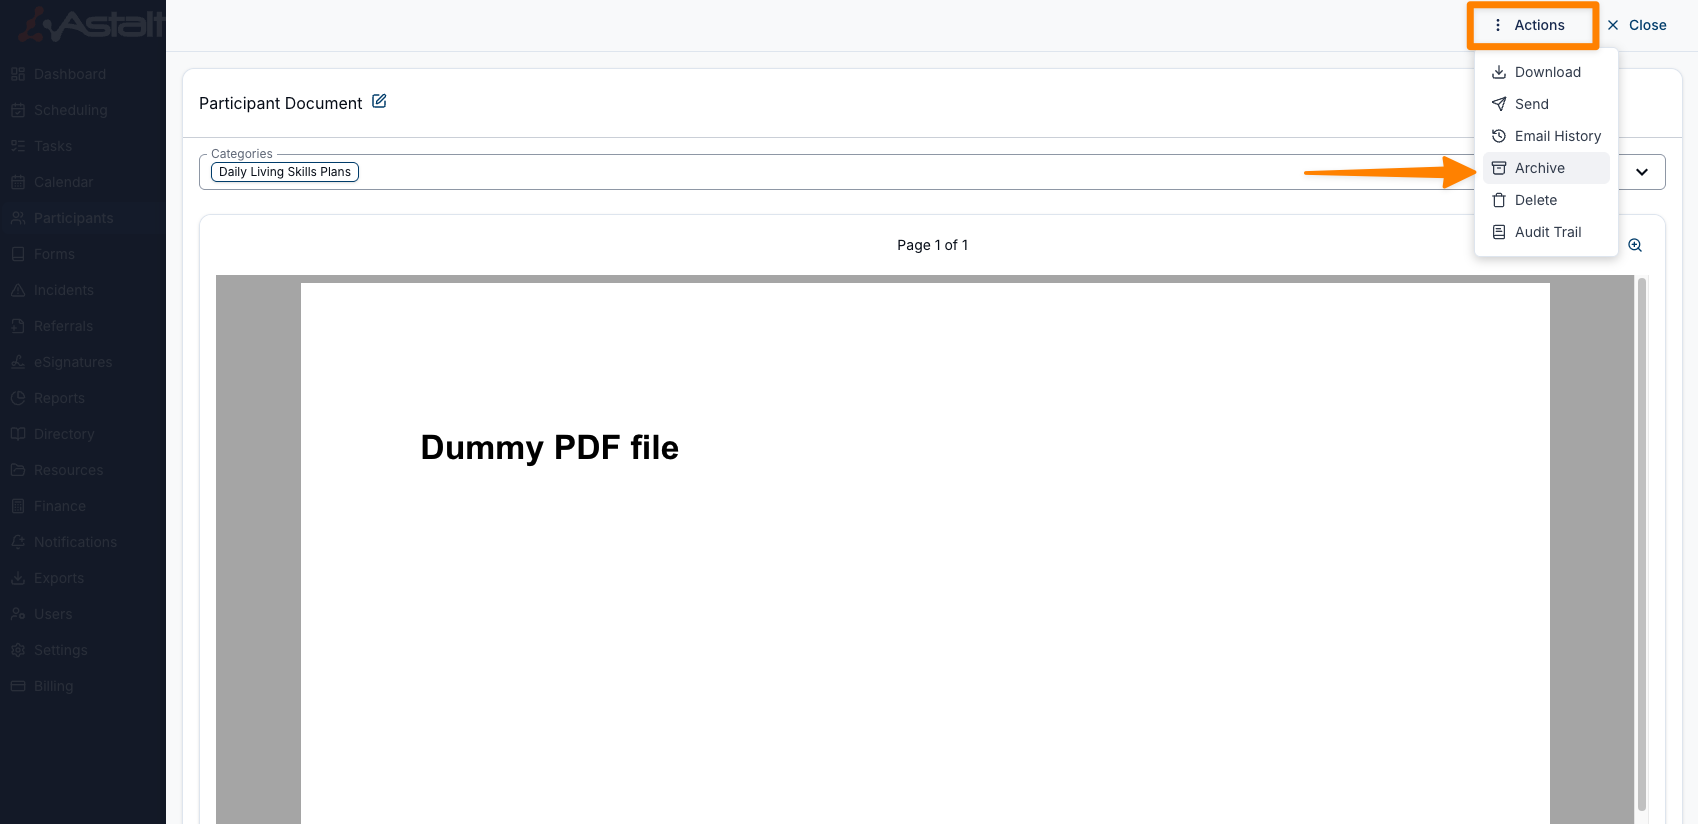
Sometimes Documents become outdated or no longer relevant but you don't want to fully delete them. Astalty allows you to archive Documents which will hide them from the main Documents list but they can still be found by adding a filter.
To archive a Document, open the Document and click the Actions button - you can then click the Archive option to archive the Document.
Deleting Documents
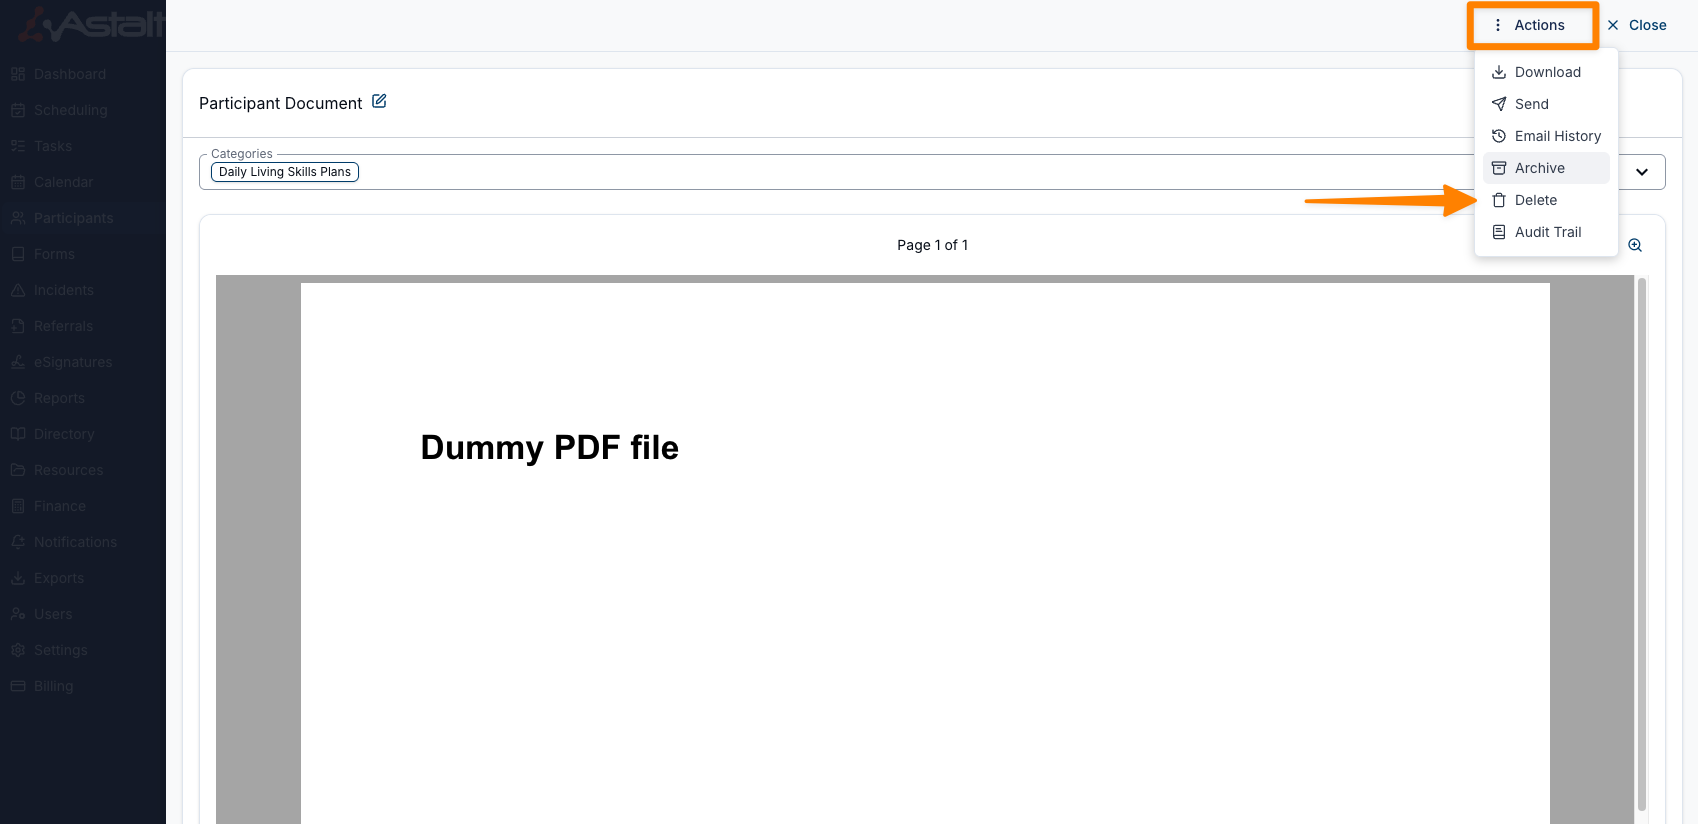
You can delete a Document from within the Document view if it is not still in use elsewhere. Astalty checks before deleting and explains anything that blocks the action. For example, a Document attached to a Participant Record cannot be deleted from this page. Open the Record to review or remove it instead.
Depending on how the Document is attached, the blocked action may offer Archive instead or Remove from this participant. Removing it from this Participant only removes the direct attachment; the file remains with its other owner. If a Document was uploaded to another item, such as a Task or Plan, the delete confirmation warns that deletion also removes it from that item.
Comments
Open a Document to view its Comments section. Users with comment permission can add context or discuss the file without changing the Document itself.
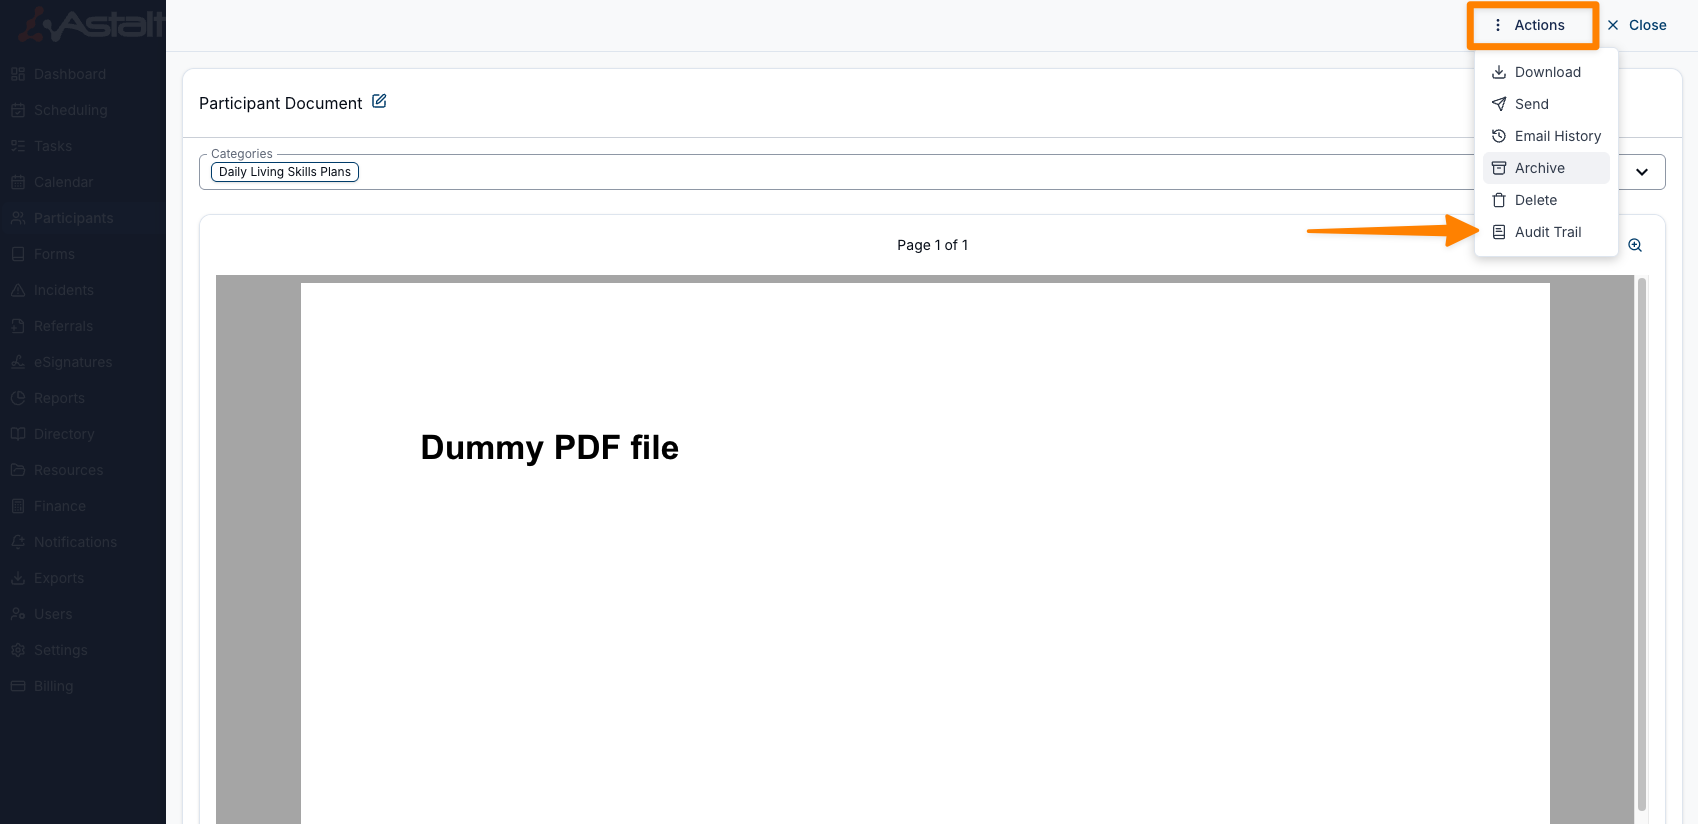
Audit Trail
This allows you to view the upload and change details of the Document.
Restoring Archived Documents
If you need to restore an Archived Document, it is really similar to the process of Archiving a Document.
To restore a Document you:
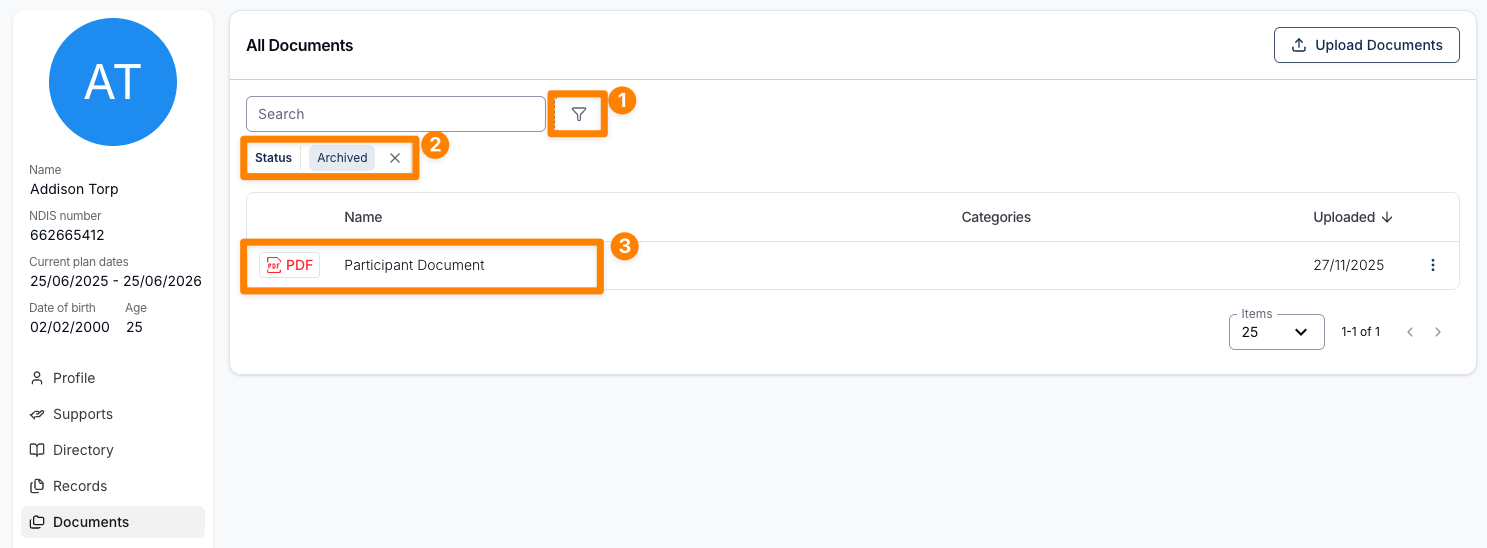
- Add a filter to a Participants Document list.
- Click the filter button and add a ‘Status’ filter and click ‘Archived’.
- Once you have found your archived Document, click on the Document.
- Then you will need to navigate to ‘Actions’ and click ‘Restore’.
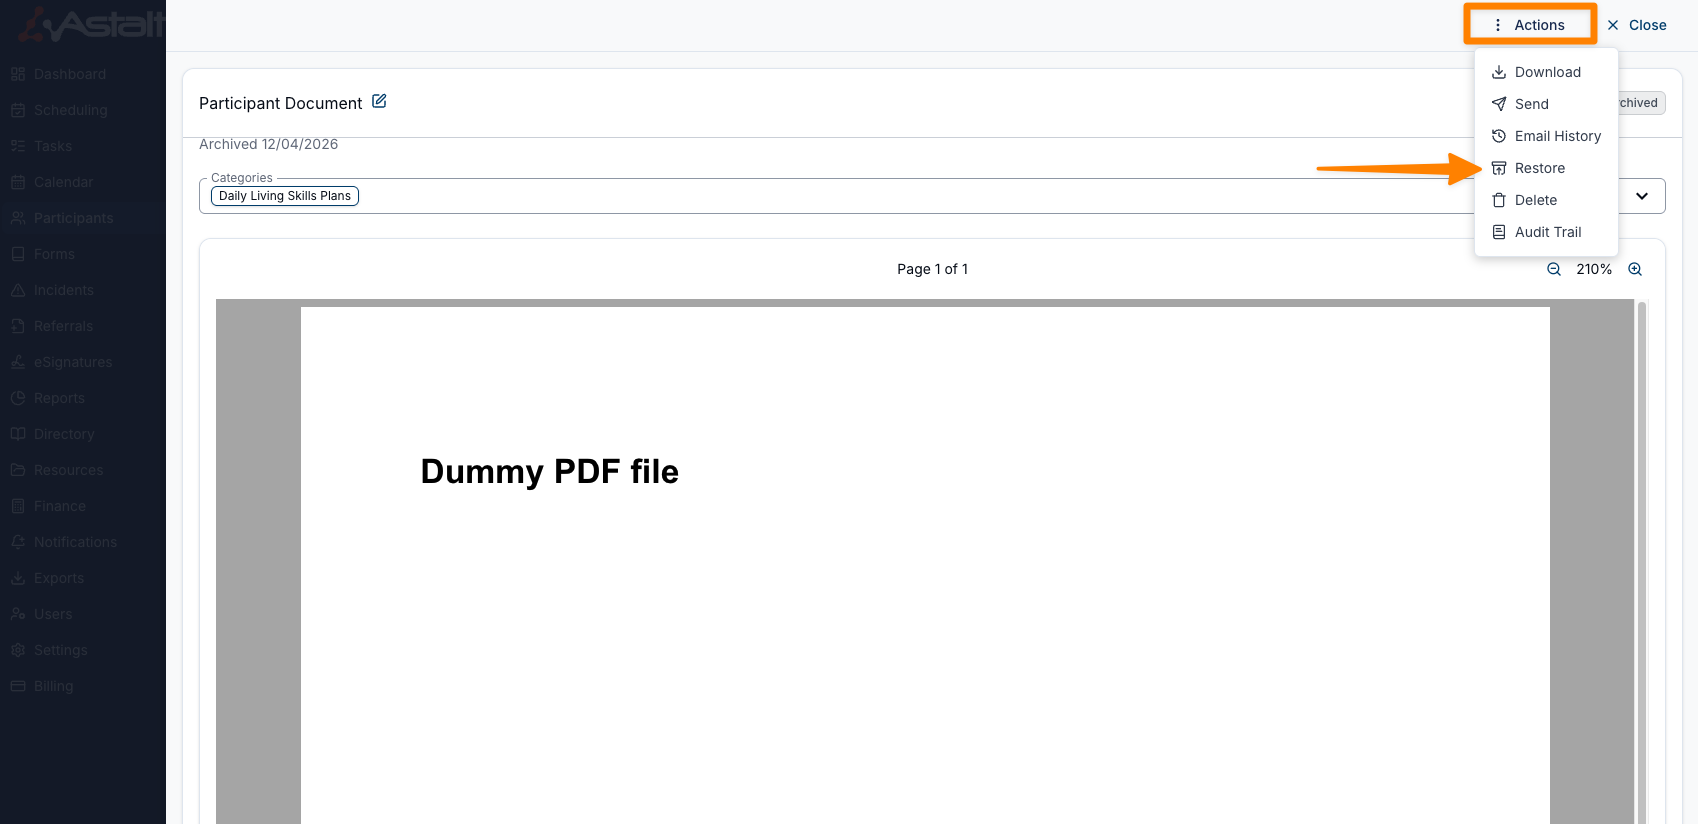
Once you have done this, the Document will return to the Documents list under ‘Documents’ on the Participants profile.
Searching Documents
To search by Document name, you can use the Search input at the top of the Documents table. You can use the search field in combination with a filter (see Available Filters below) for a powerful and detailed search.
Available Filters
To add a Filter to the Documents table, first click on the Filter icon and then select the filter you'd like to add.
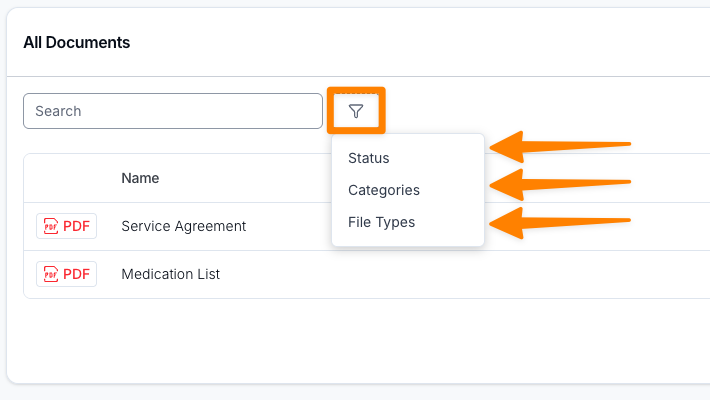
Status Filter
Sometimes you may need to find an Archived document - you can use the Status filter to do this.
Categories
If you have lots of Documents, you can use the Categories filter to refine the view (where Categories have previously been applied to Documents).
File Types
To find a particular type of Document (ie. PDF, Word, Email) you can use the File Types filter.