
.png)
Adding Plan Managed & Self Managed Payments
Adding Plan Managed & Self Managed Payments
In addition to our Xero integration you can also add payments manually to mark outstanding payments as paid within Astalty! To do this you can follow the steps below!
Navigate to Payments within the Finance tab. You will then need to create a payment. You can see this visually below.
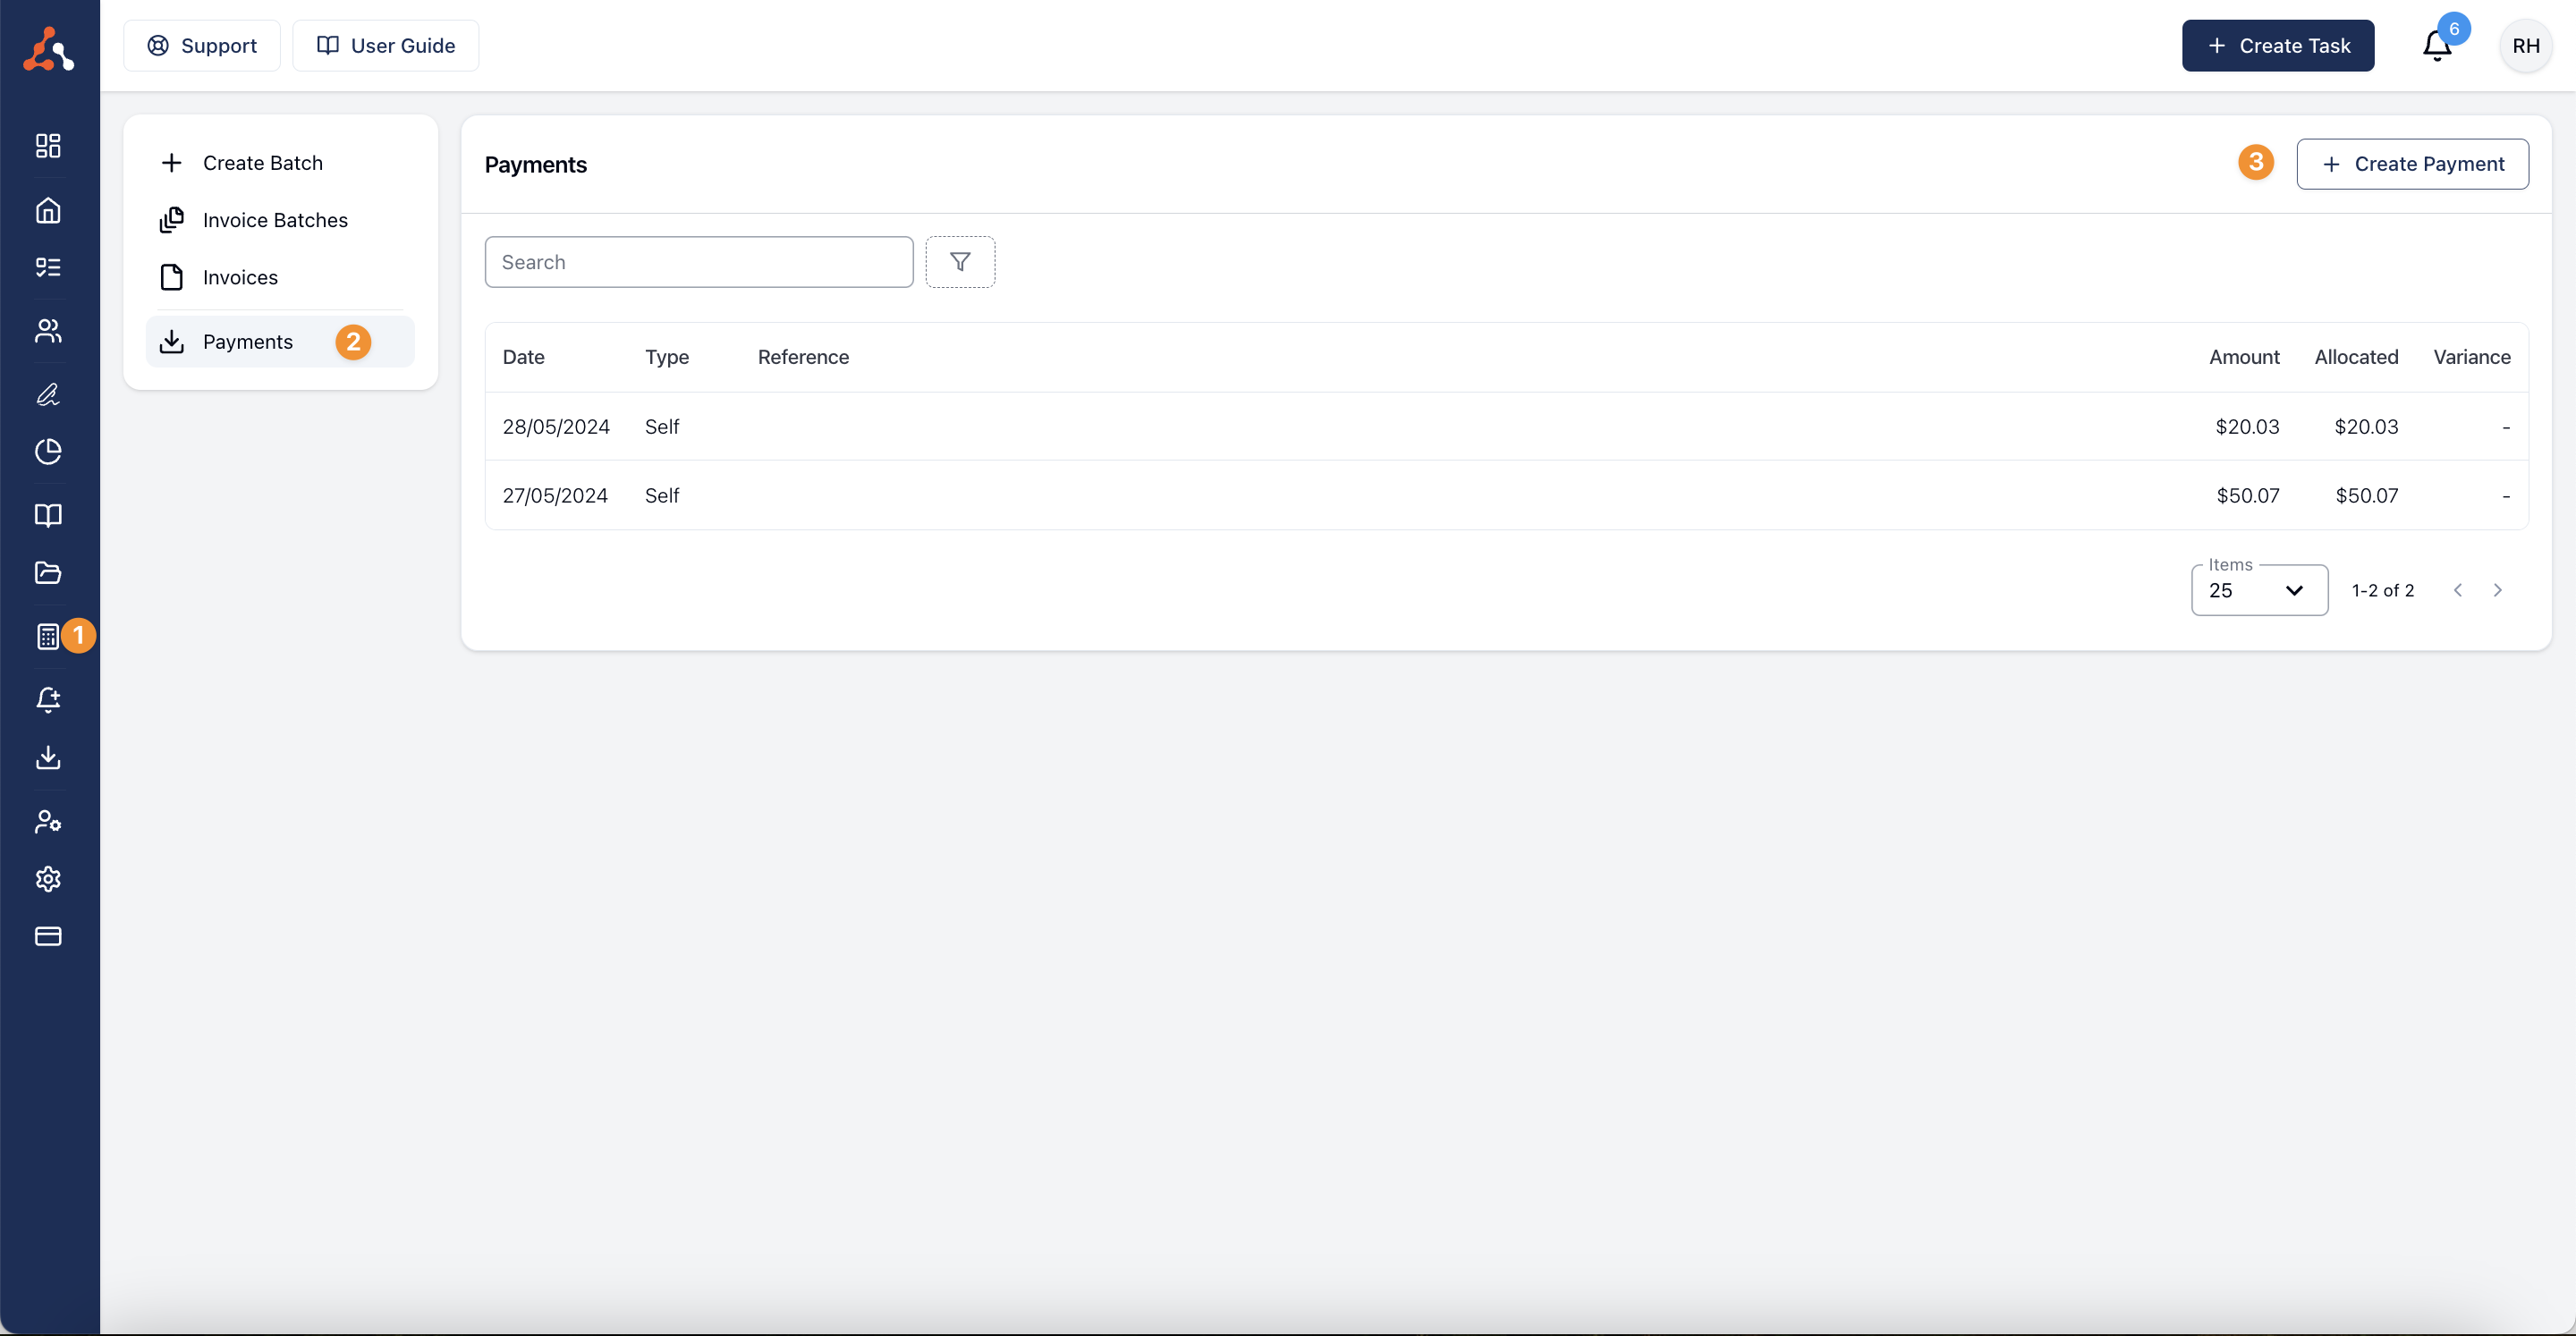
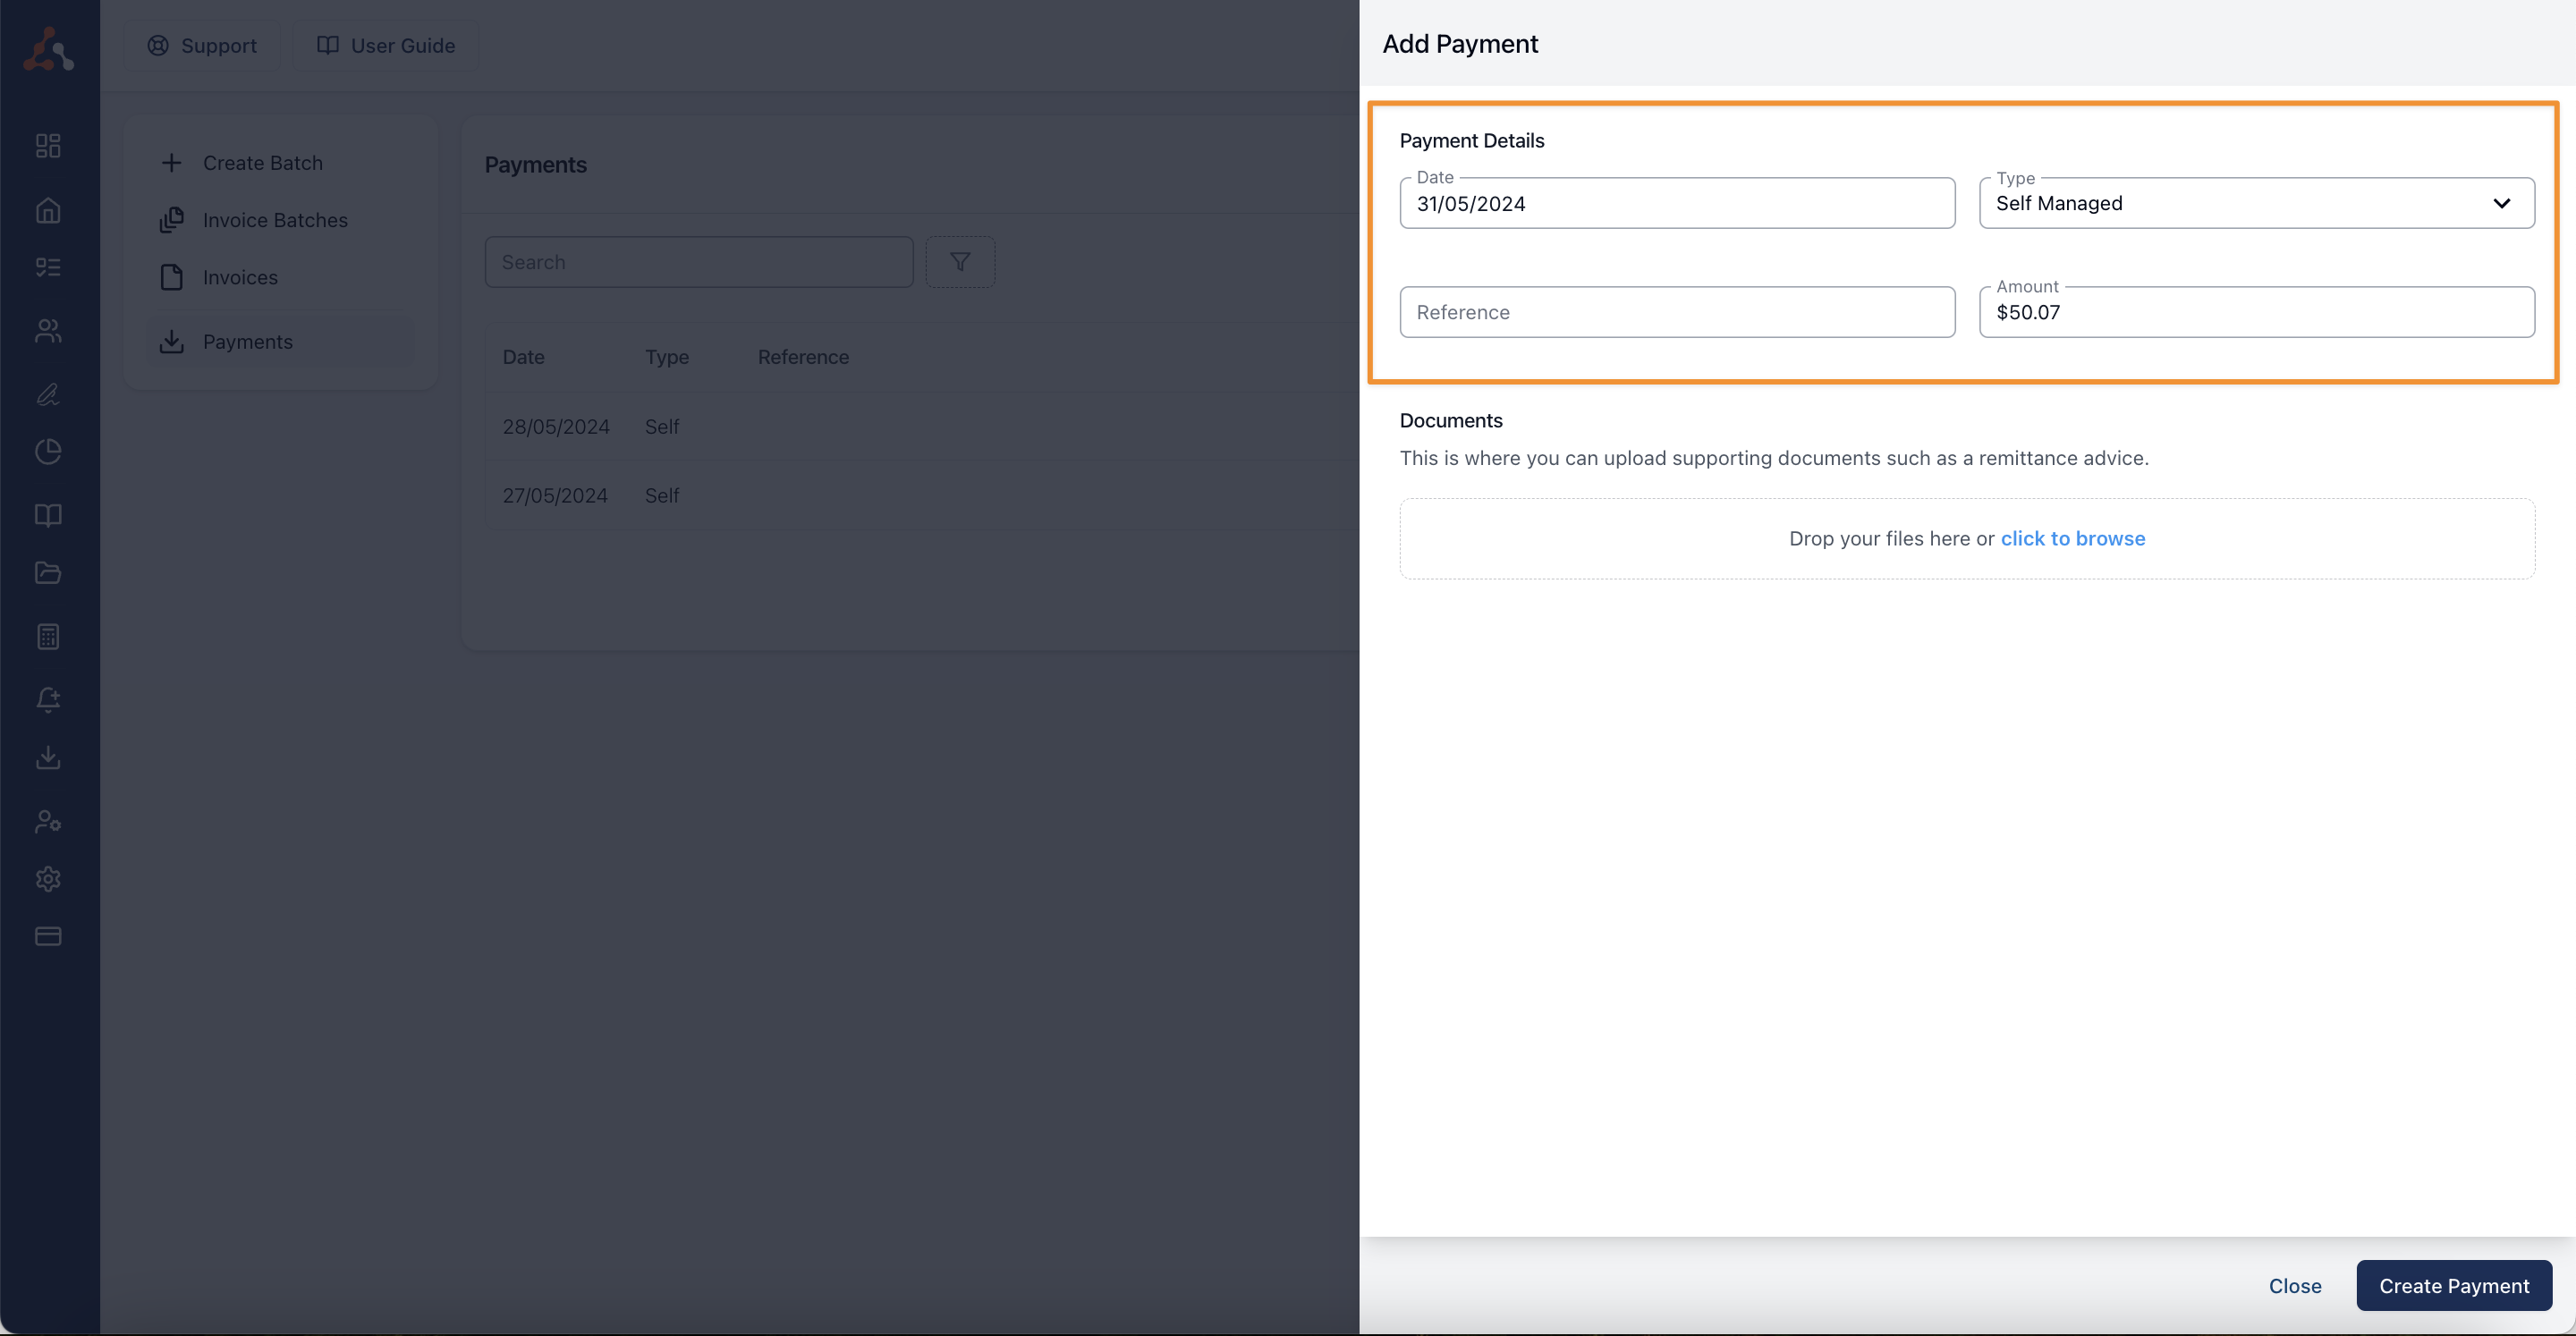
Once you have selected 'Create a Payment' you will then see the screen below. You will need to enter the following information to progress the payment creation;
Enter Payment Date
Select Participant Management Type for the Invoice (e.g., Plan managed, self-managed, or agency managed).
Optional: Add Plan Manager or Reference number for the invoice
Input Payment Amount
Finalise Payment - Click 'Create Payment'
Information has been entered in this example to match with an existing invoice within the system.
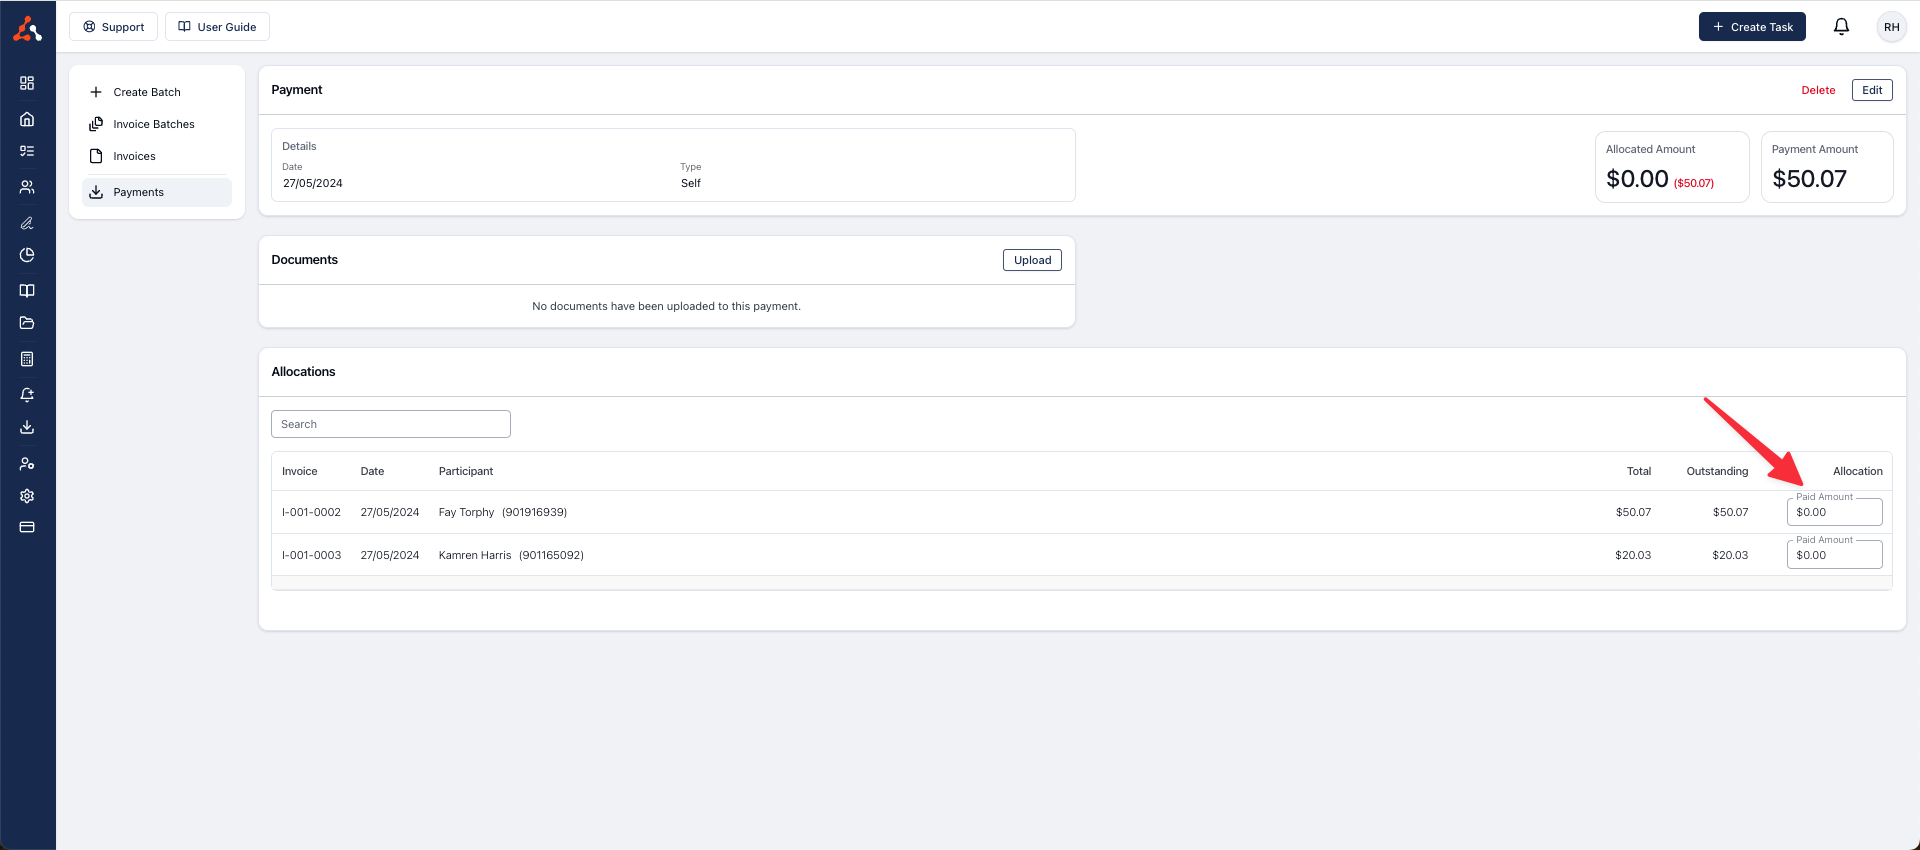
Allocate Payment to Invoices
Once the payment is created, you will see outstanding invoices for the plan manager or if Self Managed was selected you will see self managed invoices as seen below.
Enter the received amount for each invoice accordingly.
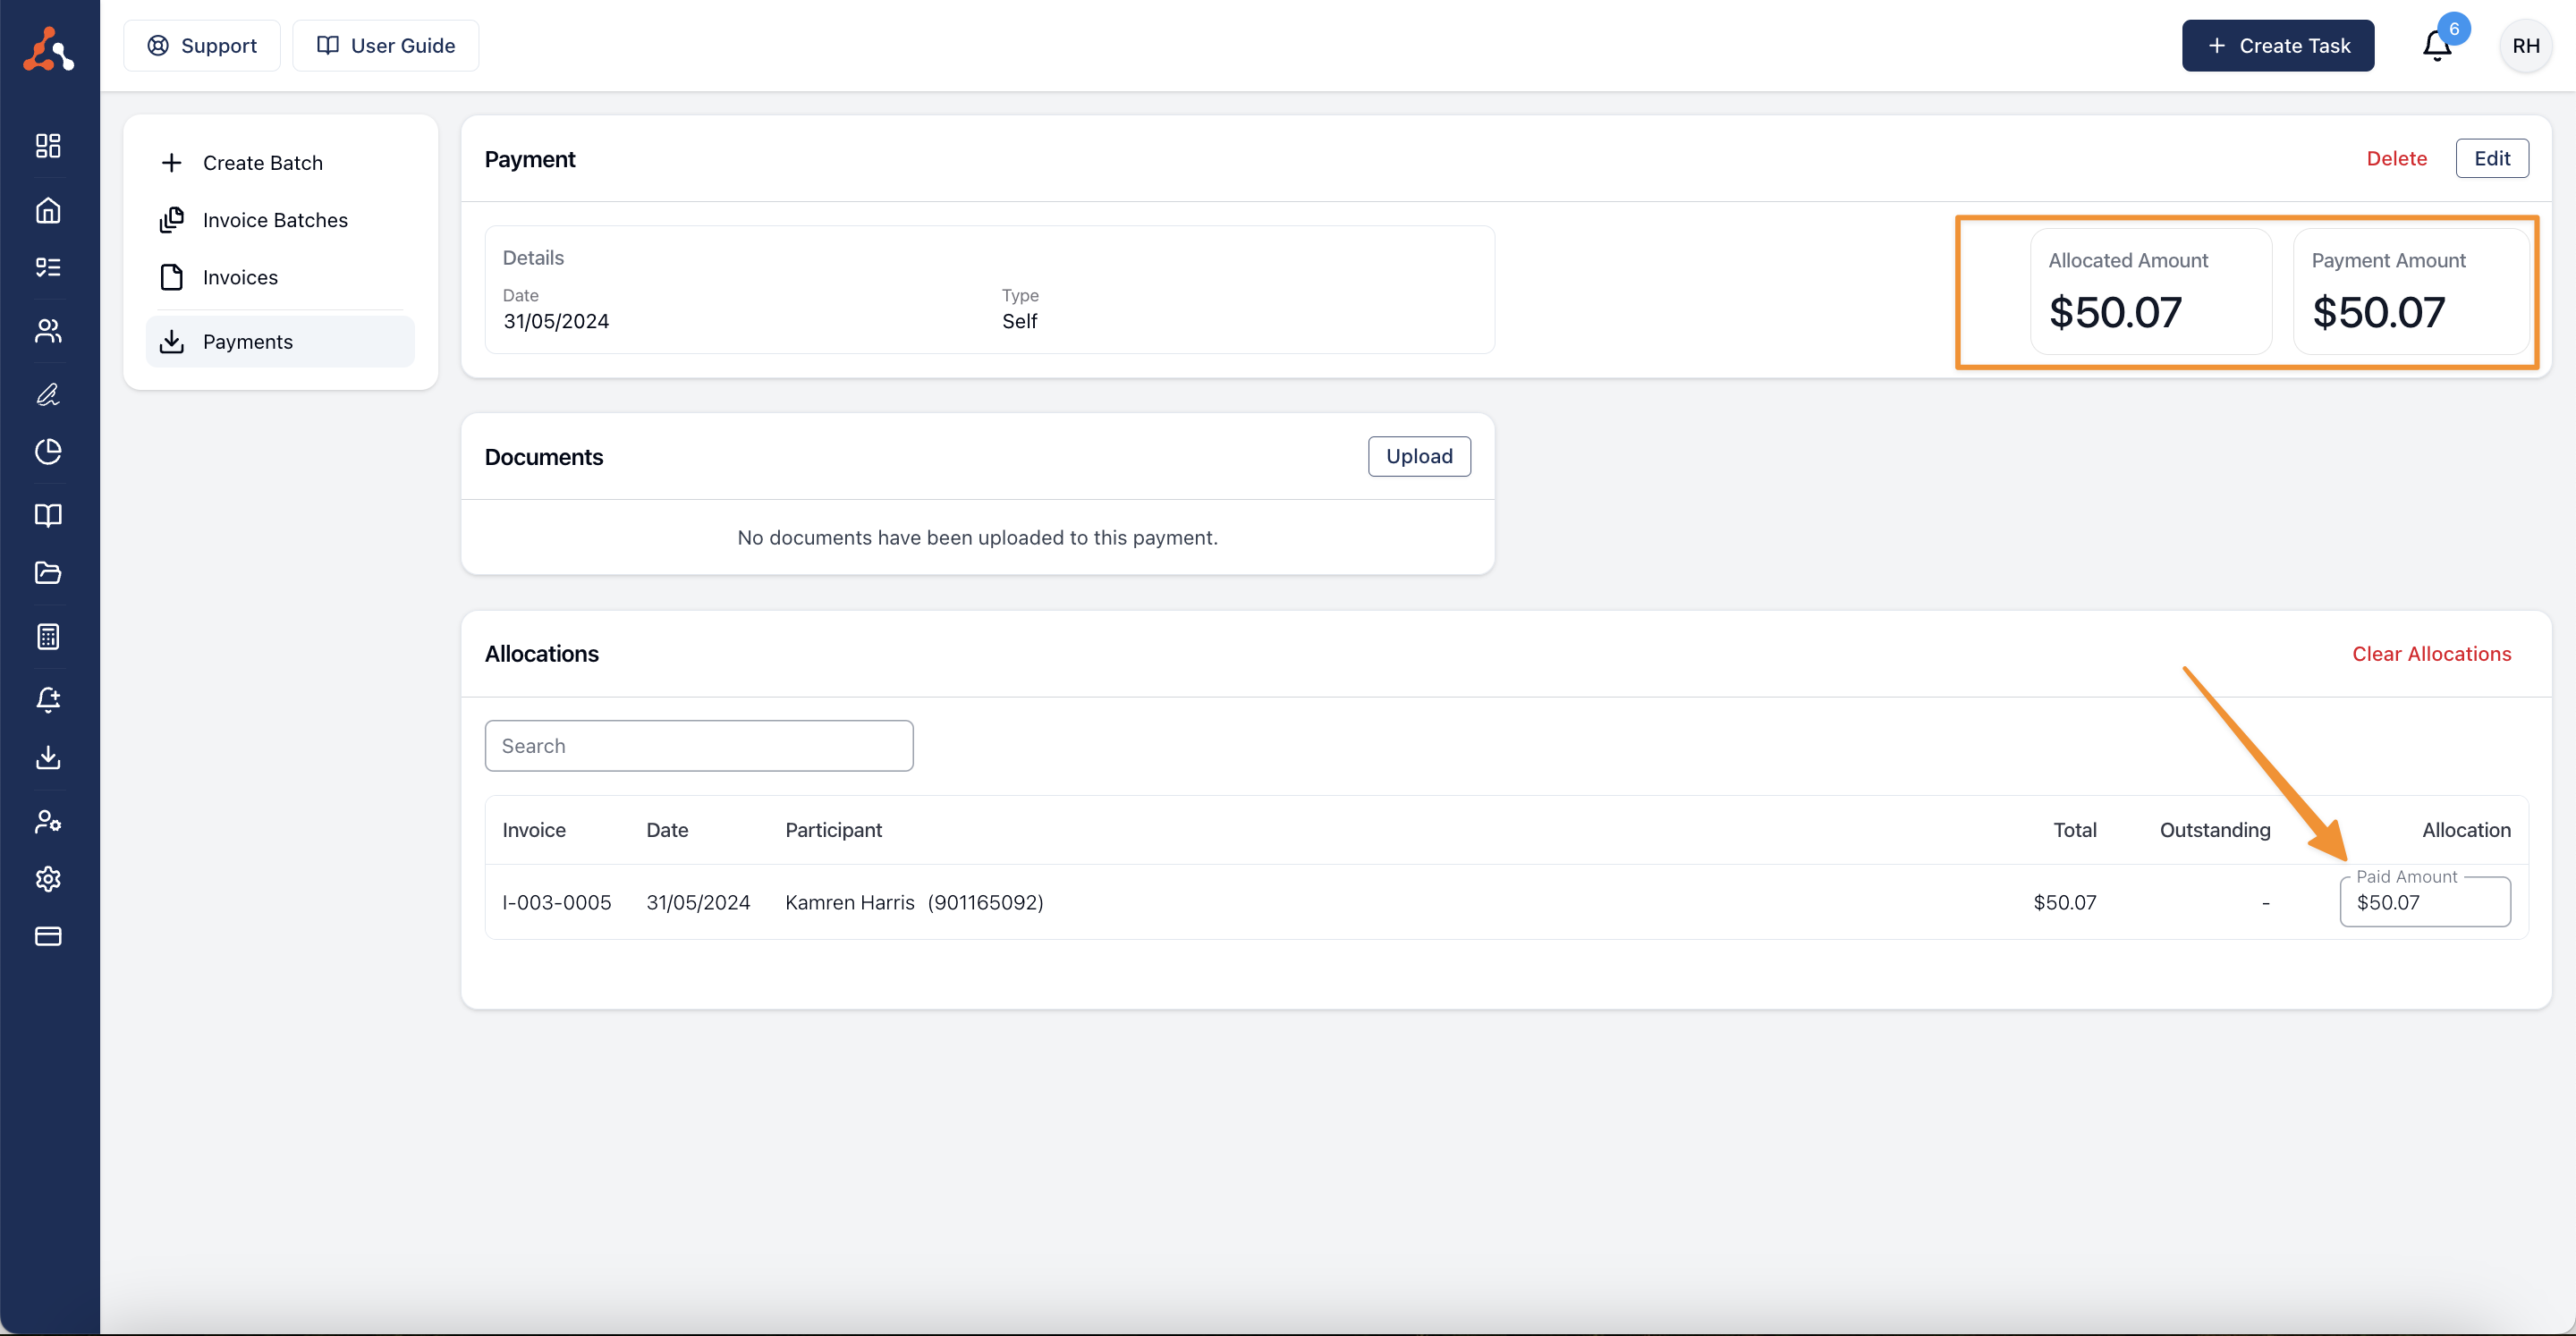
Once you allocate the payment to an invoice(s) you will see that the payment amount entered will reflect the Allocated Amount
Verify Recorded Payment
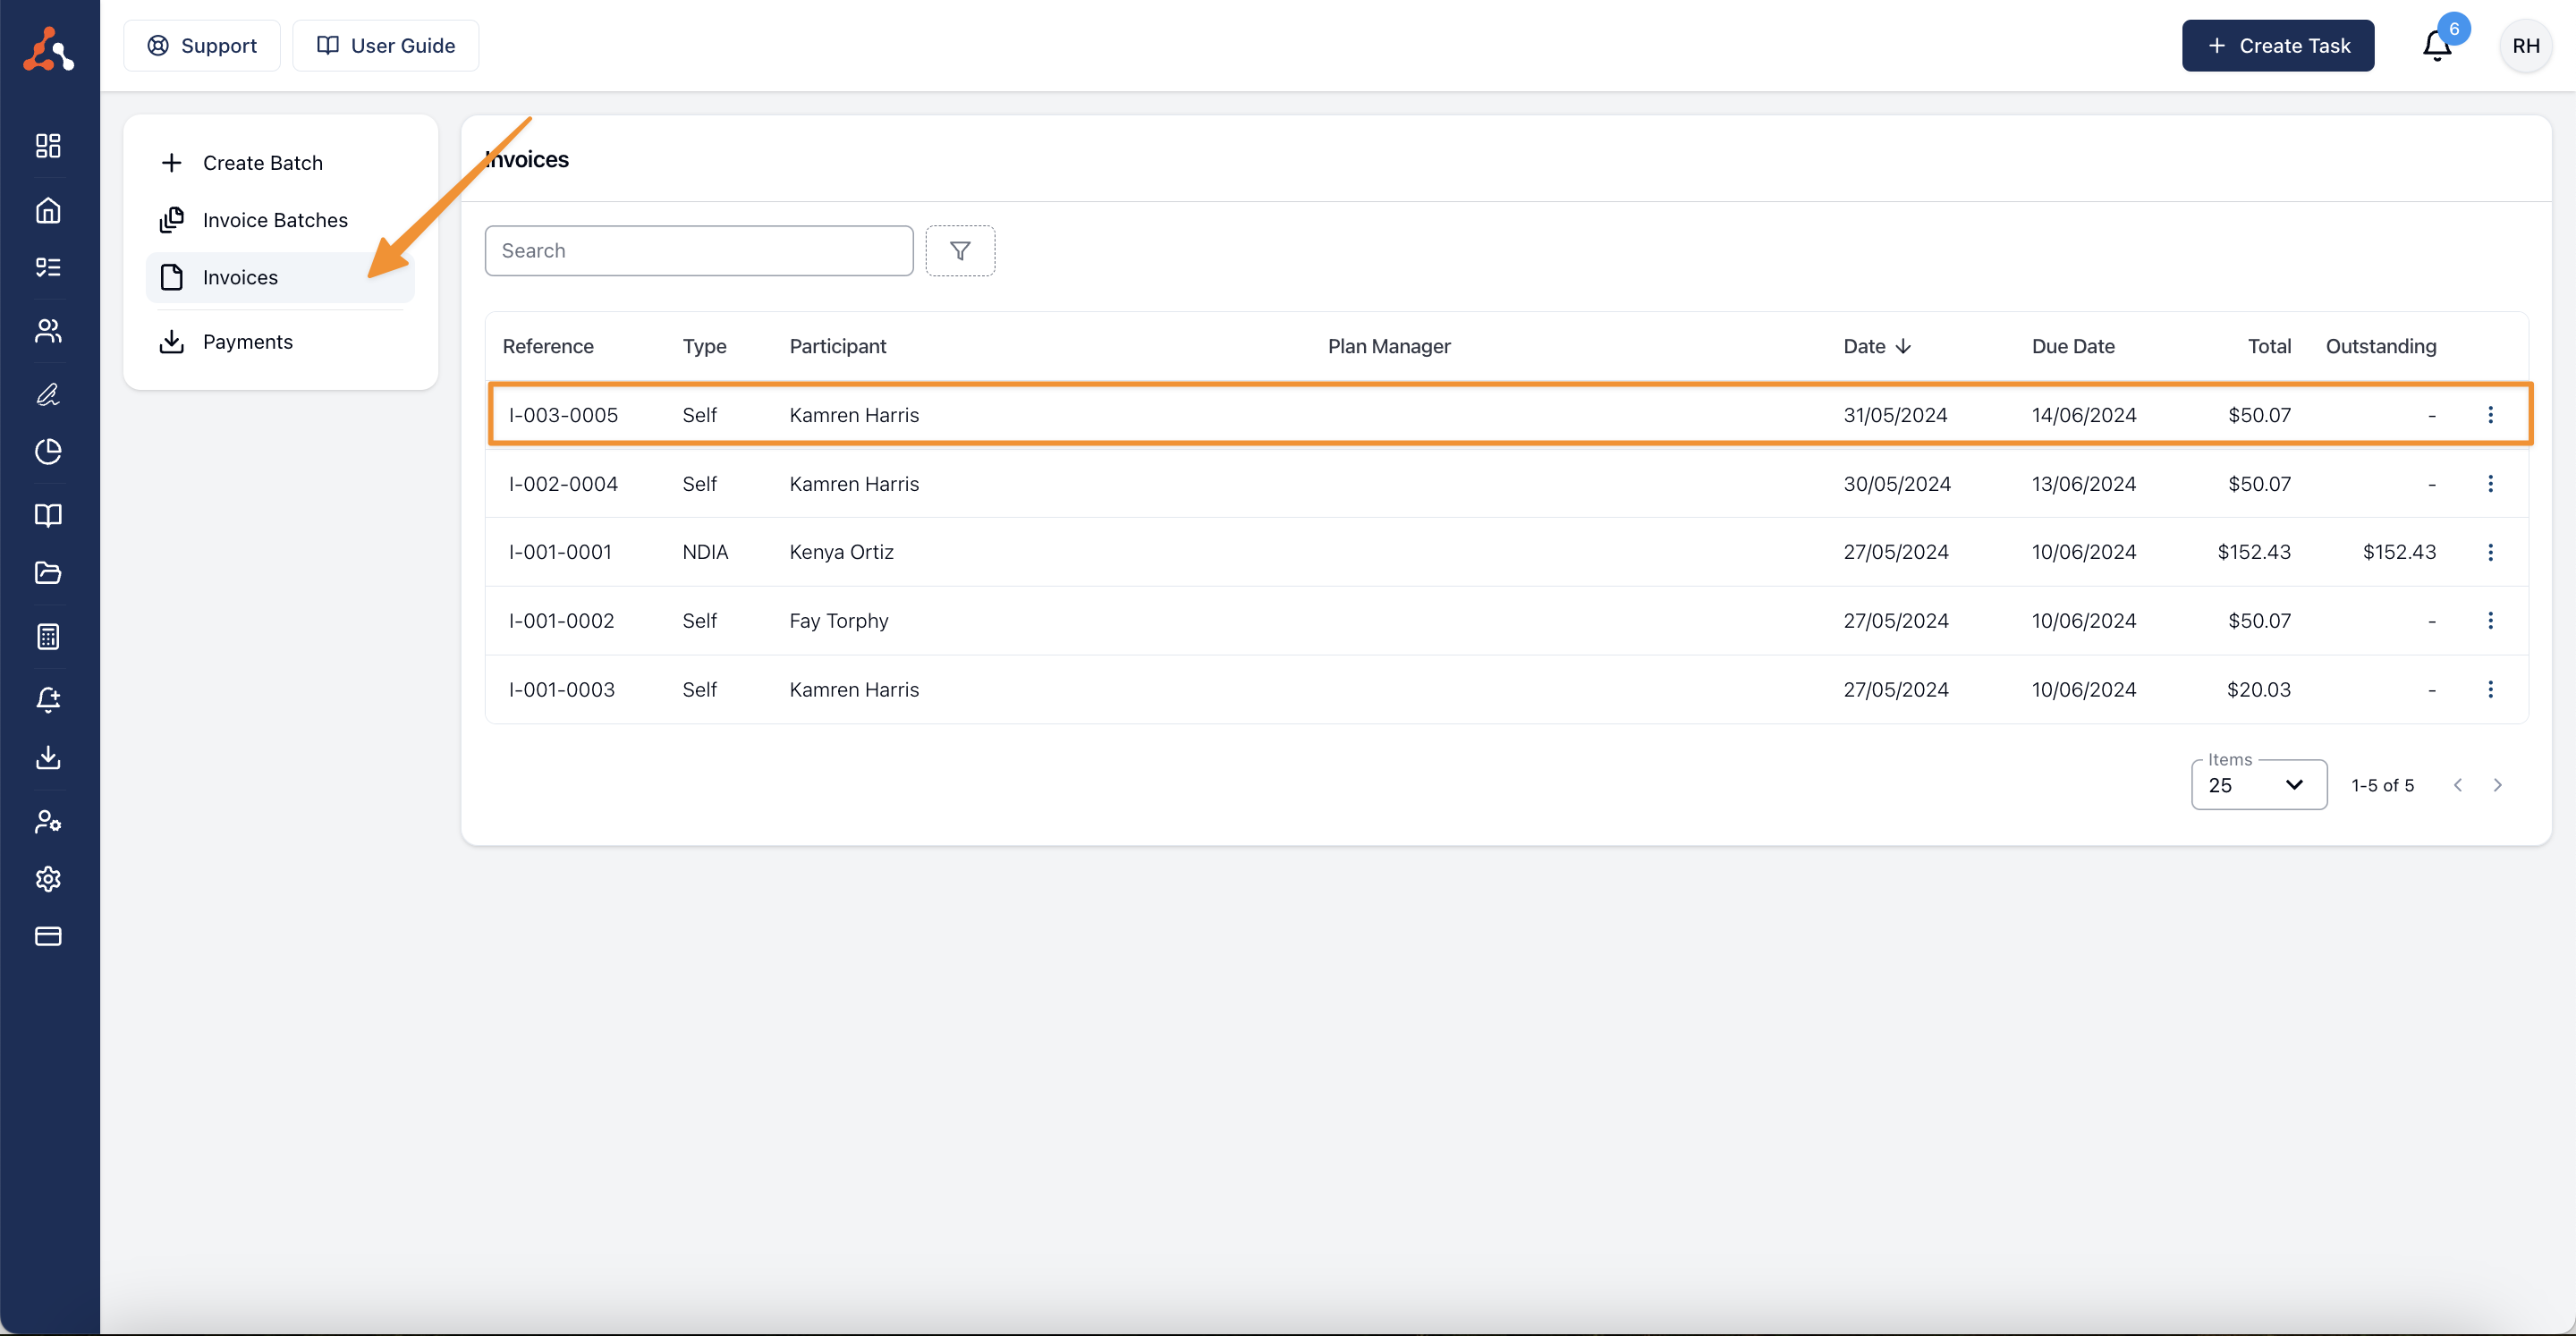
Navigate to the Invoices page.
Search for the invoice(s) that you allocated a payment to, to confirm it shows a zero outstanding amount.
For a more detailed walkthrough you can watch the video below on how to navigate adding a payment for a Plan Managed participant.
Deleting a Payment
There may be times you need to remove a payment from Astalty — for example, if it was entered against the wrong Participant or for the wrong amount. Payments that were added manually can be deleted directly from Astalty. Payments that have been synced with Xero need to be deleted in Xero first.
Delete a Payment in Astalty
To delete a payment, navigate to Payments within the Finance tab and open the payment you would like to remove.
Click the Delete button at the top of the payment.
Confirm the deletion in the dialog that appears.


Once confirmed, the payment will be removed from Astalty and any invoices it was allocated to will return to their previous outstanding balance.
Deleting a Payment Synced with Xero
If a payment has been synced with Xero, the Delete option is still shown when viewing the payment in Astalty — but selecting it will open a Cannot Delete Payment dialog rather than removing the payment.


Important Note
Payments that have been synced with Xero must always be deleted in Xero first. Once the payment has been removed in Xero, the change will flow back through to Astalty and the payment will no longer appear against the invoice.
For more information on how payments flow between Astalty and Xero, visit the Sync With Xero guide.