- Participants
- Participant Records
Participant Records
Introduction
The Participant Record feature is a critical tool designed to streamline the management and tracking of participant documents, including their expiry dates. This guide outlines the step-by-step process for setting up and managing Participant Records within the system.
Setting Up a Participant Record
Access Settings
Navigate to the left-hand side menu and click on Settings to begin the setup process.
Navigate to Participant Settings
Within the Settings menu, select Participants to access the participant record settings.
Create a Participant Record Type
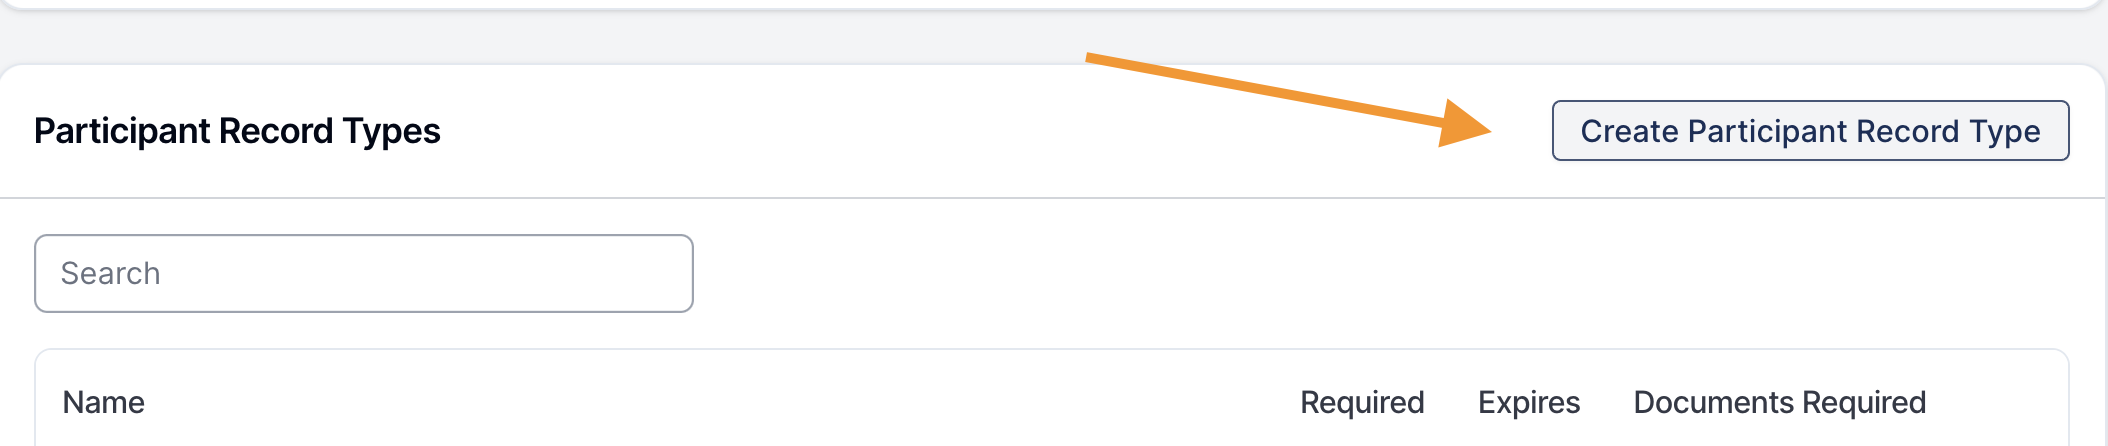
Click on the Create Participant Record Type button to initiate a new record type.
Enter the name of the Participant Record.
Specify the following attributes for the record:
- Expiry Date: Indicate whether the record has an expiry date.
- Required Record: State if the record is a required element.
- Document Upload: Decide if documents need to be uploaded for the record. These are checkboxes that must be selected as needed.
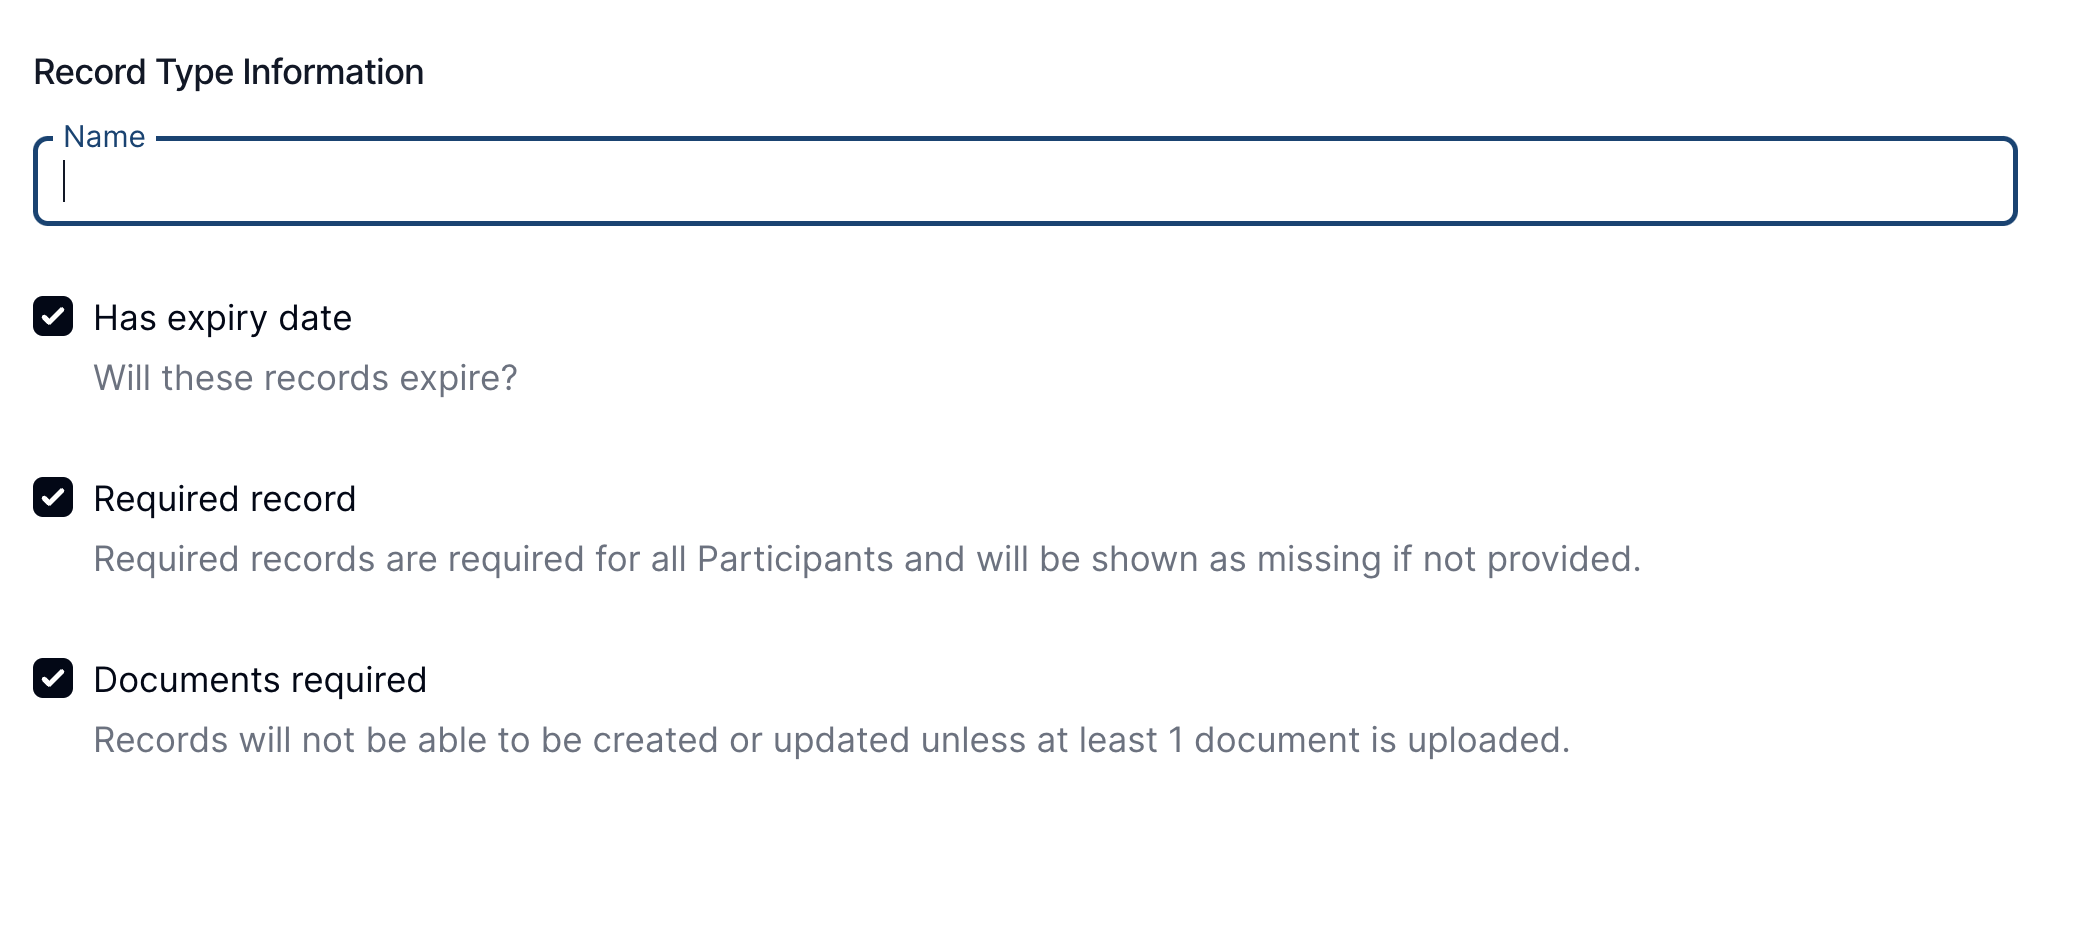
After providing the necessary information, click on Create to establish the new Participant Record type.
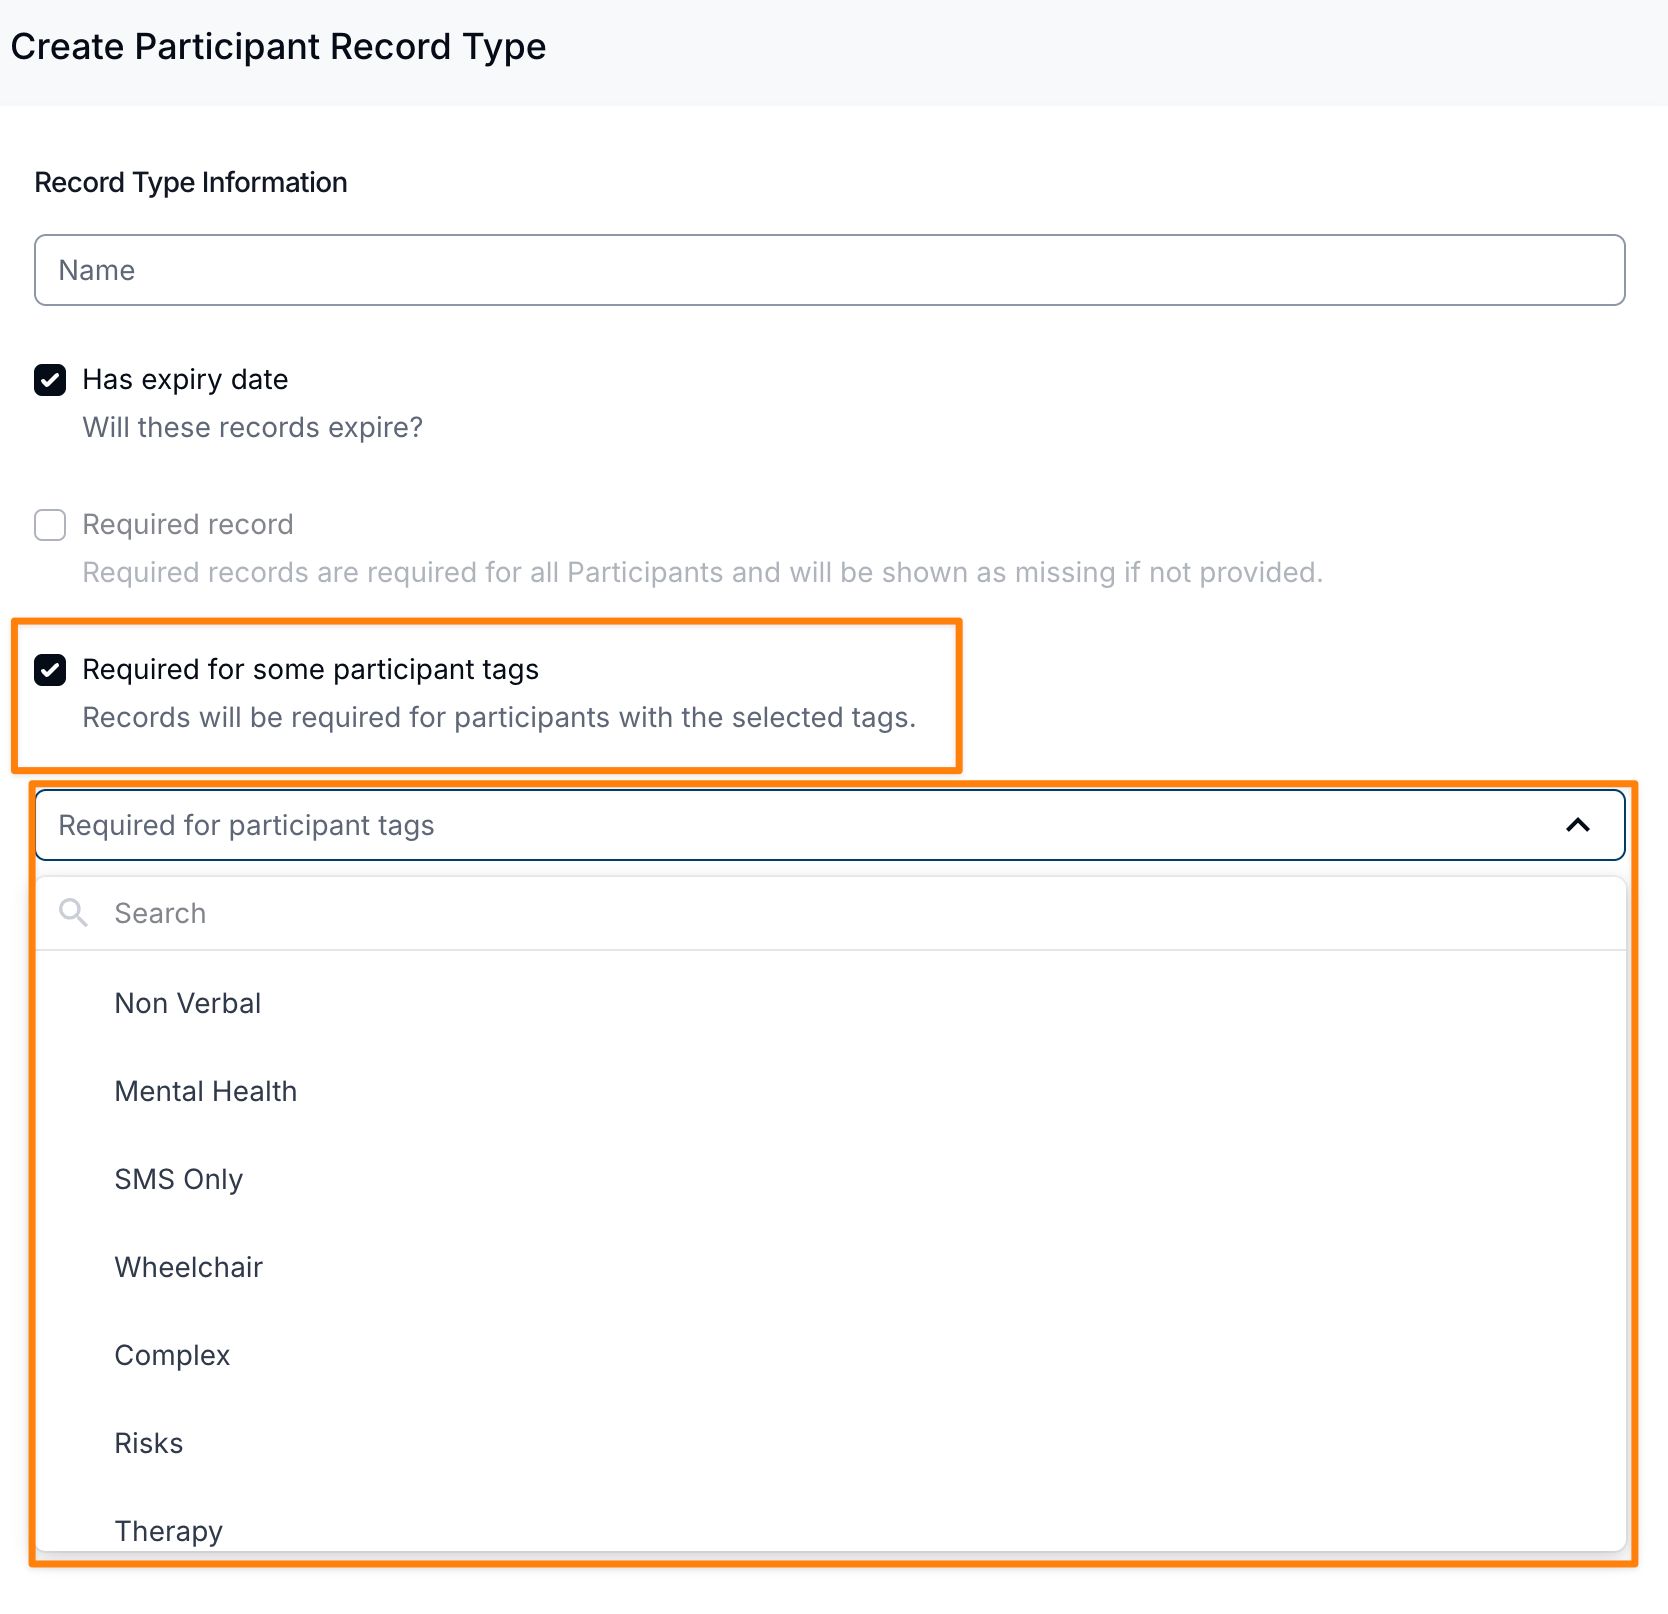
Setting Required Records by Participant Tags
When creating a Participant Record Type, you can now specify whether the record is required for all participants or only for participants with selected tags.
This allows you to tailor record requirements based on specific participant groups, rather than applying the same requirement across your entire organisation.
Configuring Required Records by Tag
When setting up a Participant Record Type:
- Navigate to Settings and select Participants.
- Click Create Participant Record Type or edit an existing record.
- Locate the Required Record option.
- Choose whether the record should be:
- Required for all participants, or
- Required only for participants with selected tags.
- If selecting tags, choose the relevant Participant Tags the requirement should apply to.
- Click Create or Save.
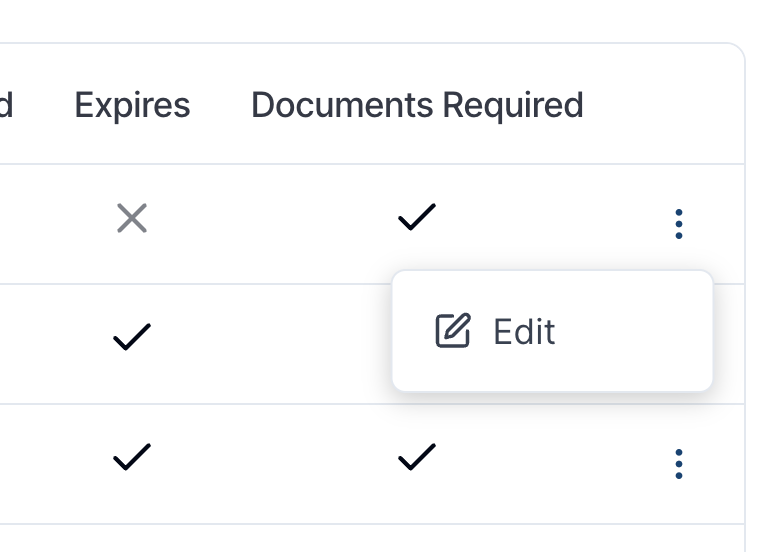
Review and Edit Record Types
Newly created Participant Record types will appear in your list, complete with indicators (a cross or a tick) showing if they are required, have an expiry, or require document uploads.
To edit any record type, click on the three dots on the right-hand side of the record and select Edit.
Adding Records to Participant Profiles
From the main menu, select Participant and choose the desired individual's profile. Within a participants profile Scroll down to the Records section within the participant's profile.
Once in the record click on Create Participant Record and select the appropriate Record Type from the dropdown menu.
Fill in additional details such as:
- Issue Date
- Expiry Date (if applicable)
- Reference Number (if applicable)
- Record Description (e.g., Allergy Information)
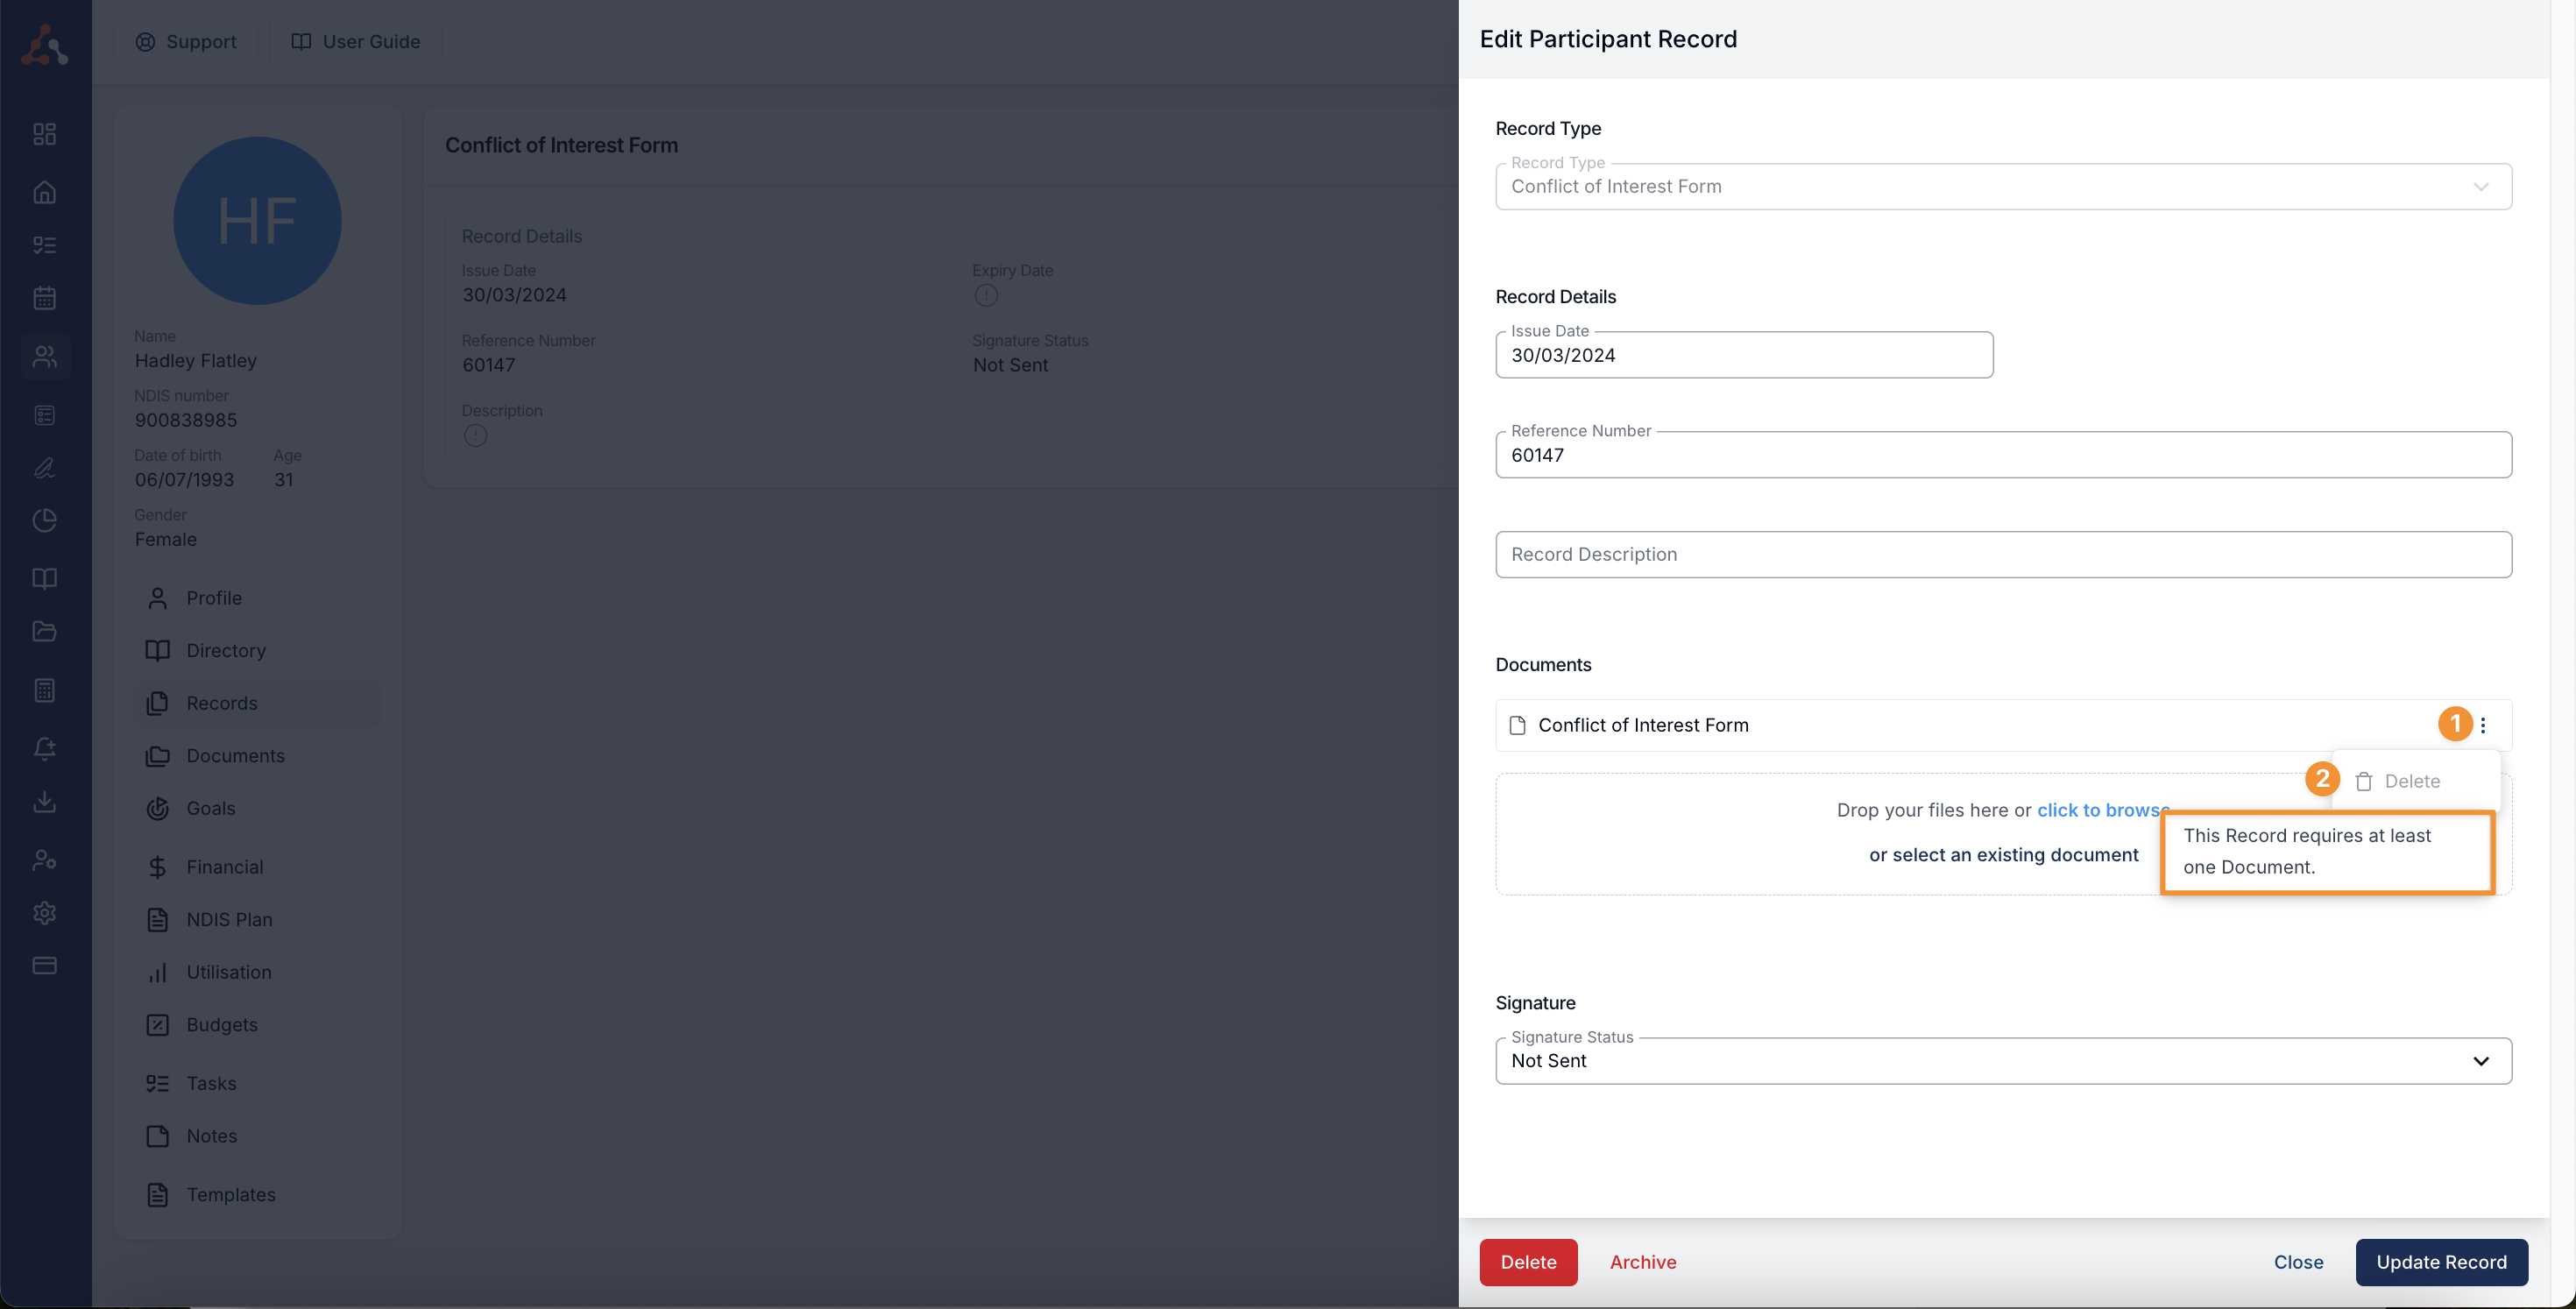
Documents can be added by dragging and dropping files into the designated area. There is also an option to add existing documents.
If the Record settings allow for Support Worker Acknowledgement, you can select the option to make this a requirement on the Record. For more information on this setting, click here.
You can select whether the Record needs to be signed, and can send the request within the Record itself. For more information on this, see the next section.
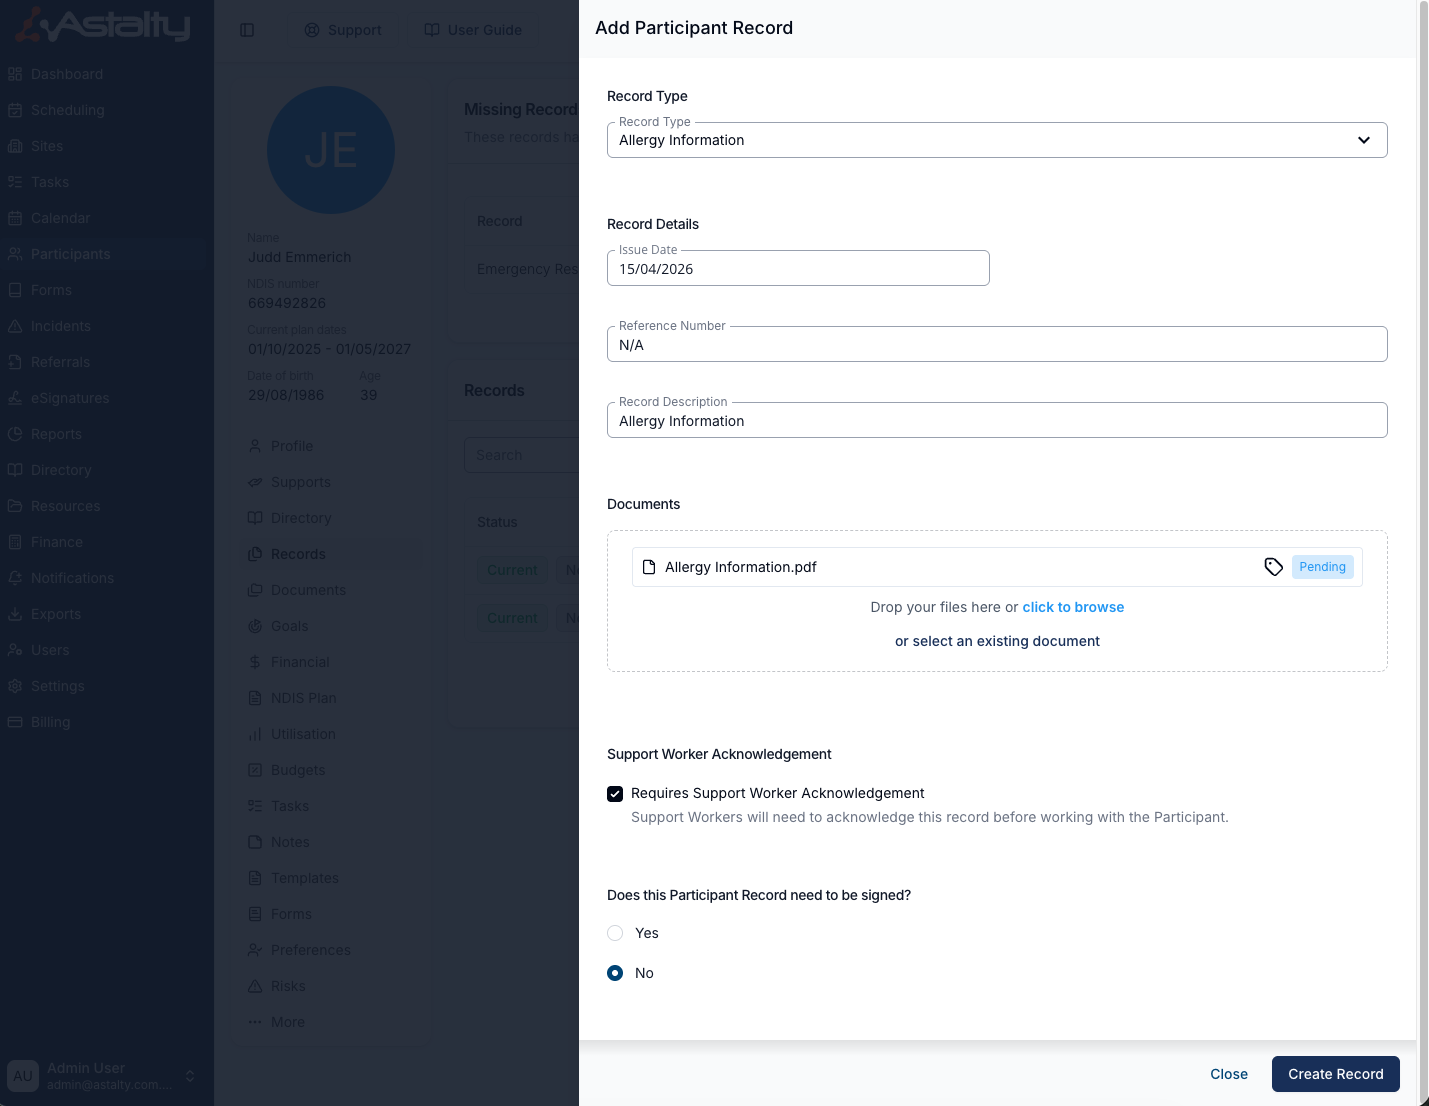
Tip: Adding existing documents is particularly useful for users wishing to track expiry dates of previously uploaded documents.
Once all information is entered and documents are uploaded, click Create Record.
Sending Participant Records for eSignature
To send the Record for signing, you have two options:
- Send the request immediately after being created
- Send the request later
Choosing the first option will navigate you to the eSignature platform immediately. For more information on this, click here.
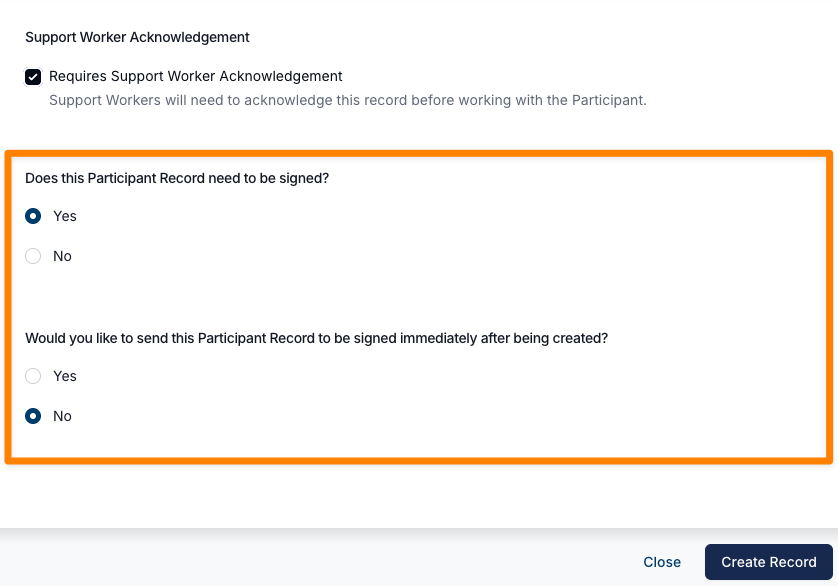
If you choose to send for signature later, you can find more info in the section below (Sending Multiple Participant Records for eSigning) or by clicking here.
Viewing Participant Records
In the record screen, you can view each Participant Record with details such as its status (current or expired), whether it has been sent for signing, the record name, and the expiry date on the far right-hand side.
Handy Hint: You can check the status of all documents across the organisation and or based on a staff member's caseload via the reports section.
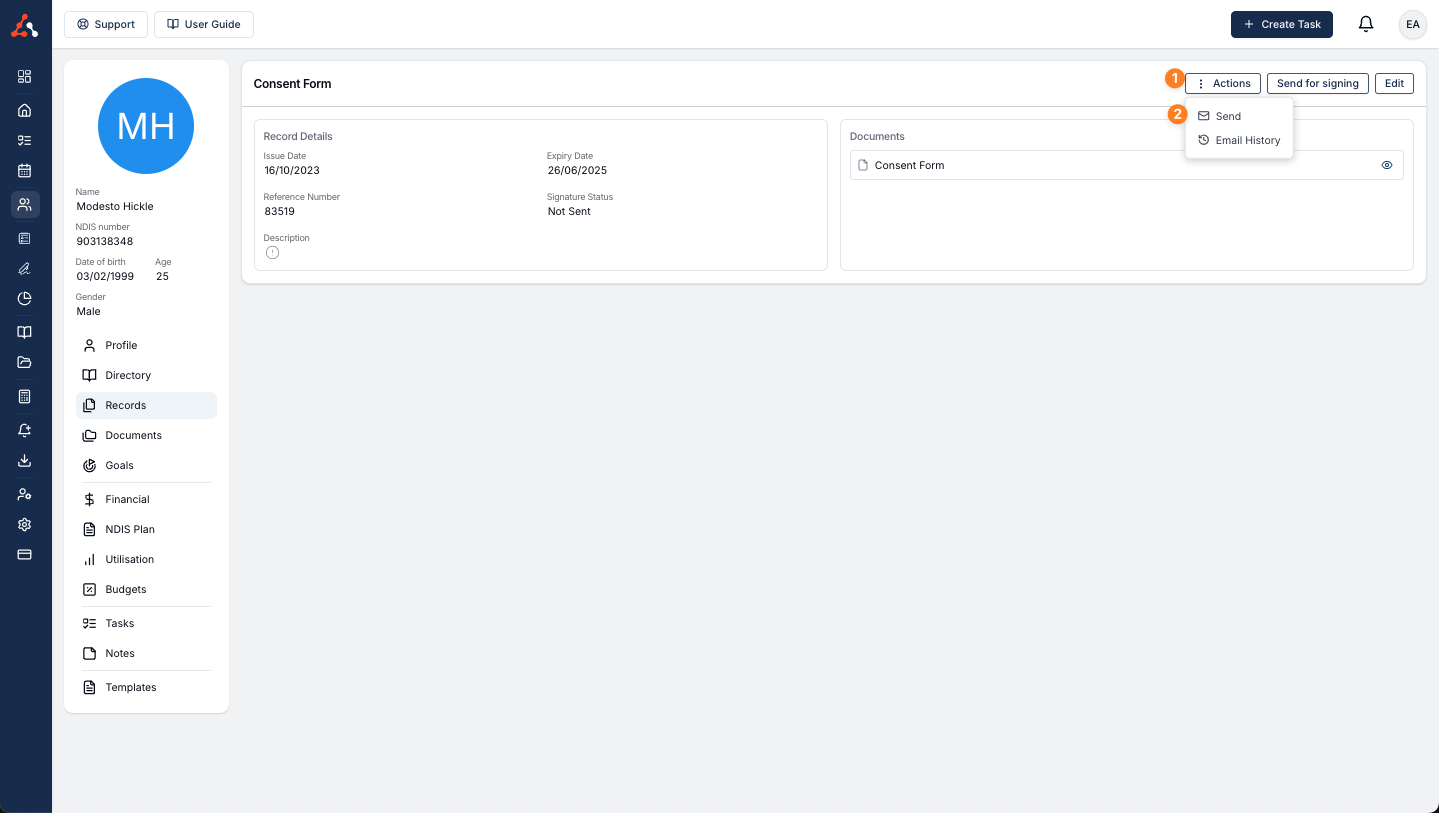
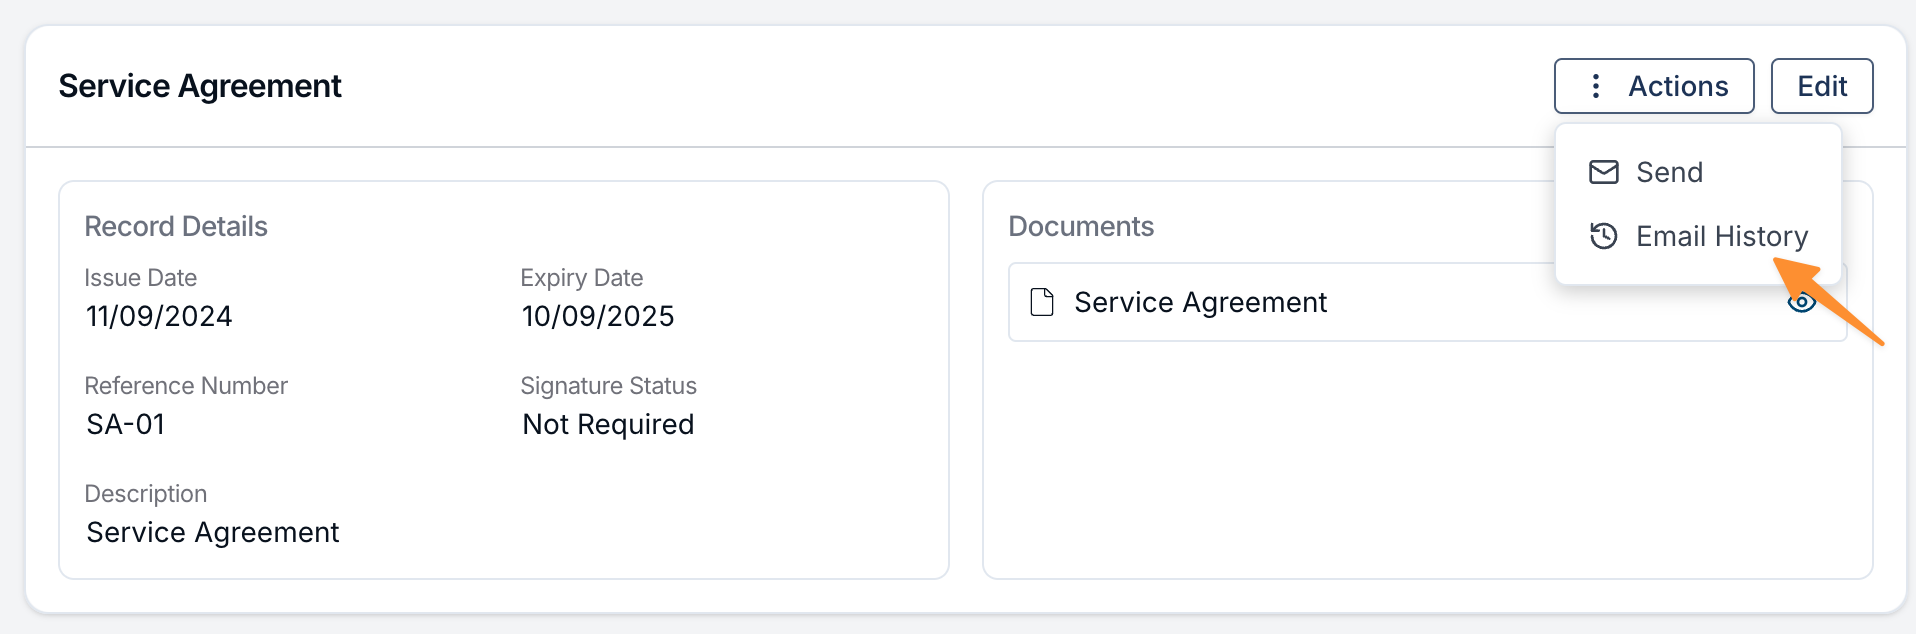
Sending Participant Records
You can send records from within the Record by selecting the 'Actions' button and then select the 'Email' option. You will then have to enter the email address for the recipient.
Sending Multiple Participant Records for eSigning
You may wish to send multiple Participant Records at once, such as a Service Agreement and Consent Form. We've created a helpful video guide that walks through this process.
Record Sending Log
You can now view the history of sent records from within the relevant records. This will help with identifying which documents have been sent.
Deleting Documents from Records
You can now delete documents from within Records! One caveat is that a record must have at least one document assigned before you can delete a document. You can do this from within the edit record screen.