- Users
- Updating User Profiles and Changing Passwords
Updating User Profiles and Changing Passwords
Who Can Update All User Details?
- Access Level Required: Only users with 'Admin' permissions have the capability to update the details of all users in the system.
To update user details you will need to navigate to the Users page.
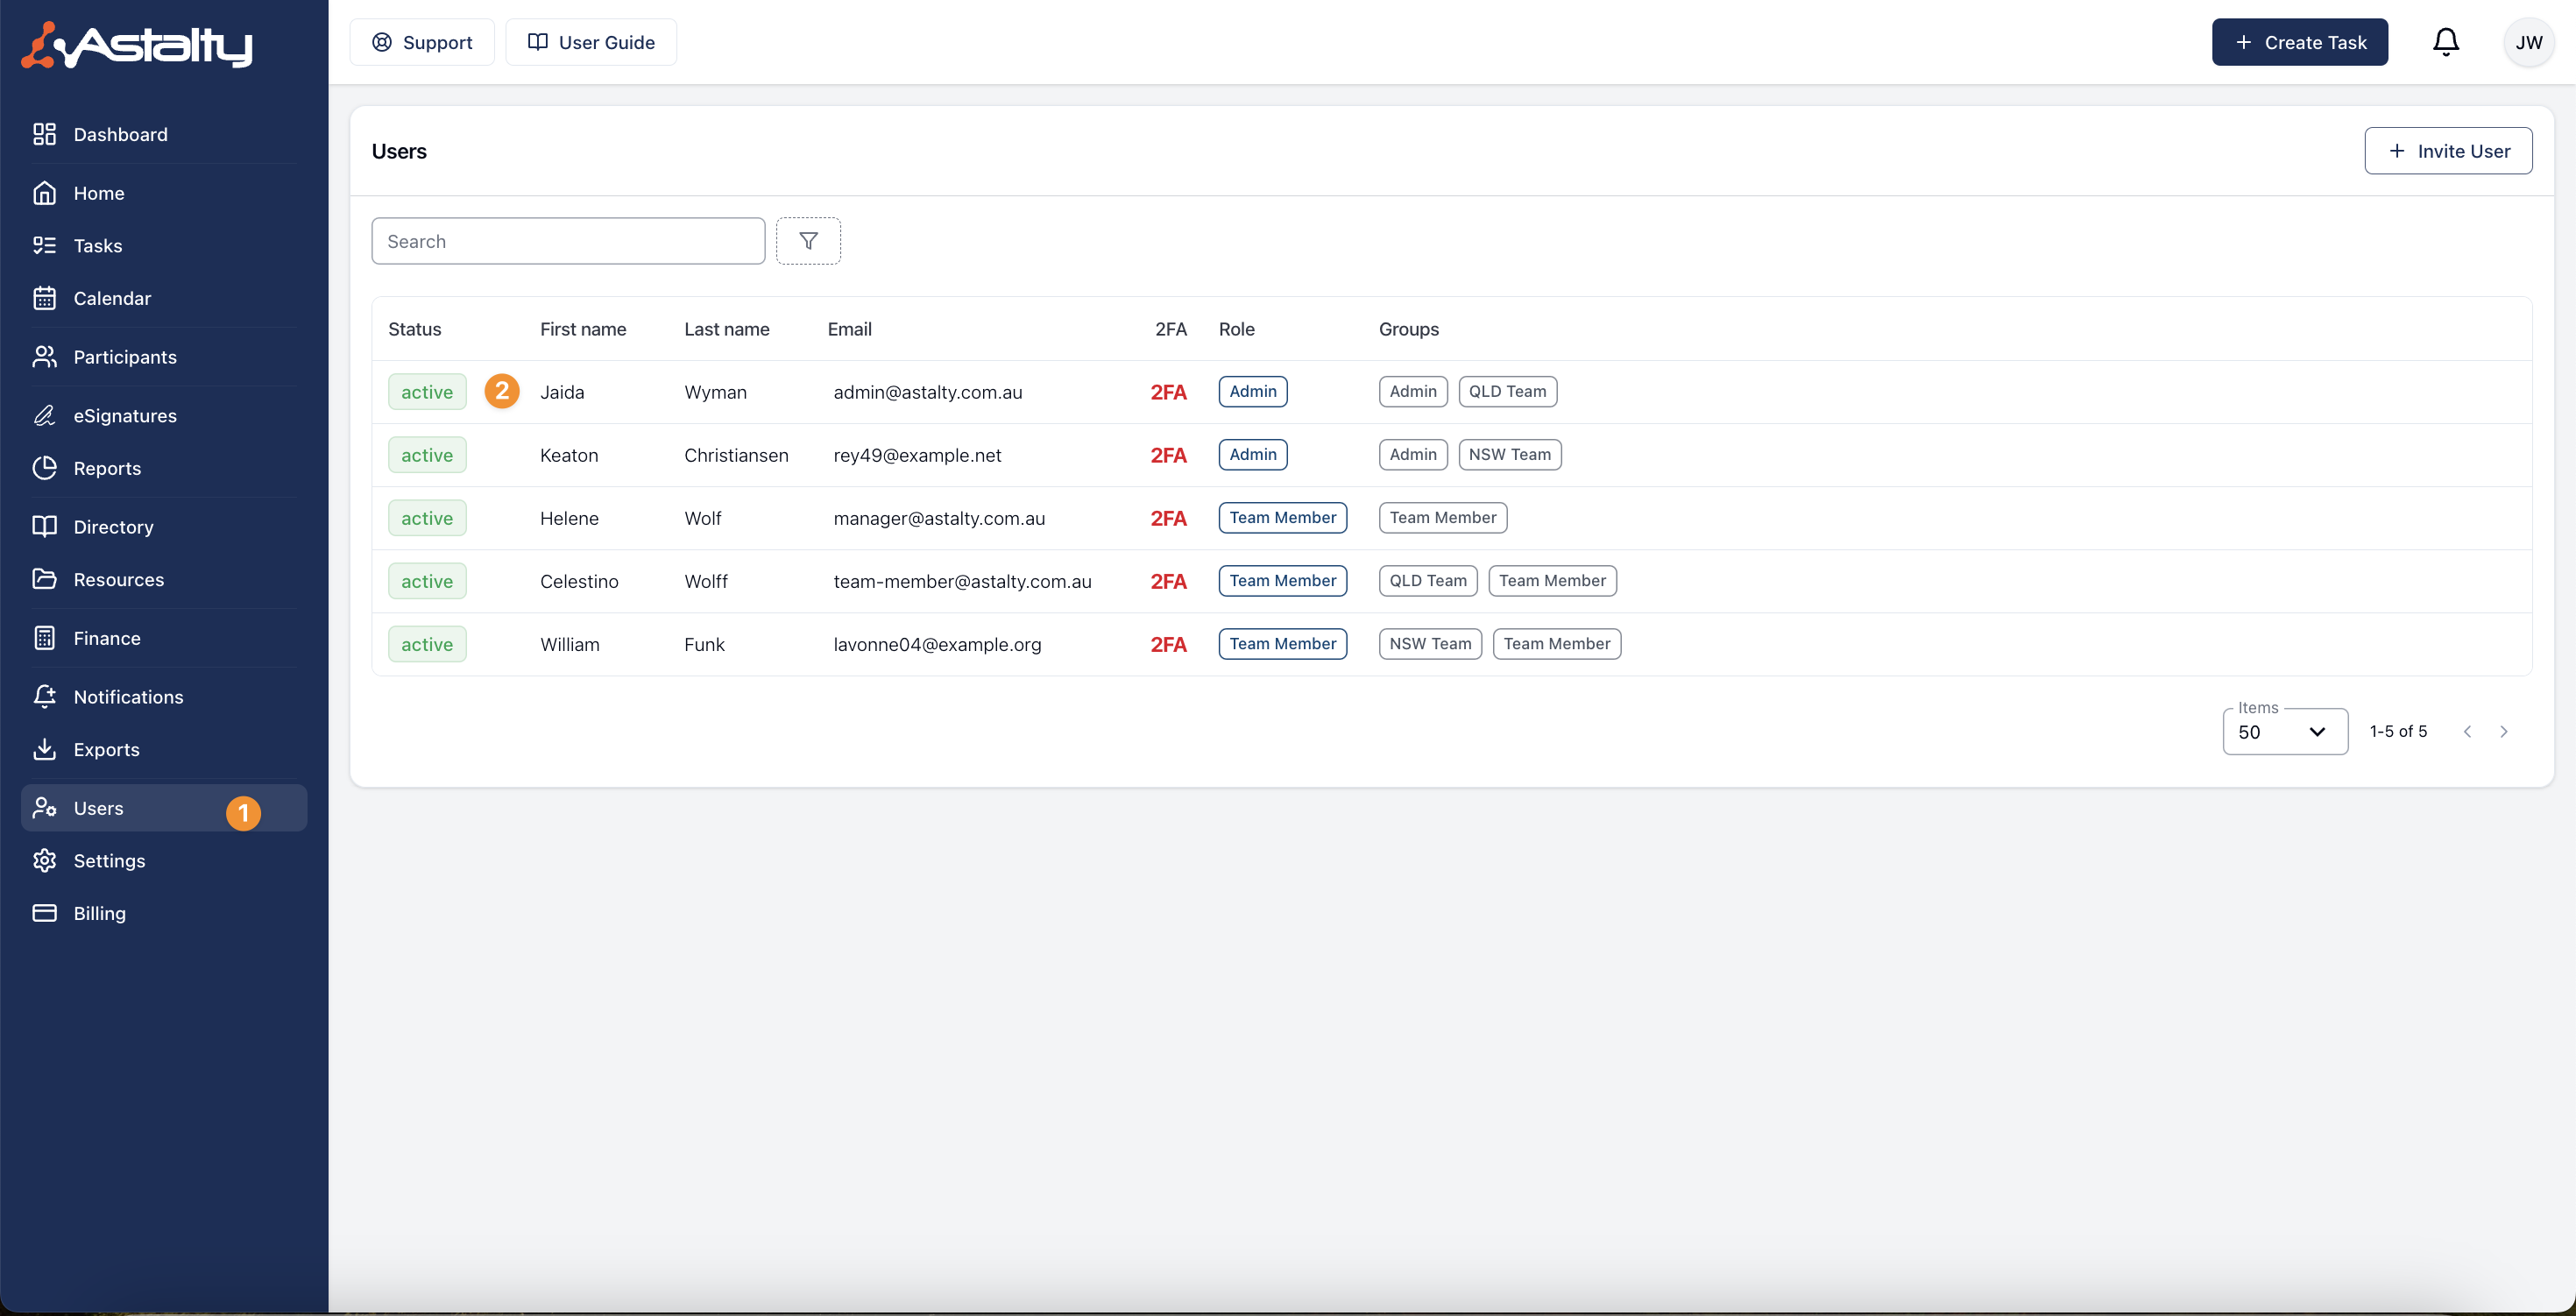
Once in here you can select a user who's details you would like to update and from here you can follow the instructions below on how to edit user information.
Who Can Update Their Own Details?
- Individual Access: Every user, regardless of their role - be it Admin, Manager, or Team Member - has the ability to update their own personal details.
To change your login details, navigate to your profile at the bottom of the main menu, then select My Profile, as shown in the screenshot below.
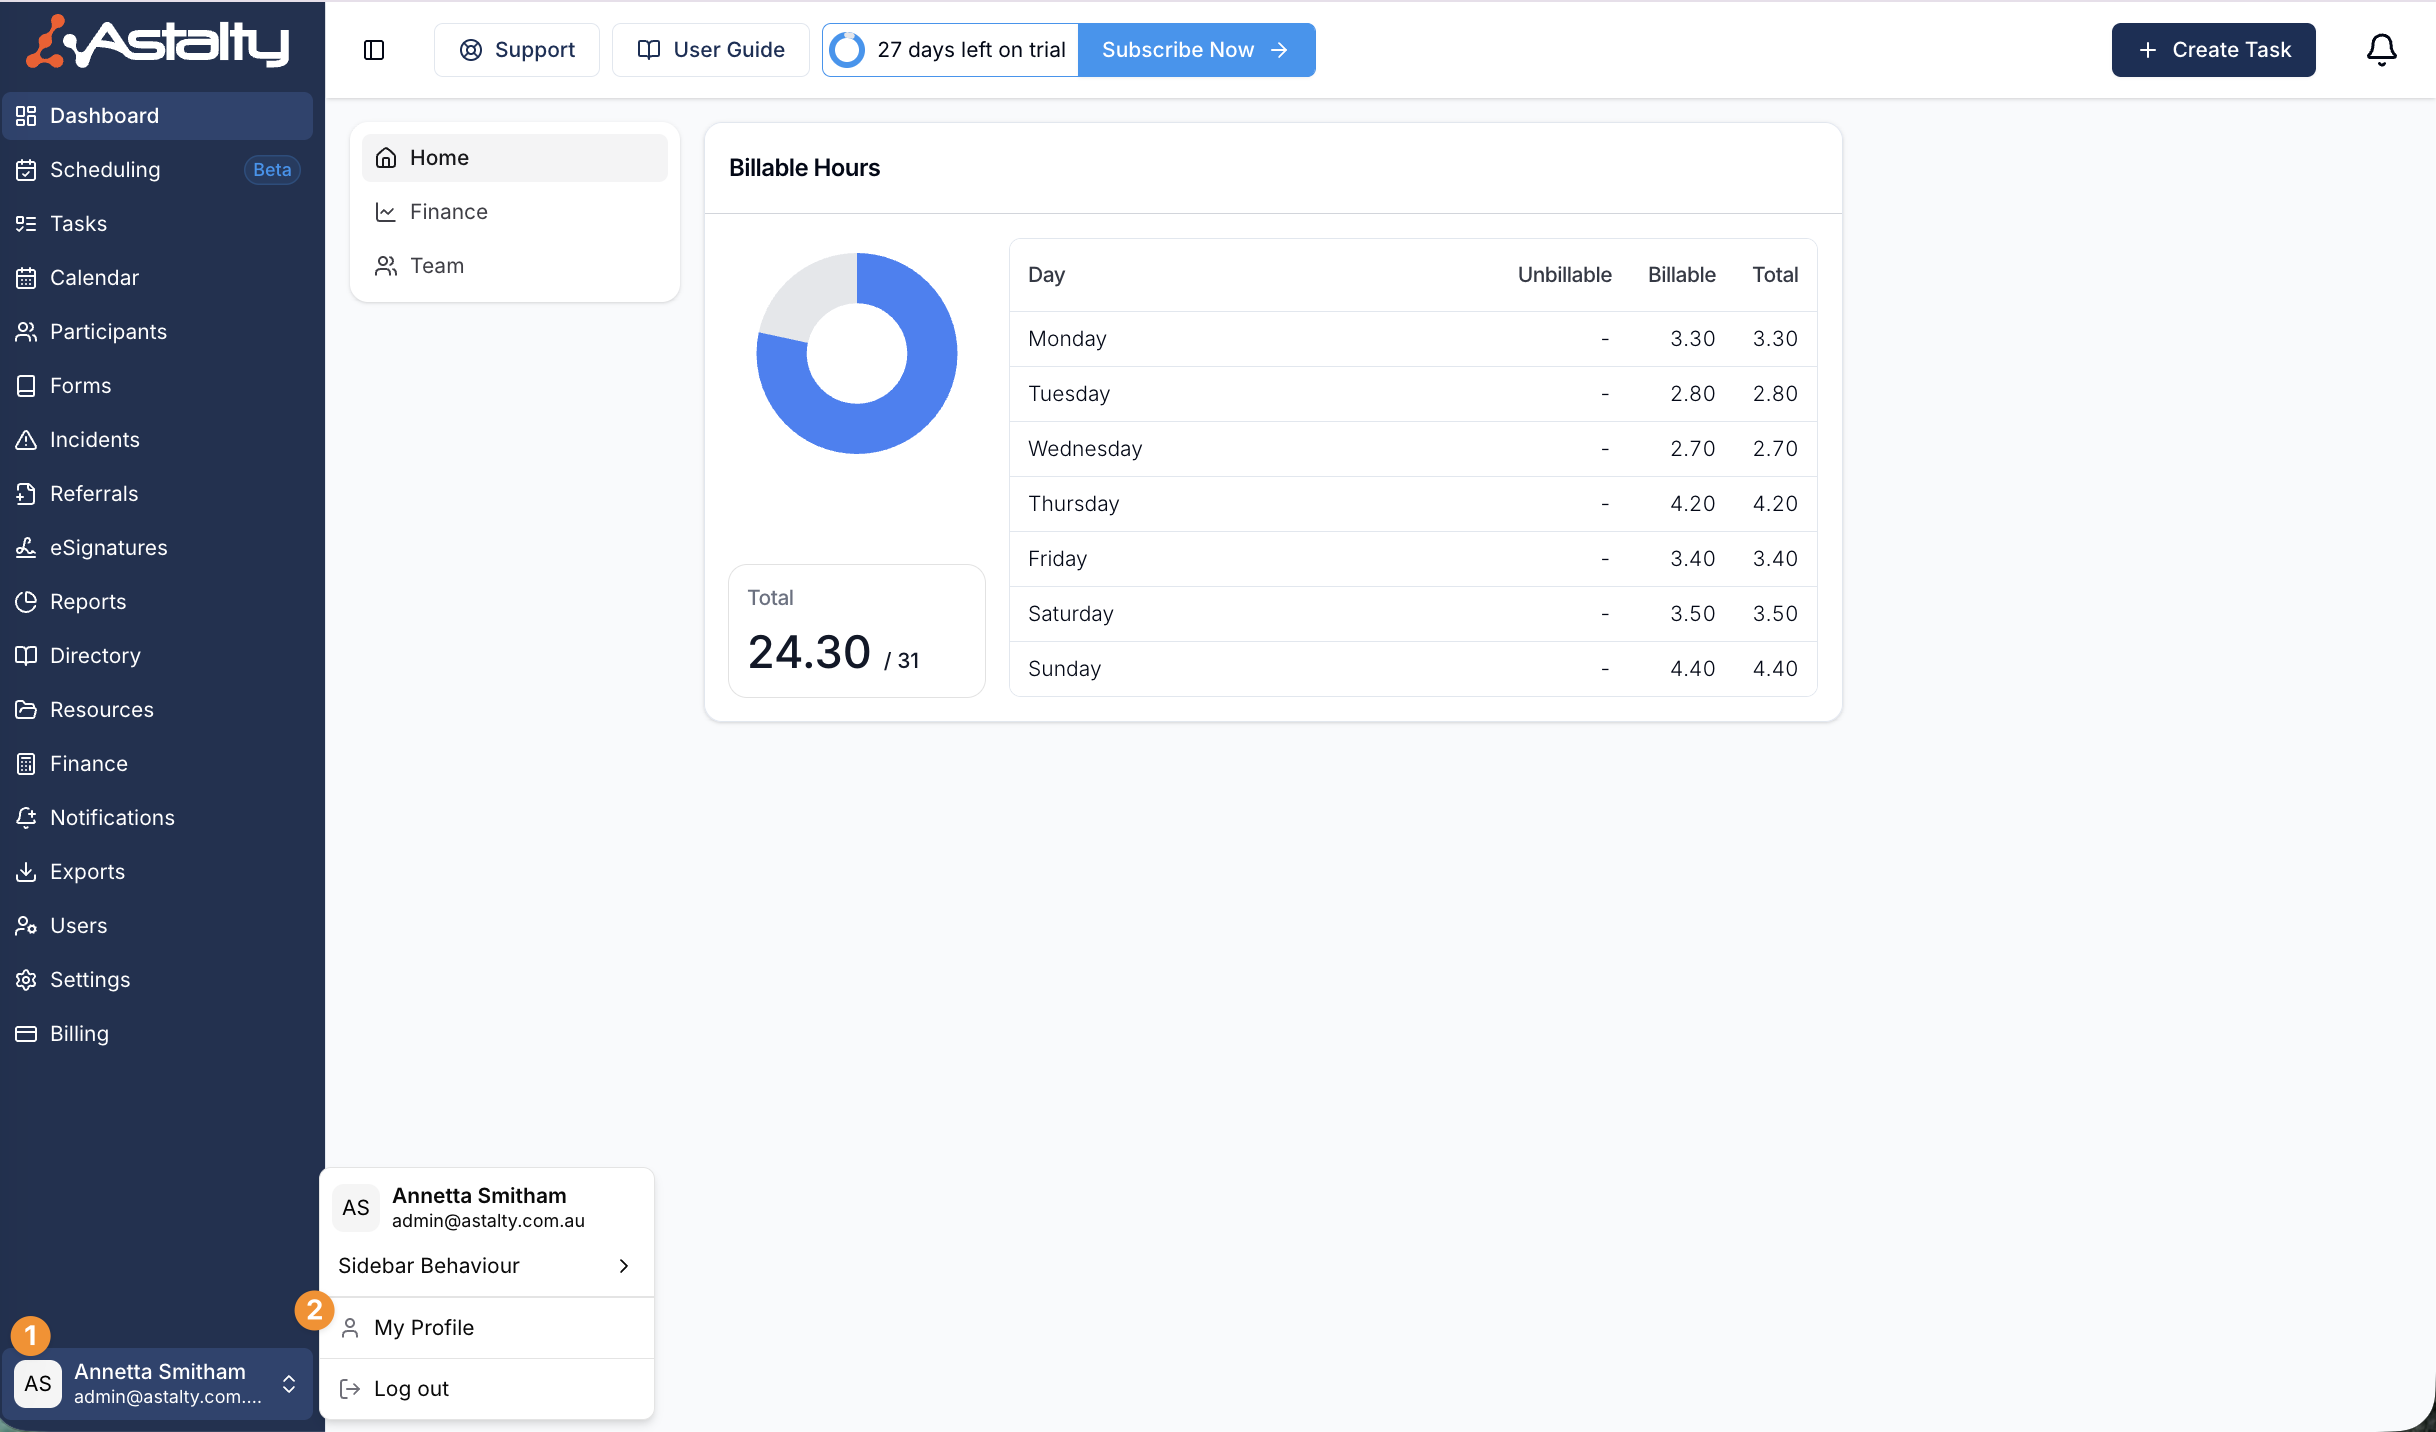
Updating your user details
Once in this screen you will be able to edit your user information by clicking the "edit" button outlined below. You can edit your address from this screen.
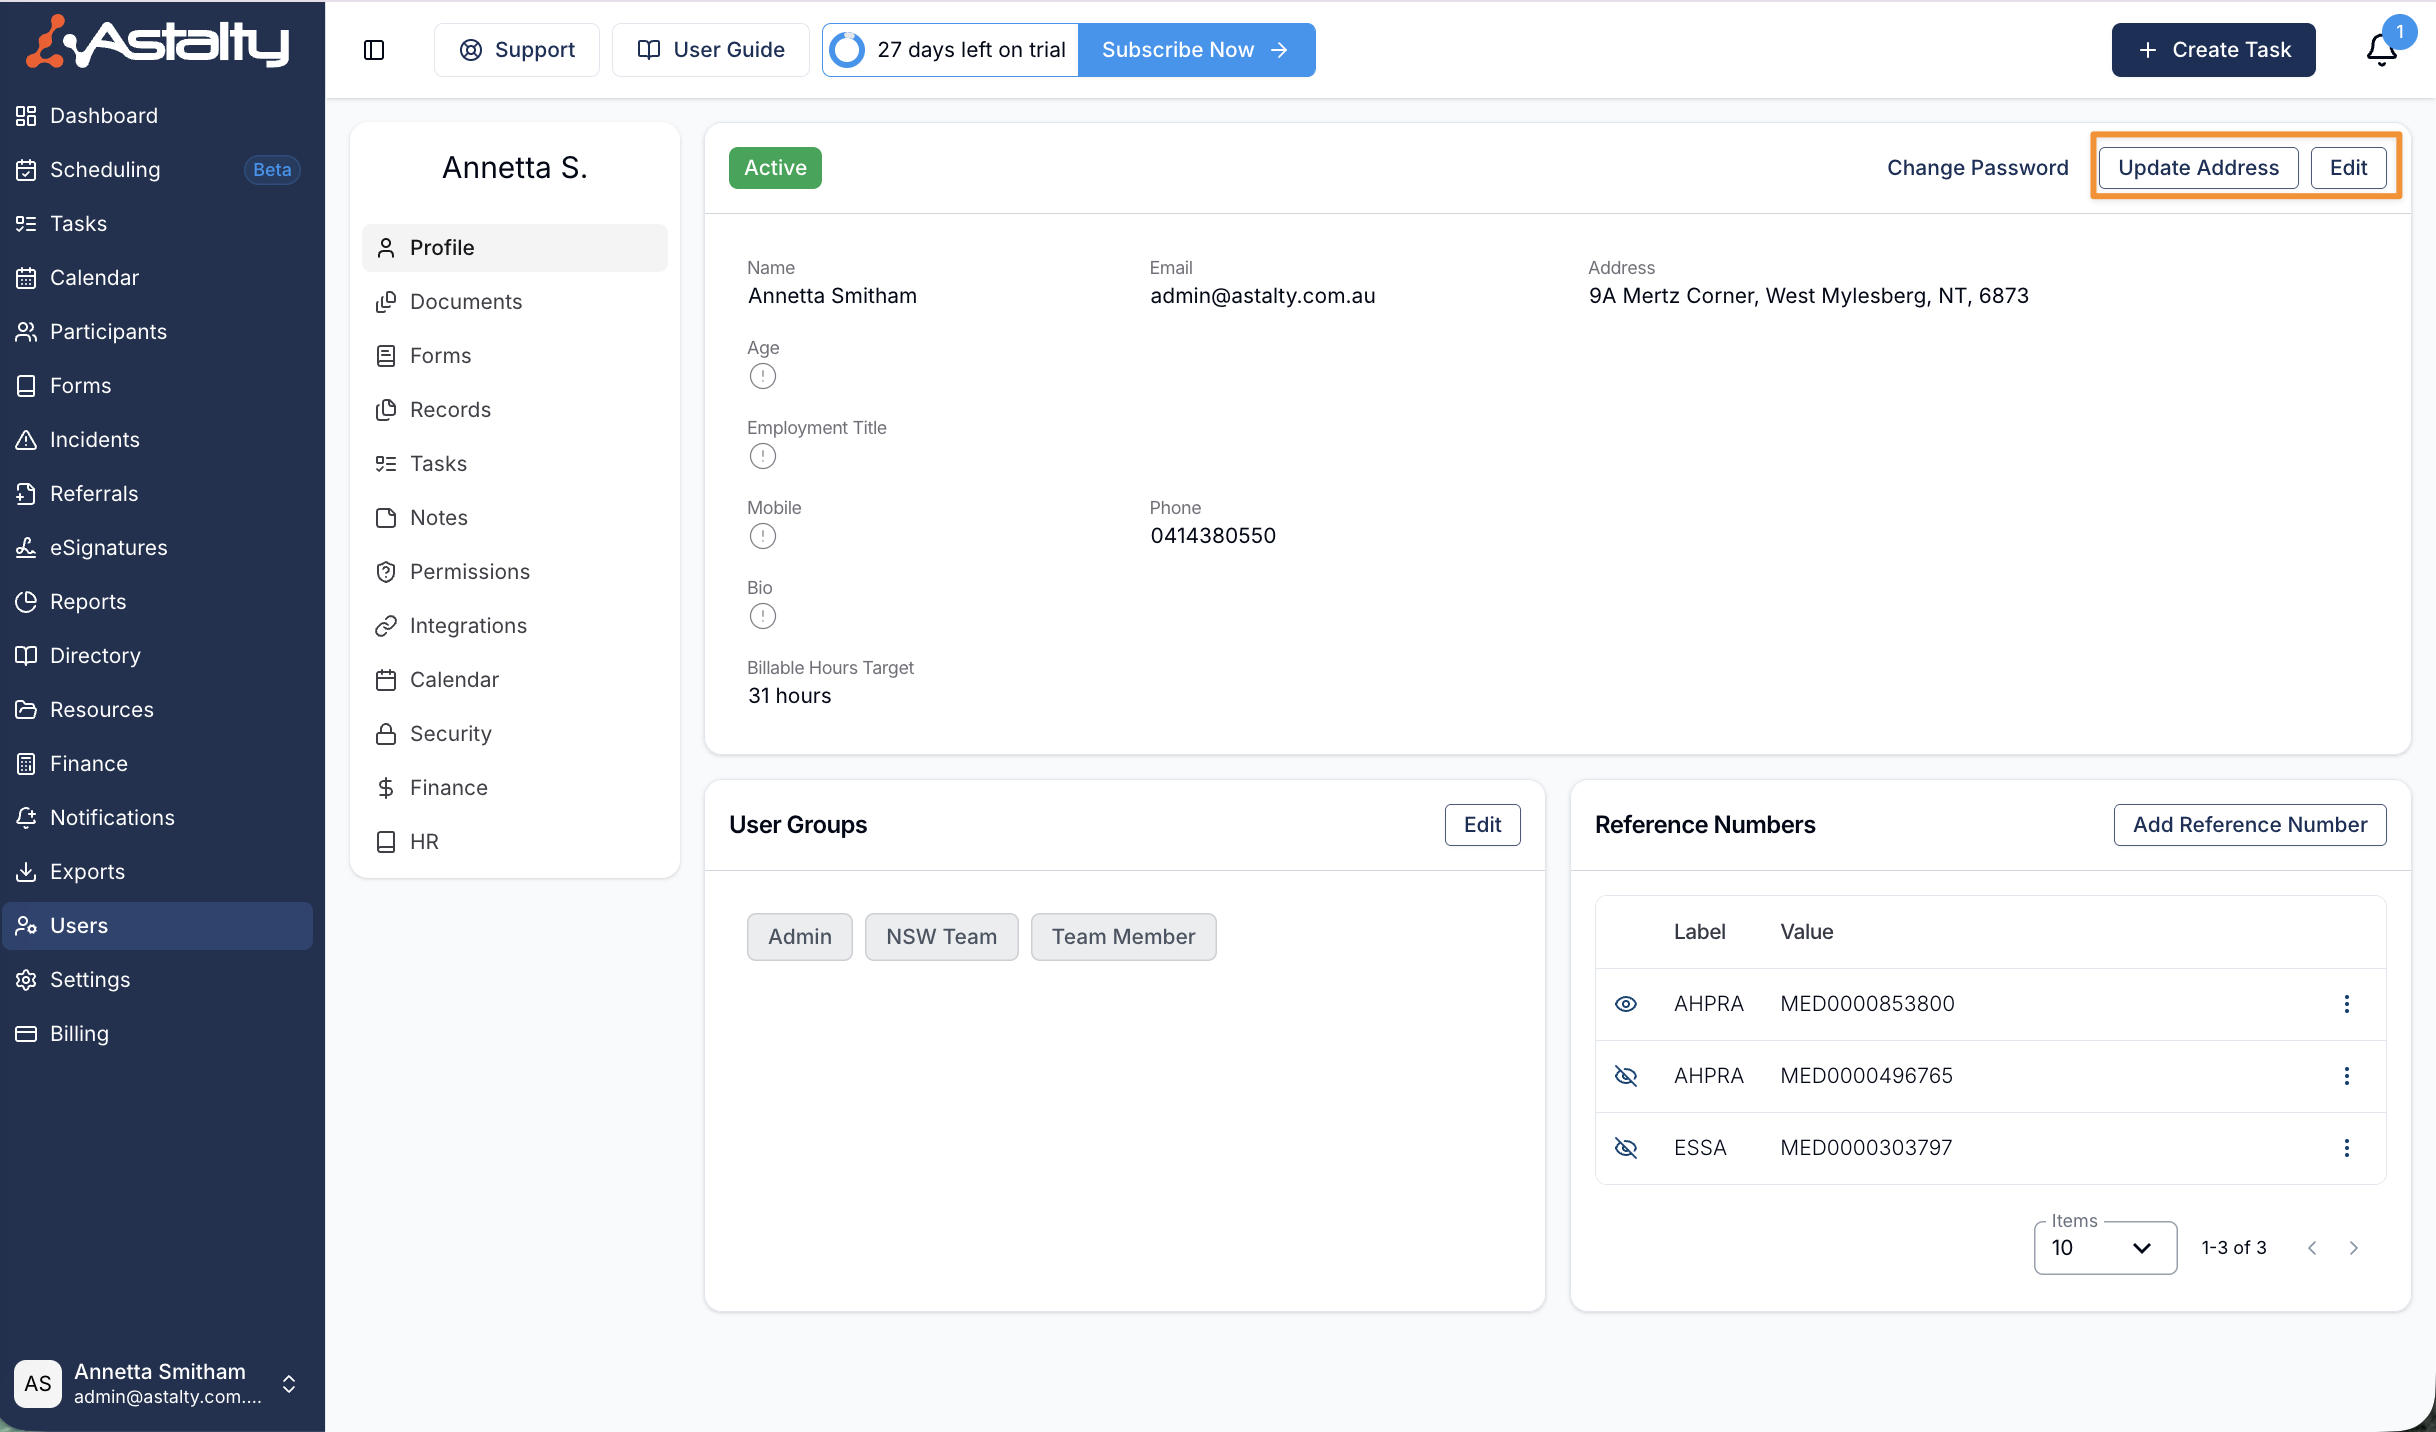
Once in this screen you will be able to edit your user email address. Don't forget to click update user in the bottom right of this page to save your new email address! It is important to remember that each user must have a unique email address. If you have created another account with your email address you must change that account first before updating.
Updating your Password
You can also edit update and change your password, this can only be done for your password. You cannot change another users password.
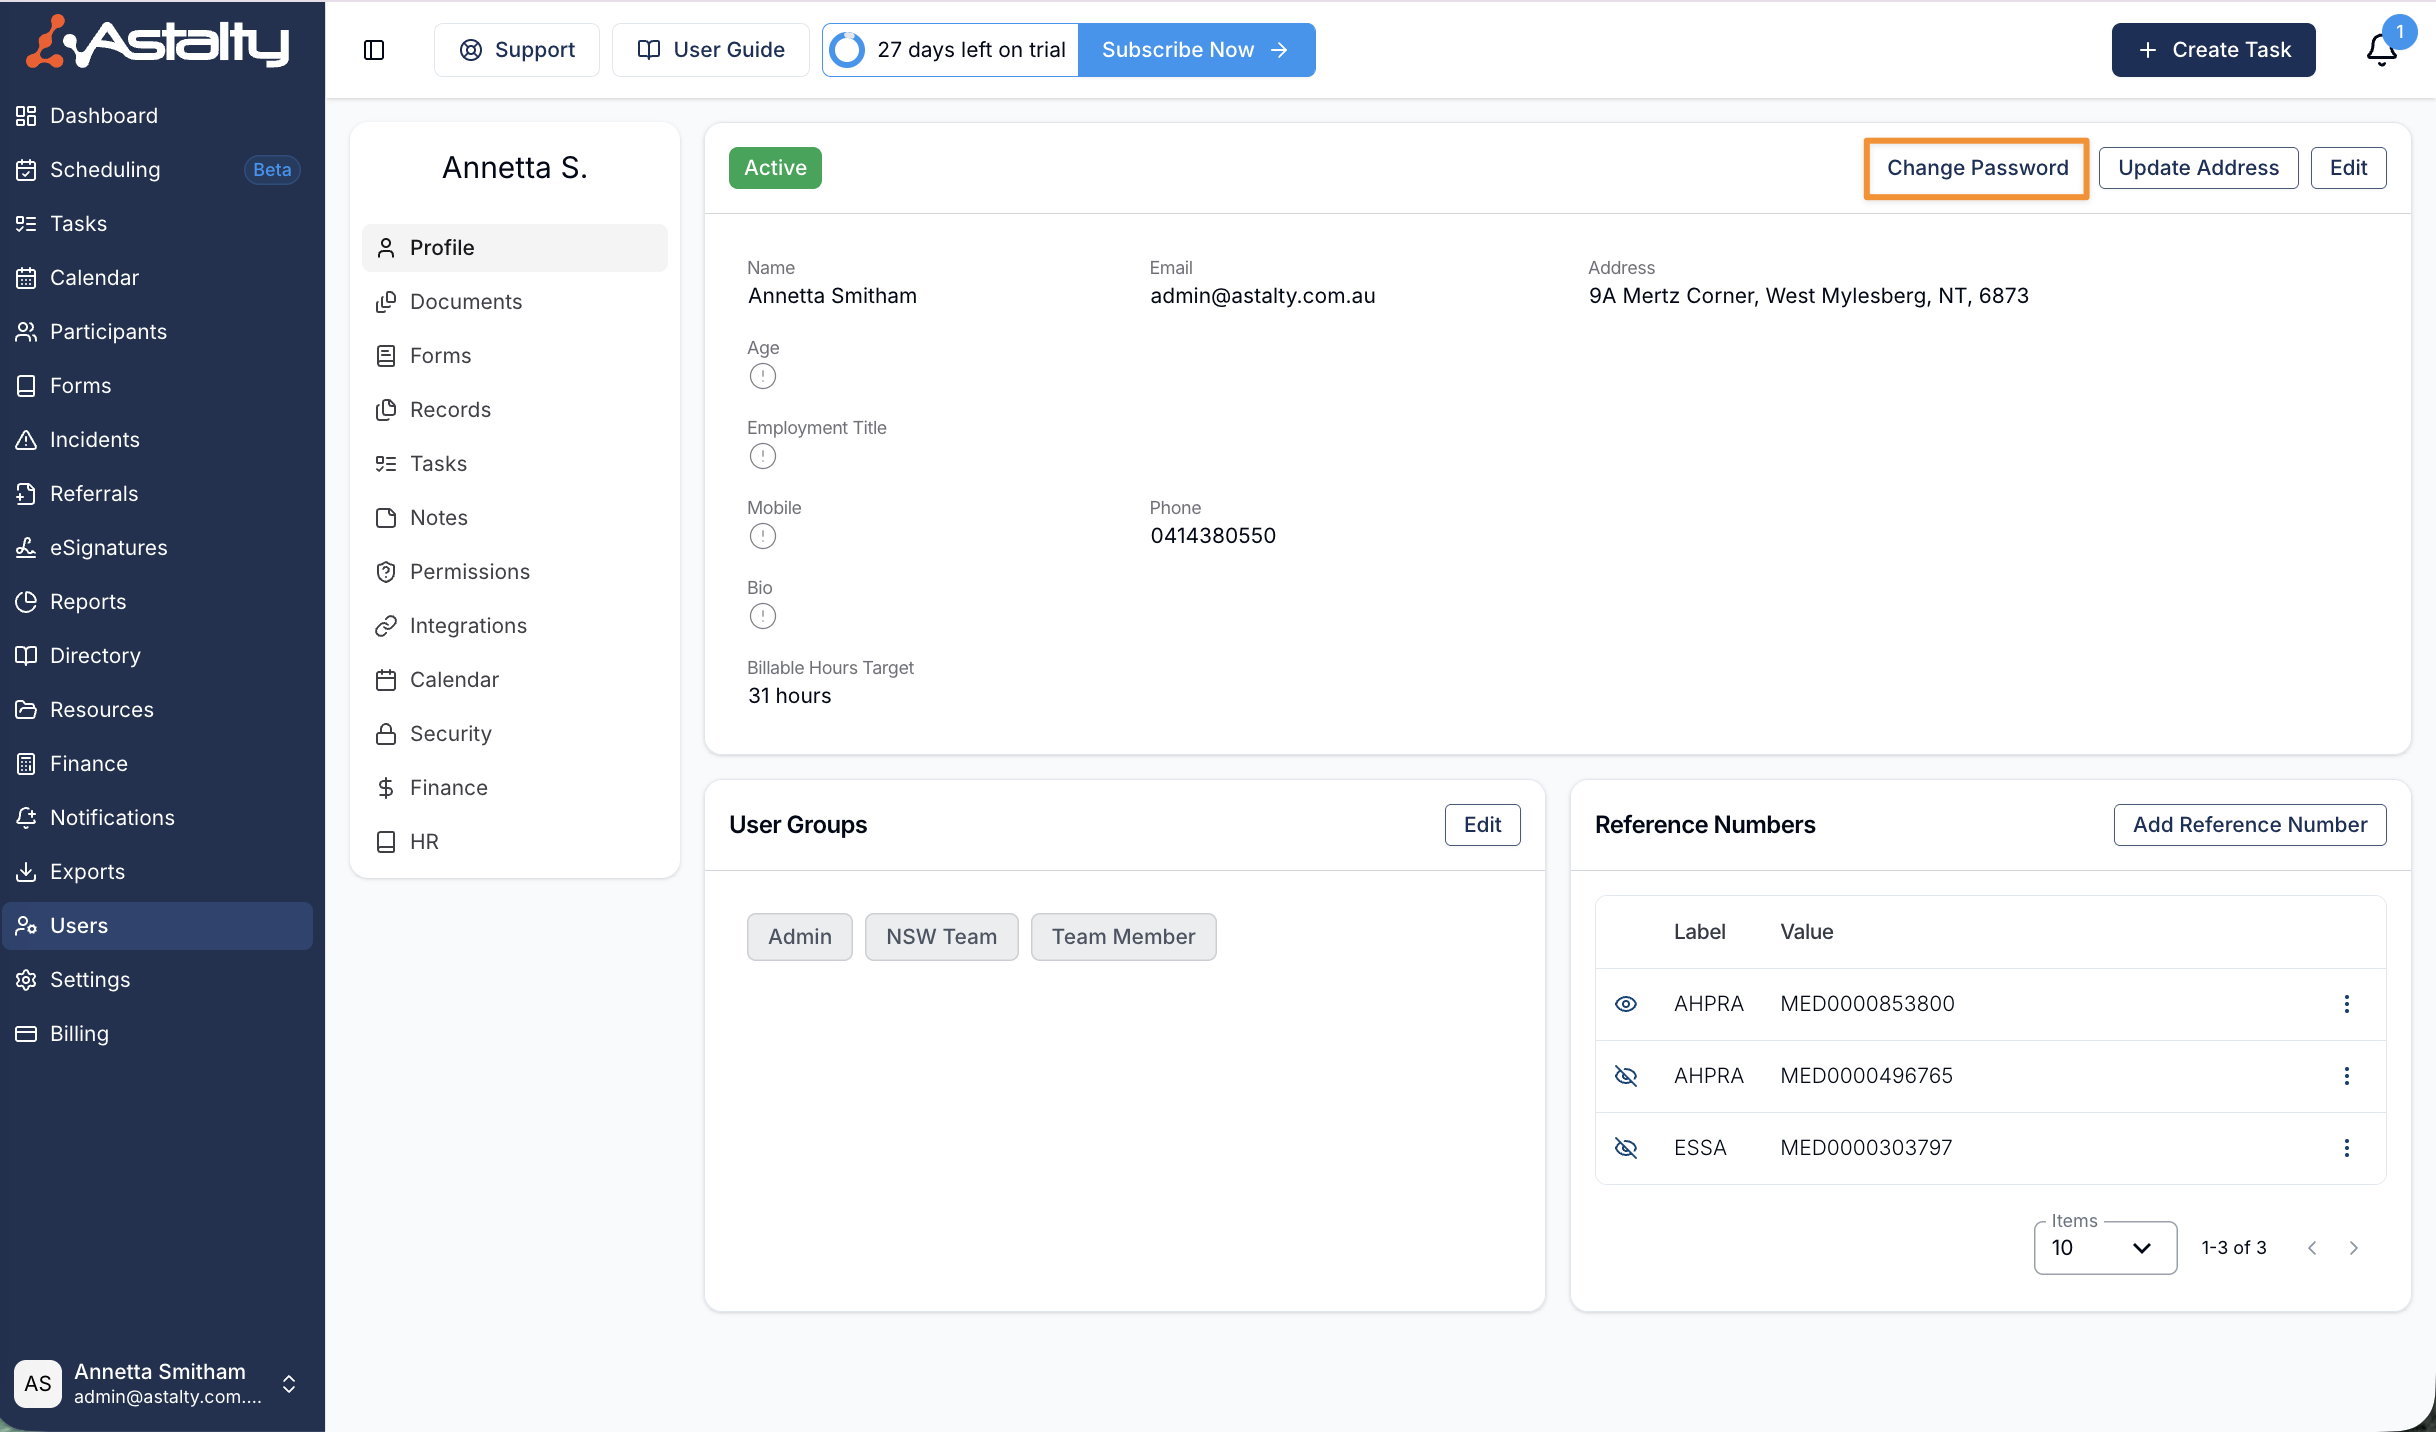
Changing your password also signs you out of Astalty in every other browser, in the Astalty app on every phone, and in the Outlook add-in. You stay signed in on the device you changed it on. See Passwords and Sessions for the full process, and for how to sign out your other devices without changing your password.
Password Issues & Account Access
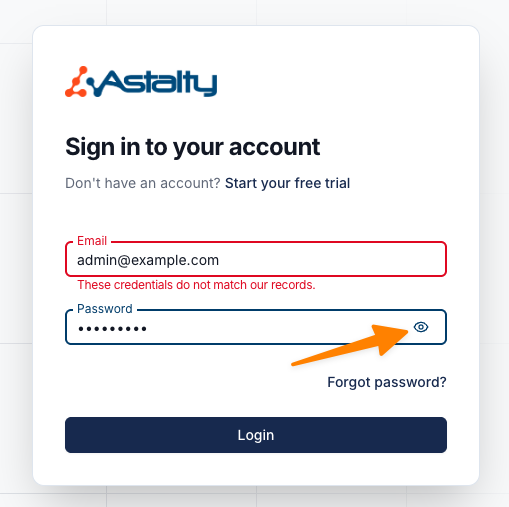
If you’re unable to access your Astalty account due to a forgotten password or receiving a “Credentials do not match” error, follow the steps below.
- Check Your Login Details
- Ensure your email address is entered correctly (no spelling errors).
- Select the eye icon in the password field to confirm your password is typed correctly.
-
Reset Your Password
If you’re still unable to log in, you’ll need to reset your password:
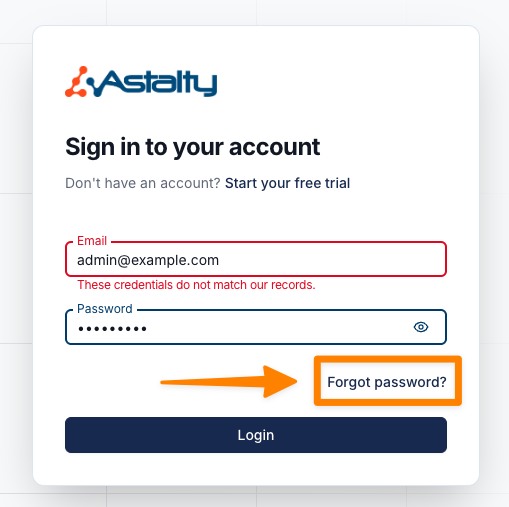
On the login screen, select “Forgot Password”. -
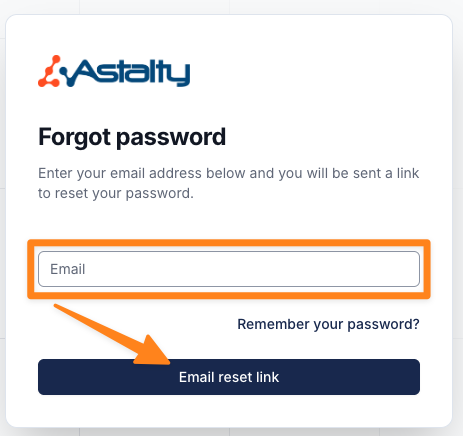
Enter your email address and click “Email reset link”.
-
Check your email and follow the link provided to set a new password.
Following these steps should resolve most login issues and restore access to your account.
Emergency Contacts and Next of Kin
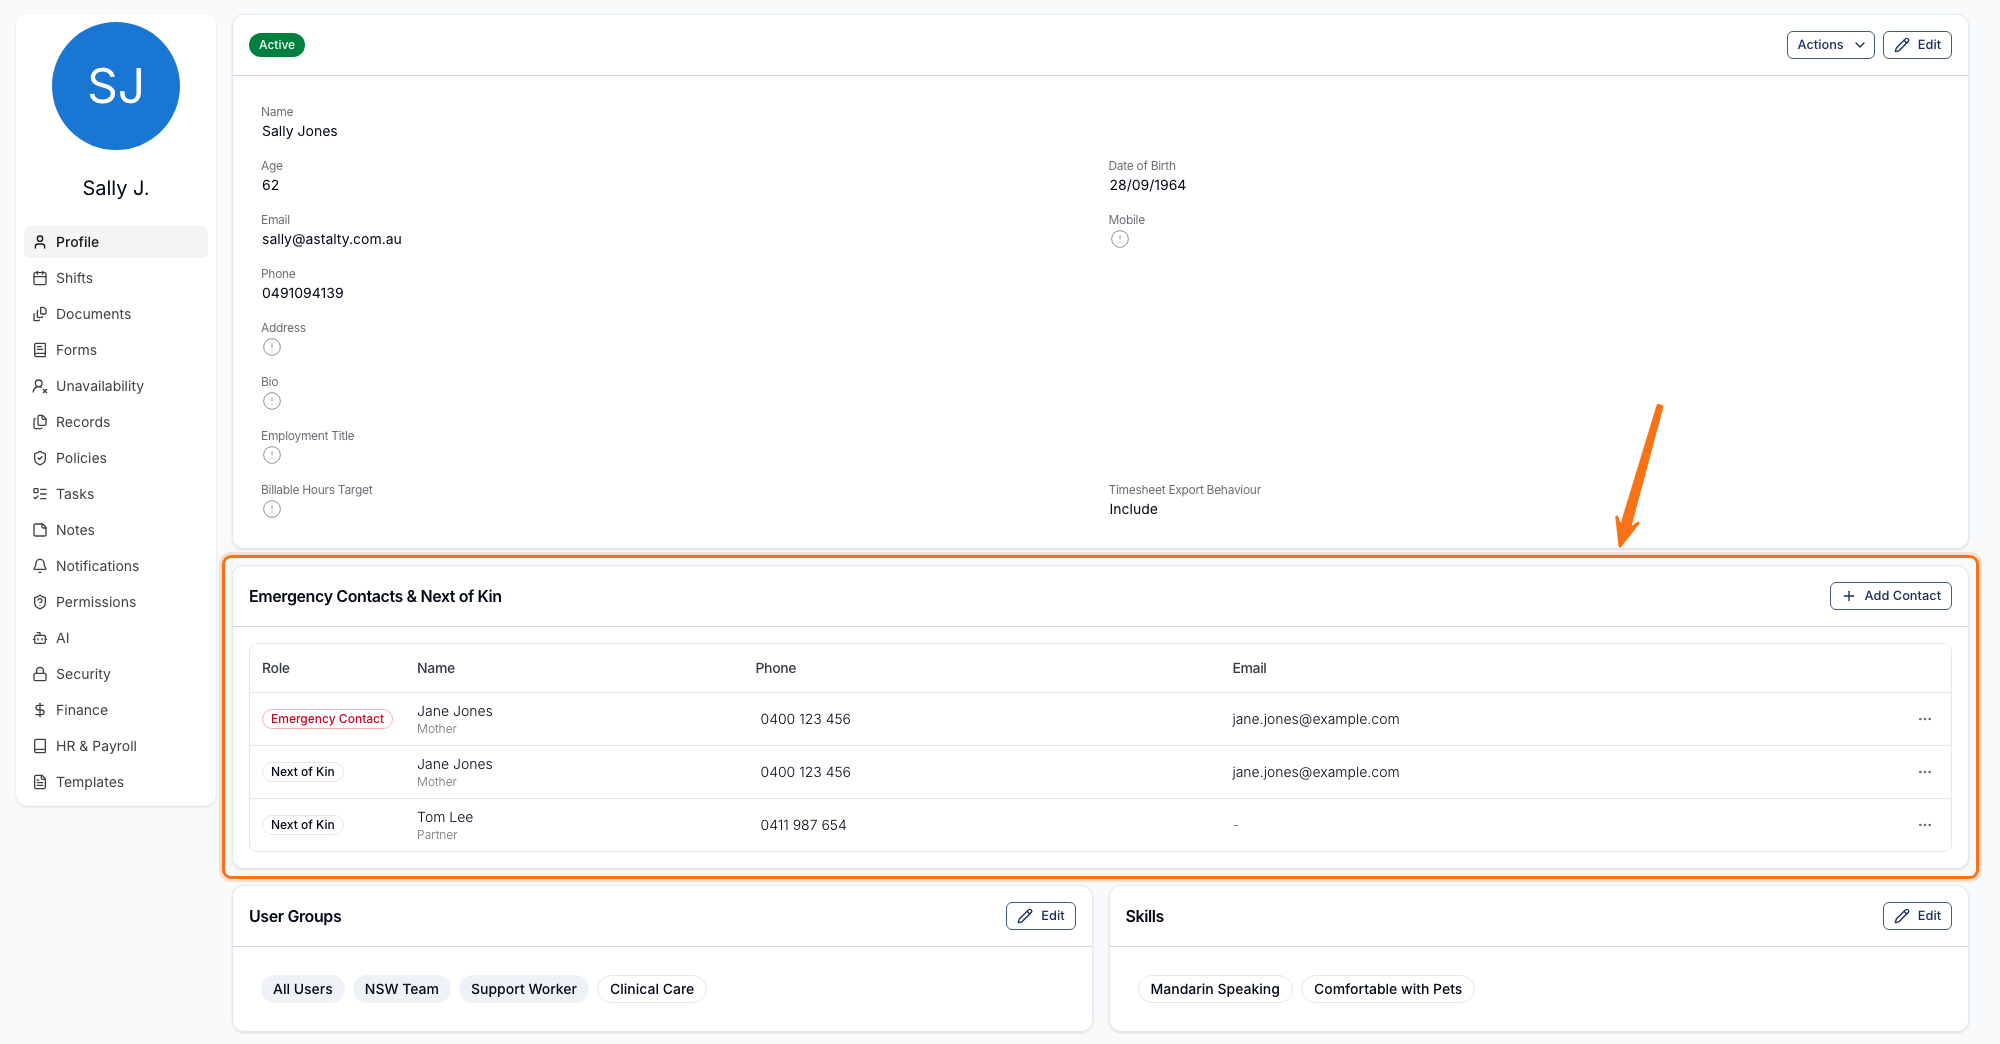
Every user's profile except an Auditor's has an Emergency Contacts & Next of Kin card, for who to call if something happens at work and who to notify. Anywhere you can already edit that user's other details — see Who Can Update All User Details? and Who Can Update Their Own Details? above — you can also add, edit, or remove their contacts.
Select Add Contact and choose a role:
- Emergency Contact — the person to call first if something happens at work.
- Next of Kin — someone to notify and keep informed.
A user can have several contacts in each role, up to 10 contacts across both roles combined.
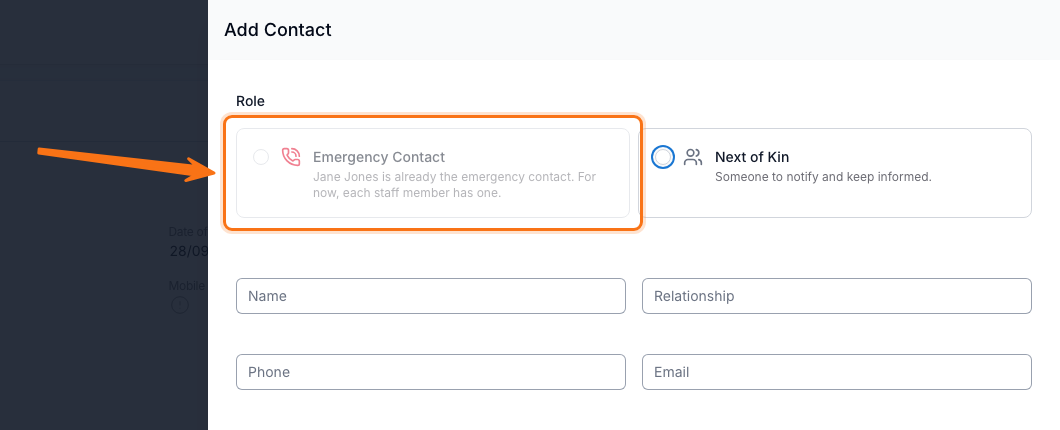
Enter the contact's name and relationship, then a phone number, an email address, or both — at least one is required. Click Add. Removing a contact is recorded on the user's audit trail.
Adding a Staff Reference Number
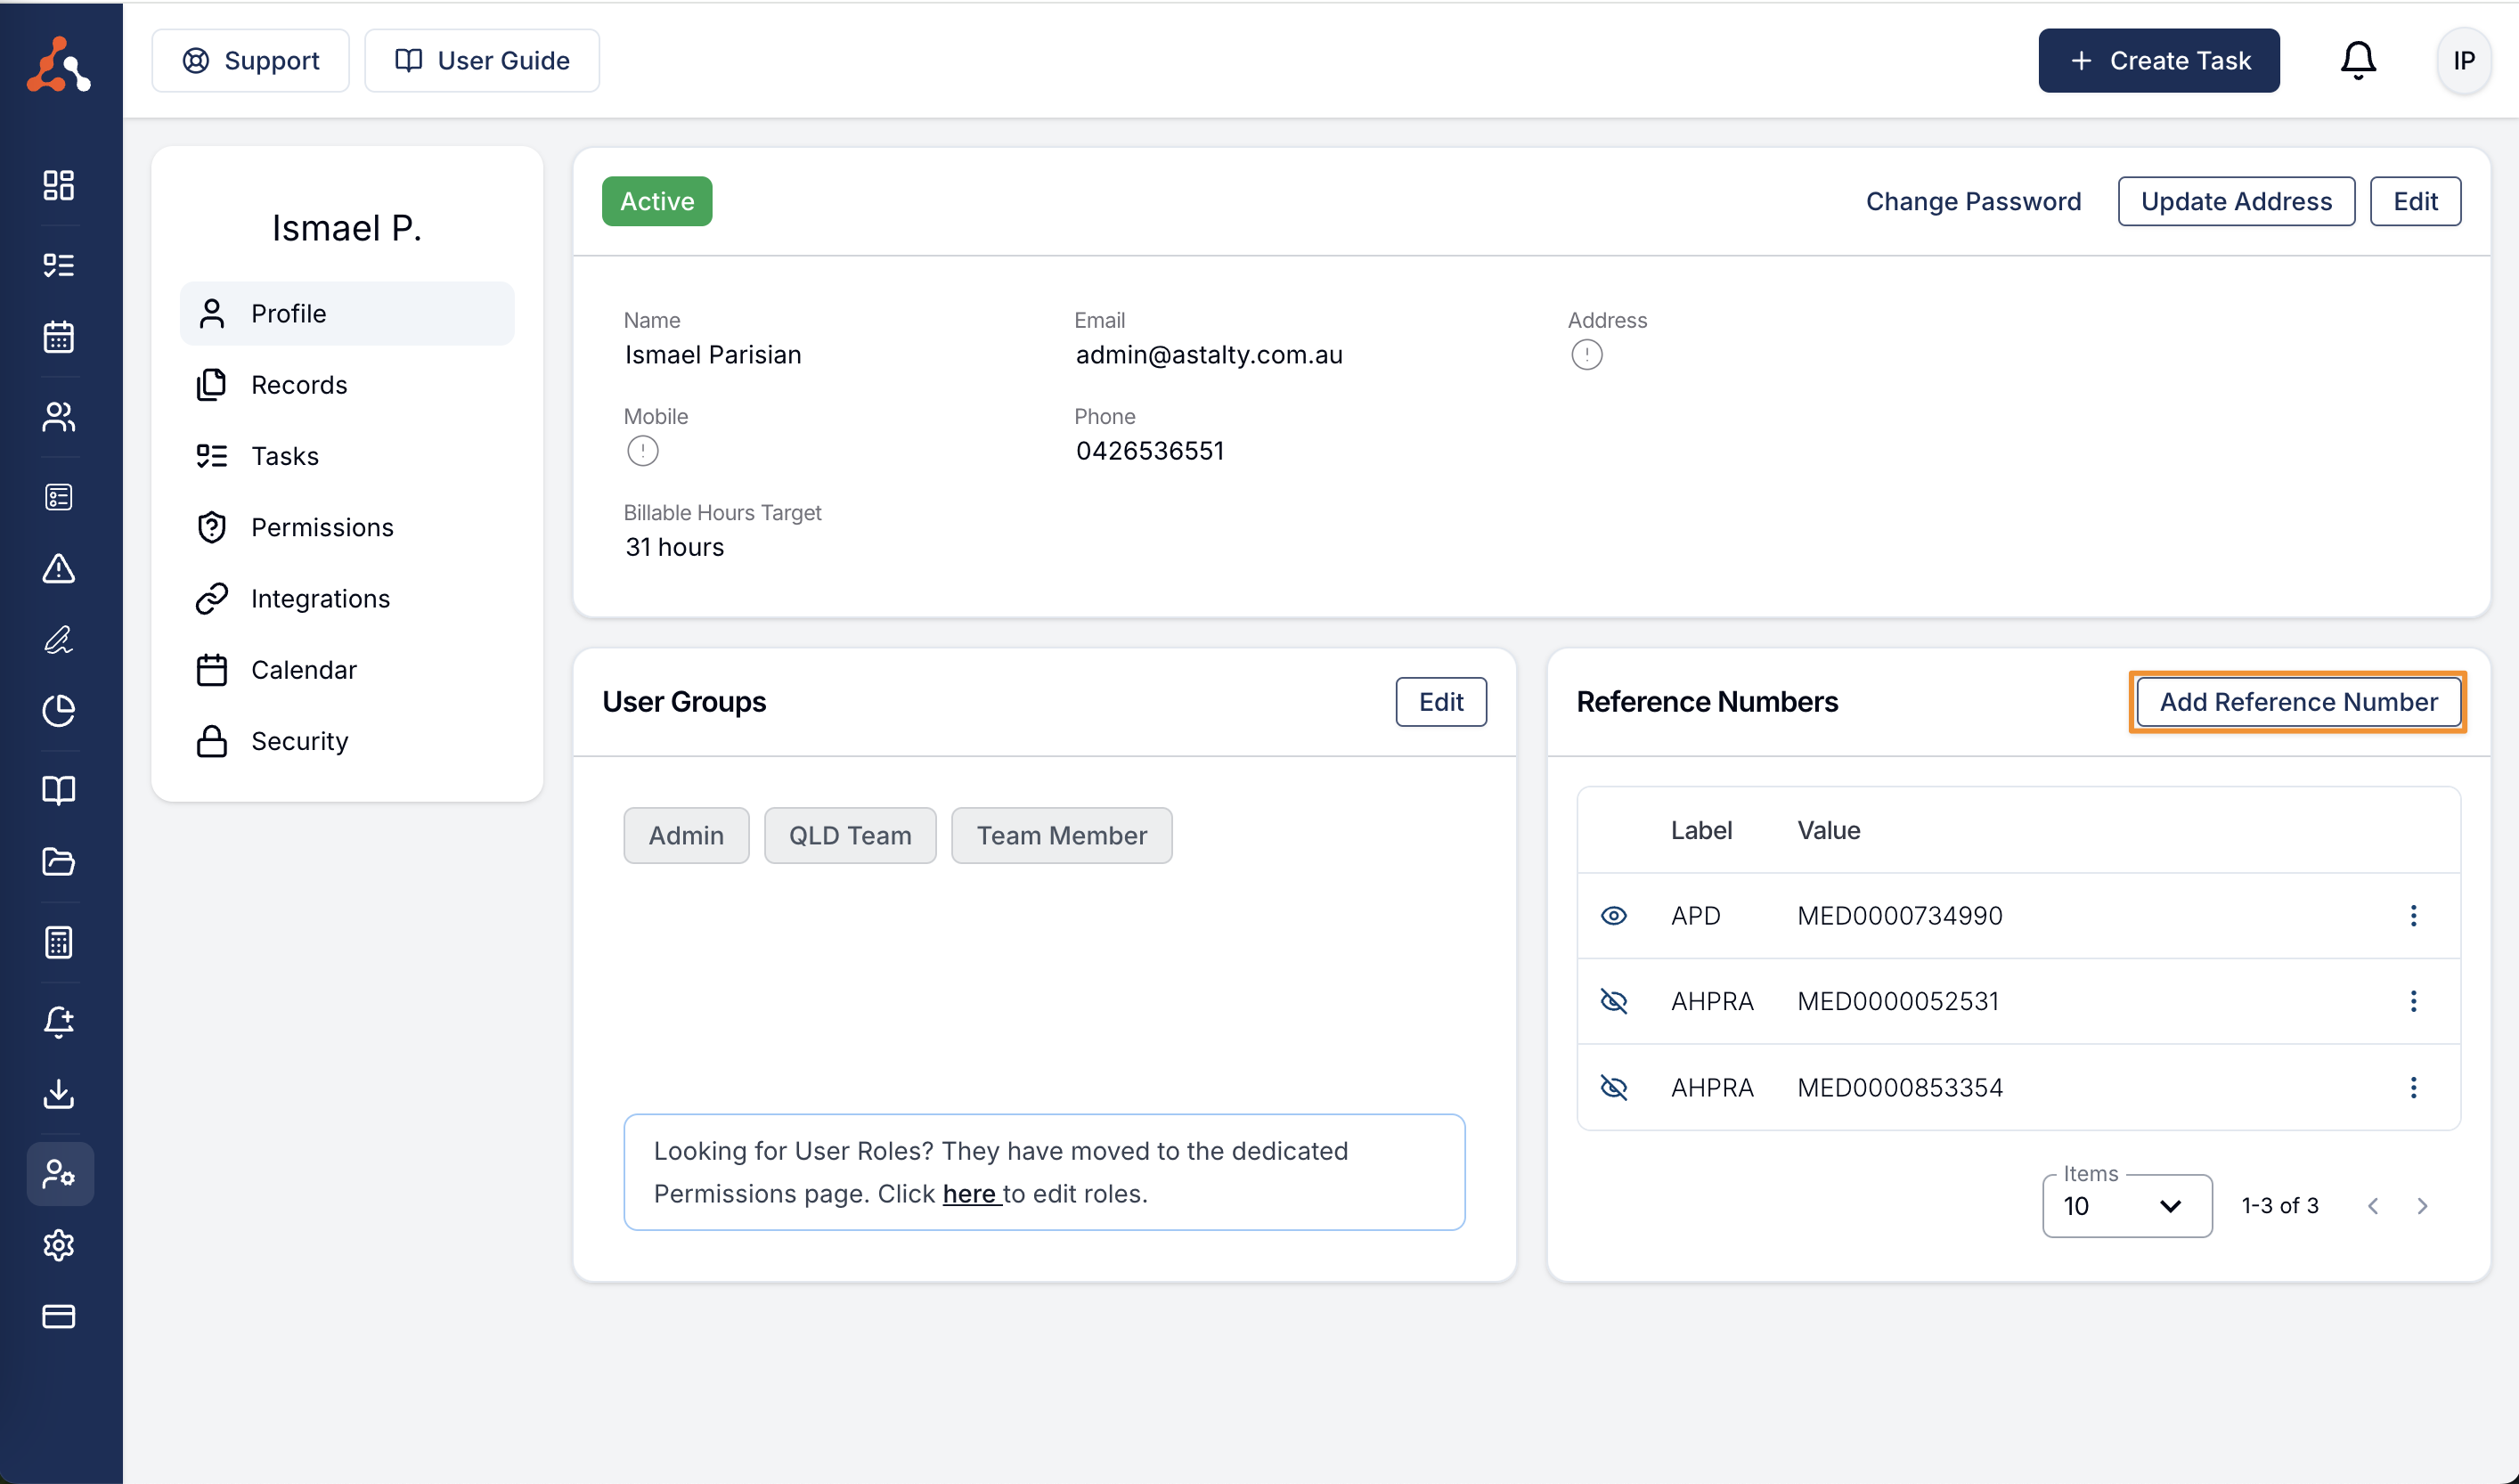
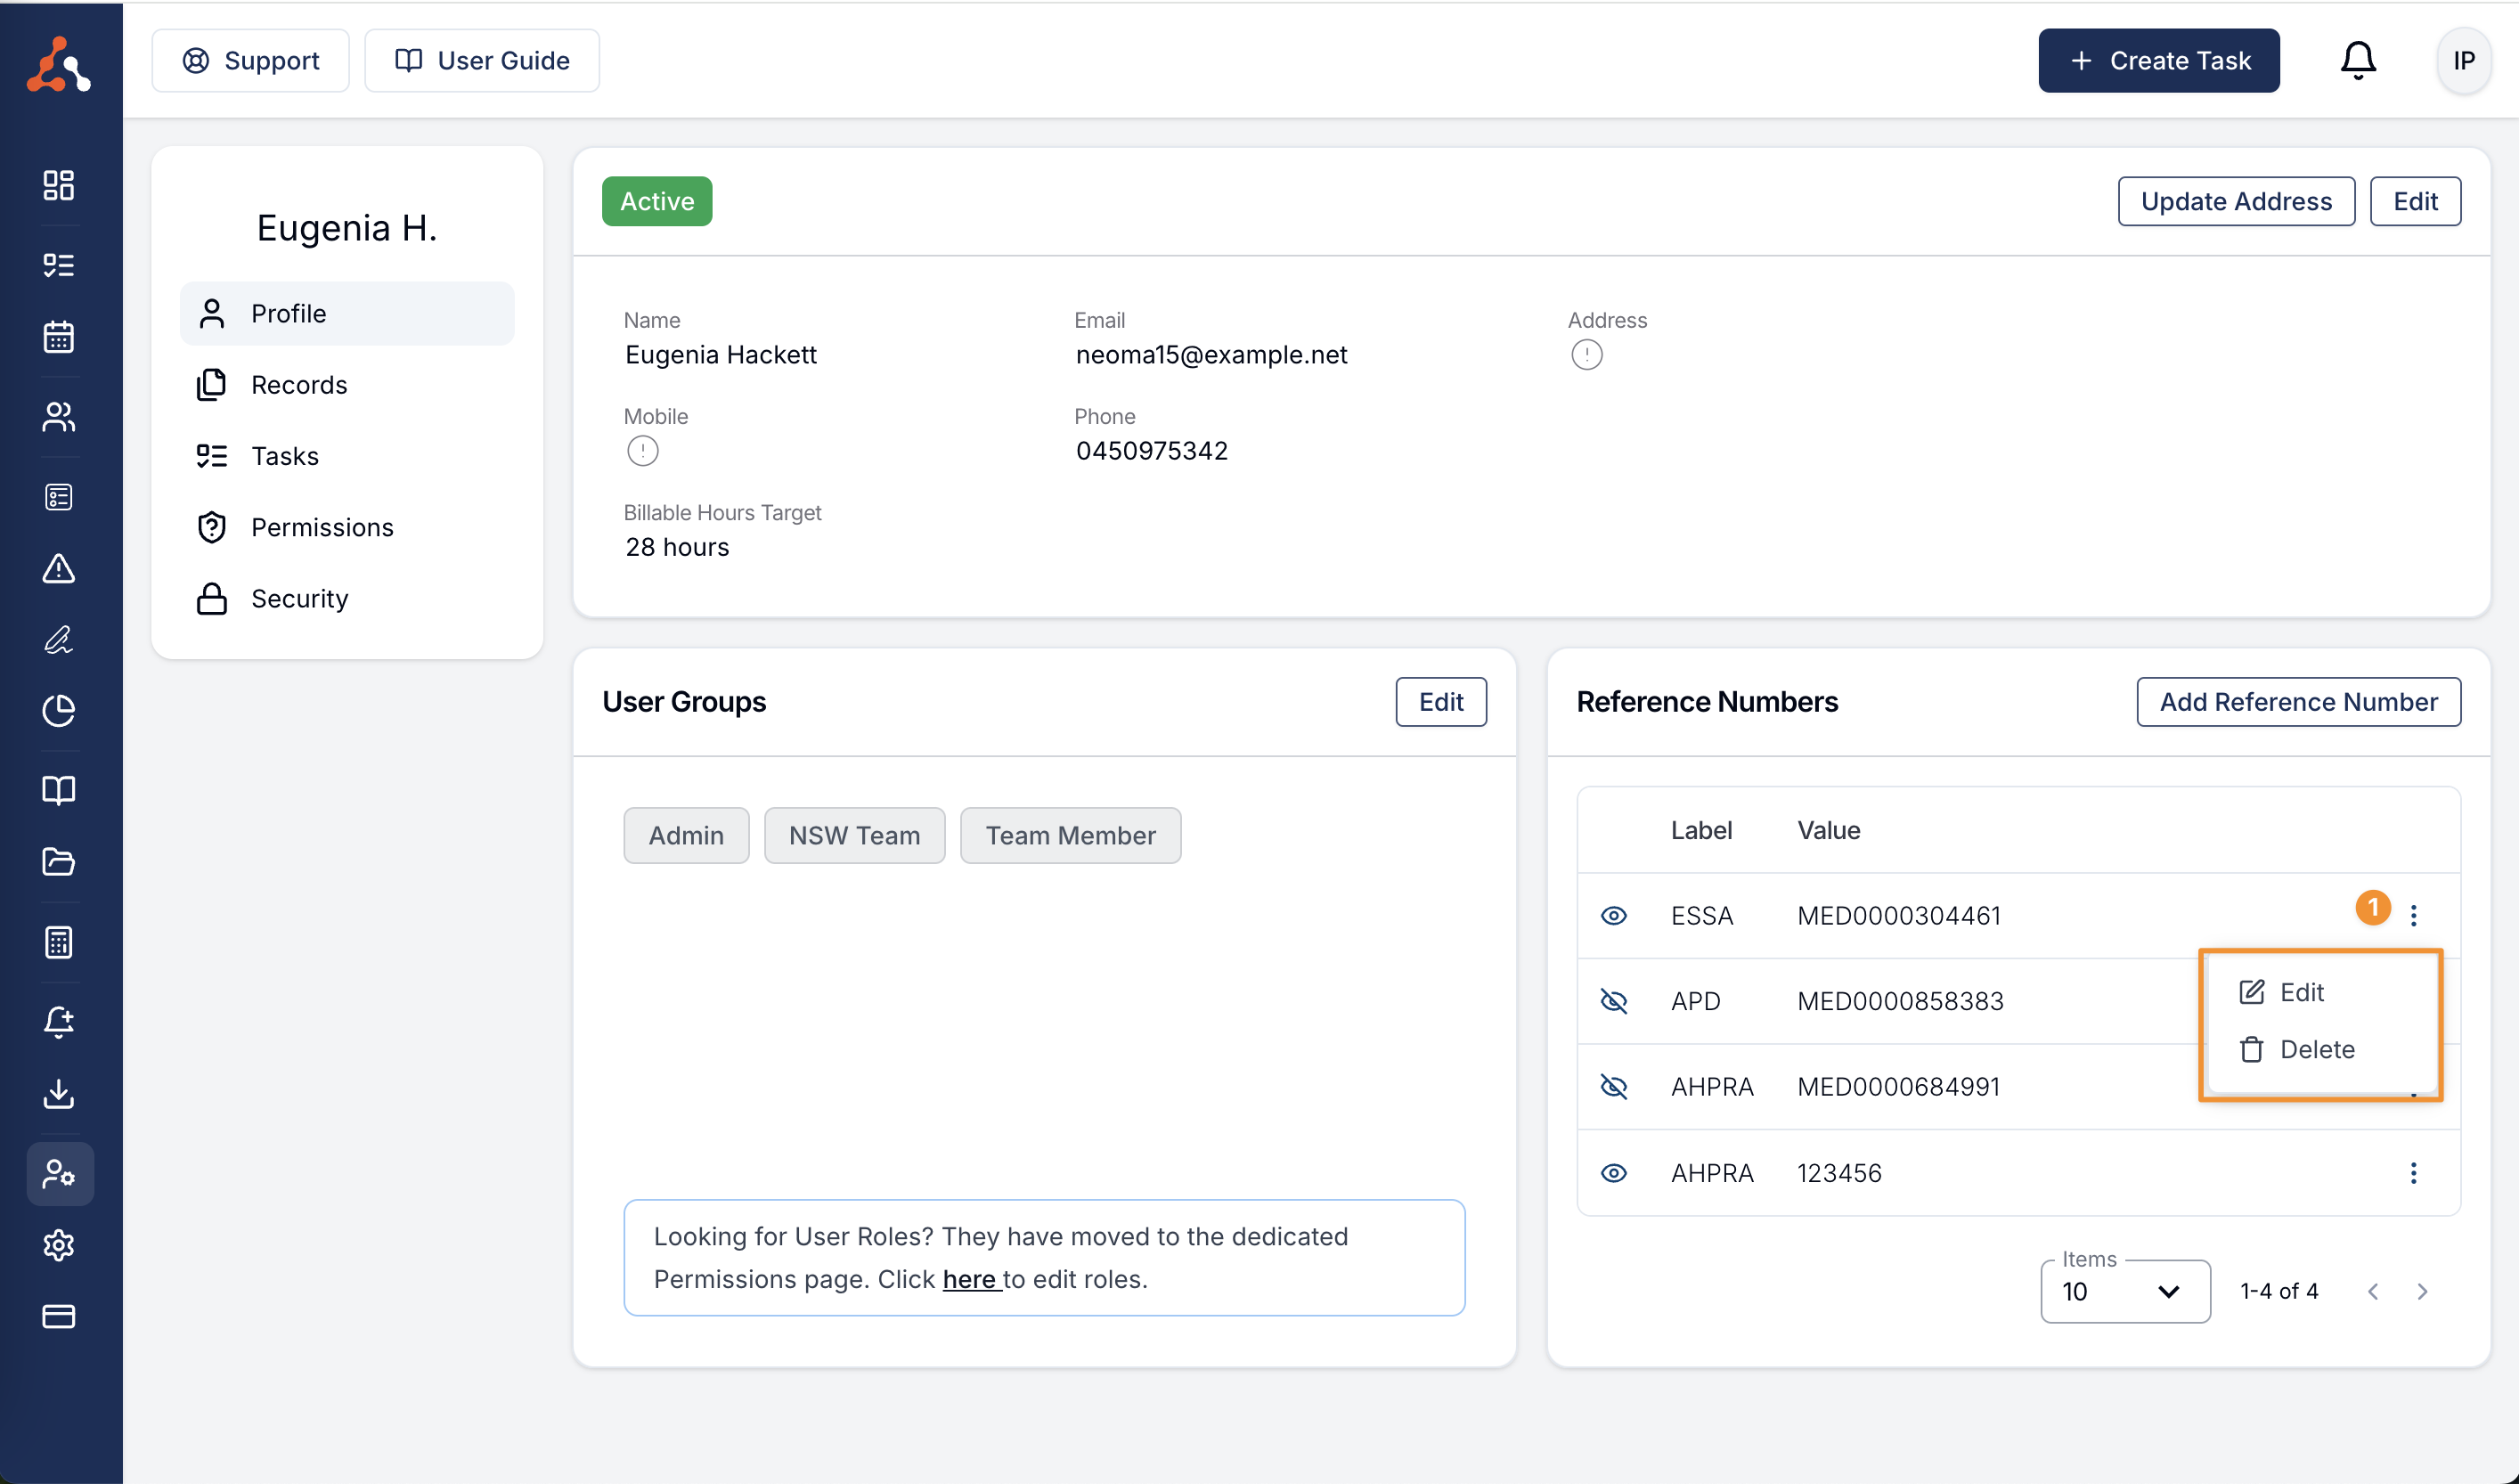
Within the User Profile page you will also see the Staff Reference Number menu option. From this menu you can add custom reference numbers for your staff members. A potential use case of this would be for an AHPRA number. To create a reference number simply select 'Add Reference'
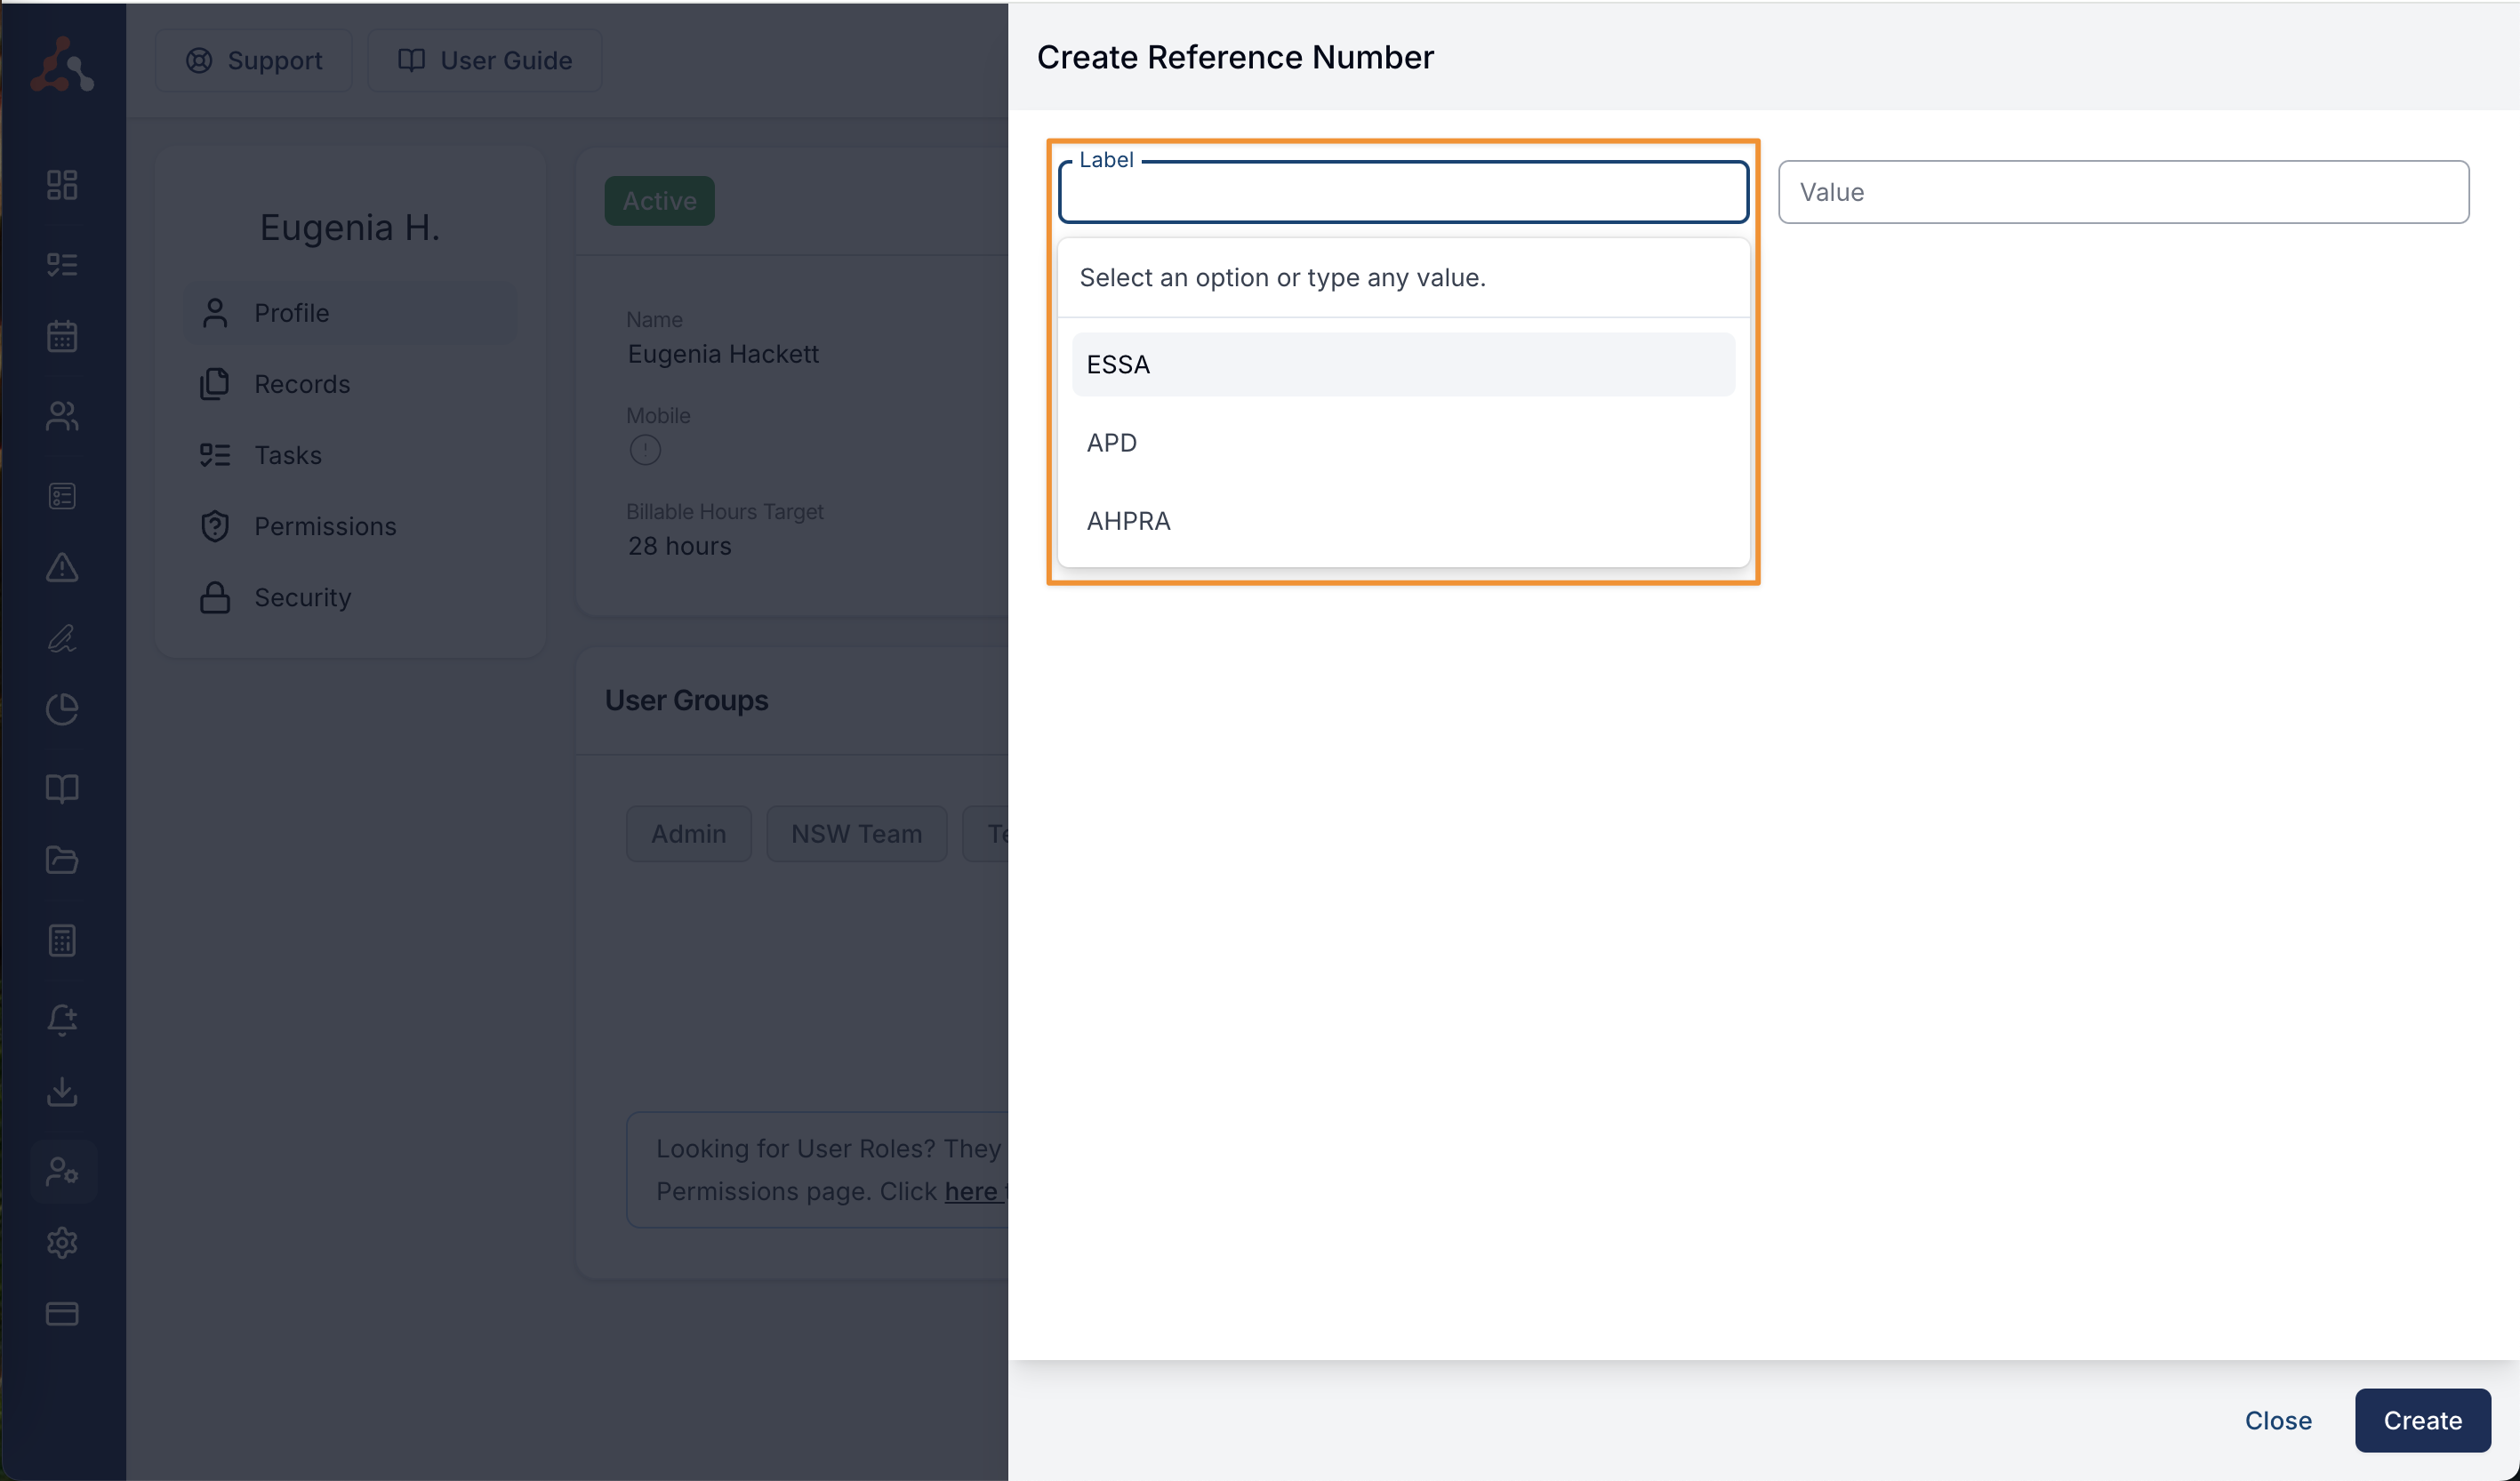
Once you select this button the reference menu view will appear prompting you to add a label for the Reference number. You can select from the listed options or create a new label by typing the label you want to create within the label box. You can then enter the reference number in the 'value' text box.
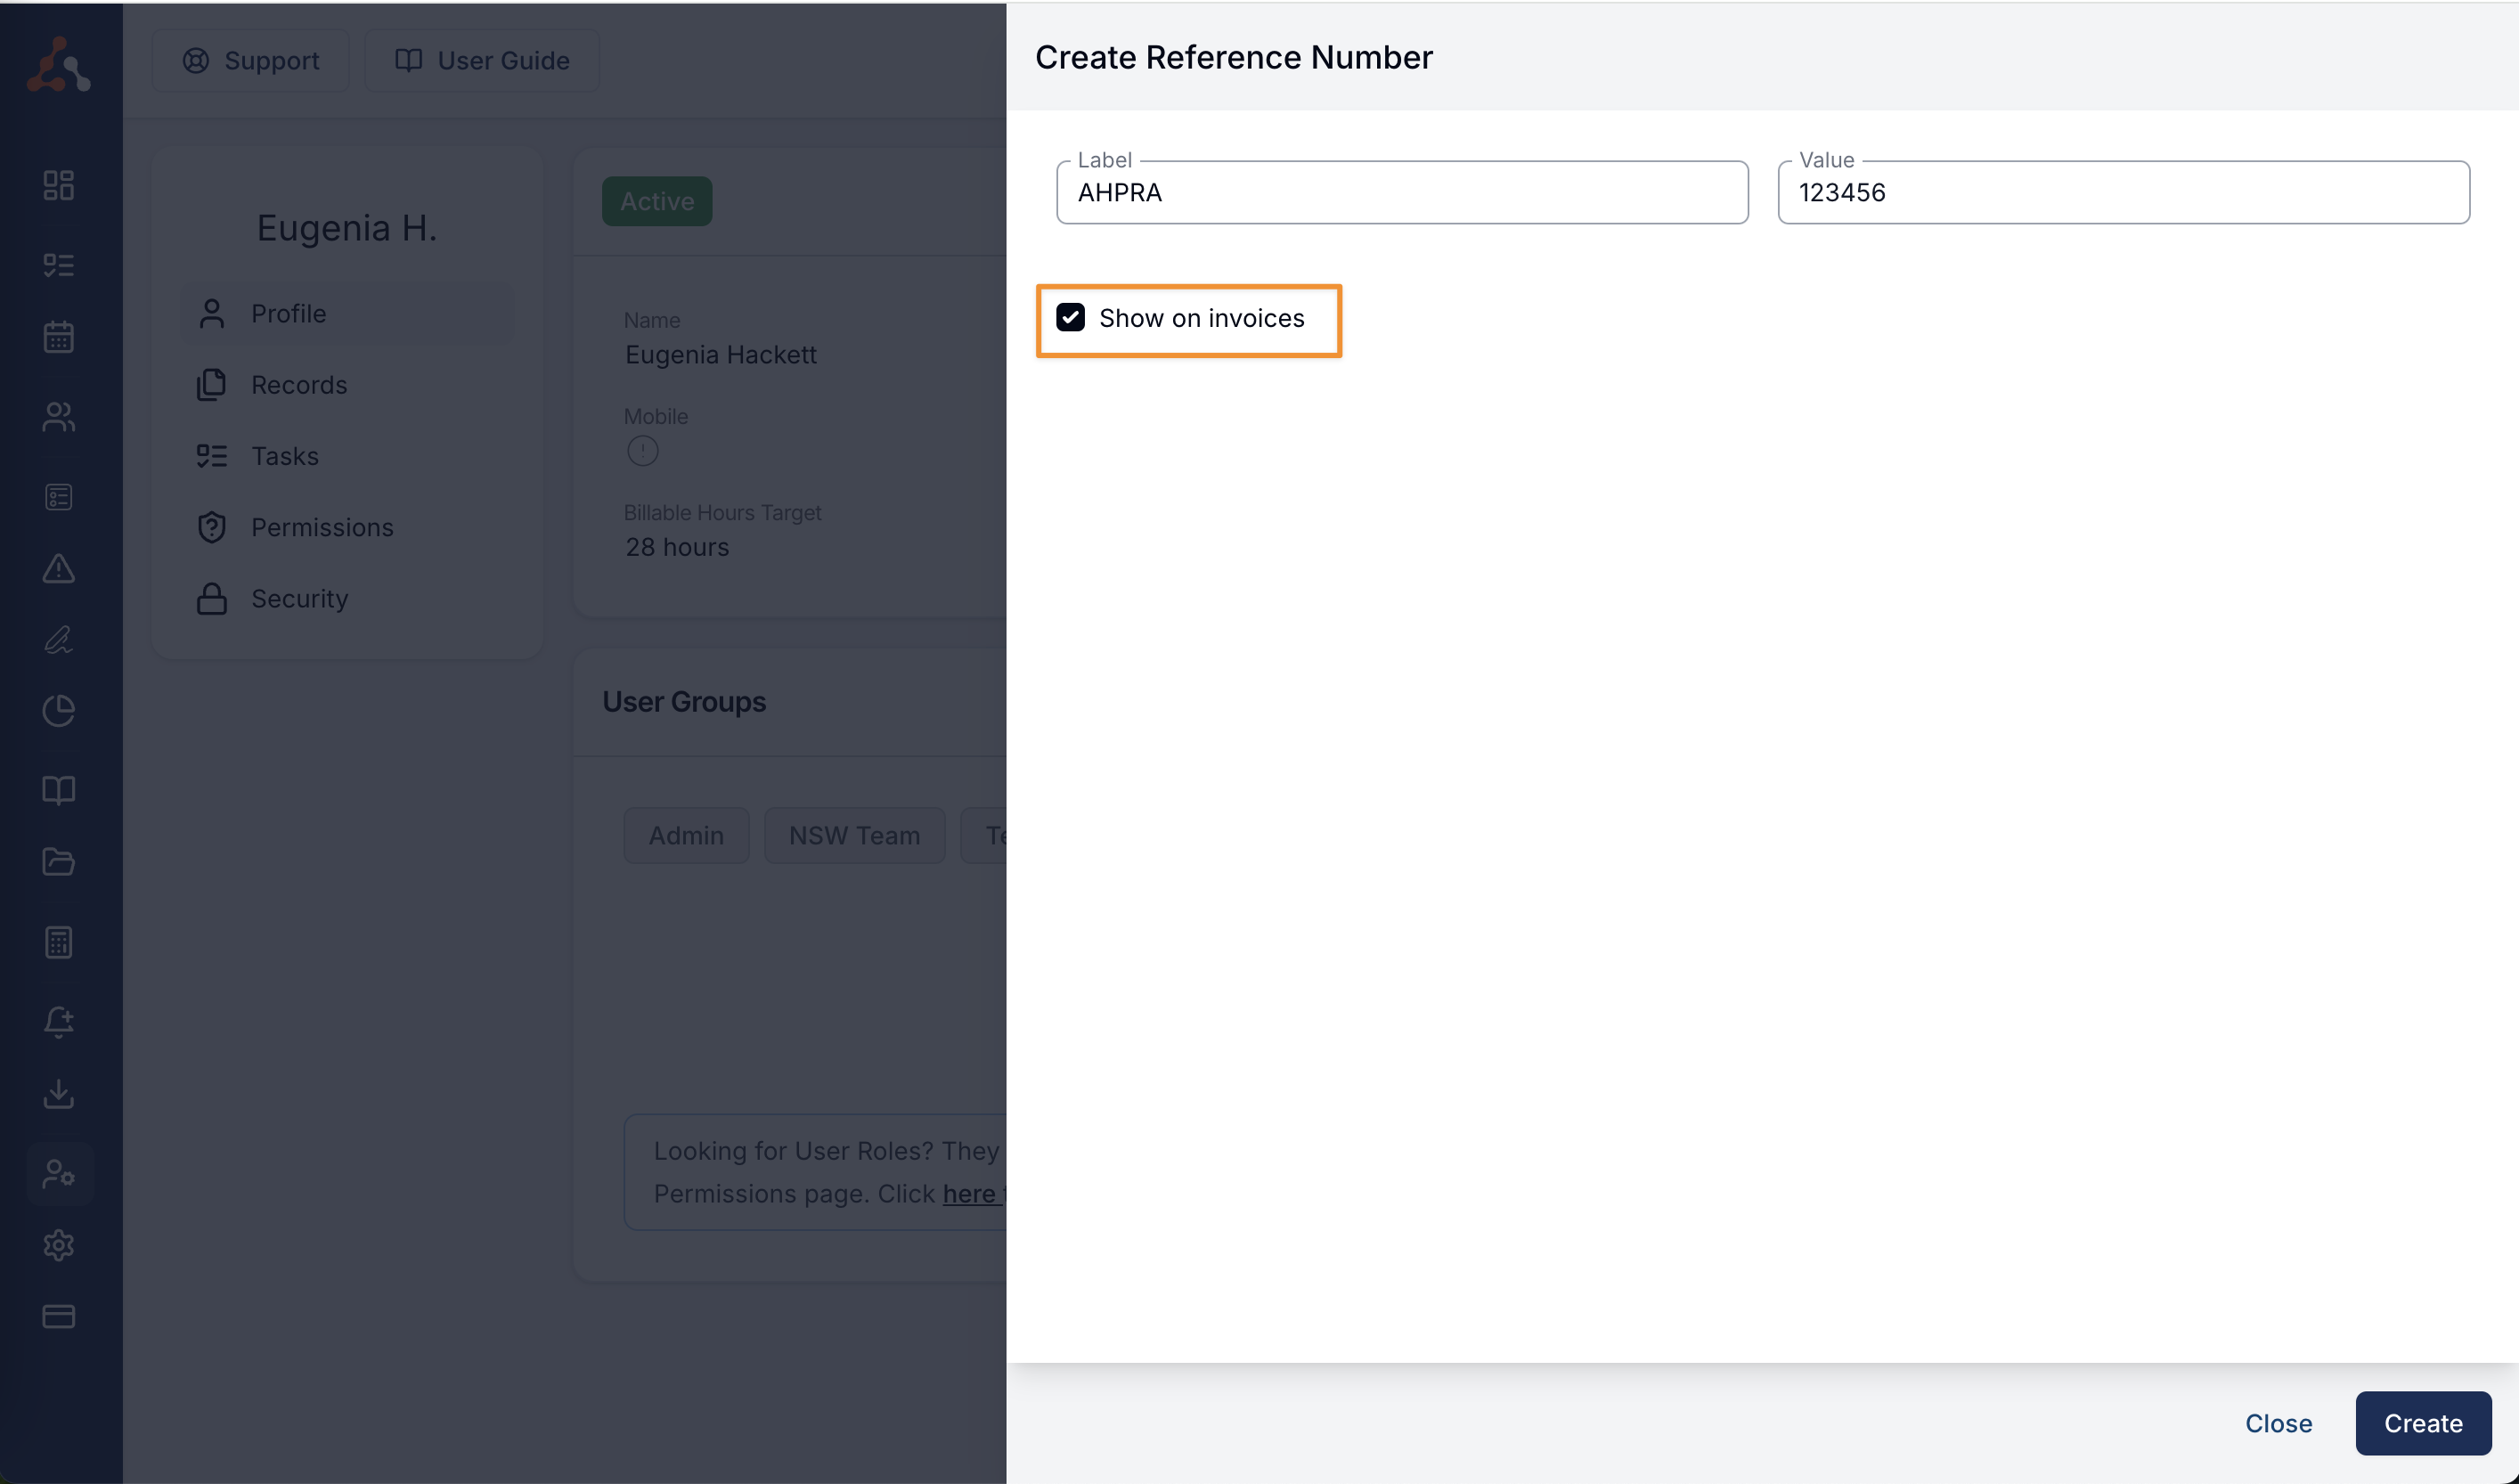
You can opt for this reference to appear on invoices as well. This setting pairs well with the Invoice Display Name option covered in Showing a User's Name on an Invoice below. By enabling this setting the user's reference number will appear under the charges created by them in any invoiced charges. Reference numbers follow the same rules as the name itself, so on charges from scheduled supports they only appear when Show support worker name on invoice is turned on for that invoice type.
You can also edit or delete any staff reference numbers by clicking the 3 dots to the right of the reference number and selecting the relevant option from the now present menu.
Updating Billable Targets
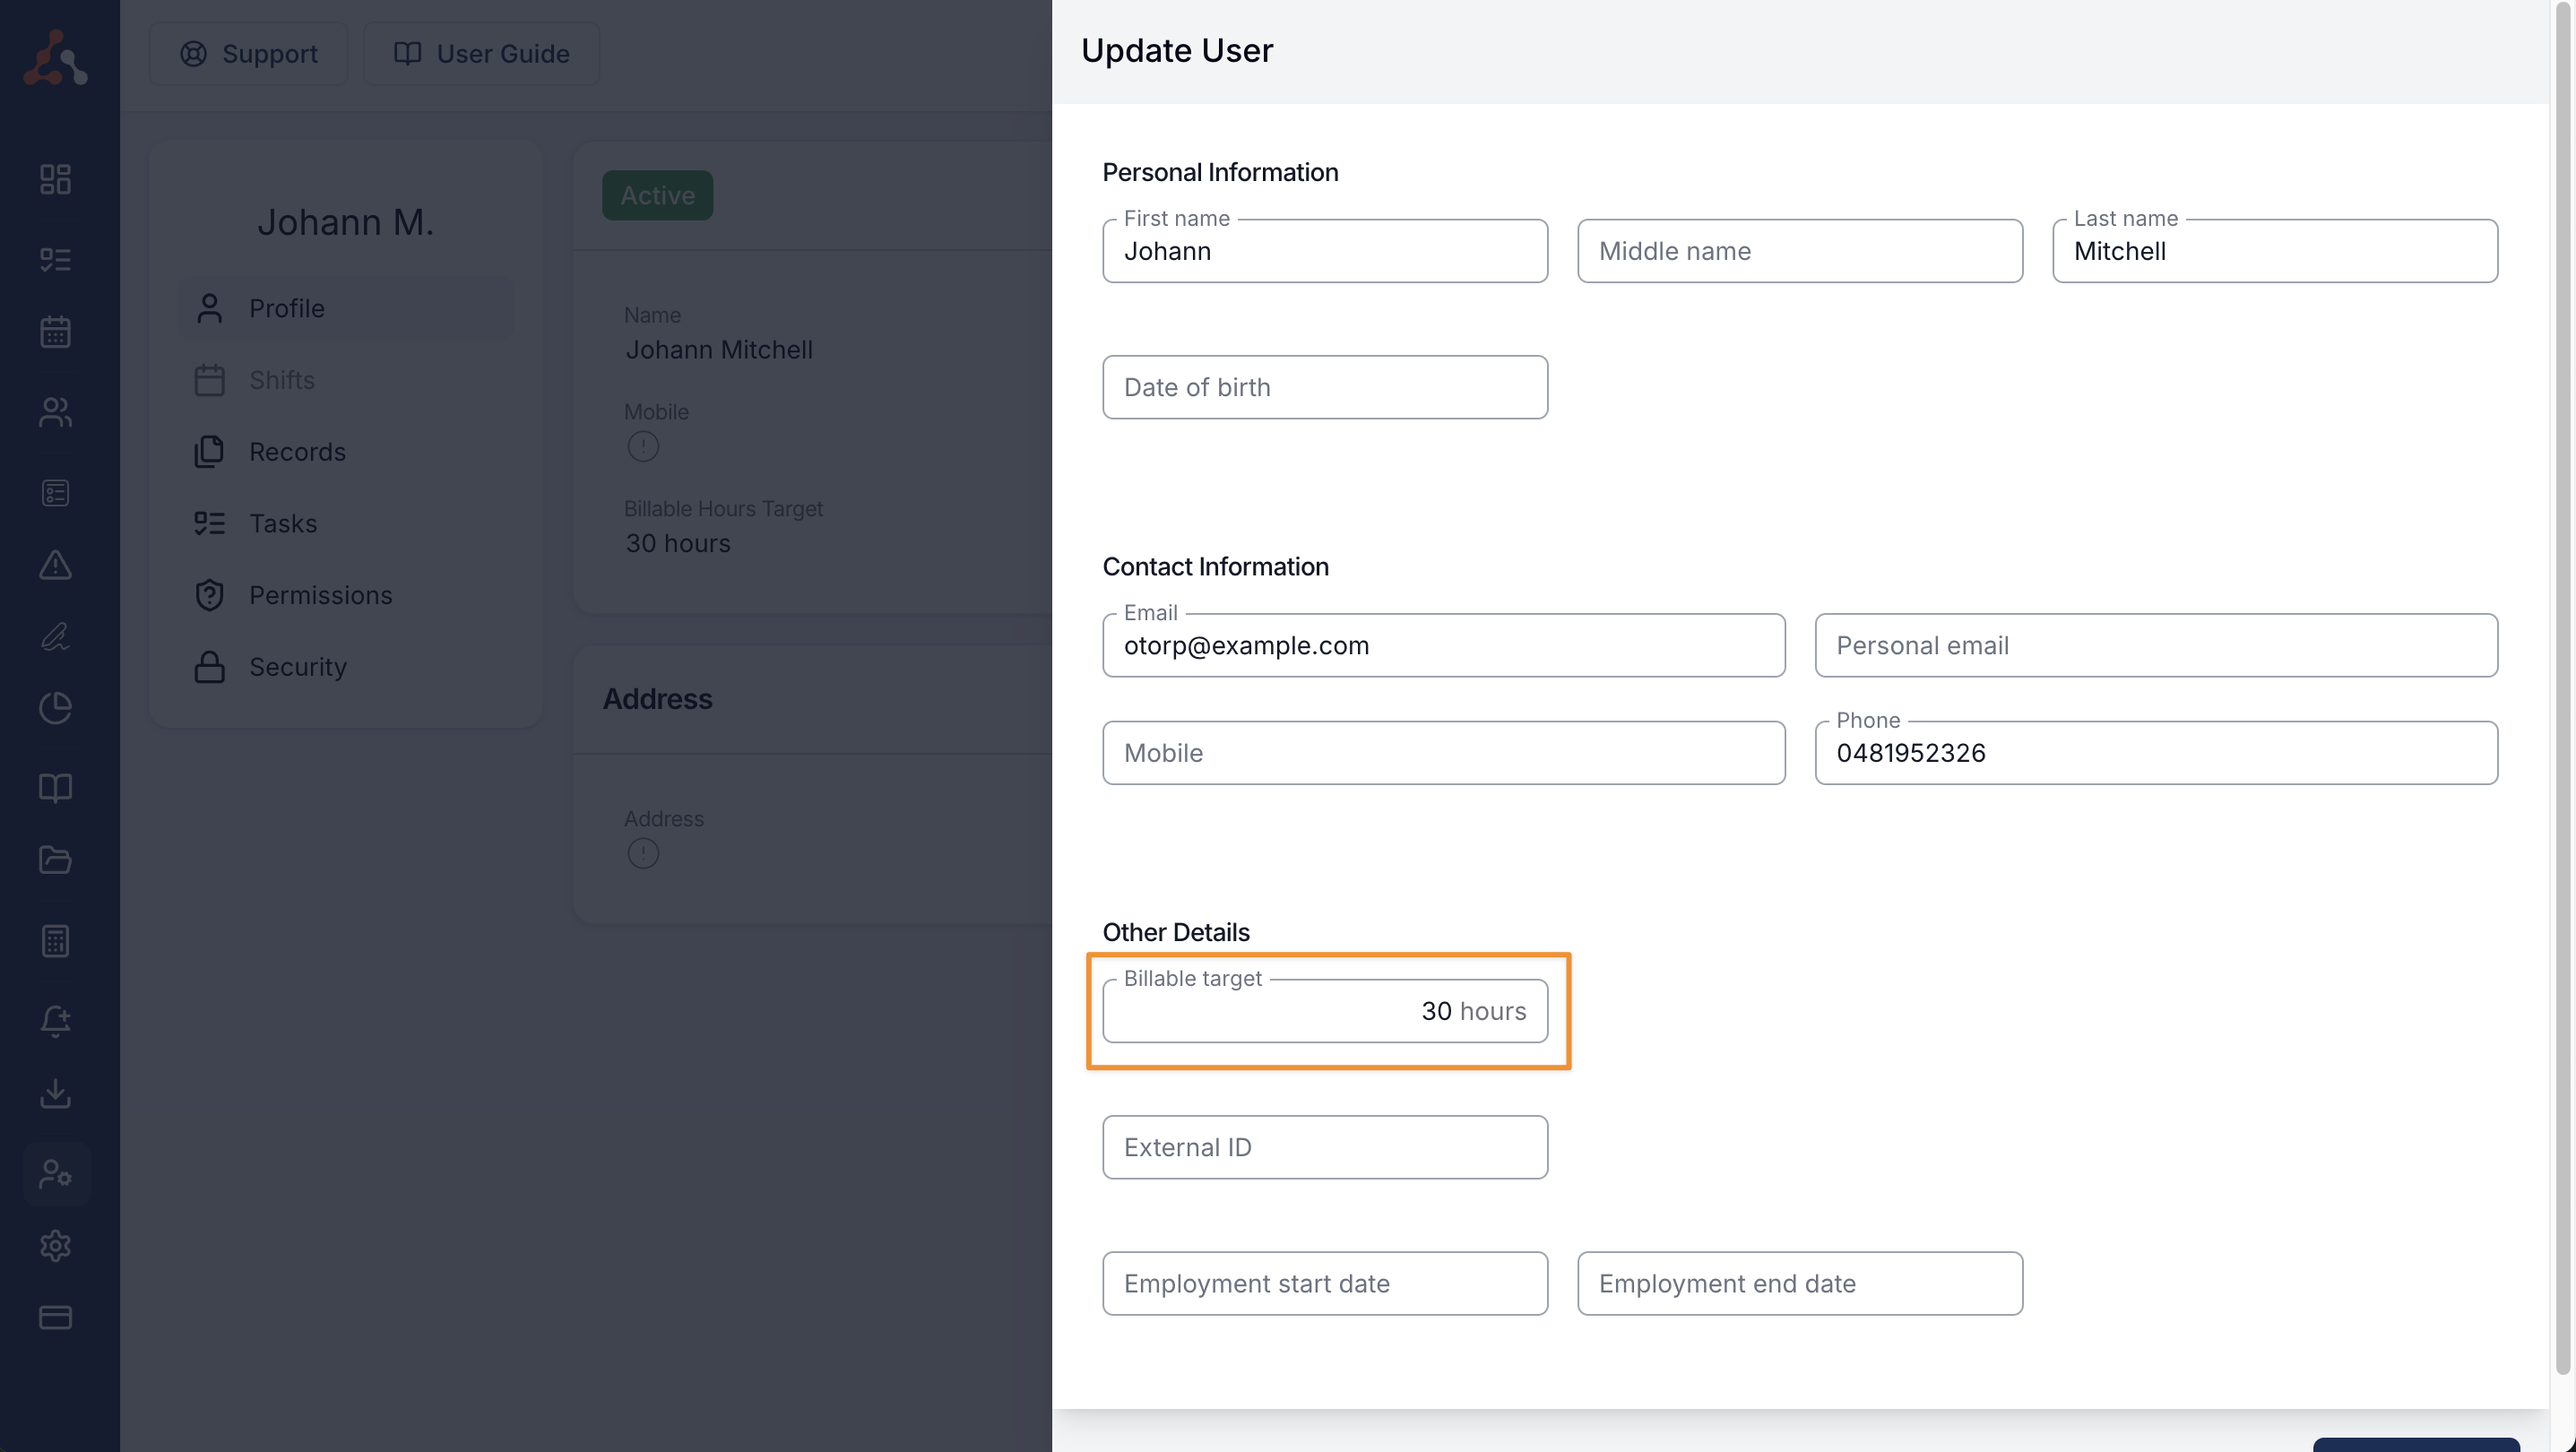
Within the edit view users with the Admin or Manager user role can update users billable targets as seen below. This change will reflect in the relevant Billable Target sections on the users profile that ahs just been updated.
Updating Employment Start and End Date
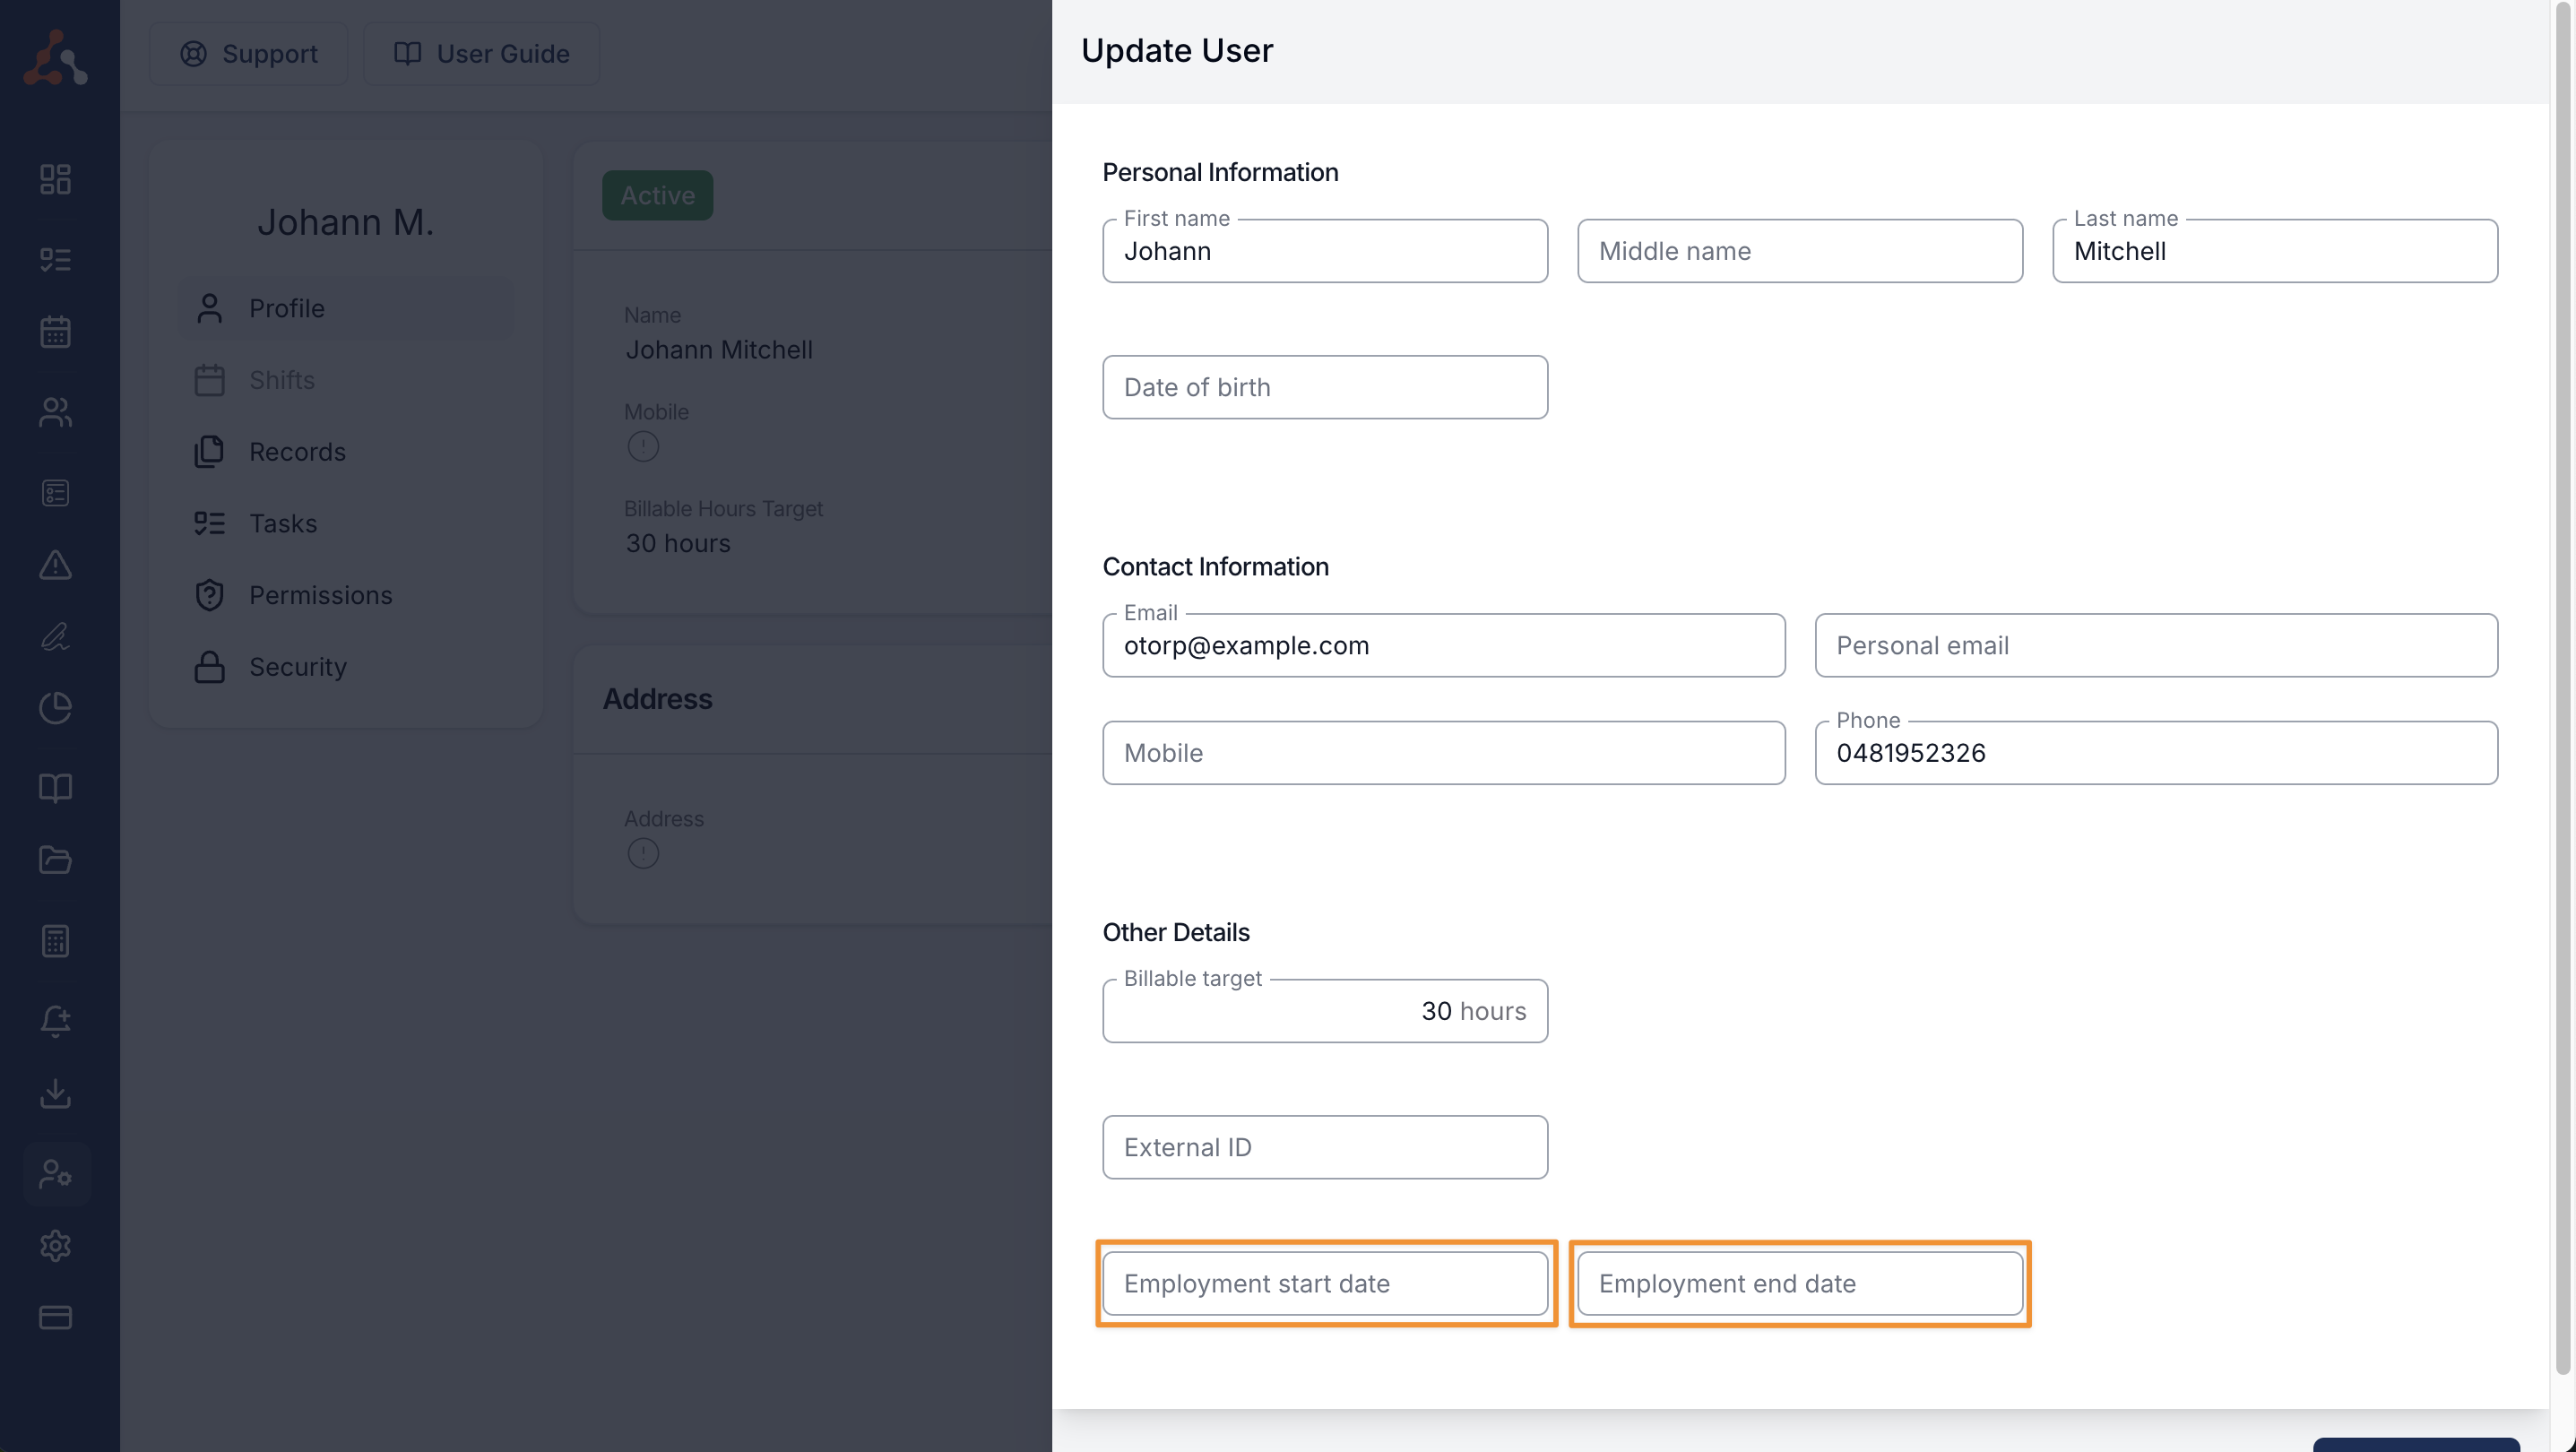
Within the edit view users with the Admin or Manager user role can update users Employment Start and End Date. This will inform the Staff Milestone Notifications, you can read more about that through this link here.
Showing a User's Name on an Invoice
Within the edit view you will see a More button. Selecting this reveals the Advanced section, which contains the Invoice Display Name dropdown. This controls how the user's name is written on invoices for charges they delivered, where it appears as Delivered By.
Not set is the field's starting state for every user, shown as a placeholder rather than a selectable option — it means no name on charges from Tasks. To return a user to Not set after choosing one of the options below, clear the field using the × that appears once a choice is made.
Choose one of the following:
- Do not display — no name on any charge, Tasks and scheduled supports alike.
- Full Name — the user's full name, for example
Tad Gislason, on every Task charge, and on scheduled-support charges only when Show support worker name on invoice is on for that invoice type. - First Name & Last Initial — the user's first name and surname initial, for example
Tad G., on every Task charge, and on scheduled-support charges only when Show support worker name on invoice is on for that invoice type. Useful when you want invoice recipients to be able to tell your workers apart without disclosing full names.
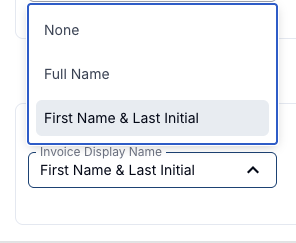
This fully controls naming on charges from any Task they are assigned to, where Not set and Do not display both hide the name. For charges from scheduled supports and travel, turning on Show support worker name on invoice in Invoice Settings can show this user's name when their own setting is Not set — it never overrides an explicit Do not display. See User Name and Registration Number for the full behaviour.
Exempting a Worker from Location Data
In the same edit view's More > Advanced section (see Showing a User's Name on an Invoice above), tick Exempt from location data to let this Support Worker clock in and out, write notes, and record travel without sharing their location — no location is recorded for them, even while Require Location Data is on for your account. An exempt worker also skips any Clock In/Out Radius you've set, so they can clock in or out from anywhere.
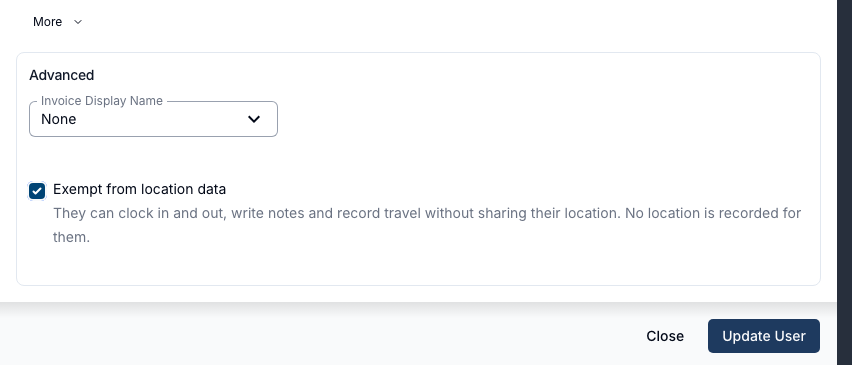
The checkbox only appears when all of the following are true:
- Require Location Data is on in Scheduling Settings.
- The worker can be scheduled on supports.
- You hold the Admin permission to update other users' details — a user editing only their own profile cannot set this for themselves.
The exemption applies only to this worker. Require Location Data, and any Clock In/Out Radius, still apply to everyone else.