- Forms & Quality
- eSignatures
- Requesting Signatures
Requesting Signatures
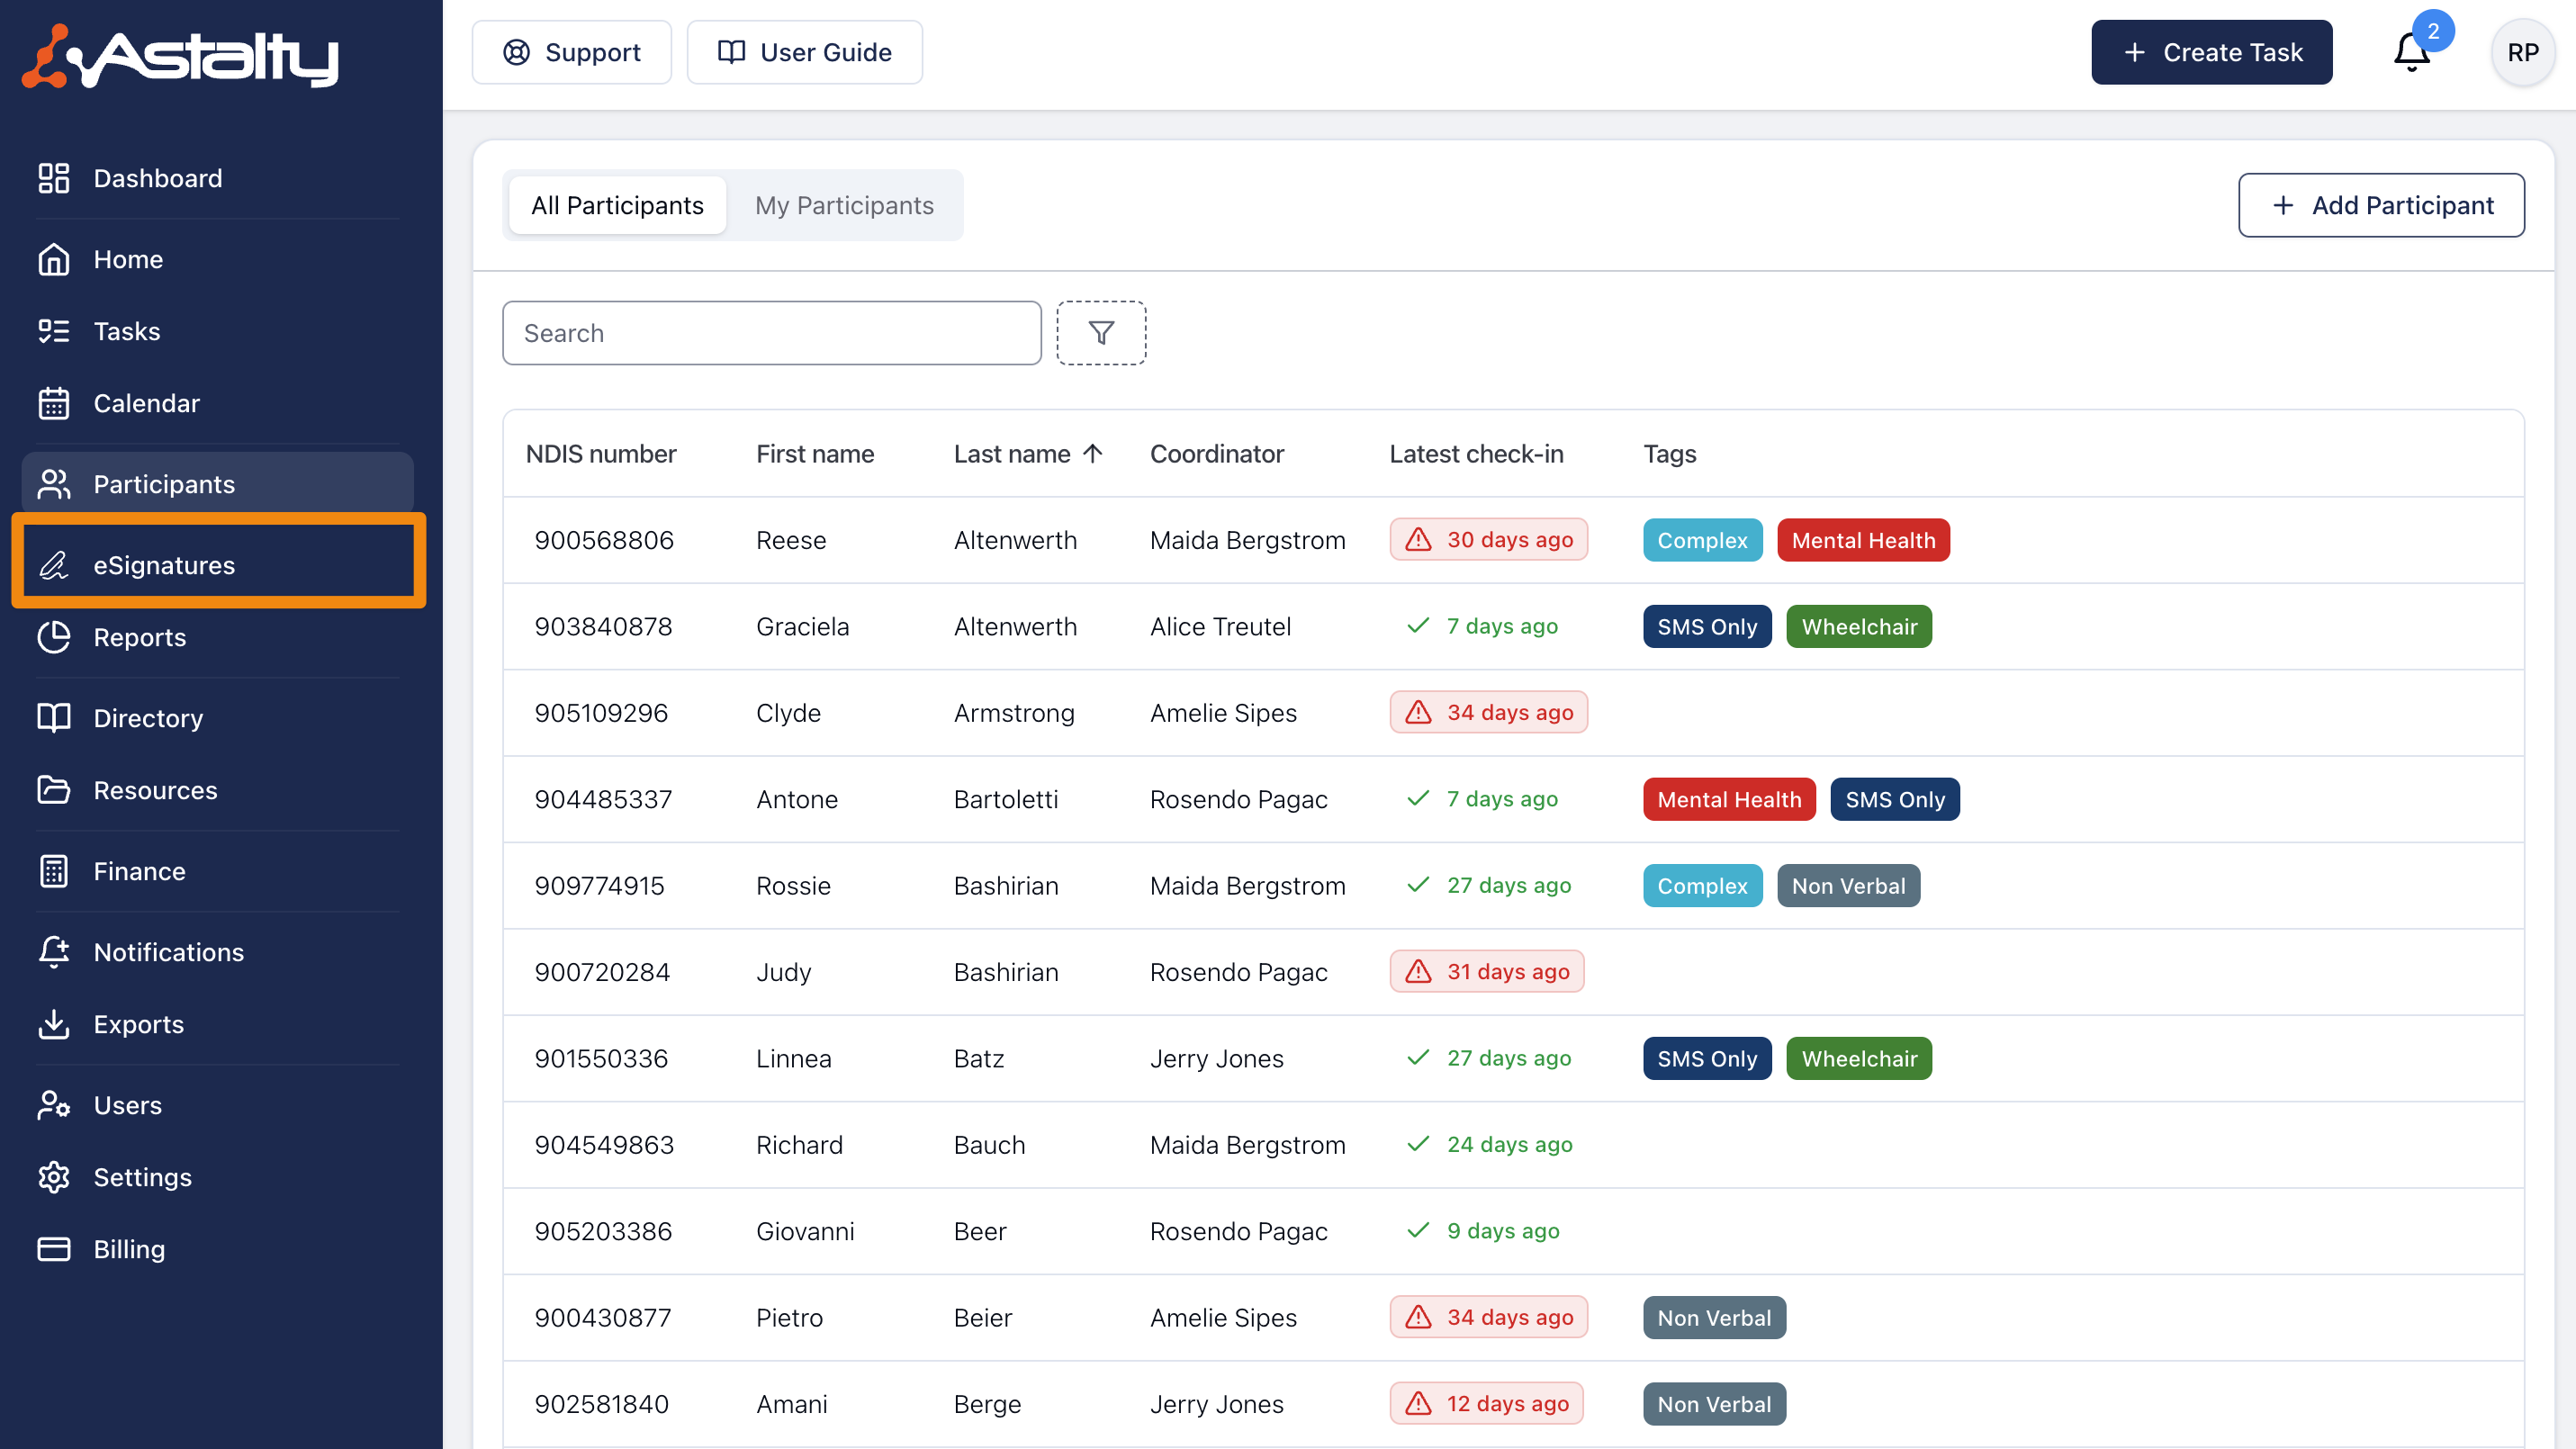
Navigate to the eSignatures page
If you have access to the eSignature functionality, you can click on the eSignature menu item in Astalty or click here.
Create a Signature Request
On the eSignatures page, click on Request Signature.
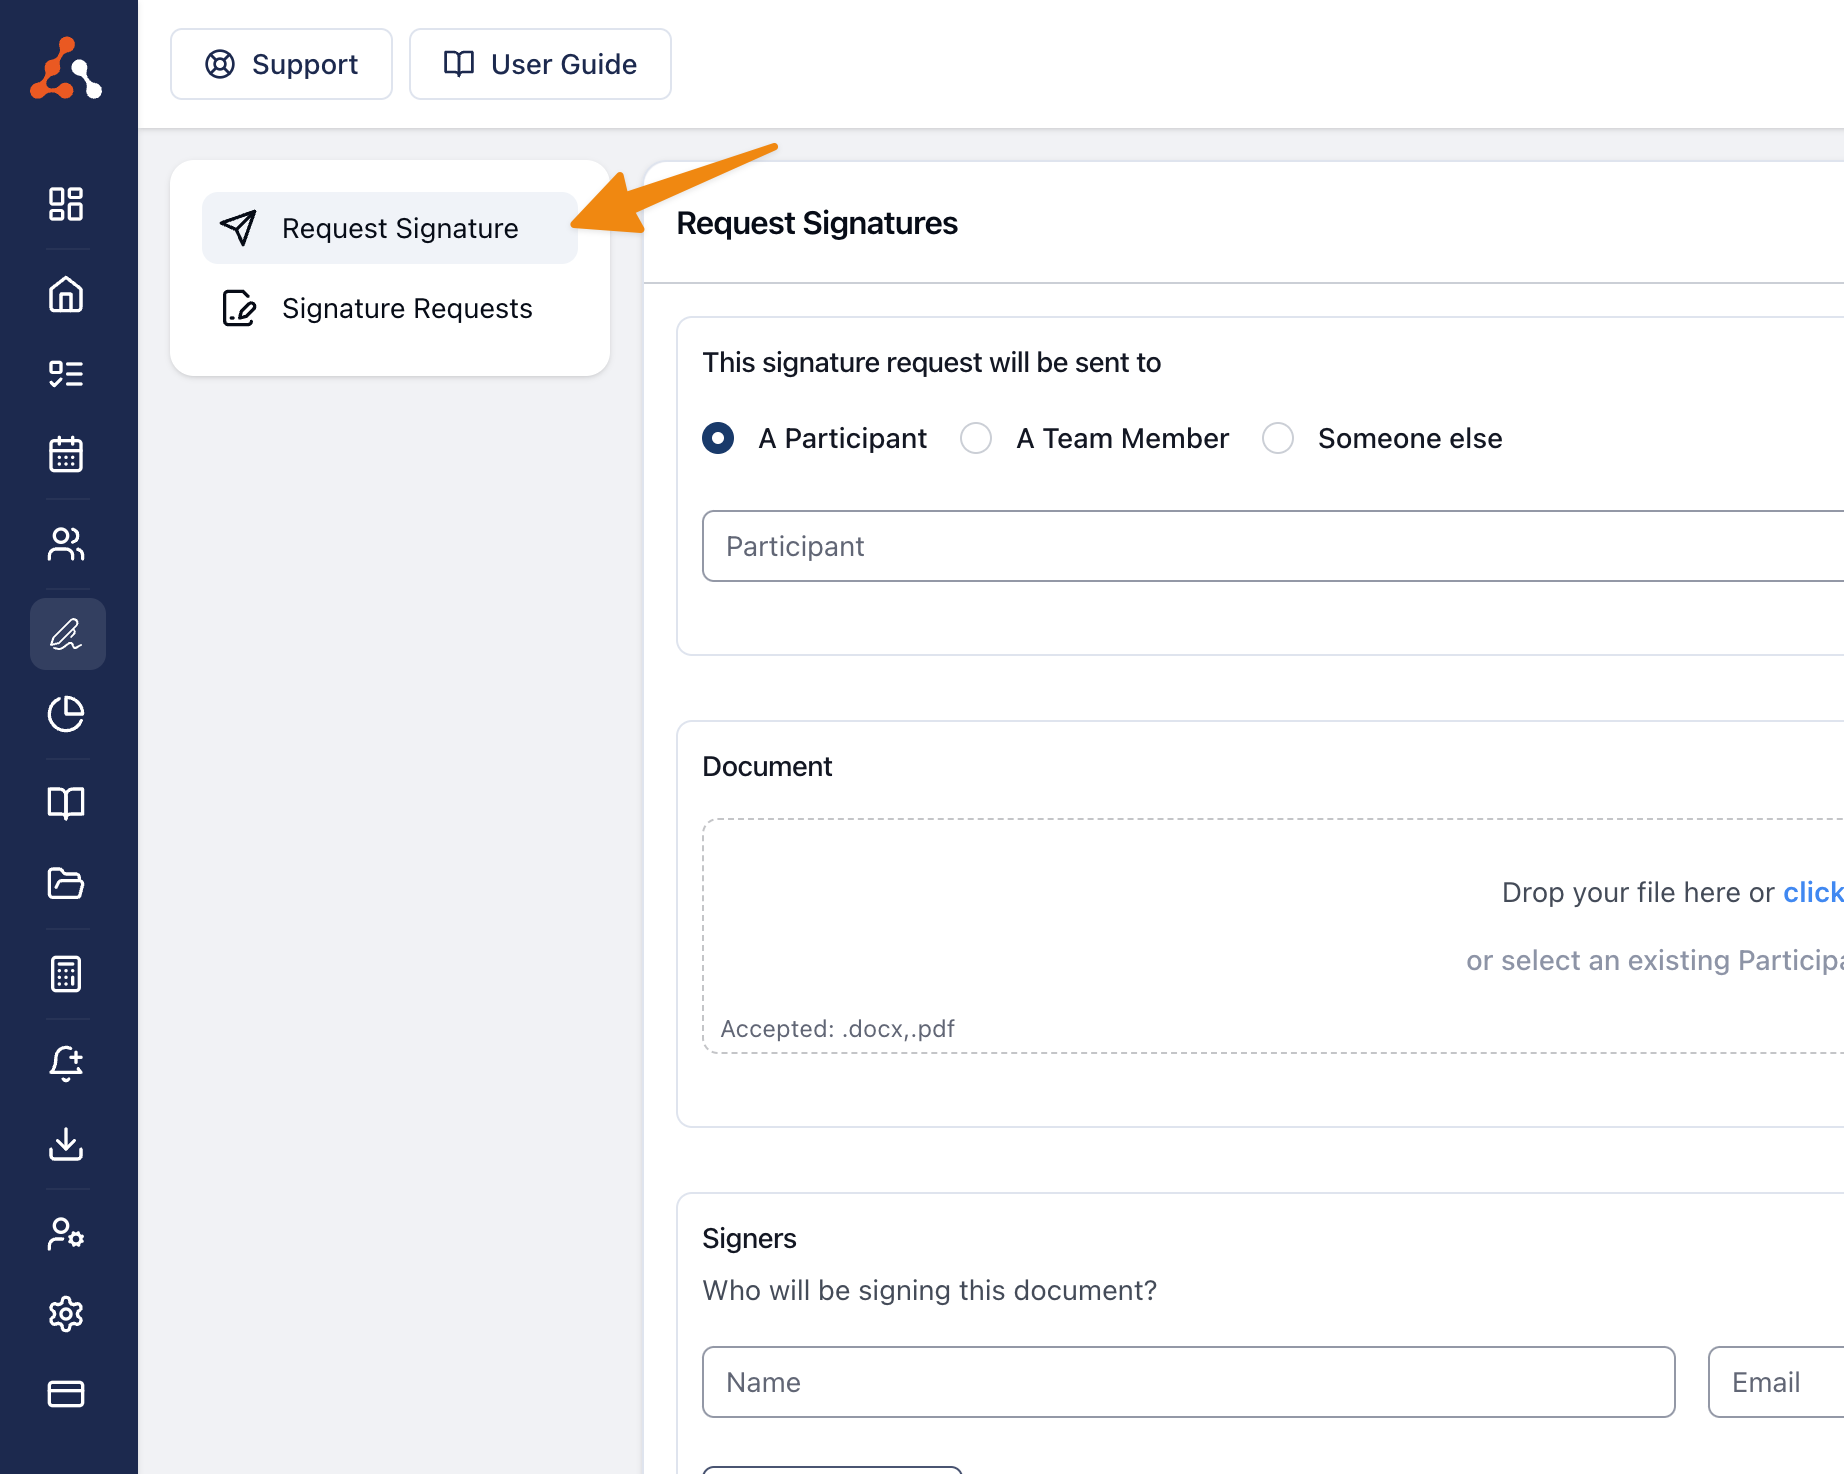
You will then be shown the Signature Request form.
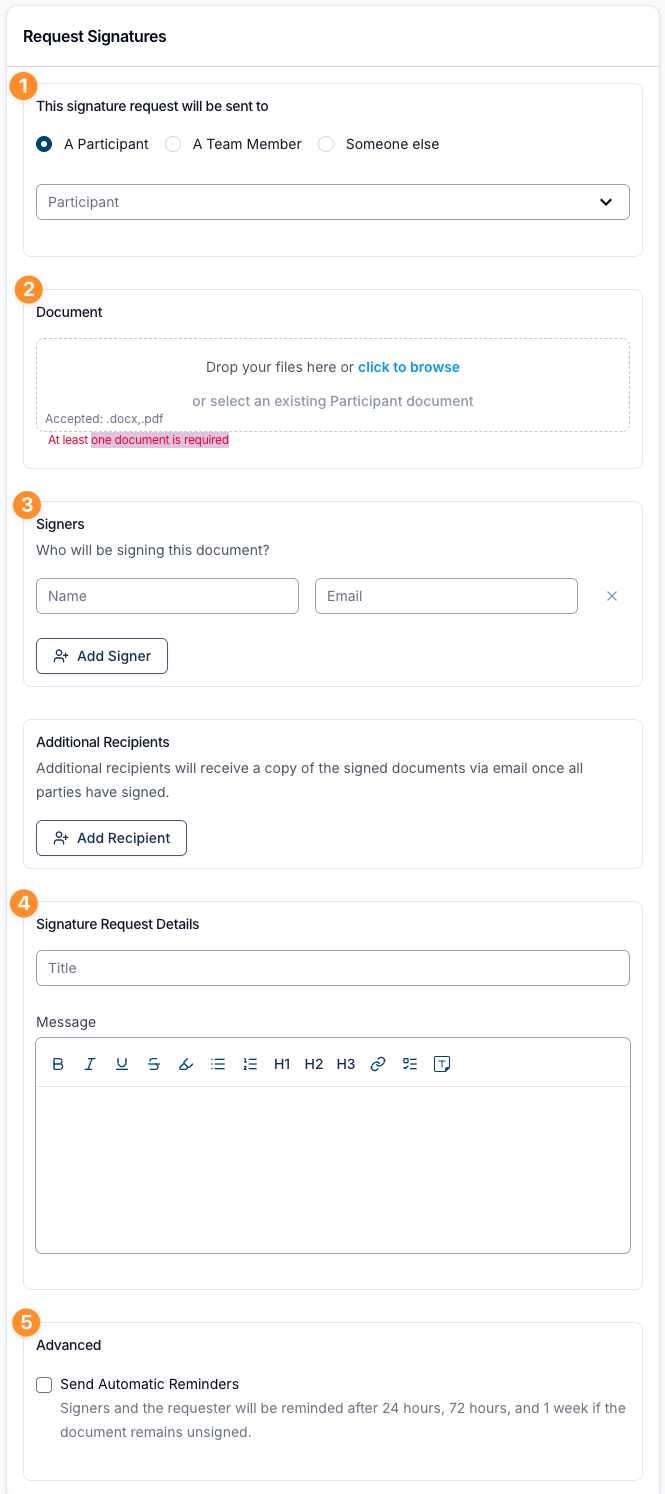
The numbers on the screenshot above match the steps outlined below.
1. Select Signature Request Recipient
The Signature Request recipient can be either;
- A Participant - you will be given the option to select a Participant in Astalty
- A Team Member - you will be given the option to select a user in Astalty
- Someone else - you can provide the name and email address manually which allows you to send anything to anyone.
2. Upload a document
You can upload or select an already uploaded individual or multiple documents to any Signature Request - the support formats are PDF and Word Documents (docx).
If you have selected a Participant as the recipient, you can also select from any existing document already uploaded to their profile.
You can select or upload as many documents as needed to the request. More on the e SIgnature bundle process is outlined below
3. Signers
In the signers section, you can define the name and email addresses of everyone who needs to sign the document. Please note, email addresses must be unique within each signature request.
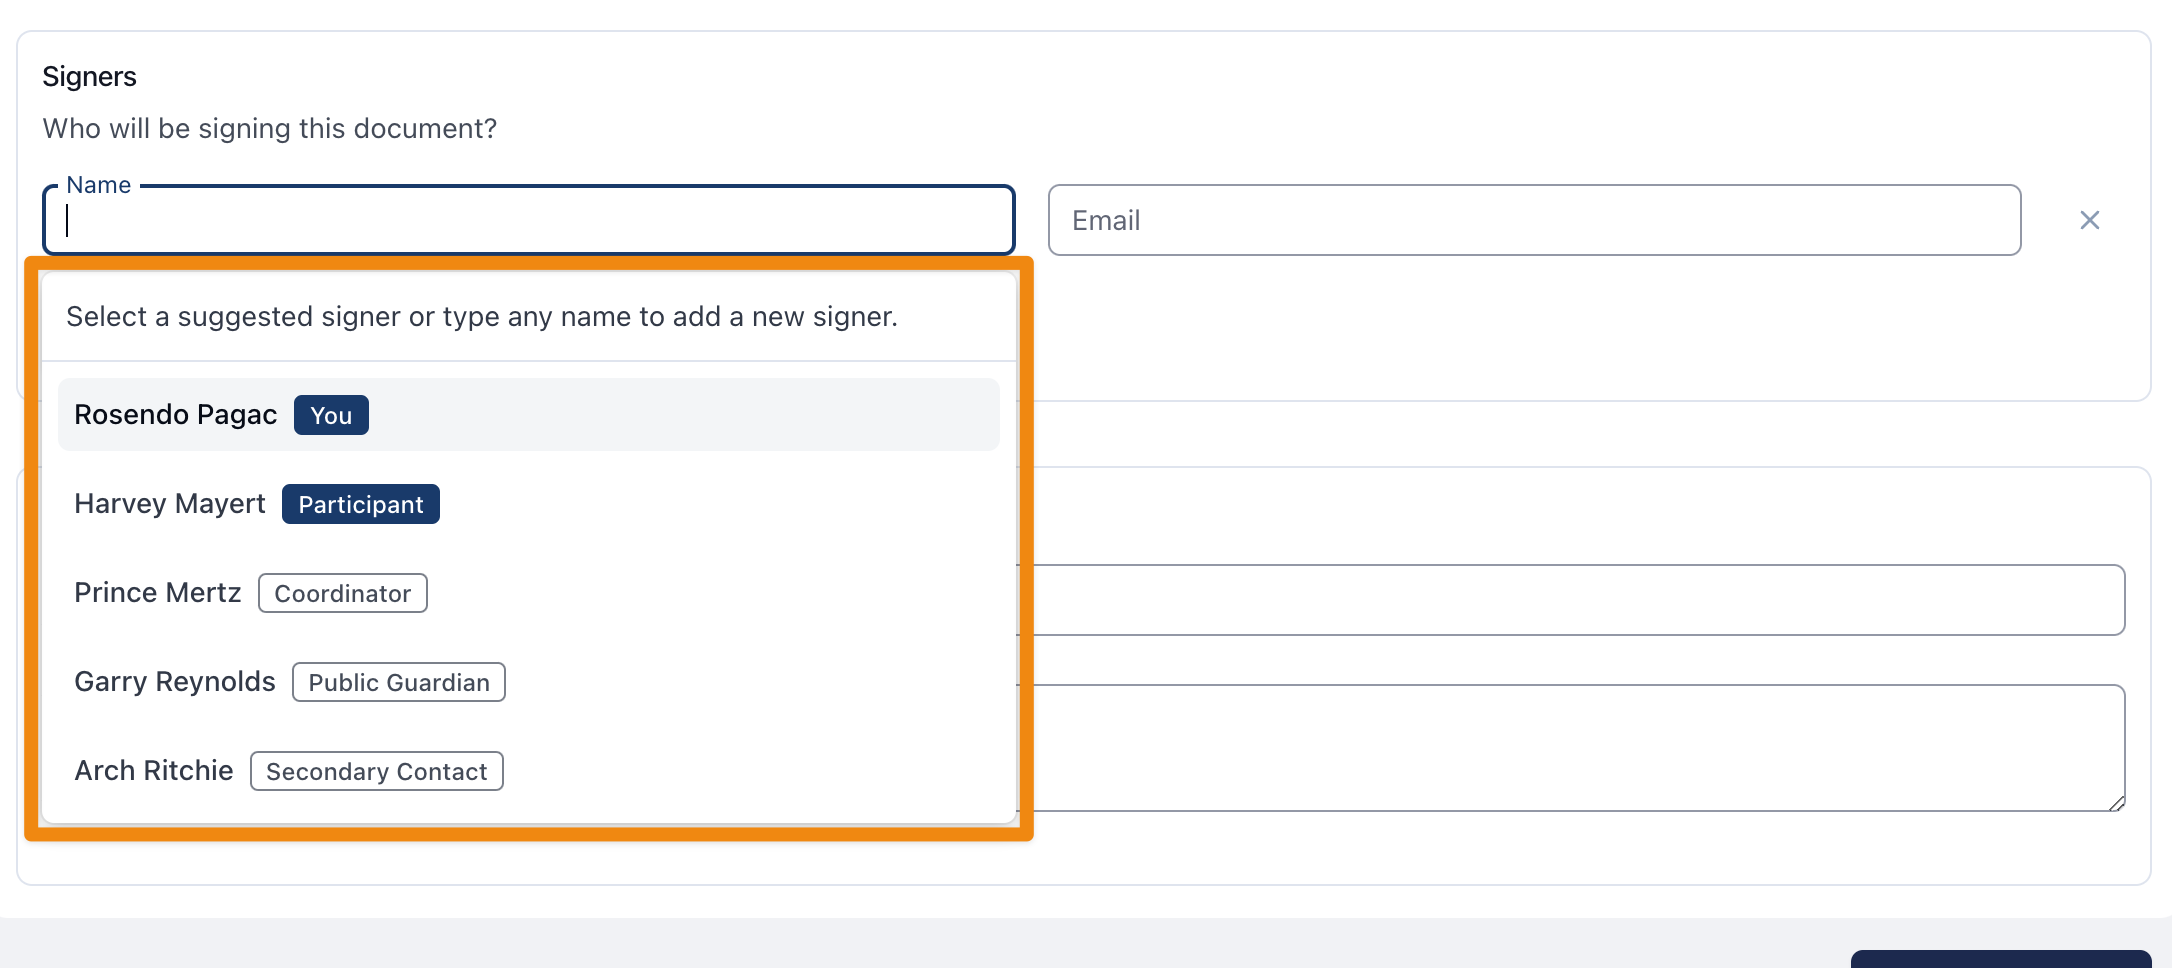
Suggested Signers
If you have selected a Participant, when you click in the Name field for a signer, you will be shown a list of suggested signers. This will consist of;
- yourself as the logged in user
- the Participant themselves
- all Contacts for that Participant
When you click on a suggested signer, the name and email will be filled for you.
4. Details
The final step is to define the Title and Message for the Signature Request. The Title and Message will be shown in the email that is sent to the signers.
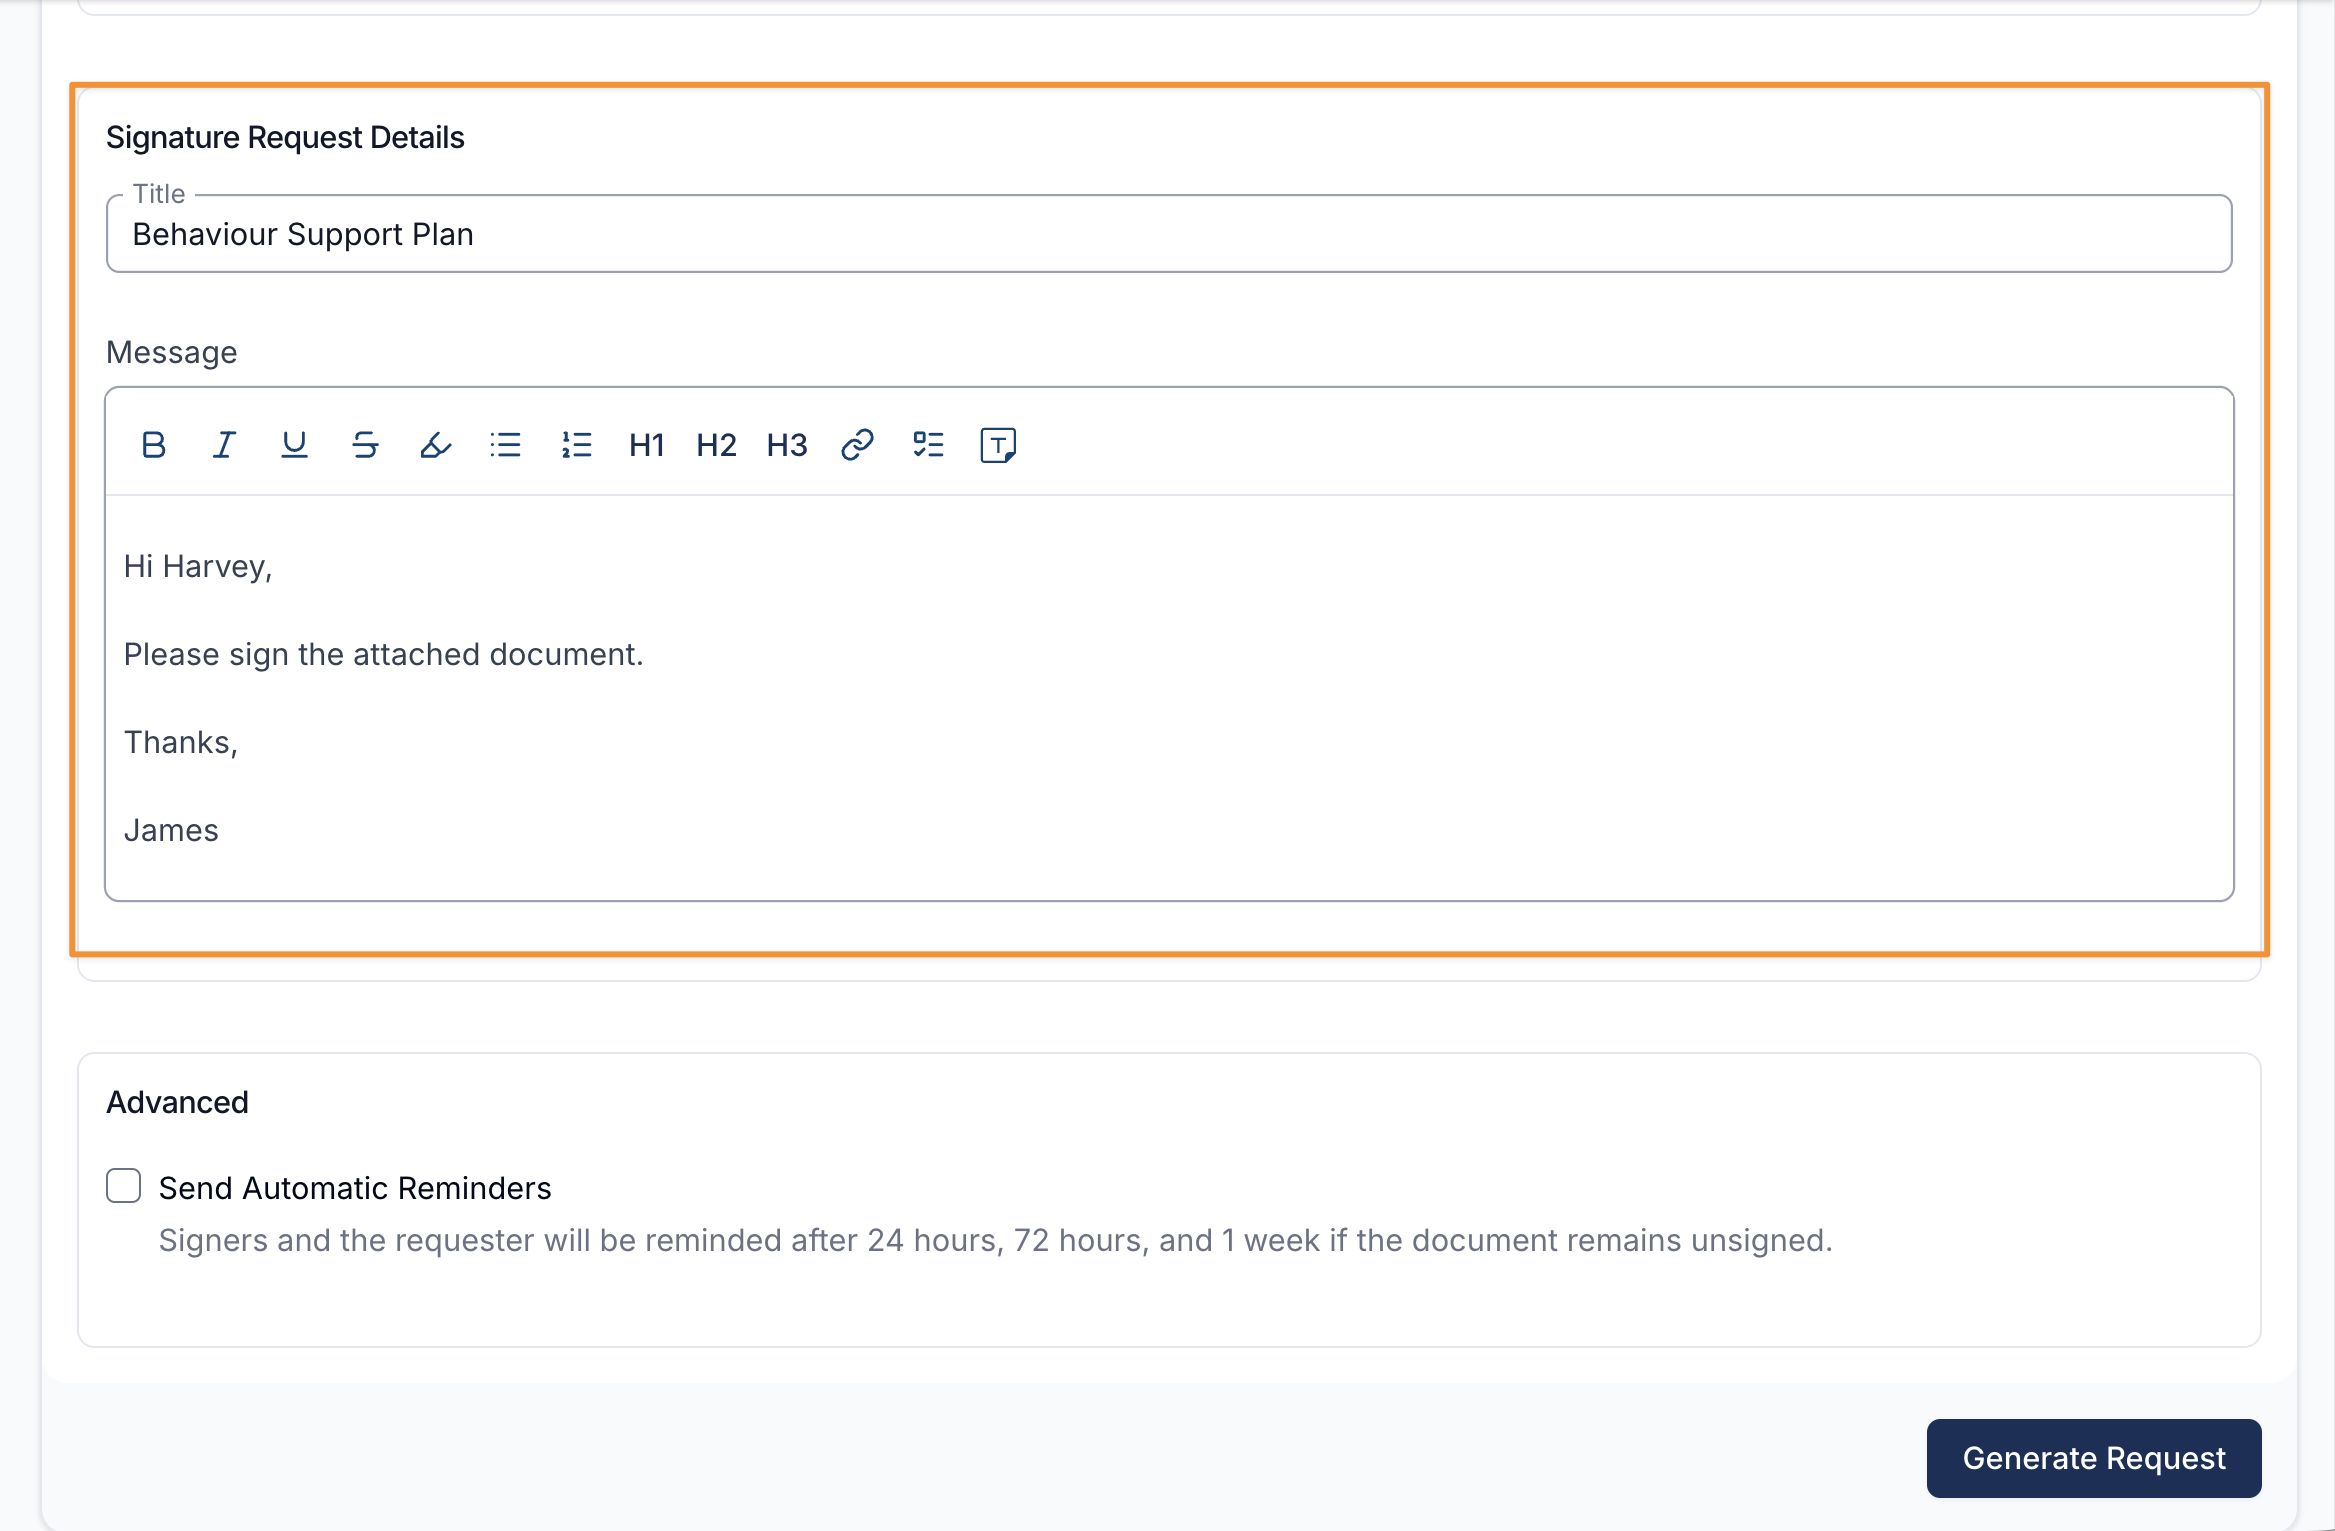
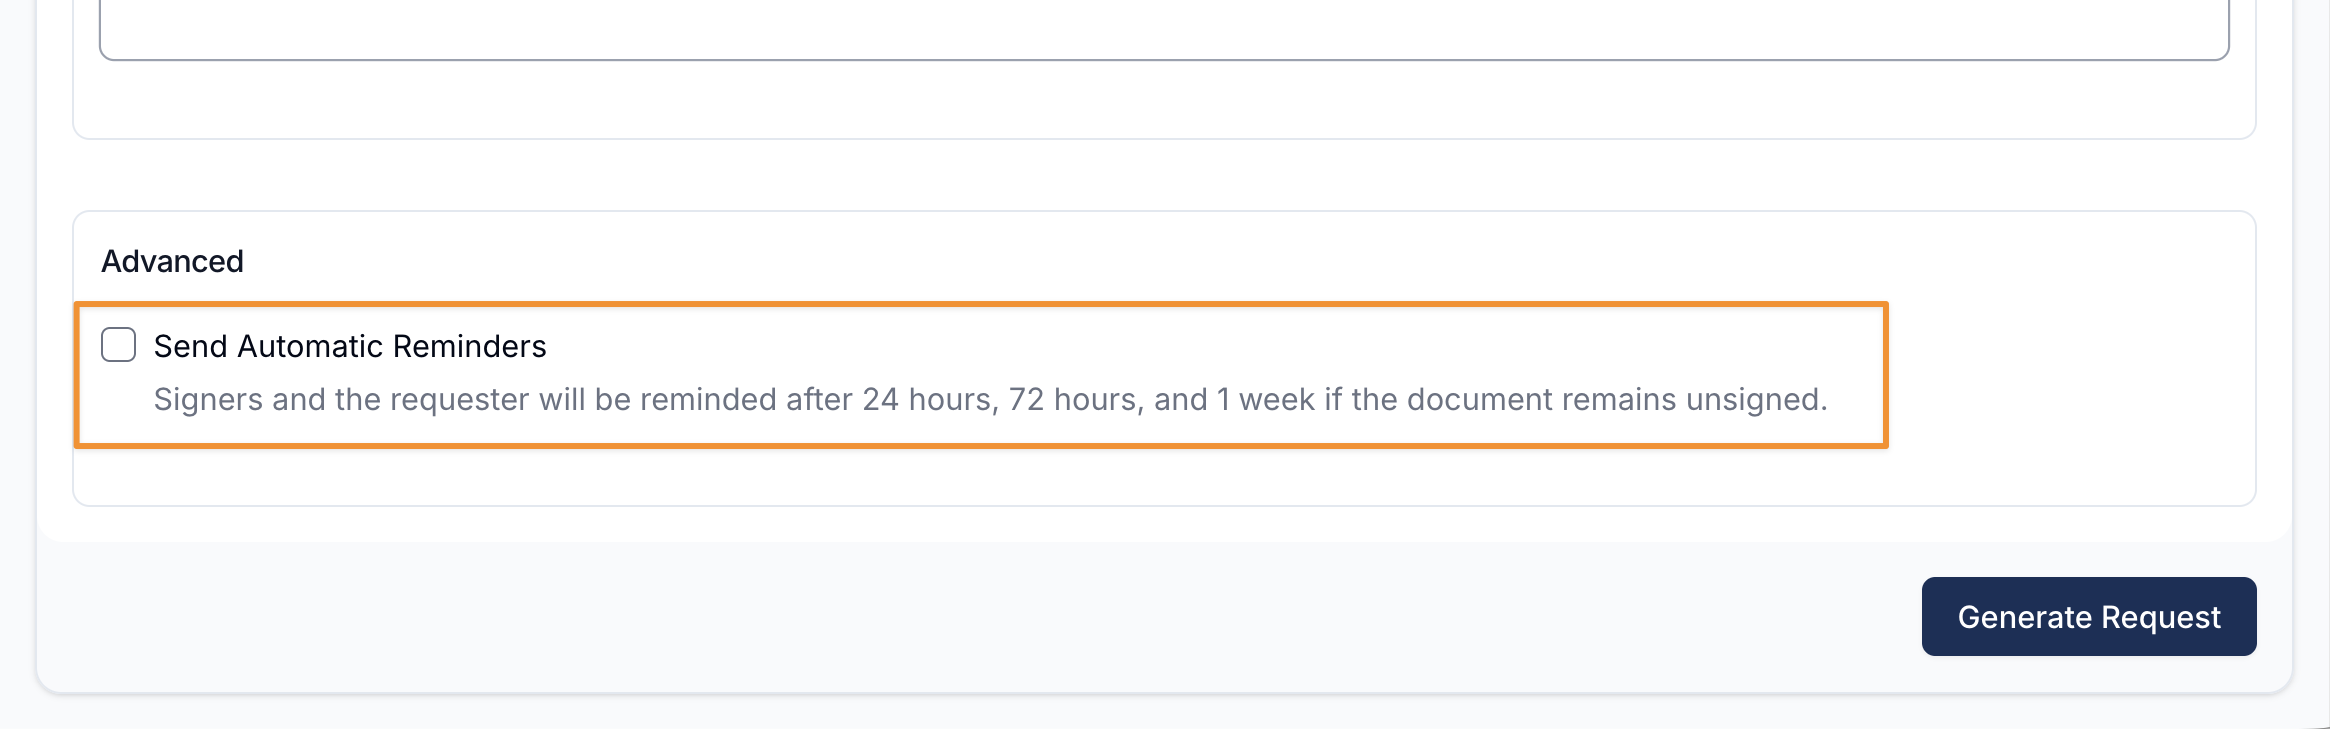
5. Send Automatic Reminders
If enabled, both the Signers and the Requester will be reminded if the document remains unsigned, at the following intervals:
- 24 hours
- 72 hours
- 1 week
Once you have completed the form, you can click "Generate Request"
Finalise a Signature Request
Once you have clicked "Generate Request", you will be taken straight to the finalise step - this is where you define where the signature fields need to go. You can also make use of any other fields shown on this screen if you wish.
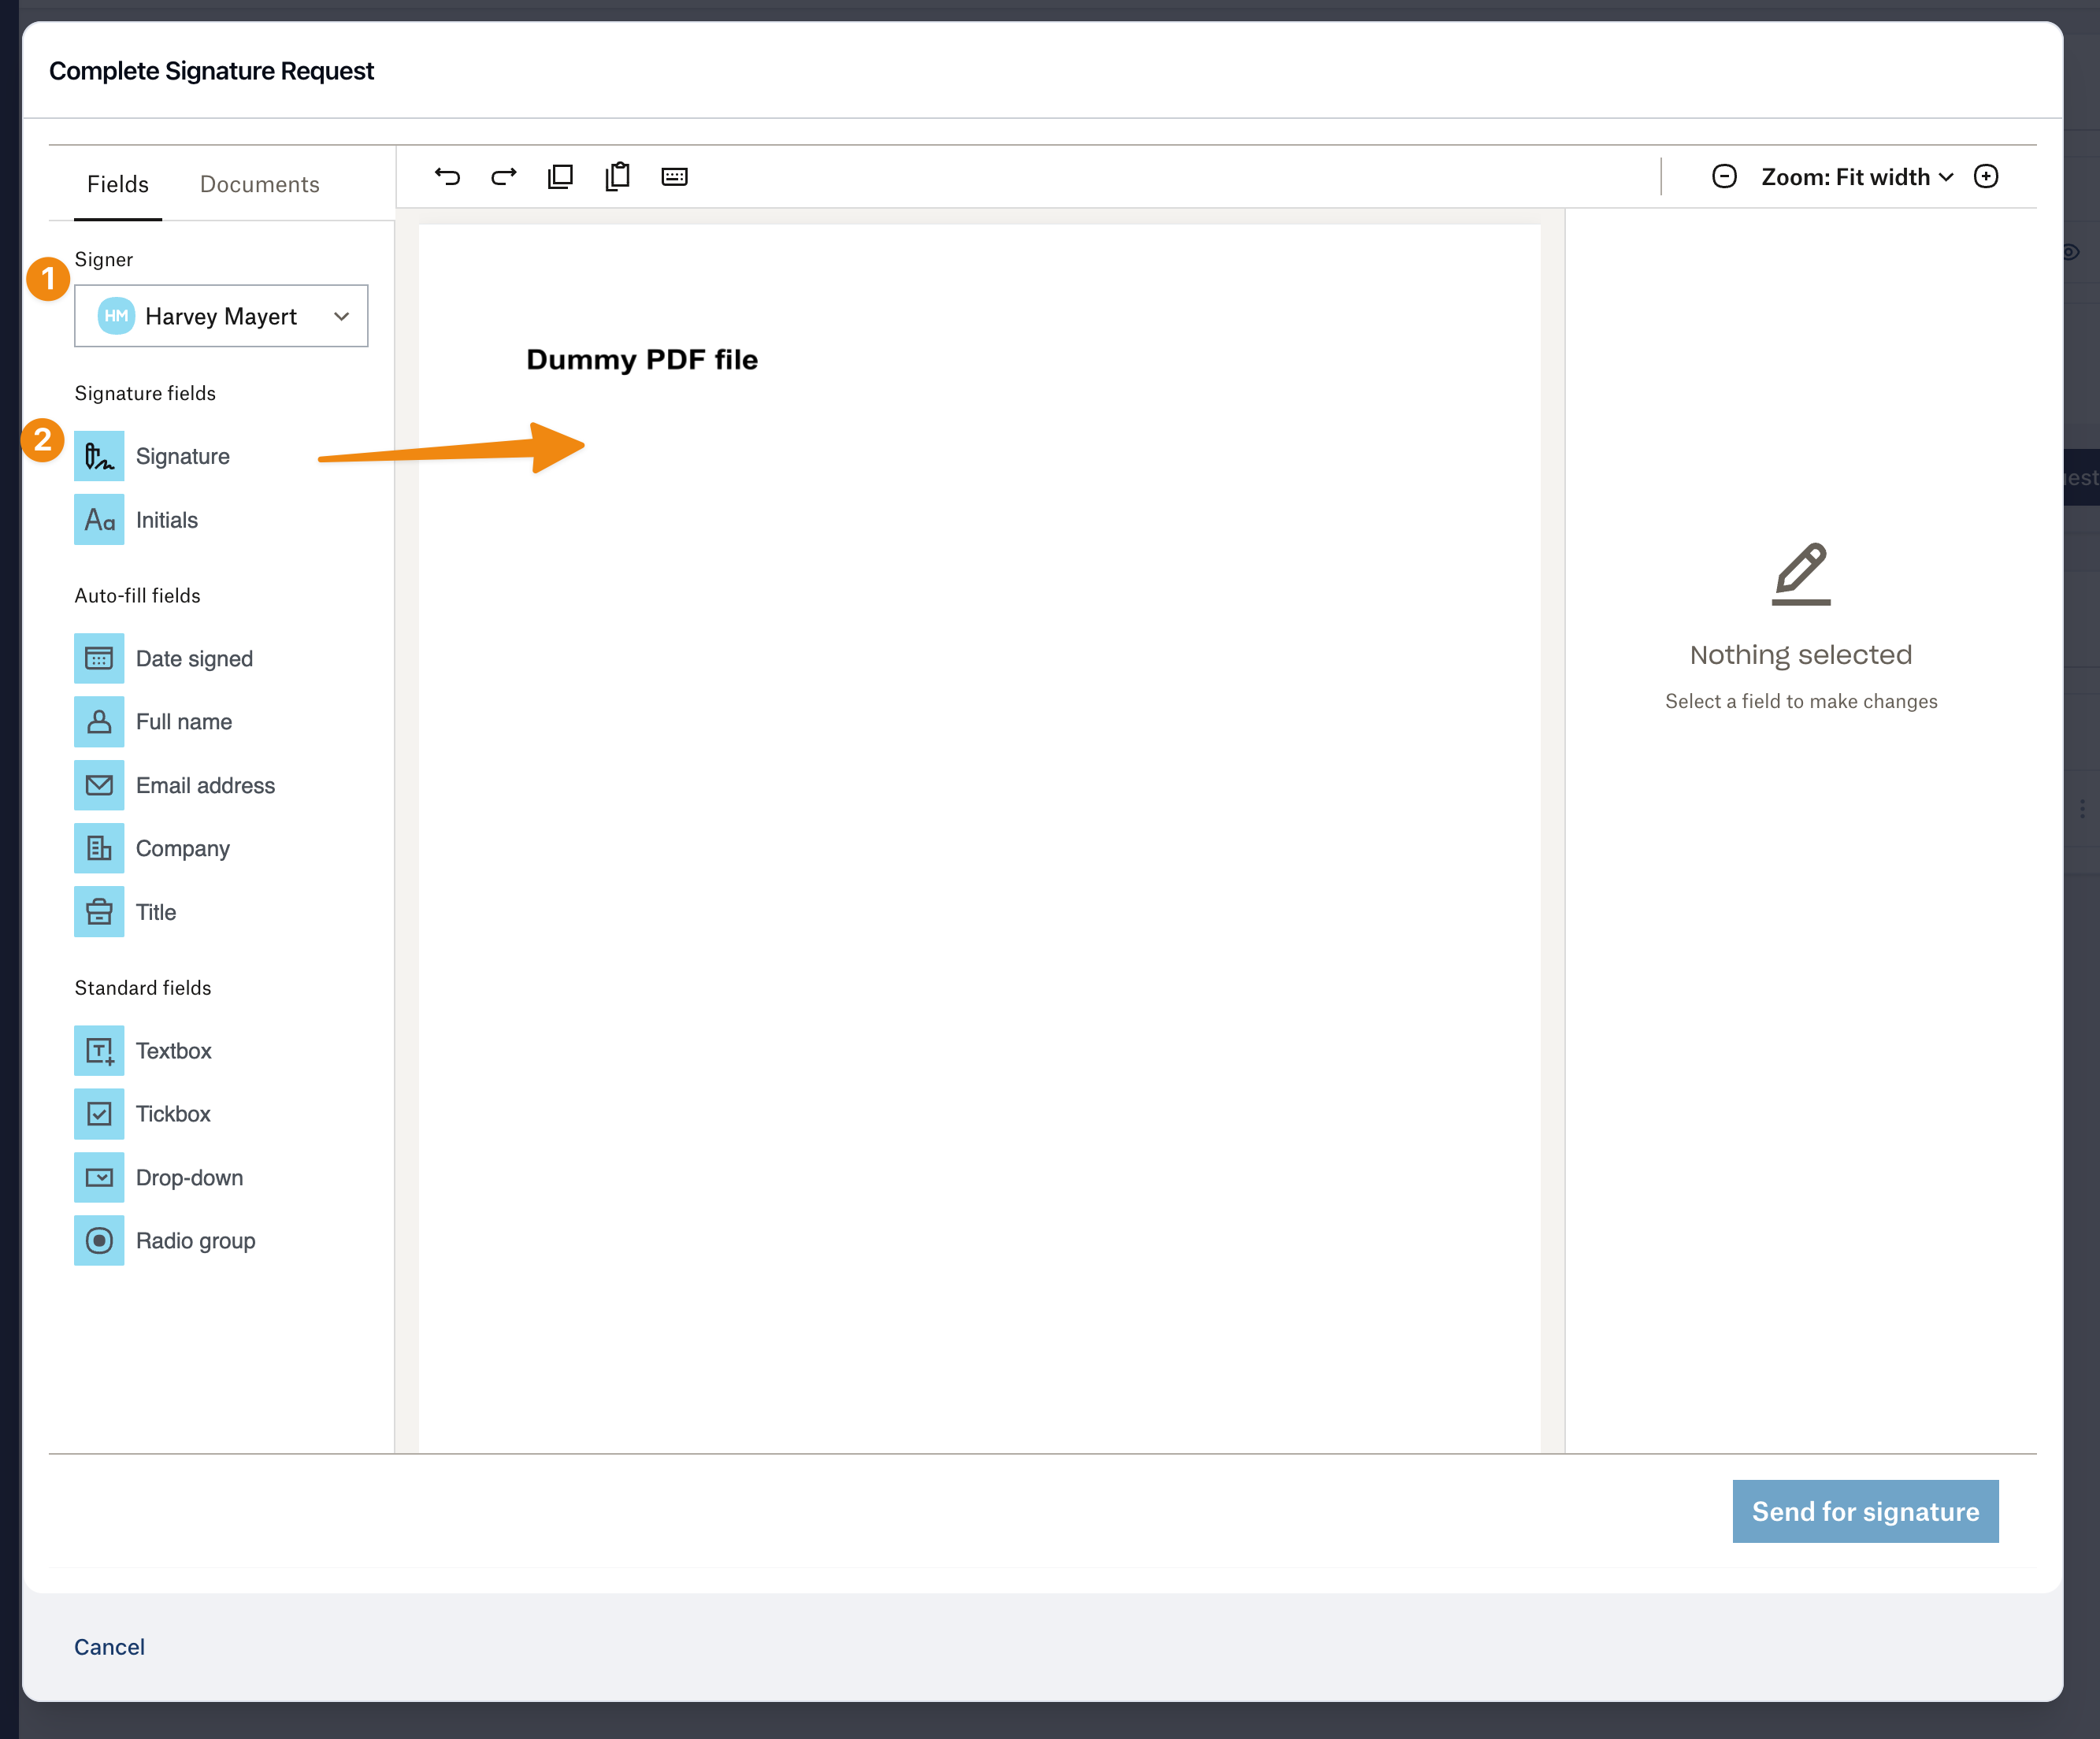
1. Multiple Signers
If you have multiple signers signing the document, you will need to drag fields for each signer. You can switch the signers by using the dropdown marked with (1) in the screenshot.
2. Drag fields
The supported fields (2) can be dragged from the sidebar onto the document where you want them to be shown. You must define a signature field for each signer.
What happens once signed?
The steps below outline the complete flow for a Signature Request including what happens after the document is signed.
- Signature Request is finalised in Astalty.
- All signers will receive an email containing a link which will take them to the signing page.
- Once all signers have signed the document, each signer will receive a copy of the signed document via email.
- The user who requested the signature will also receive an email to notify them that the Signature Request has been completed.
- The signed document will be automatically uploaded back into Astalty within the Signature Request
- If the Signature Request is for a Participant, the signed copies will also automatically be shown in the Participant's Documents page.
- If the Signature Request was created from a Participant Record, the signature status for the Participant Record will be updated automatically.
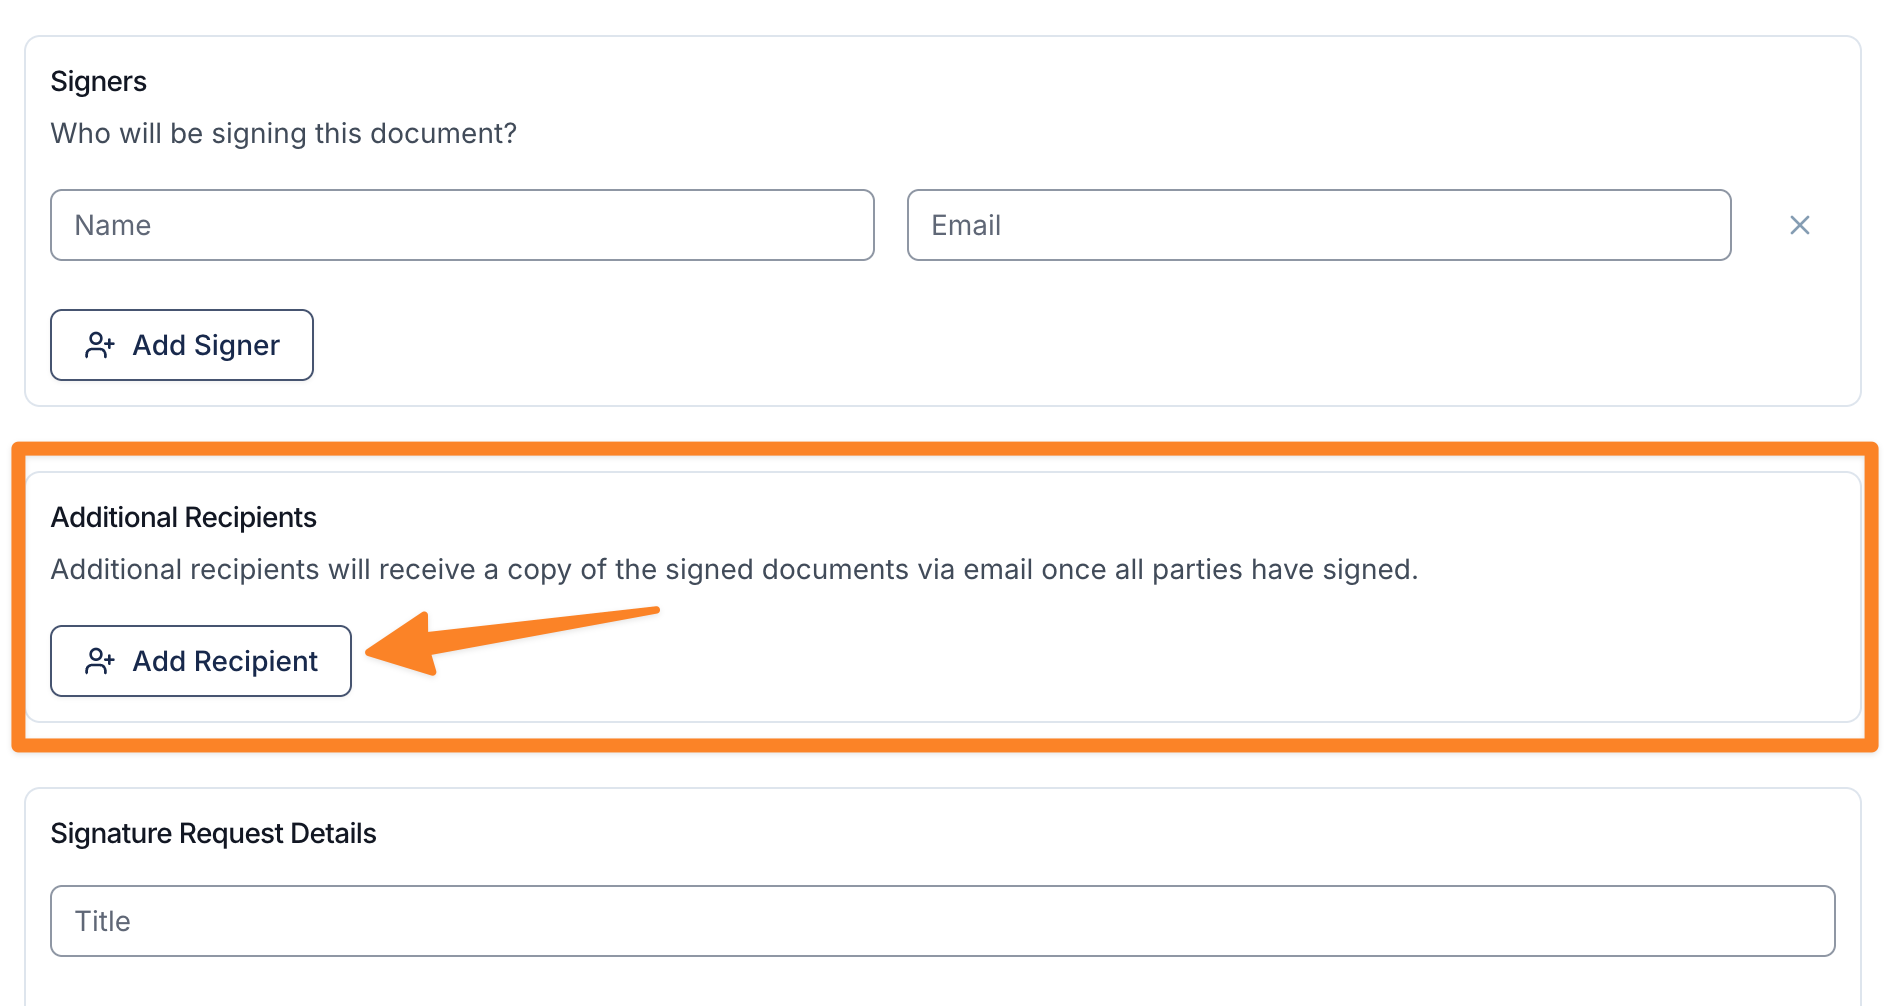
Adding Additional Recipients
When creating an eSignature request, you can add additional recipients to receive a copy of the completed document once all parties have signed.
Additional recipients are not required to sign the document but will be notified and provided with a copy after the request is finalised.
How to Add Additional Recipients
- While creating a Signature Request, locate the Additional Recipients section.
- Click Add Recipient.
- Select a recipient from the suggested list, or
- Enter a new recipient’s name and email address.
The recipient will be added to the request and will receive a copy of the signed document once all signatures are complete.
eSignature Request Activity Log
You can view your Signature Request activity log or the signature history from within the signature request. To do this you will need to navigate to the request for the activity you would like to check.
- Once in the request you will see an 'Actions' button on the top right of the request, click this.
- Click 'View Activity Log'
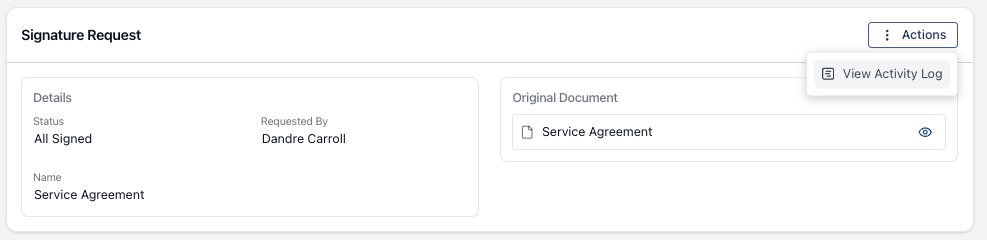
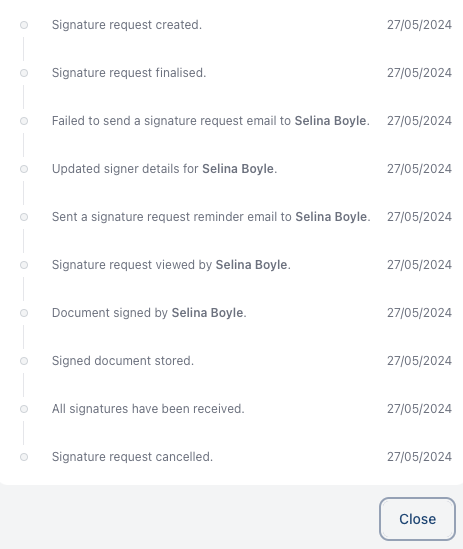
- You will then see a pop up of the activity log similar to what is seen below.
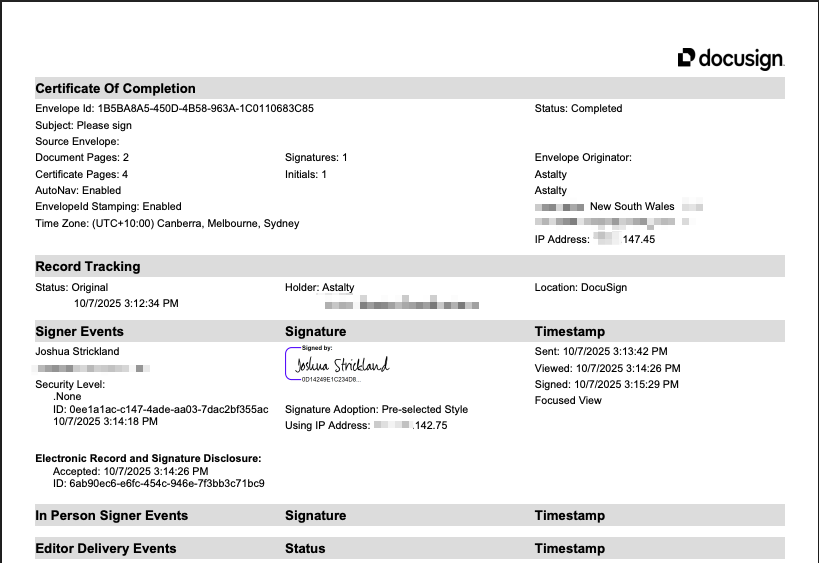
eSignature Audit Trail
Each eSignature request in Astalty also includes a comprehensive Audit Trail, providing a formal Certificate of Completion.
The Audit Trail records the overall status of the request, detailed signer events, and accurate timestamps for each action taken — creating a complete, chronological history of the signing process.
To access this, open the relevant eSignature request, select Actions, and choose Download Audit Trail. This will download a Certificate of Completion to your file explorer for your records.

The Audit Trail supports compliance, transparency, and secure record-keeping by providing a verified summary of the entire eSignature journey.
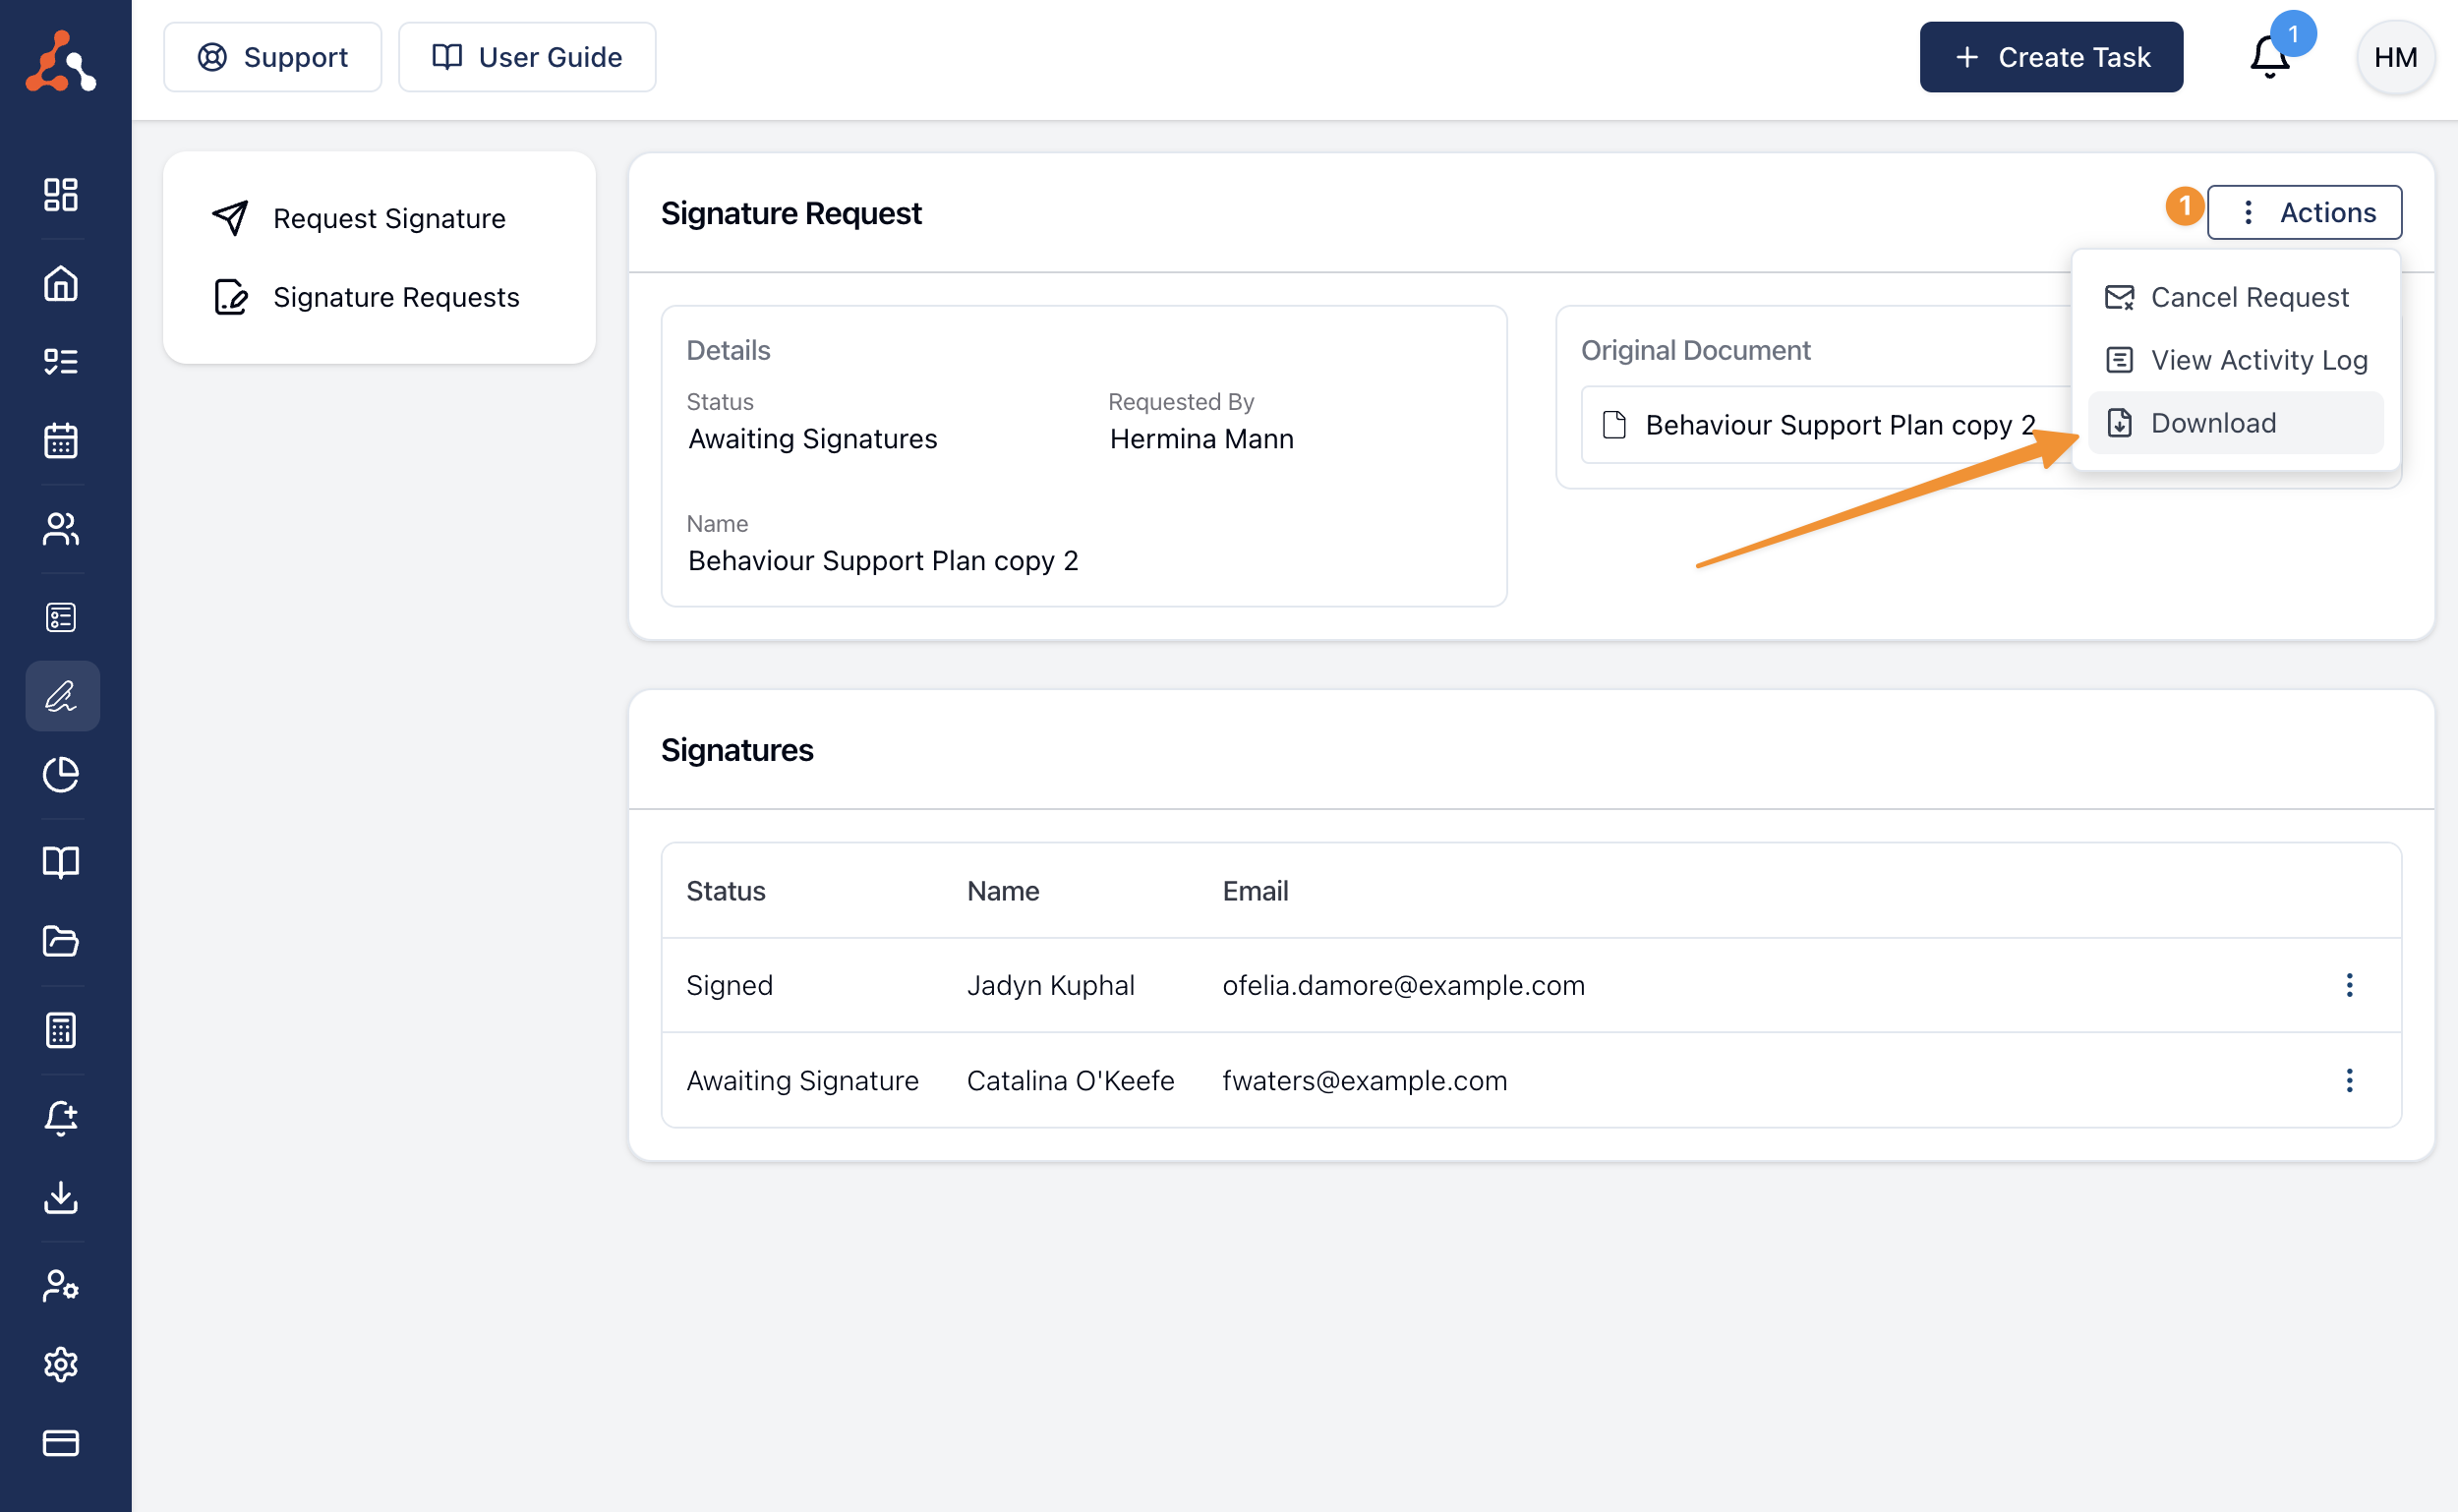
Download Partially Signed eSignature Documents
To do this navigate to the eSignature Request screen. From here click on the request that has the document you would like to download that has been partially signed.
From this screen you will need to;
- Click Actions
- Select the 'Download' option
You will now have the partially signed request, the request will also state that whoever has not signed as failed to sign. From here you can have this document signed however you wish or upload the document as a partially signed document.
How to send an eSignature Reminder and Update a signee's email address.
You can send a reminder email to the signee from within the Signature Request screen. To do this click the three dots to the right of the email address of the signee as seen below and click 'Send a Reminder'. Within this menu you can also update the signee's email address (this can only be done prior to signing the document).

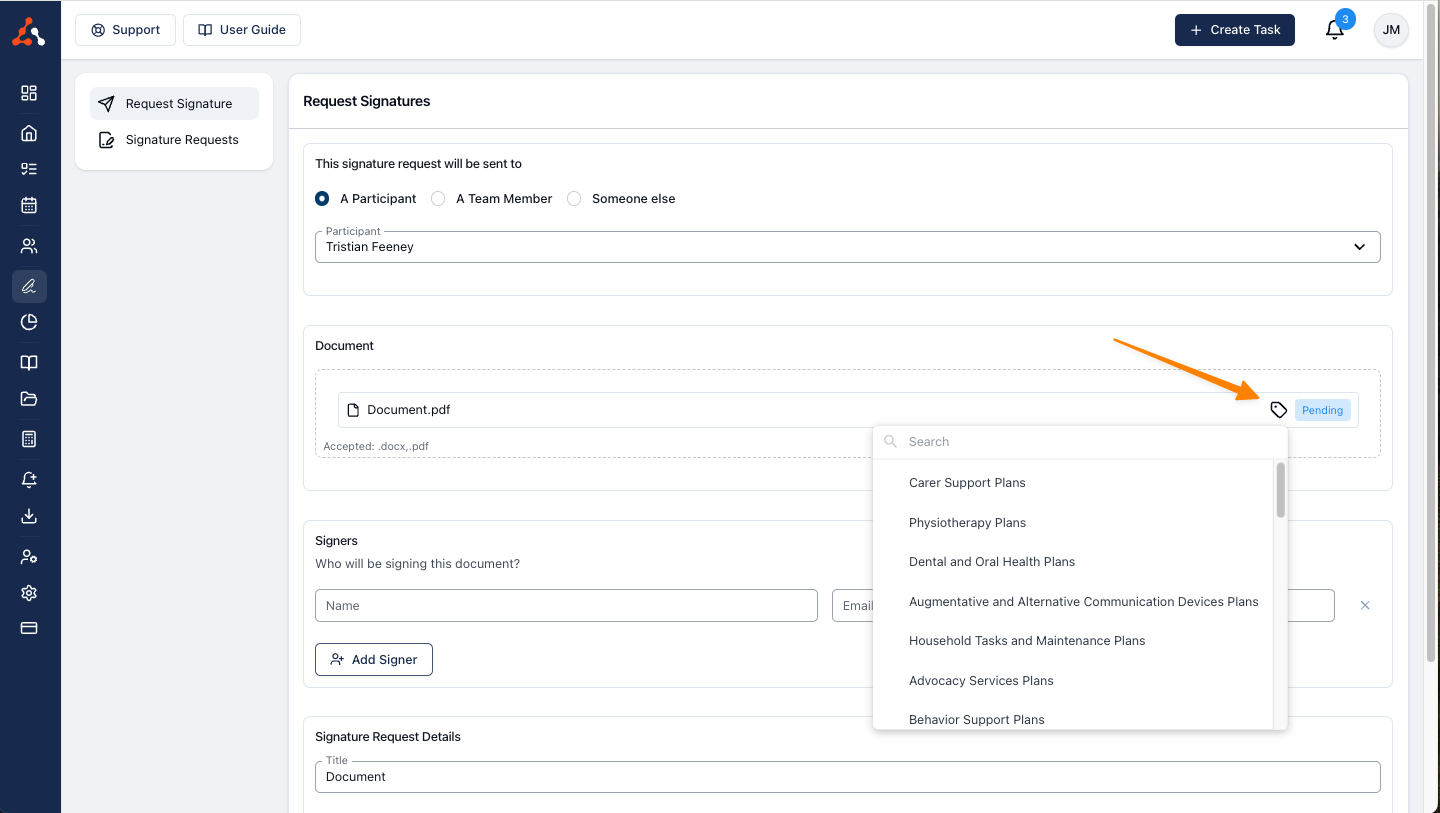
eSignature Document Categorisation
You can assign categories to documents from within the eSignature menu. Similarly to how you would within the documents section of a participants profile. This will streamline the upload process for signed documents. To do this select the 'Category' icon as seen in the image below. From here select the correct category for the document.
Filtering All Signature Requests
The All Signature Requests page includes a filter option to help you find specific requests quickly. Click the filter icon next to the search bar to open the filter menu.
The following filters are available:
- Status – Filter requests by their current status (e.g. All Signed, Pending).
- Sent at – Filter requests by the date they were sent.
- Requested by – Filter requests by the team member who created them.
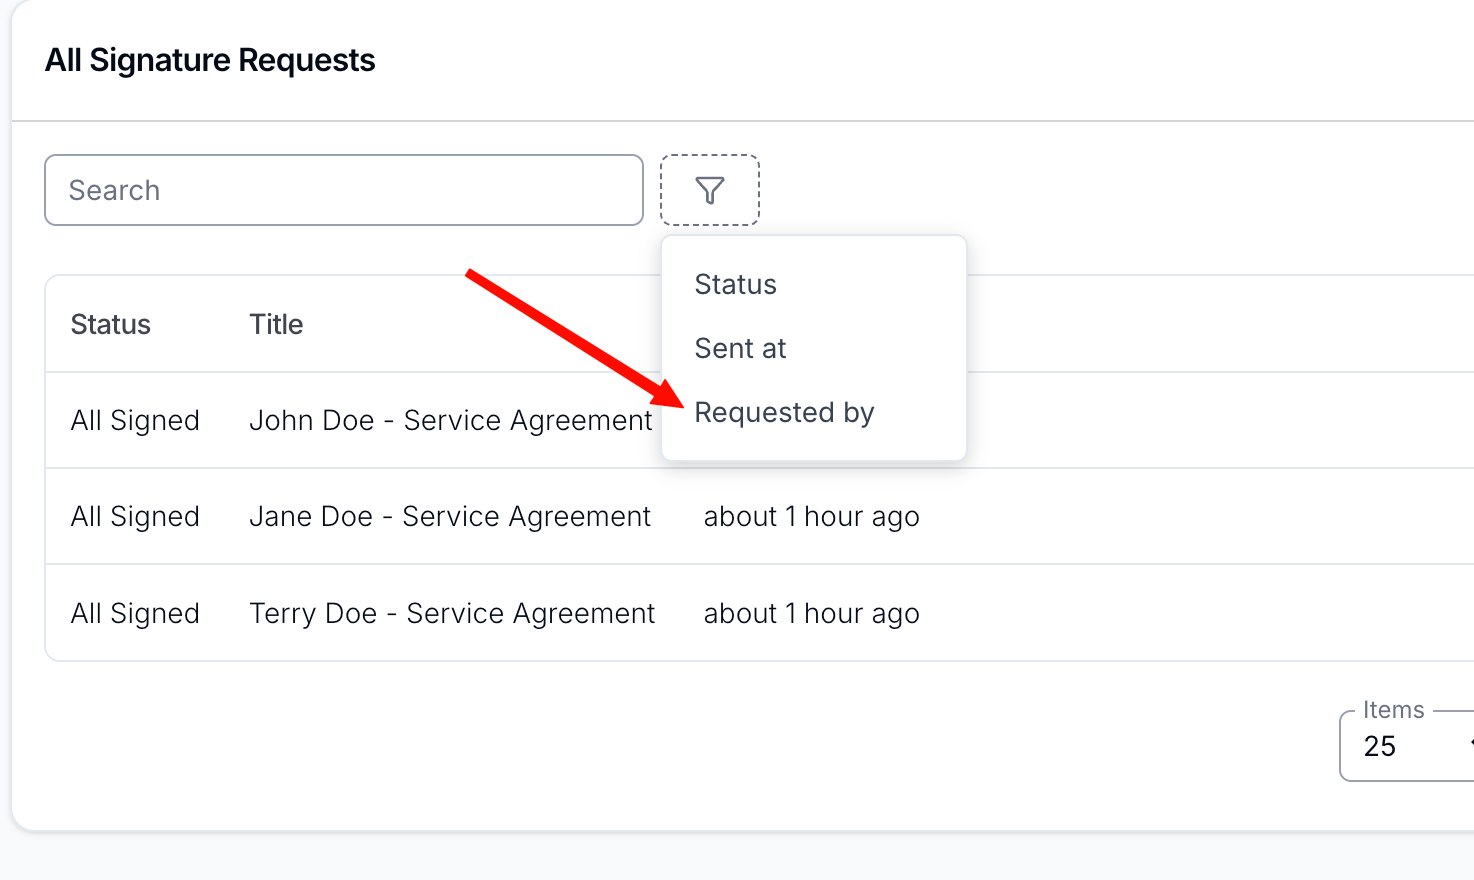
The Requested by filter opens a searchable picker of users, making it easy to view all signature requests created by a specific team member. This is particularly useful for organisations where multiple people send eSignature requests.
eSignature Request Video Walkthough
Here is a video that explains the process of how to send a document through the eSignature functionality.
Sending Participant Records Video Walkthrough
Here is a video that explains the process of how to send a record through the eSignature functionality. You can learn more about Participant records through this link here.