- Day-to-Day
- Task View
Task View
Overview
After creating a Task, the Task becomes eligible for invoicing. However, you will typically need to provide additional details to support the time you are billing. You can add this information from the Task View.
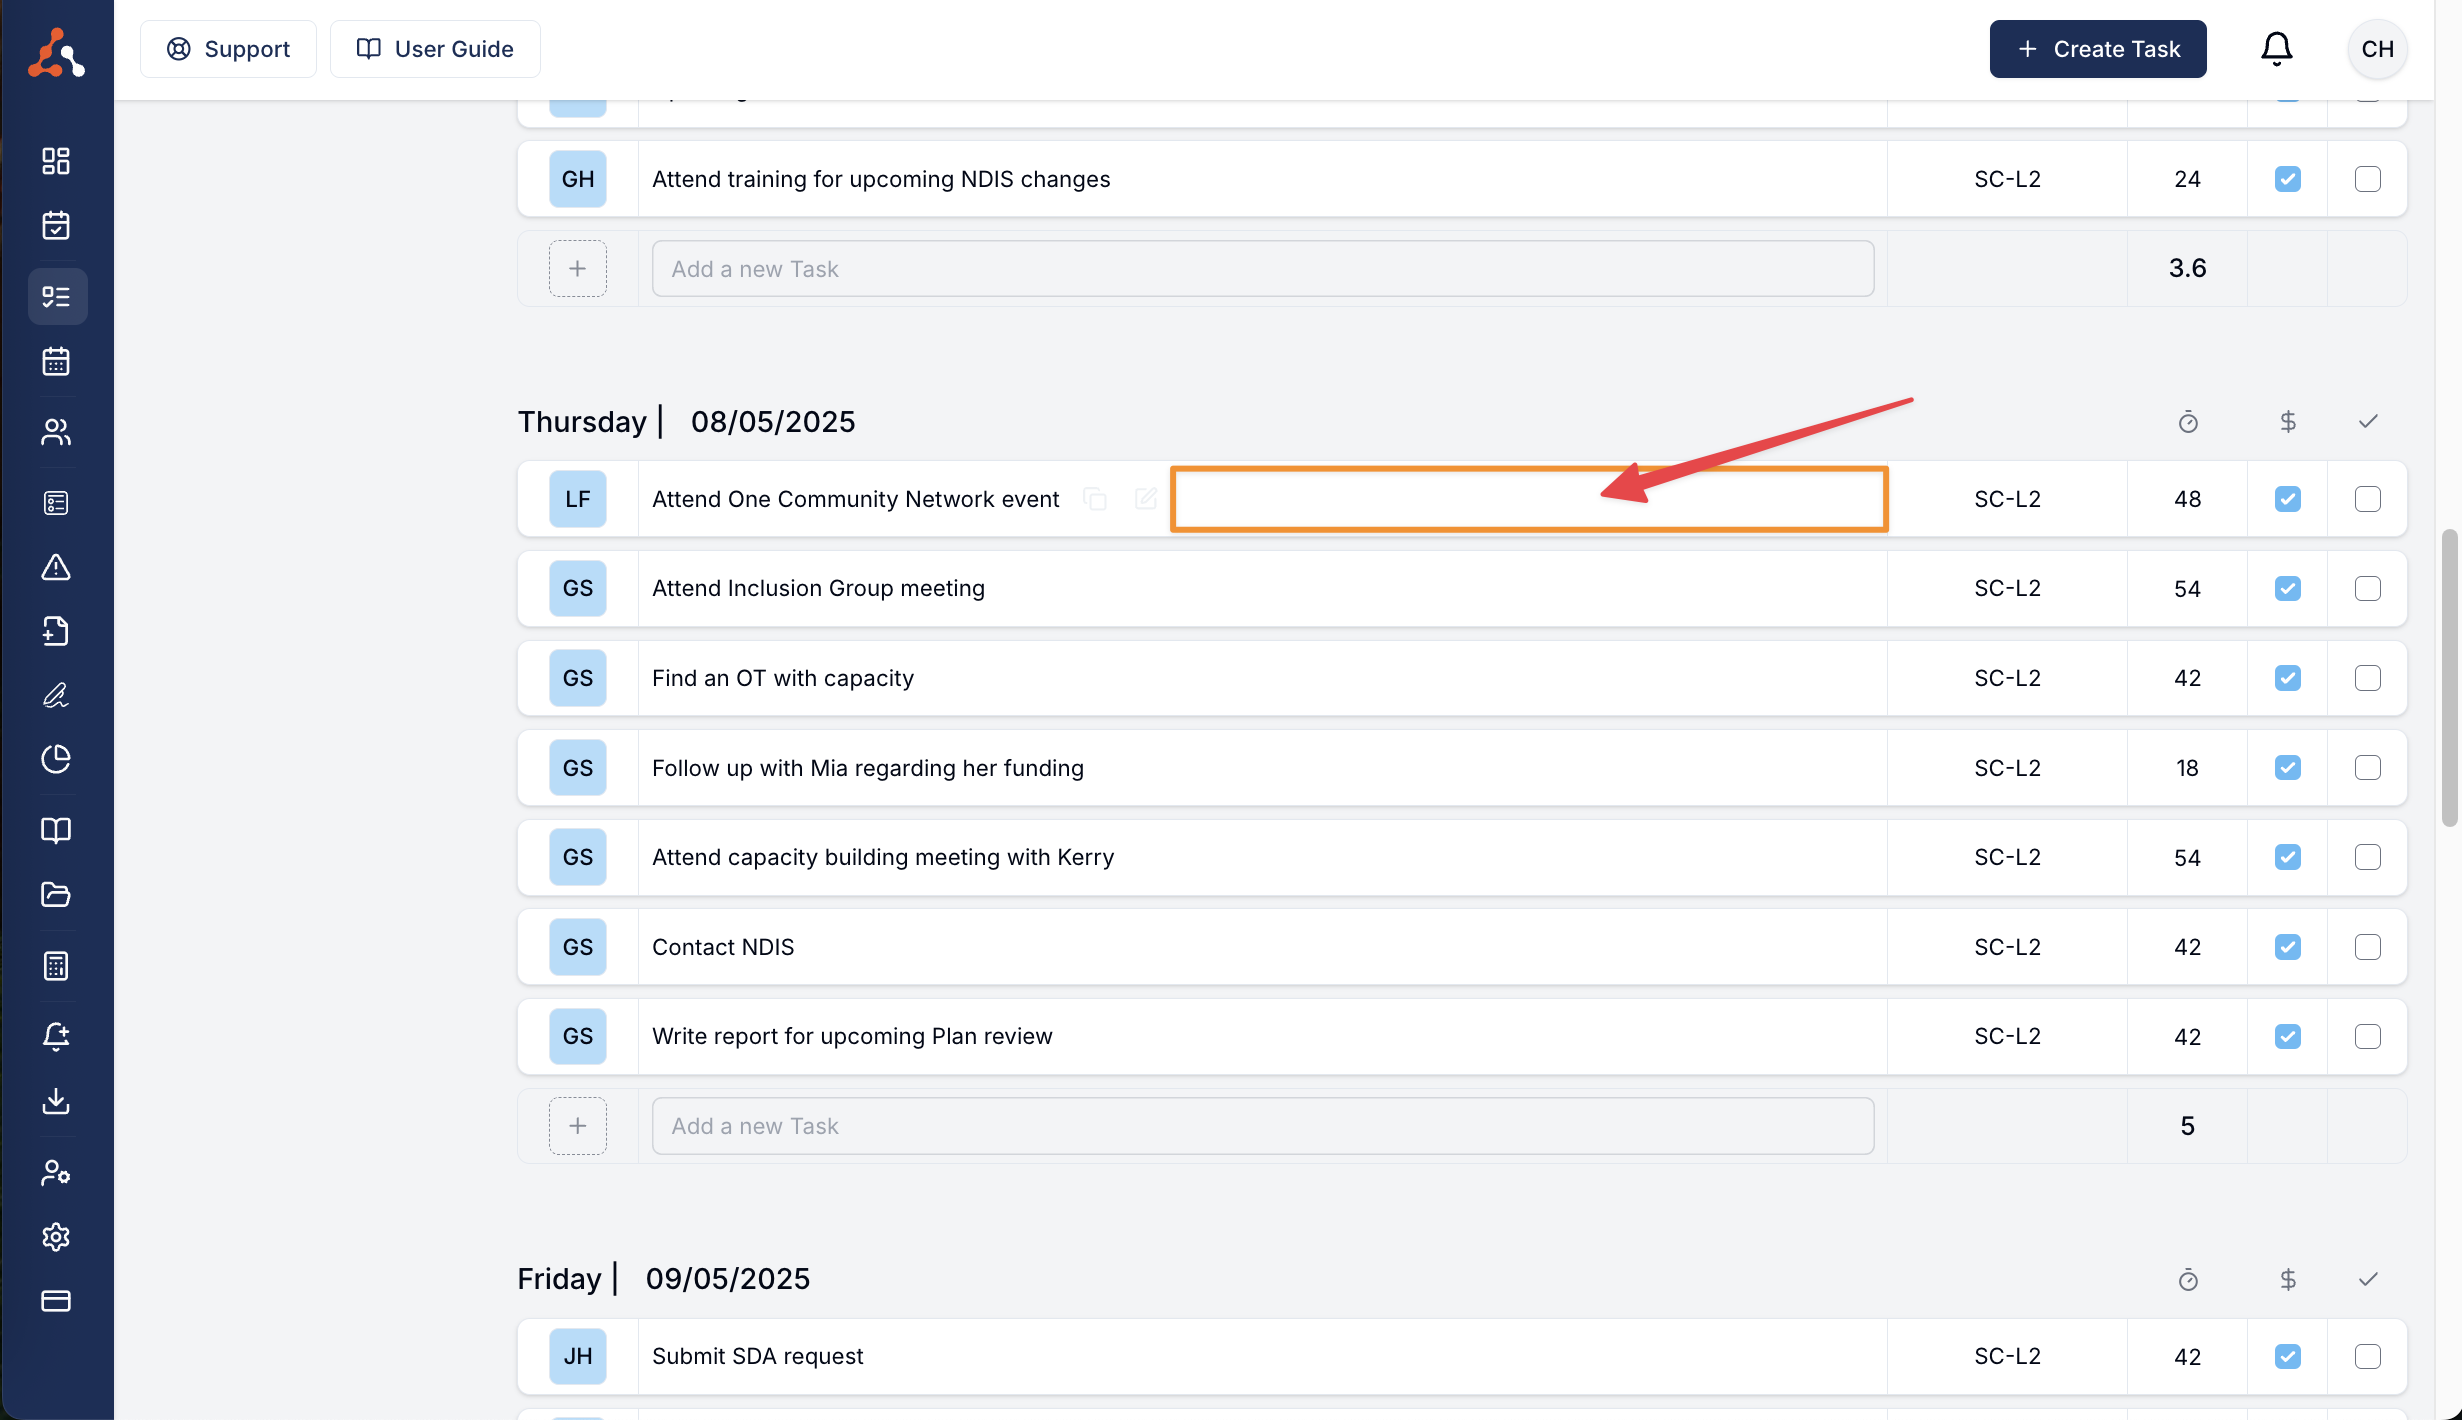
To open the Task View, simply click anywhere on the Task within the Task Board, as shown below.
Task View Options
Within the Task View you have multiple options for assigning information to the Task as evidence for the time you are billing. The image below is an example of the type of information you may want to include, and shows the associated options to add additional information;

- Notes - Click here for our user guide article on this process
- Finance - Click here for our user guide article on this process
- Documents - Click here for our user guide article on this process
- Goals - Click here for our user guide article on this process
Task Actions
There are additional actions that you can perform within a Task. To see these options simply click Actions at the top right of a Task View. Within these options you can;
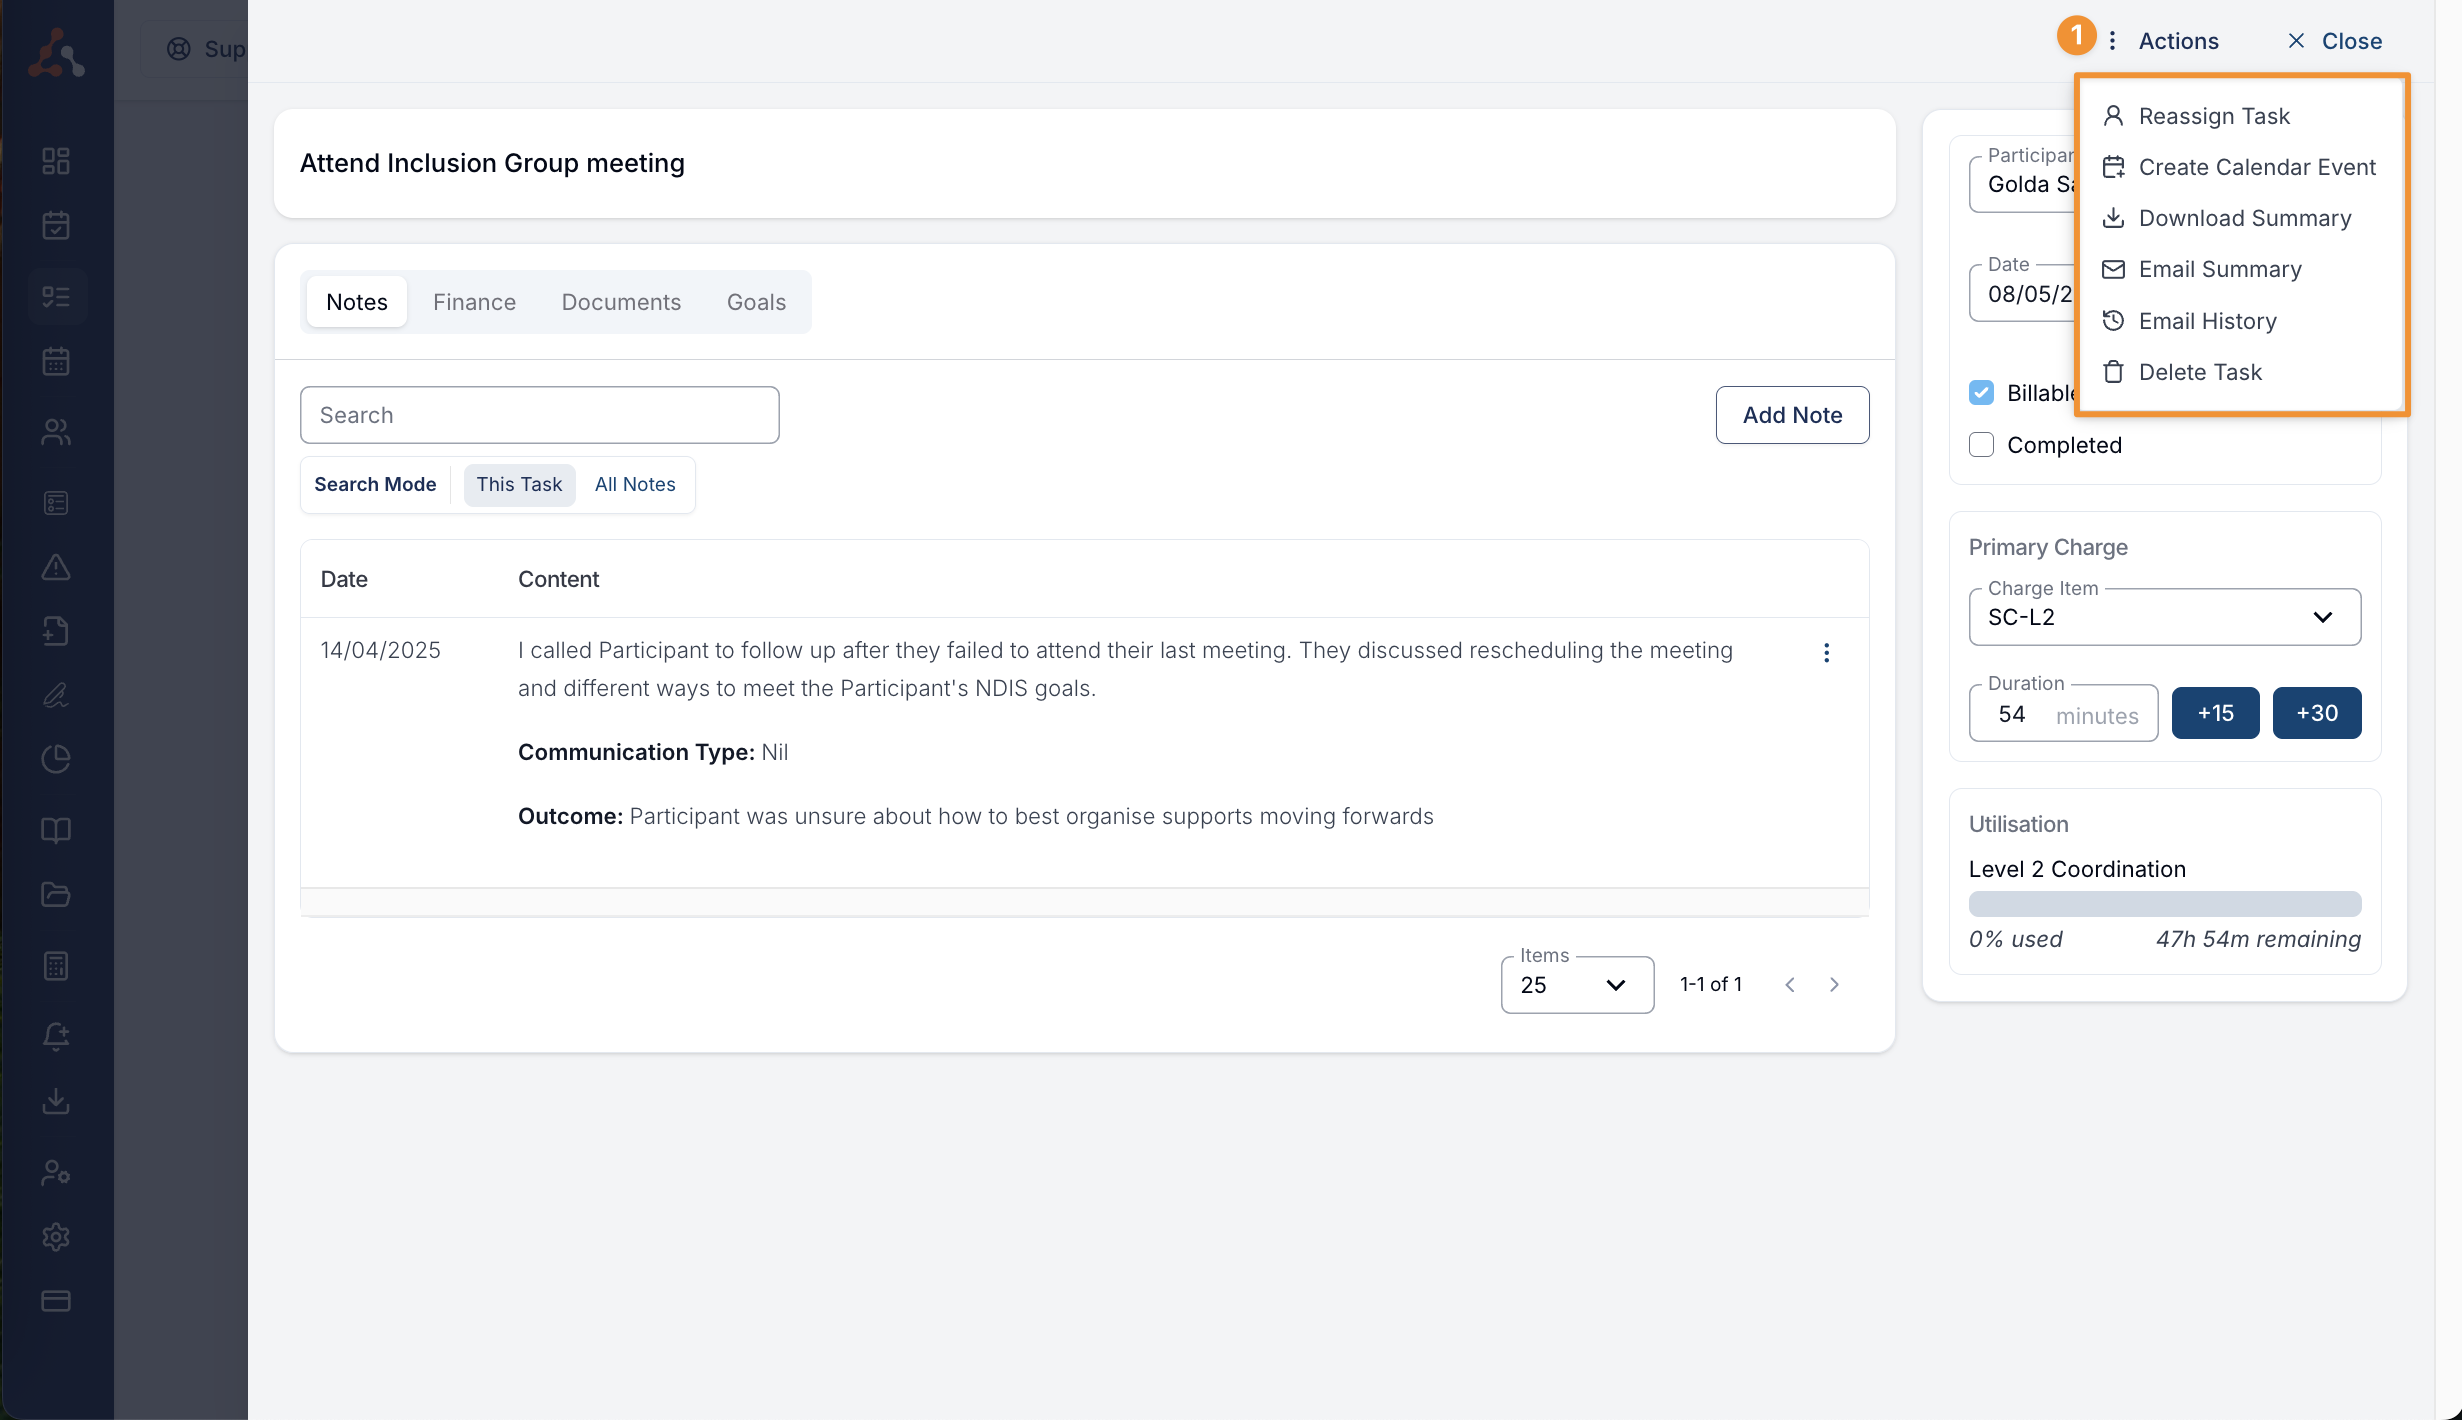
- Reassign a Task to another User - Click here for more information
- Create a Calendar Event from a Task - Click here for more information
- Download a Summary of the Task
- This will download a PDF summary of the Task
- Email the Task Summary
- This will prompt you to choose the recipients and email details, allowing you to send a PDF summary of the Task to the selected recipients
- See the history of the emailed Task Summary
- This will show you who this Task Summary was emailed to and when.
- Delete the Task
Task Further Options
On the right hand side of the Task View you can see the options you selected on the Task Board when creating the Task. These include;
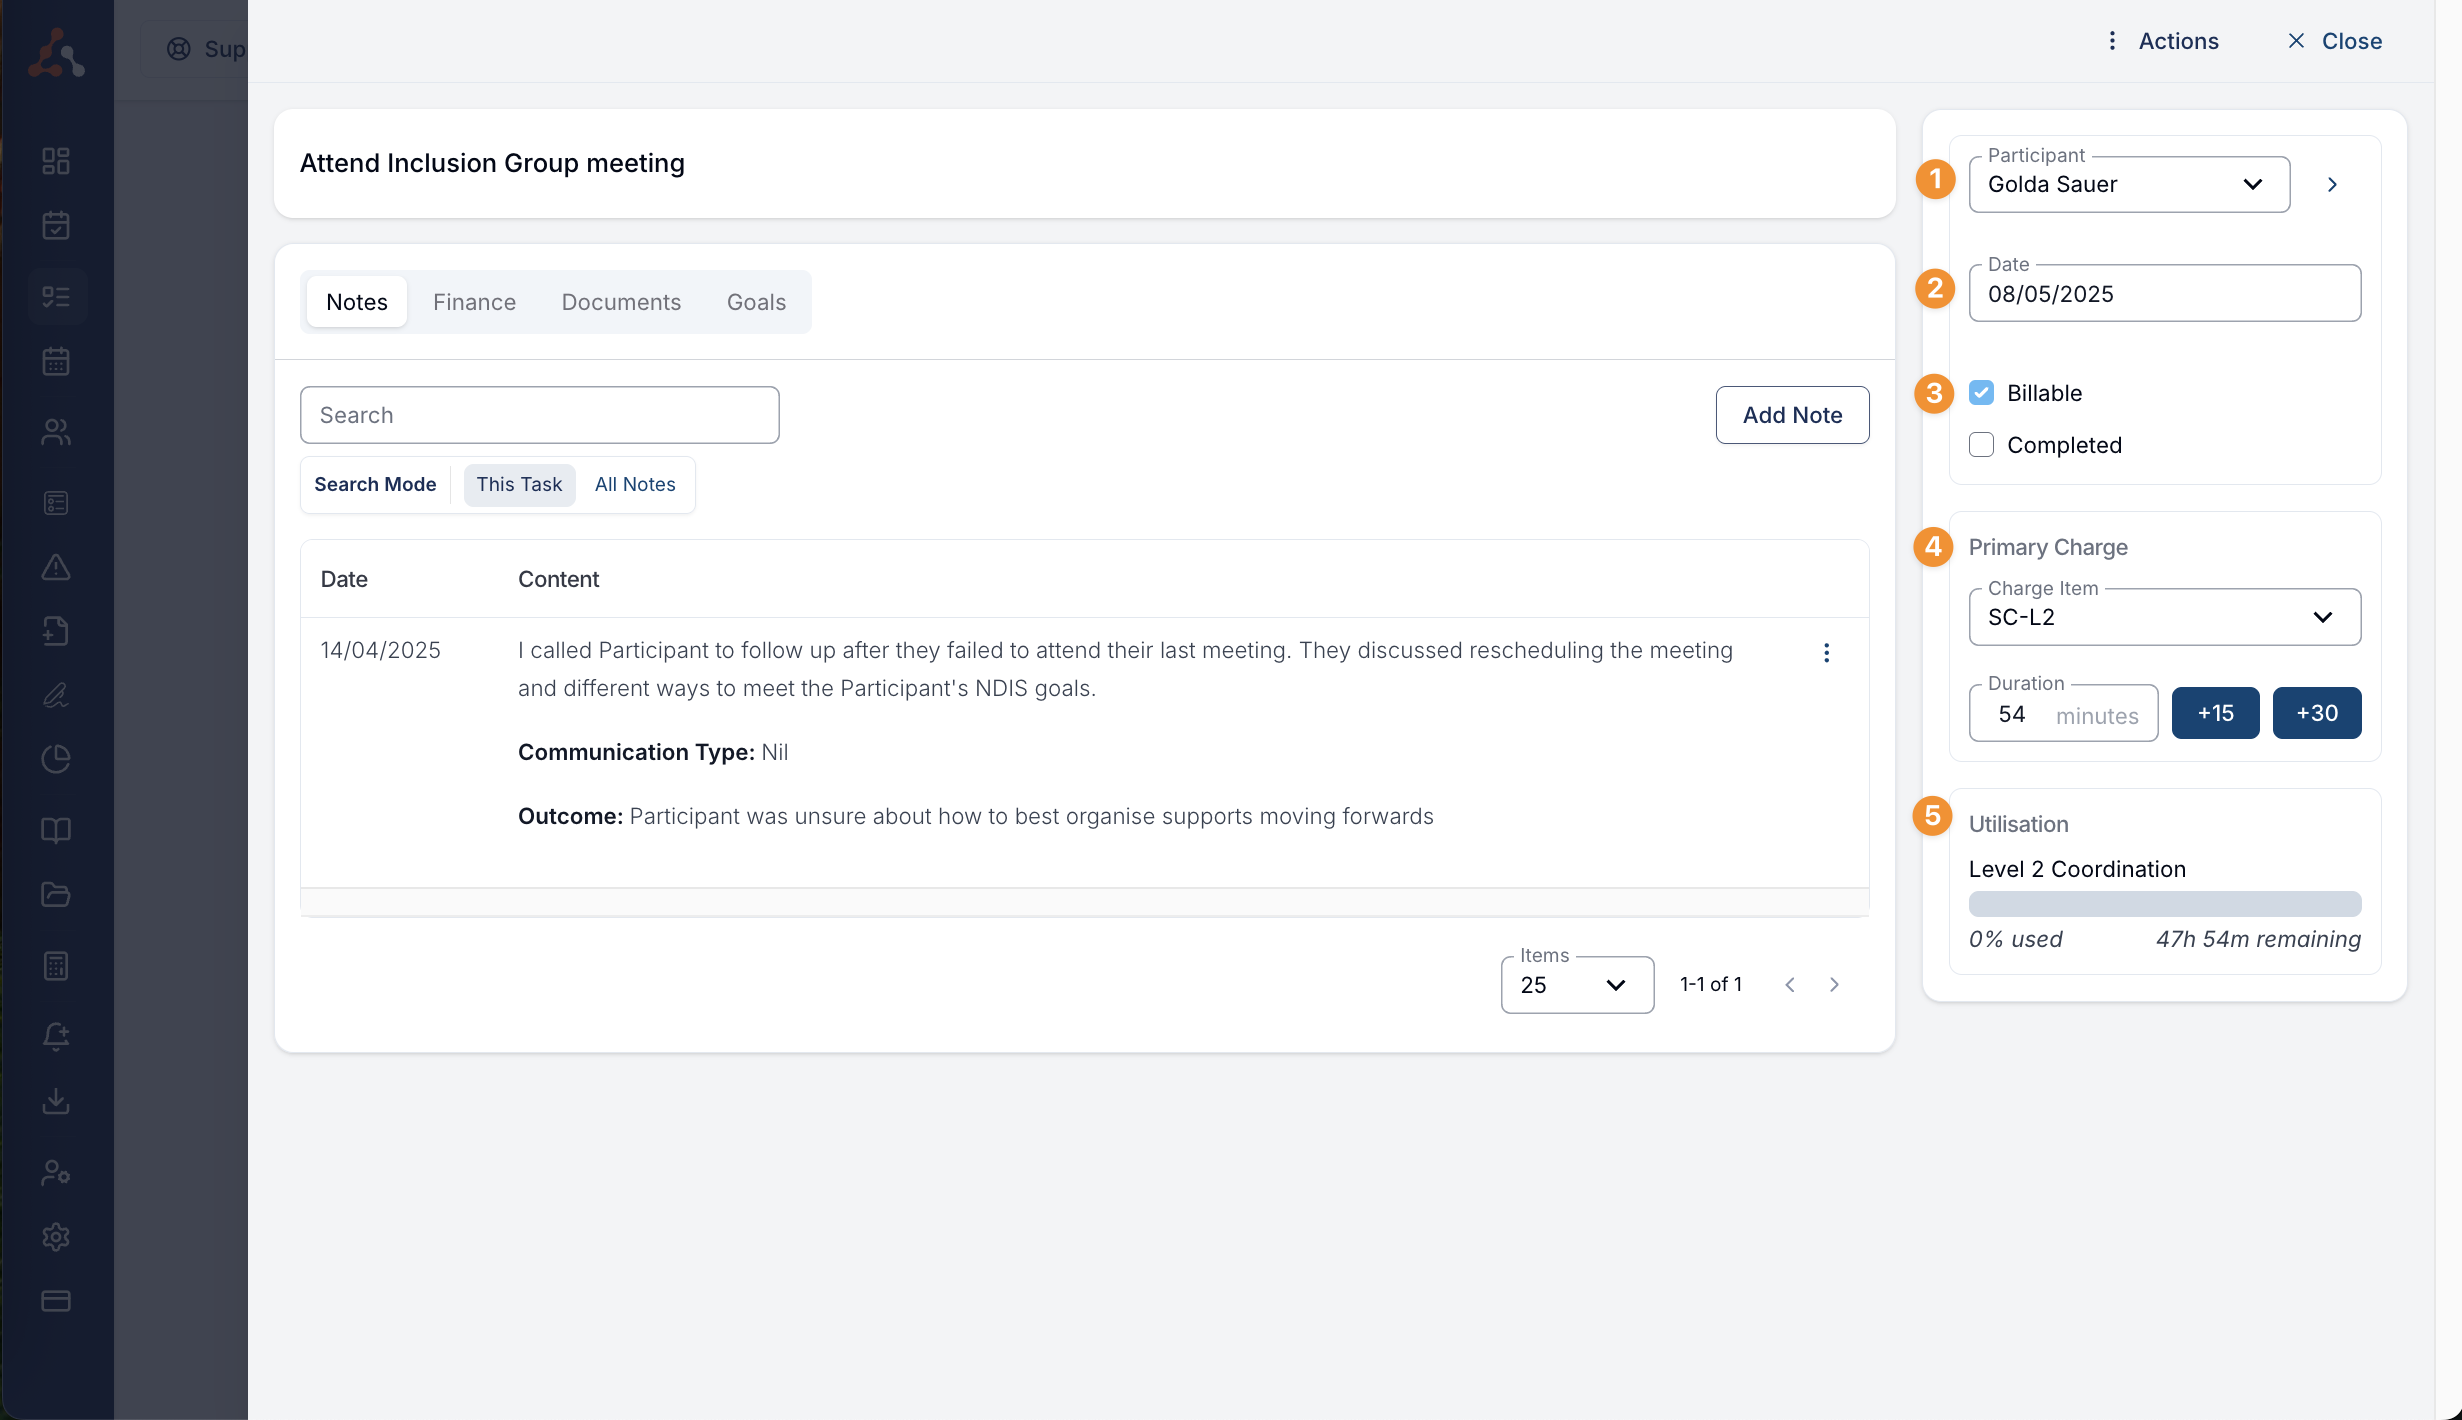
- Participant Name
- Date of the Task
- Billable and Completion Status
- Primary Charge Item and Billable time added
- The Utilisation of the Participants funding based on the Charge Item selected.
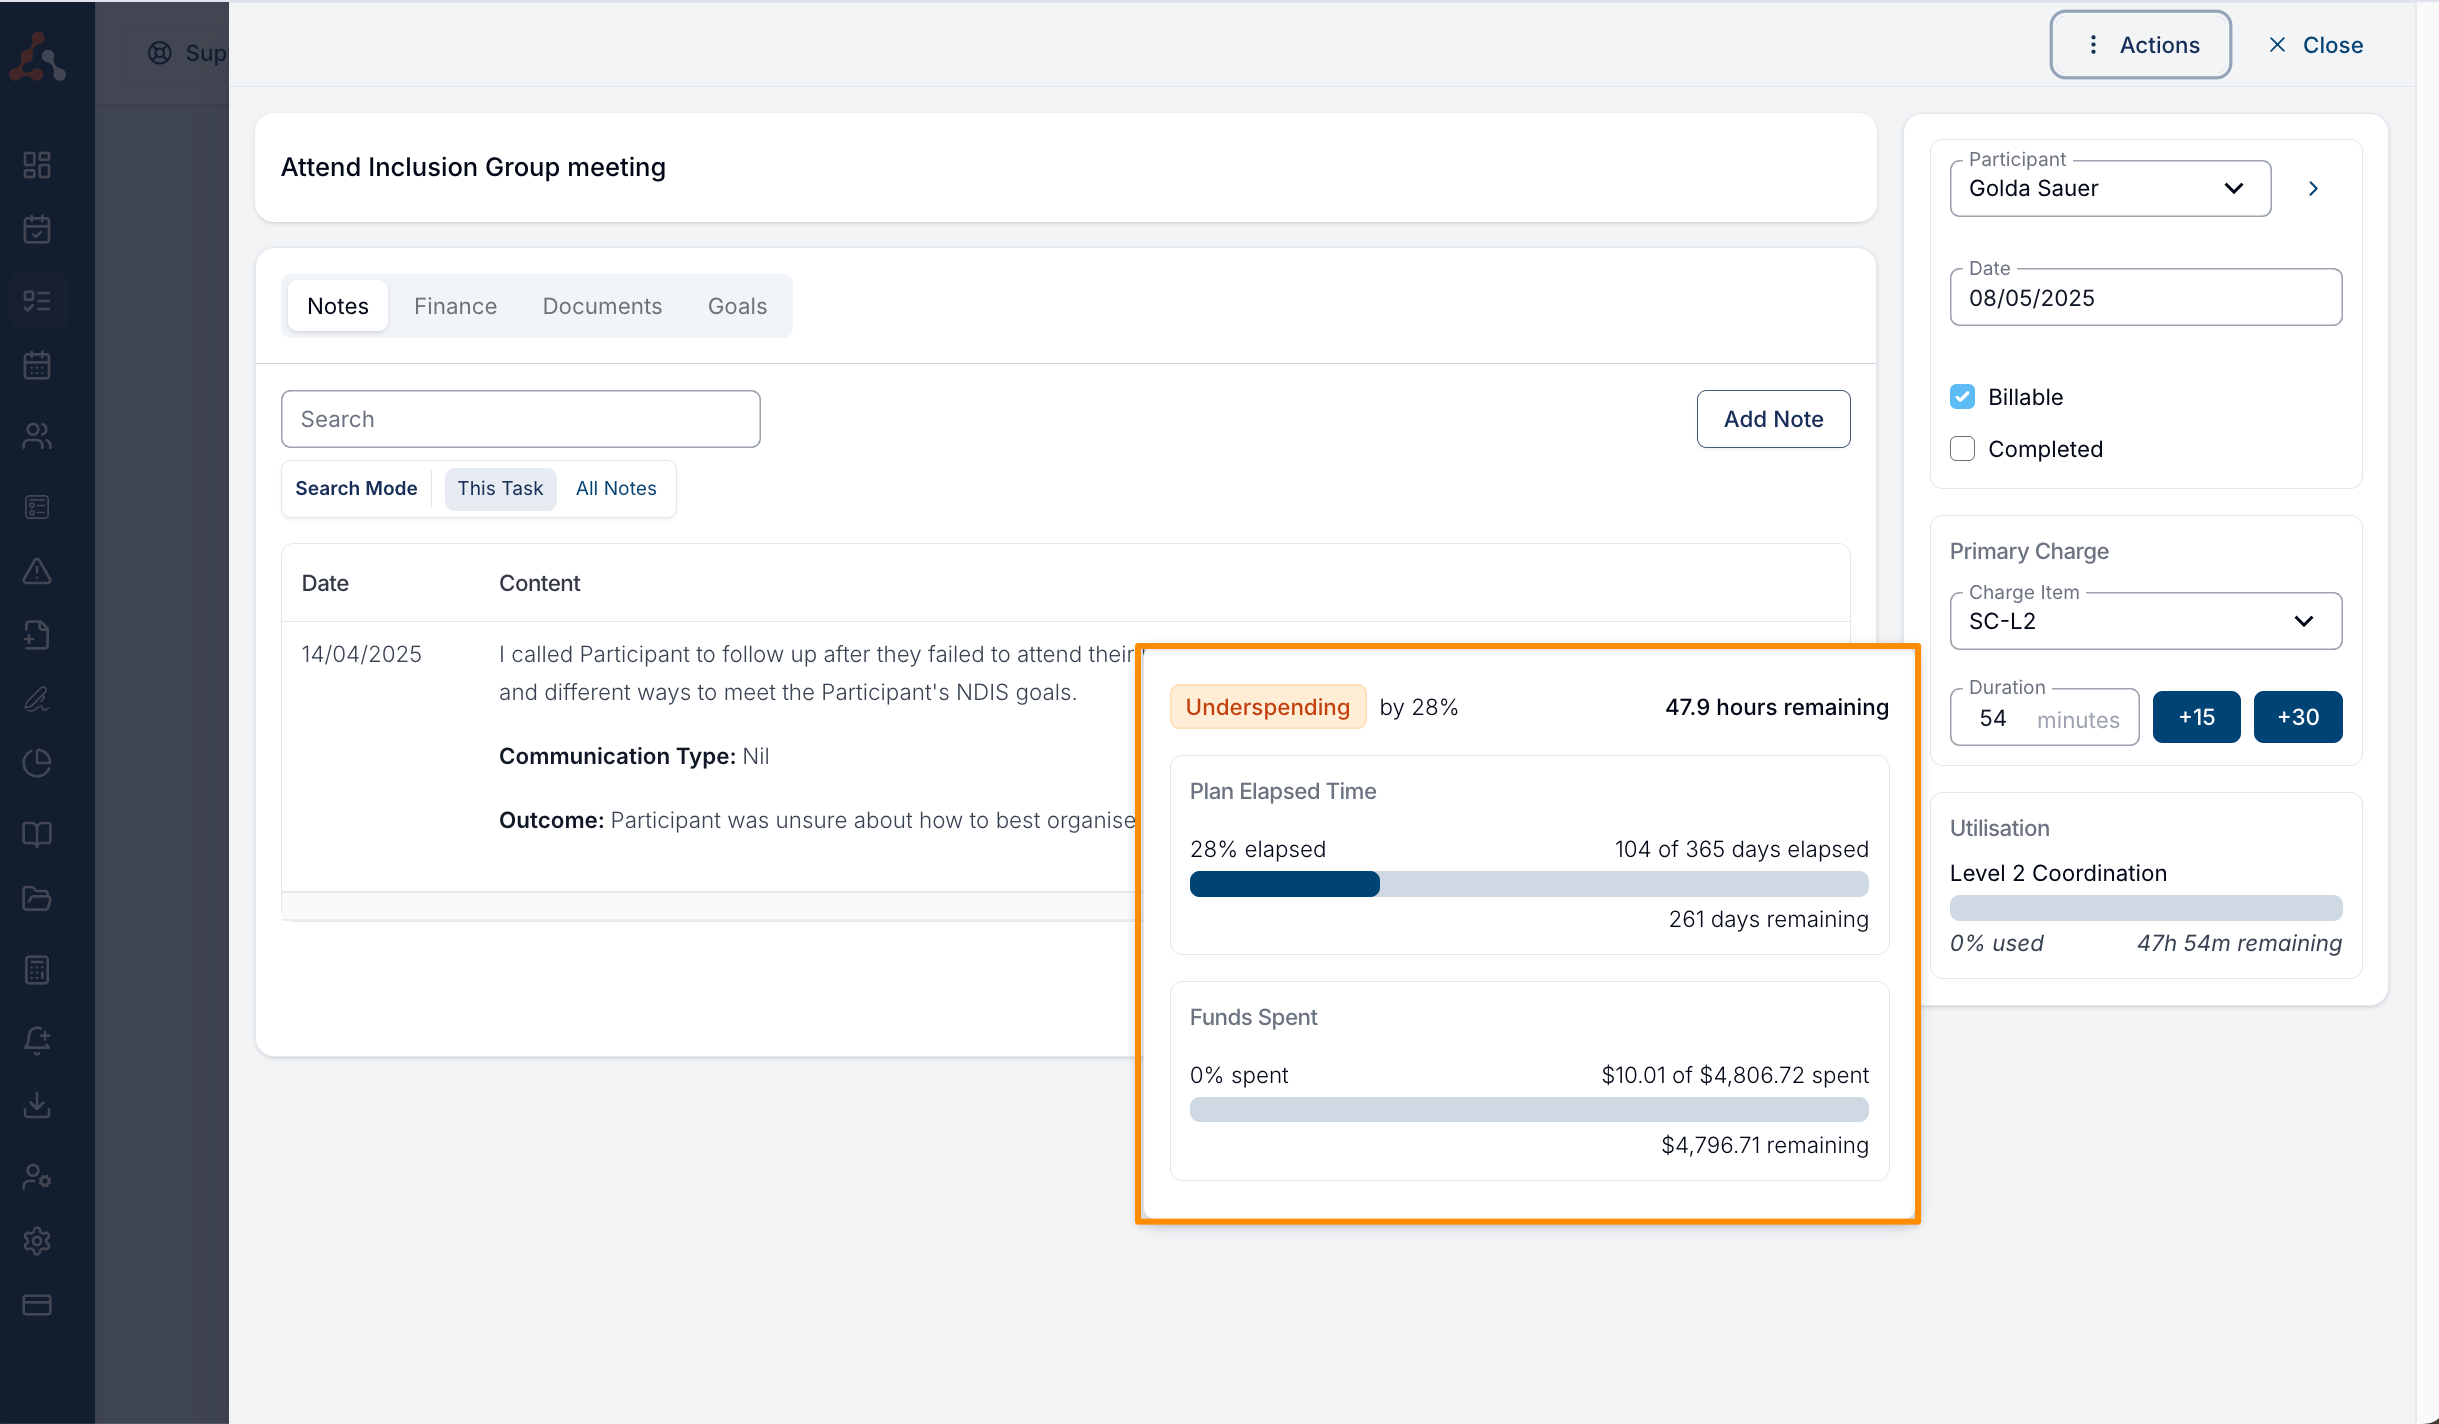
If you hover your mouse over the Utilisation, this will show you the breakdown of the Participants funding based on the Plan Elapsed Time and funding remaining in hours and also a dollar ($) amount. You will also see a utilisation variance (Underspending or Overspending) — this is based on Plan Elapsed Time Vs. Funding Spent. This is similar to what you would see within the Participants Utilisation menu on their profile and also the Utilisation Report.