Staff Payments - Processing Staff Payments Guide
Overview
Want Access To This Feature?
The Staff Payments feature must be enabled by the Account Owner via the Optional Features menu within Settings, before it can be set up. You can check out our guide for more information.
This user guide article you will learn how to create and complete Staff Payments Batch's. See the steps for this process below.
Staff Payment Settings
Have you set up your Staff Payment settings first? You can find our user guide on this process through this link here.
Staff Payment Batch Criteria
To be able to create a staff payment batch, the relevant charge items must have a Payment Rate assigned, the staff payment settings are updated and the relevant staff members must be assigned the 'Contractor' user employee type (you can learn more about this in our user guide article here). Once this has been completed you will then need to process (finalise) an Invoice batch before you can create and finalise a Staff Payment Batch. To learn more about the invoicing process you can read our user guide article here that outlines this in detail.
Invoices
The invoices generated by by Invoice Batch do not need to be marked as Paid for them to appear as a payable item in the Staff Payment Batch.
Staff Payment Batch Process
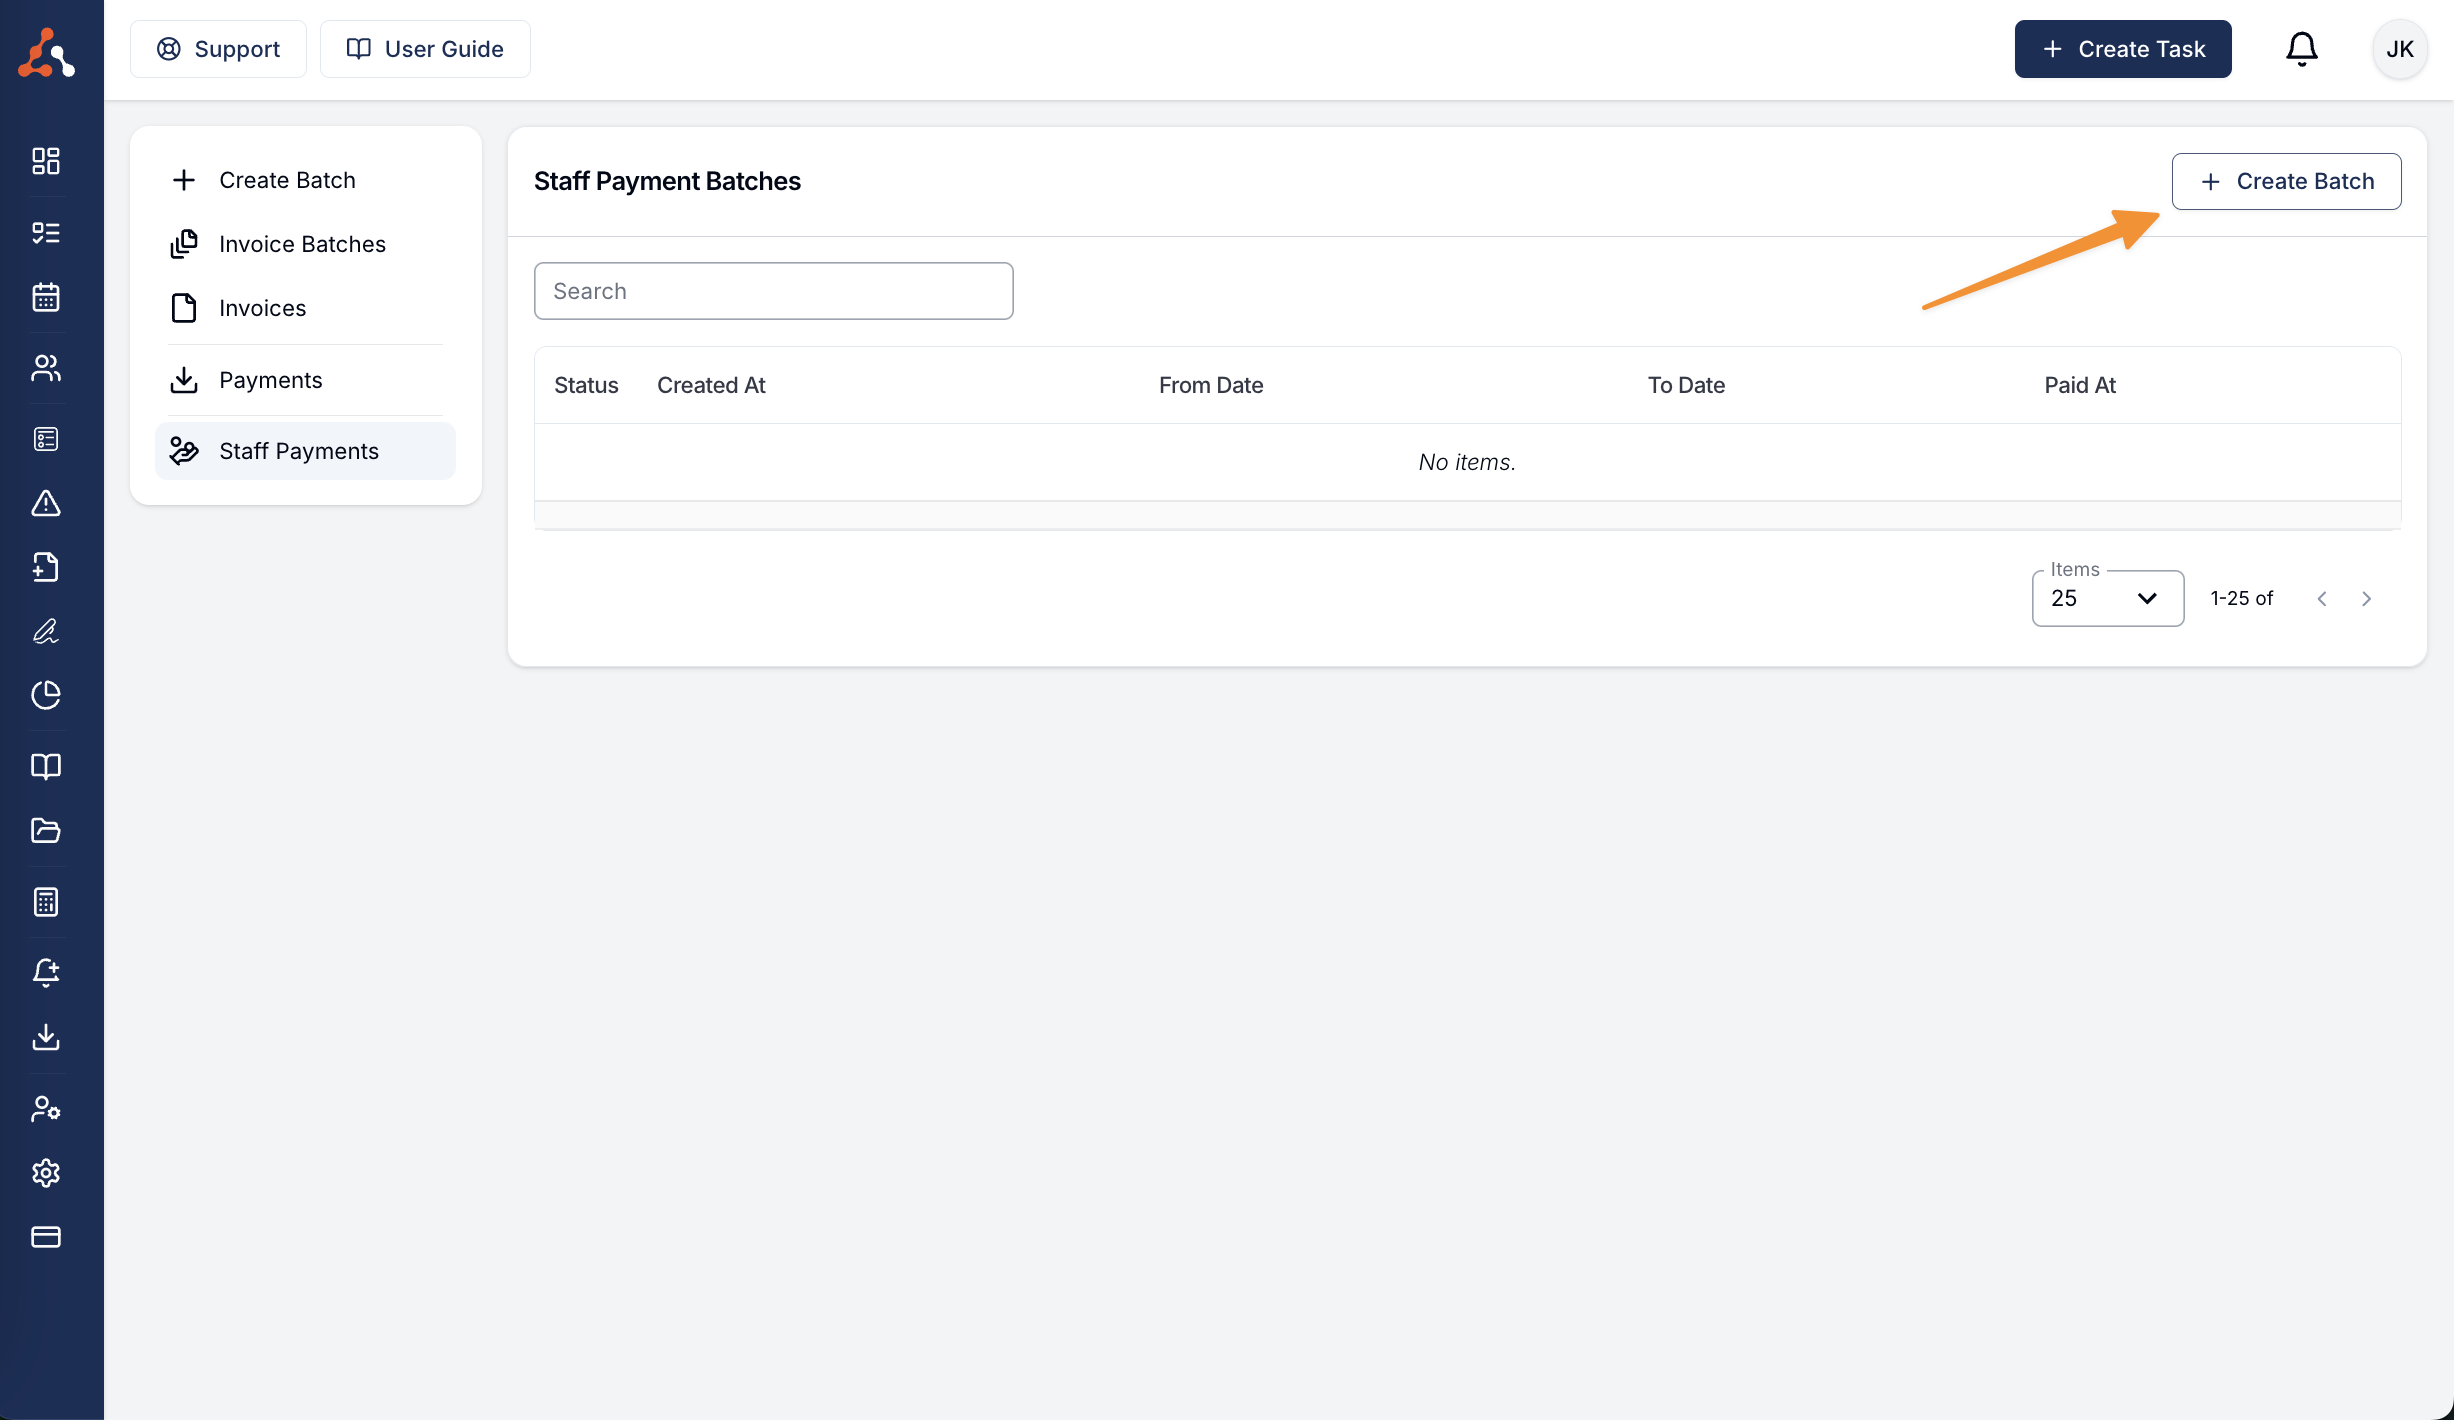
Once you have finalised an invoice batch, you can now create a Staff Payment Batch from the Staff Payments menu within the Finance functionality.
To create a Staff Payment Batch from within this menu click 'Create Batch'.
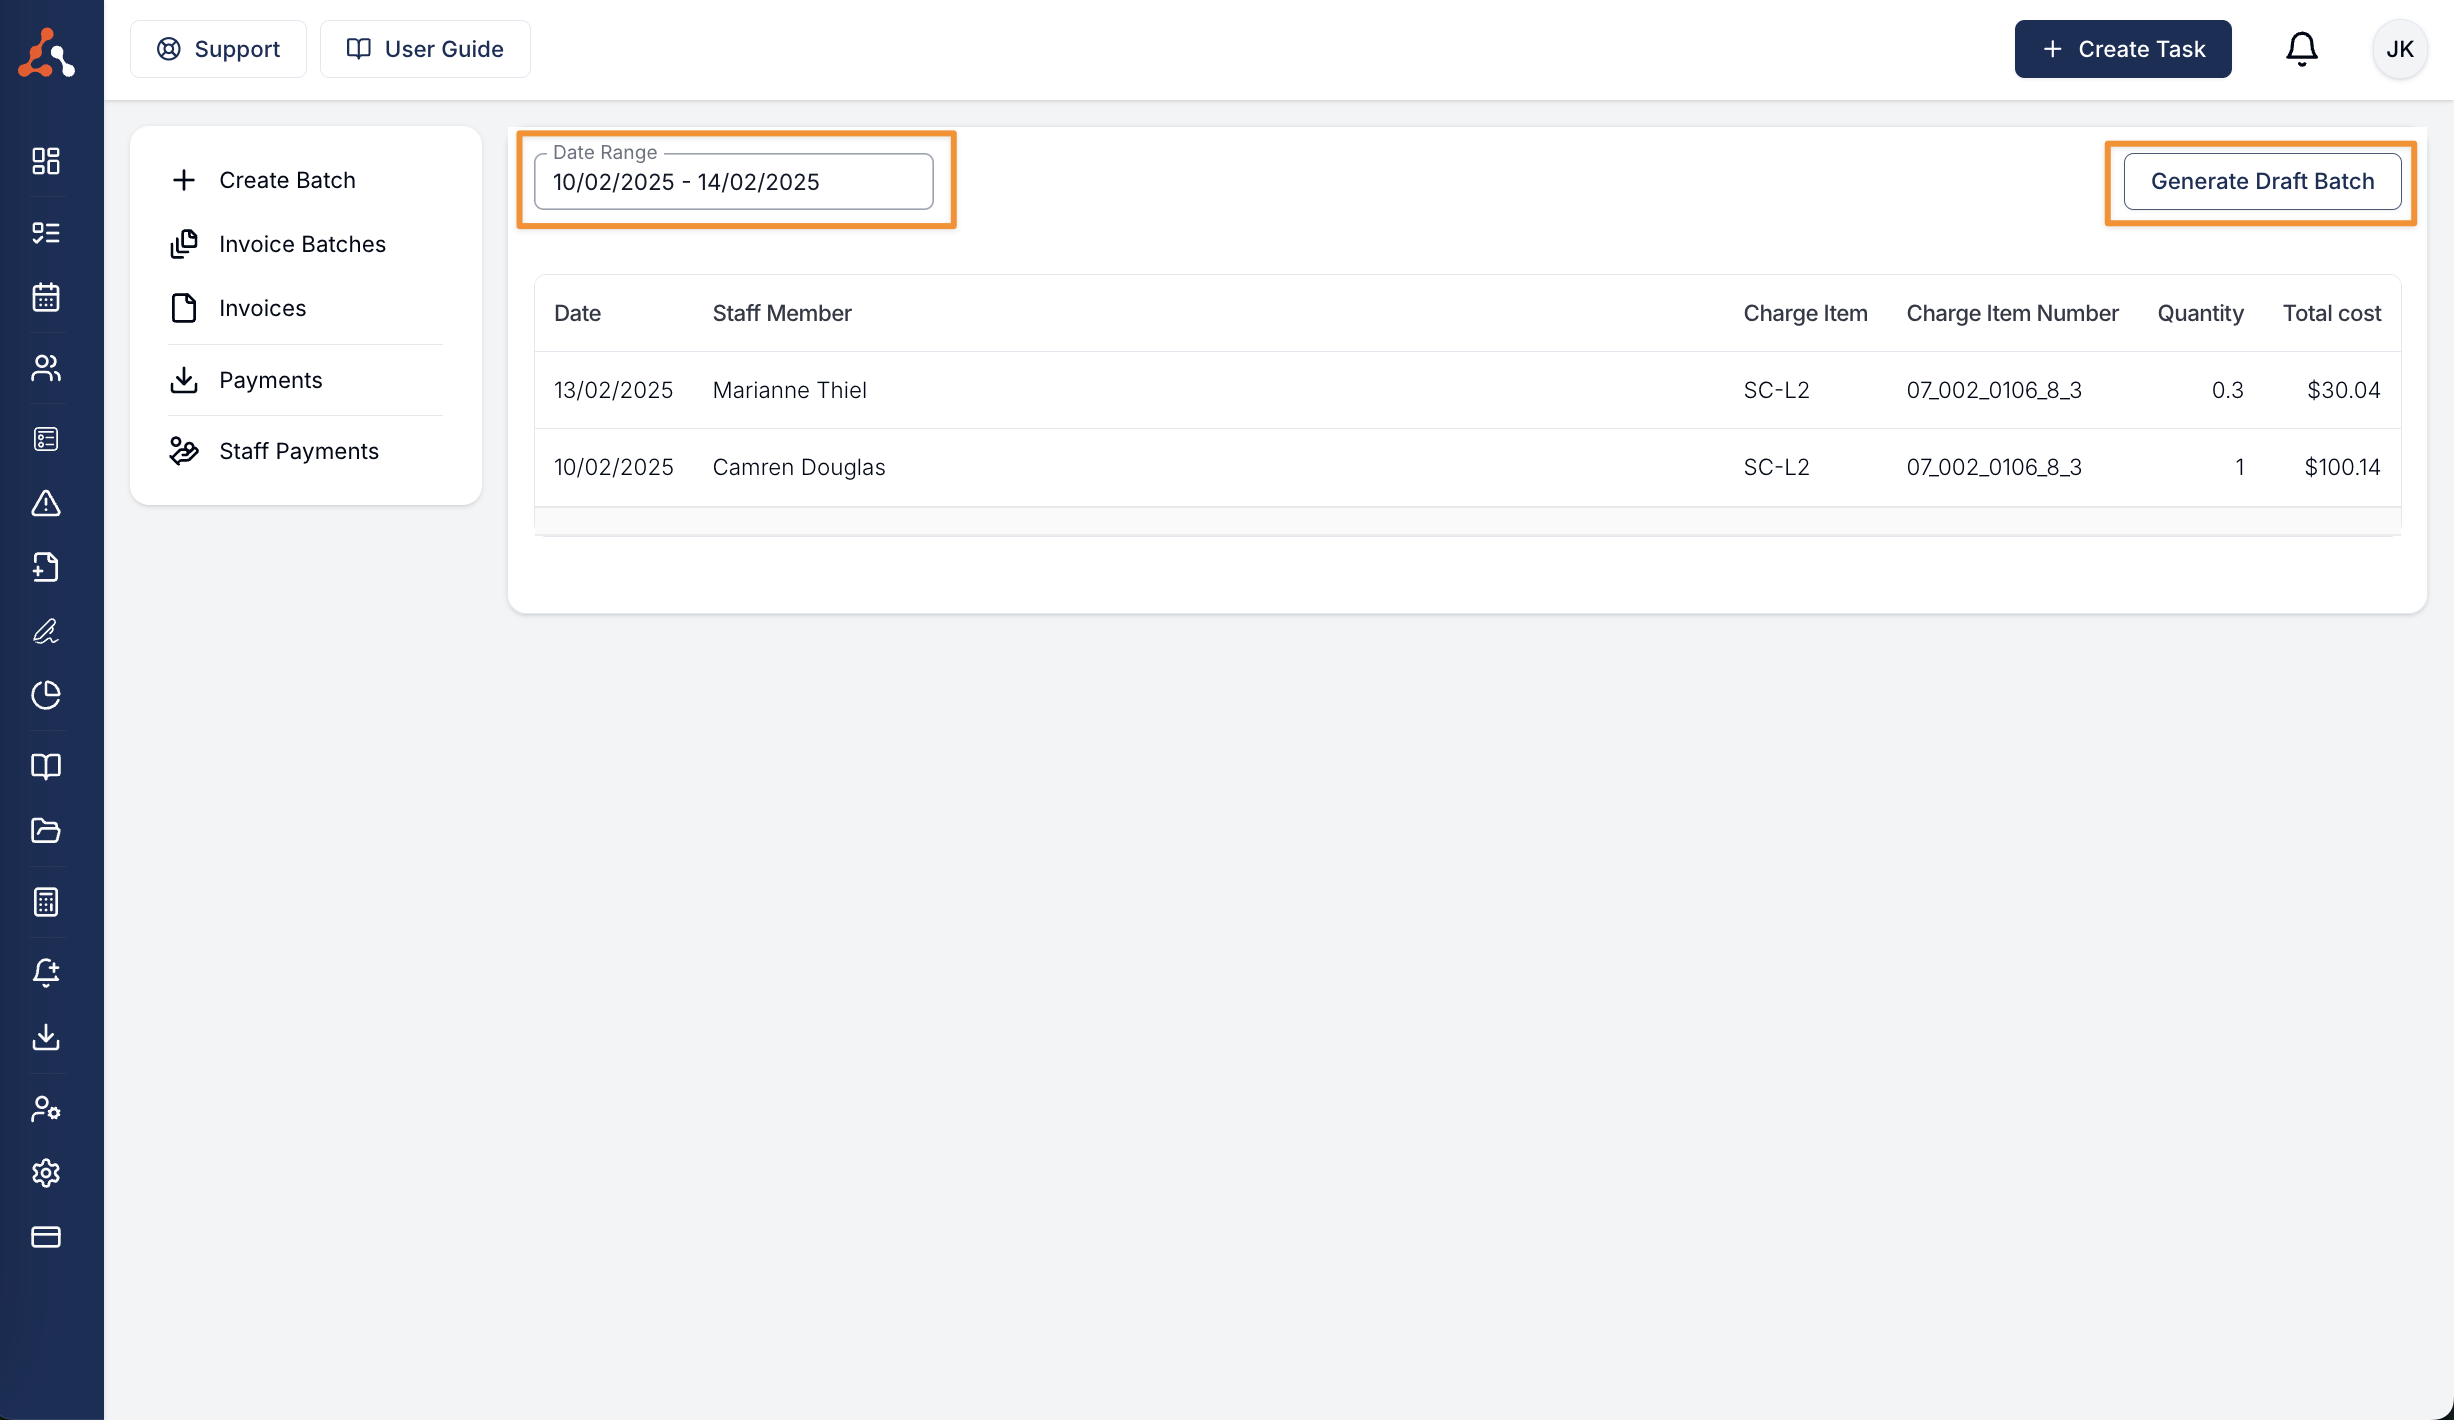
Once you have selected create batch you will be taken to the create payment batch screen. Within this menu you can select the date range for the charges you want to create a staff payment for. This function works similarly to how the invoice batch creation screen works. If you have charges outside of the range selected, Astalty will prompt you to adjust the dates to the earliest date of a charge. Once you are happy select 'generate draft batch'.
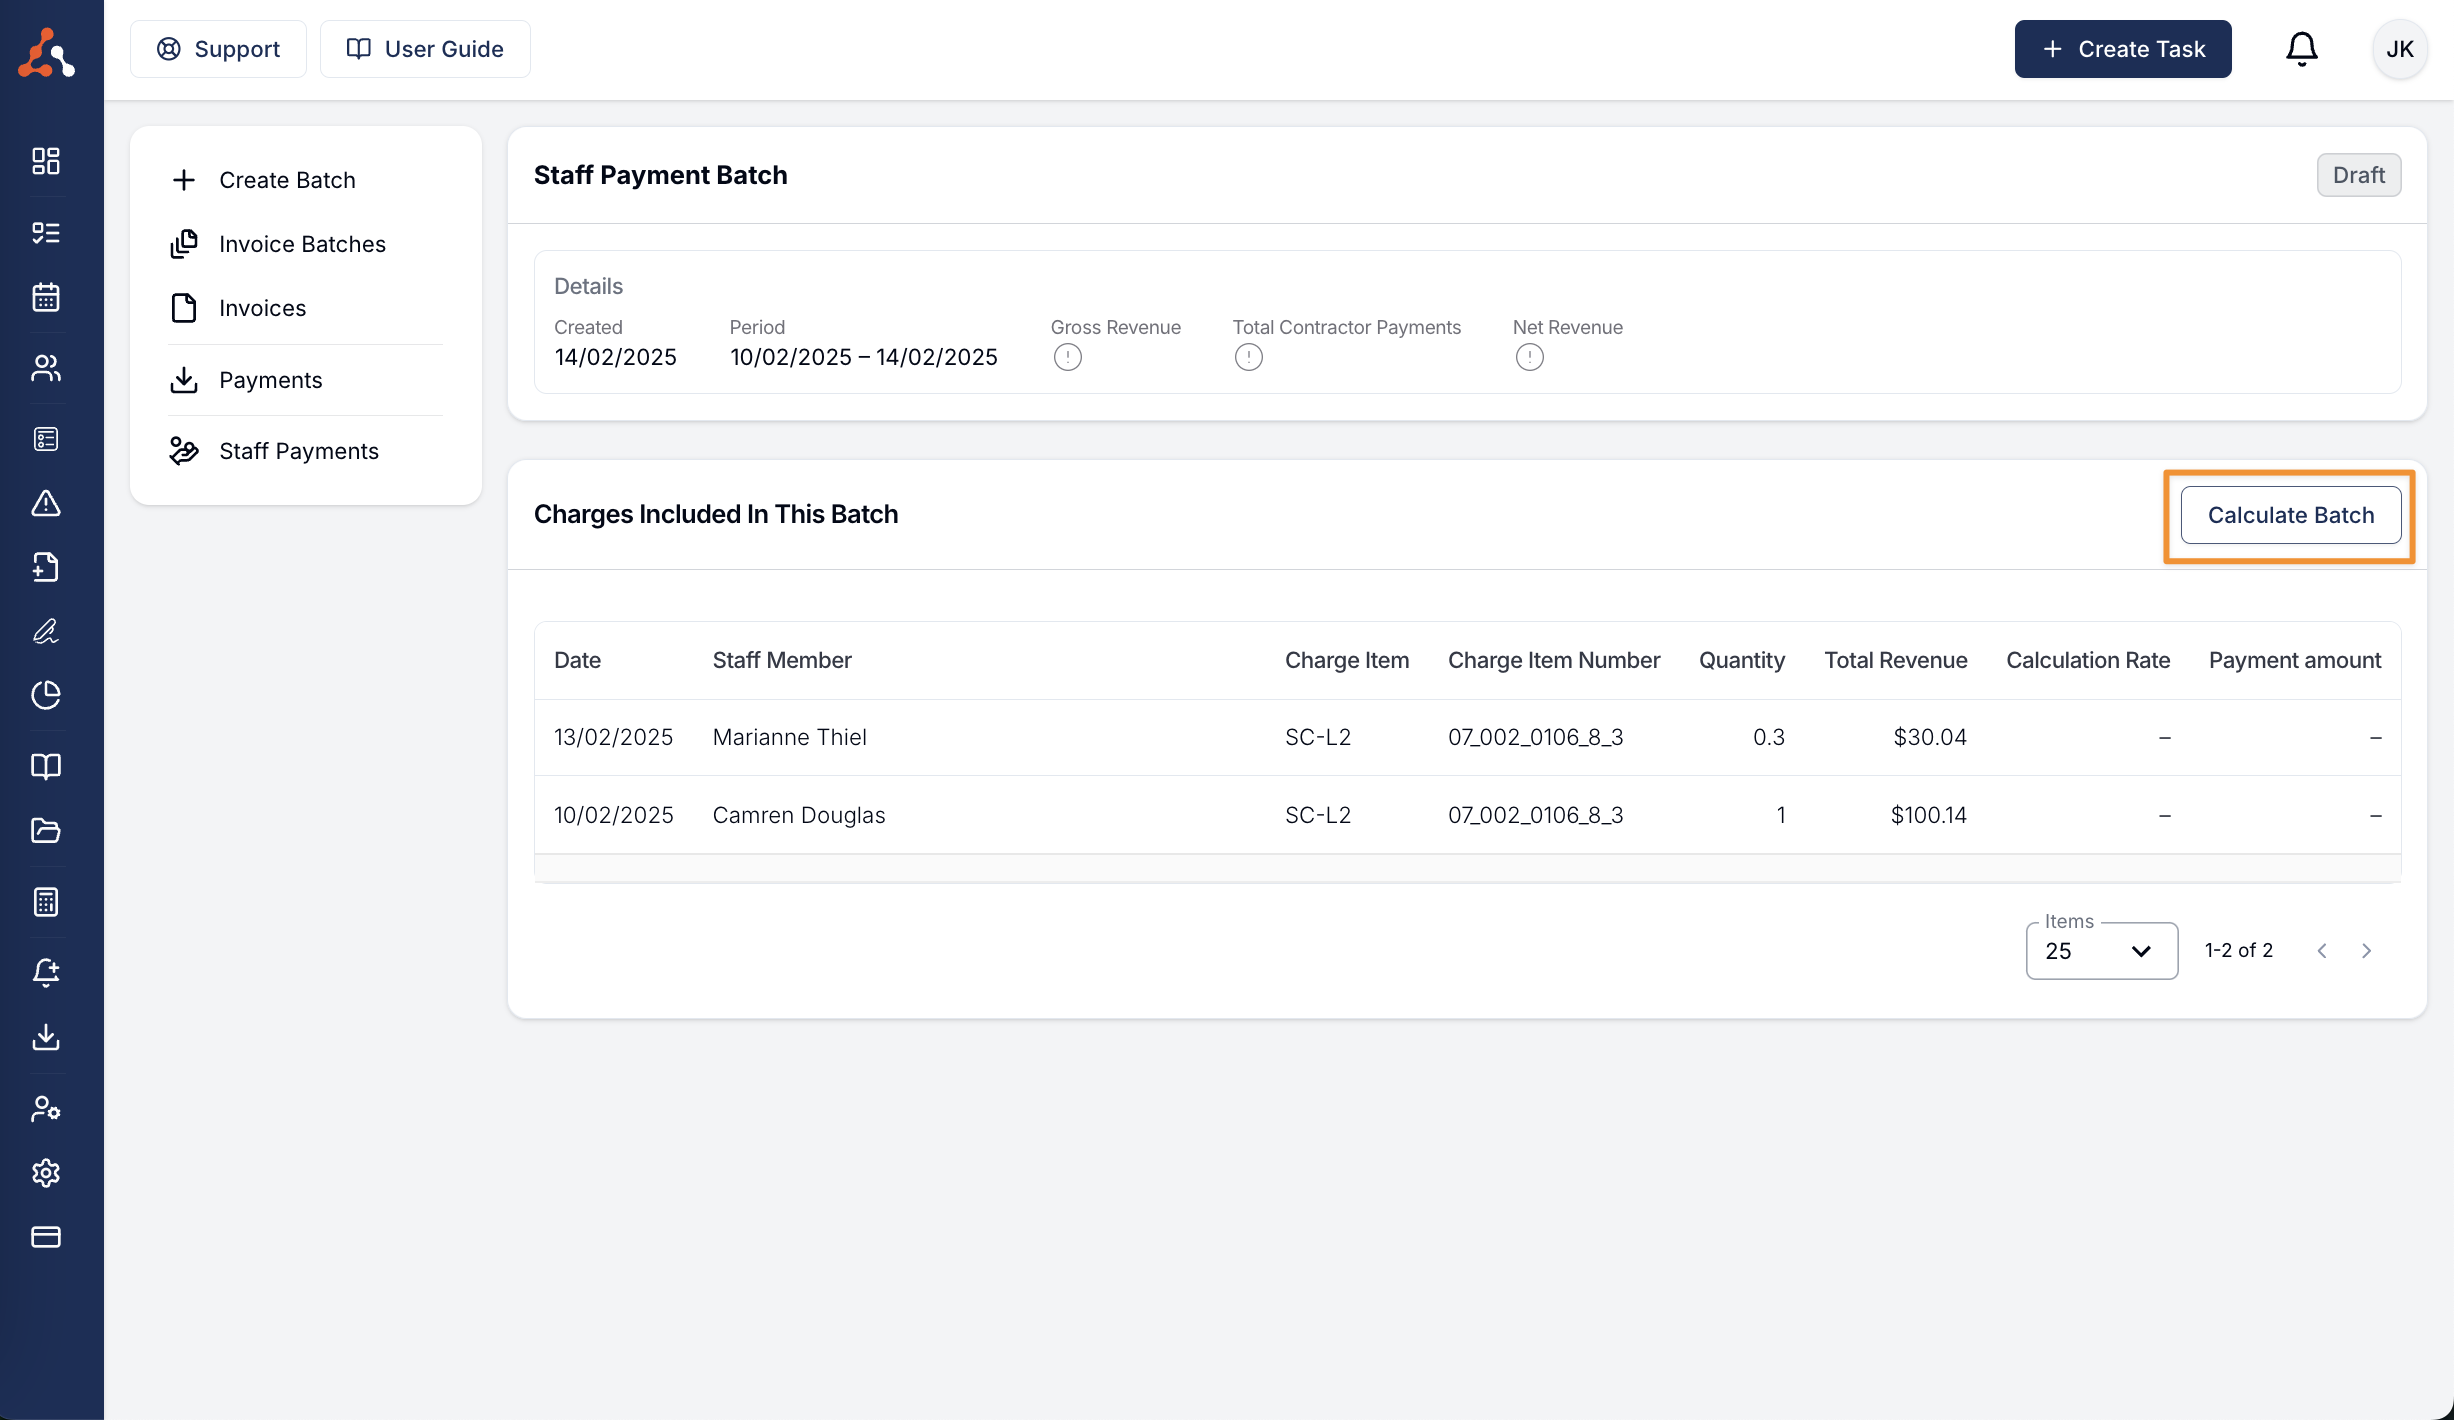
The next step to finalise the Payment Batch is to click 'Calculate Batch' and hit 'Confirm' in the pop up window.
At this point the calculation happens behind the scenes and Astalty will work out how much the total payment amount will be per charge within this batch.
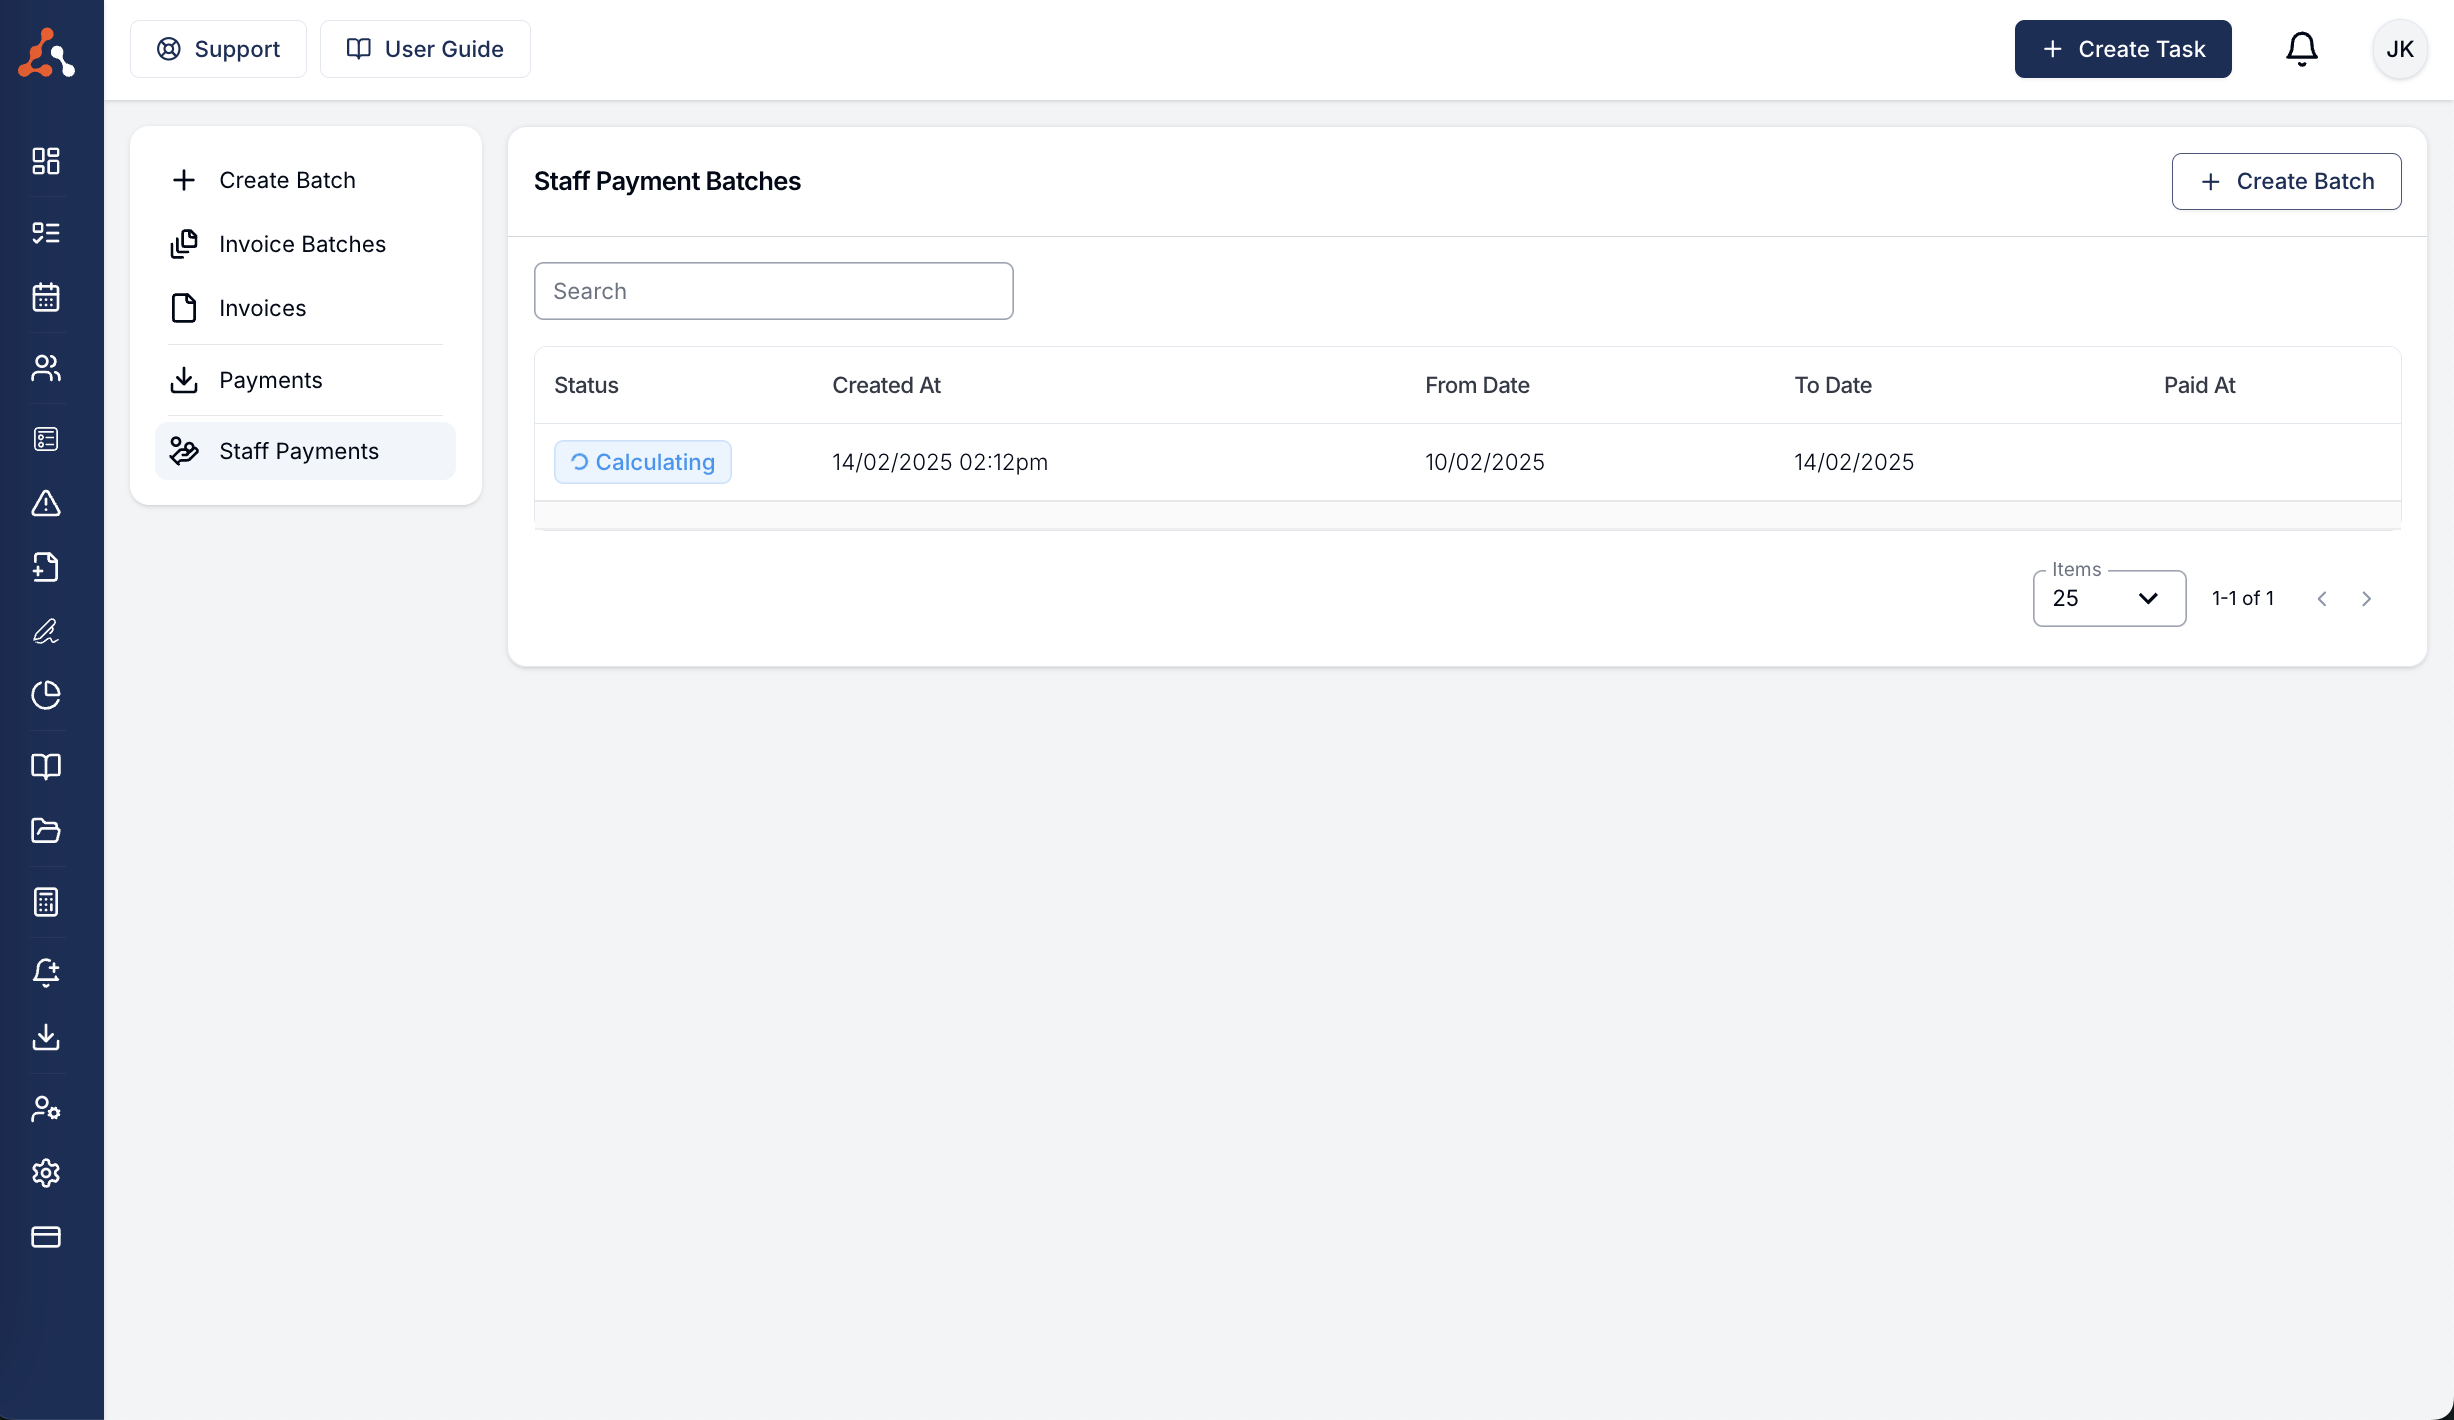
You will then be taken to the Staff Payment Batches screen while the batch calculates.
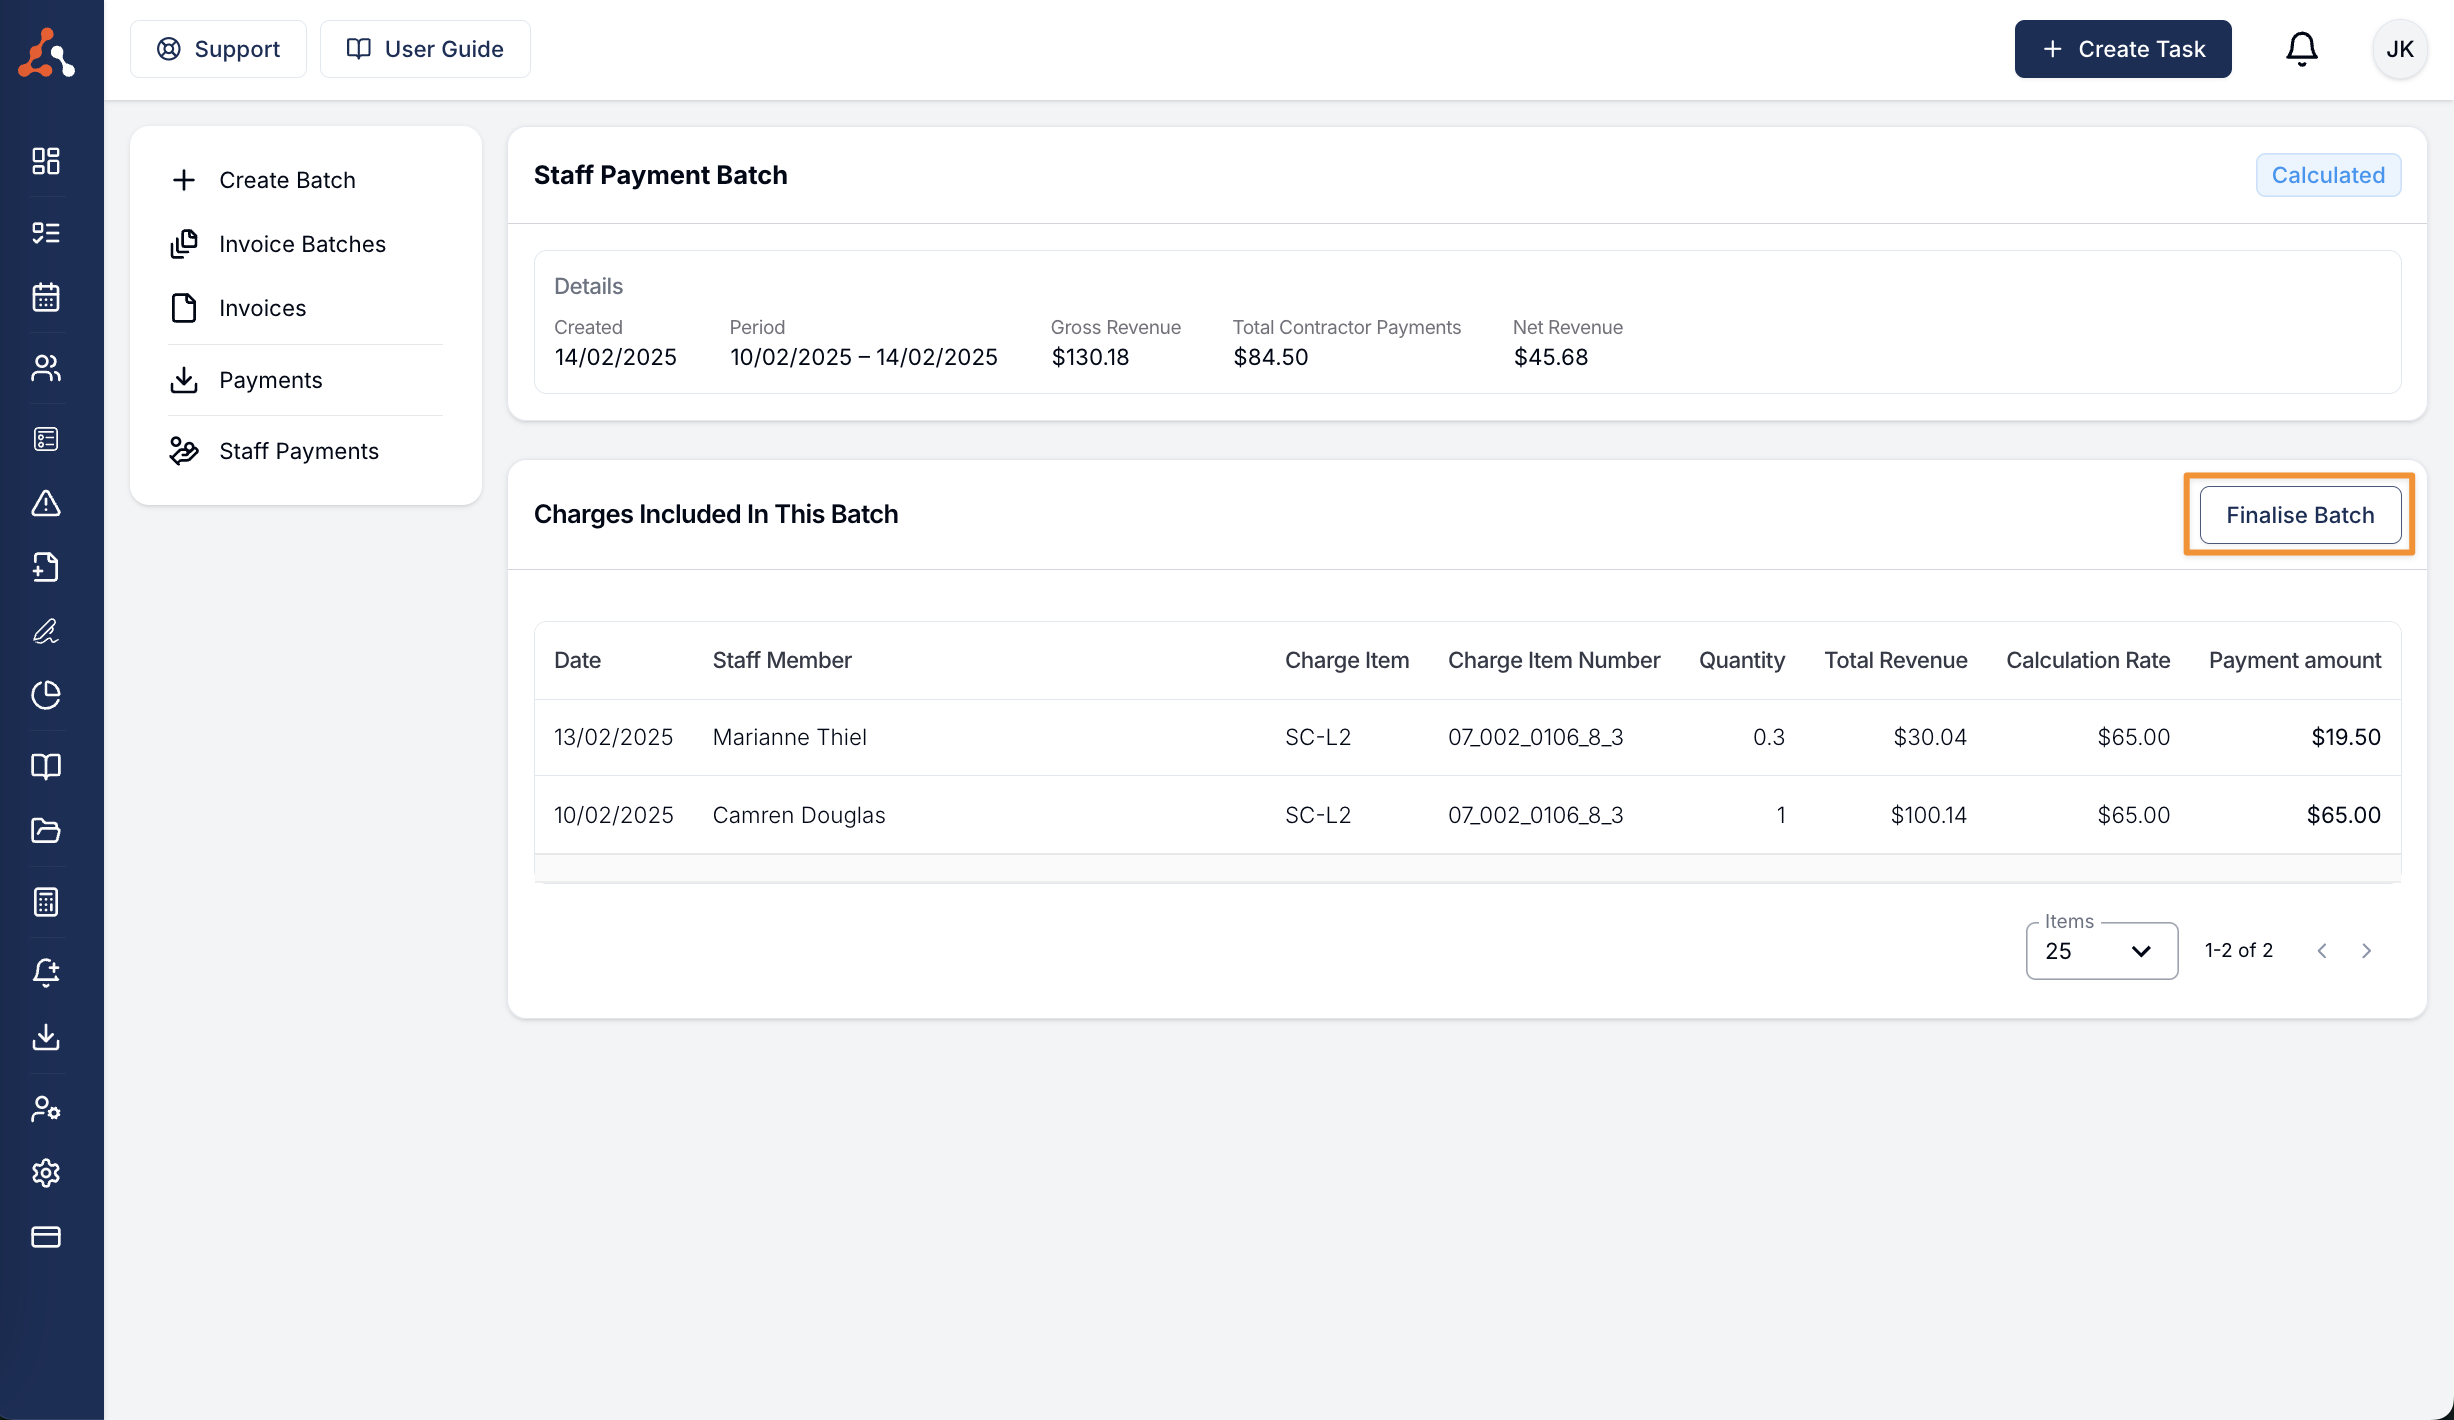
Once this is finished calculating, click into the calculated batch. Here you will see the calculated charges included within the batch. Once everything looks correct you can click 'Finalise Batch' and hit 'Confirm' to finalise the Payment Batch.
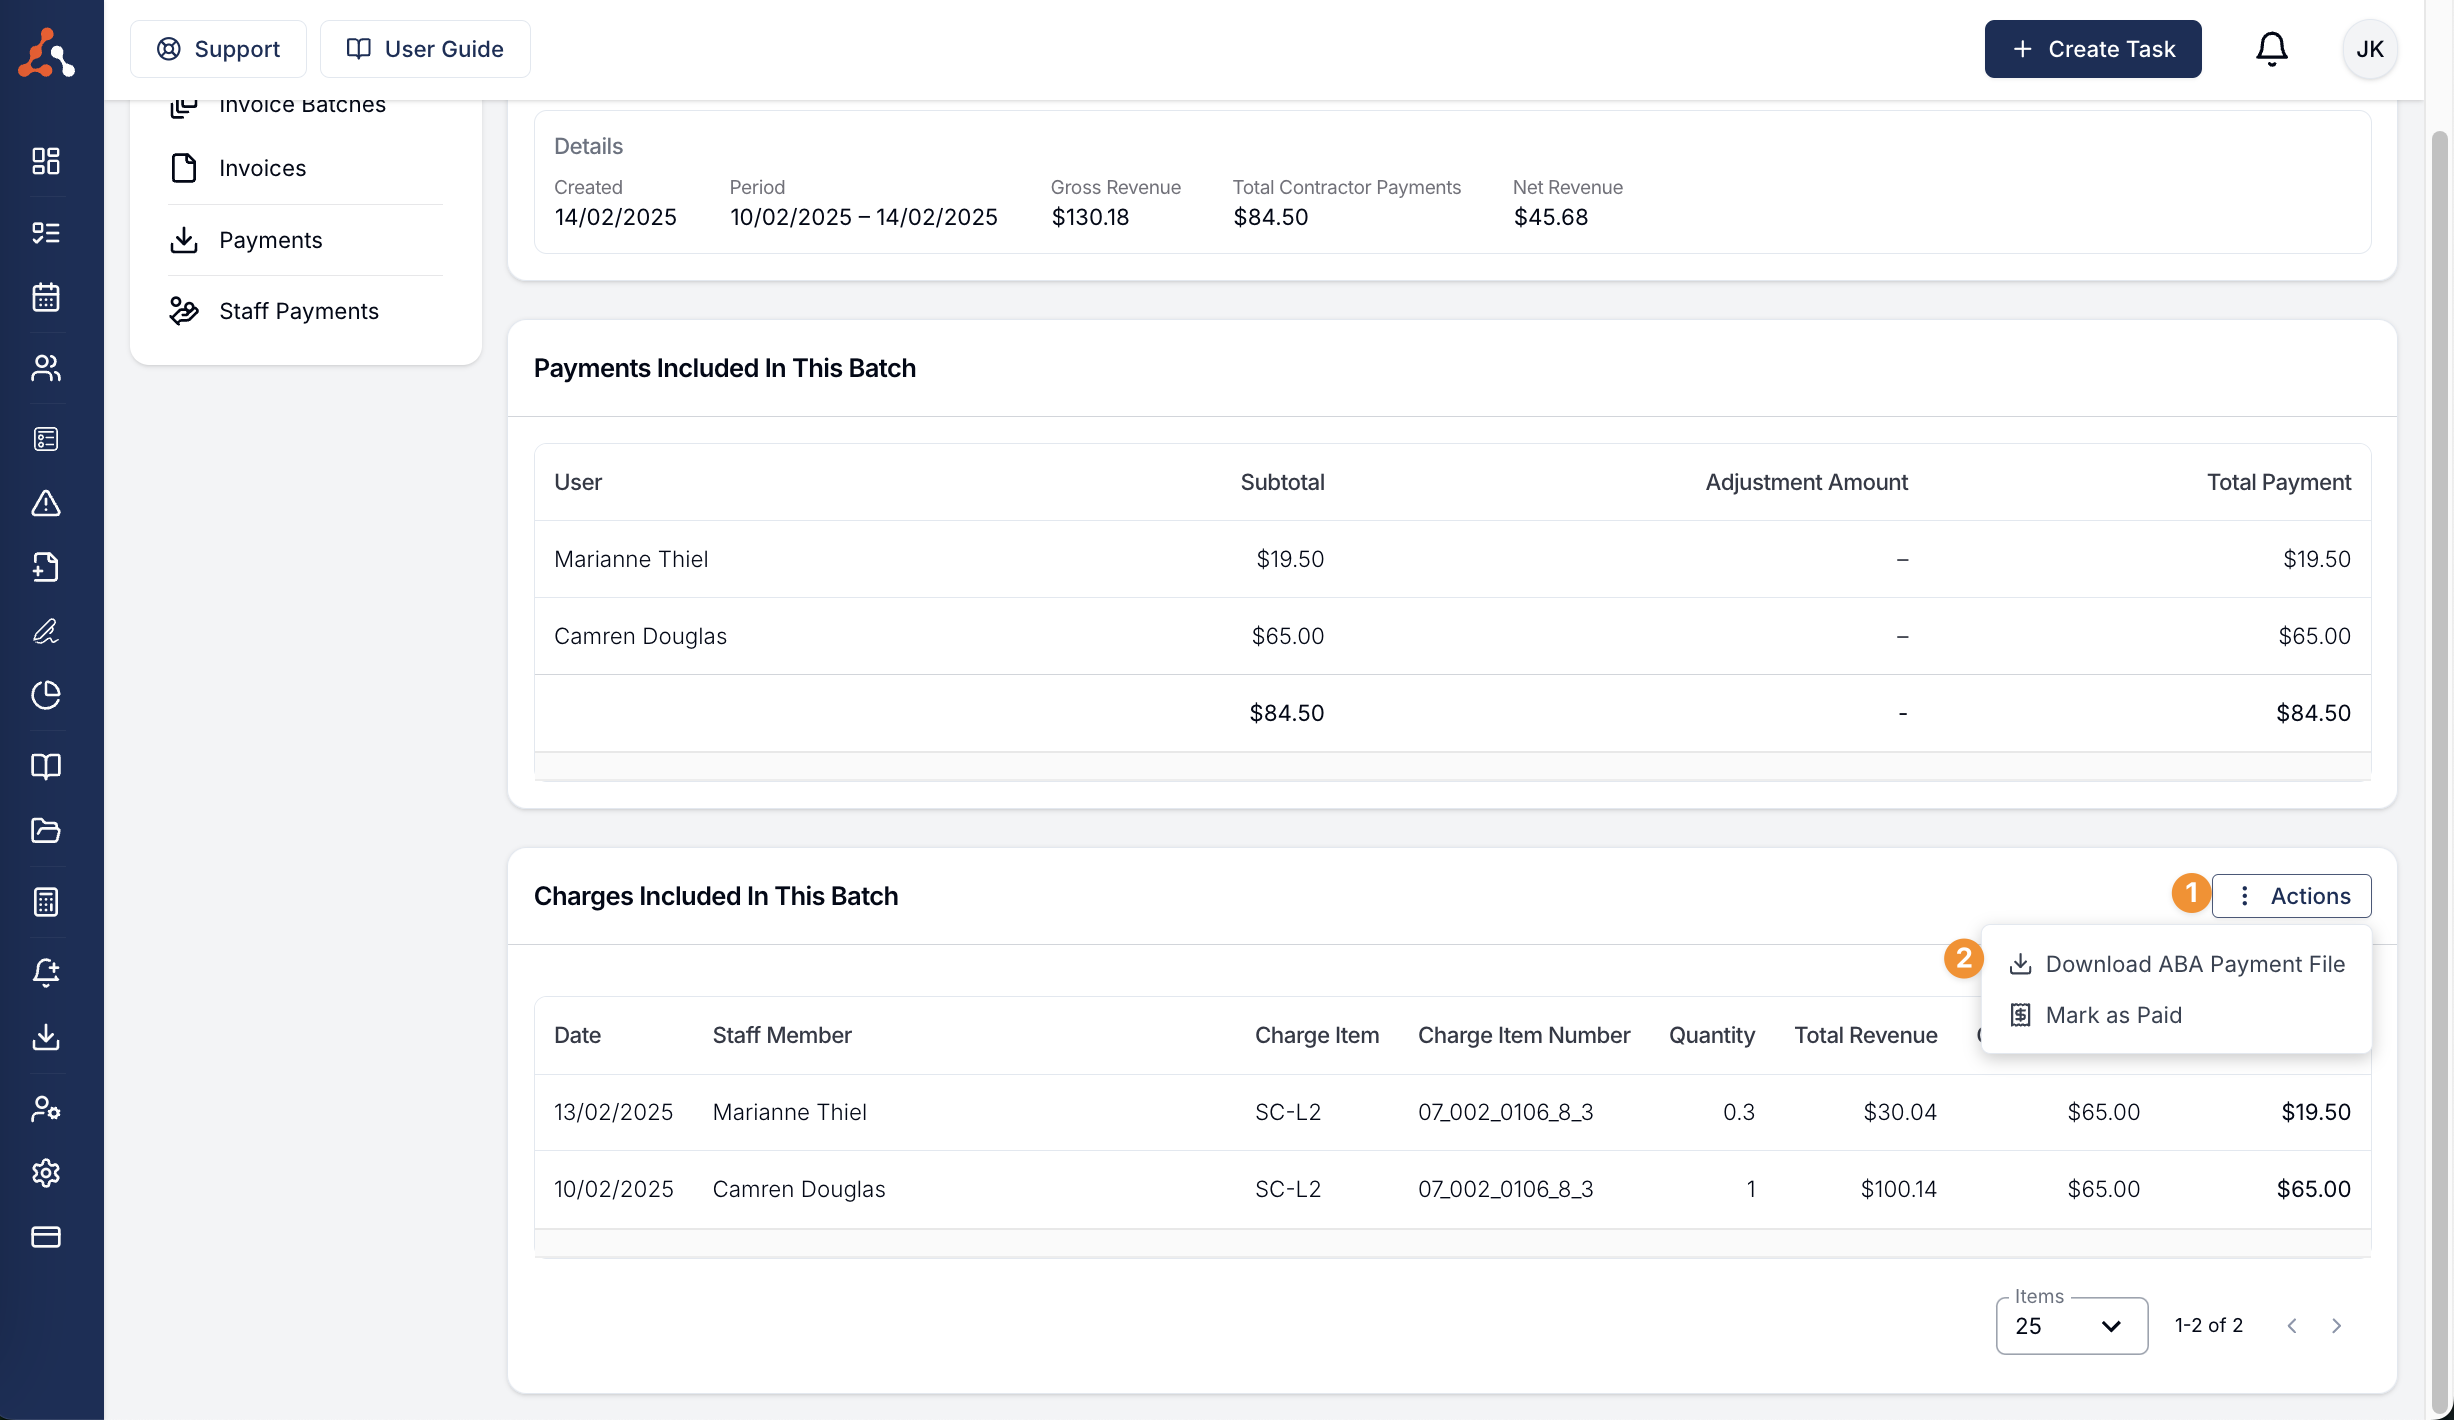
To download the ABA Payment file associated with this finalised Payment Batch simply select the 'actions' button and select' Download ABA Payment File' from the dropdown menu.
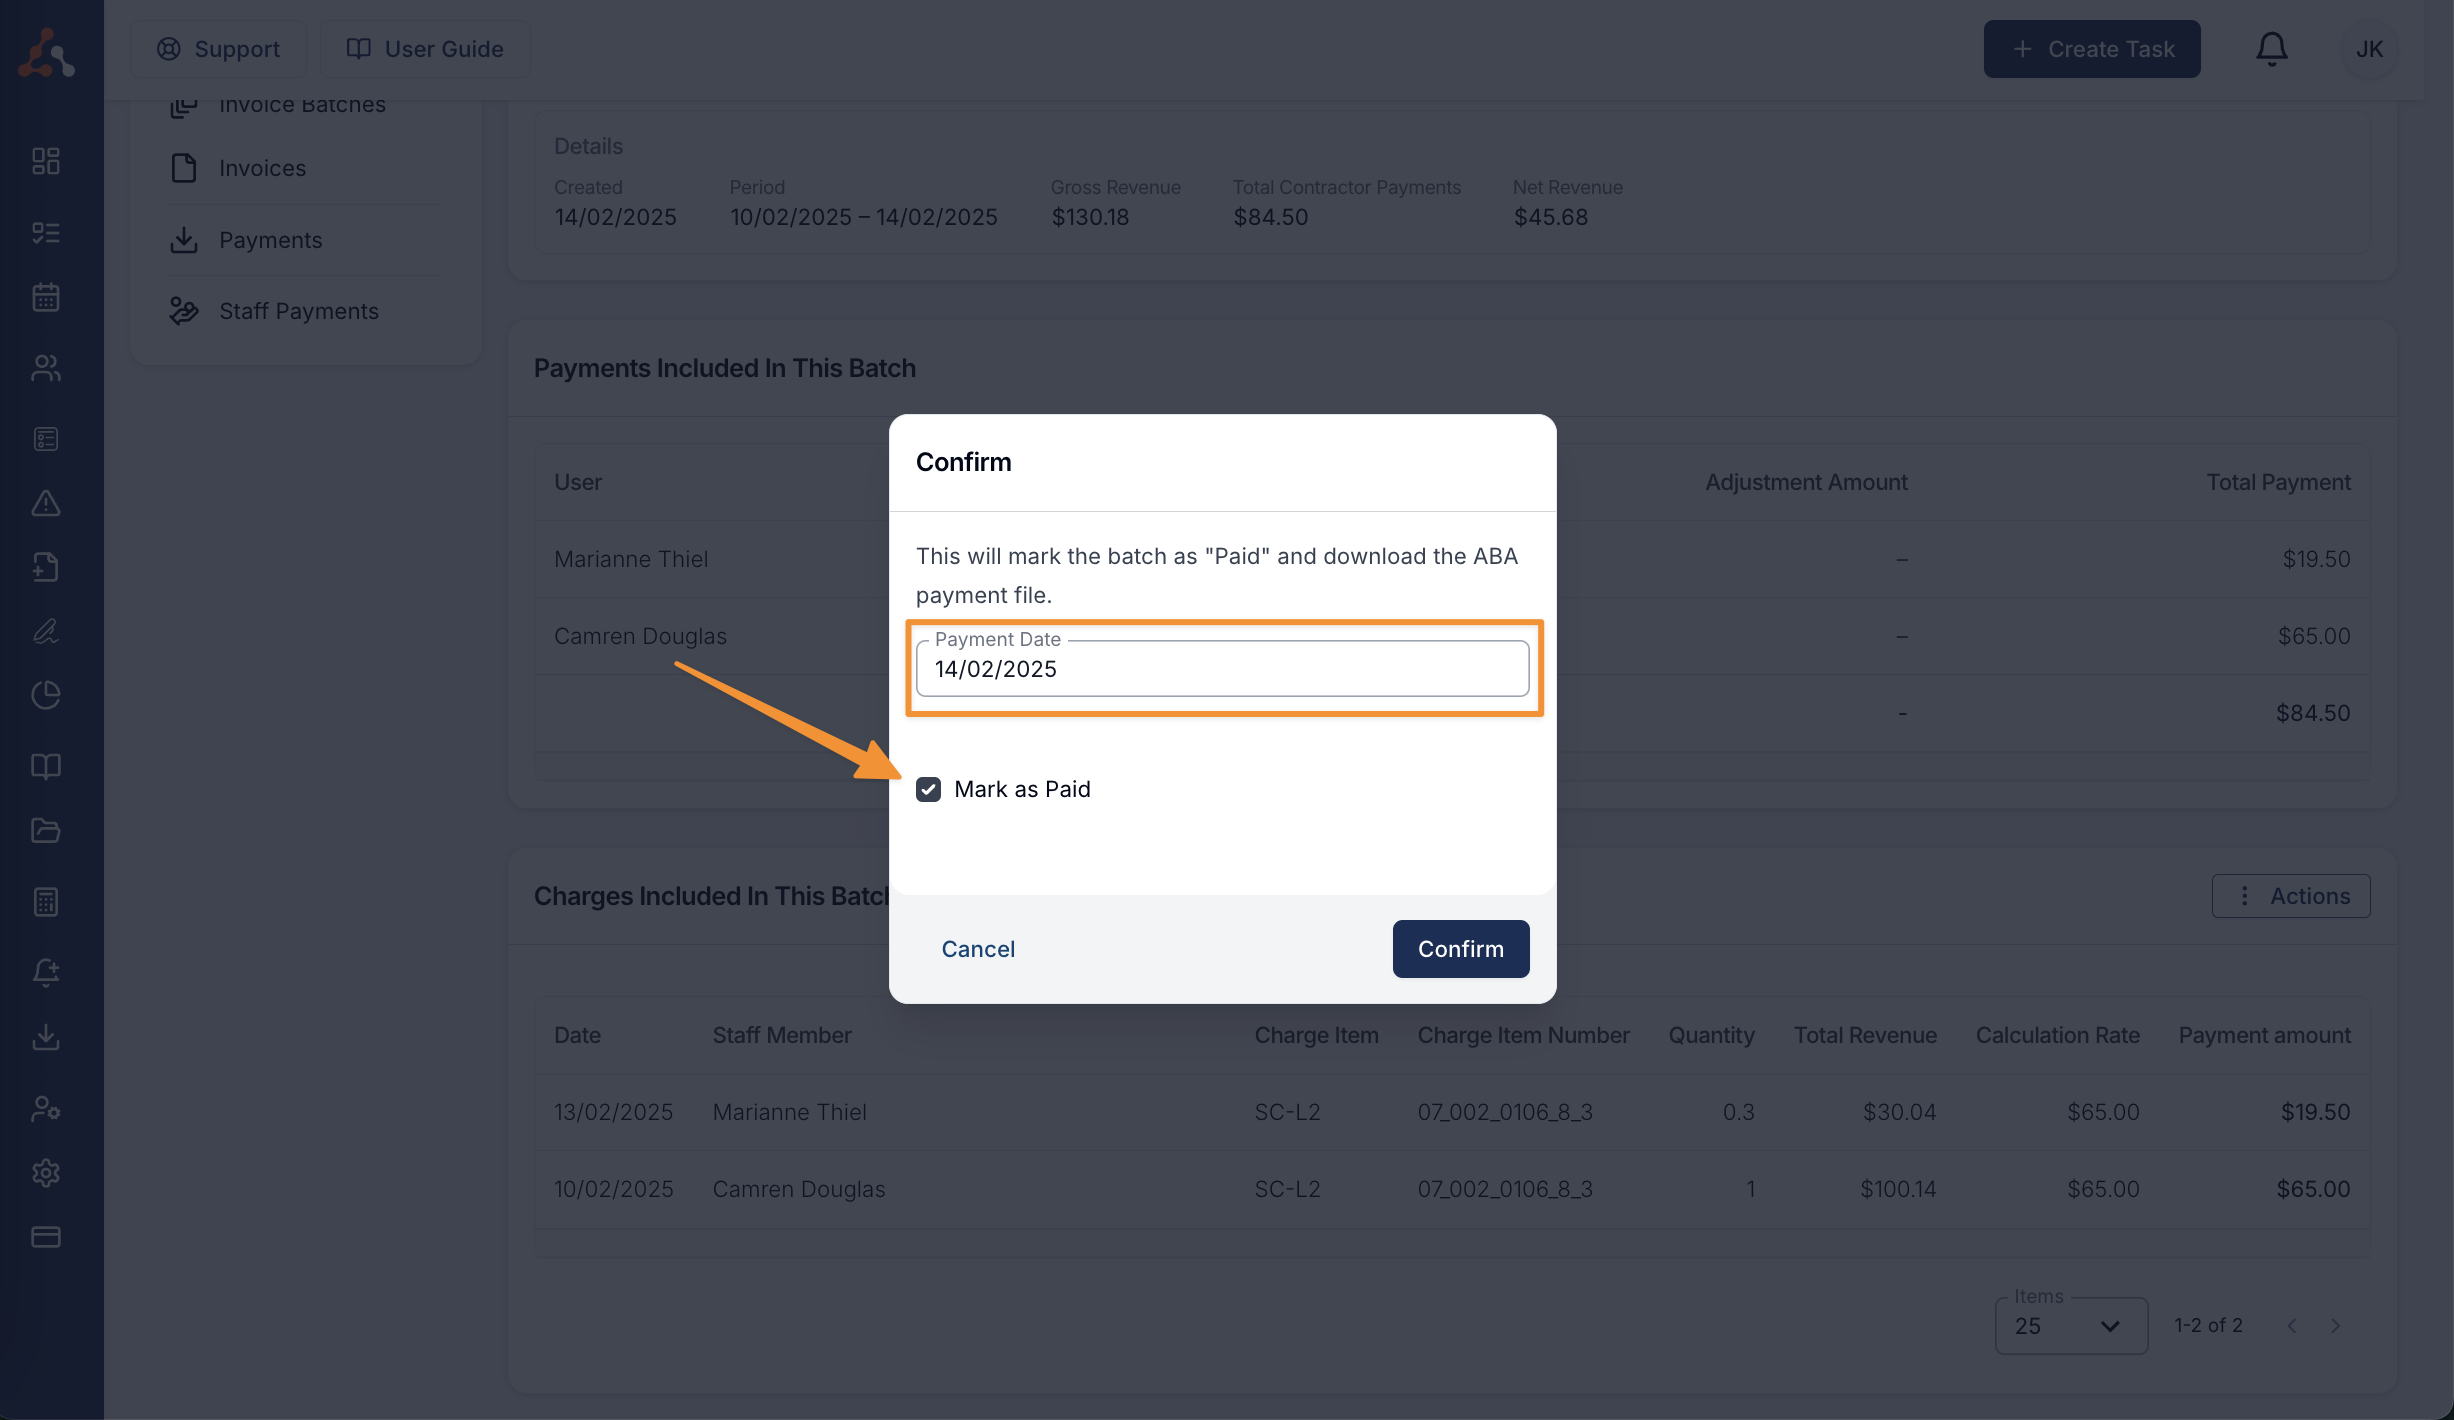
This will prompt you to then select the Payment Date. The payment date is the date you expect to be paying the contractors from your bank. You will need to mark this as Paid and this is important when it comes to the reporting and the export file. If a Payment is not marked as paid then it will not appear within the associated reports.
Voiding an Invoice and how this affects a processed Staff Payment Batch
To find out how to void an invoice simply head to our user guide article here.
Once an invoice is voided this will not affect the finalised payment associated with this voided charge as you have already paid the contractor. However, if the charge is then invoiced for again and you then generate a payment batch and calculate the payment for this charge, you will see a 'blank' line under the payment. This is an adjustment to account for the previously paid Staff Payment. Rather than the contractor being paid twice for the same work.
Following this you would complete the usual steps as per the above guide to mark the payment as paid and the finalised Staff Payment will reflect the adjustment.
Staff Payment Reports and Exports
To learn more about your export and reporting options for Staff Payments, head to our user guide article through this link here that outlines these options.

.png)