- Scheduling
- Xero Integration in Scheduling
Xero Integration in Scheduling
Overview
Astalty allows you to integrate with your Xero account for the purposes of sending your Timesheet Batches across for processing in Xero. This guide will cover all the steps required by an Admin user to prepare Astalty and Xero for integration.
Connecting Xero
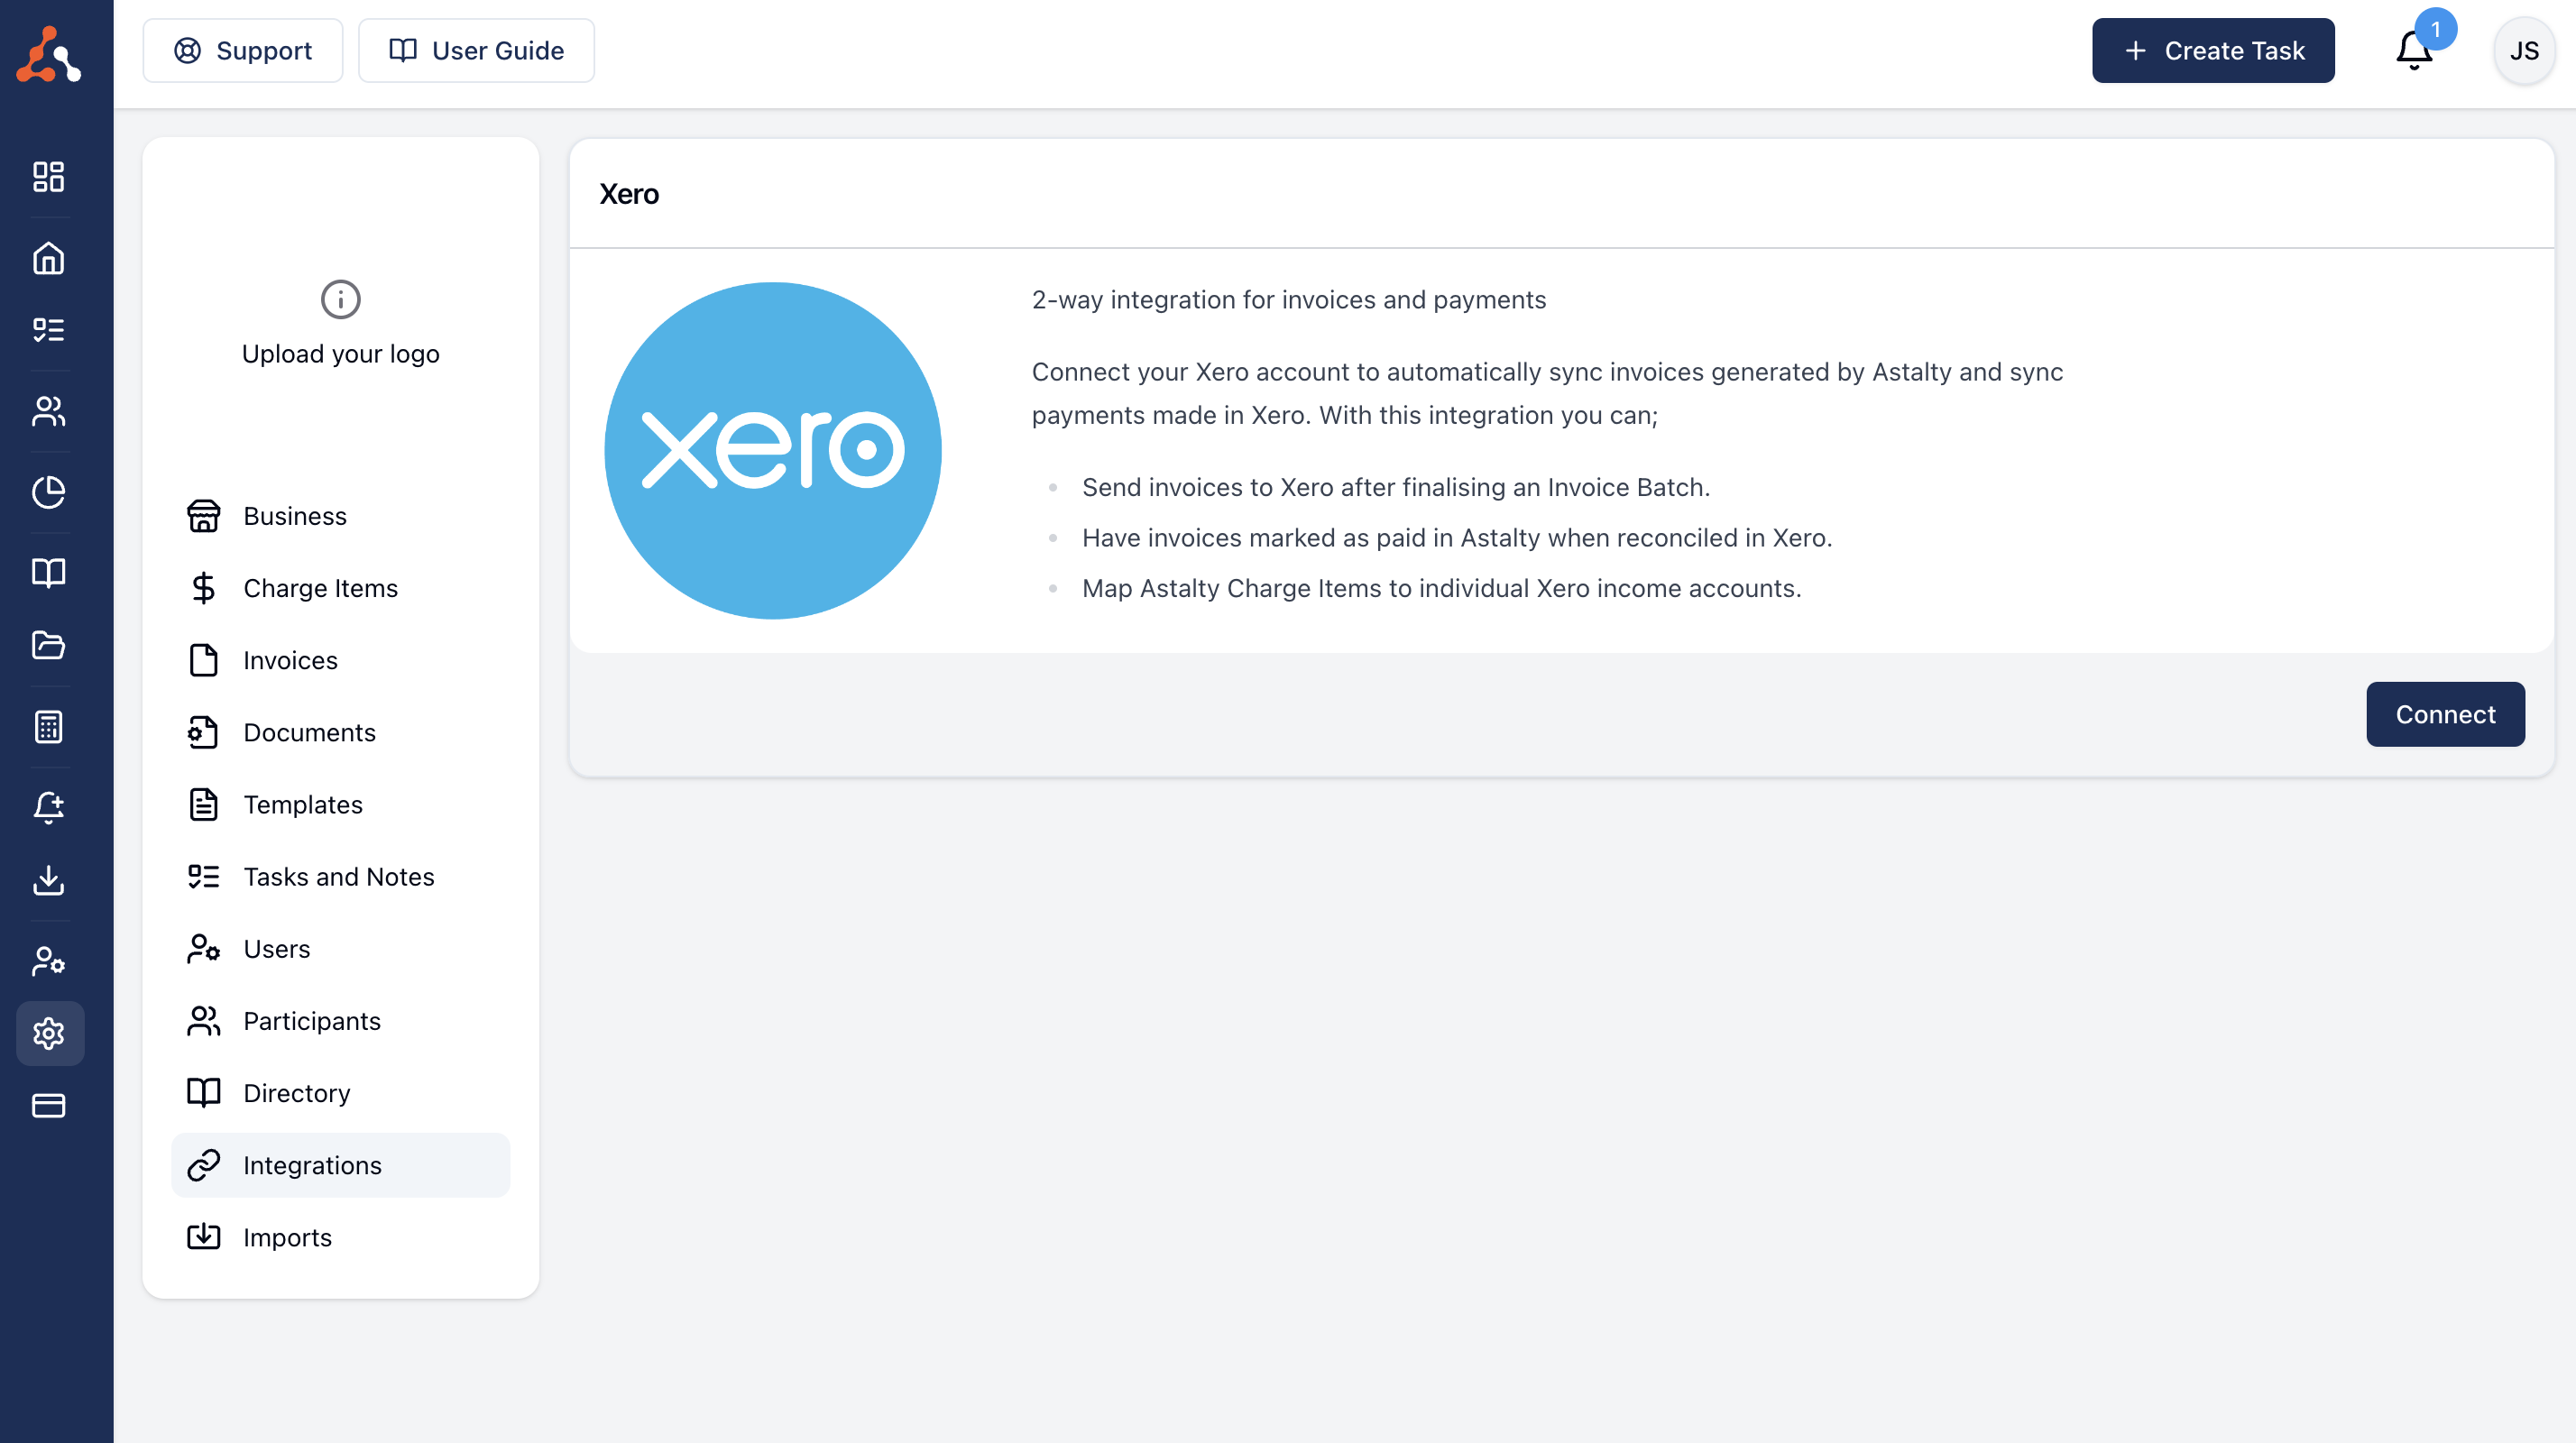
Head to the Integrations settings page and click Connect.
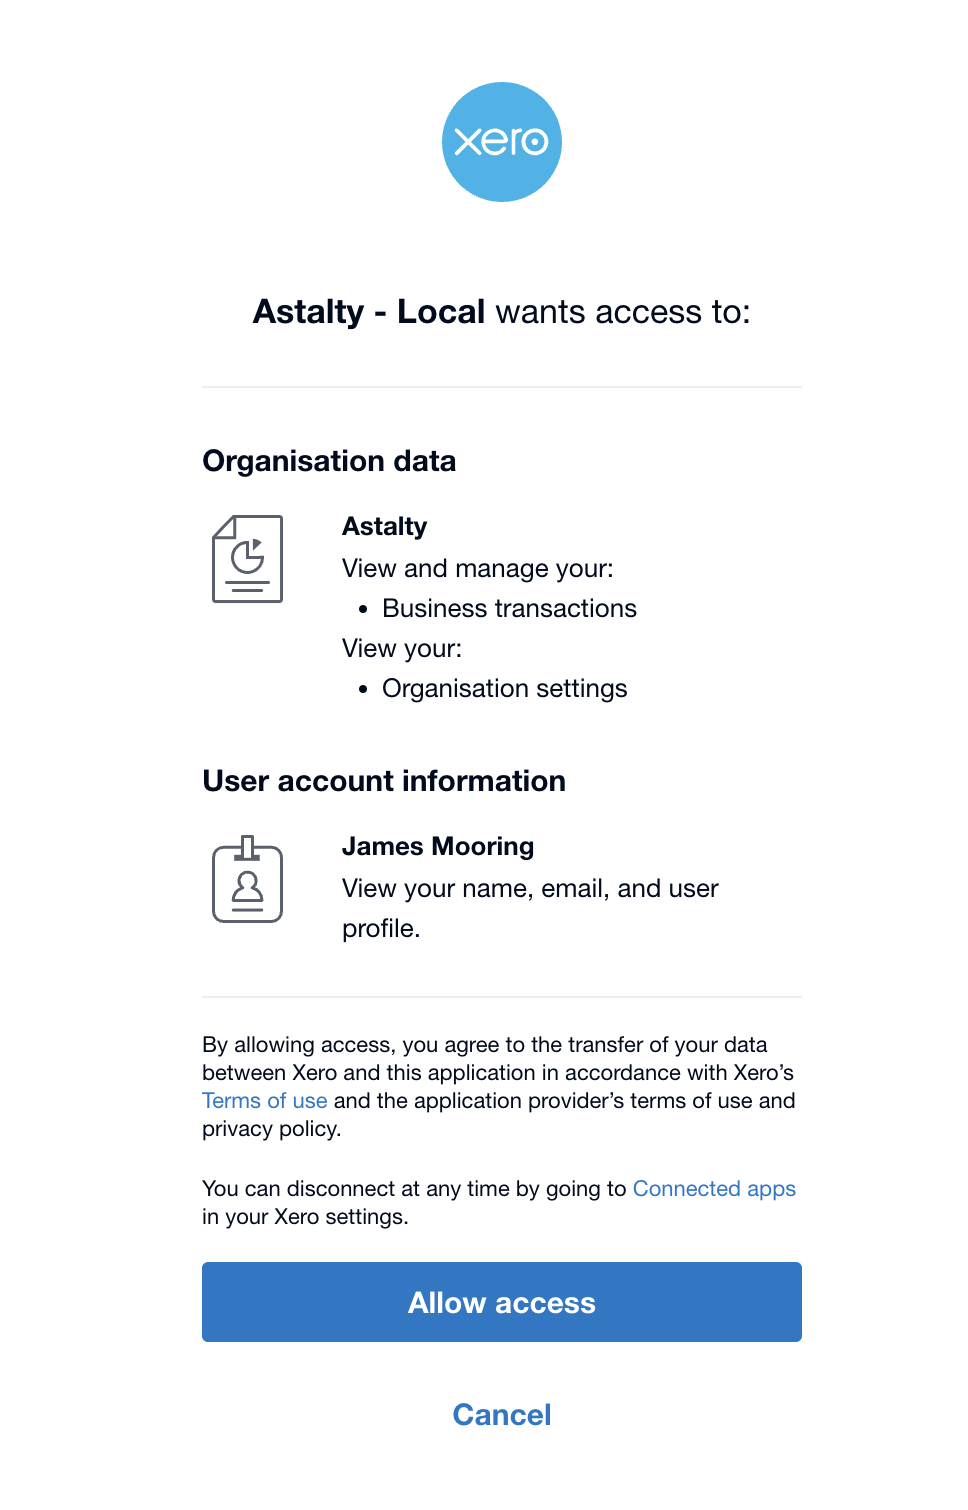
Allow Access
You will then be asked to allow Astalty to access certain parts of your Xero account - you may need to log in first.
Once you have allowed access, if you haven't already - you will need to configure your Payroll settings within your Xero account - see Xero Configuration below.
Xero Configuration
You will need to ensure you have a valid Xero configuration in order for the integration to work properly. There is some required configuration that needs to be setup in both Xero and Astalty. This section will cover the required configuration in the Payroll Settings within Xero:
- Pay Frequencies
- Pay Items
Pay Frequencies
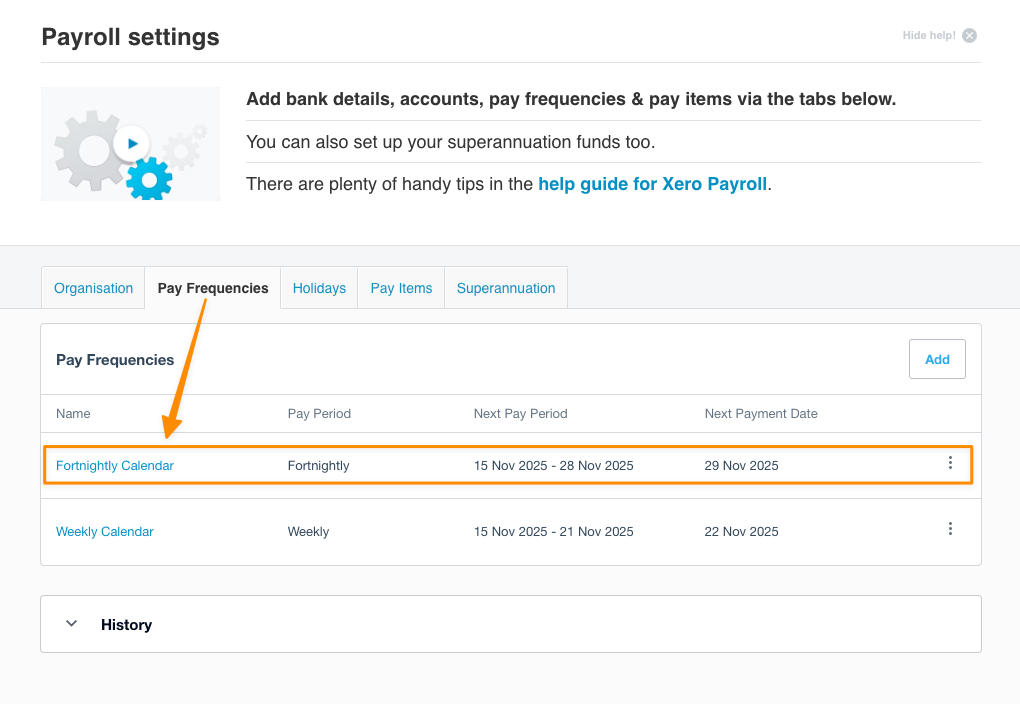
In Xero, navigate to Payroll Settings where you will require a Pay Frequency setup to manage the Pay Period of your Support Workers. If this hasn't been set up, you can select Add to create one.
Pay Items
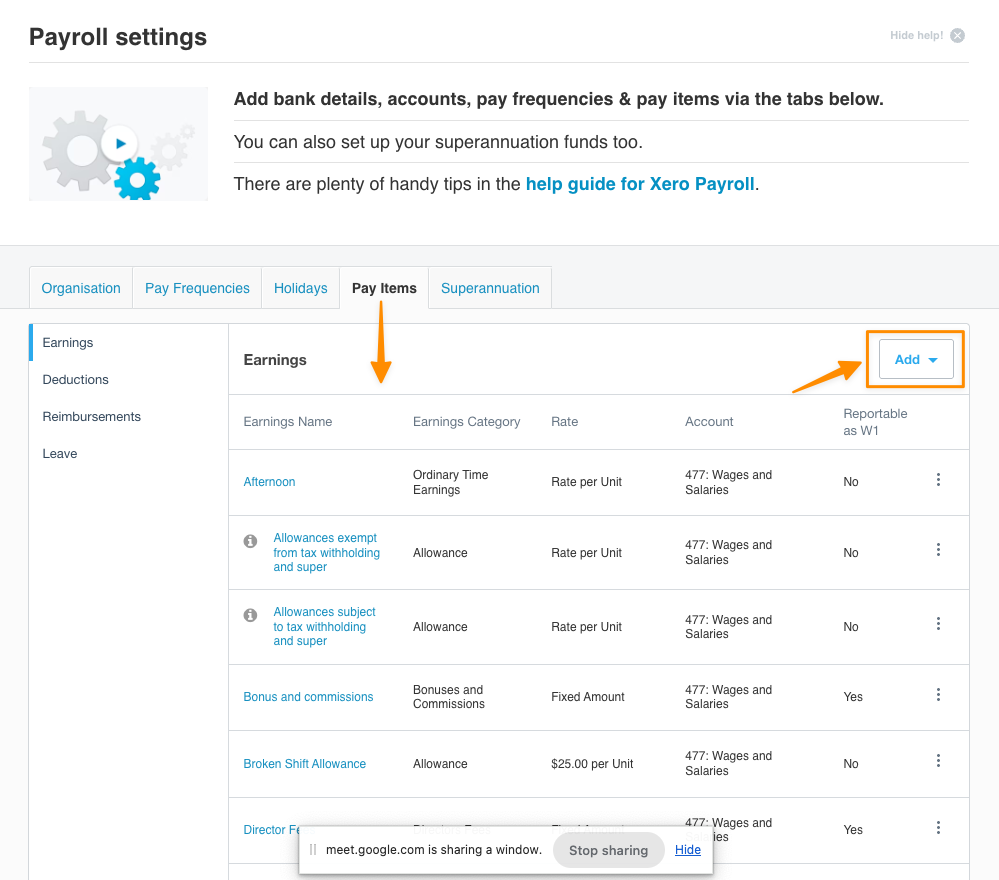
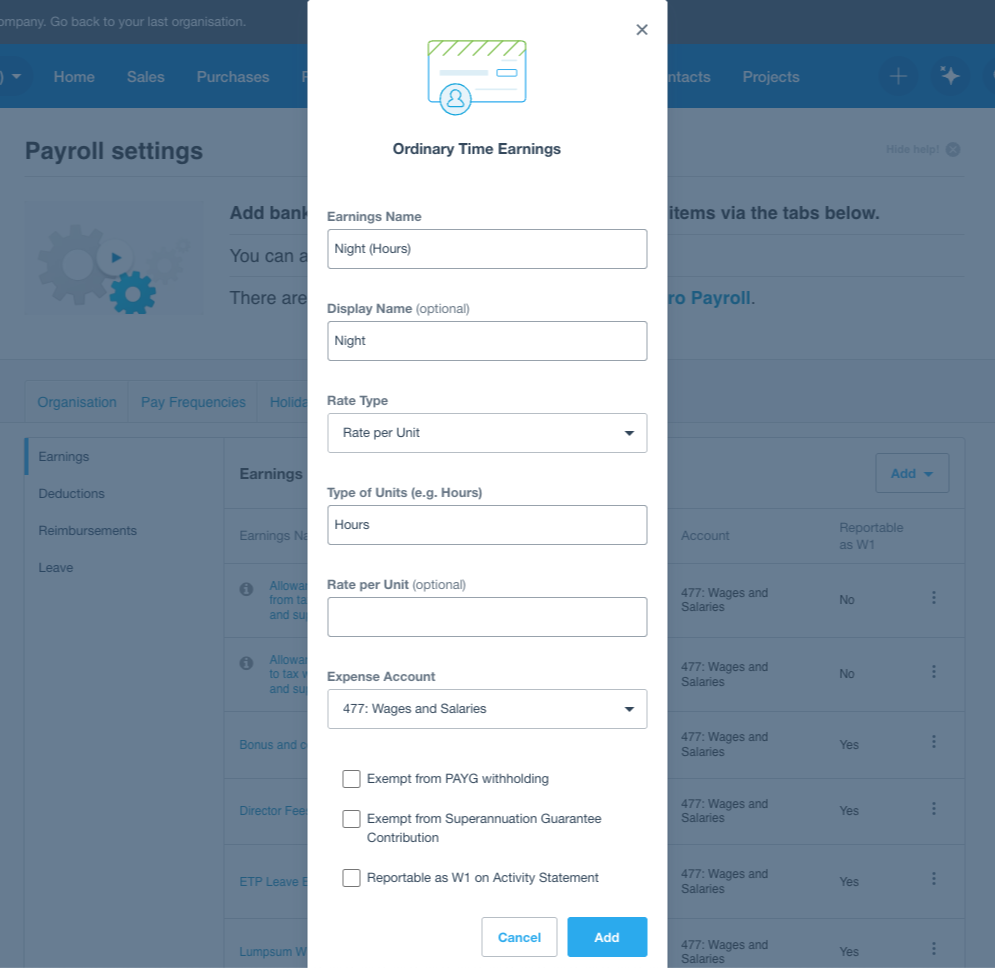
In Xero, select the Pay Items tab within Payroll Settings. This is where Xero stores all the pay items that can be mapped with the your Astalty Pay Items stored within the selected Pay Groups. If this hasn't been set up, you can select Add to create a new Pay Item.
Employees
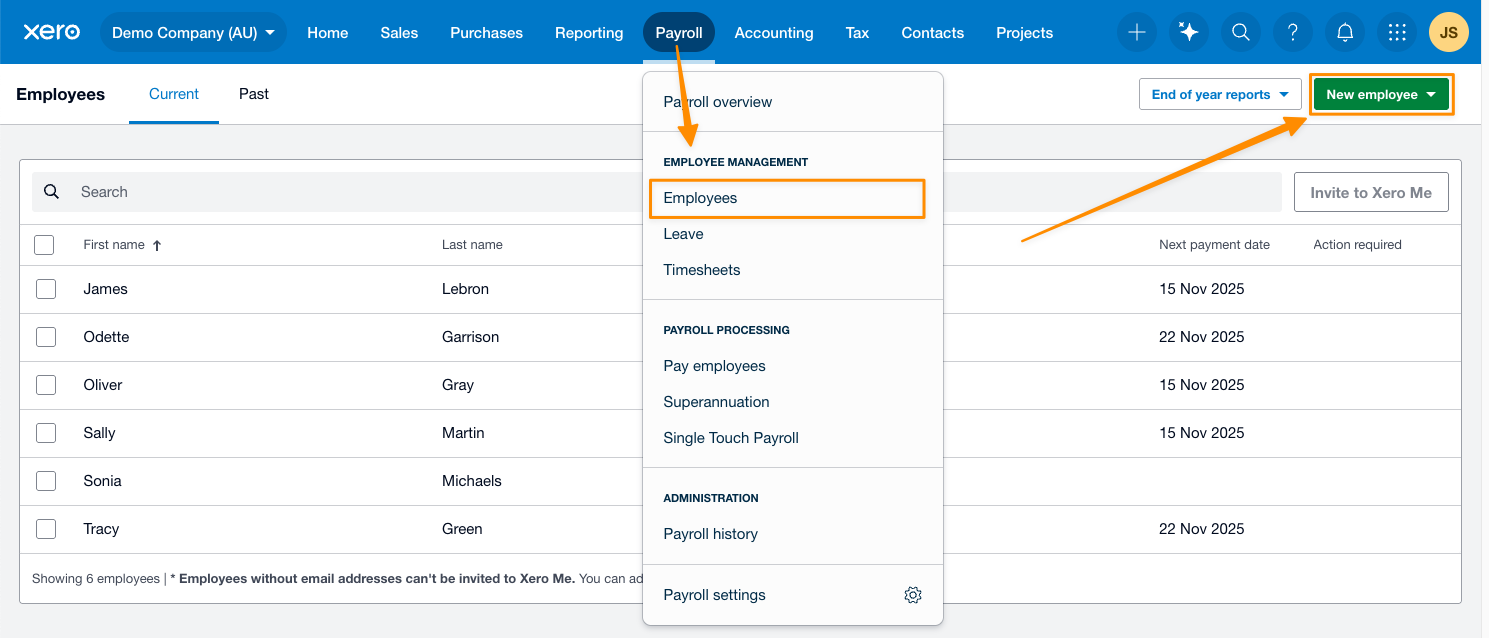
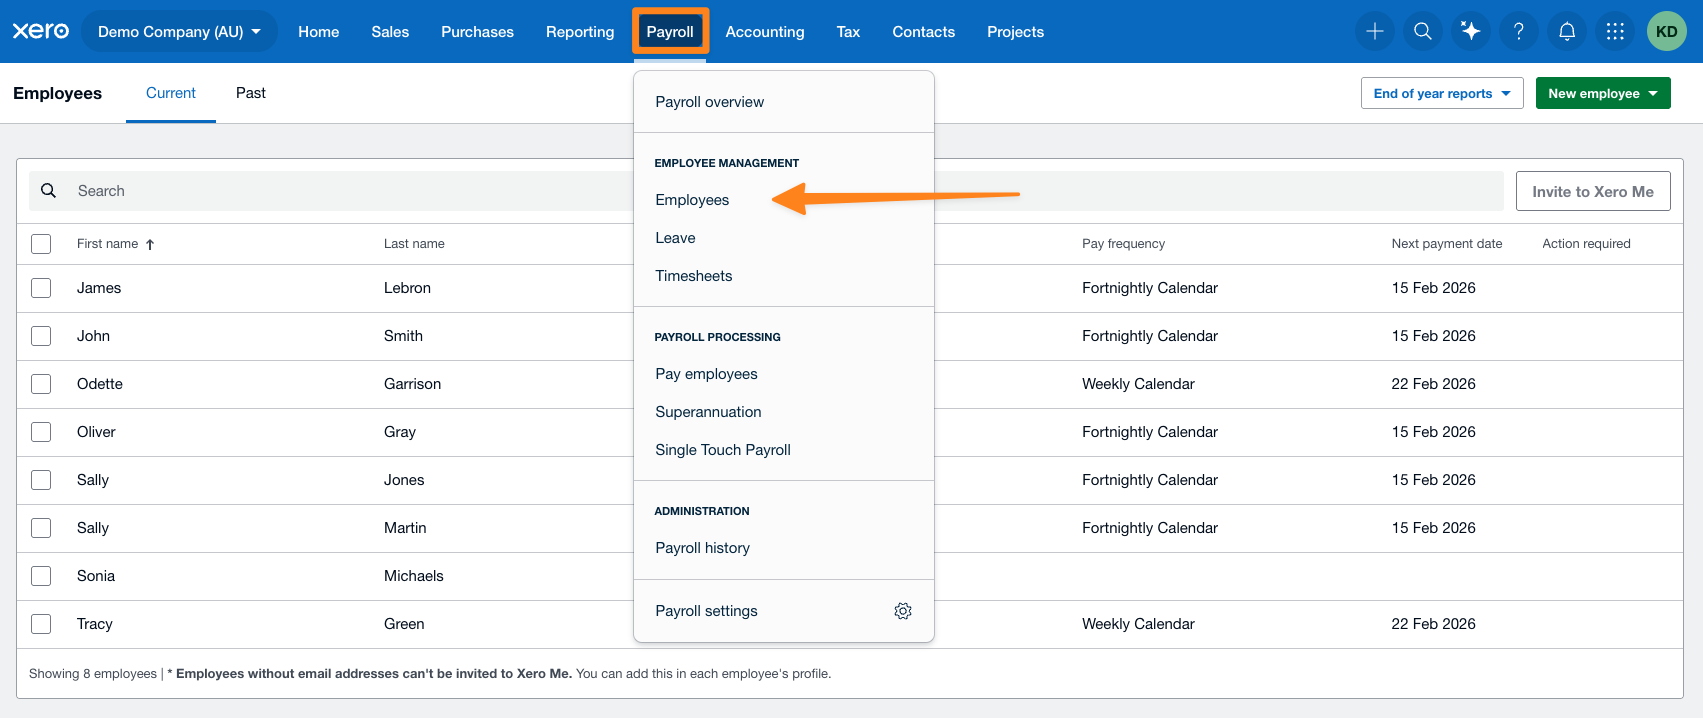
In Xero, to view the employees that will be available for mapping with the employees (users) in Astalty, navigate to the Employees page via the Payroll menu. If you haven't already setup your Employees in Xero, you can add them by selecting New employee.
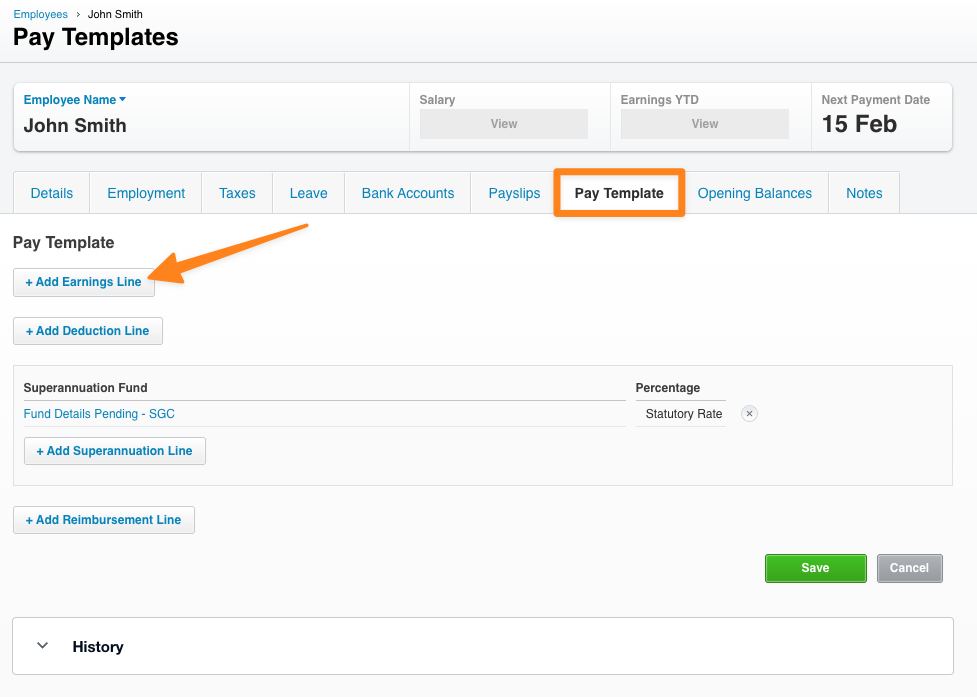
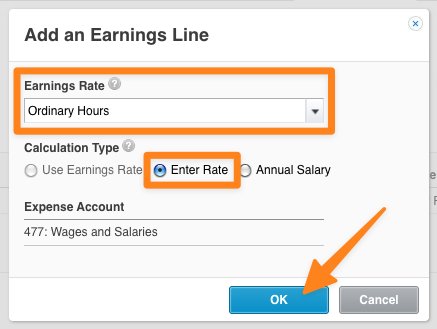
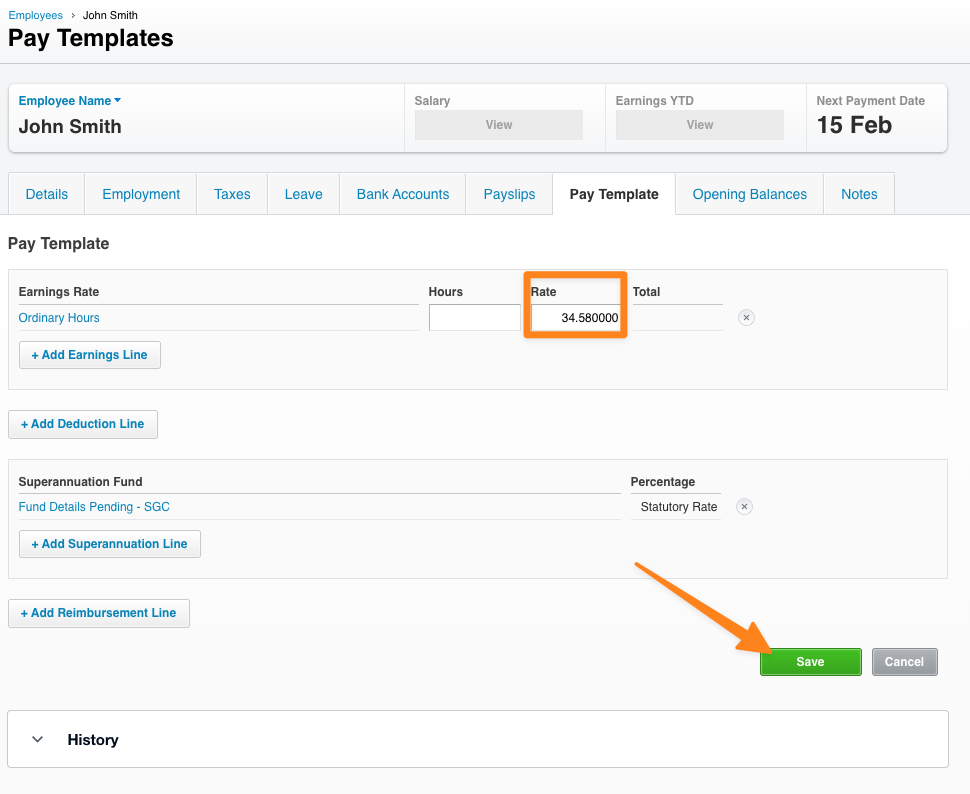
Employee Pay Templates
For the Multiplier method, set each employee's Ordinary Hours rate in Xero to their base pay rate for their classification, excluding casual loading. This allows the multipliers configured within the Pay Items to calculate correctly.
Review deductions, superannuation, leave and any default earnings that could duplicate imported timesheets. For both Multiplier and Rate Per Unit setup, use Setup Pay Items and Employee Templates in Xero. Check the resulting pay-run amounts before posting.
Astalty Configuration
You will need to ensure you have a valid Xero configuration in order for the integration to work properly. There is some required configuration that needs to be setup in both Xero and Astalty. This section will cover the required configuration in Astalty:
- Payroll Platform
- Payroll Calendar
- Pay Groups
- Employees
Payroll Platform
Begin by assigning Xero as your Payroll Platform within your Scheduling Settings.
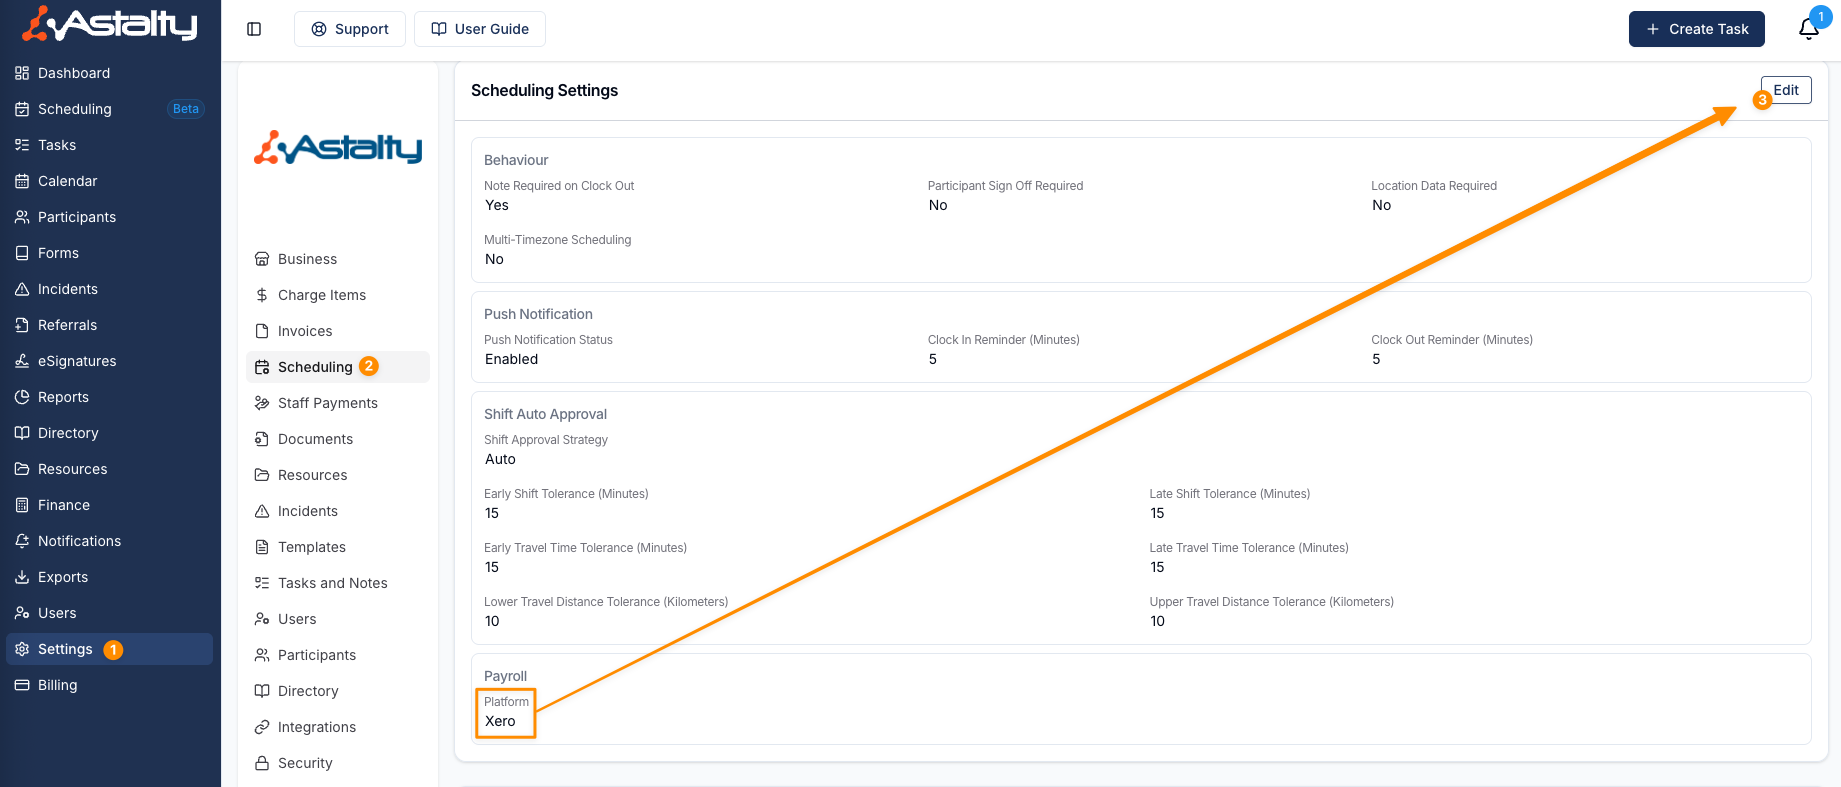
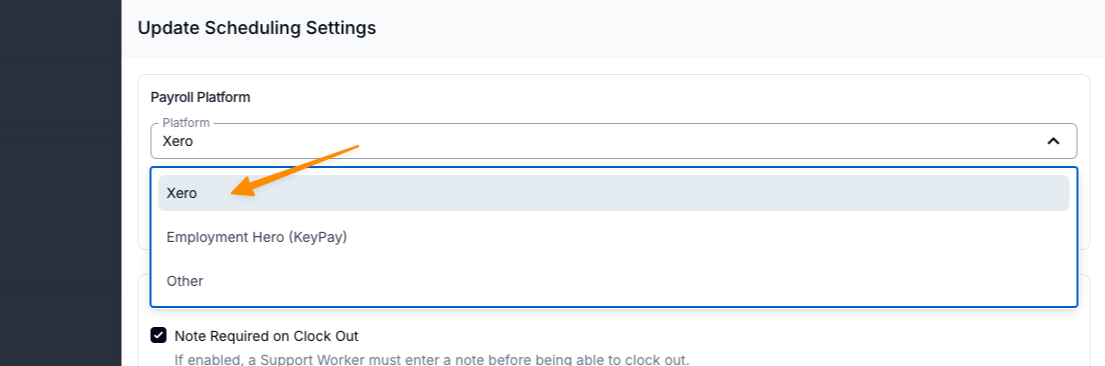
Select Update to save your changes.
Payroll Calendar
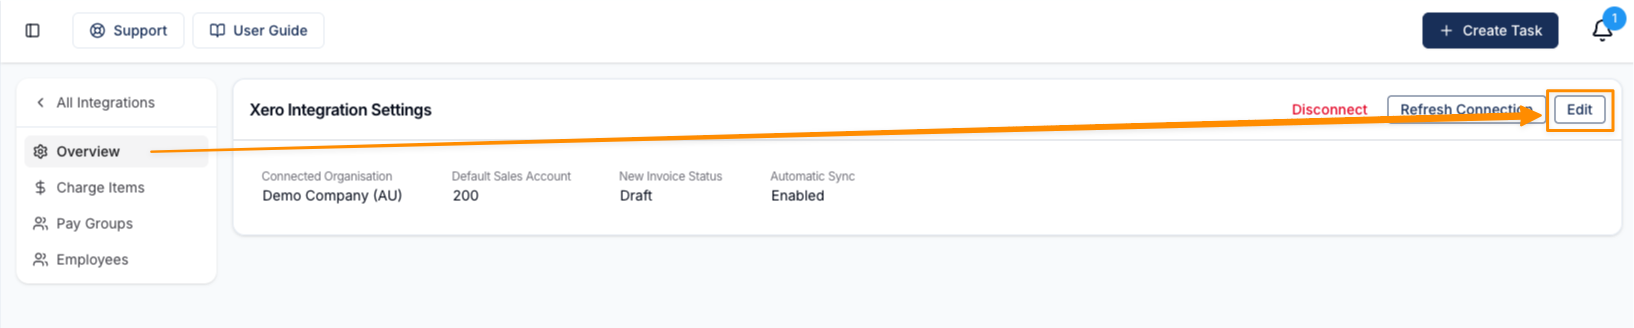
Within Astalty navigate to your Xero Integration Overview page and select Edit.
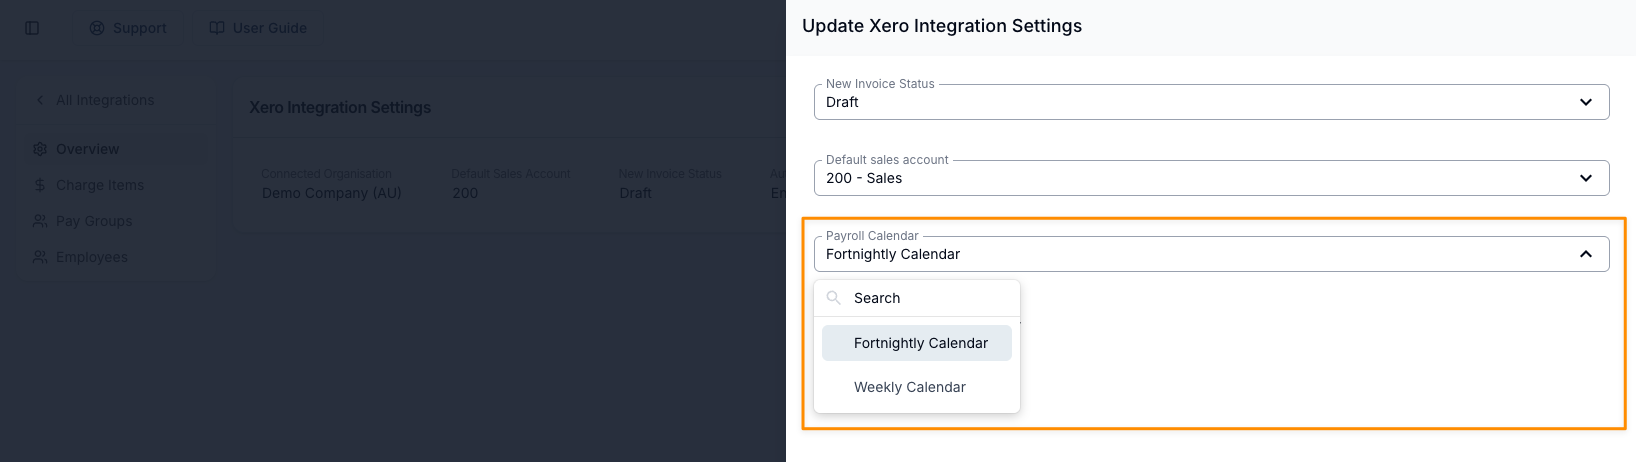
Select the required Payroll Calendar (the Pay Frequency setup in Xero), and then Update to save your changes.
Pay Groups
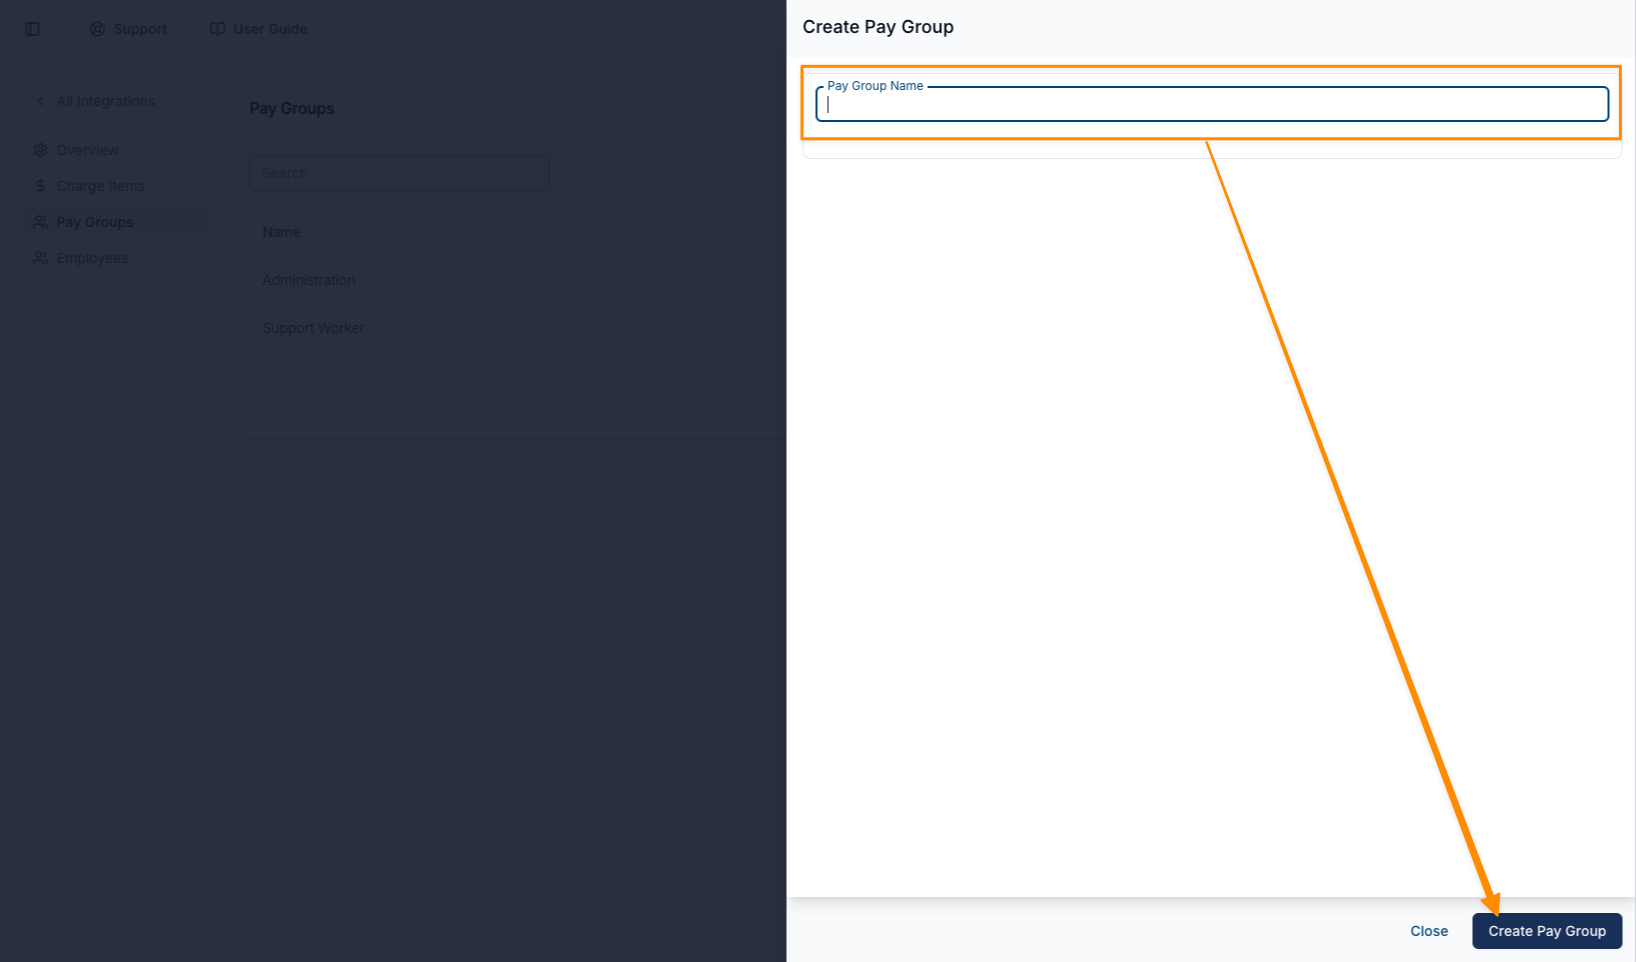
Pay Groups let you organise Pay Items into specific groups. Within Astalty's Xero Integration page navigate to Pay Groups. If you don't already have a pay group setup, you can create one by selecting Add Pay Group
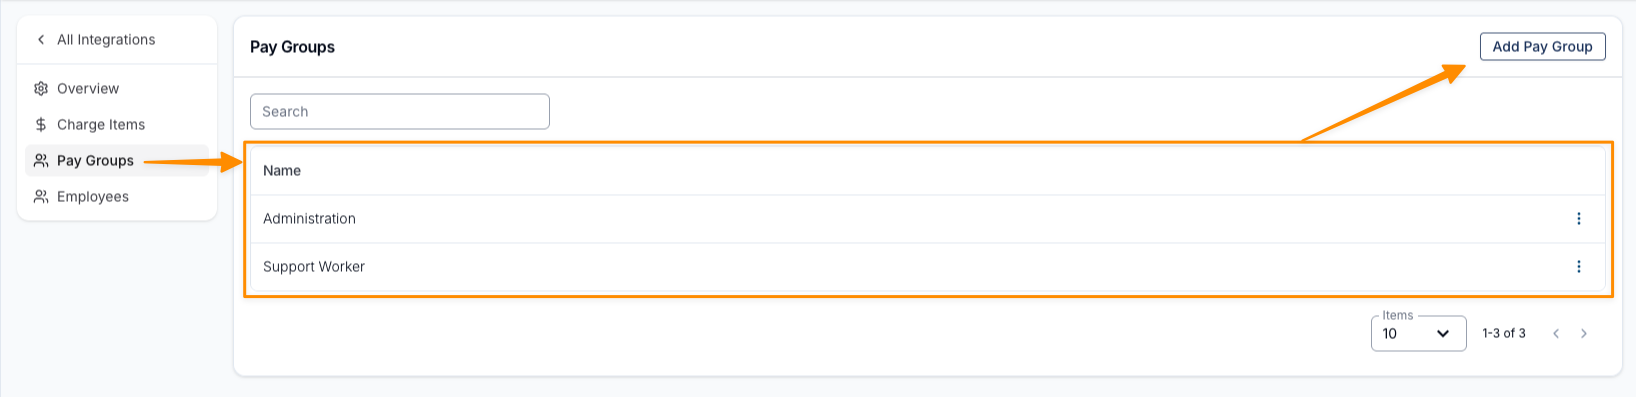
Give the group a Pay Group Name, select the Award matching its workers, and select Create Pay Group. Keep different awards and casual/permanent rate mappings in separate groups; see Setup Pay Groups and Employees.
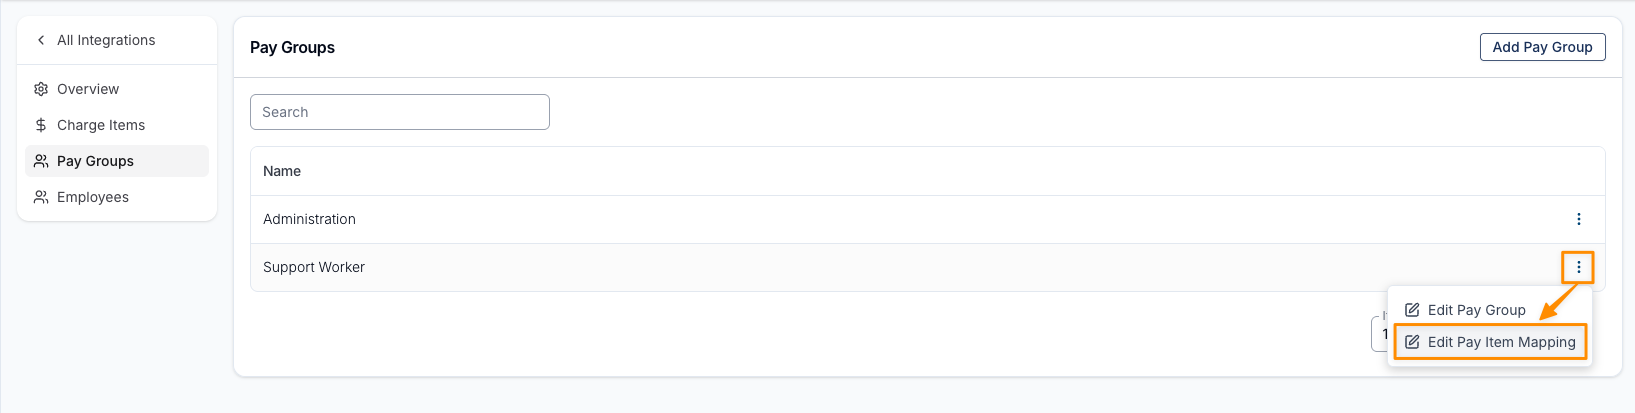
Use the 3 dot menu of the Pay Group you just created to select Edit Pay Item Mapping.
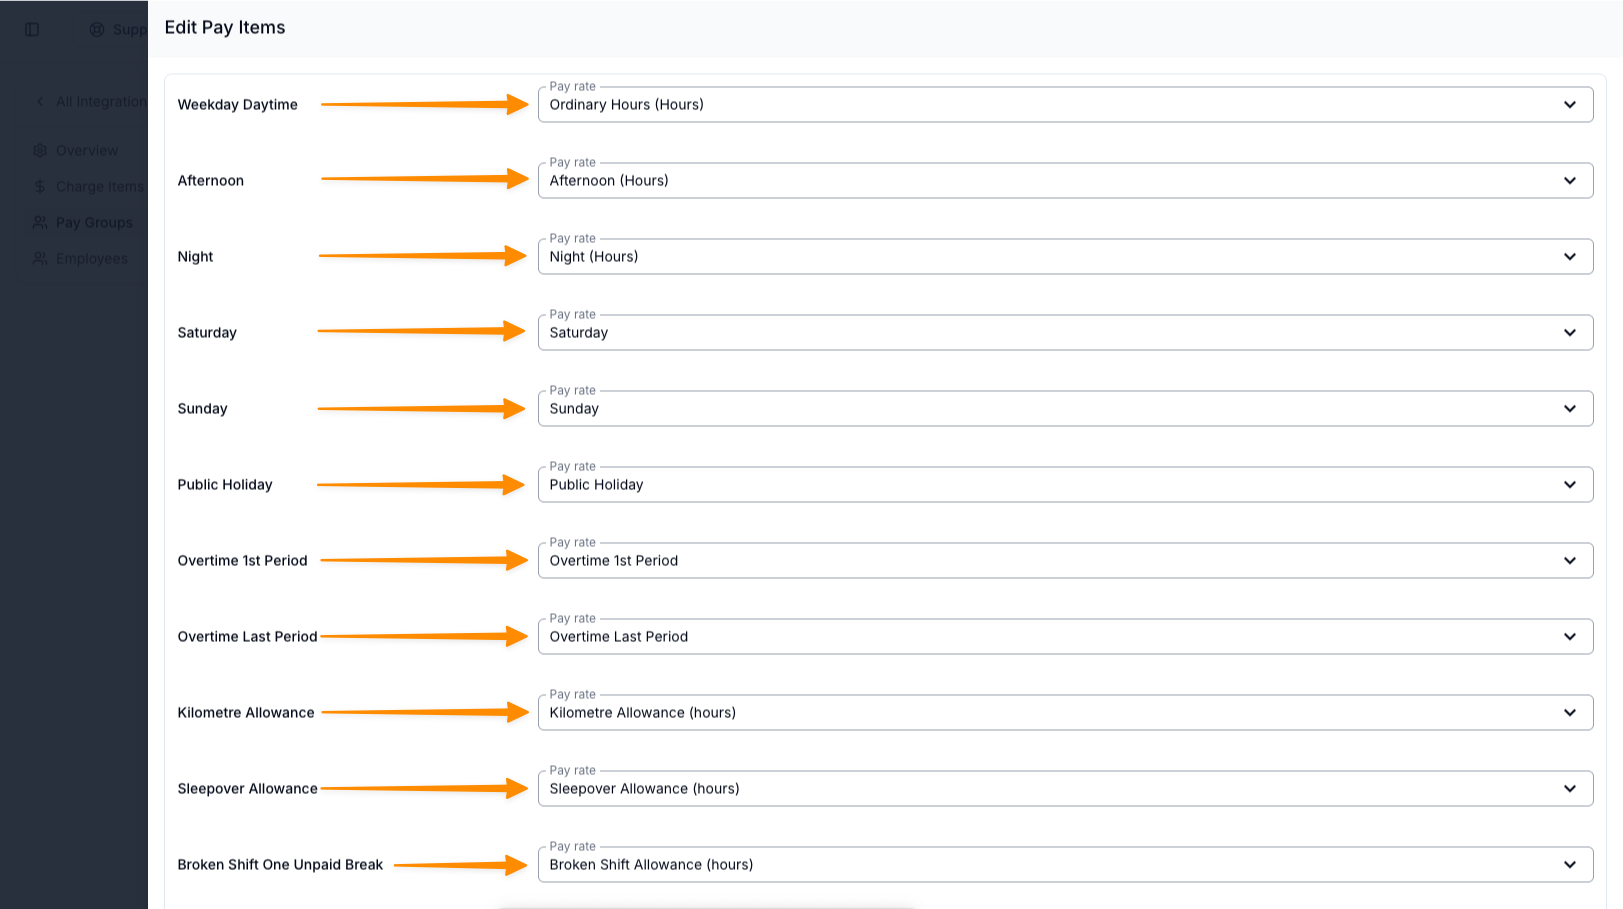
Here you can begin mapping the Pay Items with the Pay rates from Xero.
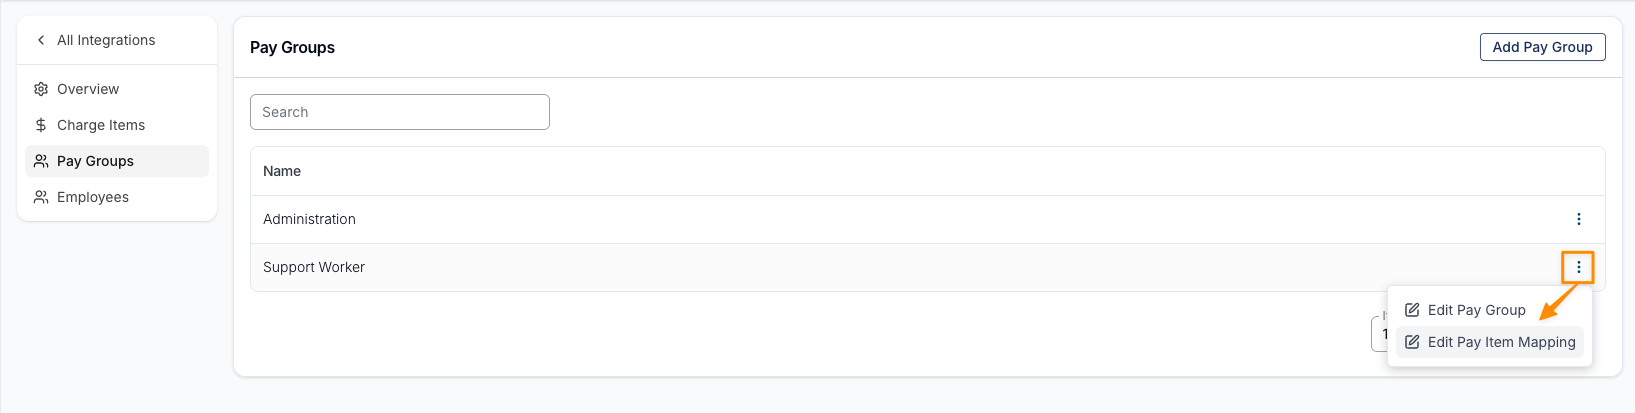
If you need to make any changes to any other existing Pay Groups, use the 3 dot menu if you need to Edit Pay Group or Edit Pay Item Mapping.
Pay Groups can also be deleted, providing they unused (not assigned to any users as a pay group).
Employees
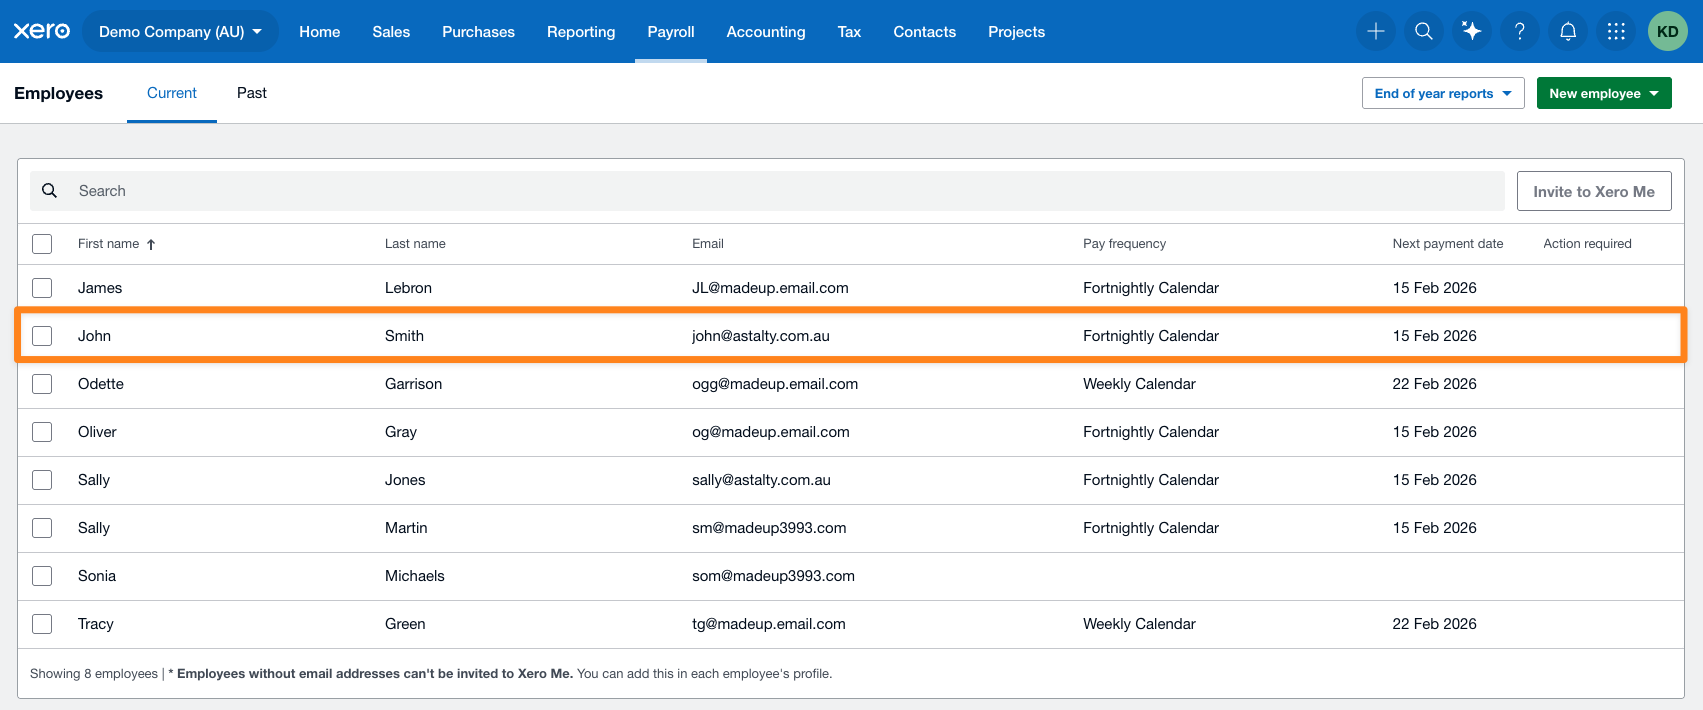
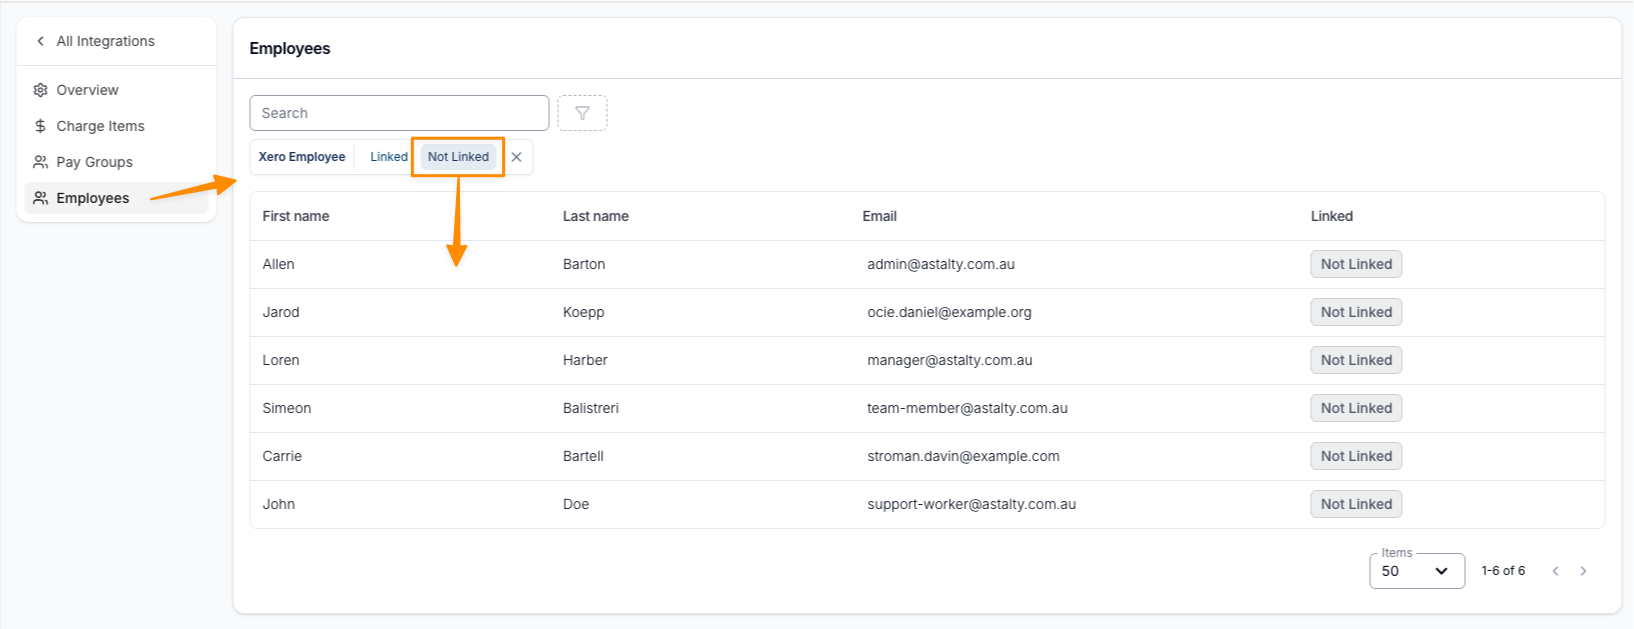
Within Astalty's Xero Integration page navigate to Employees. Here you will find a list of employees that are either currently Linked or Not Linked to Xero. To ensure the integration works correctly, you will need to map out the employees between Astalty and Xero.
To map any employees (users) that are not currently linked to their Xero employee yet, view the list by selecting the Xero Employee filter for Not Linked, and select the employee (user) to edit.
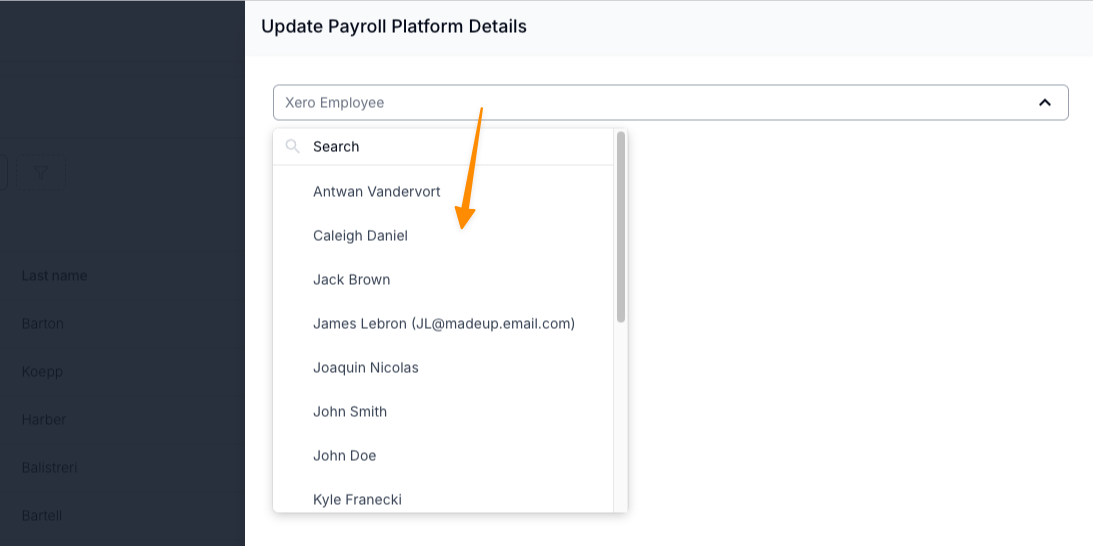
Then select the matching employee from the drop down that is populated from Xero, and then Update to save your change.
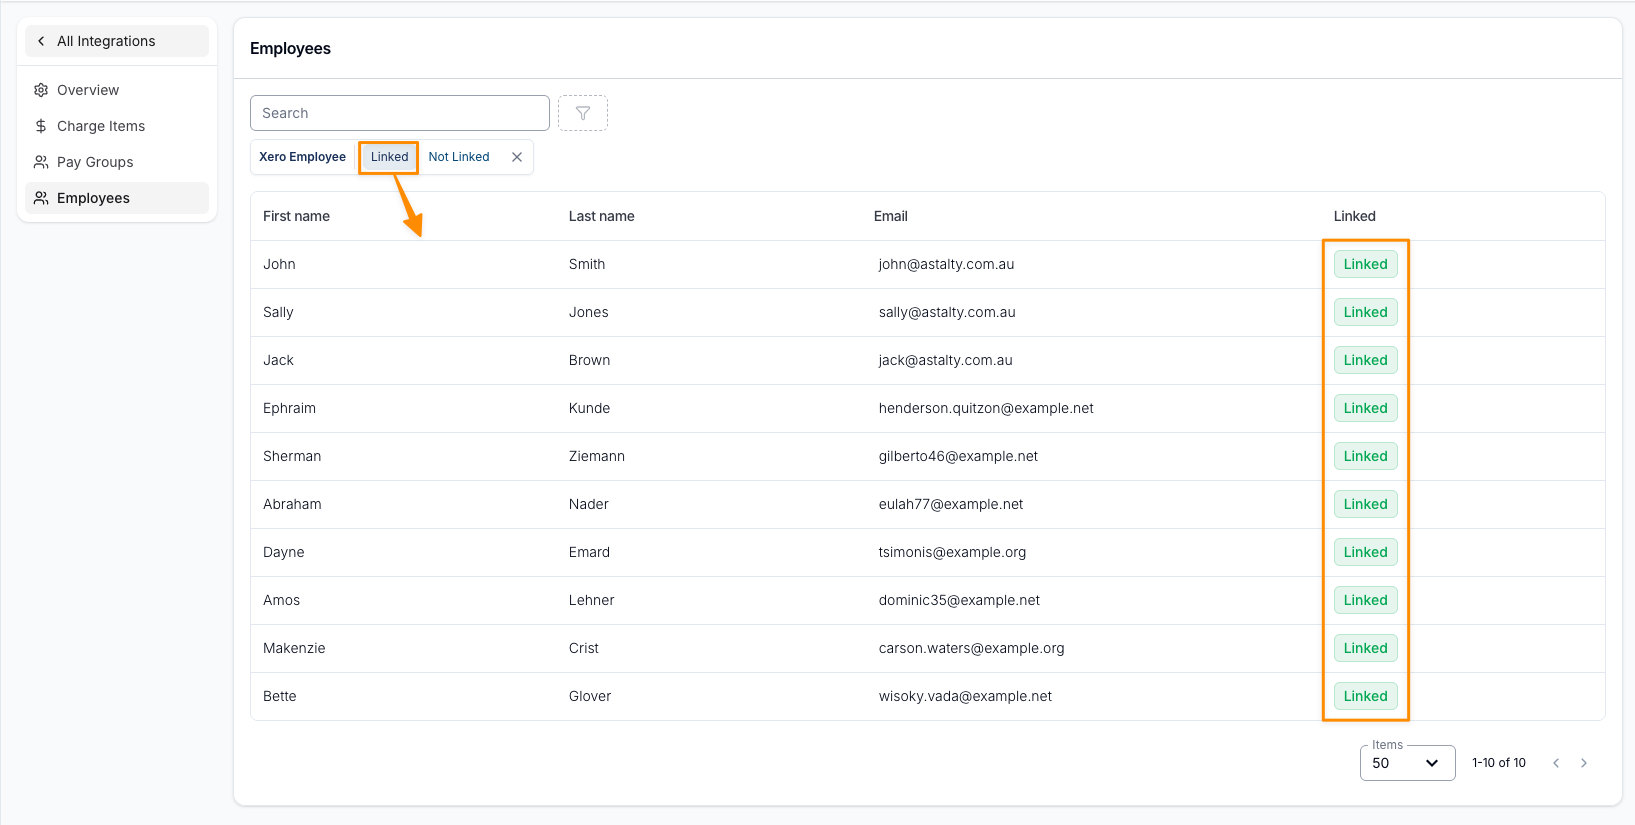
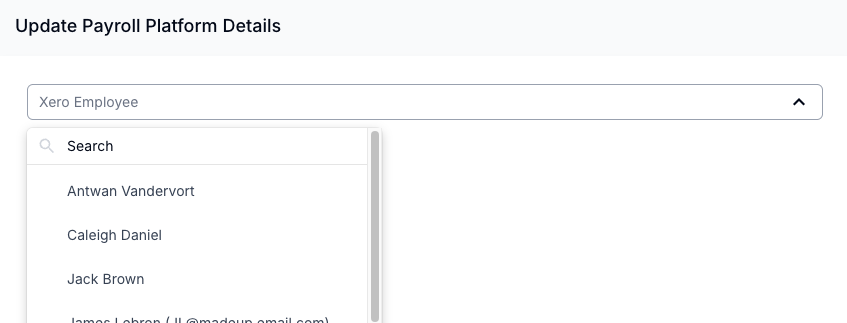
Once the employees are linked, they'll appear within the Linked list. If required, you can edit the linked Xero employee, by selecting a Linked employee (user) from the list.
Missing Employees
If the employee is missing from the Xero Employee dropdown, you will need to ensure they are setup in Xero as an Employee.

If an employee cannot be found in either Linked or Not Linked, make sure the user has their own Astalty profile under Users.
Syncing Timesheet Batches to Xero
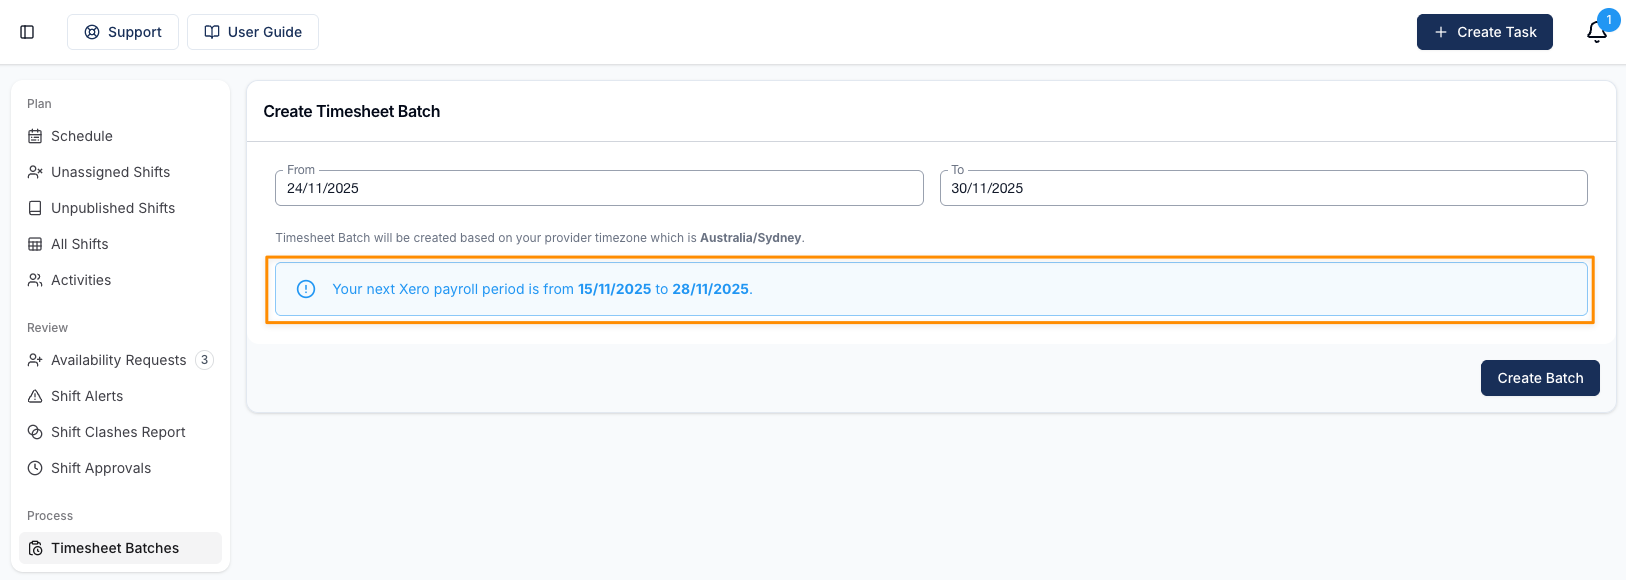
When generating your Timesheet Batch to sync with Xero, the dates must match the next Pay Frequency date range that Xero hasn't processed yet. When creating your Timesheet Batch, Astalty will display a helpful warning advising the date range of your next Xero Payroll Period.
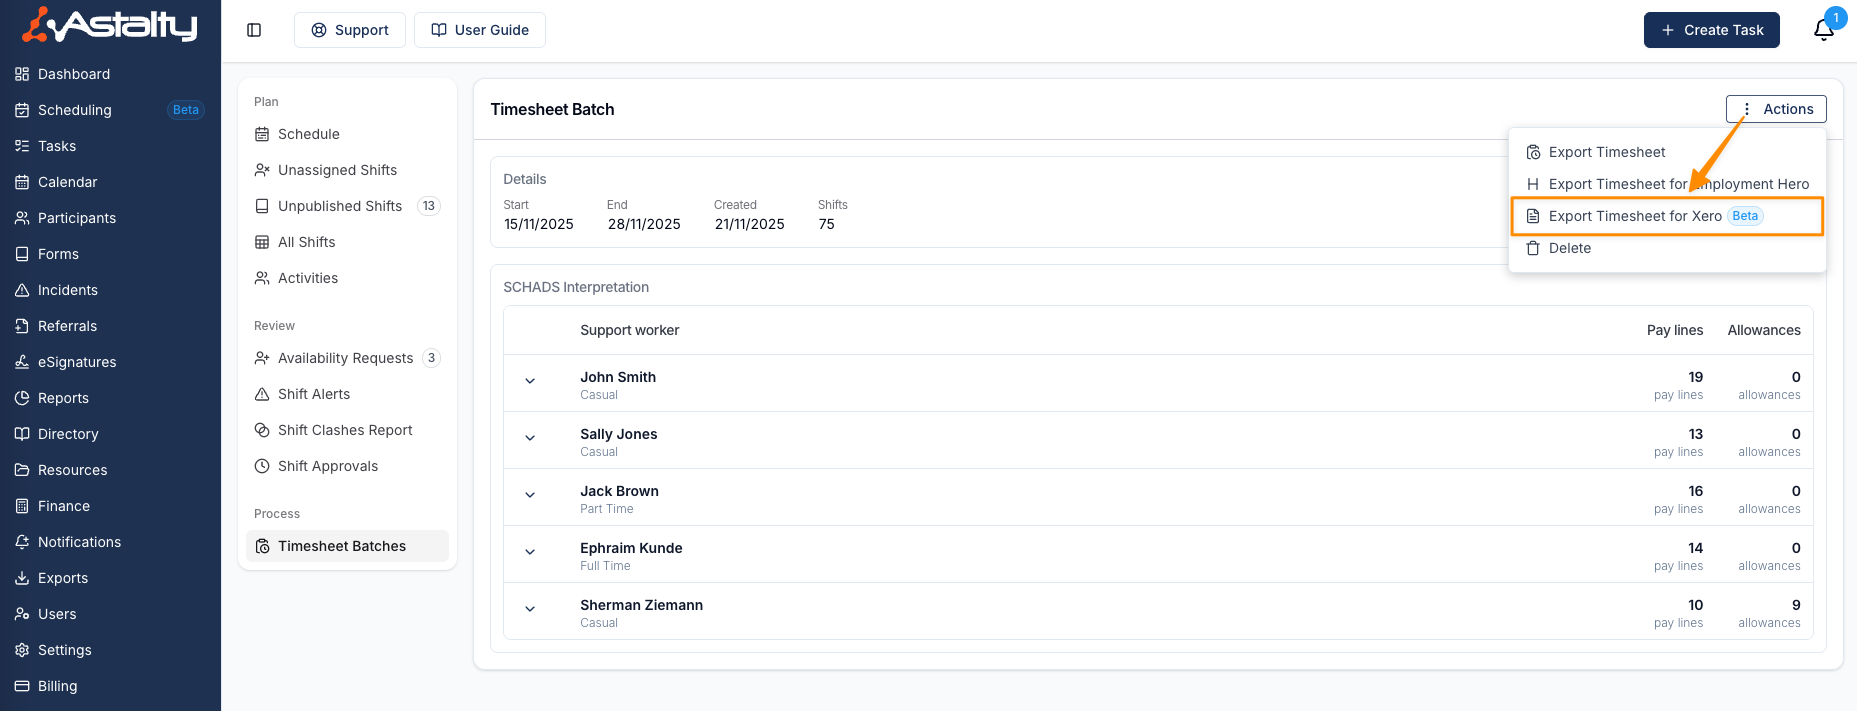
Once you have generated your Timesheet Batch, use the Actions button to select Export Xero Timesheet (API). See our Timesheet Batches guide for more information on how to create these.
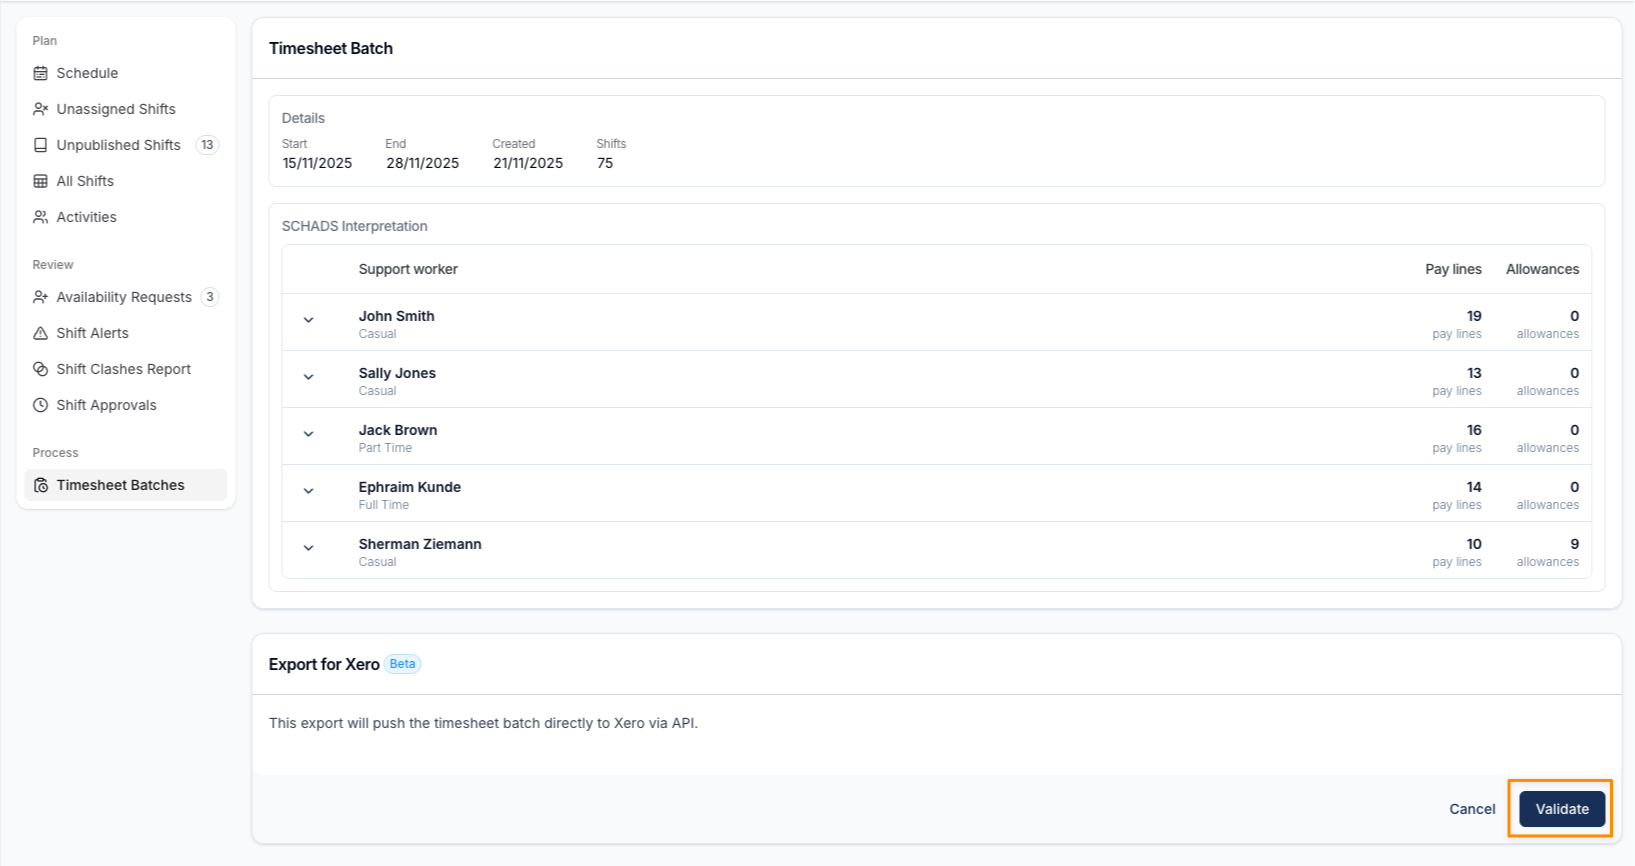
When you're ready to sync the Timesheets batch with Xero, select Validate.
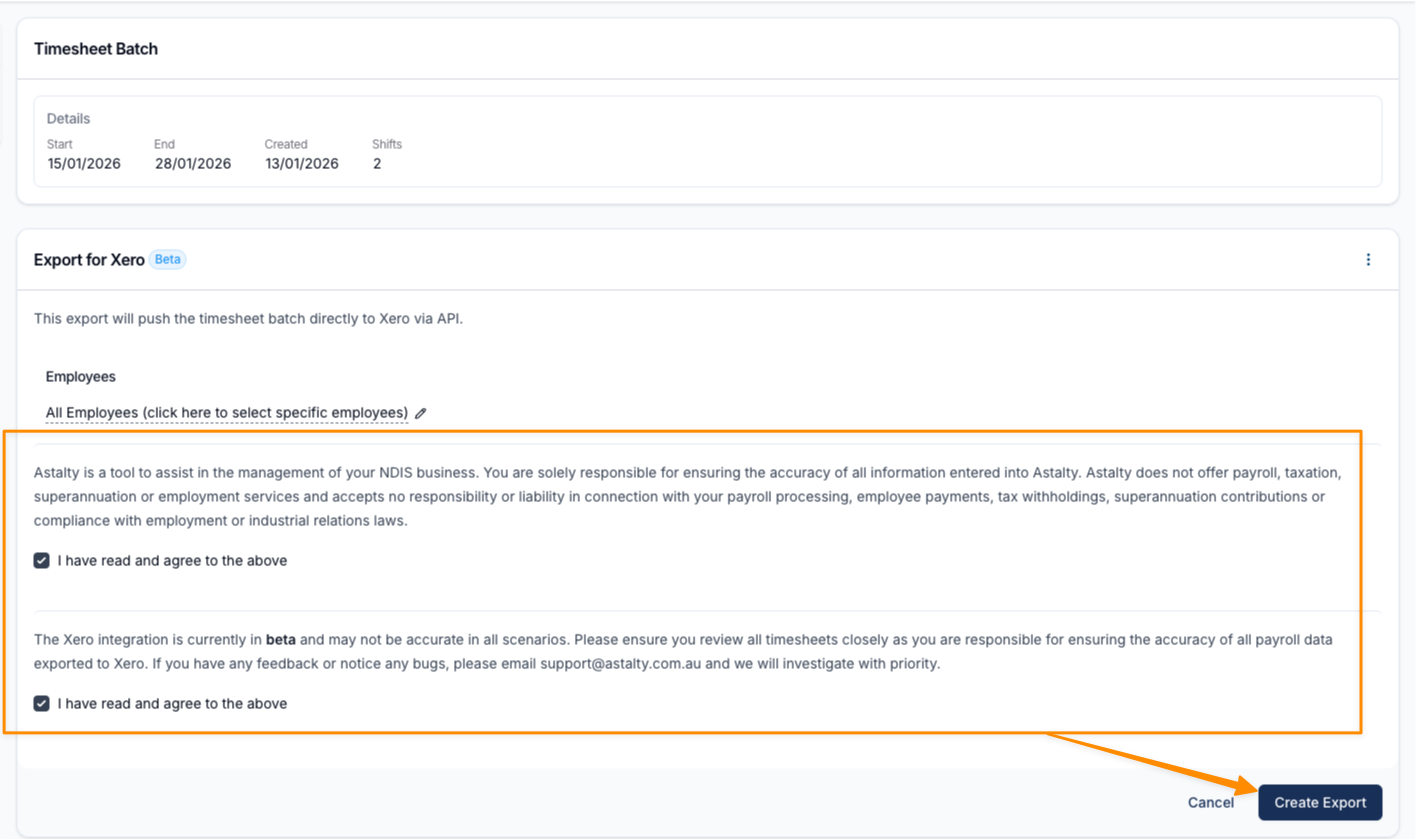
Once validated, you'll be asked a couple of questions before you can select Create Export.
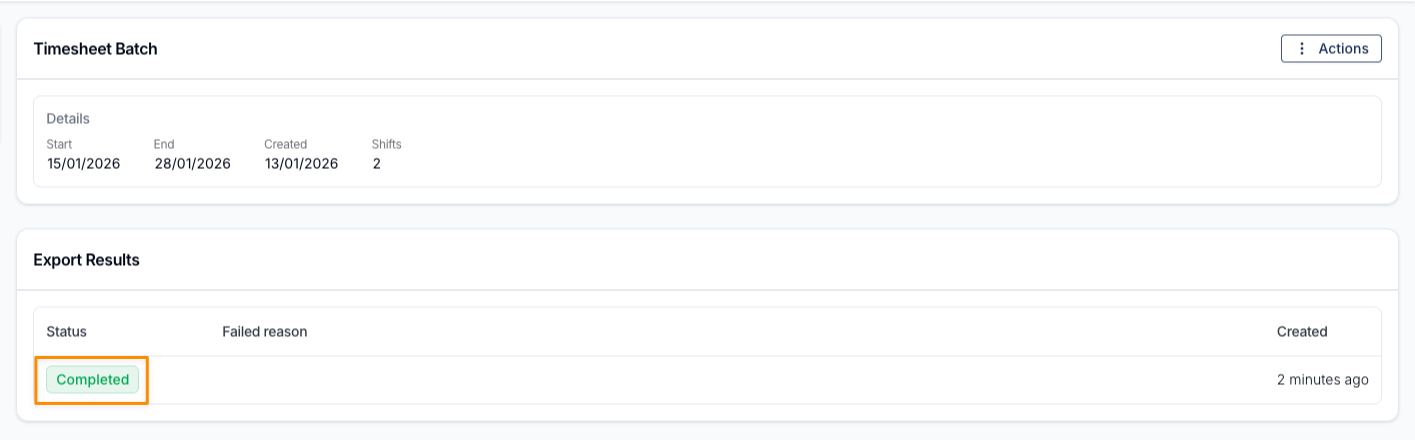
After selecting Create Export, the export will display below within Export Results. If it was successfully synced with your Xero account, the Export will display as 'Completed'.
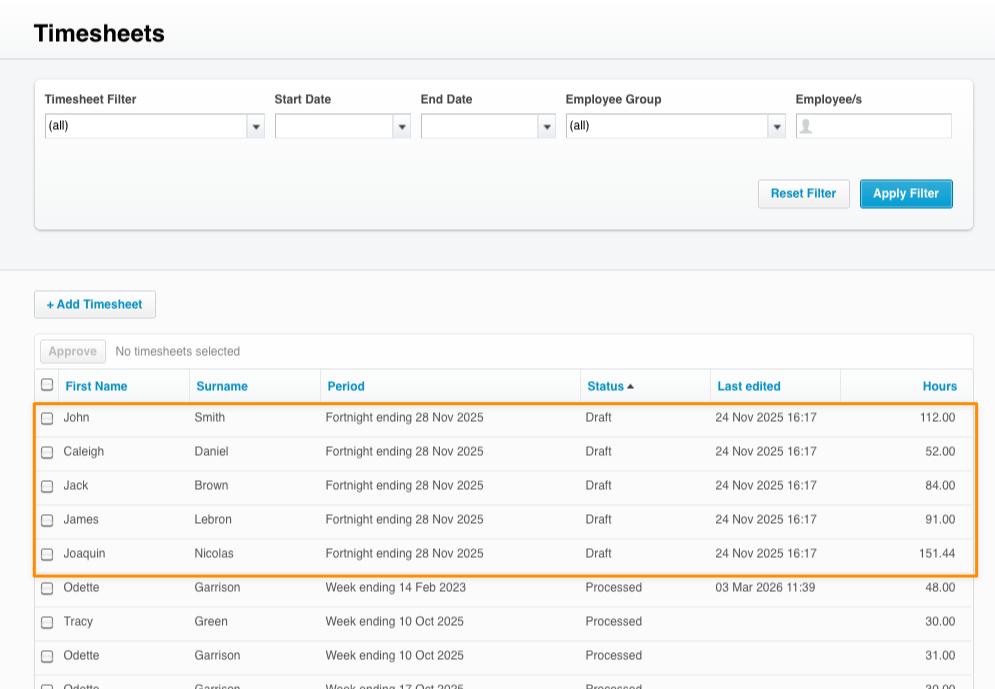
The newly synced Timesheets will appear in Xero with the Timesheet Status of Draft, ready for processing in Xero.
Errors When Syncing Timesheets
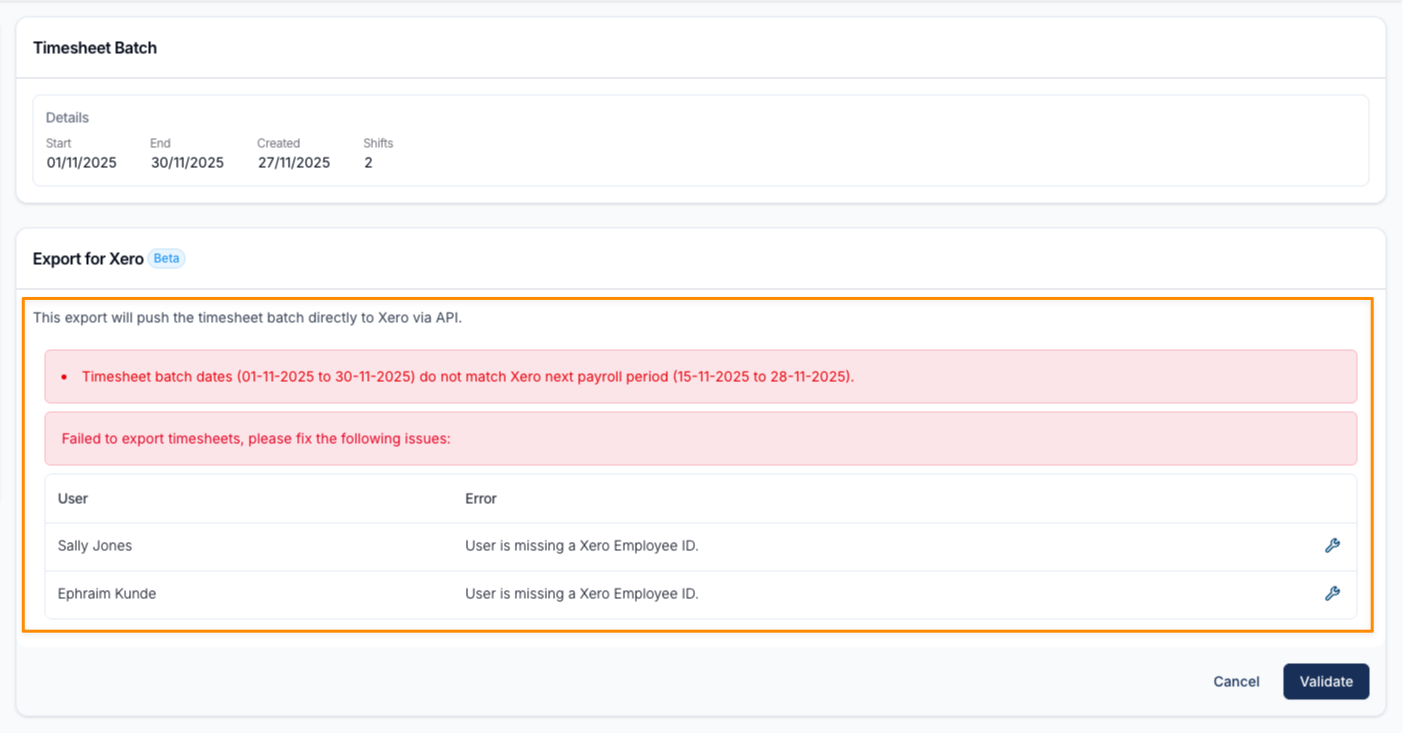
Astalty will identify errors that occur during the syncing process when you attempt to Validate a Timesheet Batch.
Errors can surface at two different points, and the Fix issue button behaves differently in each:
- When you validate, before anything is sent to Xero. Each problem is listed against the worker it affects, and most rows have a Fix issue button (wrench icon) that takes you straight to the screen where you can resolve it. See Resolving Timesheet Batch Validation Errors for every error, where each button goes, and what to do when there's no button.
- After the sync runs, when Xero itself rejects the timesheets. The attempt is recorded in the Export Results panel with a status of Failed and the reason Xero gave. Here, Fix issue opens a Why this export failed drawer rather than navigating away.
Timesheet Already Exists
Xero allows one timesheet per employee per pay period, in any status - awaiting approval, approved, rejected and processed all count. If Xero already holds one for a worker in this pay period, it won't accept another, and the export is recorded as Failed in the Export Results panel. This usually happens when an earlier export partially succeeded, or when a timesheet was entered directly in Xero.

Select Fix issue on the failed row to open the Why this export failed drawer. Under Timesheet to remove in Xero it names the worker and the pay period the clashing timesheet covers, and offers a Manage Xero timesheets button that opens Astalty's draft timesheet tool in a new tab, already filtered to that worker and pay period.
Who removes the timesheet, and how, depends on its status and on who created it:
| The existing timesheet | How to remove it |
|---|---|
| Draft, created by Astalty or by you | Delete it from Manage Xero timesheets. |
| Any other status - approved, awaiting approval, rejected or processed - created by Astalty or by you | In Xero, revert it to draft, then delete it. Astalty deletes drafts only, so nothing else can be cleared from Astalty. |
| Entered by the worker in Xero Me | Only the worker can delete it. Ask them to open Xero Me, revert it to draft if needed, and delete it. Don't reject it - that hands it back to them without removing it. |
| Already in a pay run in Xero, draft or posted | Revert the pay run to draft if it's posted - that also unlocks the timesheet - then delete the pay run, remove the timesheet, export again, and create the pay run again. If the pay run has already been filed and paid, don't delete it - add the hours in Xero instead. |
Once the timesheet is gone, run the export again.
Incorrect Timesheet Batch Dates
Validate blocks the export unless the batch dates match Xero's next payroll period exactly:
Timesheet batch dates (01-08-2026 to 14-08-2026) do not match Xero next payroll period (15-08-2026 to 28-08-2026).
That period starts on the start date currently held on the batch's Xero payroll calendar and runs one period length - a week, fortnight, four weeks, month, half-month or quarter, depending on the calendar type. A batch that sits inside a period, spans two of them, or covers a period Xero has already moved past fails the check.

A Pay Run Has Moved Xero Past the Batch
Xero - not Astalty - moves that start date: creating a pay run, draft or posted, advances it by exactly one period. So when the batch ends the day before Xero's next period starts, a pay run for that period almost always already exists. Astalty recognises that case and prints the remedy underneath the message:
Xero's next pay period has moved past this batch, which usually means a pay run for this period already exists in Xero. Delete that pay run, export, then create it again. If the pay run is posted, revert it to draft first.
- In Xero, open the pay run covering the batch period. If it's posted, revert it to draft.
- Delete the pay run.
- If a timesheet for the period is still in Xero, remove it - see Timesheet Already Exists.
- In Astalty, select Validate and run the export again.
- Create the pay run again in Xero.
Other Date Mismatches
Every other mismatch shows the message on its own with no remedy underneath - the batch runs ahead of Xero's next period, its dates don't line up with the calendar, or it belongs to an older period. Correct the batch dates to match the period Xero is expecting. Don't delete the pay runs sitting between an older period and today to reach it: those are pay runs you've already processed.
To process missed timesheets from a previous period, export the batch as a file and enter it in Xero manually. Select Export as Excel in the top-right corner of the Export for Xero panel. This produces the same Xero-formatted Excel file as the Xero-formatted timesheet option under Export Timesheet as Excel, ready for importing into Xero - see Export Timesheet as Excel.
Missing Users
If you attempt to sync a batch that contains users who are not linked to employees in Xero, the sync will fail. You will need to link these employees before rerunning the sync.
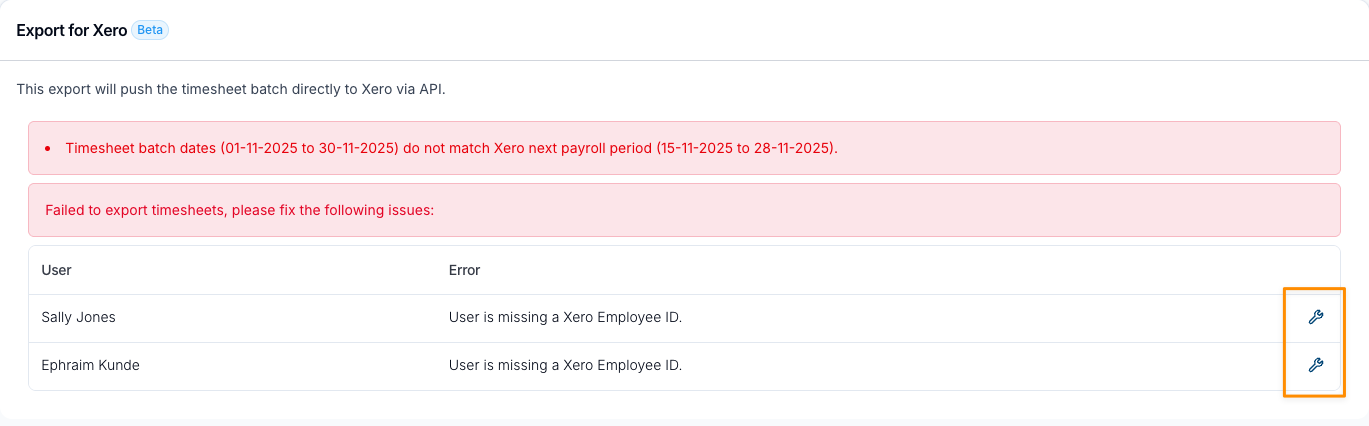
Each error row has a Fix issue button (wrench icon). For this error it opens the worker's HR tab in a new tab, with the Update payroll platform drawer ready so you can link them to their Xero employee.
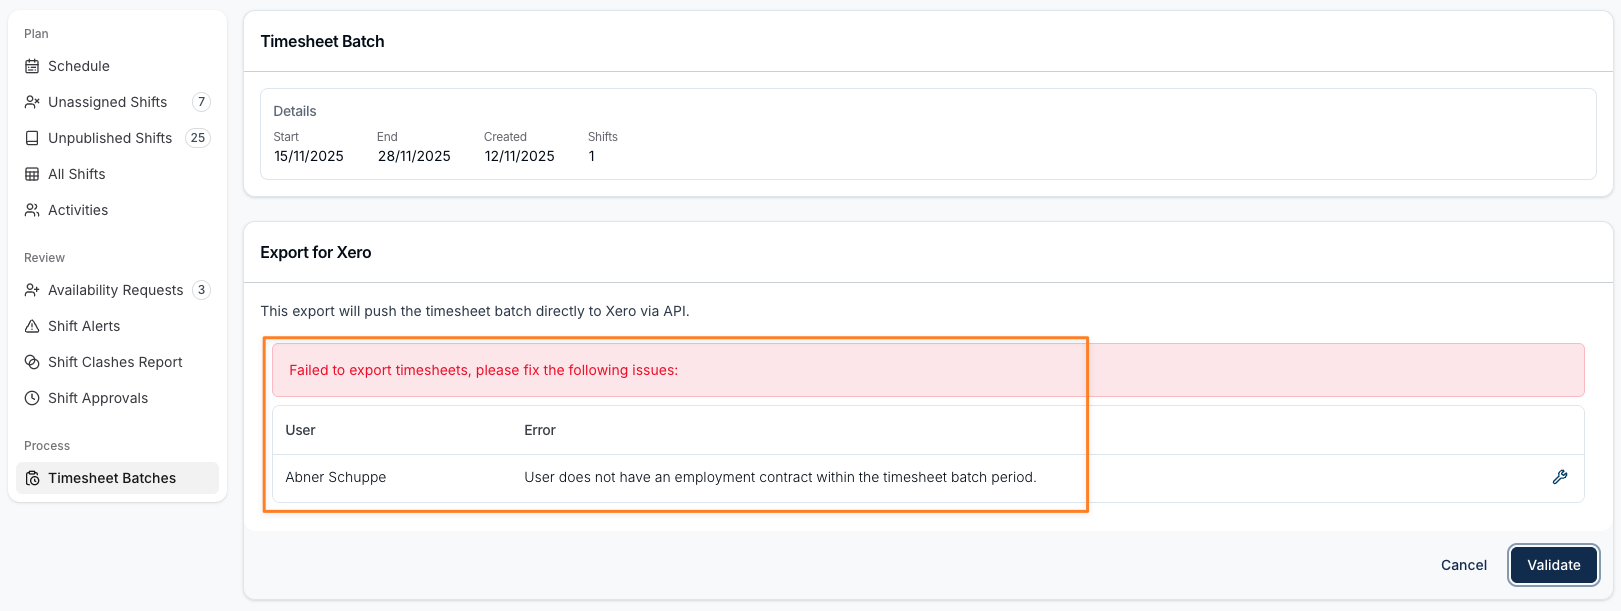
No Employment Details Error
If you attempt to sync a batch that contains users who do not have employment details in Astalty, the sync will fail. You will need to assign the employee employment details before rerunning the sync.
Xero Pay Item Configuration Walk-Through
Before you link Astalty and Xero, it's important that you set up your pay items correctly. We've created a quick Xero Payroll - Pay Item Configuration reference listing all the pay items that you'll need in order to integrate with Astalty and a video walkthrough of how to create these in Xero.
Xero Payroll Integration Walk-Through
This video provides a comprehensive walk-through of the Payroll Integration setup between Xero and Astalty. We cover the key configuration steps required in both platforms, including preparing employee settings, configuring pay items, and ensuring pay rates are aligned correctly for accurate data syncing.
You'll learn how to structure Ordinary Hours in Xero, how multipliers in Astalty Pay Items interact with payroll settings, and what needs to be configured (and what doesn't) within employee Pay Templates. By the end of the video, you'll have a clear understanding of how to set up and validate your integration to ensure payroll data flows smoothly and calculates correctly.