- Administration
- Setup Pay Groups and Employees in Astalty
Setup Pay Groups and Employees in Astalty
Overview
Before timesheets can be exported to Xero, you must configure Pay Groups and set up Employees within the Xero Integration in Astalty.
Pay Groups organise employees for payroll processing and determine which Pay Rates apply to their scheduled shifts. These Pay Rates categorise worked hours — for example, ordinary hours, evening shifts, weekend work, and allowances — so that when timesheets are exported, the hours can be correctly mapped to the corresponding Pay Items in Xero.
Once Pay Groups are created, employees must be assigned to the appropriate group to ensure their scheduled shifts are interpreted correctly during the payroll export process.
Create a Pay Group
Pay Groups define the payroll configuration for a group of employees and link them to the relevant Pay Rules used for payroll calculations.
To create a Pay Group:
- Navigate to Settings in Astalty, select Integrations, and click View Details for Xero.
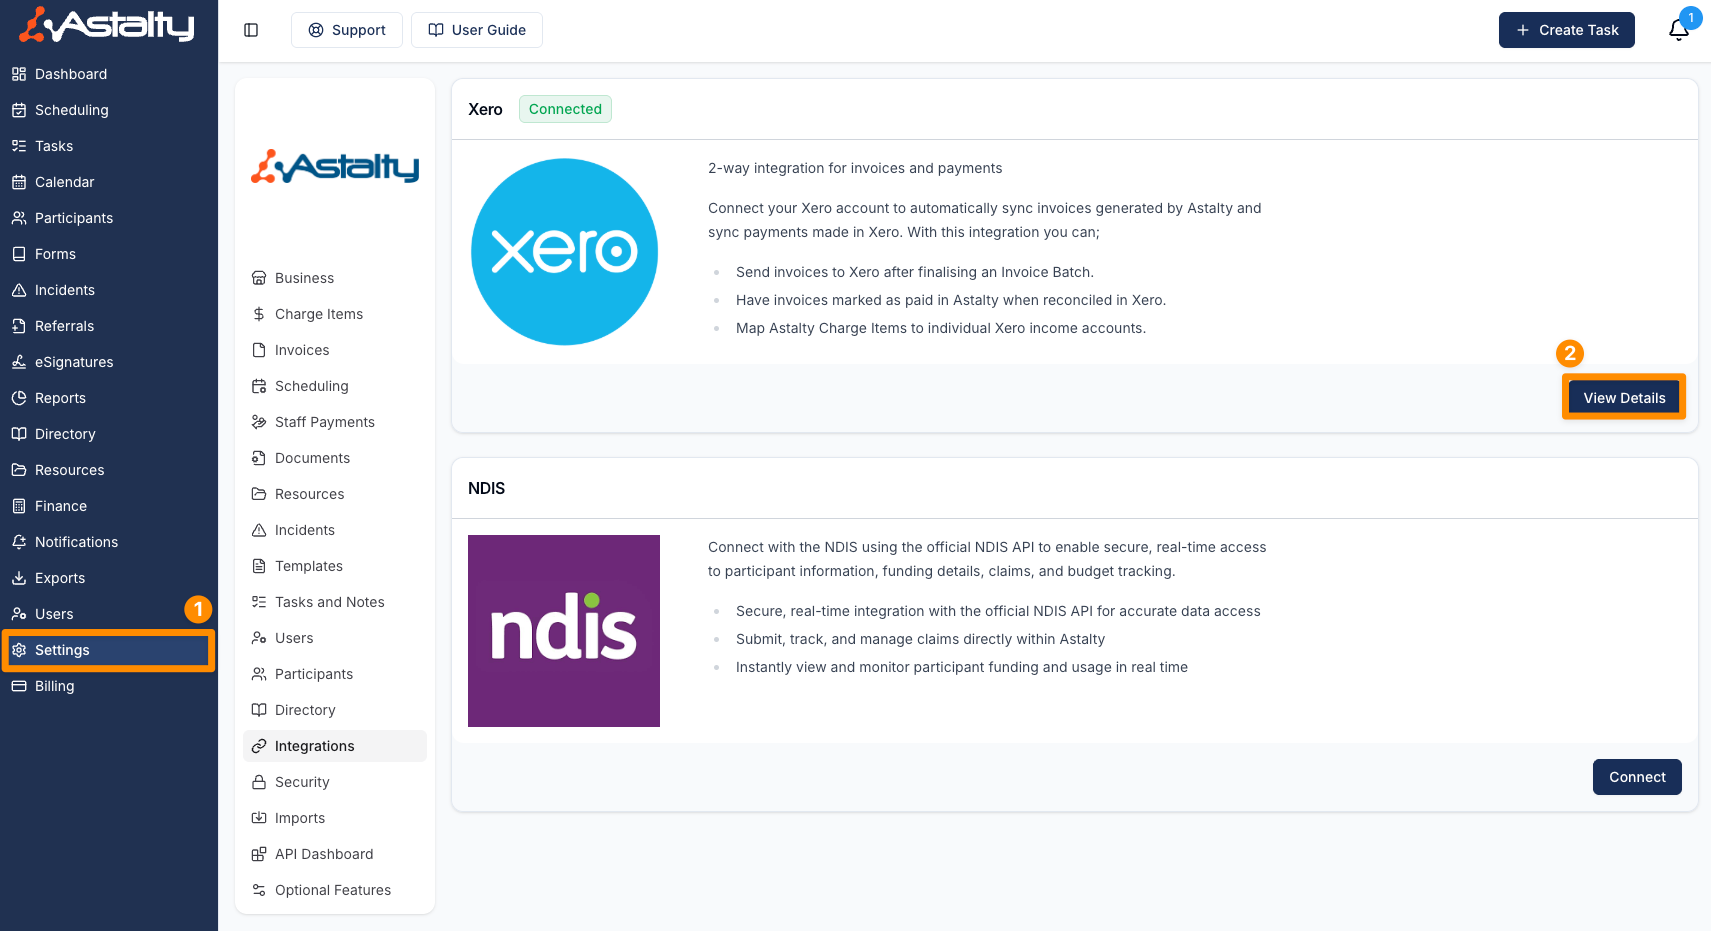
- Select Pay Groups from the sub-menu.

- Click Create Pay Group.

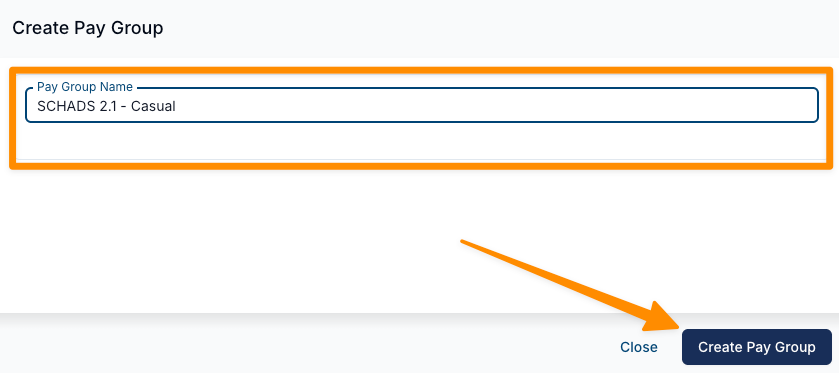
- Enter a Pay Group Name and click Create Pay Group.
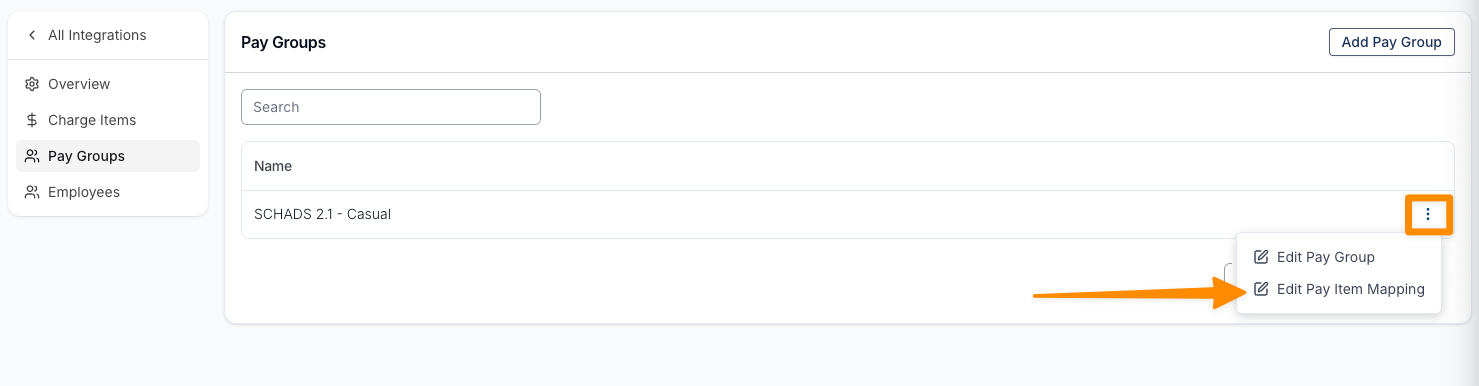
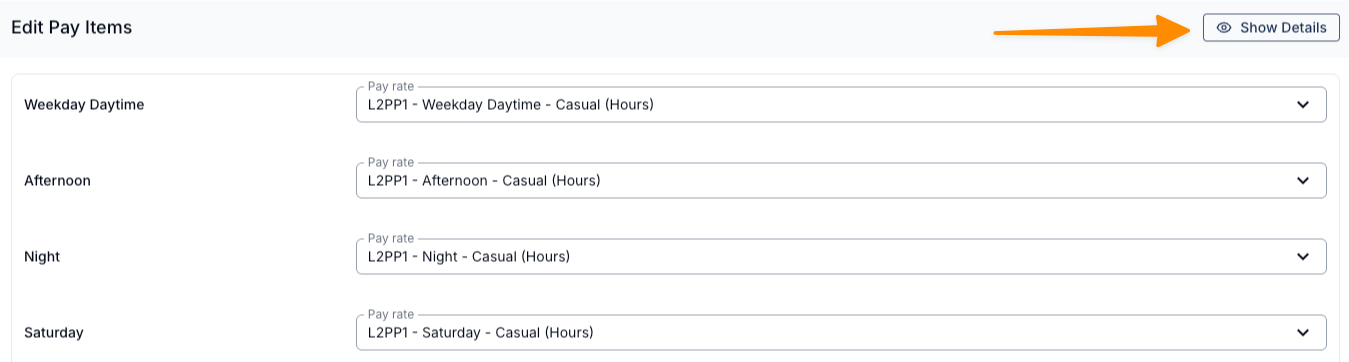
- Click the three dots next to the Pay Group and select Edit Pay Item Mapping.
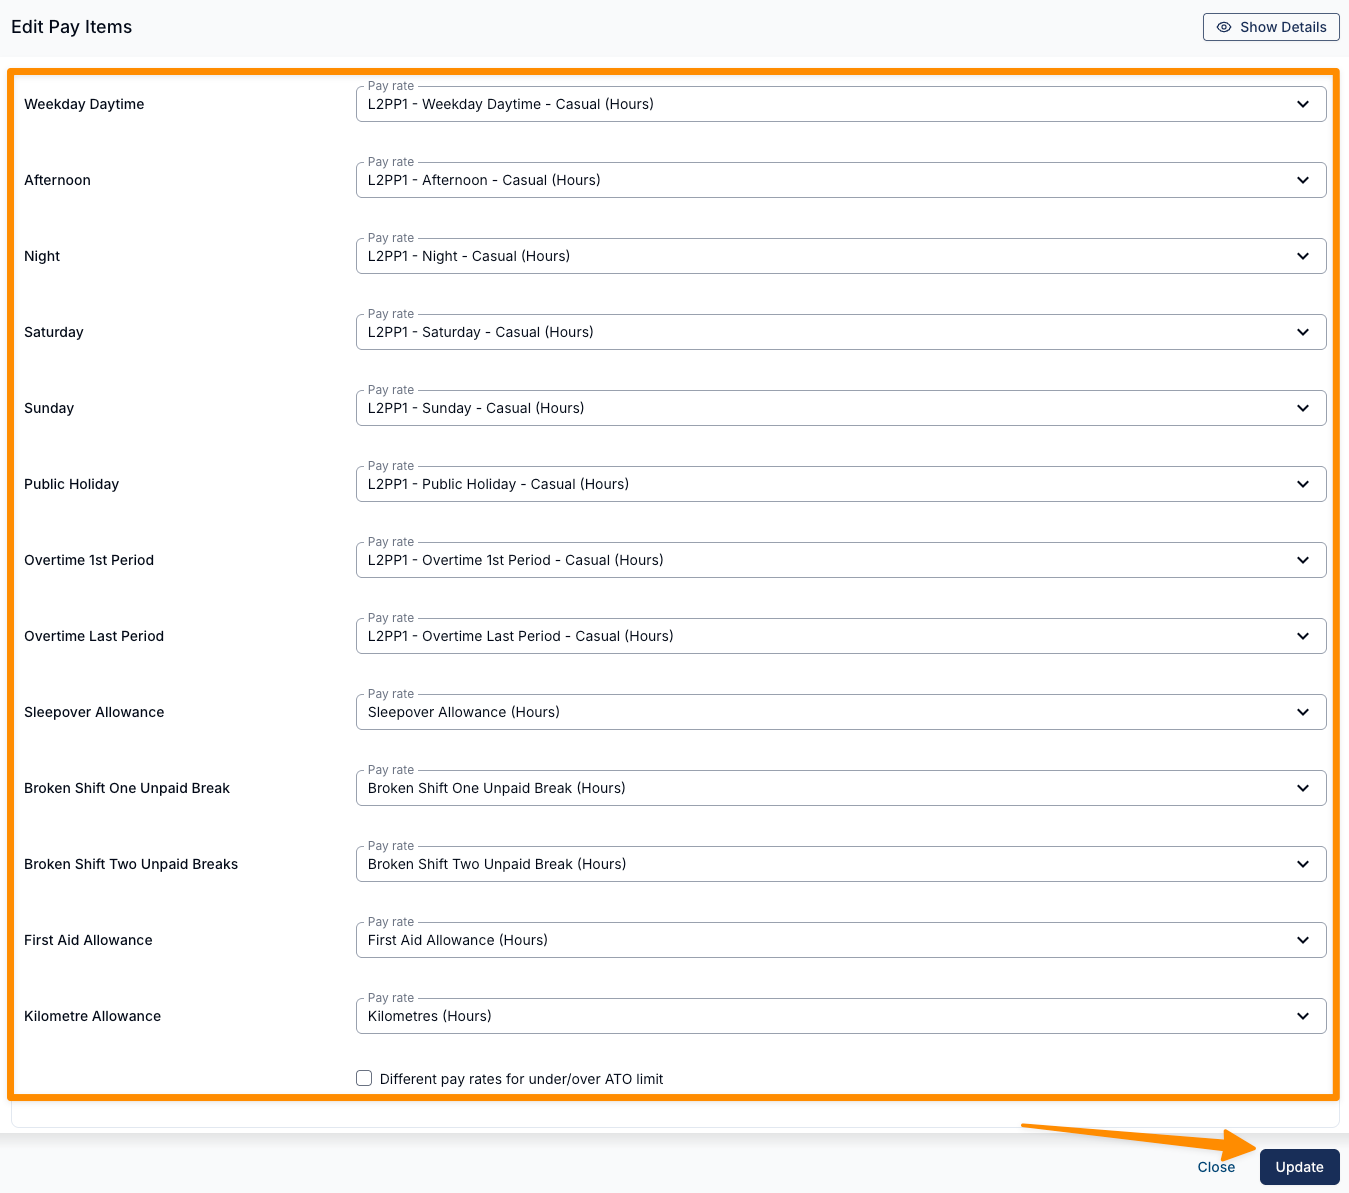
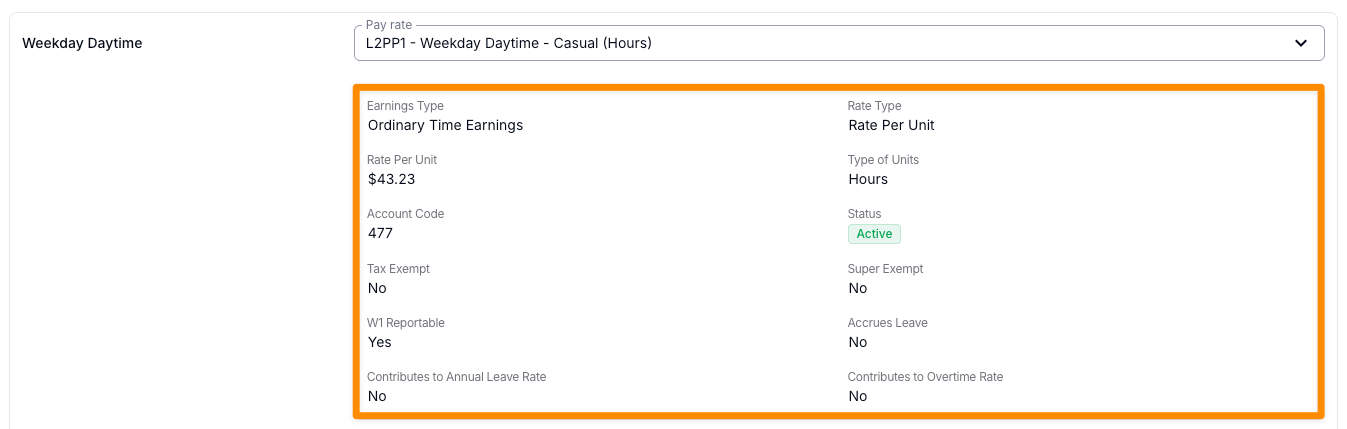
- Assign the Pay Items created in Xero to the corresponding Pay Items in Astalty (make sure to select the appropriate Pay Classification or Employment Basis (e.g. Casual, Permanent)).
Setup Employees
Once your Pay Groups have been created, you will need to link employees between Astalty and Xero, assign them to the correct Pay Group, and ensure each employee has Employment Details configured.
Link Employees to Xero
- Navigate to Settings in Astalty, select Integrations, and click View Details for Xero.
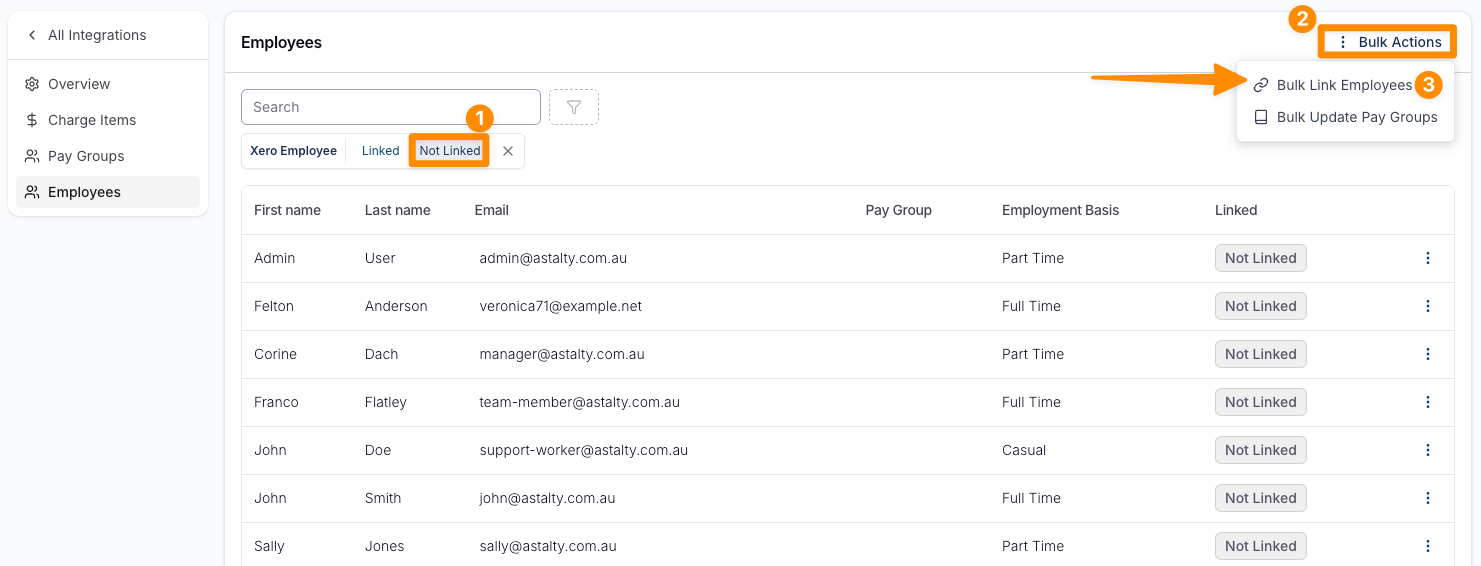
- Select Employees from the sub-menu.

- In the Xero Employee filter, select Not Linked.
- Click Bulk Actions and select Bulk Link Employees.
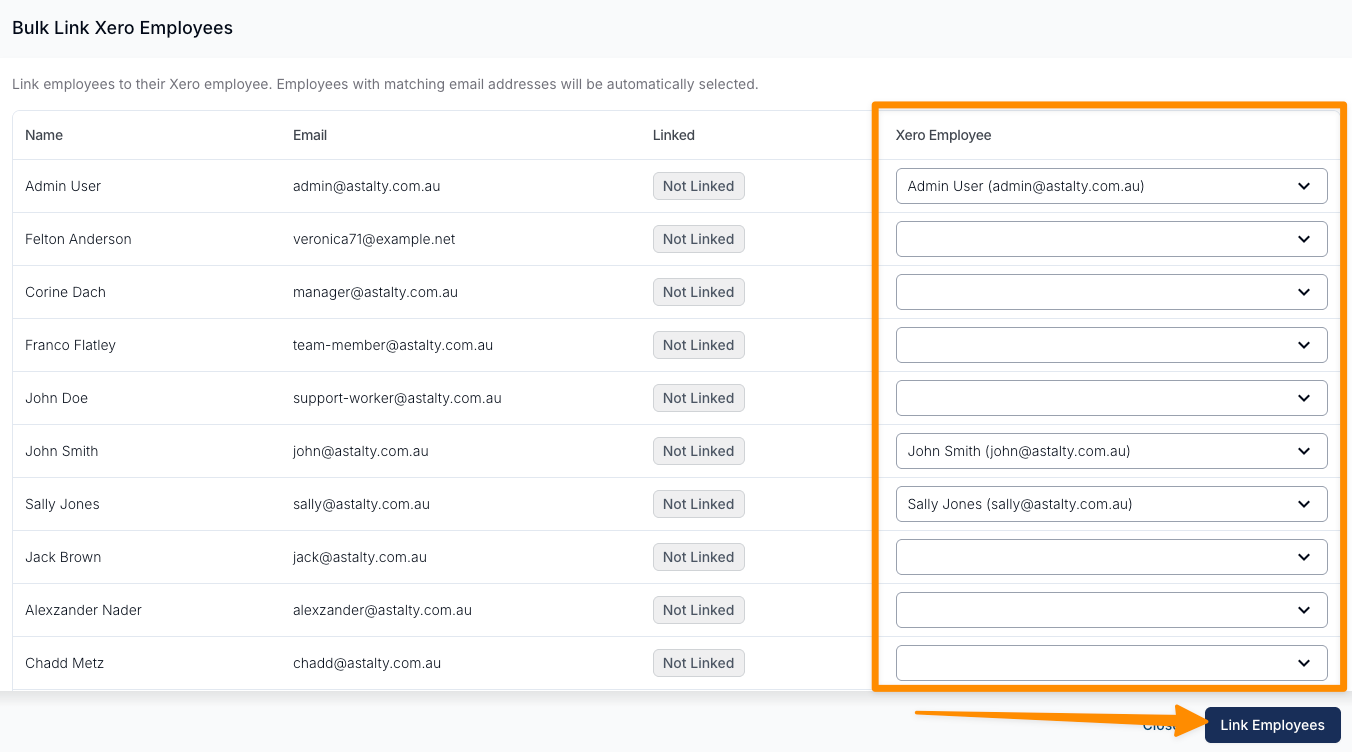
- For each Astalty employee, select the corresponding Xero employee from the dropdown menu.
- Once all employees have been matched, click Link Employees.
Assign Pay Groups
After linking employees, you will need to assign them to the correct Pay Group.
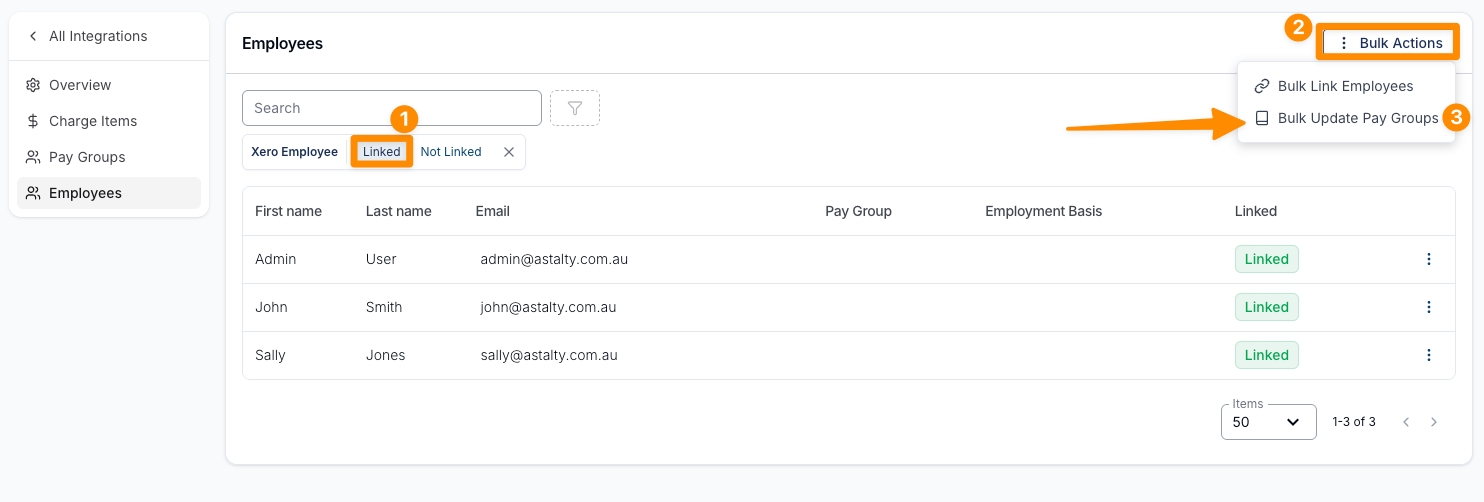
- Change the Xero Employee filter to Linked.
- Click Bulk Actions and select Bulk Update Pay Groups.
To assign the same Pay Group to multiple employees:
- Select the Pay Group from the dropdown menu at the top of the page.
- Tick the checkbox next to the Name header to select all employees.
- Click Apply to Selected.
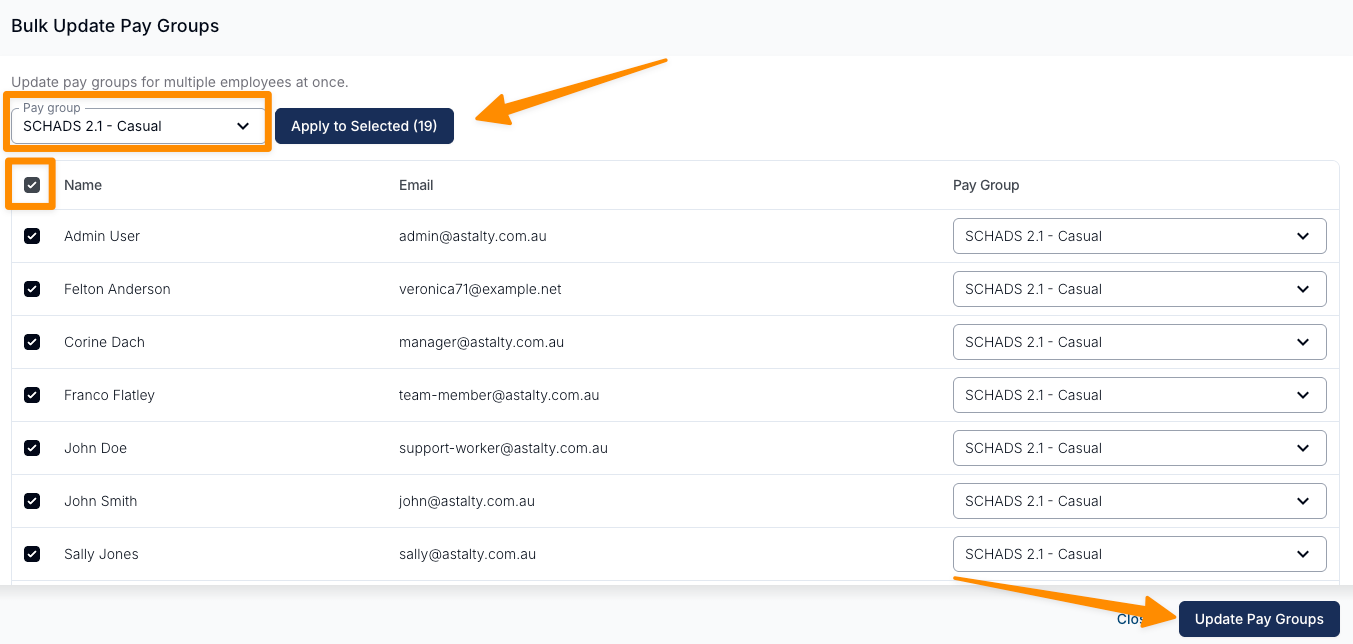
If an employee requires a different Pay Group, you can select the Pay Group dropdown next to their name and choose the appropriate group from the list.
Once all Pay Groups have been assigned, click Update Pay Groups.
Create Employment Details
Each employee must have Employment Details configured in Astalty.
To create employment details:
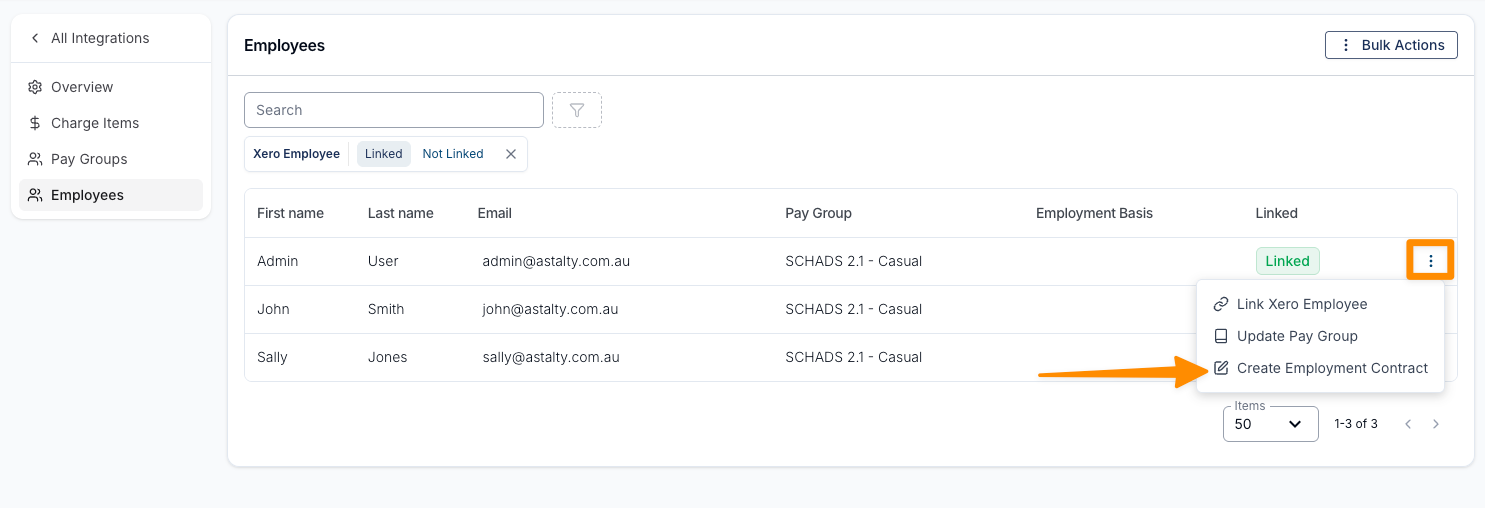
- In the Linked Employees list, click the three dots next to the employee's name.
- Select Create Employment Details.
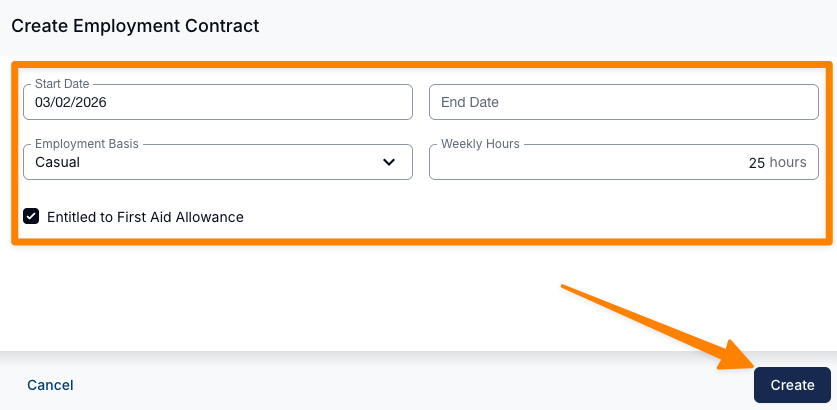
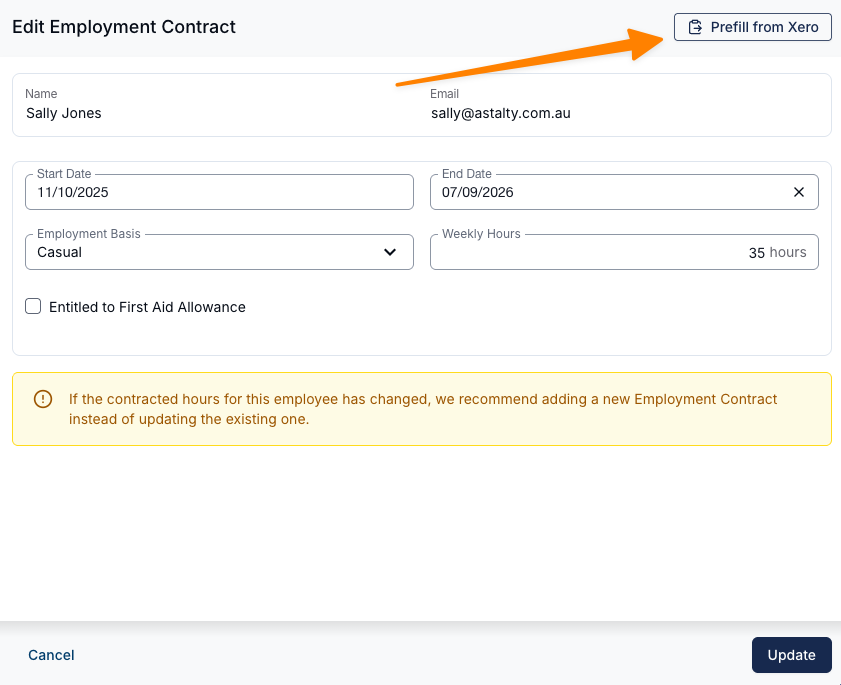
- Enter the relevant Start Date and select the employee's Employment Basis.
- If required, enter the employee's Weekly Hours.
- If the employee has completed First Aid training, ensure the Entitled to First Aid Allowance checkbox is selected.
- Click Create to save the employment details.
For employees who already have contract information in Xero, you can select Prefill from Xero in the Employment Details form. This will automatically retrieve the start date and employment basis from Xero and populate these fields in Astalty.
Repeat this process for all employees.
Setting Up Pay Groups and Employees Video Walk-Throughs
Rate Per Unit Method
In this video, we walk through how to create Pay Groups and set up Employees in Astalty using the Rate Per Unit Method.
Multiplier Method
In this video, we walk through how to create Pay Groups and set up Employees in Astalty using the Multiplier Method.
Next Steps
Once all employees have been linked, assigned to the correct Pay Groups, and have Employment Details in place, you're ready to process your first Timesheet Batch. Click here for the guide.