- Administration
- Configuring Xero in Astalty
Configuring Xero in Astalty
Overview
Before you can send Timesheet data from Astalty to Xero, you must first connect your Xero organisation to your Astalty account.
This connection authorises Astalty to securely communicate with Xero and allows payroll-related data — such as Pay Items — to be retrieved from Xero. Once connected, Astalty will be able to send Timesheet Batches directly to Xero for payroll processing.
Only users with Admin permissions in Astalty can complete this setup.
Confirm Xero as the Payroll Platform
Before proceeding, you’ll need to confirm that Xero is selected as your payroll platform in Scheduling Settings.
- Navigate to Settings and select Scheduling.
- Click Edit in the Scheduling Settings section.
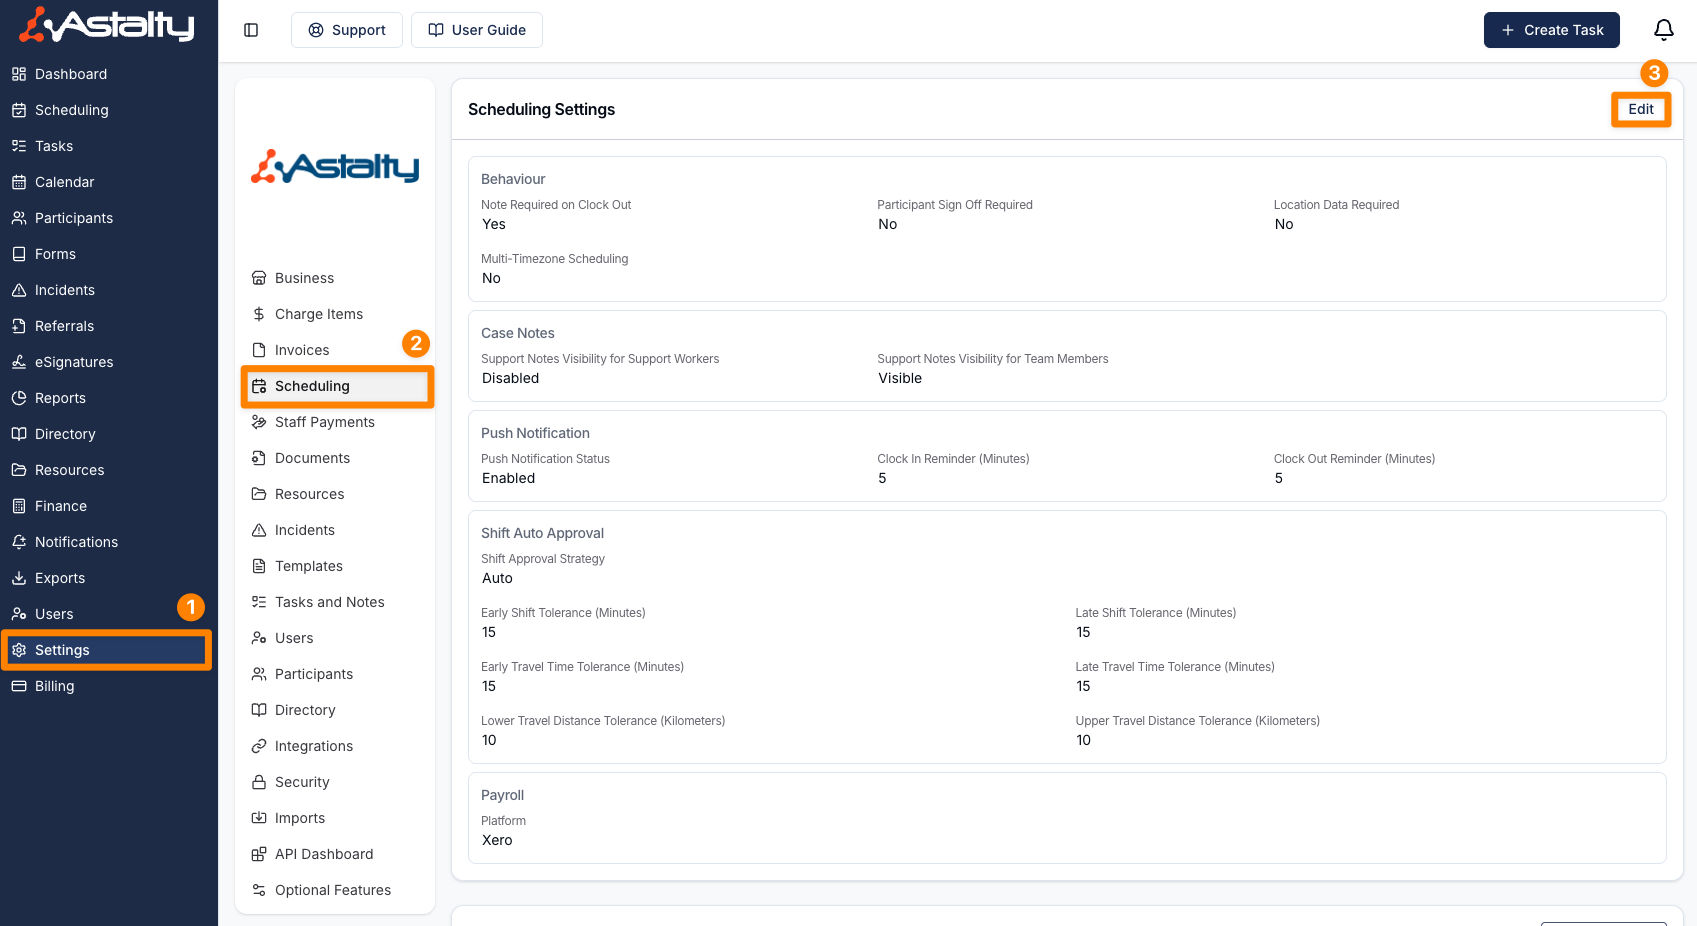
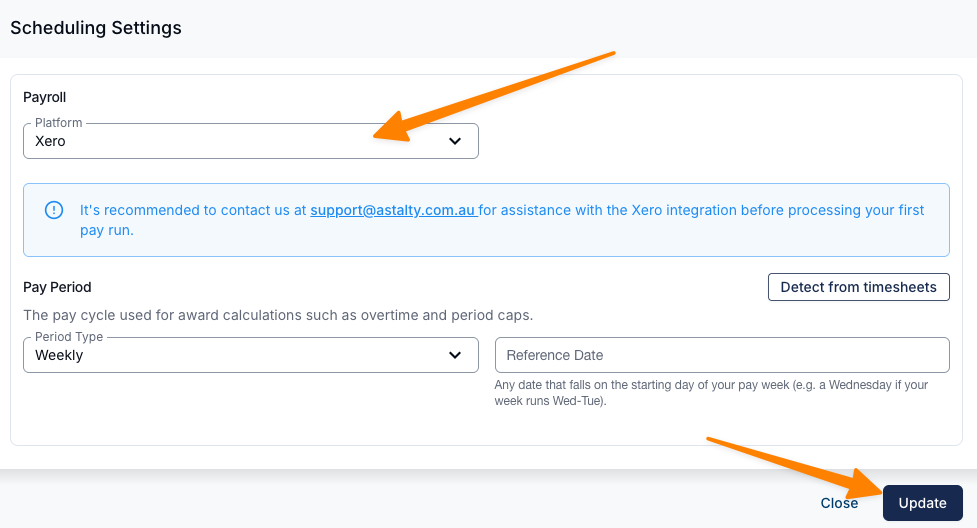
- In the Payroll Platform dropdown menu, select Xero.
- Click Update to save your changes.
How to Connect Xero
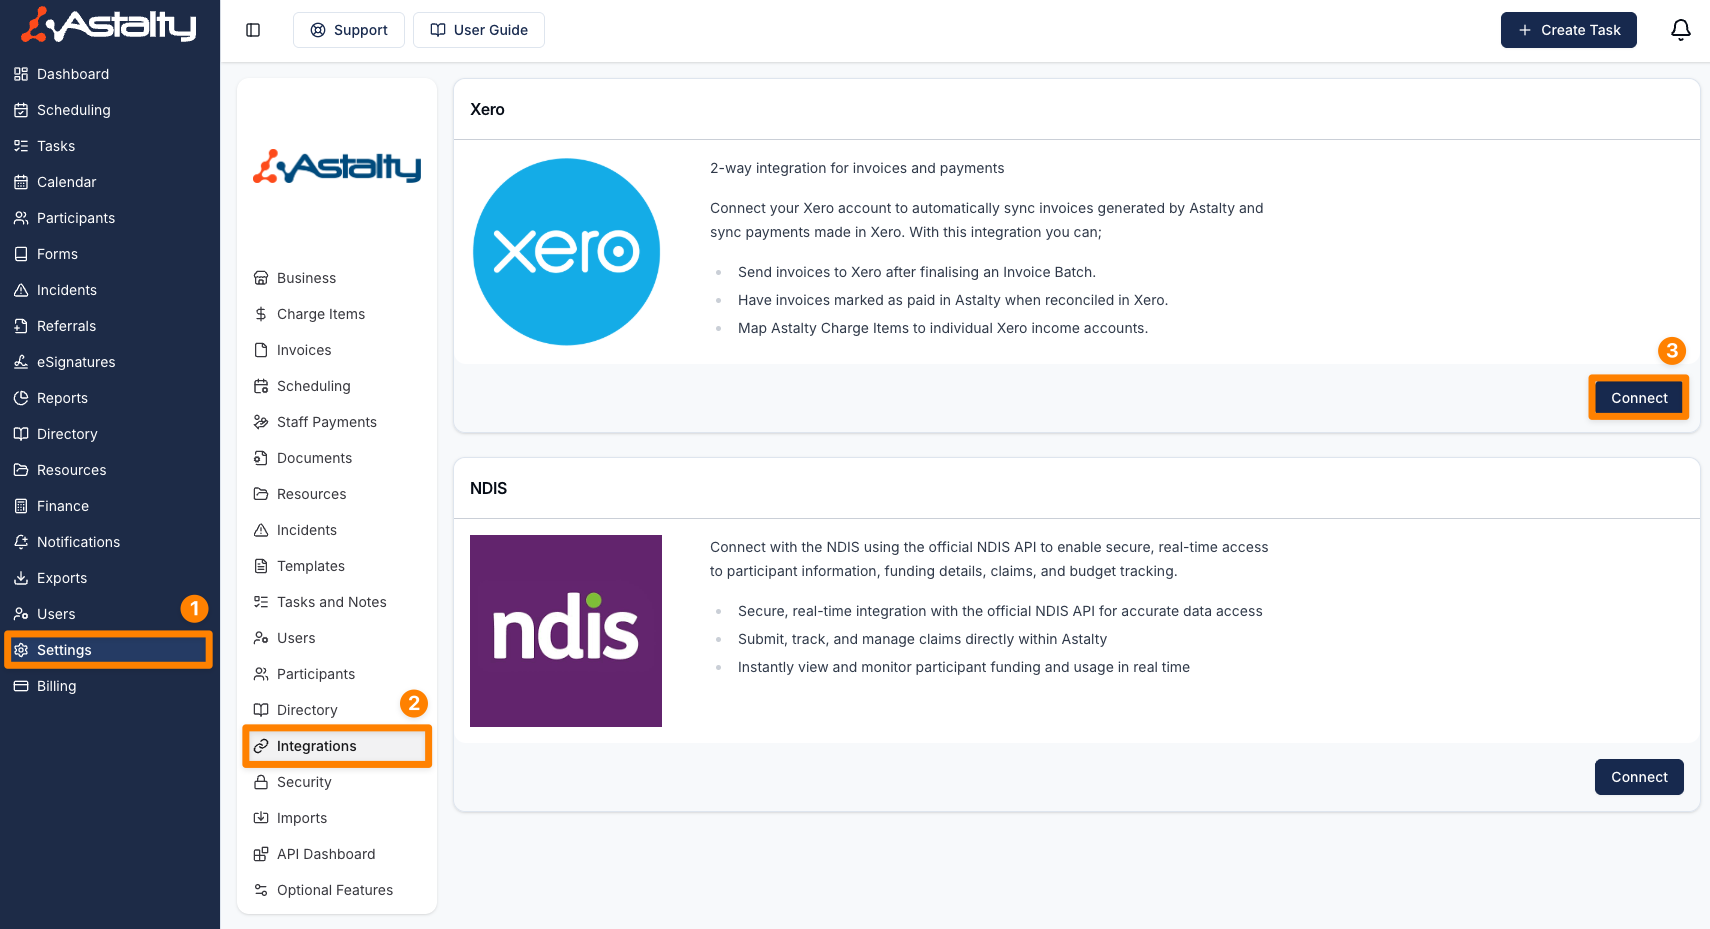
- Navigate to Settings.
- Select Integrations.
- Click Connect to Xero.
- Sign in to your Xero account when prompted.
- Select the Xero organisation you want to connect.
- Click Allow access.
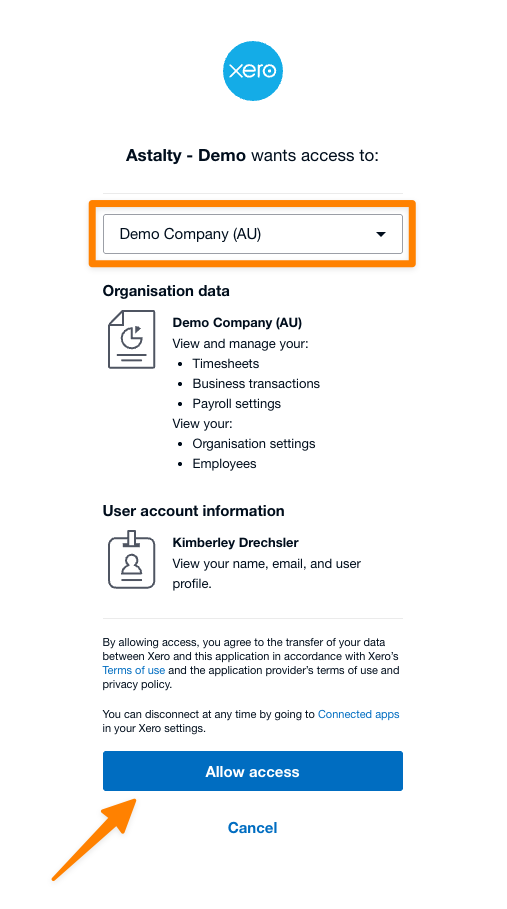
Once connected, Astalty will be authorised to send payroll timesheet data to Xero.
Setup Integration Settings
After connecting, you'll be prompted to configure your Xero Integration:
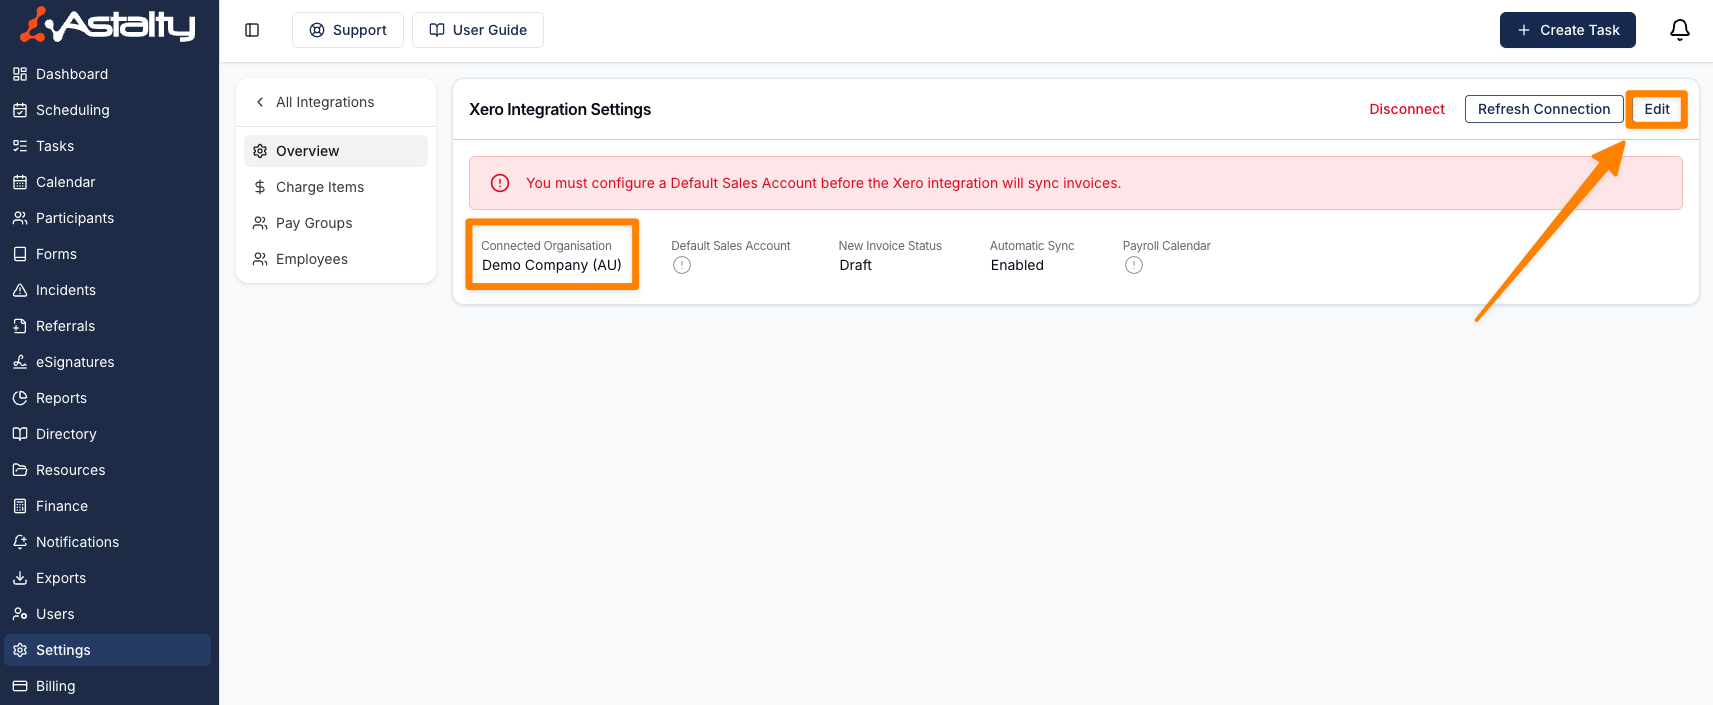
- The Xero Organisation Name should appear in the integration settings.
- In the Xero Integration settings page, click Edit (top-right corner).
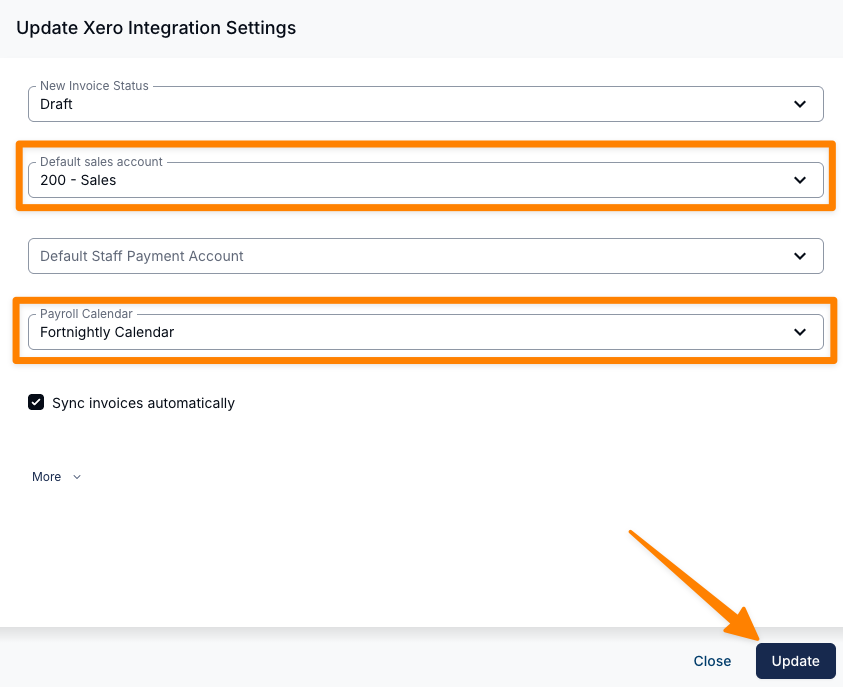
- Select your Default Sales Account from the dropdown list.
- If Staff Payments are enabled in your Xero account, select the relevant Staff Payments account from the dropdown.
- Choose your Payroll Calendar (this must already be set up in Xero).
- Click Update to apply your changes.
Connecting Xero Video Walk-Through
In this video, we walk through how to connect and configure your Xero integration in Astalty to enable the Xero Payroll integration.
Next Steps
You’re now ready to set up your Pay Items and Employee Pay Templates in Xero. Click here for the guide.