- Scheduling
- Uploading User Records
Uploading User Records
Overview
The Astalty mobile app allows Support Workers to upload and manage required and optional Records from their device. This includes certifications, licences, and compliance Records.
Within the app, you can:
- View which Records are required, and which are optional
- Upload documents quickly using your phone
- Track the status of your submissions
- Receive notifications when updates are needed (dependent on notification settings applied by admin users)
Keeping your Records current helps ensure compliance and allows you to continue working without interruptions.
Uploading Your Records
Open the Astalty App
- Navigate to the Astalty mobile app on your device.
Access Your Profile
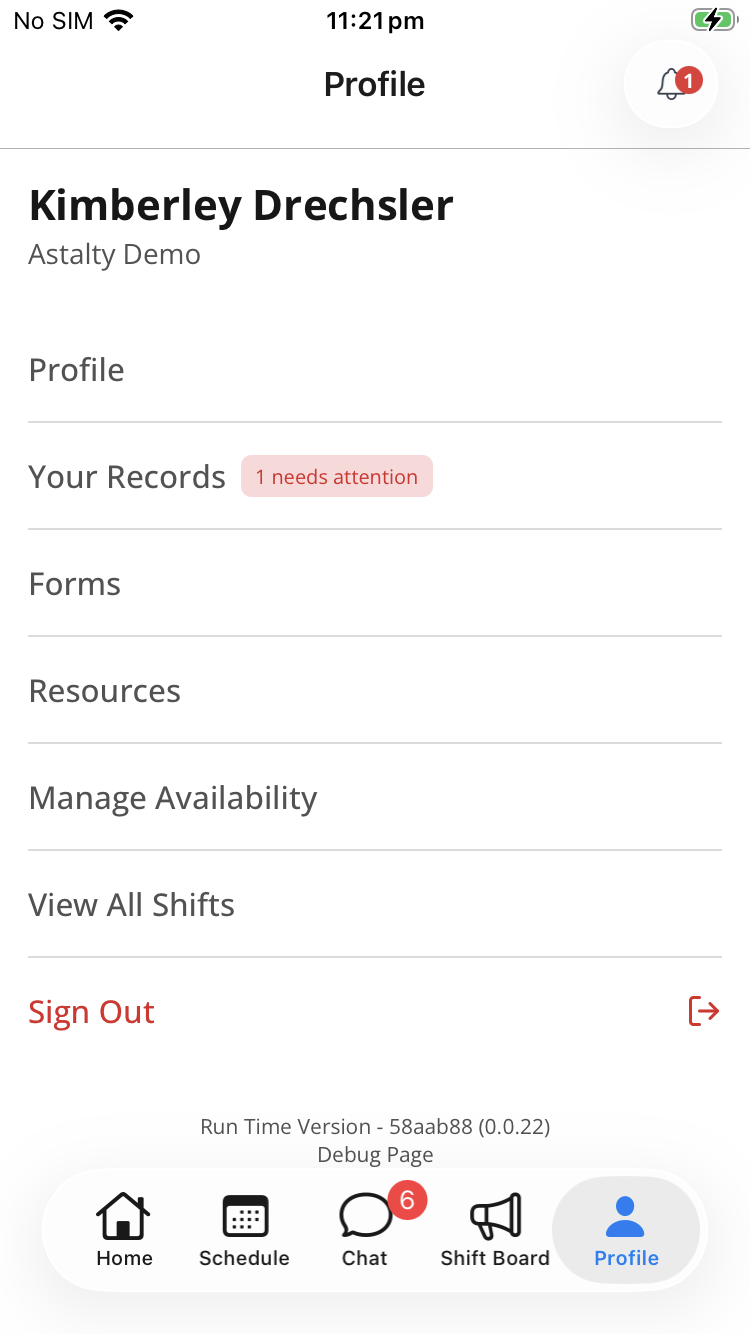
- Tap Profile in the bottom menu to open your profile.
Go to Records
- Select Your Records. The page shows every self-service Record Type available to you, with required types first and optional types after them.
- If any of your required Records need action, a needs attention badge is displayed next to the option. Optional Records never count towards it, even if one you've uploaded is Expired or Declined.
Start an Upload
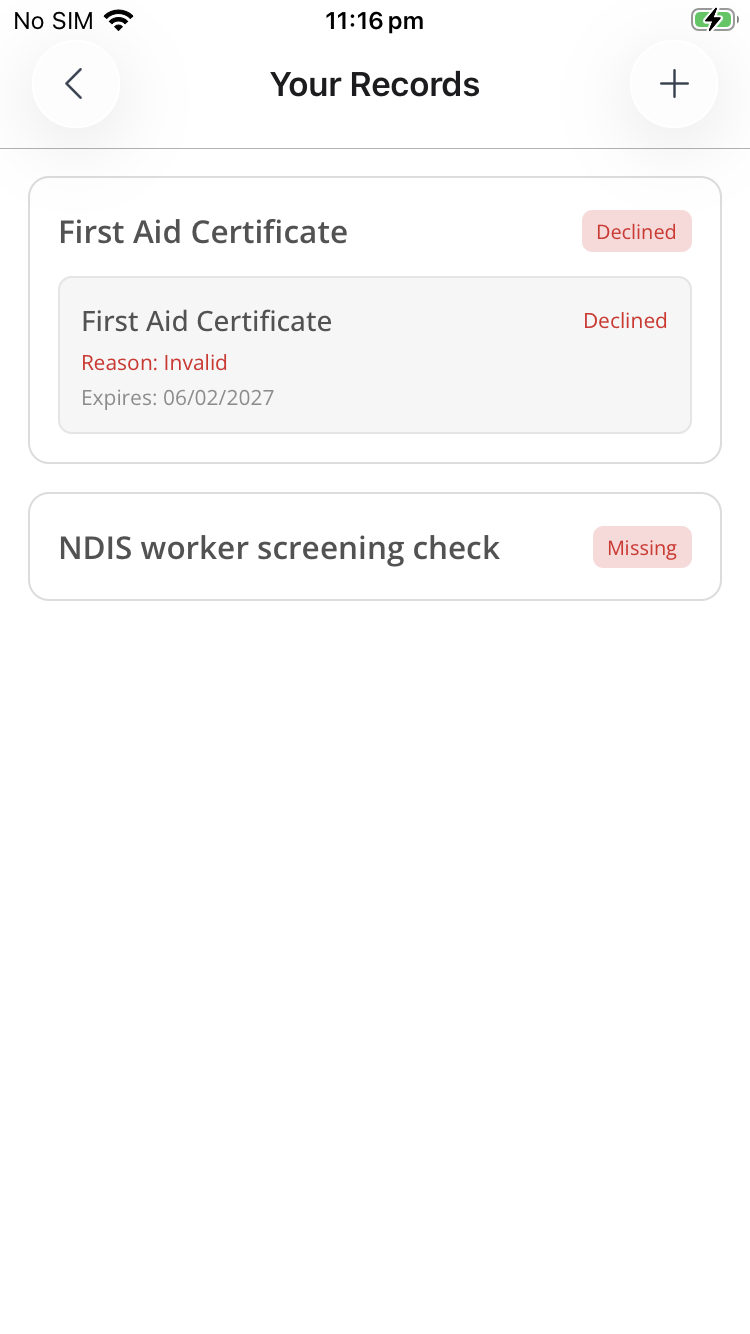
Each Record Type available to you is shown as a card with a status badge. Required Record Types are listed first.
- Tap the card for the Record you want to upload.
- If the Record is Missing or Optional and you haven't uploaded one yet, the upload form opens straight away with that Record Type already selected.
- If the Record already has an entry, a menu appears. Select Create Record to add a new one.
- Alternatively, select + in the top right and choose the Record Type. Required Record Types are listed first.
Complete the Upload Record Form
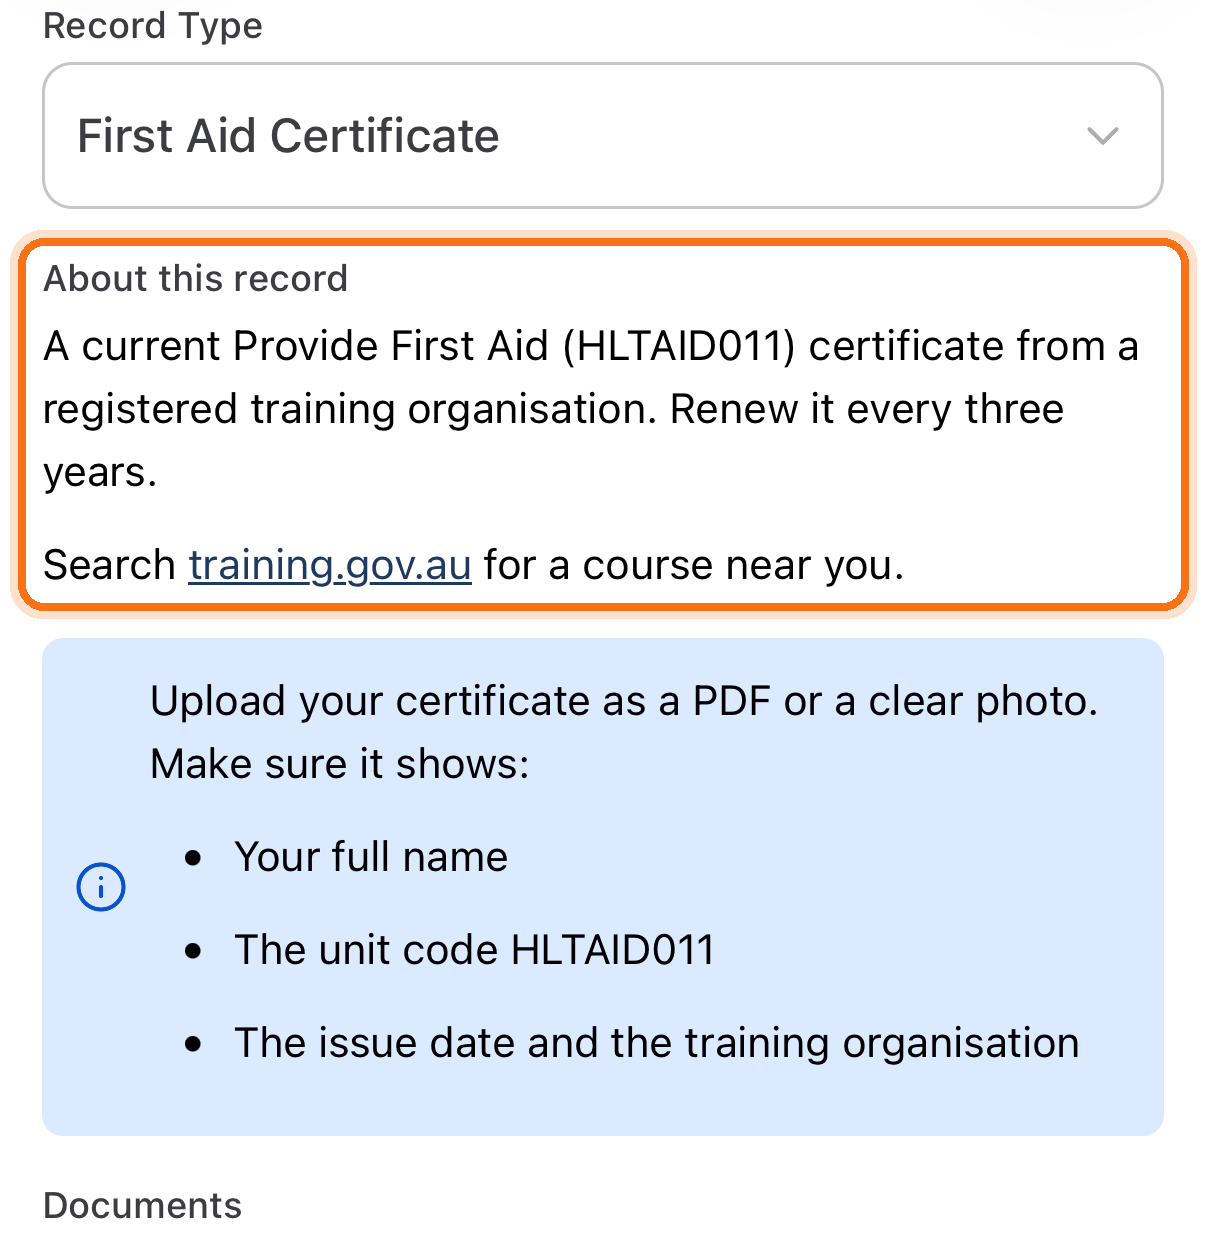
- Record Type - set automatically when you start from a card, or select one. The rest of the form appears after a Record Type is chosen.
- About this record - if an Admin has added a description for the selected Record Type, it appears here explaining what the Record is and where to get it. Links open in a new tab.
- Upload guidance - if an Admin has added guidance for the selected Record Type, read the information callout before uploading.
- Documents - select Upload Document and choose how to supply your file:
- Take photo
- Choose from gallery
- Choose file
- Name (optional) - a label for the Record.
- Expiry Date - only shown for Record Types that expire.
- Issue Date (optional)
- Reference (optional)
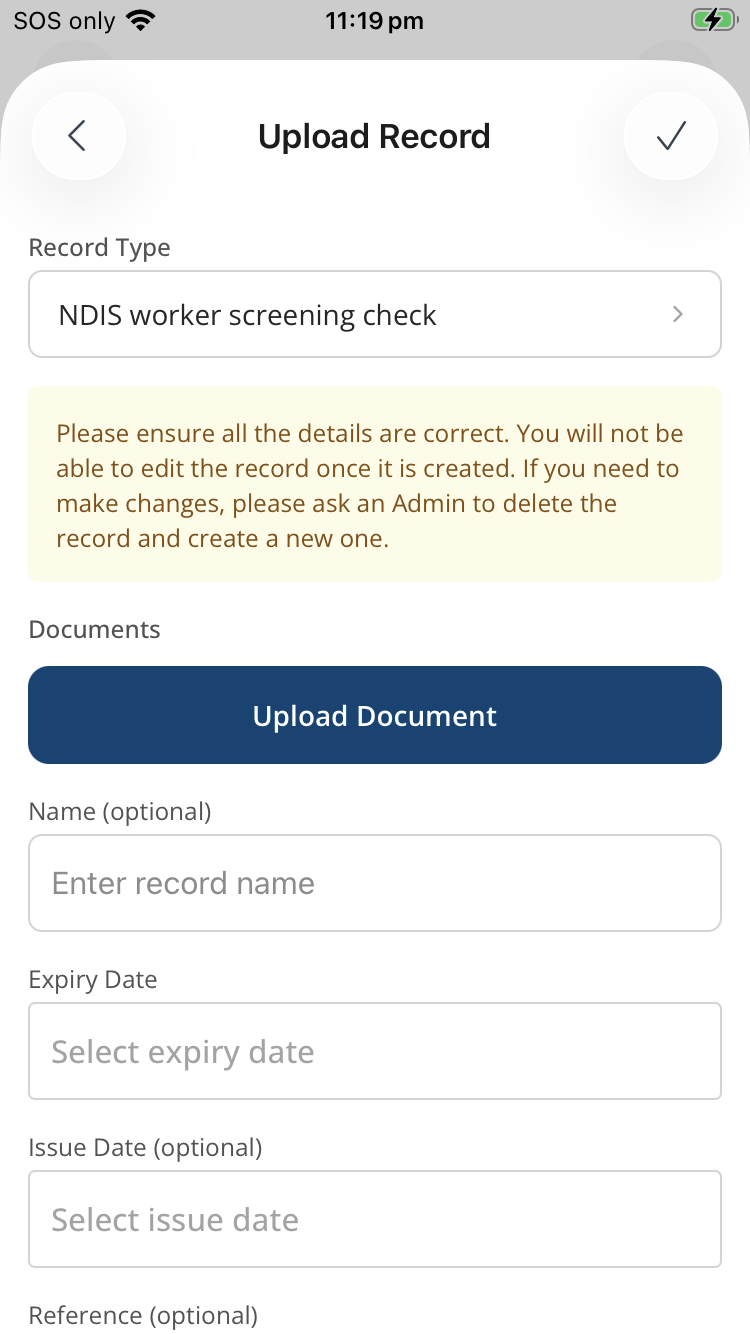
Submit the Record
- Tap the tick in the top right to save. Your document will be attached to your User Records.
Record Status & Notifications
After uploading, you can view the status of your Records within the Your Records section. The badge beside each Record Type reflects the overall status of that Record:
| Status | What it means |
|---|---|
| Missing | No Record has been uploaded for this Record Type yet. |
| Optional | This Record Type isn't required for you, and you haven't uploaded one yet. |
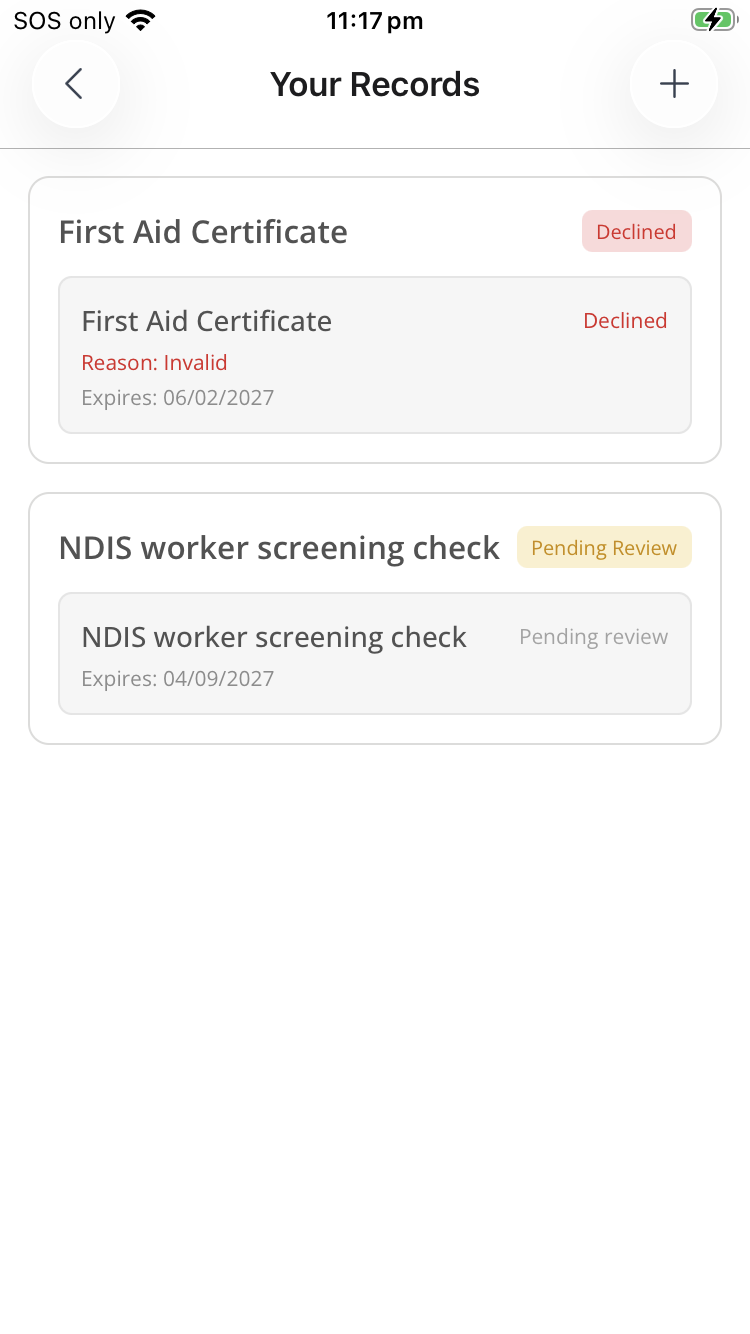
| Pending Review | The Record has been uploaded and is awaiting verification by an Admin. |
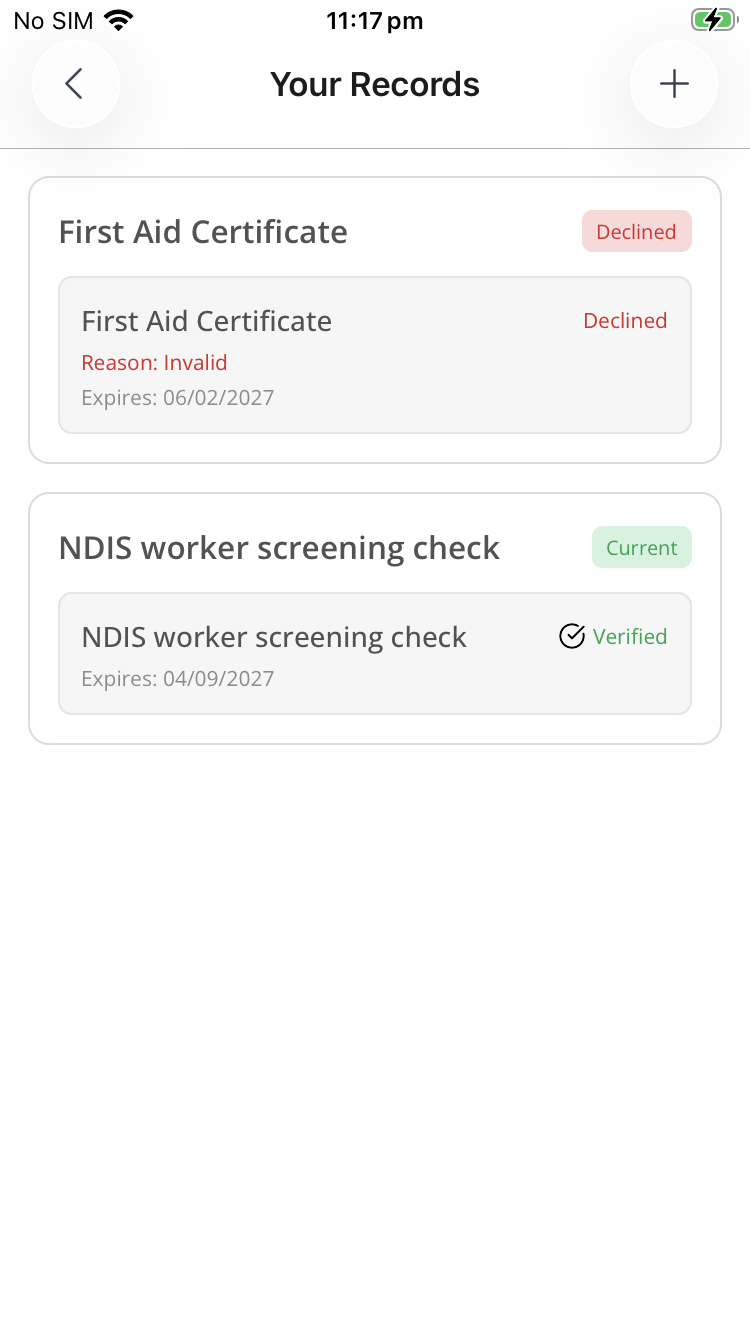
| Current | The Record has been accepted and is up to date. |
| Declined | An Admin has reviewed the Record and rejected it. |
| Expired | The Record has passed its expiry date and needs to be replaced. |
Individual entries beneath each Record Type show their own status, along with the issue date, expiry date and reference where these have been recorded.
- Records awaiting verification display a Pending Review alert.
- Once a Record is approved and up to date, the Record Type shows as Current, and the entry beneath it is marked Verified.
-
If a Record is Declined, the reason supplied by the Admin is displayed beneath the entry (for example, Reason: Invalid). Upload a replacement Record to resolve it.
-
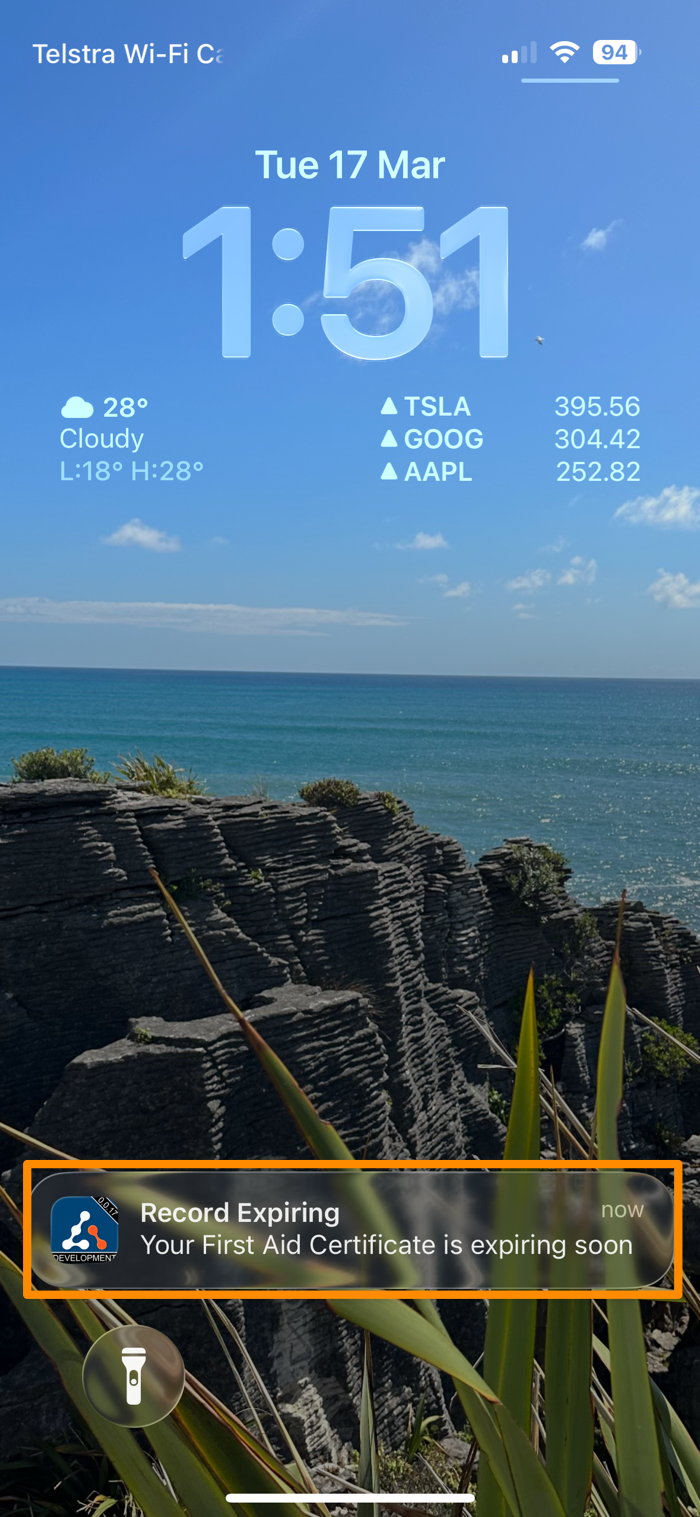
Depending on the Record type, you may receive notifications on your device when a document needs to be updated.