- Scheduling
- Leave
Leave
Leave allows Support Workers to submit leave requests — annual leave, personal/carer's leave, unpaid leave and more — directly in Astalty, against the leave types configured for your account. When a request is approved, Astalty can automatically create the corresponding leave application in your payroll system (Xero or Employment Hero), so leave approved in Astalty is reflected in payroll without manual data entry.
Leave is built on the existing availability system and uses the same request and approval workflow as unavailability requests, with the addition of payroll-aware leave options.
Overview
Unavailability requests support two request types. When creating a request, Support Workers choose between:
- Unavailability — blocks the roster so the Support Worker is not scheduled during that period.
- Leave — records actual leave being taken, with a leave type, leave balance visibility, and optional payroll sync.
| Unavailability | Leave | |
|---|---|---|
| Purpose | Block the roster so the person isn't scheduled | Record actual leave being taken |
| Leave type | Not applicable | Pick a leave type (e.g. Annual Leave) |
| Balances at review | Not shown | Shows the employee's live leave balance from payroll |
| Approved hours | Not captured | Captures the approved leave hours |
| Payroll sync | None | Can auto-create a leave application in Xero / Employment Hero |
Both request types follow the same submission, review, and approval workflow, and both remove the Support Worker from the roster for the dates involved.
How it Works
The flow from request to payroll looks like this:
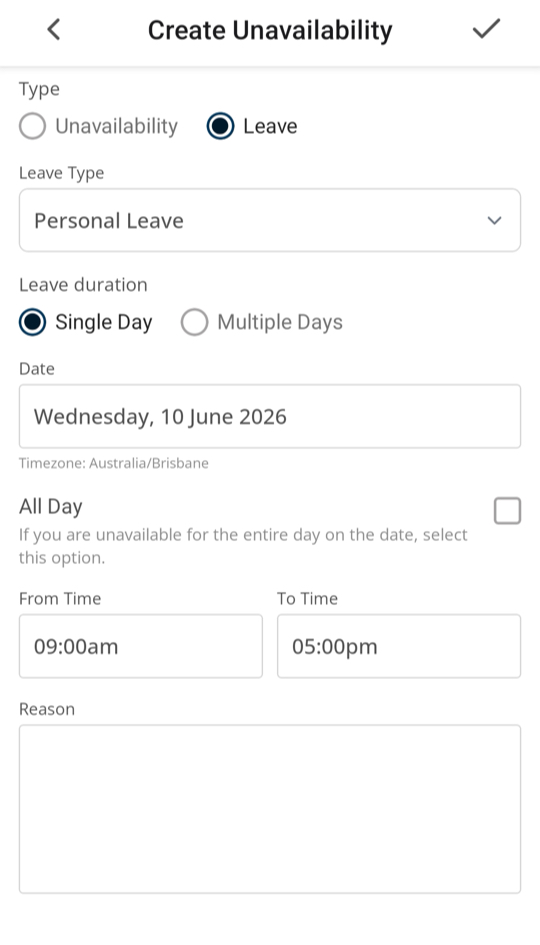
- A staff member requests leave. From the web app or the mobile app they create a request, choose Leave, pick the leave type, and set the dates and times.
- The request appears for review. Managers and admins see it under Scheduling > Unavailability Requests (mixed in with unavailability requests; you can filter by type). Pending requests also appear on the Schedule — with a dashed outline and a distinct colour — where they can be reviewed and approved or declined inline.
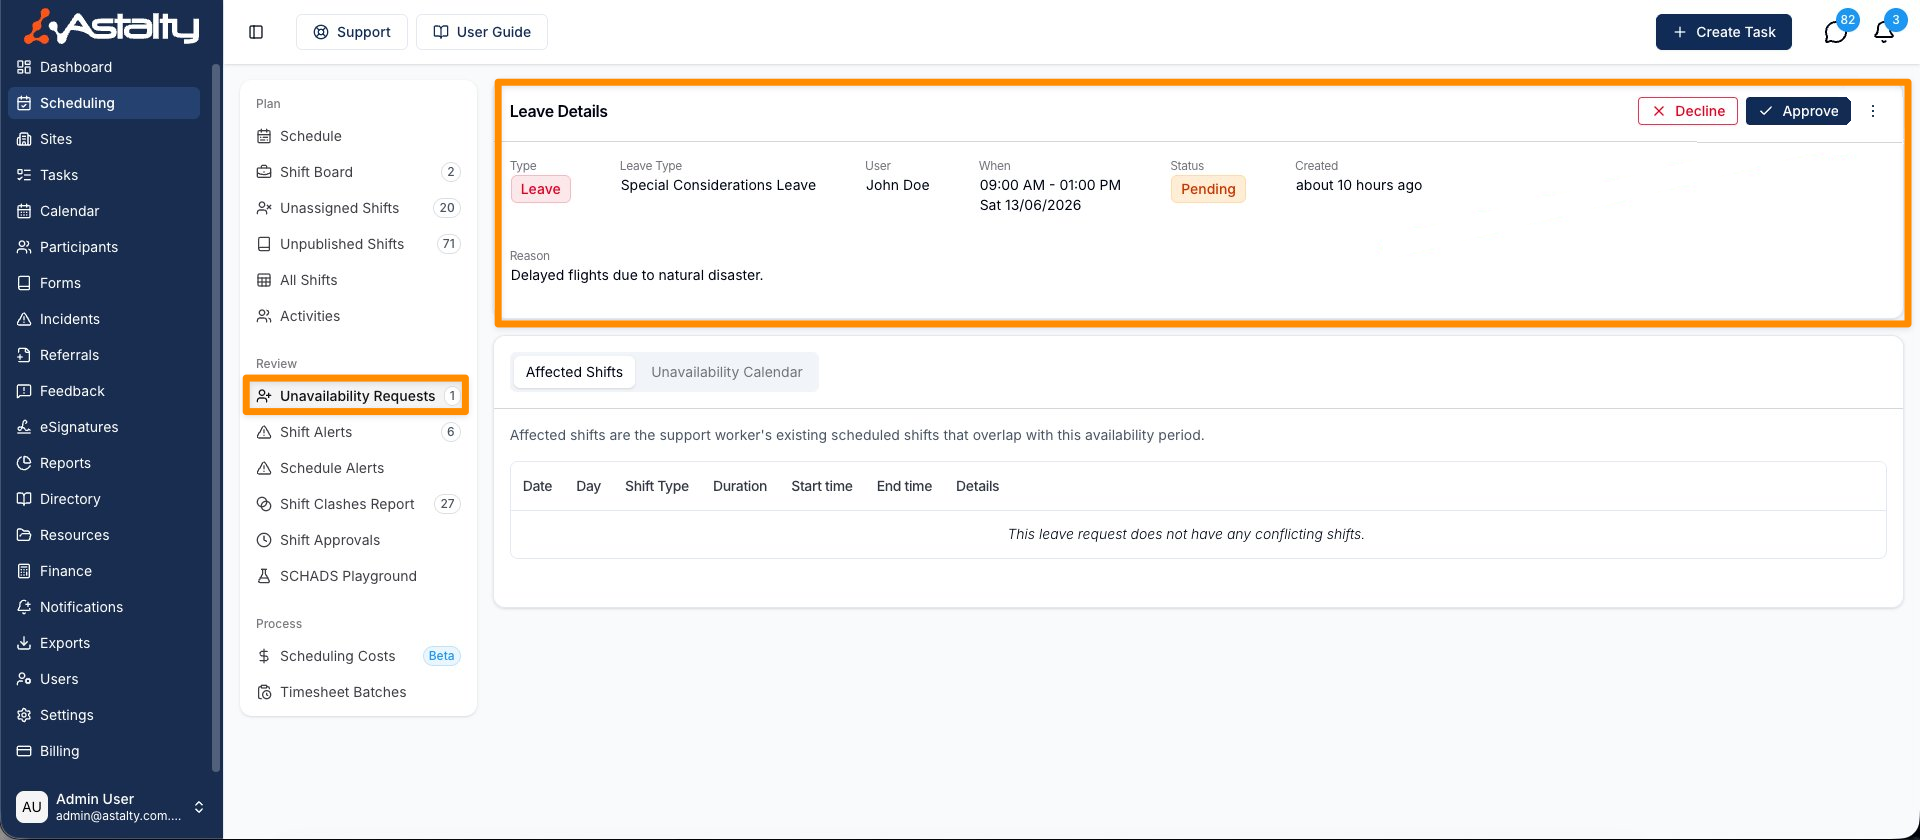
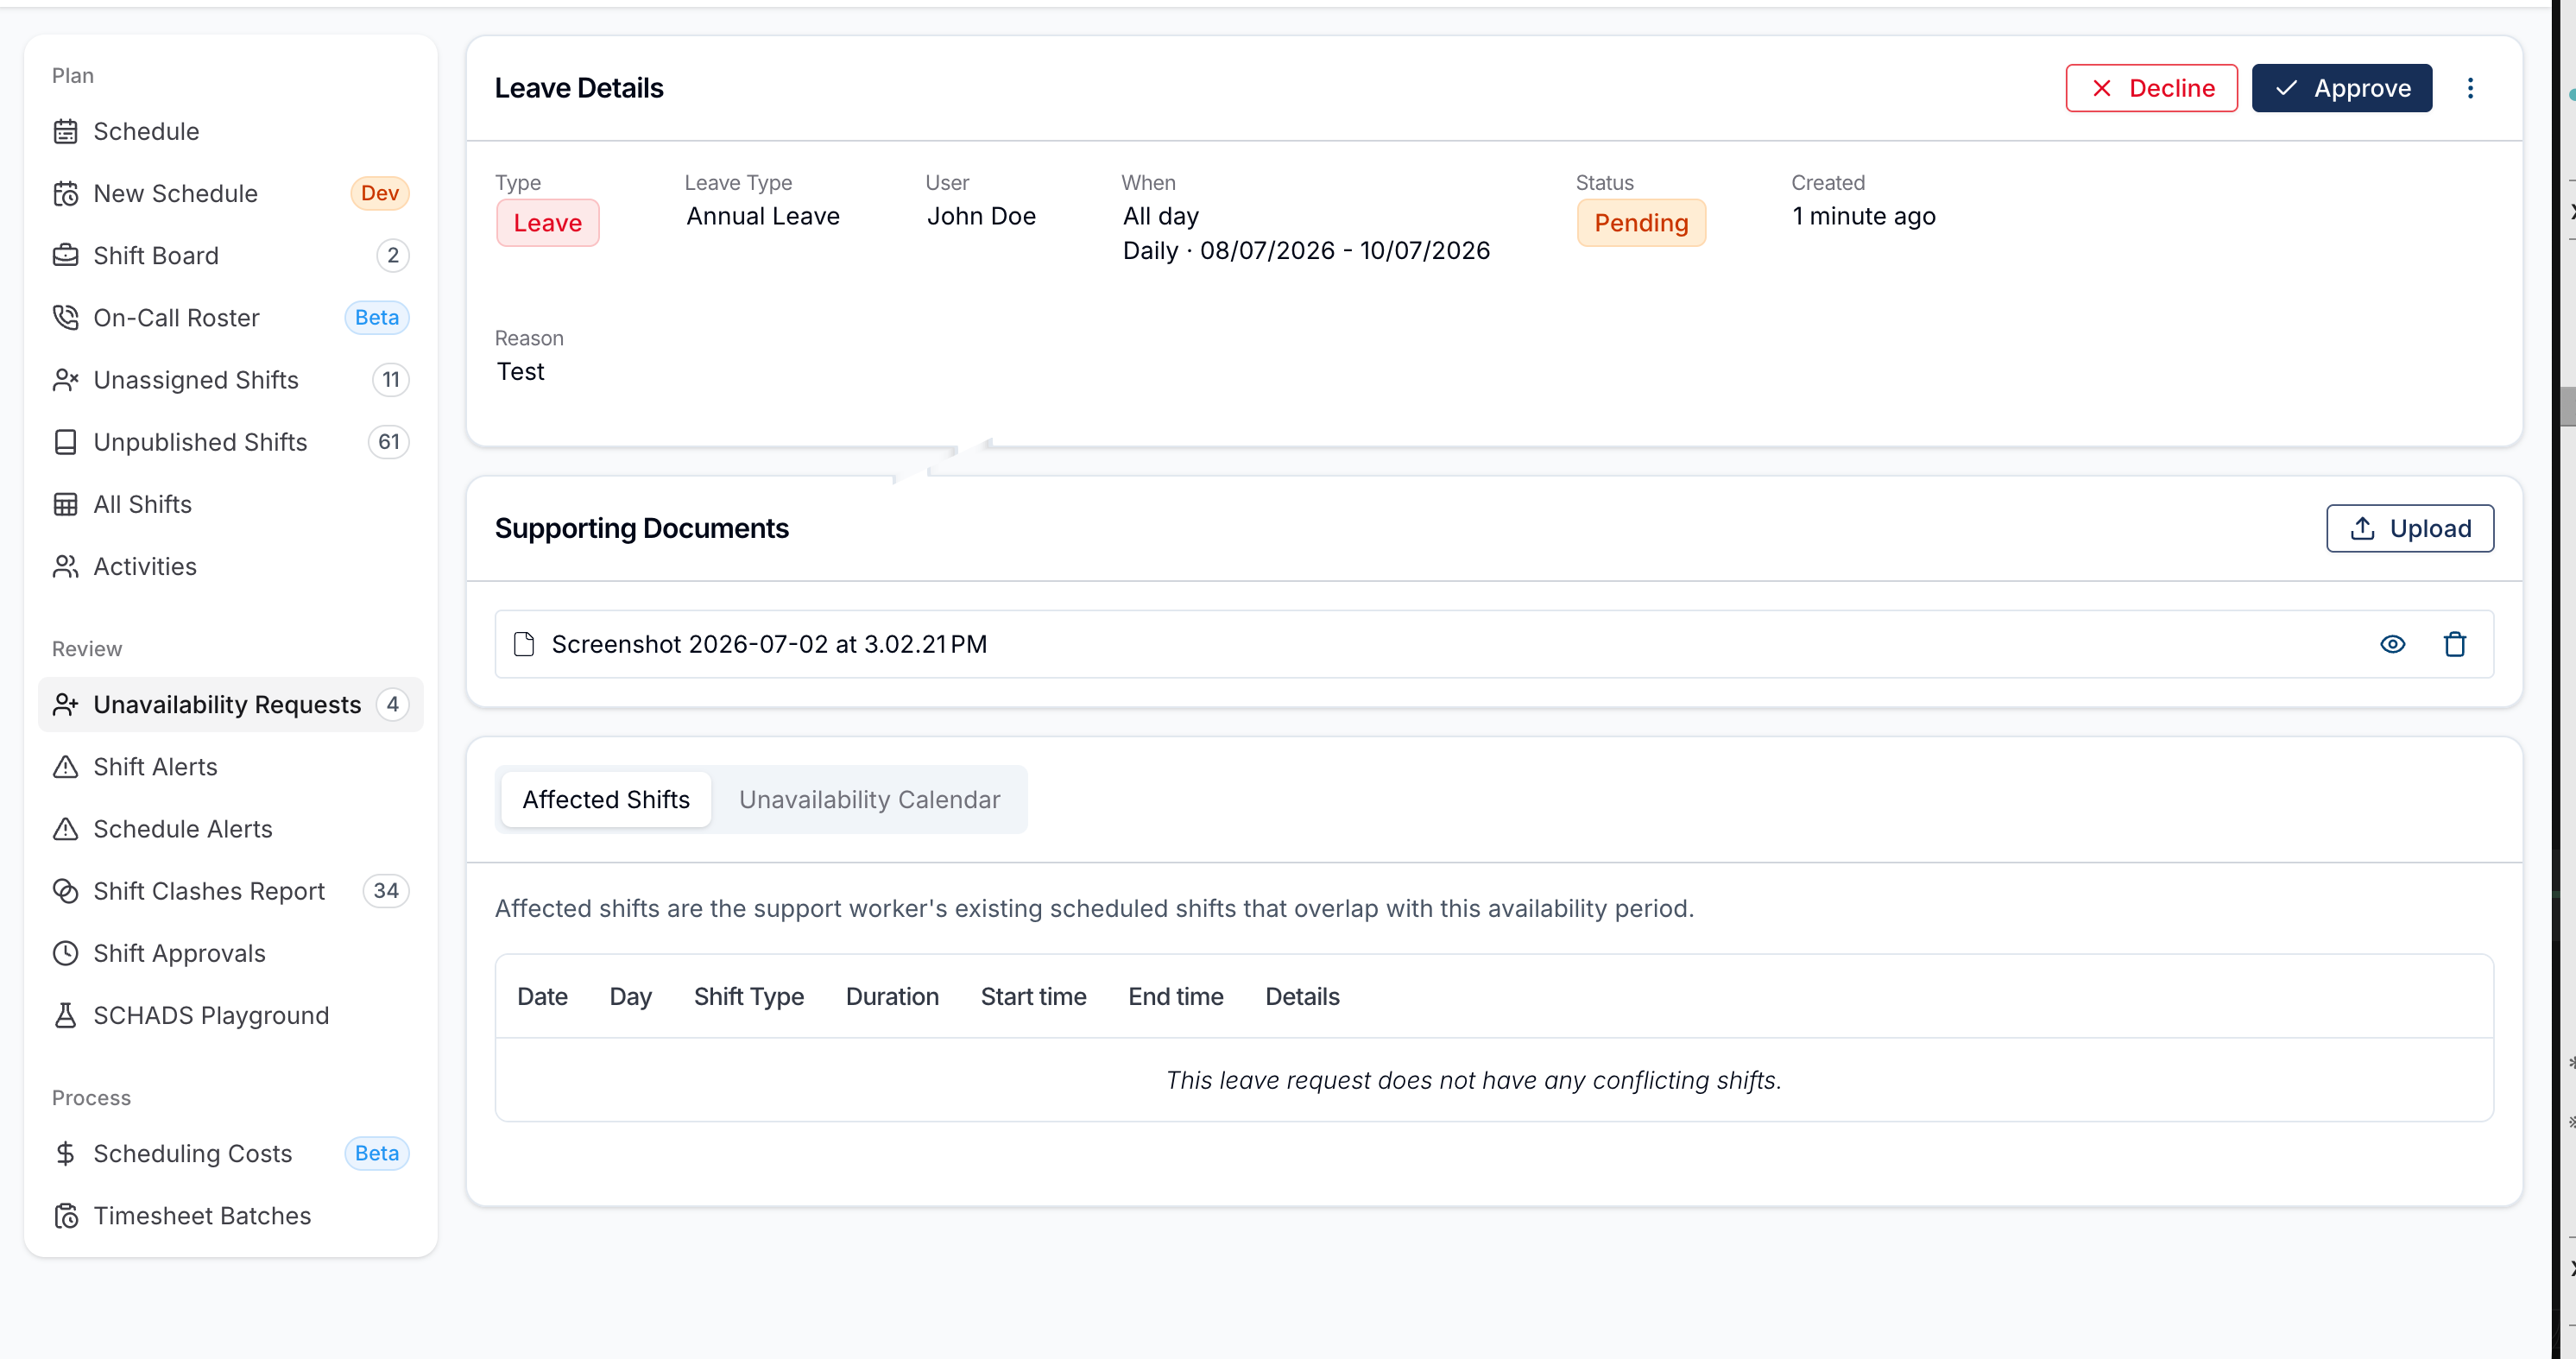
- The reviewer opens the request. On the detail screen, if the employee is connected to payroll, Astalty shows their live leave balances pulled straight from Xero or Employment Hero, with the requested leave type highlighted. Astalty also shows a suggested hours figure so the reviewer has a sensible default.
- The reviewer approves or declines. On approval they confirm the leave hours (and, for Employment Hero, can choose to have the leave automatically approved in payroll too). Declining records a reason.
- Astalty syncs to payroll. If payroll sync is switched on, approving the leave automatically creates a matching leave application in Xero or Employment Hero in the background. A status card on the request shows whether the sync succeeded, and lets you retry if it failed.
Supporting Documents
Support Workers can attach one or more supporting documents — such as a medical certificate — to a leave request. This works on both the web portal and the mobile app, and it's completely optional.
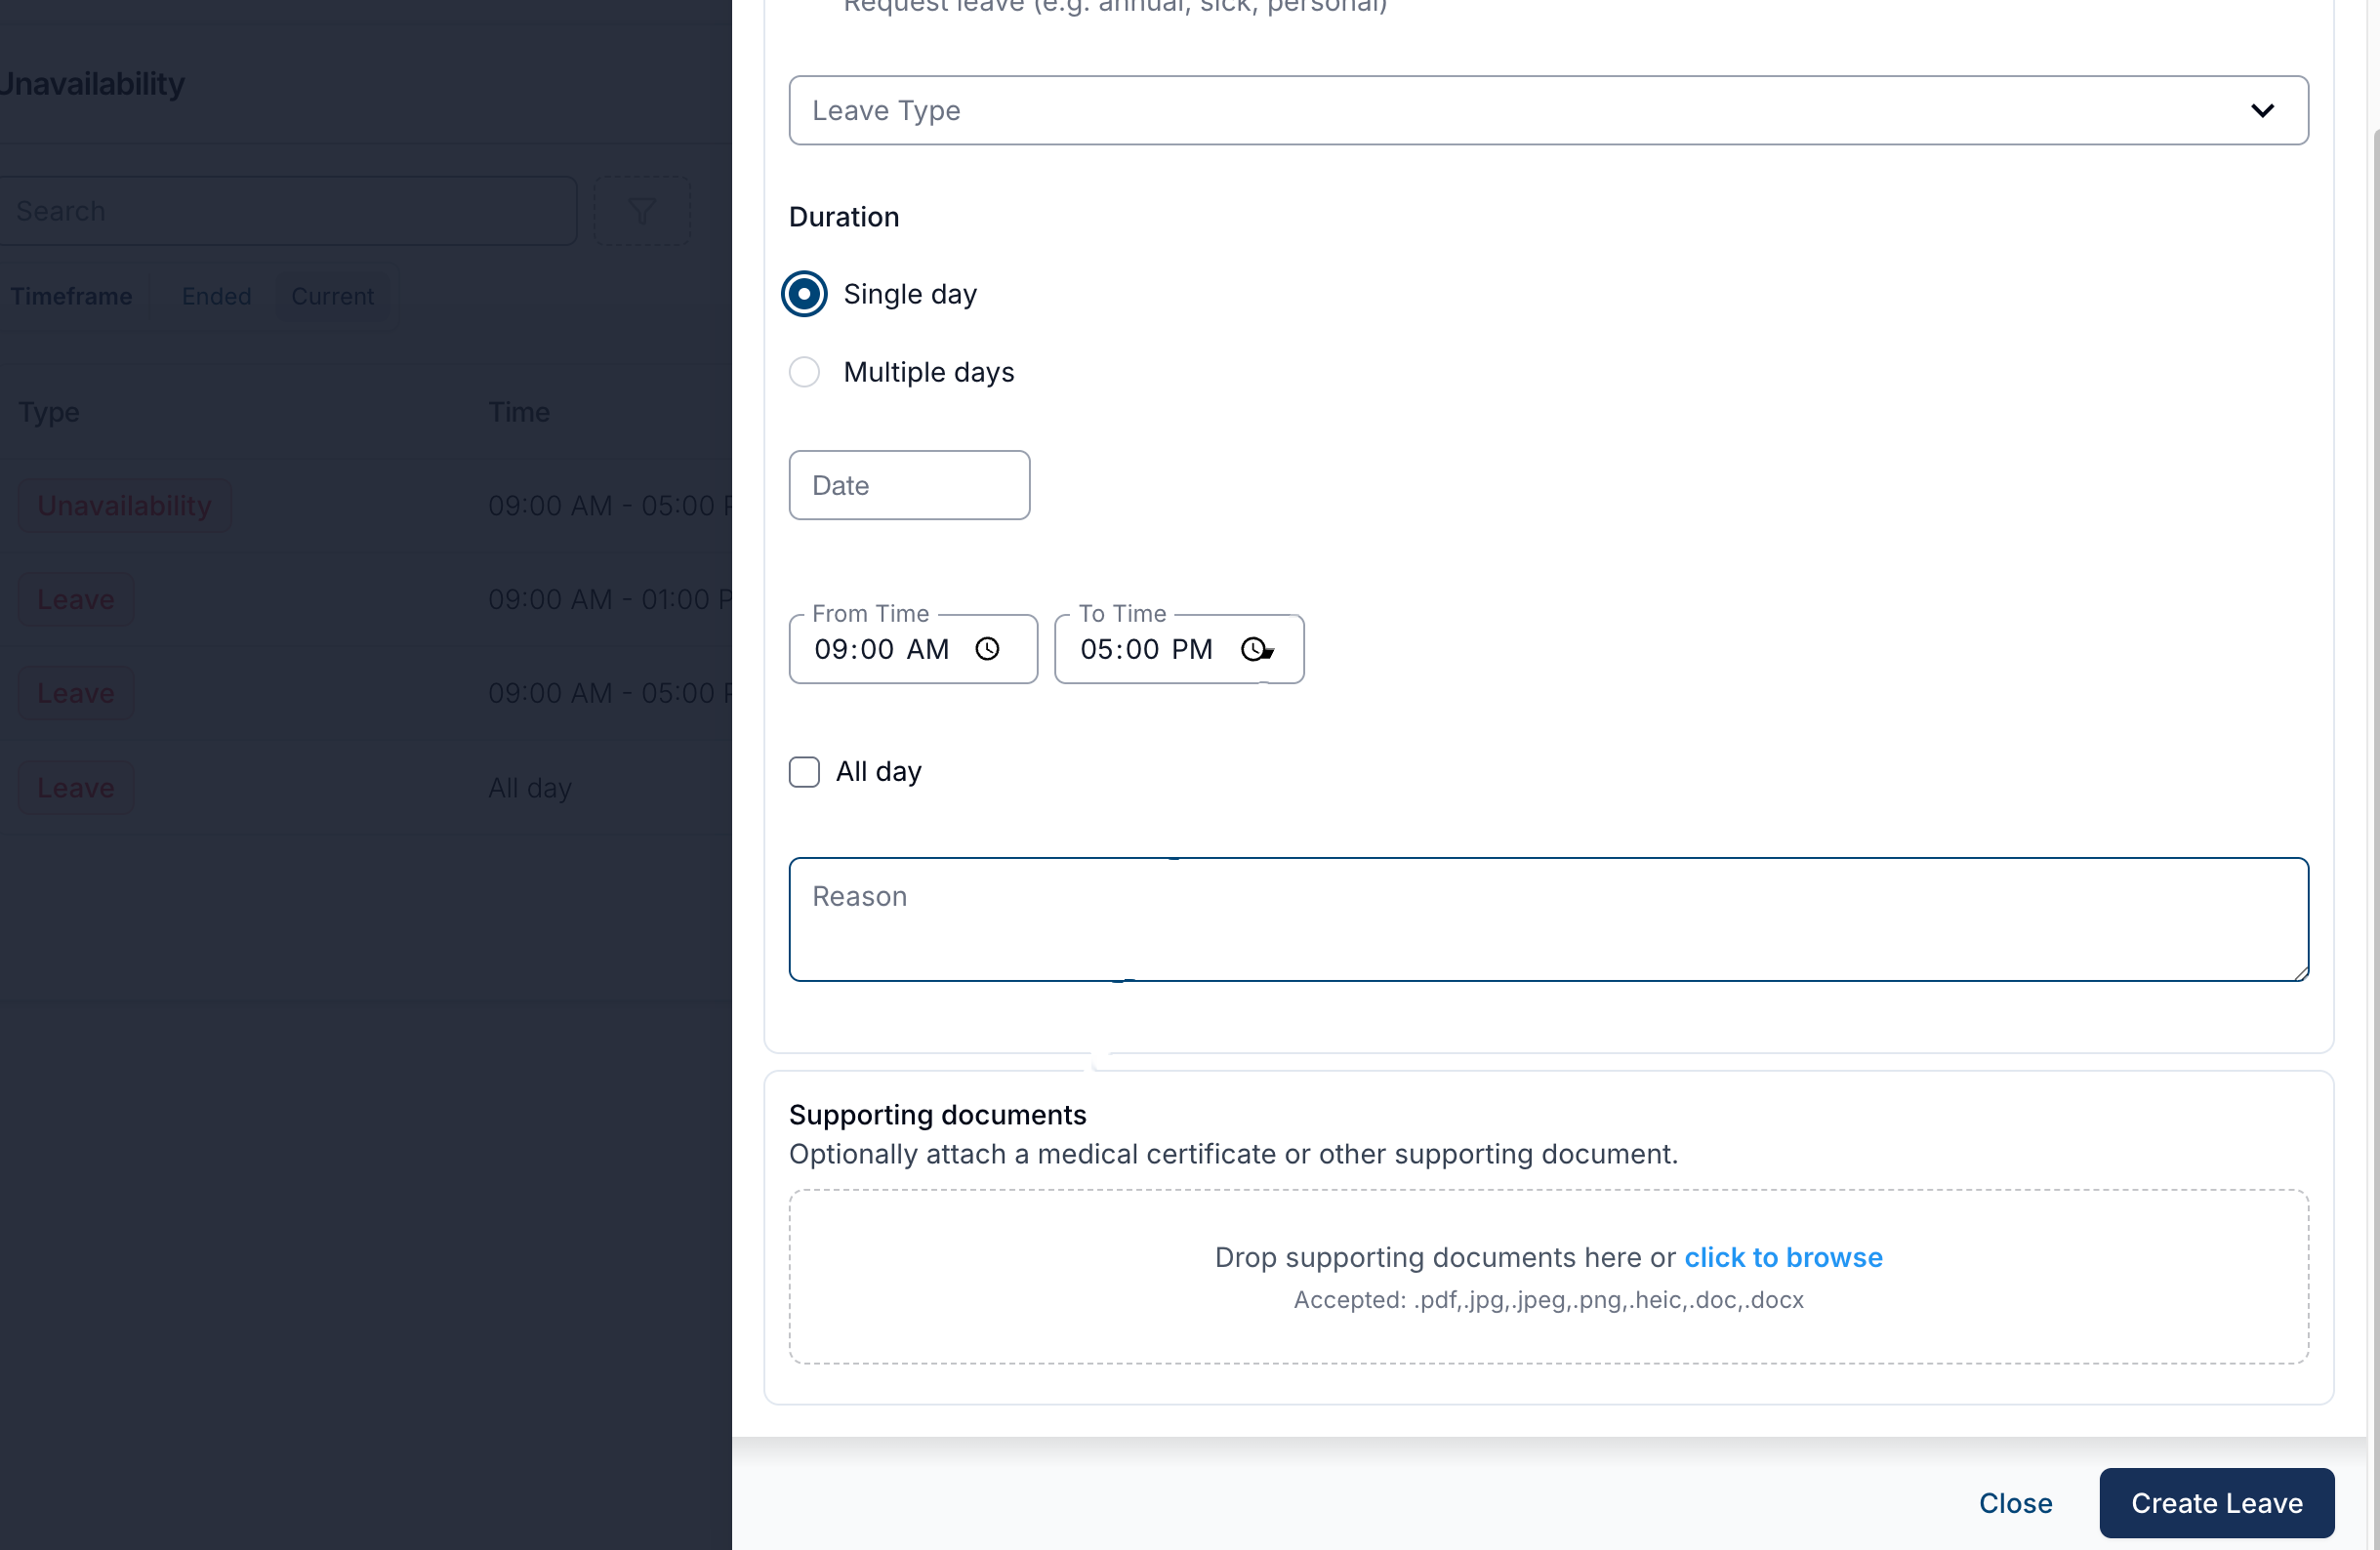
On the web portal, the leave form has a Supporting documents area. Drop files onto it or click to browse and pick them from your device. Accepted file types are .pdf, .jpg, .jpeg, .png, .heic, .doc, and .docx.
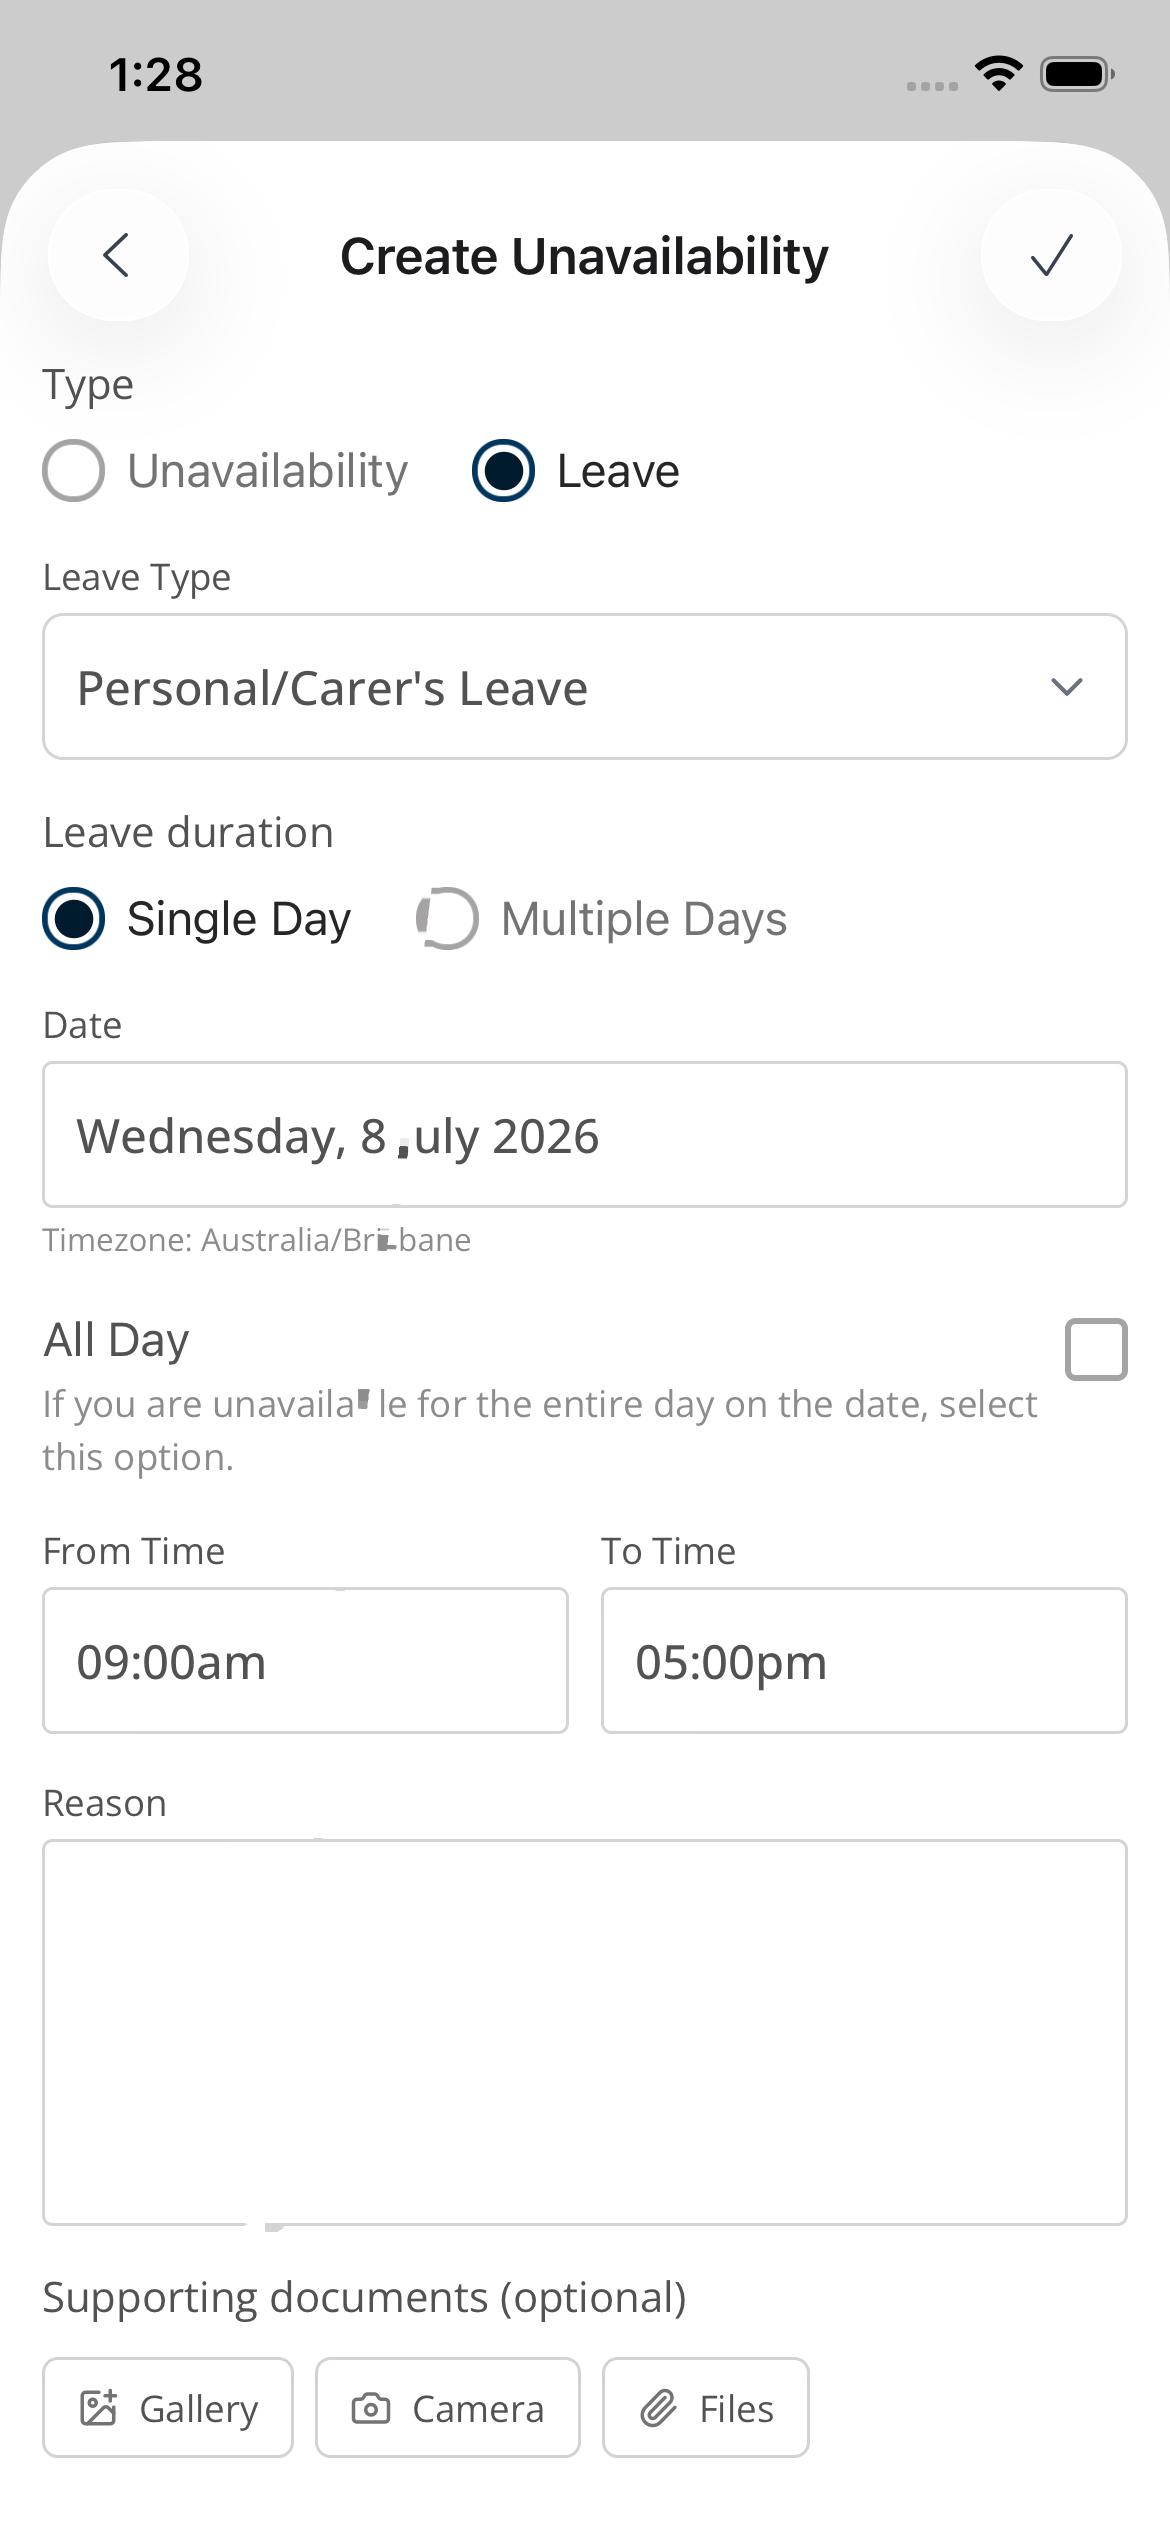
On the mobile app, the leave screen shows a Supporting documents (optional) section with three ways to add a file — Gallery (an existing photo), Camera (take a new photo), or Files. Attached documents can be opened again from the leave details screen.
When reviewing a request, any attached documents appear in a Supporting Documents section on the leave details screen, where you can open each one to view it.
Documents aren't locked in at submission — they can be added or removed on an existing leave request afterwards. Use Upload to attach more, or the delete icon to remove one.
Leave Types
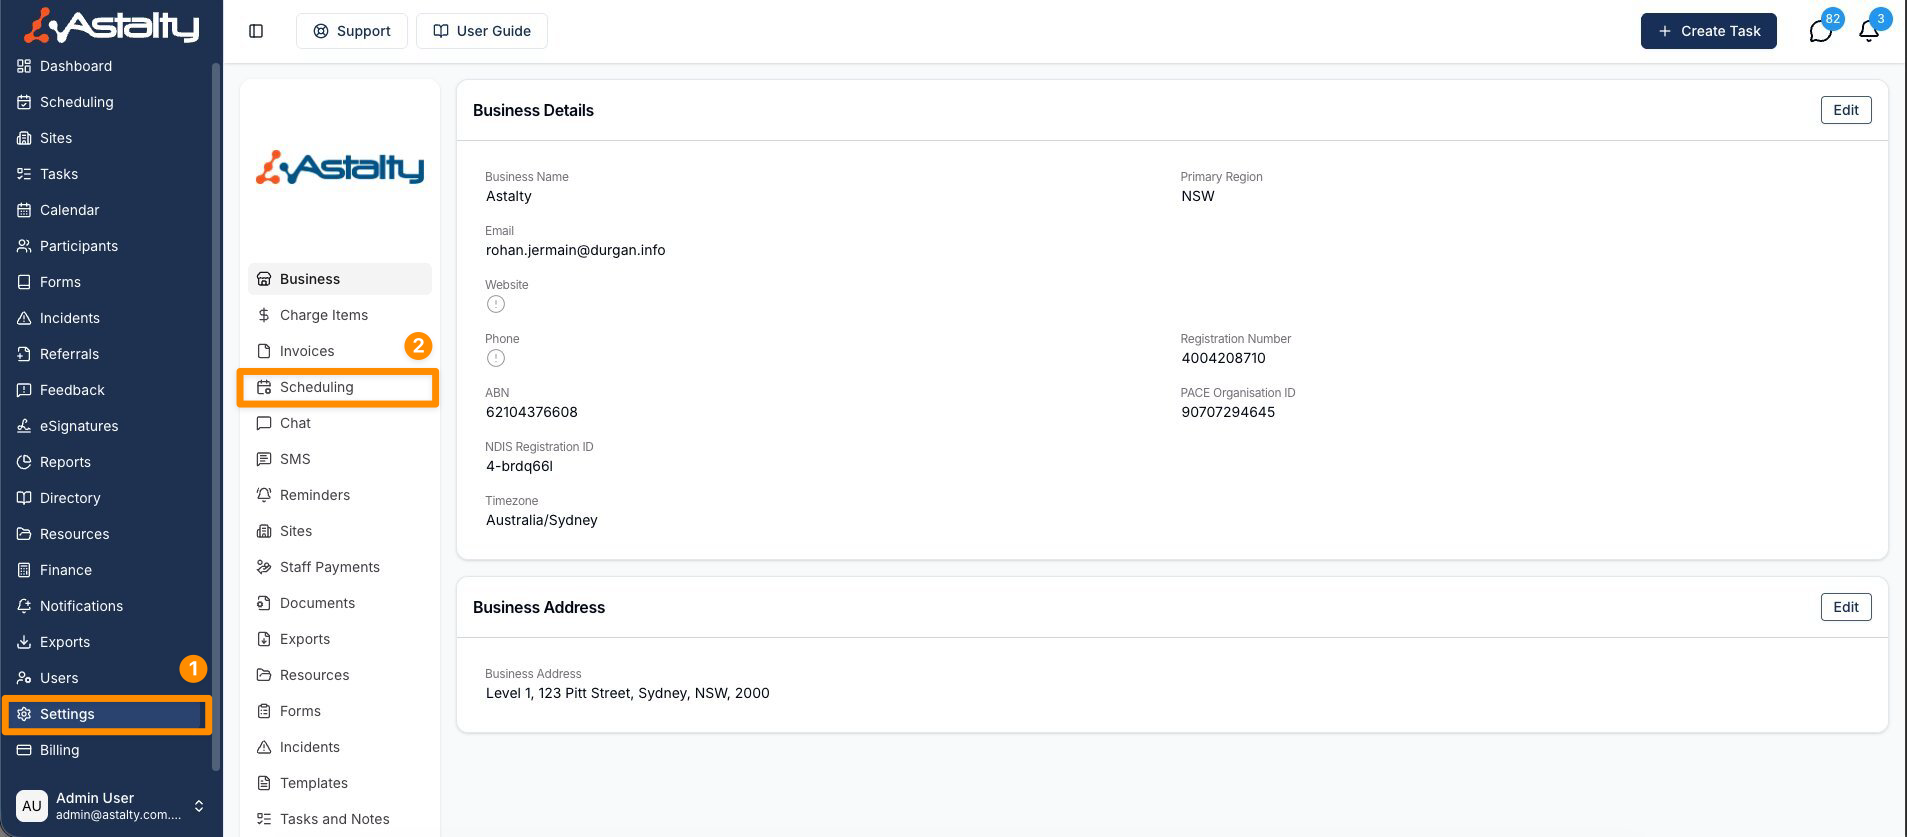
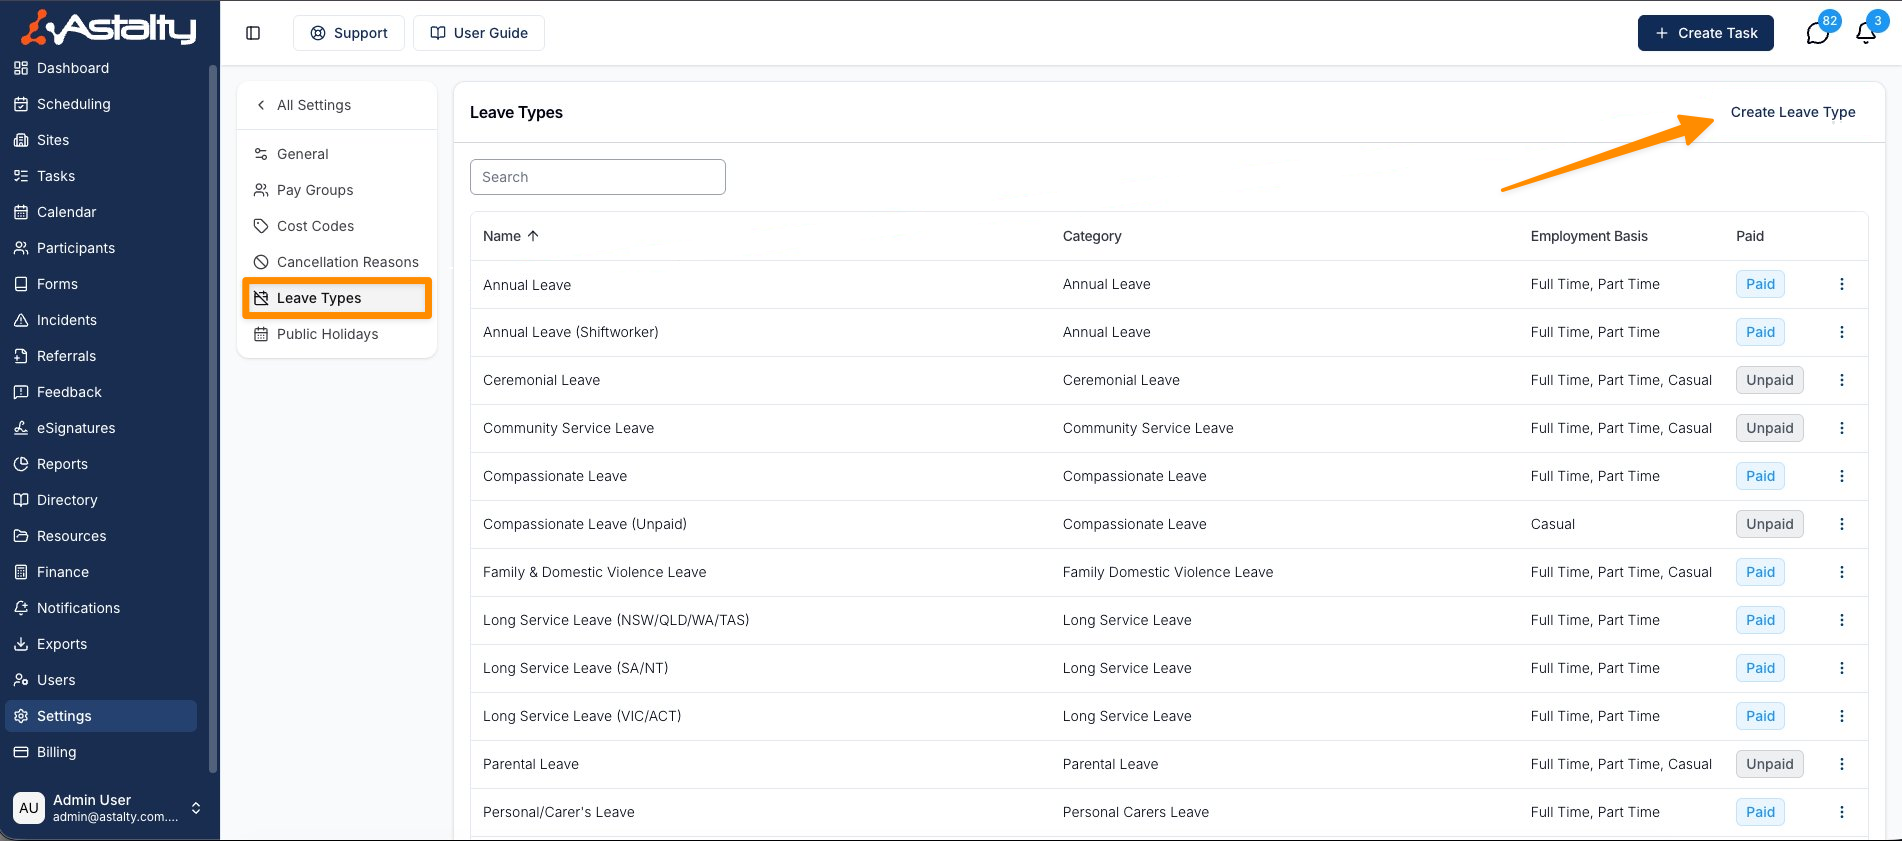
Leave Types define the options available to Support Workers when submitting a leave request. These are managed through Settings -> Scheduling -> Leave Types. Each leave type includes:
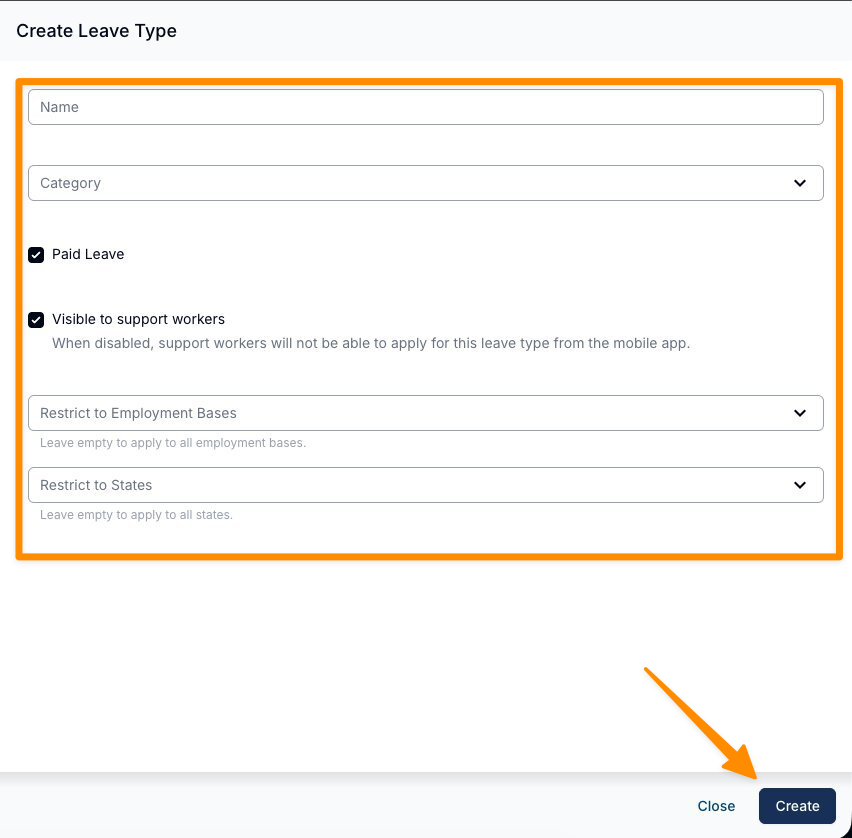
- Name - what staff see when requesting (e.g. "Annual Leave", "Personal / Carer's Leave").
- Category - the underlying kind of leave (annual leave, personal/carer's, long service, compassionate, parental, unpaid, rostered day off, time off in lieu, study leave, workers compensation, and more). The category is what Astalty uses to line your leave type up with the right leave type in your payroll system.
- Paid or unpaid.
- Visible to support workers - controls whether support workers can pick this leave type themselves when requesting.
- Who it applies to - you can limit a leave type to certain employment bases (e.g. full-time/part-time) and certain states.

Leave Types you no longer use can be archived so they stop appearing on new requests, without affecting past records.
Before you Start
To use Leave you'll need:
- Scheduling enabled on your account - Leave is part of Scheduling and builds on top of it.
- The Leave feature enabled by Astalty. Leave is currently a beta feature that isn't self-serve - email support@astalty.com.au to request this feature.
- For payroll sync (optional but recommended): your Xero or Employment Hero integration connected, and your employees linked to their payroll records.
Setting it up
Follow these steps once Leave is enabled on your account:
- Create your leave types. Go to Settings -> Scheduling -> Leave Types and add the kinds of leave your staff take. Set each one's category, whether it's paid, who it applies to, and whether support workers can select it.
- Connect your payroll integration (skip if you don't want payroll sync). Connect Xero or Employment Hero and make sure your employees are linked to their payroll records.
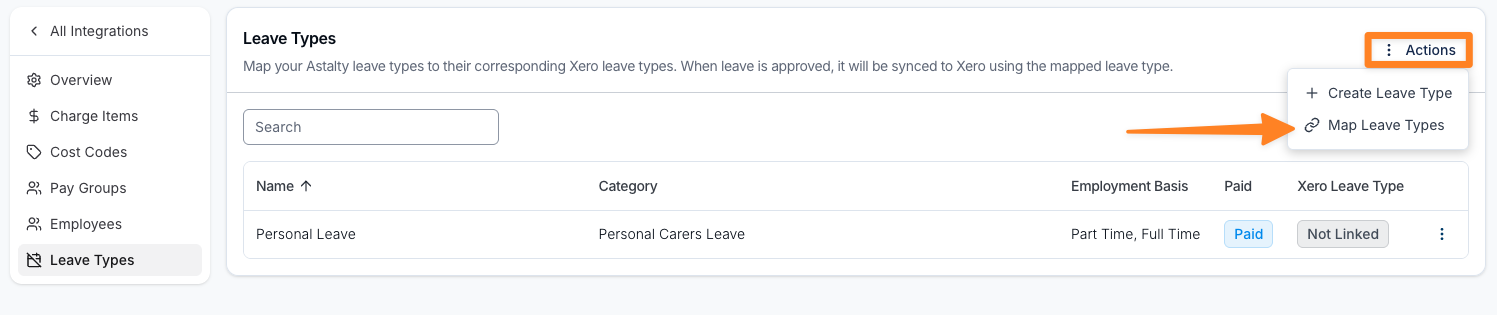
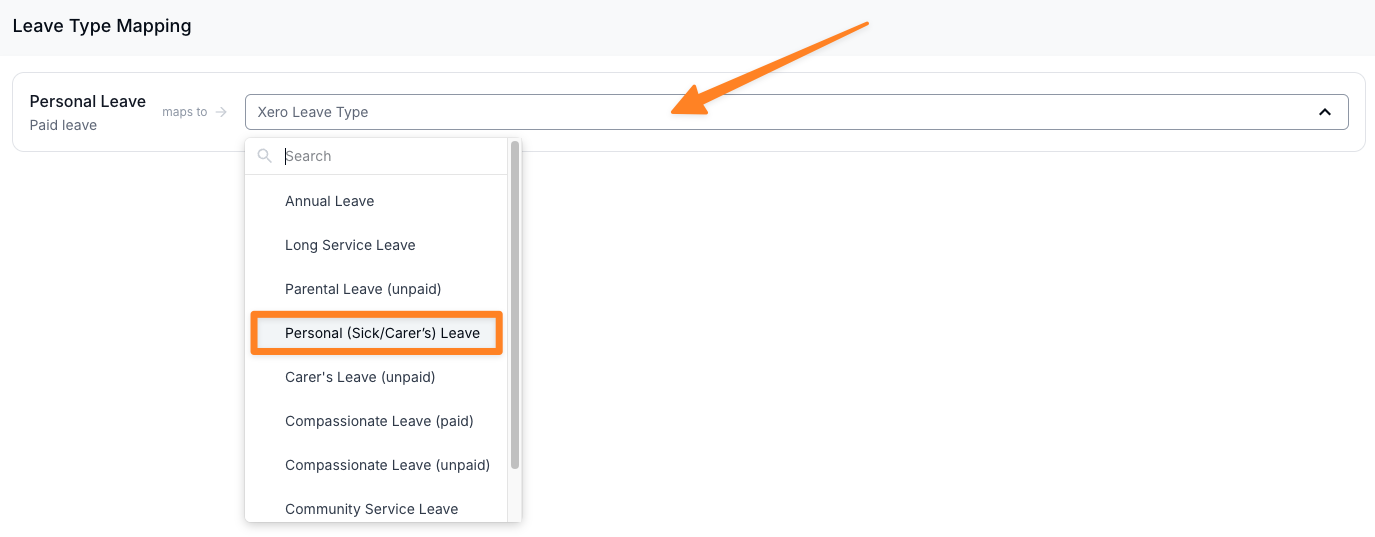
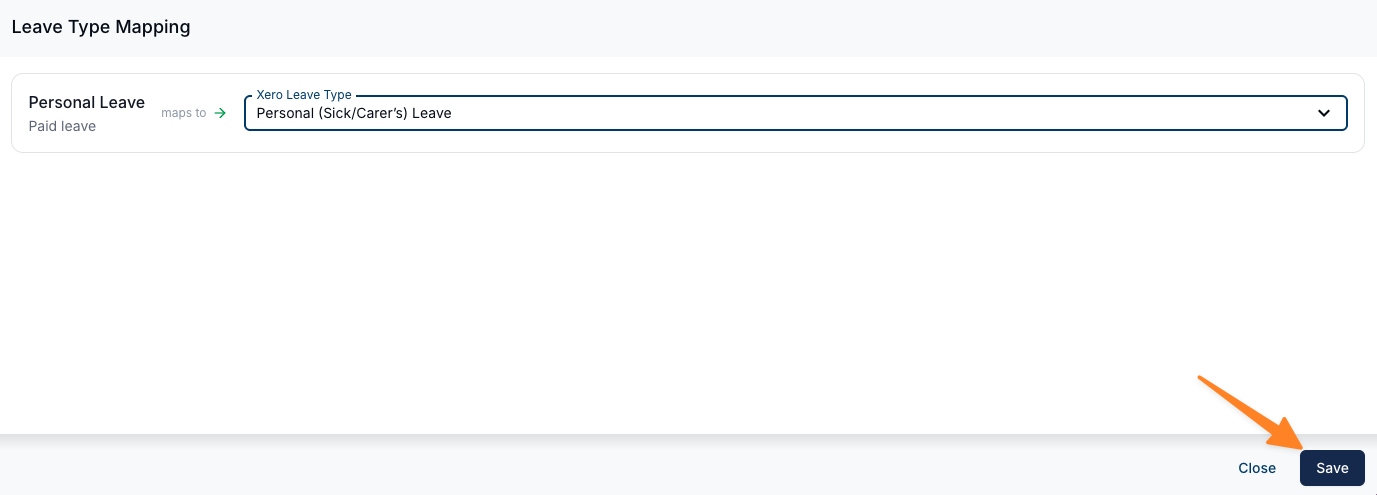
- Map your leave types to payroll. In Settings -> Integrations -> Xero (or Employment Hero) -> Leave Types, match each Astalty leave type to the matching Xero leave type / Employment Hero leave category. This mapping is what tells payroll which bucket the leave belongs to.

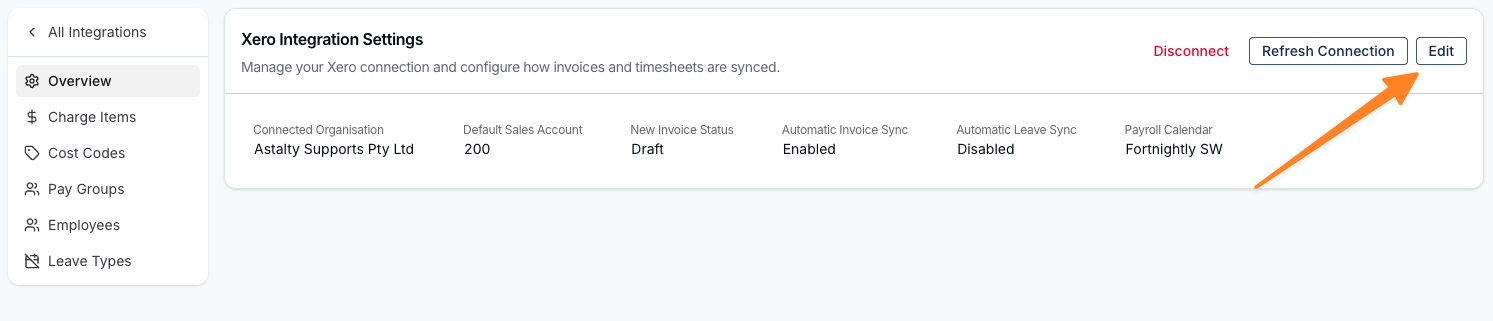
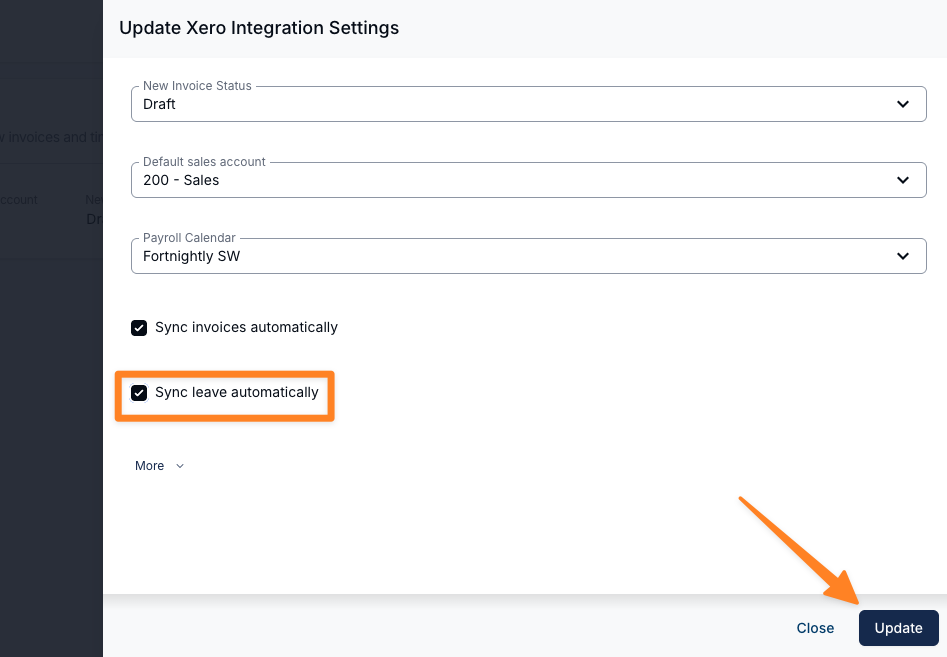
- Turn on automatic sync. In the same integration's settings, enable "Sync leave automatically". From then on, approving a leave request will create the leave application in payroll for you.
- Test with one request. Have someone submit a leave request (or create one yourself), approve it, and check the sync status card on the request to confirm it landed in payroll.
How Leave Hours are Calculated
When leave is approved, Astalty needs to know how many hours of leave to record. It suggests a figure based on the employee's contracted weekly hours, spread evenly across the calendar days of the leave:
- Leave hours = weekly hours x calendar days / 7
This treats every calendar day equally rather than trying to guess which days the person works - which is the right approach for support workers who can be rostered any day of the week, including weekends.
A couple of refinements:
- Part of a day: for a single day where the requested time range is shorter than a normal day (e.g. a 4-hour appointment), Astalty uses those actual hours instead.
- Longer leave across pay periods: when leave spans more than one payroll period, the total hours are split evenly across those periods.
The reviewer can always adjust the hours before approving - the calculated figure is just a sensible starting point.
Things to Note
- Casual employees are excluded from paid-leave sync. Under the Fair Work Act casuals aren't entitled to paid leave (they receive casual loading instead), so leave for casual employees won't be pushed to payroll.
- The employee must be linked to payroll (with a Xero employee ID / Employment Hero ID) and have active employment details for sync to work. If they're not linked, the leave is still recorded in Astalty but won't sync.
- Leave is a single, once-off request - it isn't set up as a recurring pattern the way some availability can be.
- Balances are read live at review time. Astalty doesn't store or manage leave balances itself - it reads them from your payroll system each time you open a request. Astalty is not the source of truth for accruals.
- Sync is one-way and create-only. Astalty creates the leave application in payroll on approval. If you later cancel or edit the leave, that change is not pushed back to payroll - you'll need to adjust it in Xero / Employment Hero directly.
- Failed syncs can be retried. If a sync fails (e.g. payroll was briefly unavailable), the request shows a failed status with a reason and a retry option.
- Support workers only see leave types marked visible to them.
What's Covered and What Isn't
| Behaviour | Supported |
|---|---|
| Requesting typed leave alongside unavailability | ✅ |
| Attaching supporting documents (e.g. a medical certificate) on web and mobile | ✅ |
| Adding or removing supporting documents after a request is submitted | ✅ |
| Seeing live payroll leave balances when reviewing a request | ✅ |
| Automatically creating the leave application in Xero / Employment Hero on approval | ✅ |
| Suggested leave hours, adjustable at approval | ✅ |
| Retrying a failed sync | ✅ |
| Managing leave balances or accruals inside Astalty | ❌ |
| Paid-leave sync for casual employees | ❌ |
| Updating or deleting a leave application in payroll after it's synced | ❌ |
| Pushing later cancellations or edits back to payroll | ❌ |
| Acting as the system of record for leave entitlements | ❌ |