- Scheduling
- Activities
Activities
Overview
The Activities functionality in Astalty allows you to create and manage activities, set a maximum number of Participants, and track capacity in real time. This helps you plan and coordinate group sessions and events while ensuring Participant numbers stay within limits. You can also include additional information, such as document uploads related to the group, to keep all relevant details in one place.
Creating an Activity
Open the Activities Section
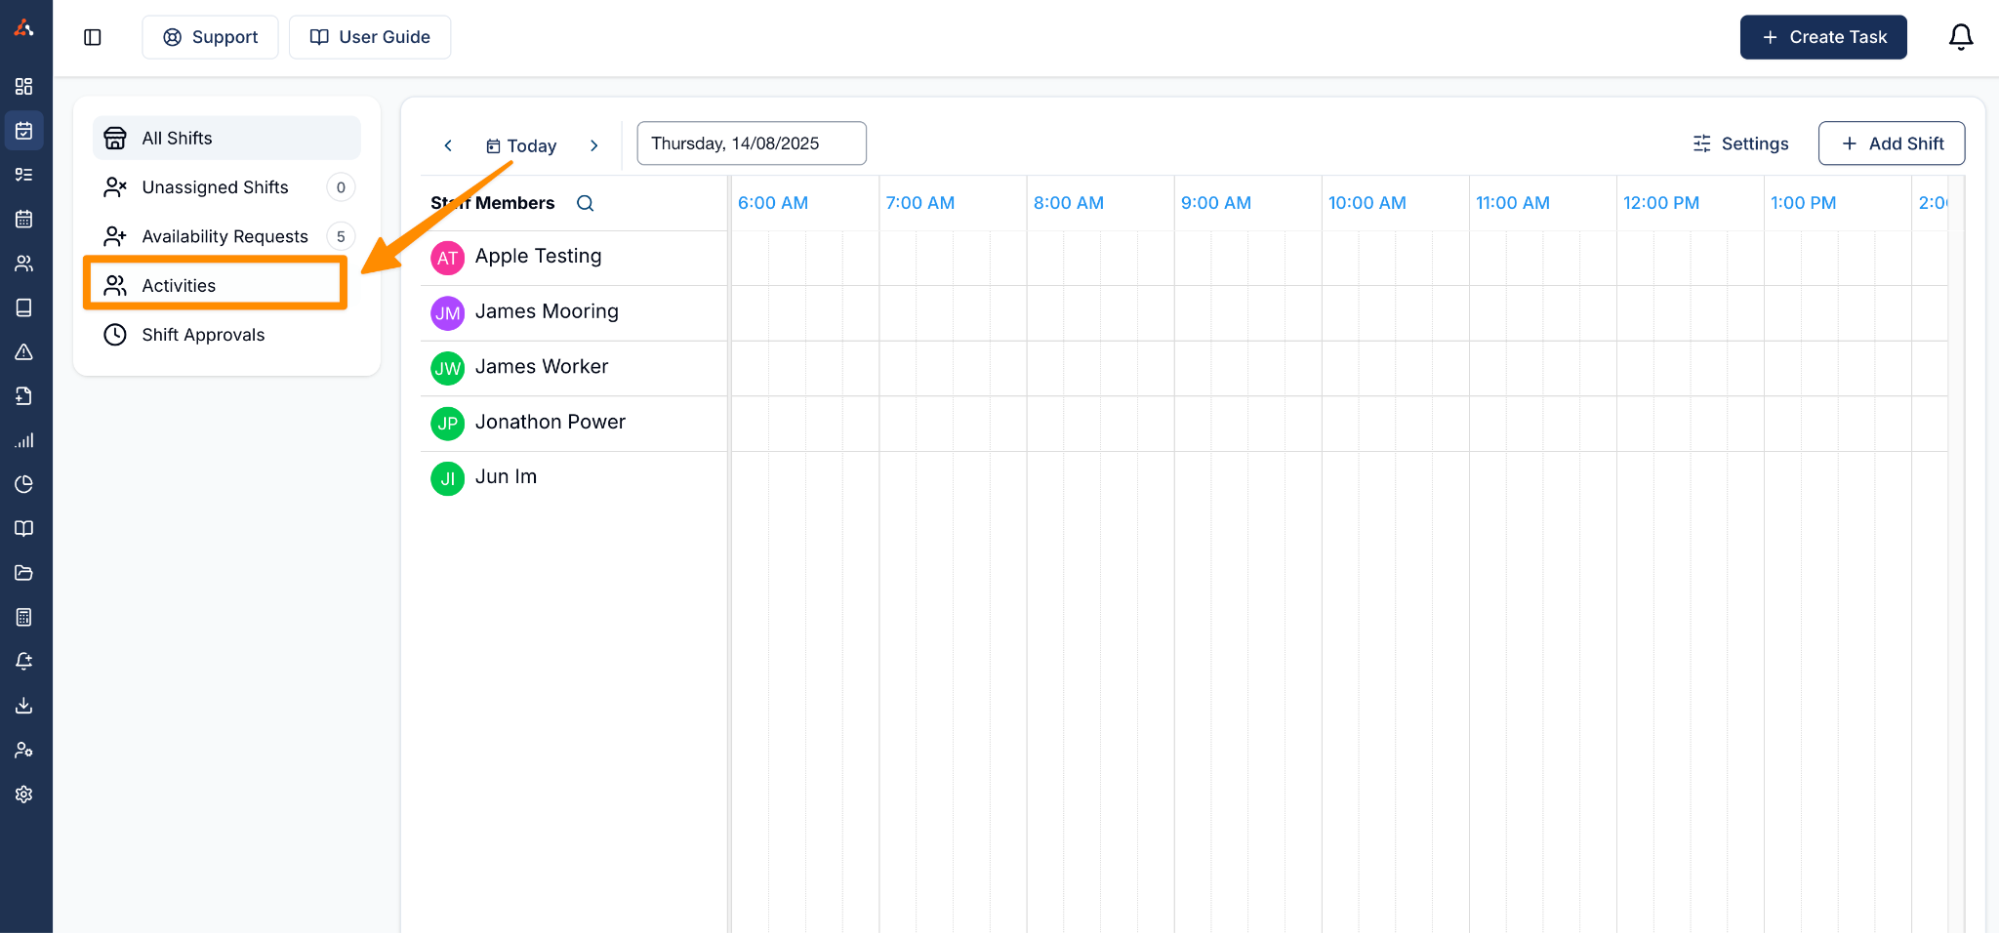
From Scheduling, select Activities, then click Create Activity. You need the View All Activities permission to open this page and the Create Activities permission to create one.
Enter Activity Details
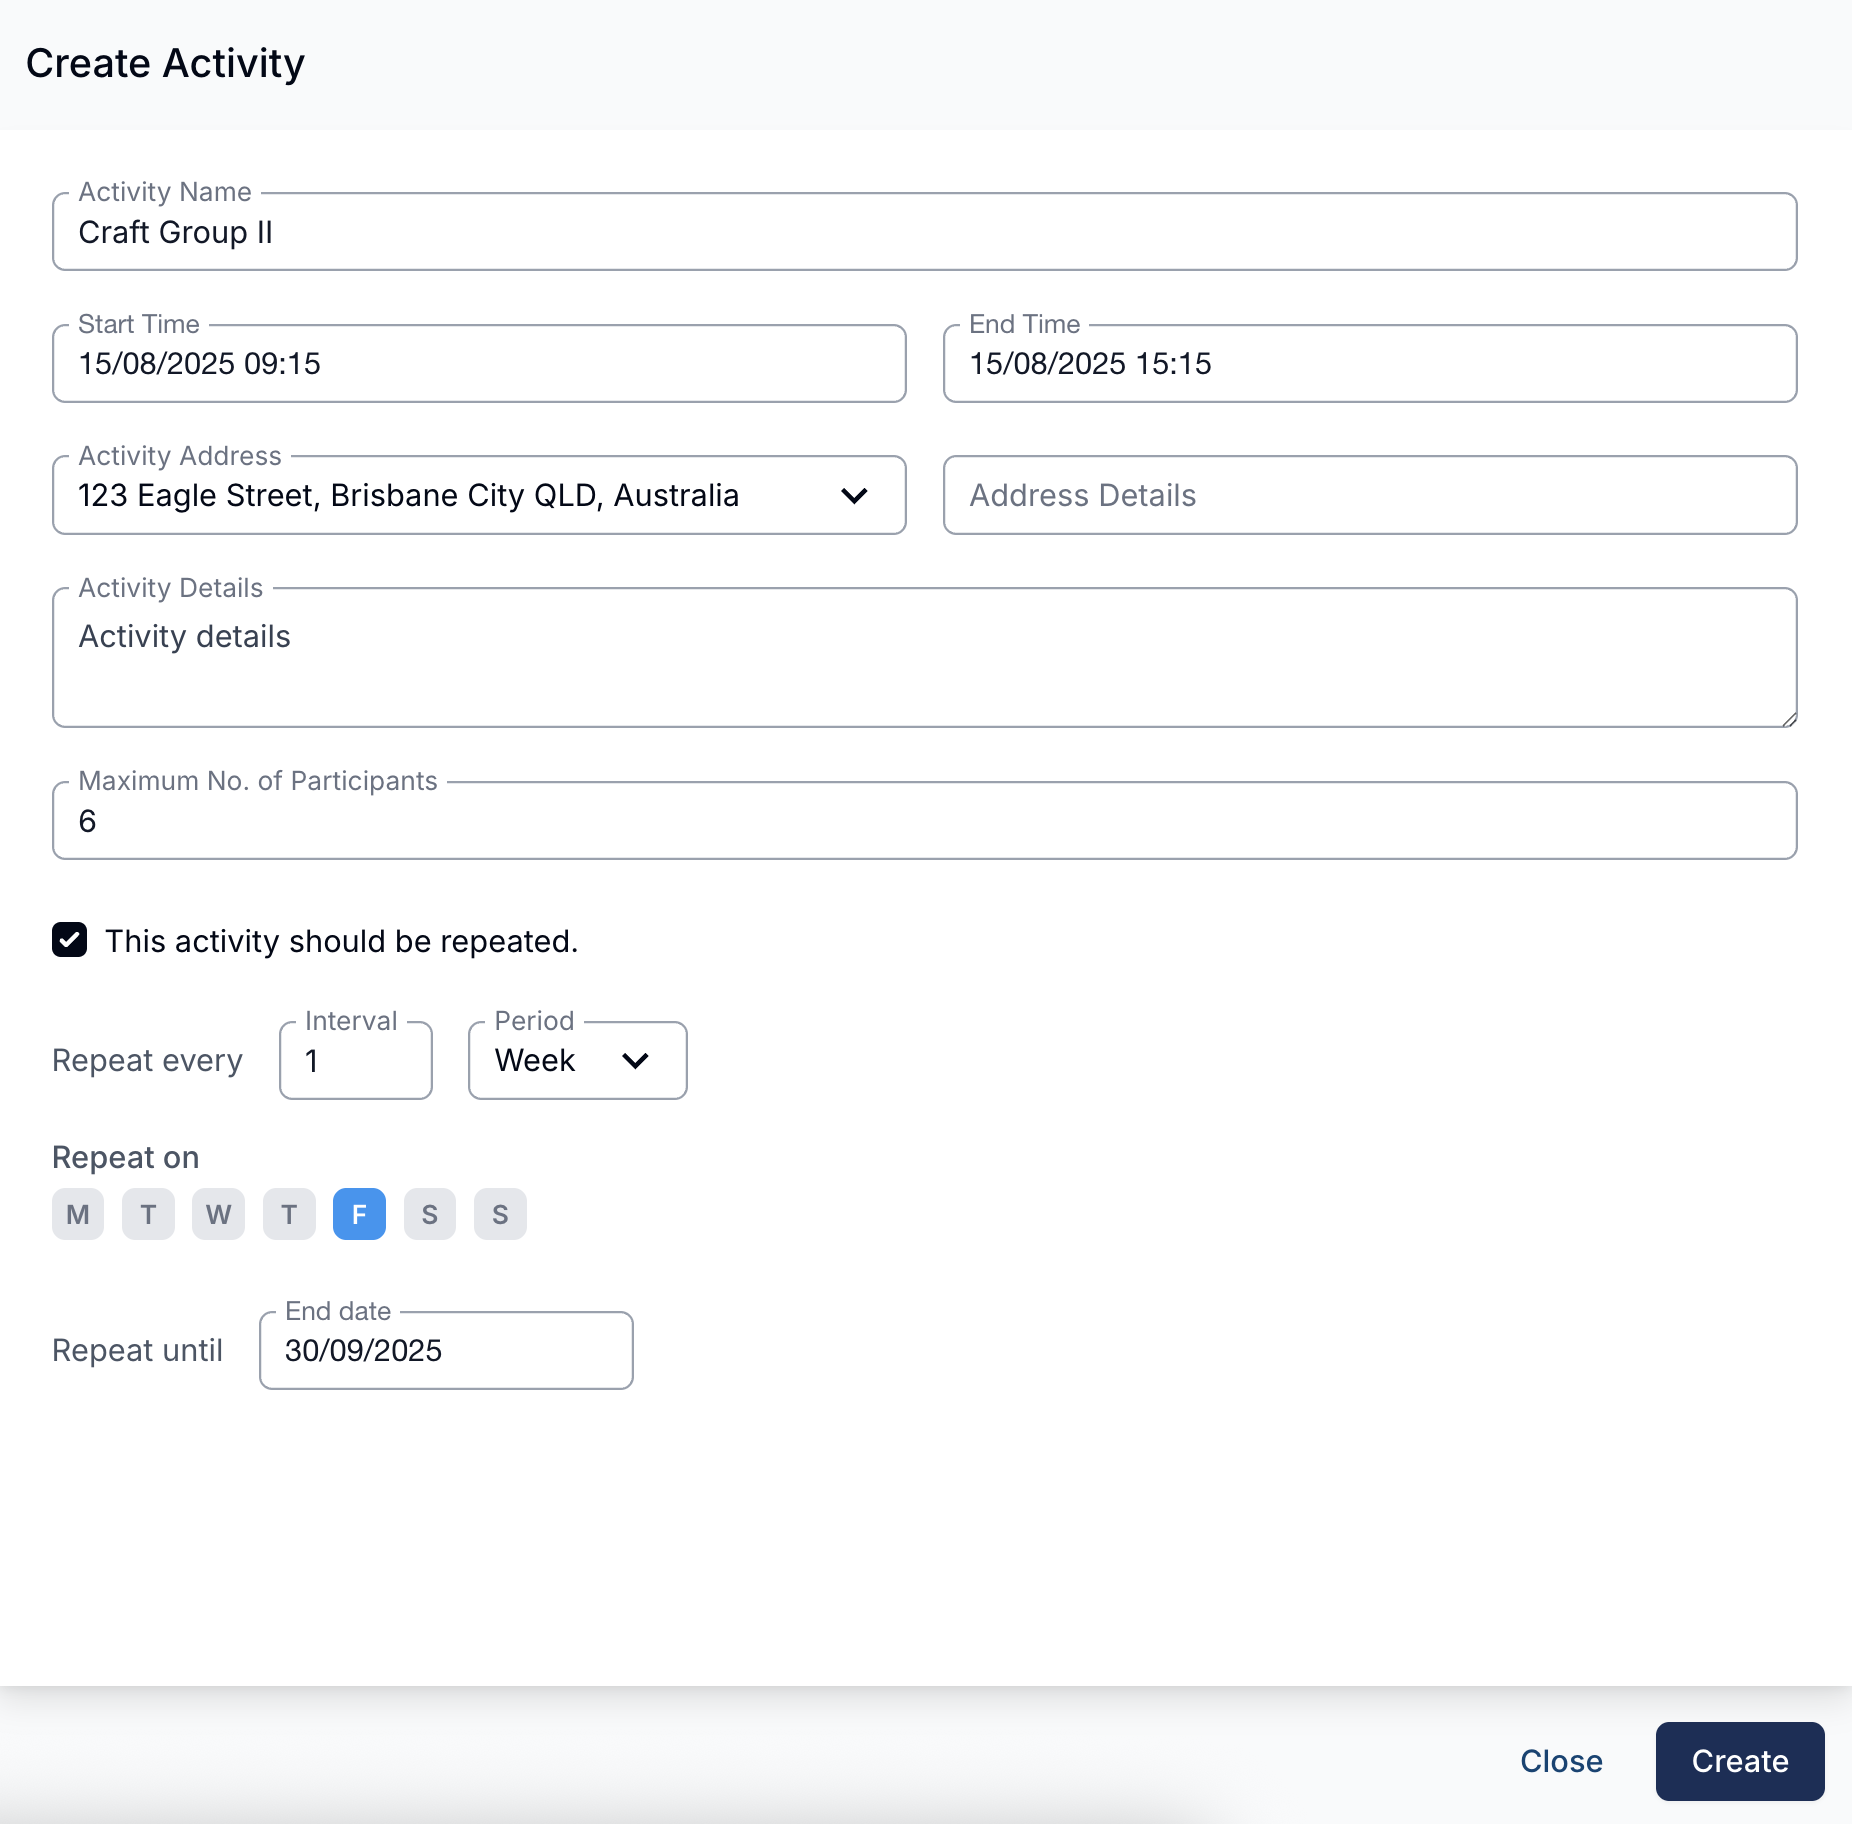
- Activity Name - Give the activity a clear title.
- Start Time / End Time - Set when the activity begins and ends.
- Timezone - Select the activity's timezone when multi-timezone scheduling is enabled. Otherwise, Astalty uses your organisation's scheduling timezone.
- Activity Address - Enter the location and any address details.
- Activity Details - Add notes or instructions.
- Maximum Number of Participants - Set the capacity that Astalty tracks as Participants are added.
Set Recurrence (Optional)
Turn on Repeat this Activity until, choose the end date, then set how often it repeats. Activities can repeat every set number of days or weeks. For a weekly recurrence, select the weekdays it should occur on.
Create the Activity
Once all details are entered, click Create.
Adding Participants to a Group Activity
Access the Activity
Go to Activities in the left-hand menu and click on the group activity you want to add supports to.
Select an Activity Event
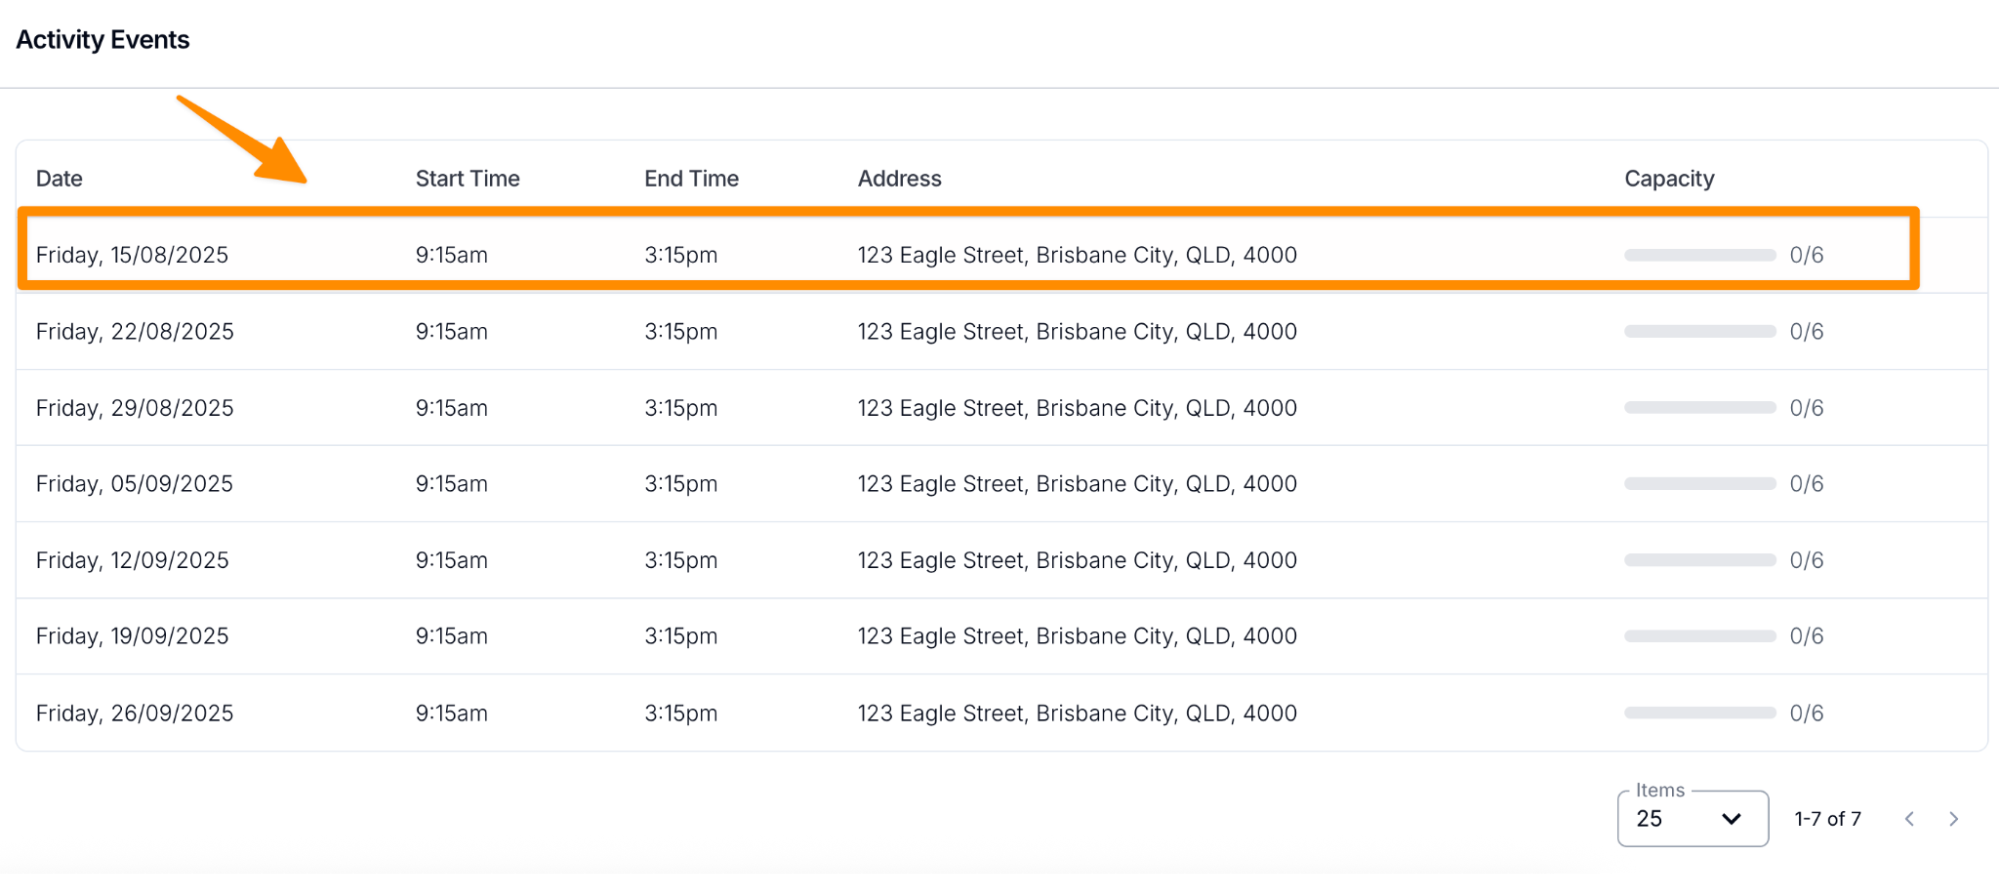
Under Activity Events, choose the specific date and click Add Support.
Add Group Support
Follow the process to add a Group Support (click here for more information on that process). During setup:
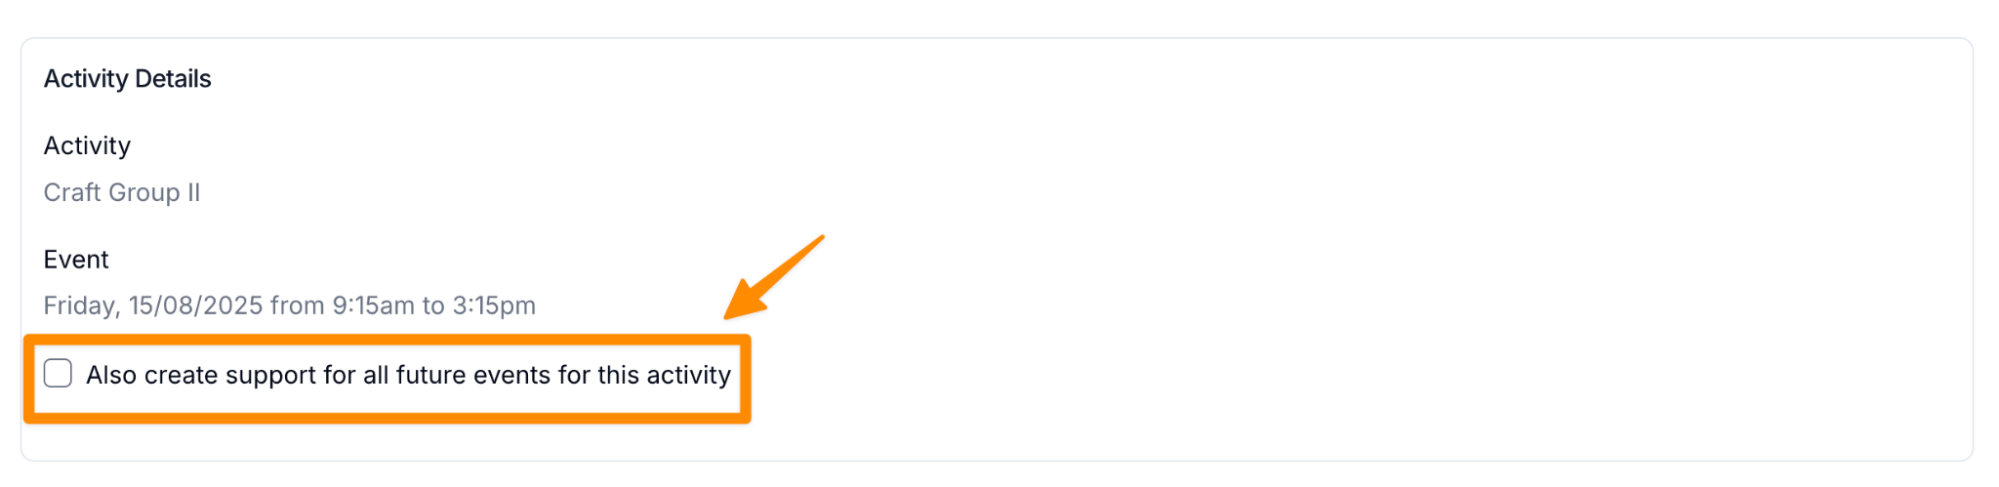
- Indicate whether this is a one-off support.
- If not, select Also create support for all future events for this activity to apply the support to all remaining scheduled events.
View the Activity and Capacity
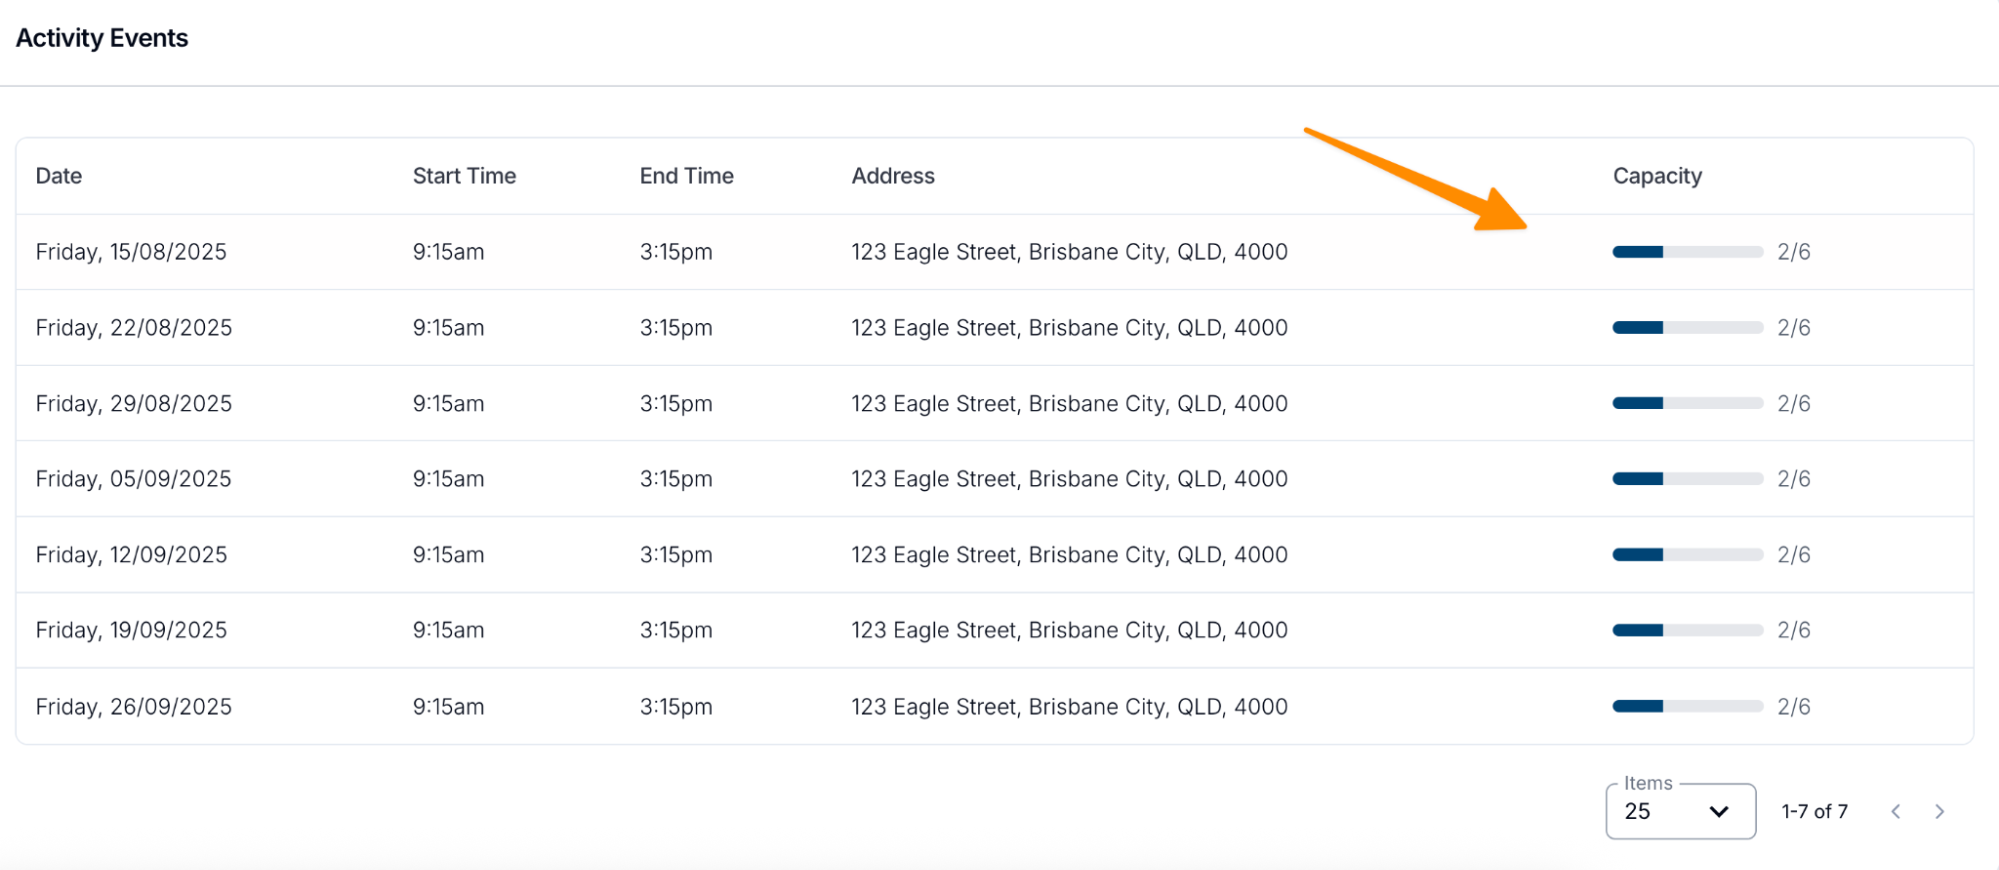
Once created, you can view the activity and all its scheduled instances. Capacity for each event is displayed under Activity Events.
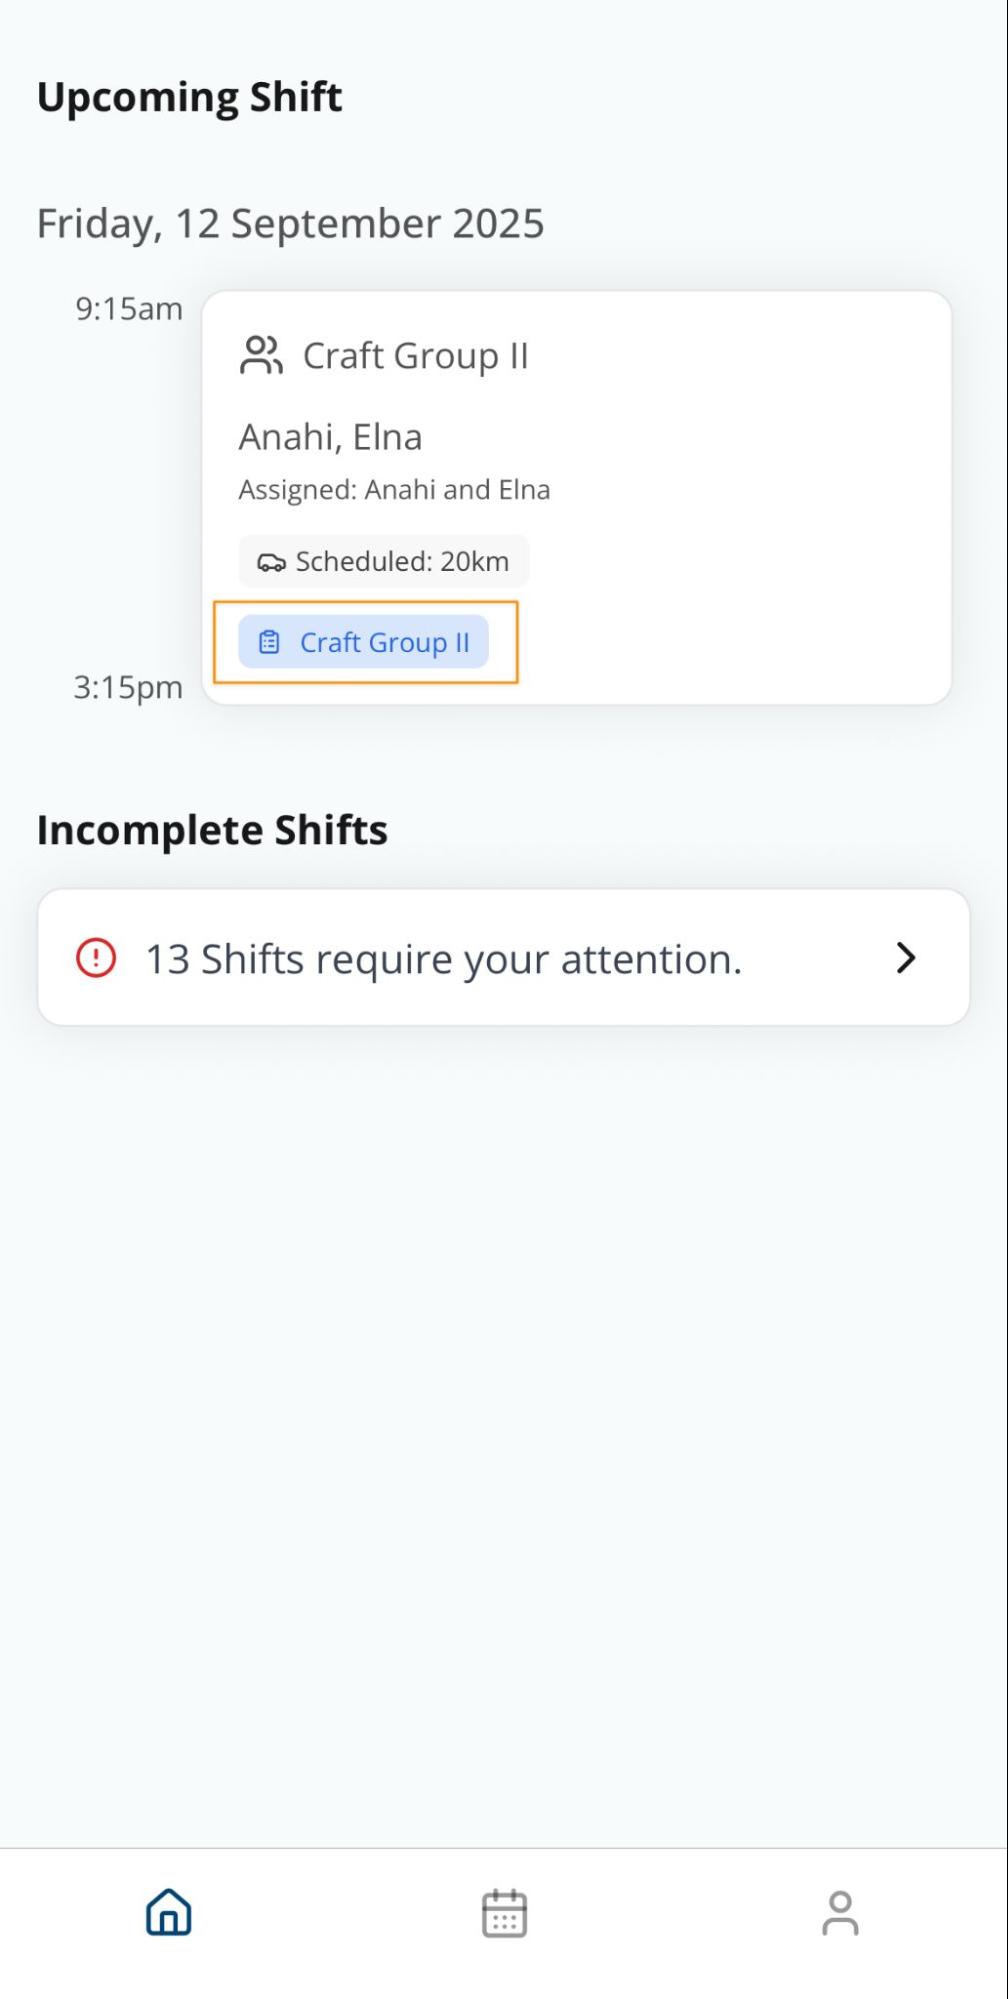
The image below shows how activities appear in the app for Support Workers.
Cloning Activities
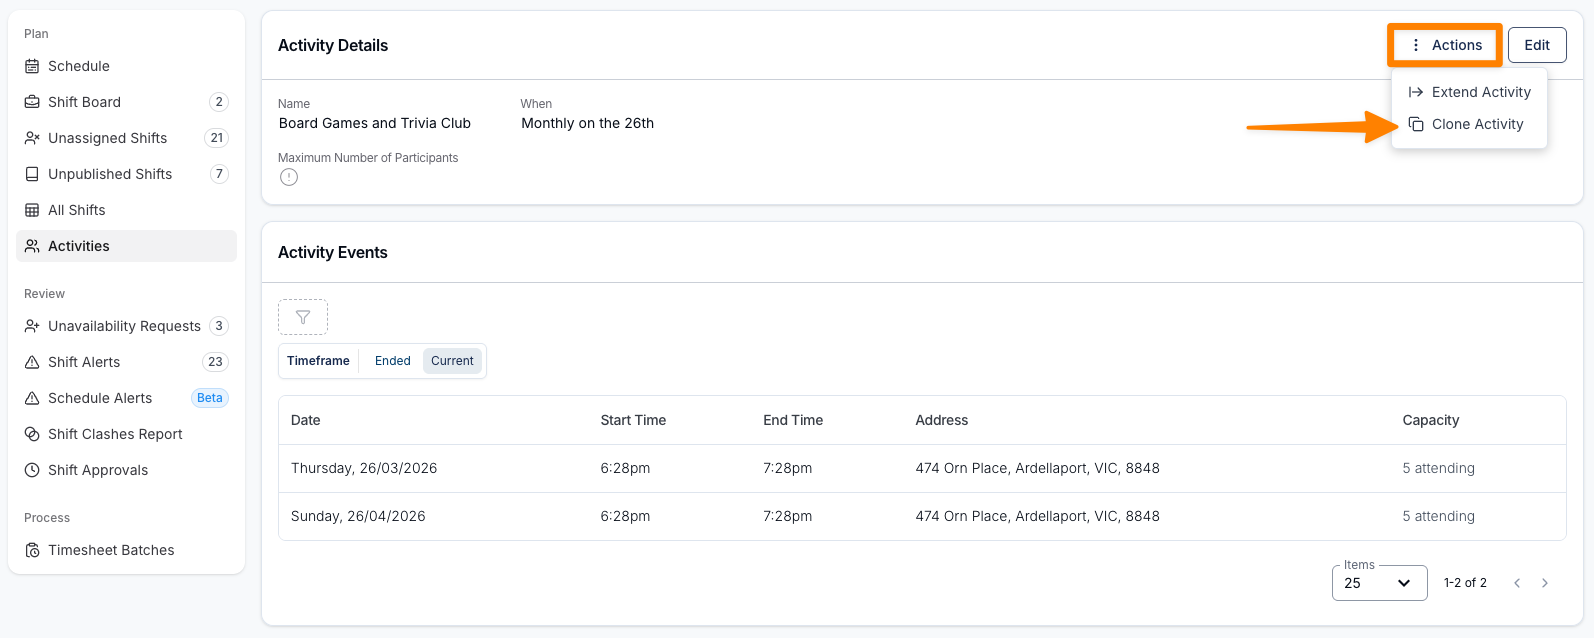
You can clone an Activity to quickly create a new event based on an existing one, making it easy to apply minor changes without starting from scratch.
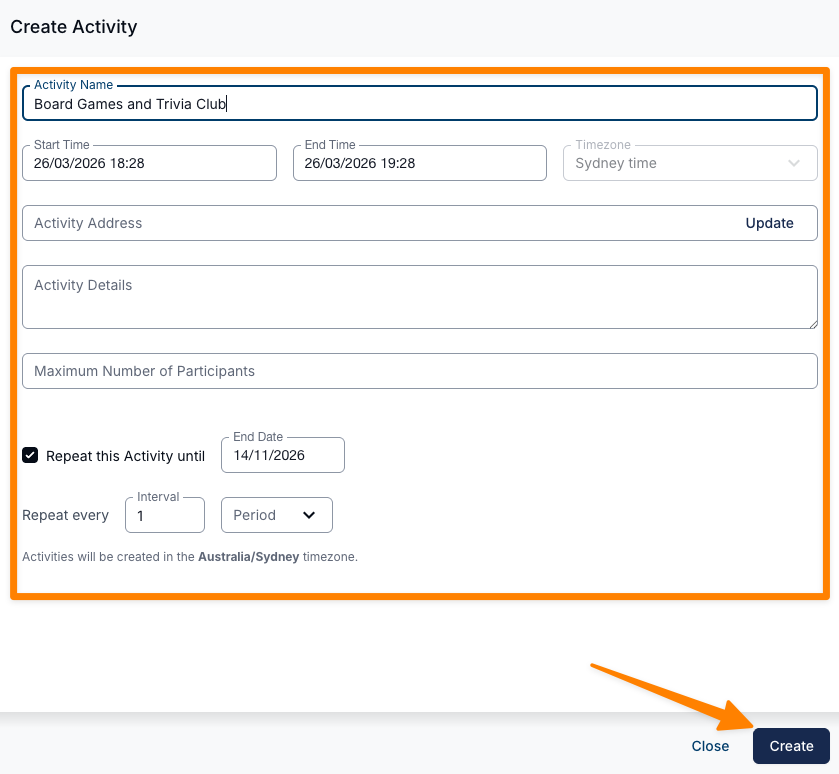
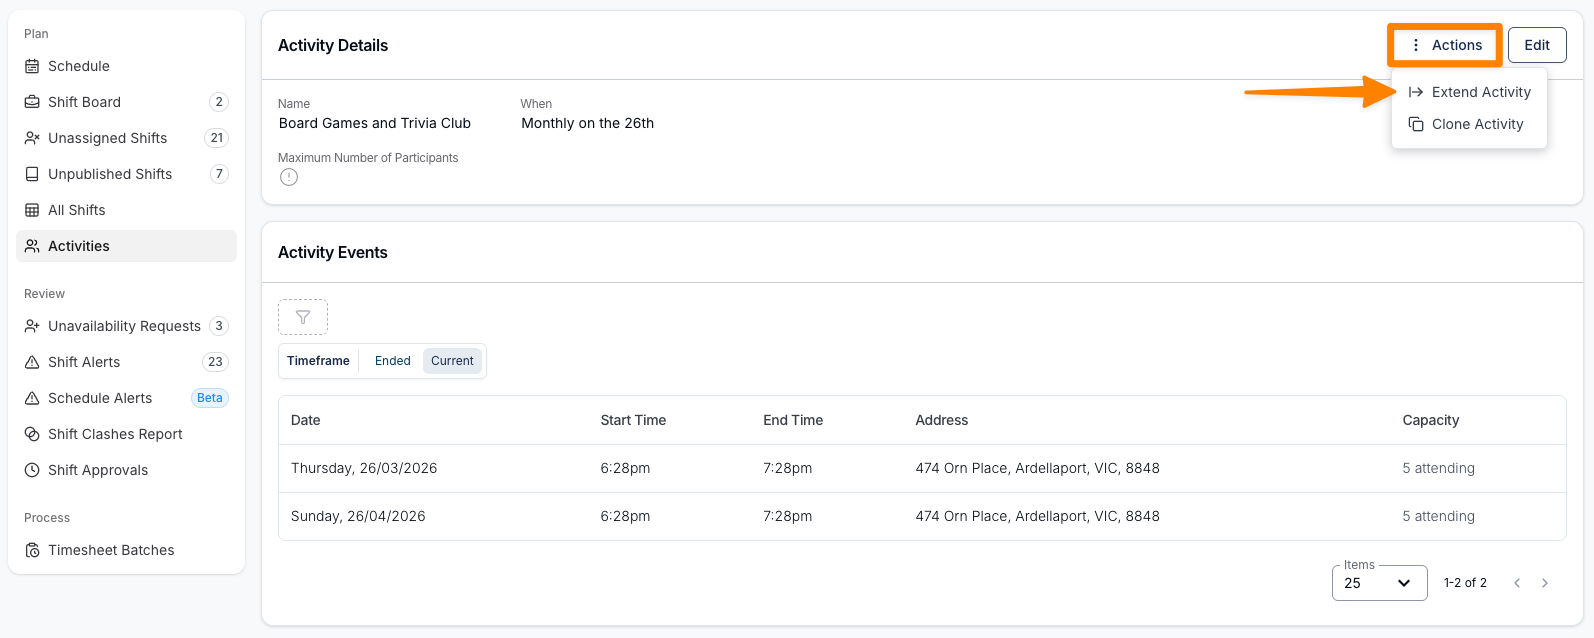
To do this, click Actions within the Activity and select Clone Activity. Complete the relevant fields, then click Create.
Extending Activities
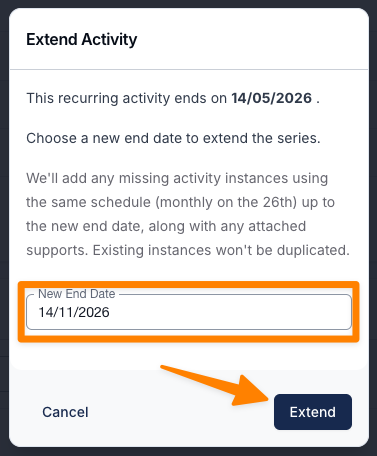
If you need to extend an Activity beyond its current end date, you can do so from the Activity’s Actions menu. Select Extend Activity, choose the new end date, and click Extend to apply the change.
Astalty will automatically carry over the supports from the previous event in the Activity series, saving schedulers from having to enter this information manually.
Editing and Deleting Activities
Open an Activity and select Edit to update its name, times, timezone, address, details, or capacity. These changes apply to the Activity's future events.
Select Delete from the update drawer to delete all future events for the Activity. This cannot be undone. Existing Supports and Group Supports that were created from those events are retained.
The Activities list includes a Status filter. Choose Current for active Activities or Archived for Activities that have been deleted.
Adding Participants After a Group Support has Ended
If a Participant was not included in a group support linked to an activity, they can still be added after the support has ended. Updating Participants in the group support will automatically update the associated activity records.
To complete this process, follow the steps outlined in the guide here.
Creating an Activity Overview
The following video provides an overview of the Activities functionality, including how to set up a group and add supports to it.