.png)
Adding a 1:1 Shift
This is an Astalty Scheduling feature.
Overview
This page will walk you through how to add a direct support, including setting the time and date, selecting participants and locations, linking planned services, assigning a support worker, and adding any support or admin details. You’ll also learn how to configure optional travel, apply charges, and understand how shifts are created as unpublished by default.
How to Add a Direct Support
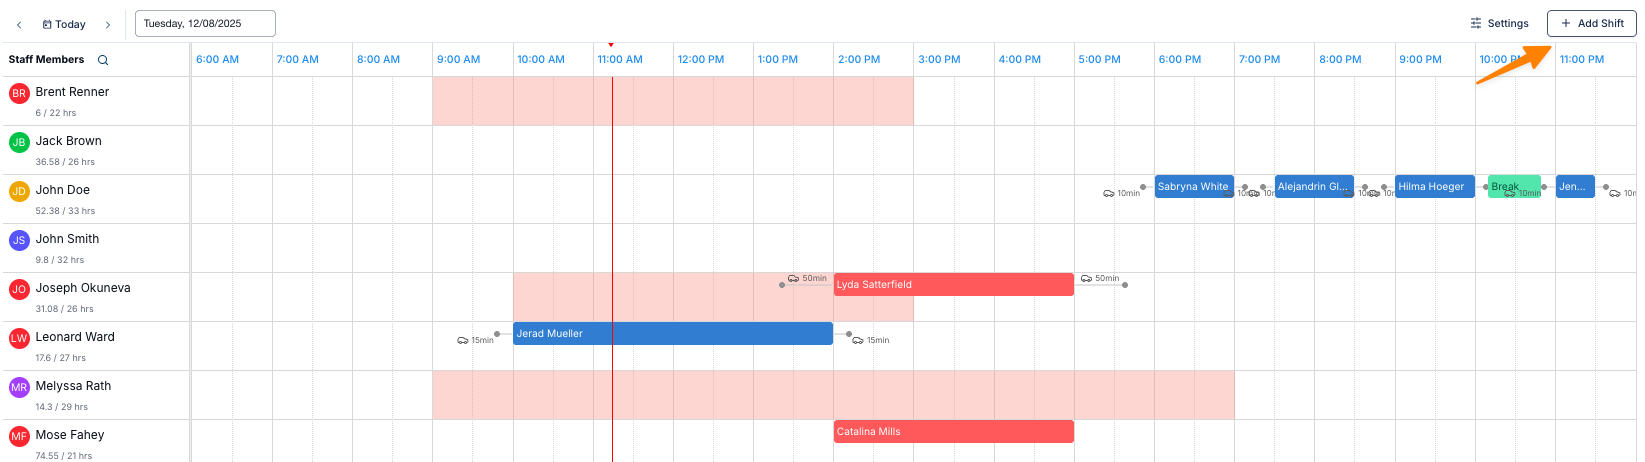
Navigate to the Schedule
From the left-hand menu, click Schedule.
On the right-hand side of the screen, click Add Shift.
Select the Support Type
Choose from the following options:
Direct Support – For one-on-one supports.
Group Support – For supports involving multiple participants.
Shift – For internal or non-support activities (e.g., administrative work in the office).
Break – For meal breaks or other scheduled breaks.
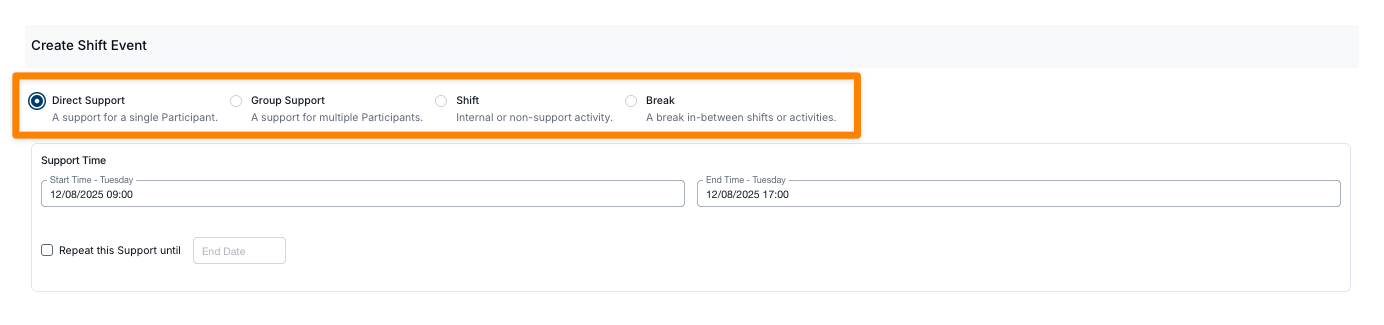
Set the Time and Date of the Scheduled Support
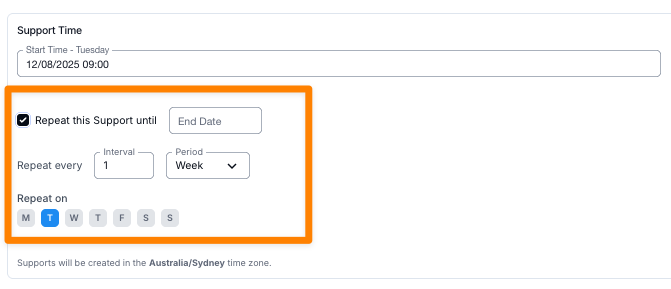
Use the date and time picker to select the start time and date.
Choose whether the support repeats (weekly, fortnightly, or monthly) and set an end date.
Note
Astalty allows rostering up to two years in advance.
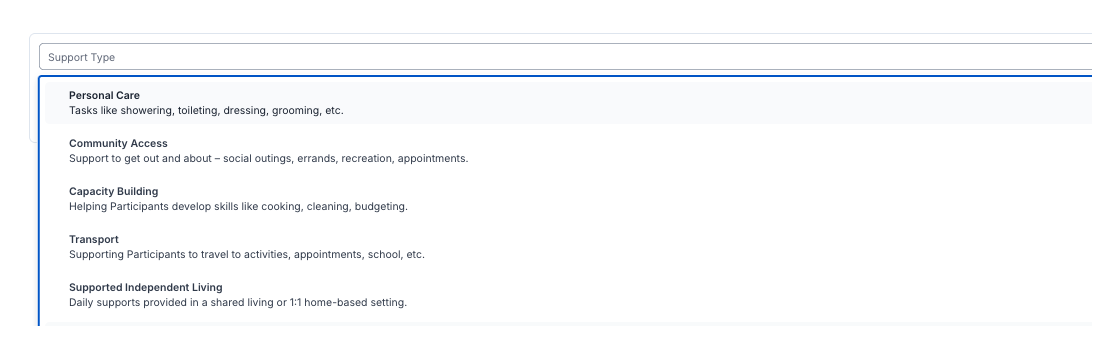
Select the Support Type
Options include Personal Care, Community Access, In-Home Supports and more.
Assign Participants and Locations
Select one or more participants.
Choose the participant’s address or specify an alternate address.
Assign Participant
After selecting the support type, you can add the participant information.
Select the relevant participant from the list.
On the right-hand side, the View Details section will appear.

This section helps rostering coordinators quickly find additional information about the participant, such as:
Tags linked to the participant
Participant Details (core profile information)
Information Items (customised details relevant to supports)
By toggling between Participant Details and Information Items, you can gather further context that may be important when rostering the support.
Select a Charge Item Set
If a planned service has already been created for a participant, it will appear by default.
If no planned service exists for scheduled services, you will be prompted to create one.
For more information on setting up scheduled services, click here.
Participant Address
You can assign the participant’s address for the support, or choose an alternate address if there is a different pickup location.
Assign a Support Worker
Select the worker delivering the support.
Indicate if there is a paid meal break. If selected, this will appear in the shift details for the Support Worker.
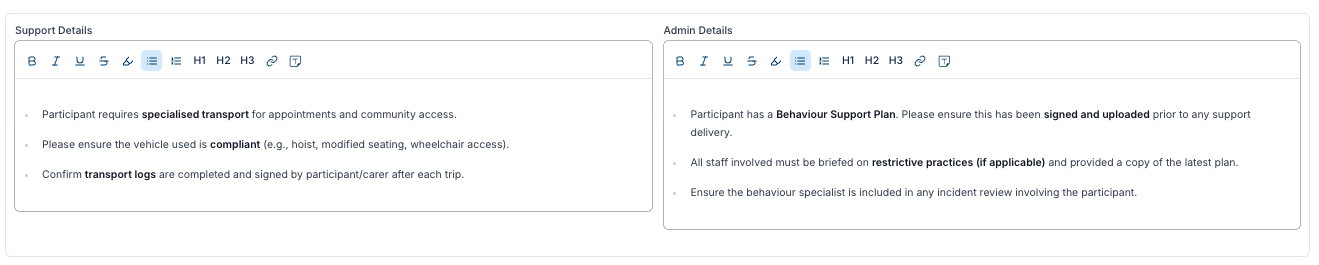
Add Support and Admin Details
Support Details – Visible to support workers.
Admin Details – Visible only from the desktop application.
Configure Travel (Optional)
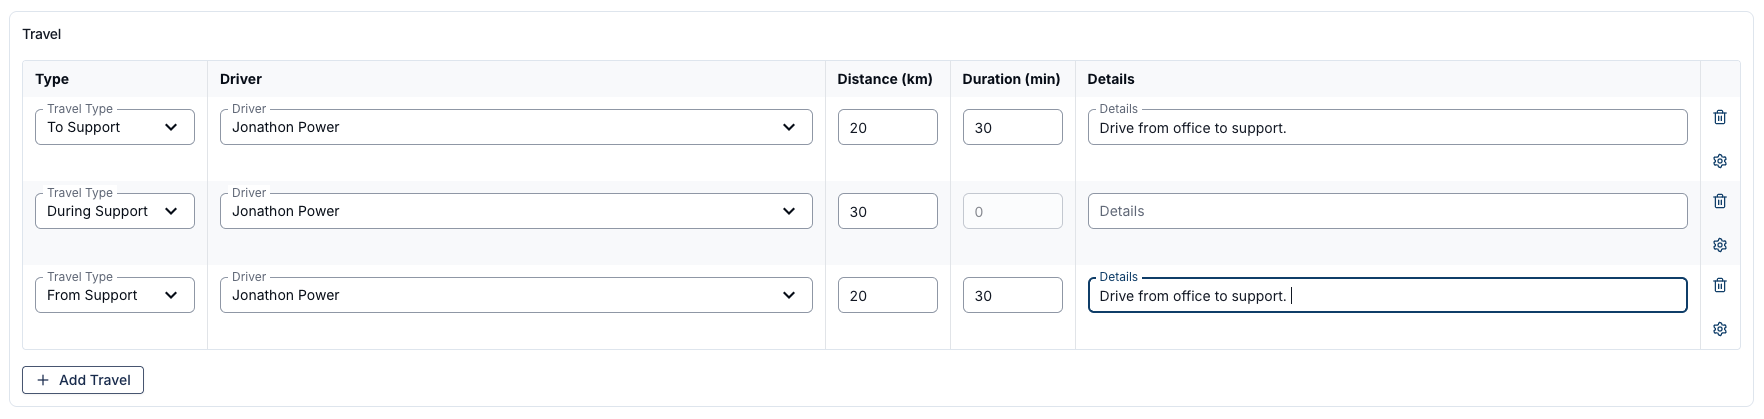
You can choose to set travel to the support, during the support, or from the support. These fields are optional and can be configured based on your organisation’s preferences. The image above shows an example setup.
The amounts you enter represent the estimated distances and the budgeted kilometres expected to be travelled.
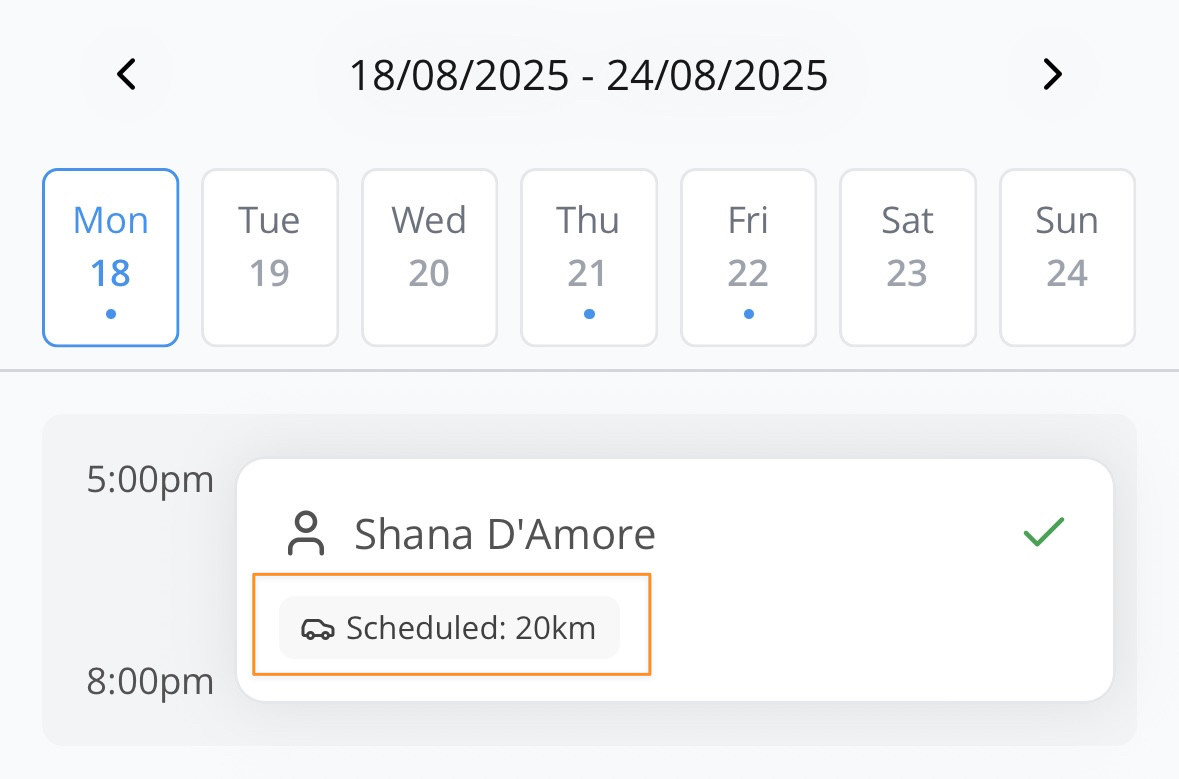
When configuring travel, be sure to specify the driver, distance, and estimated duration. For example, you might budget 20 km during the support. This budgeted amount will be visible in the Support Worker app. See the image below for an example of how displayed to support workers.
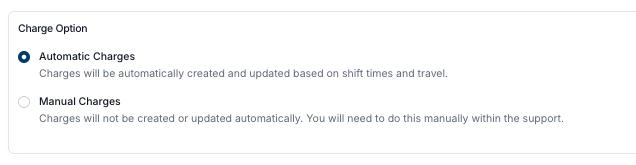
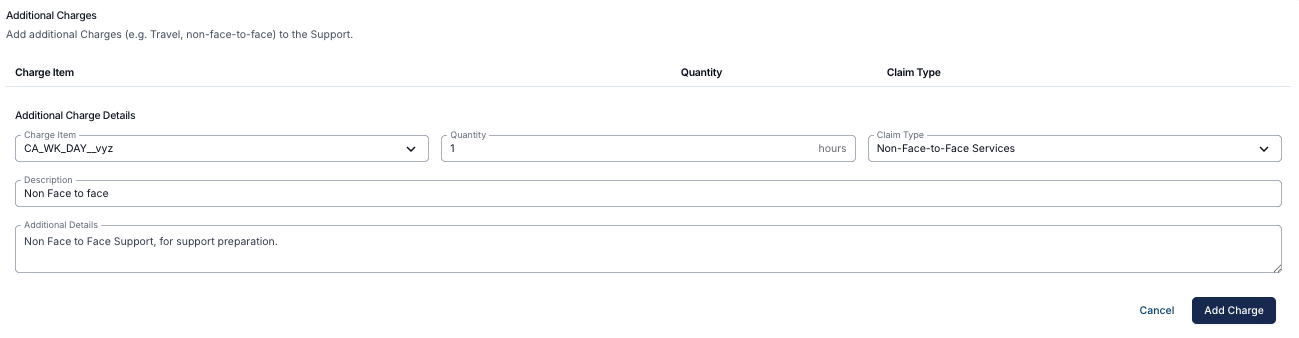
Set Charges
If billing from a Charge Item Set, configure automatic charges. For example, you would like to bill from the Community Access 04, Charge Item Set.
For other billing types (e.g., respite, SIL), you may wish to set up manual charges.
Add any Additional Charges (e.g., non-face-to-face work) using the drop-down. Enter details such as quantity, claim type, description, and any extra notes, then click Add Charge.

Create the Shift
Once all details are complete, click Create to save the shift.
Unpublished Shifts
Please note that all shifts will be created as unpublished by default. For more information on published and unpublished shifts, please head to the following link here.
Adding a Direct Support
This video walks through how to add direct support.