.png)
All new accounts will have a dummy participant and we will create the following for that participant;
Create a new Participant named John Doe
The Primary Coordinator will be the account owner
Create a Charge Item called Level 2 Support Coordination with the details from the latest price guide and reference SC-L2
Create an NDIS plan that starts on the 1st day of the month that the user registers and goes for 12 months
Create a service for that NDIS planned called Level 2 Support Coordination with the Charge Item created above assigned to it. The total amount should be 48 hours (48 * 100.14 as the $ amount). It should be Self managed.
We will add a Participant alert to the profile to let you know that this is an example participant and also the method of archiving them.
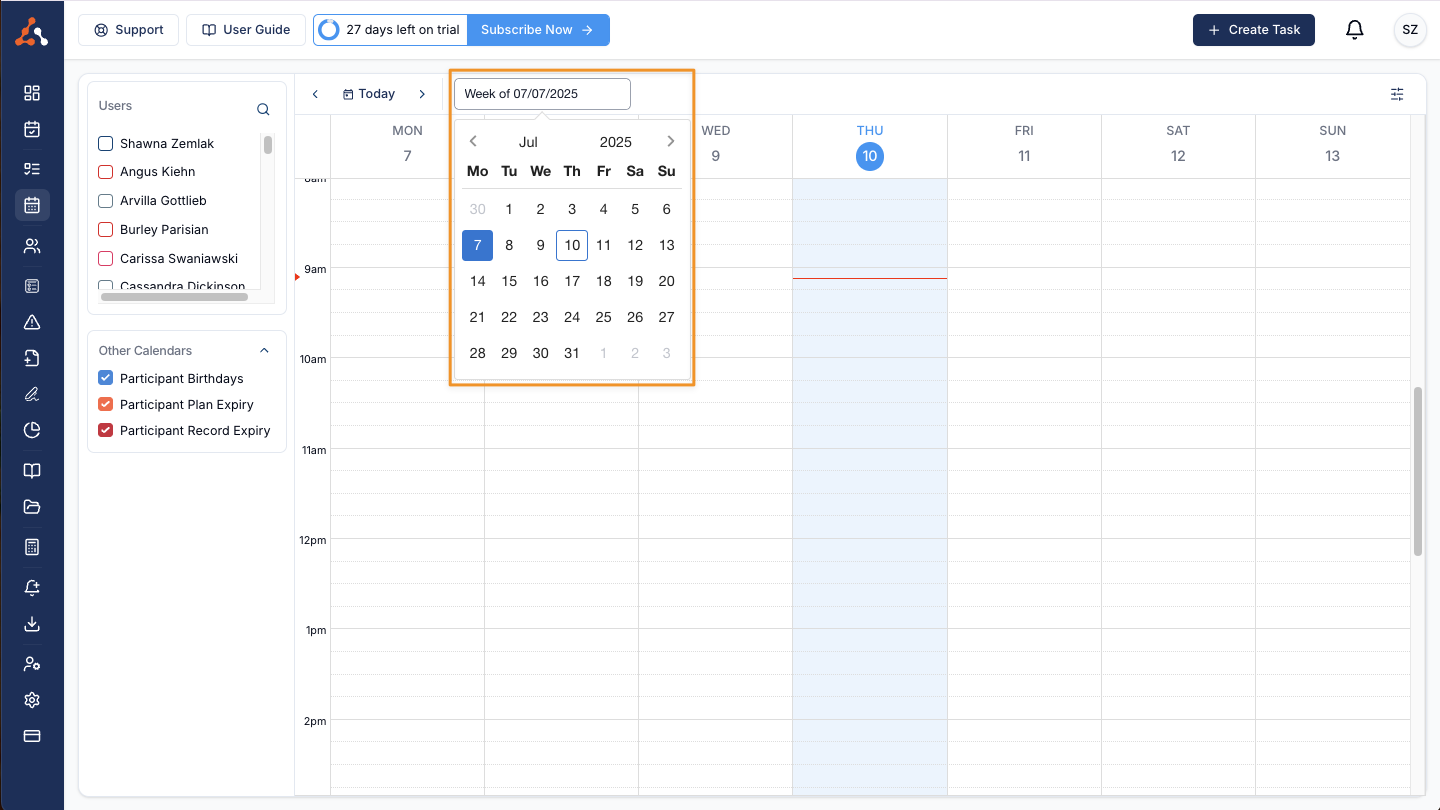
The Calendar now has a monthly navigation to help with navigating and planning future events. Previously you would need to navigate week by week.
We fixed a bug that was displaying the incorrect number of active participants on the Team Dashboard. The bug displayed all of the participants (active + archived) rather than just the specific active participants.

We have added Newcastle Permanent as a financial institution selection for the business bank account for the Staff Payments functionality when adding their financial information. This is done within the Staff Payment Settings menu.

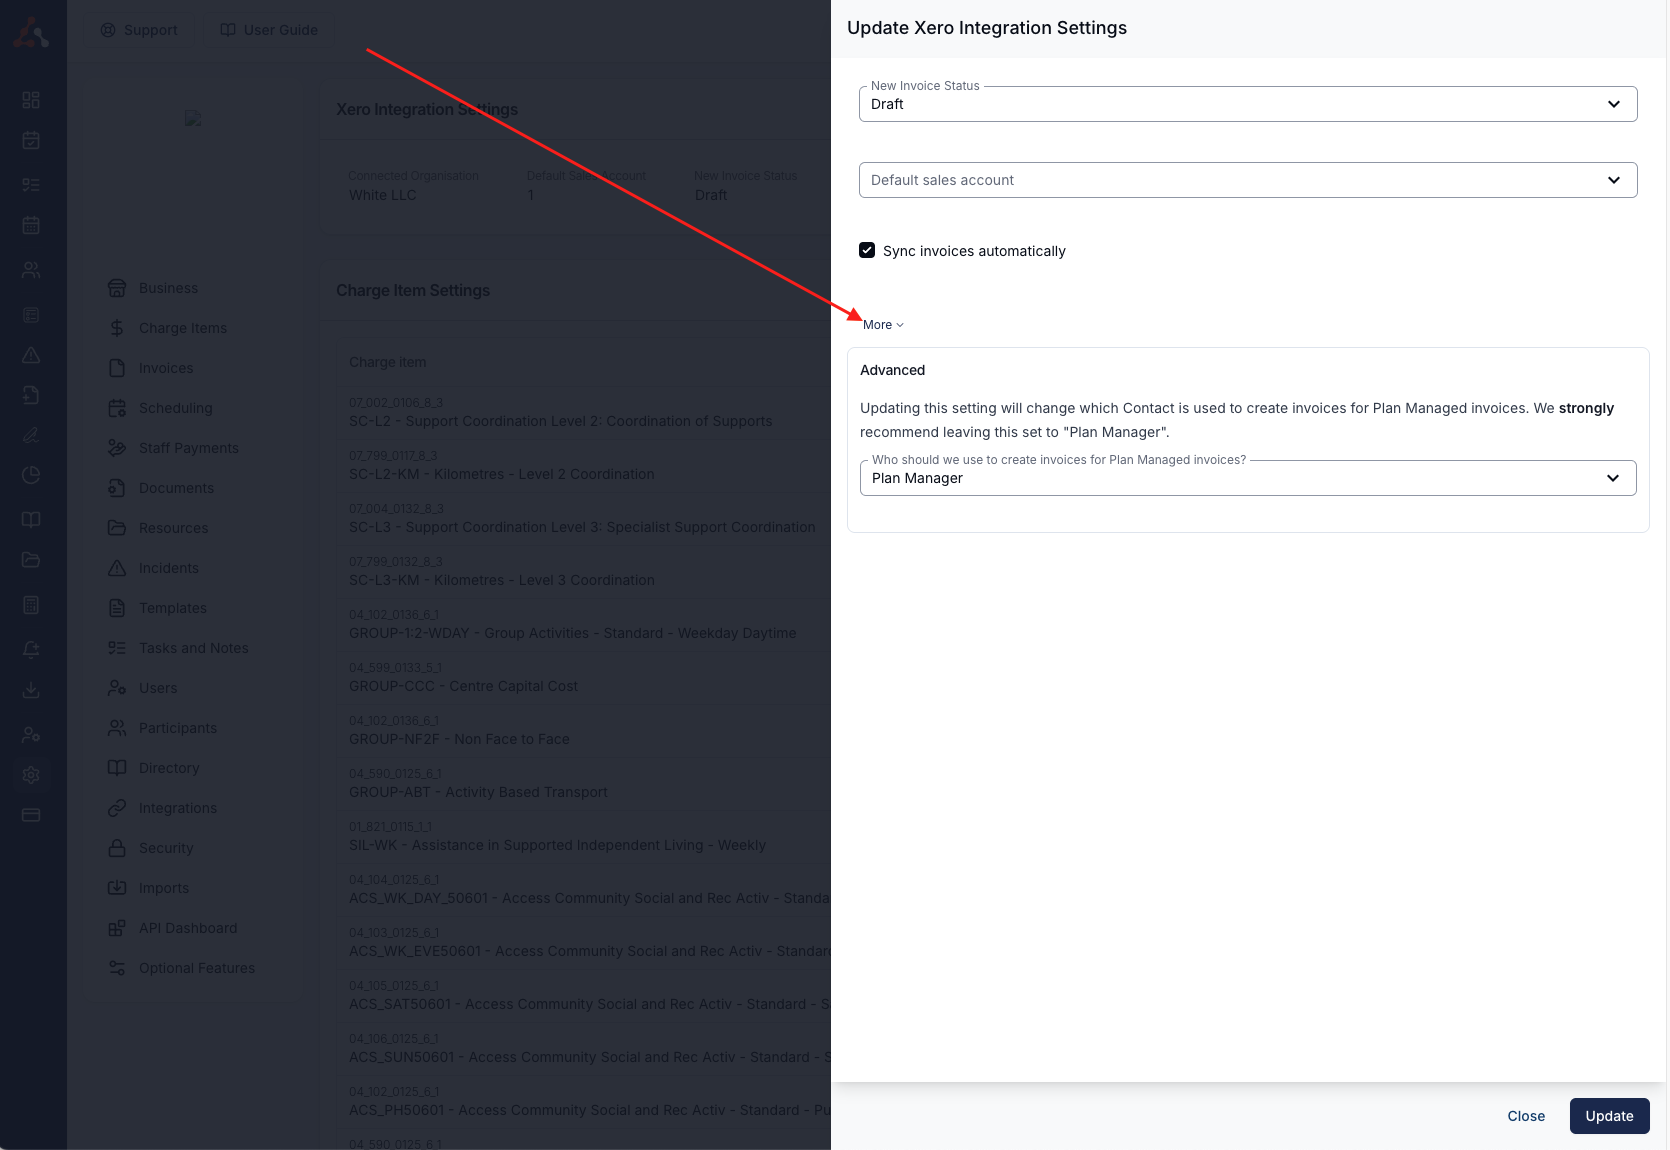
You can now opt to import your plan managed invoices to Xero with the participant as the contact. We do not recommend this approach. This can be toggled within the Xero Integration Settings under the "More Info" dropdown menu.
You will now see a sync with Xero option to all batches that were sent prior to setting up the integration, or for any batches that fail to sync for any reason. To do this head to the non-synced batch and you will see a "Sync With Xero" option in the top left of the batch view. By clicking this the batch will sync with your Xero account.
You will now see an option within the Xero integration settings to toggle the NDIA managed invoices to sync with Xero. You can find this setting by going to your Xero integration (click here) and selecting the “Edit” option, then navigating to “More Settings”.
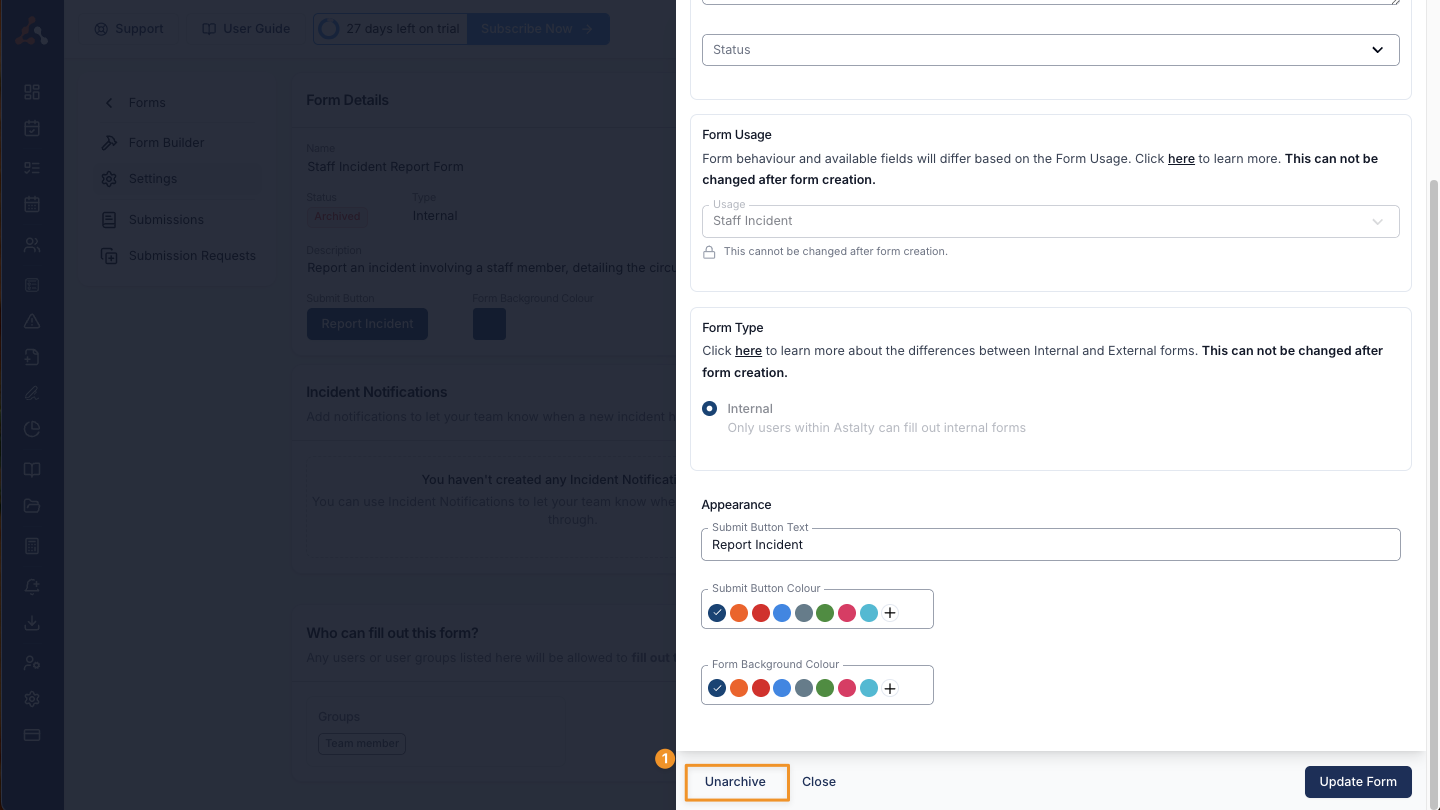
On the "Manage forms" page you can now filter by the status of the form (published, unpublished, archived) to view all or specific forms with a particular status. Previously you were unable to view archived forms. Now this method allows it.

You can now filter for an unarchive forms! This can be done by applying the filter option outlined above and selecting the archived form. Once in the archived form entry head to the forms settings menu and click 'edit' within the form details option.

Now scroll to the bottom of the screen and you will see the 'Unarchive' option.
We have added the ability to add a document to a user profile, and create staff-related document categories as well. Users can use this menu to store any other relevant information to the user that wouldn't exactly be a record. The functionality works similarly to the participant documents menu.

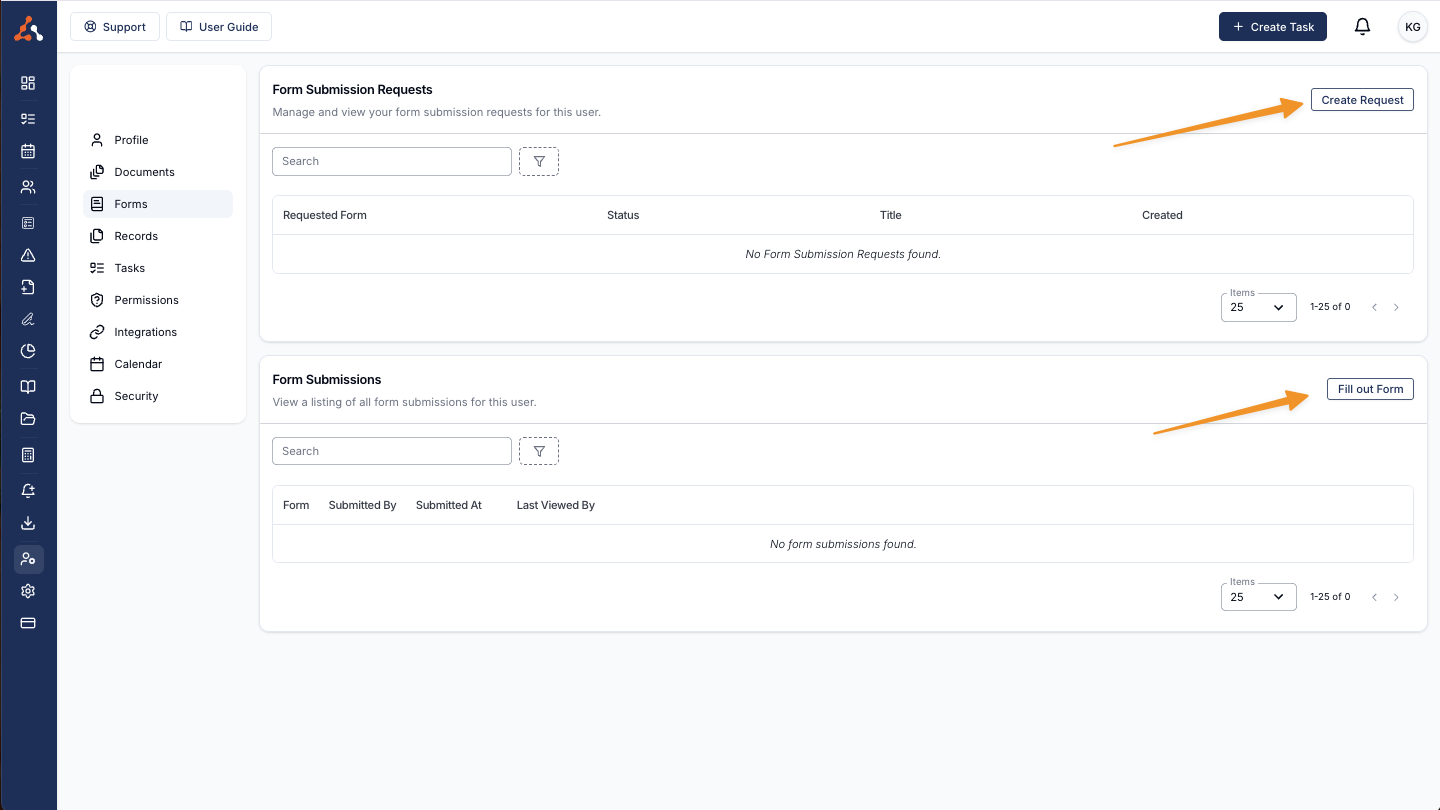
We have added a user forms menu to the user profiles, this menu functions the same as the participant profile forms menu where you can complete and request form submissions for this user.
You can now assign a user group to a specific record type. In this video, James walks through the process using the example of the "Car Insurance" record type, which may be required, but only for users who have a car. He demonstrates how to create a user group for those users, assign individuals to the group, and then link the group to the relevant record type. You can watch the video below to see how it’s done!
You can now add the exit date for participants within their participant profile. This can be done within the Participant Profile Details edit menu.

We shipped a bug fix for the staff milestone notification that was sent 3 months prior to the due date of the notification!