.png)
Creating Invoice Batches
To create an Invoice Batch, you can head to the Invoice Batches page and click Create Batch (1) in the sidebar or towards the top right of the page (2).
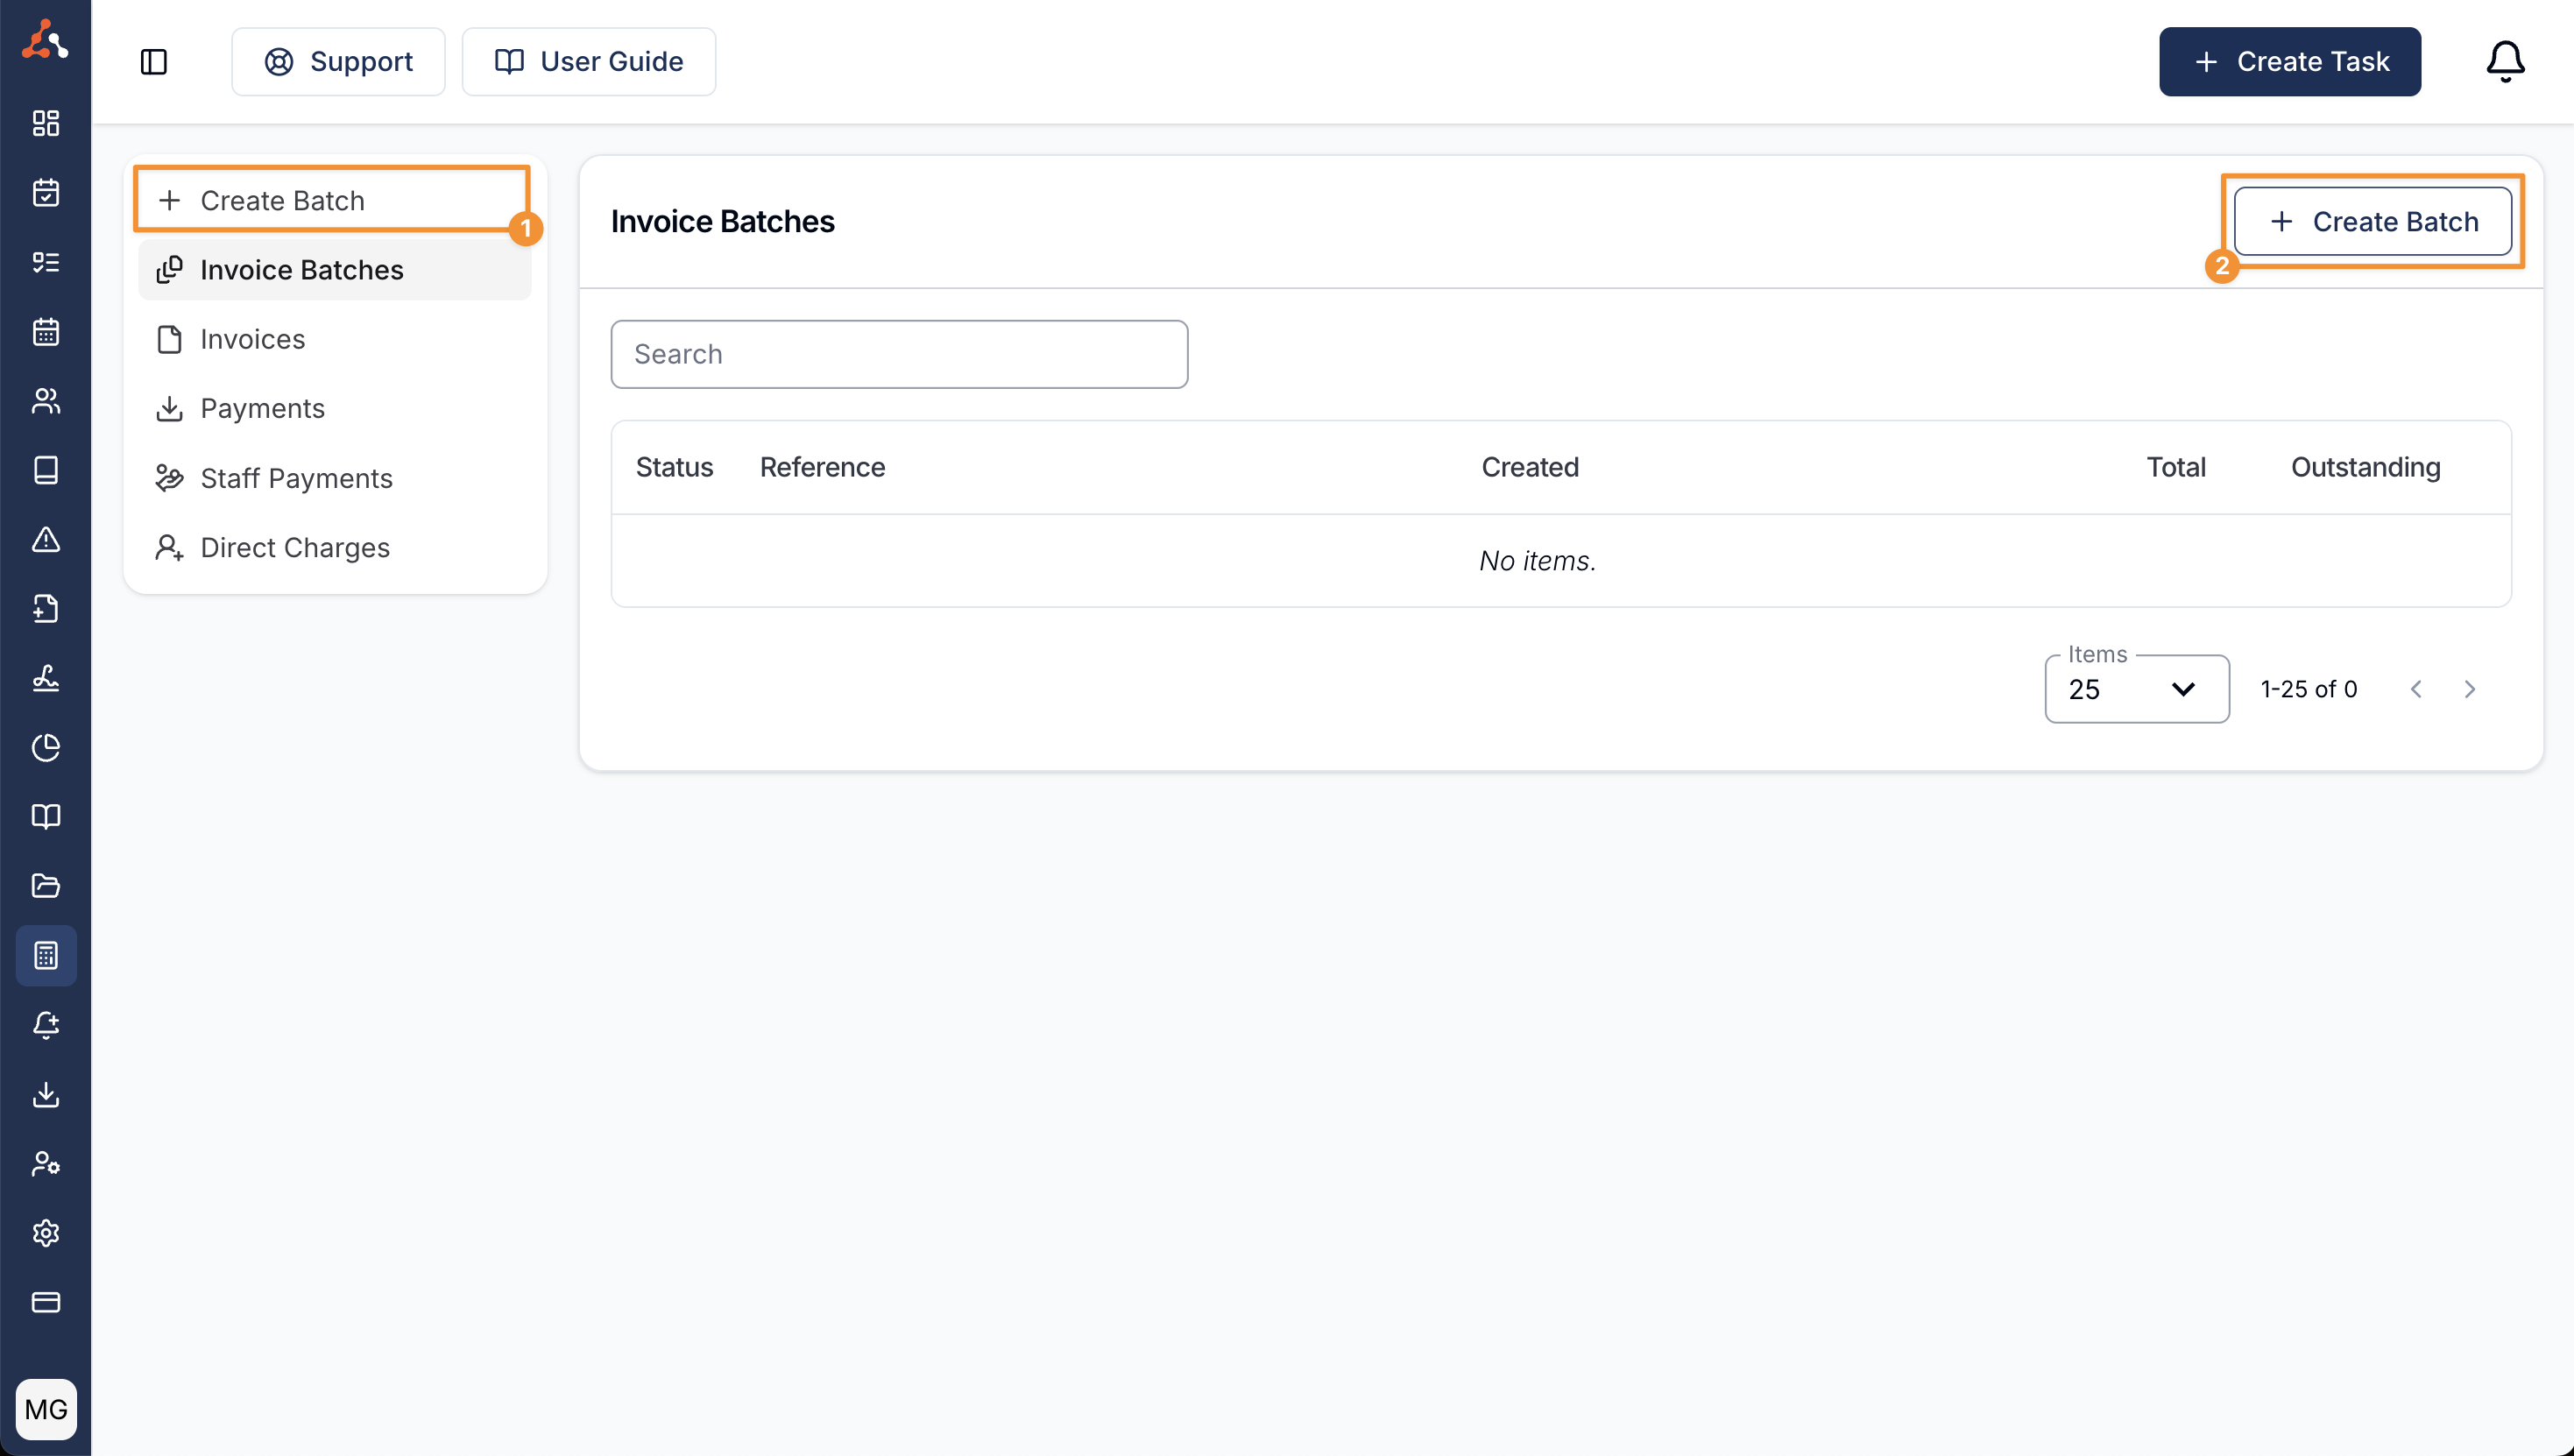
You are free to create Invoice Batches for any period you like - you can do it weekly, daily or monthly. You can also go back to any past period and re-run an Invoice Batch to process any uninvoiced items.
Creating an Invoice Batch
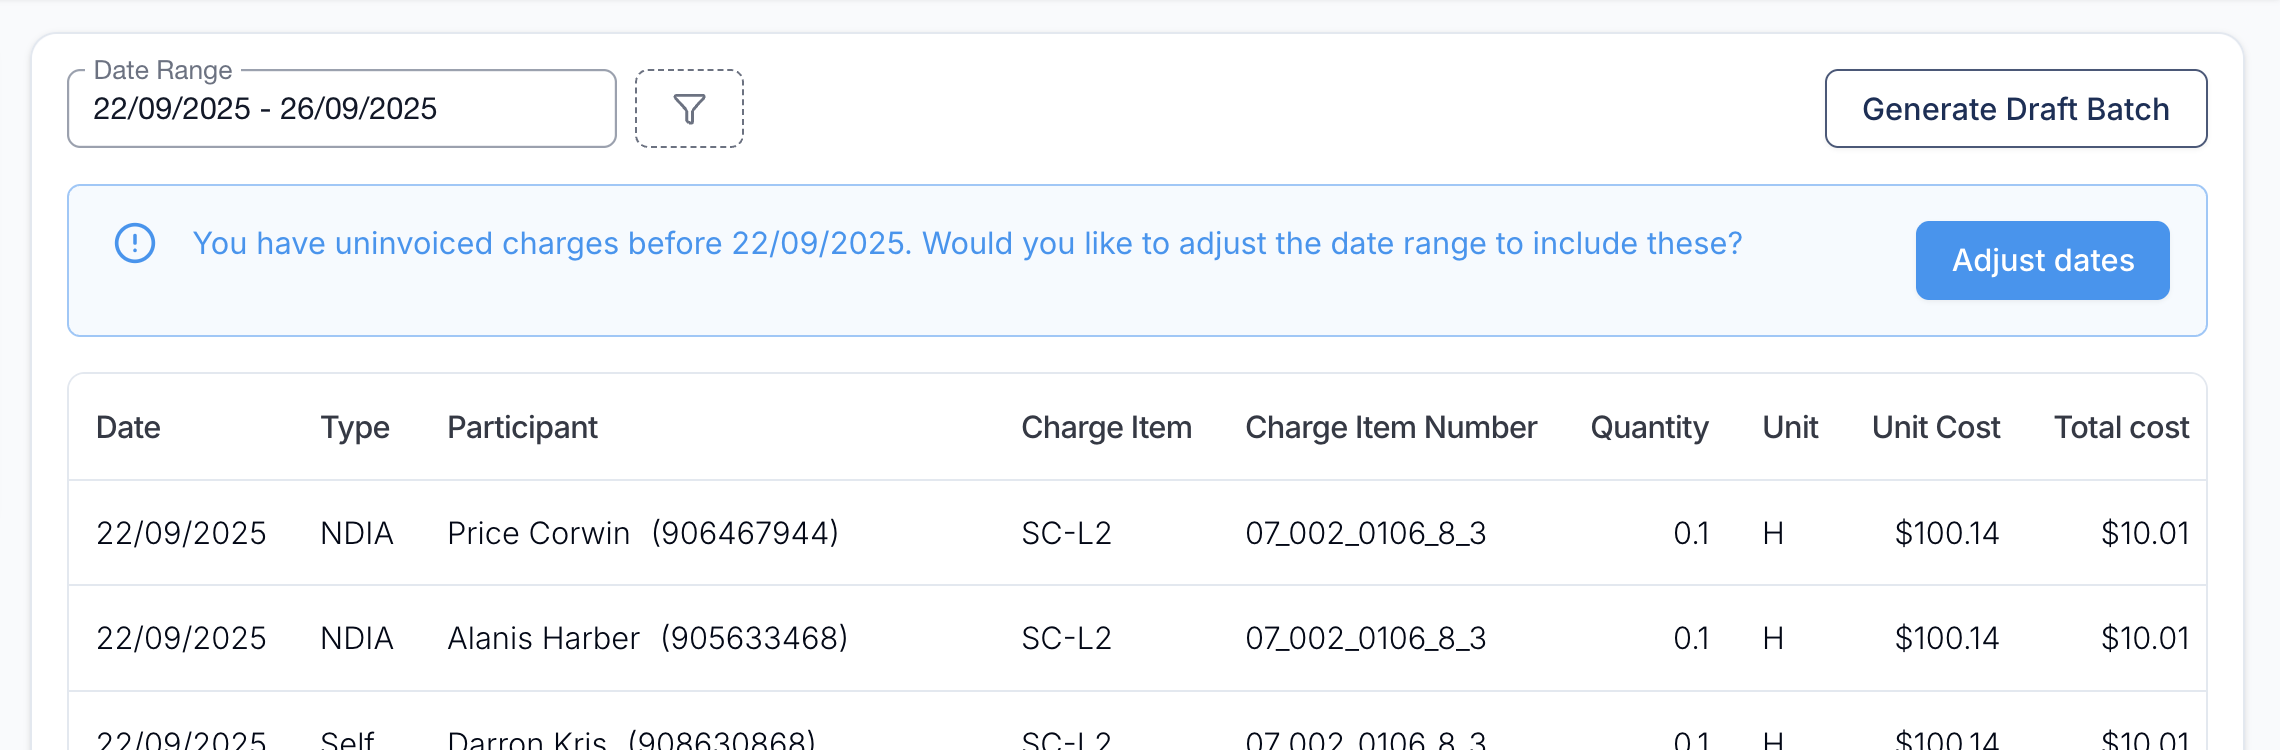
All Invoice Batches will be created as a draft first. Once you are on the Create Batch page, you can adjust the date range that you'd like to invoice for.
Uninvoiced Charges Warning
Sometimes you may see a blue warning starting "you have uninvoiced charges before [start date]". This means that Astalty has found charges outside of the selected date range that have not yet been invoiced. If you click on the Adjust Dates button, Astalty will automatically adjust the date range to ensure all uninvoiced charges are included in the draft batch.
Shifts Warning
If there are Shifts in the period you're invoicing that may affect payroll and invoicing accuracy, Astalty will display a yellow warning banner at the top of the draft batch. The banner gives you two ways to review the relevant Shifts before generating the batch:
View ** Shifts — opens the Shift Approvals page so you can action any outstanding shift approvals.
View ** Alerts — opens the Shift Alerts page so you can action any Shifts that haven't been clocked in or out of, along with any cancellations requiring review.

Important Note
This alert will only be visible to those with Scheduling enabled on their account. To learn more about Scheduling, please click here.
It's best to action any outstanding approvals and alerts before generating the batch, so that any charges affected are captured accurately.
Filters
Before generating your draft batch, you can apply one or more filters to narrow down the charges that appear in the batch. Filters can be combined to scope the batch to a specific group of charges.
Charge Type: Use the Charge Type filter to only show charges created by Task, Support, or Direct Charges.
Management Type: Use the Management Type filter to only show charges for Participants with a specific Management Type — NDIA, Plan, or Self. This is useful when you need to send a batch of invoices to a single Plan Manager or to the NDIA.
Task Owner: Use the Task Owner filter to only show charges created from Tasks owned by a specific user. This is helpful when a team member is responsible for reviewing or invoicing their own Tasks before they are batched.
Participant: Use the Participant filter to only show charges for a specific Participant. This is helpful when you want to create a batch for a single Participant or quickly check the charges that will be invoiced for them.

Generating the draft batch
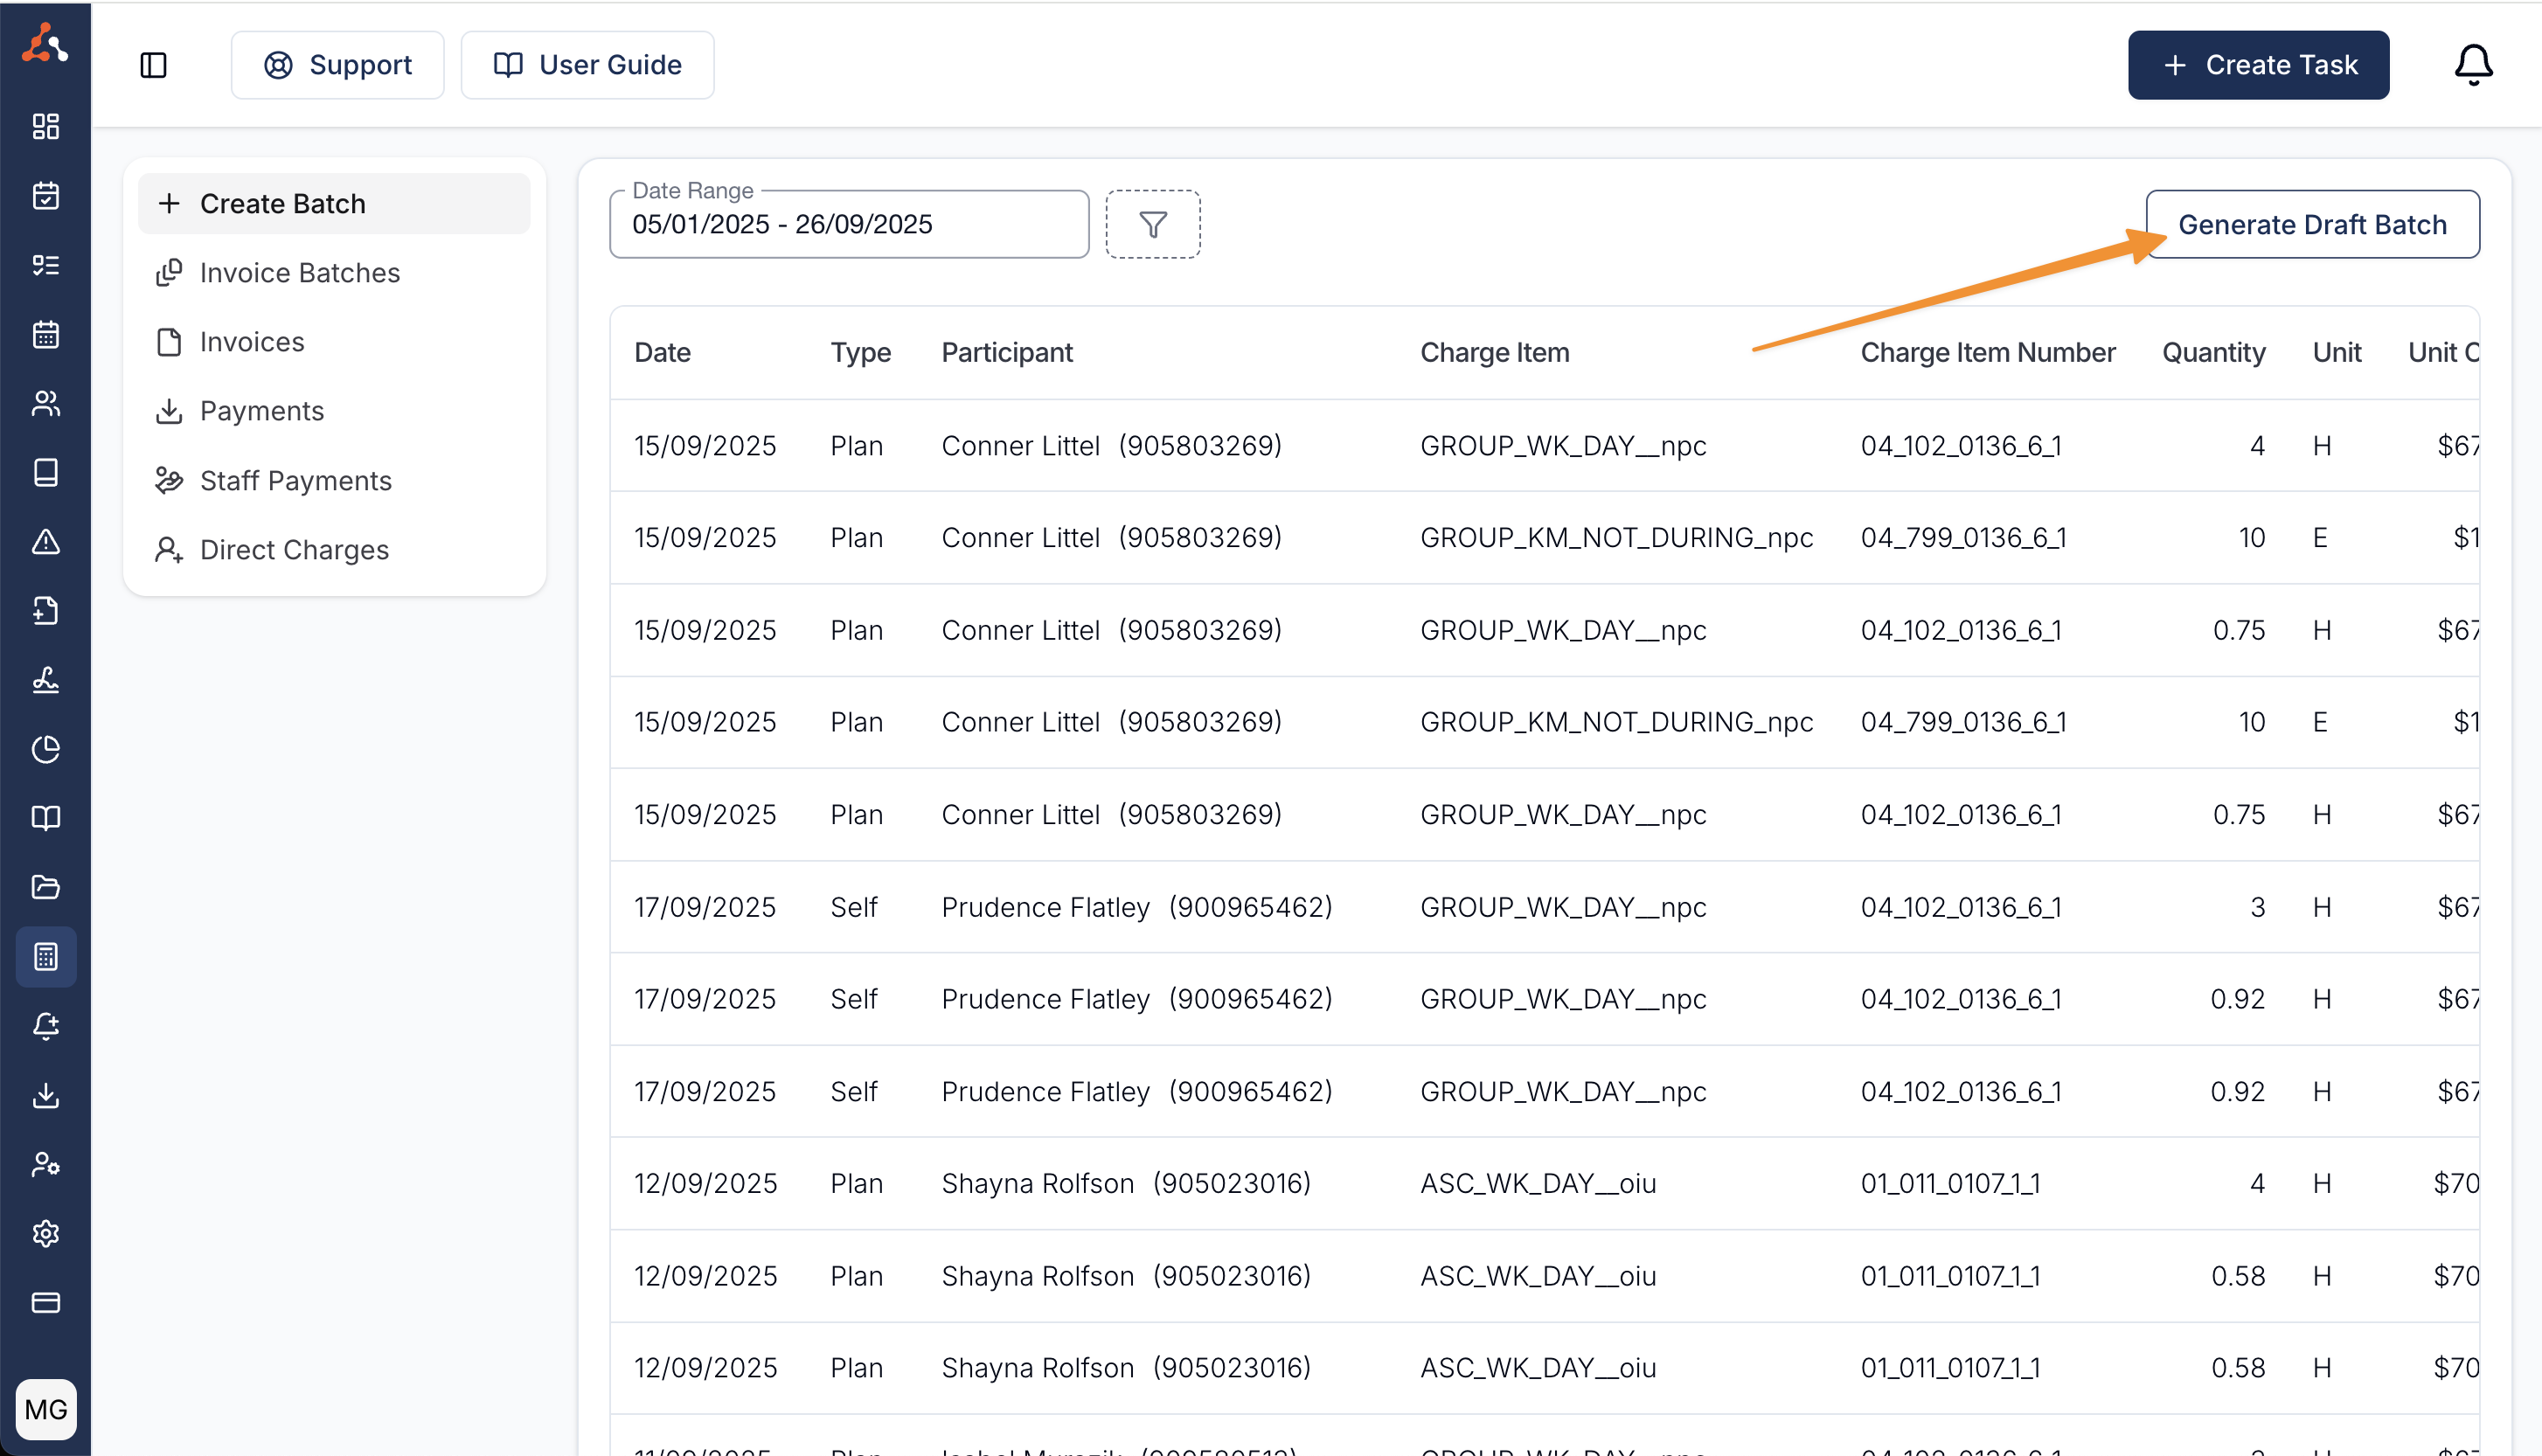
When you are ready and happy with the selected date range click on Generate Draft Batch.
This will not send any invoices yet.
Searching by Participant
After the Draft Batch has been generated, you can narrow the list to a specific Participant by typing their name into the search field.

Excluding Charges from a batch
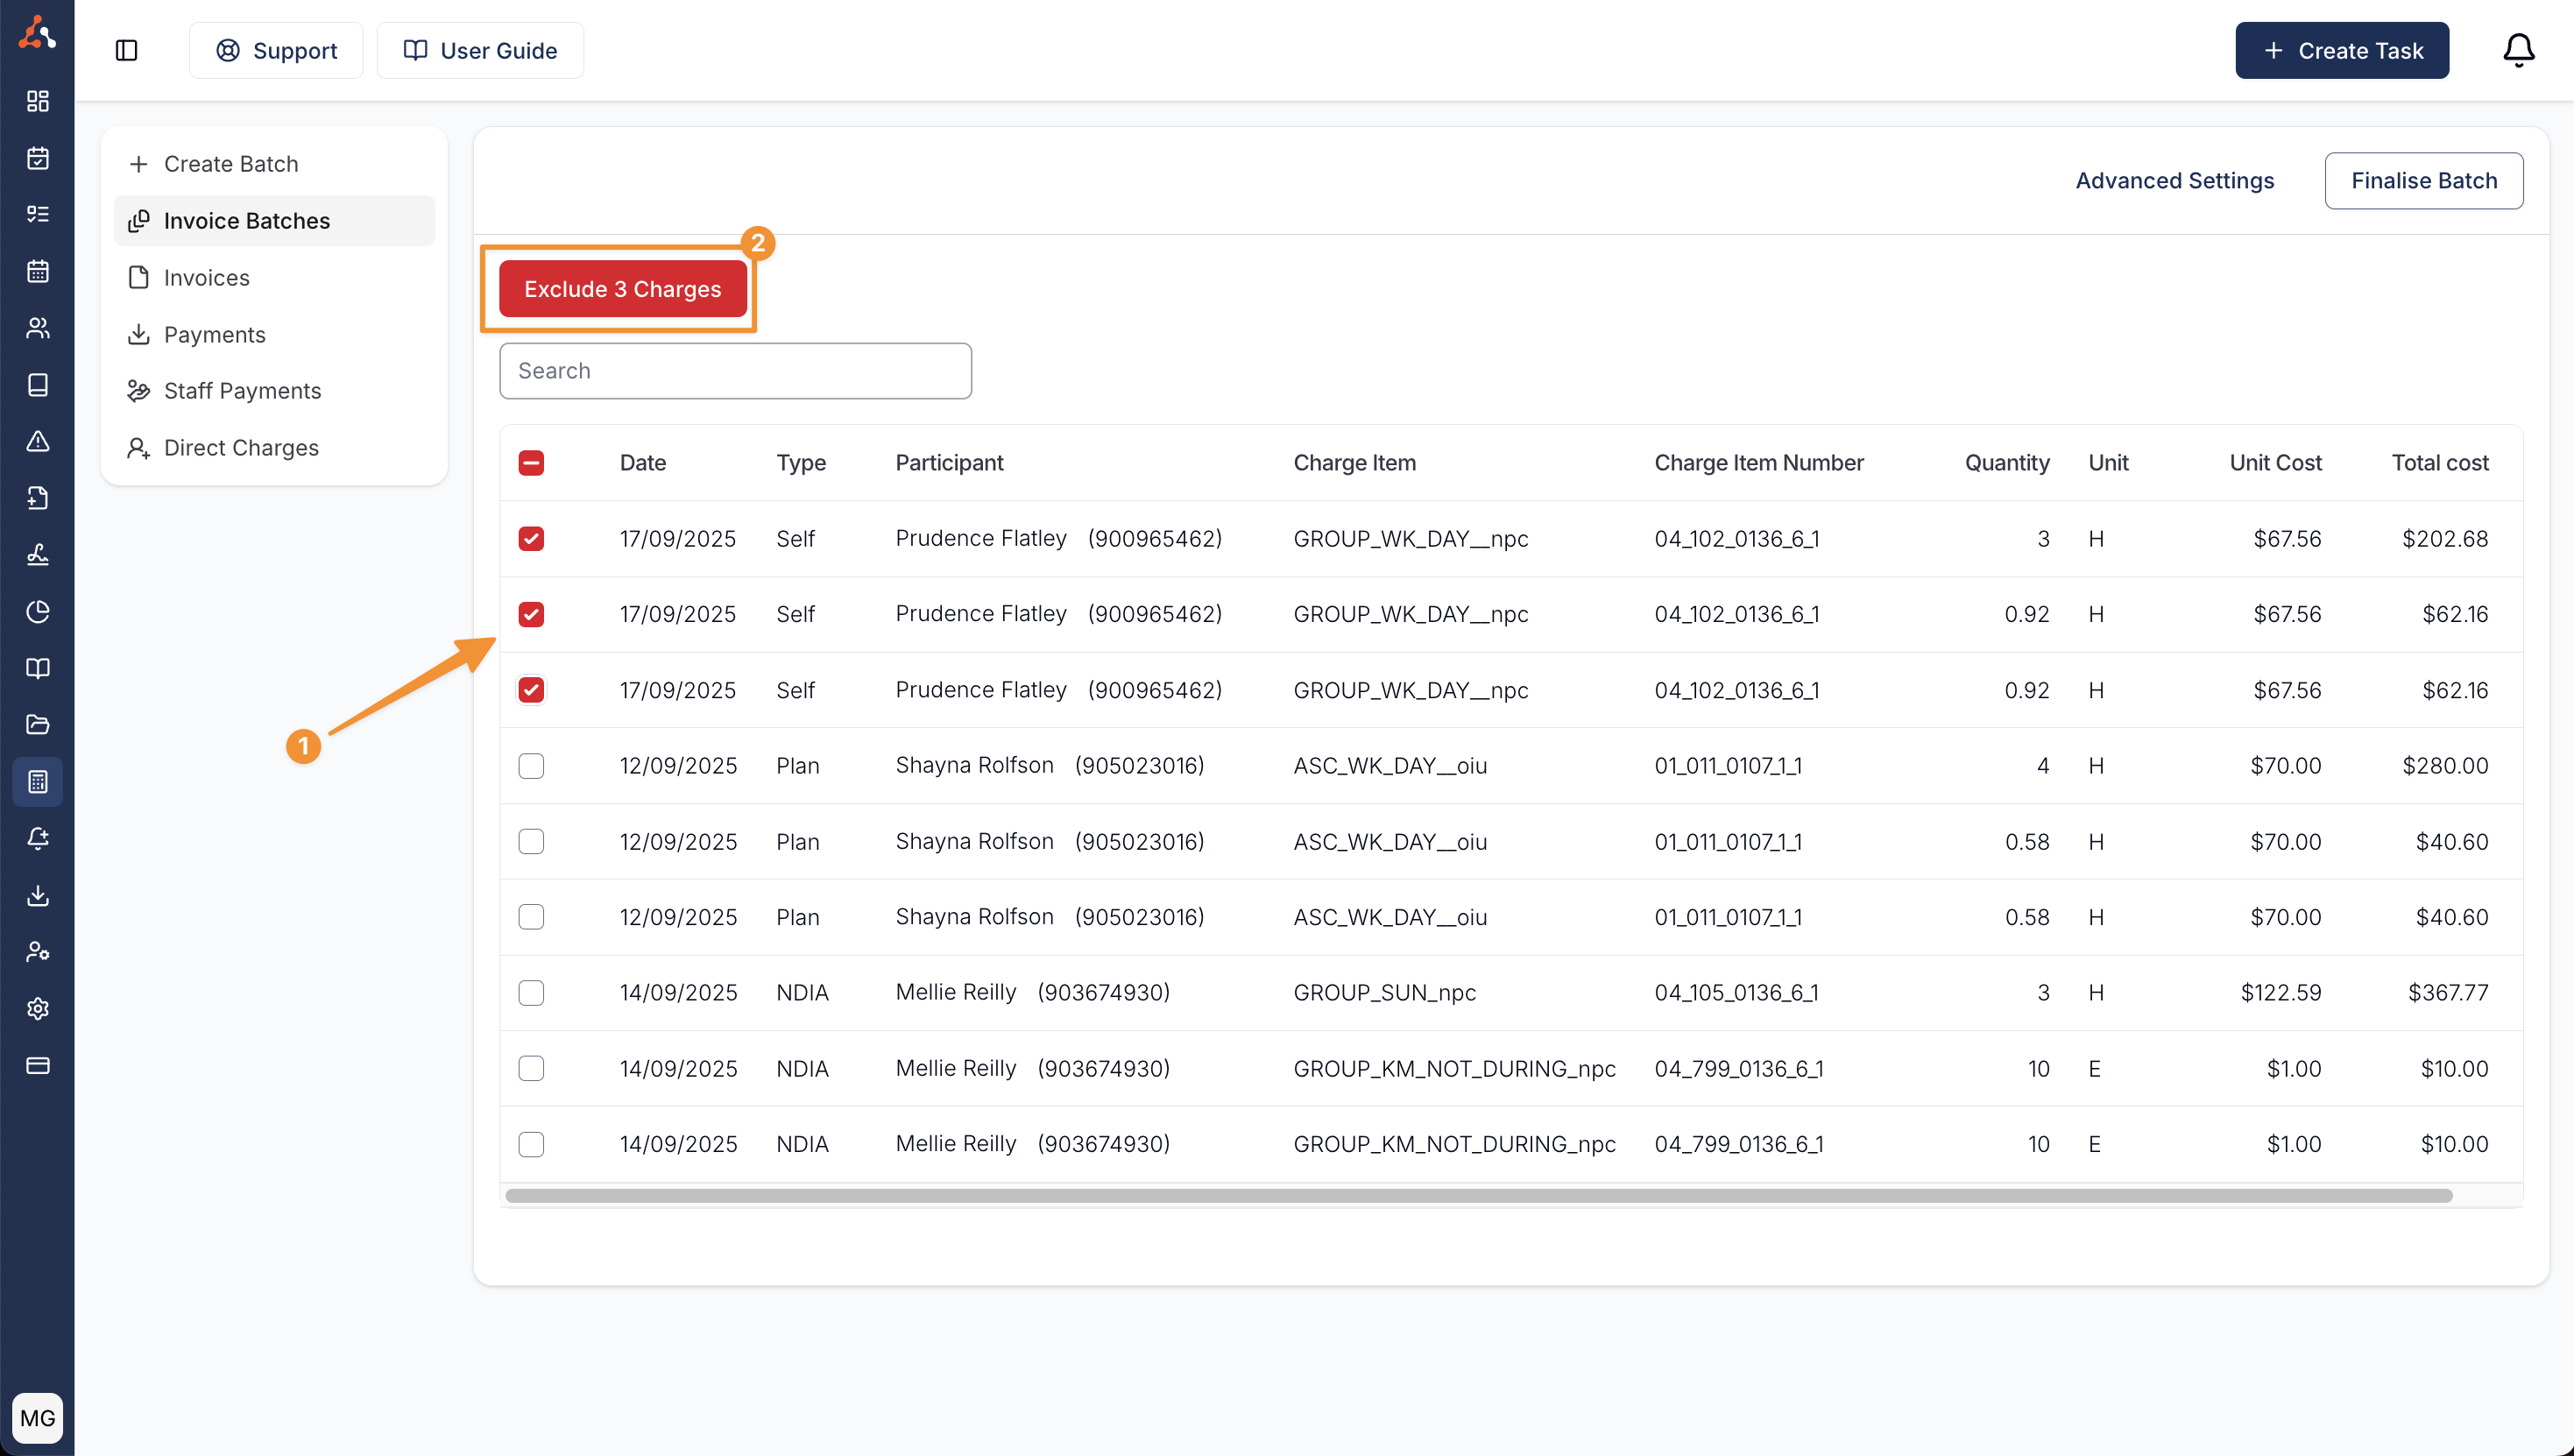
Sometimes you may want to exclude charges from a batch - they might be invalid or you just don't want to invoice for them yet. To do this click on the checkbox on the left hand side of the table to select them (1) and once selected click on the Exclude Charges button (2) to remove them from this batch.
Excluding charges does not delete them but it removes them from the current batch so they can be invoiced at a later date.
Handy Hint
Did you know that you can select/ deselect the first charge and then Shift + Click the last charge to select/deselect a range of charges rather than clicking one at a time!
Invalid Charges
Sometimes you may see errors within the invoice batch - there are a range of errors. To learn more about the types of errors you might see and how to fix them head to the Invoicing Errors page.
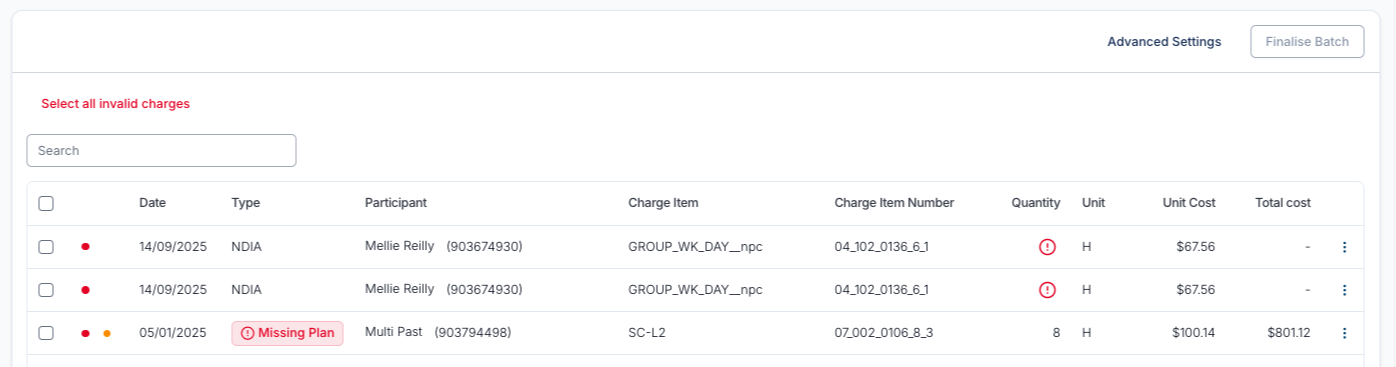
Excluding all invalid charges
Astalty makes it easy to exclude all invalid charges with a Select all invalid charges button - if you click this, all invalid charges will be selected and you can exclude them from this batch. This allows you to finalise the valid charges and fix the invalid charges at a later date.
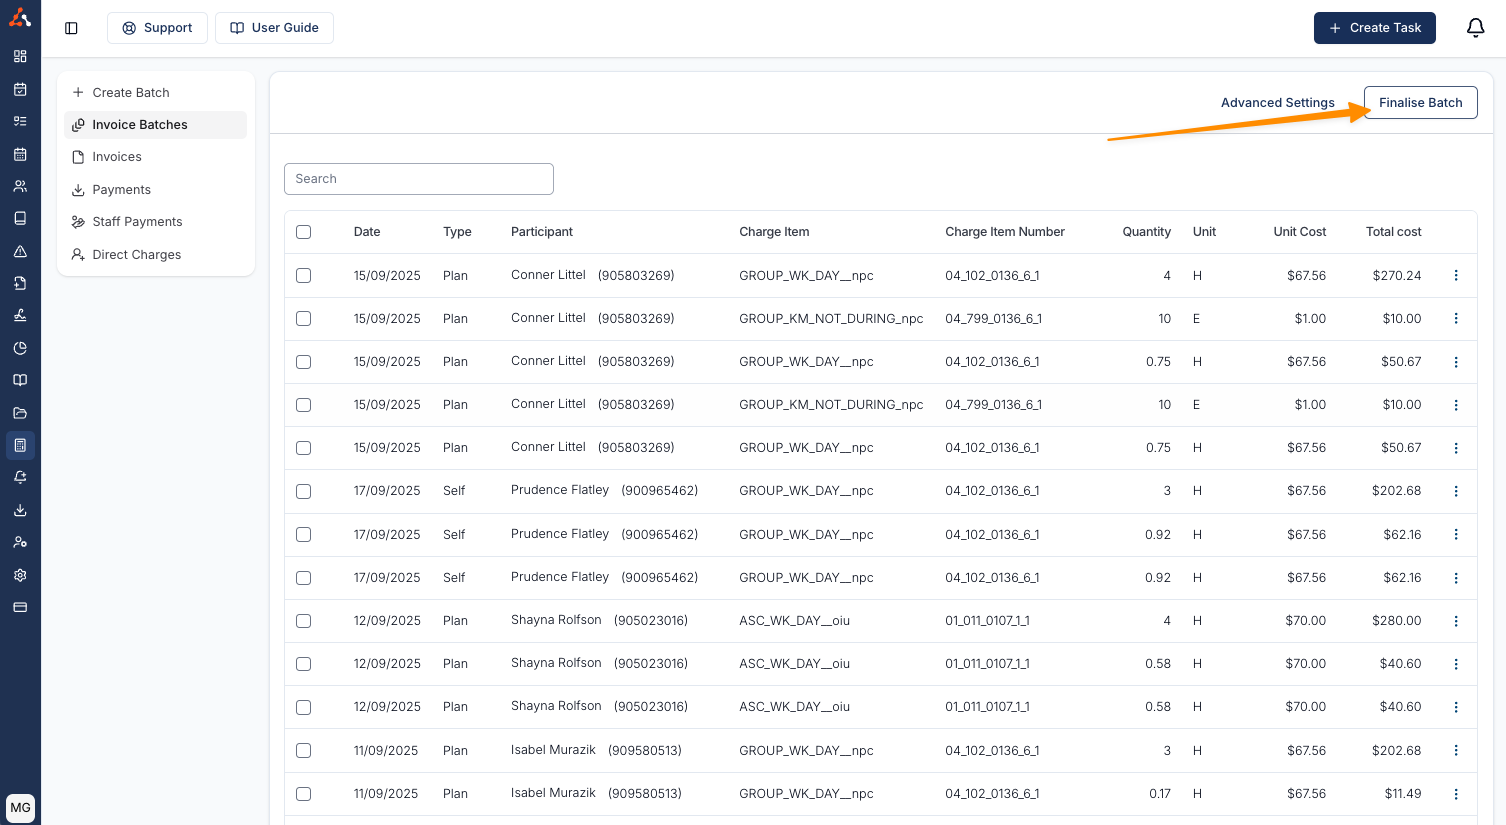
Finalising an Invoice Batch
Once you have reviewed the invoice batch and you are happy with all charges, you can click the Finalise Batch button to finalise the Invoice Batch.
Once a batch is finalised, PDF invoices will be sent automatically unless disabled
Once you have confirmed that you'd like to finalise the invoice batch, Astalty will start sending PDF invoices immediately and this can not be stopped.
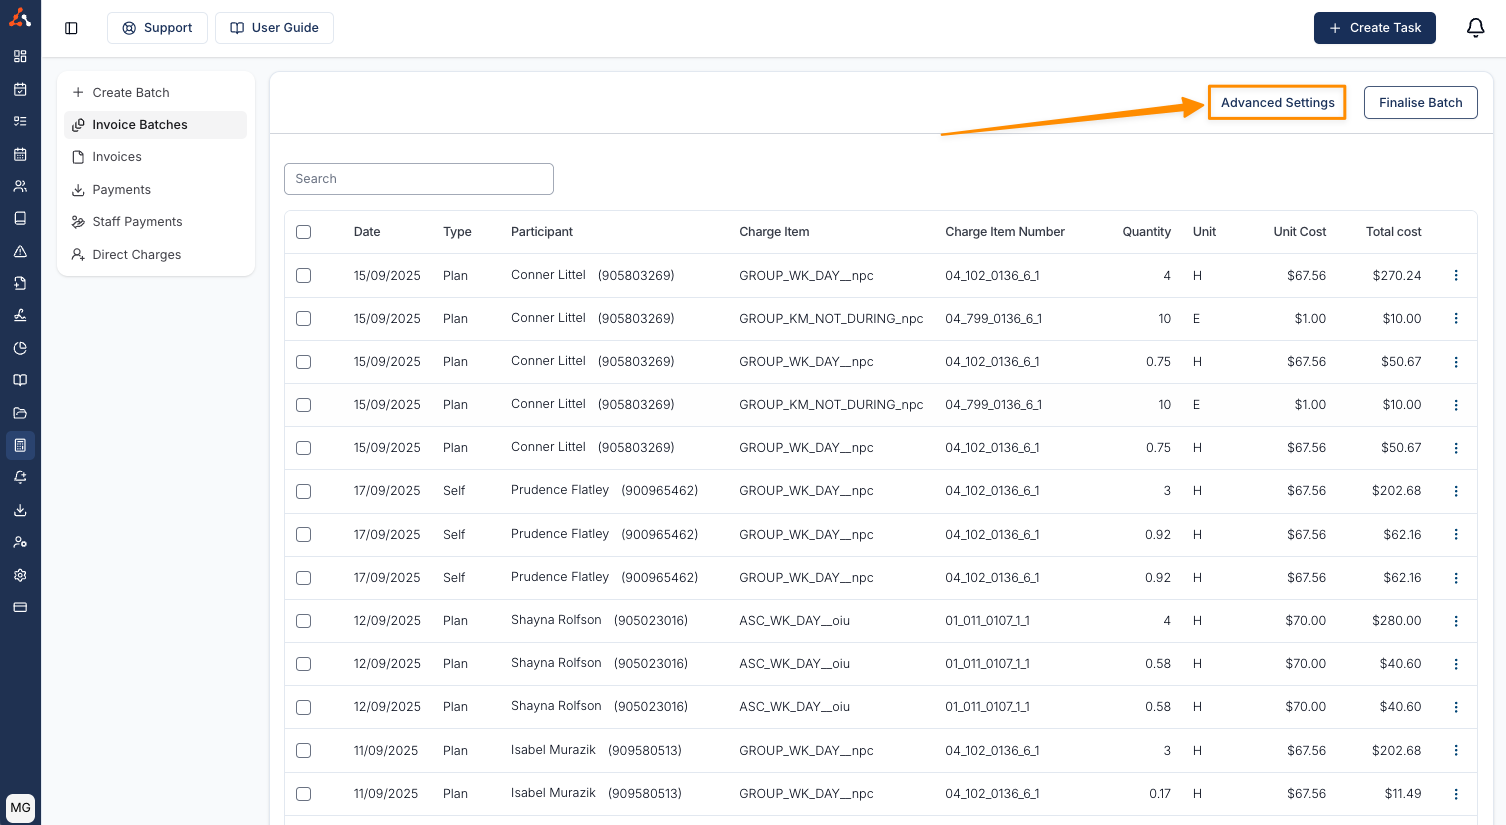
Turning off automatic PDF invoices
If you would like to prevent Astalty from sending PDF invoices automatically for a particular batch, you can use the "Advanced Settings" button.
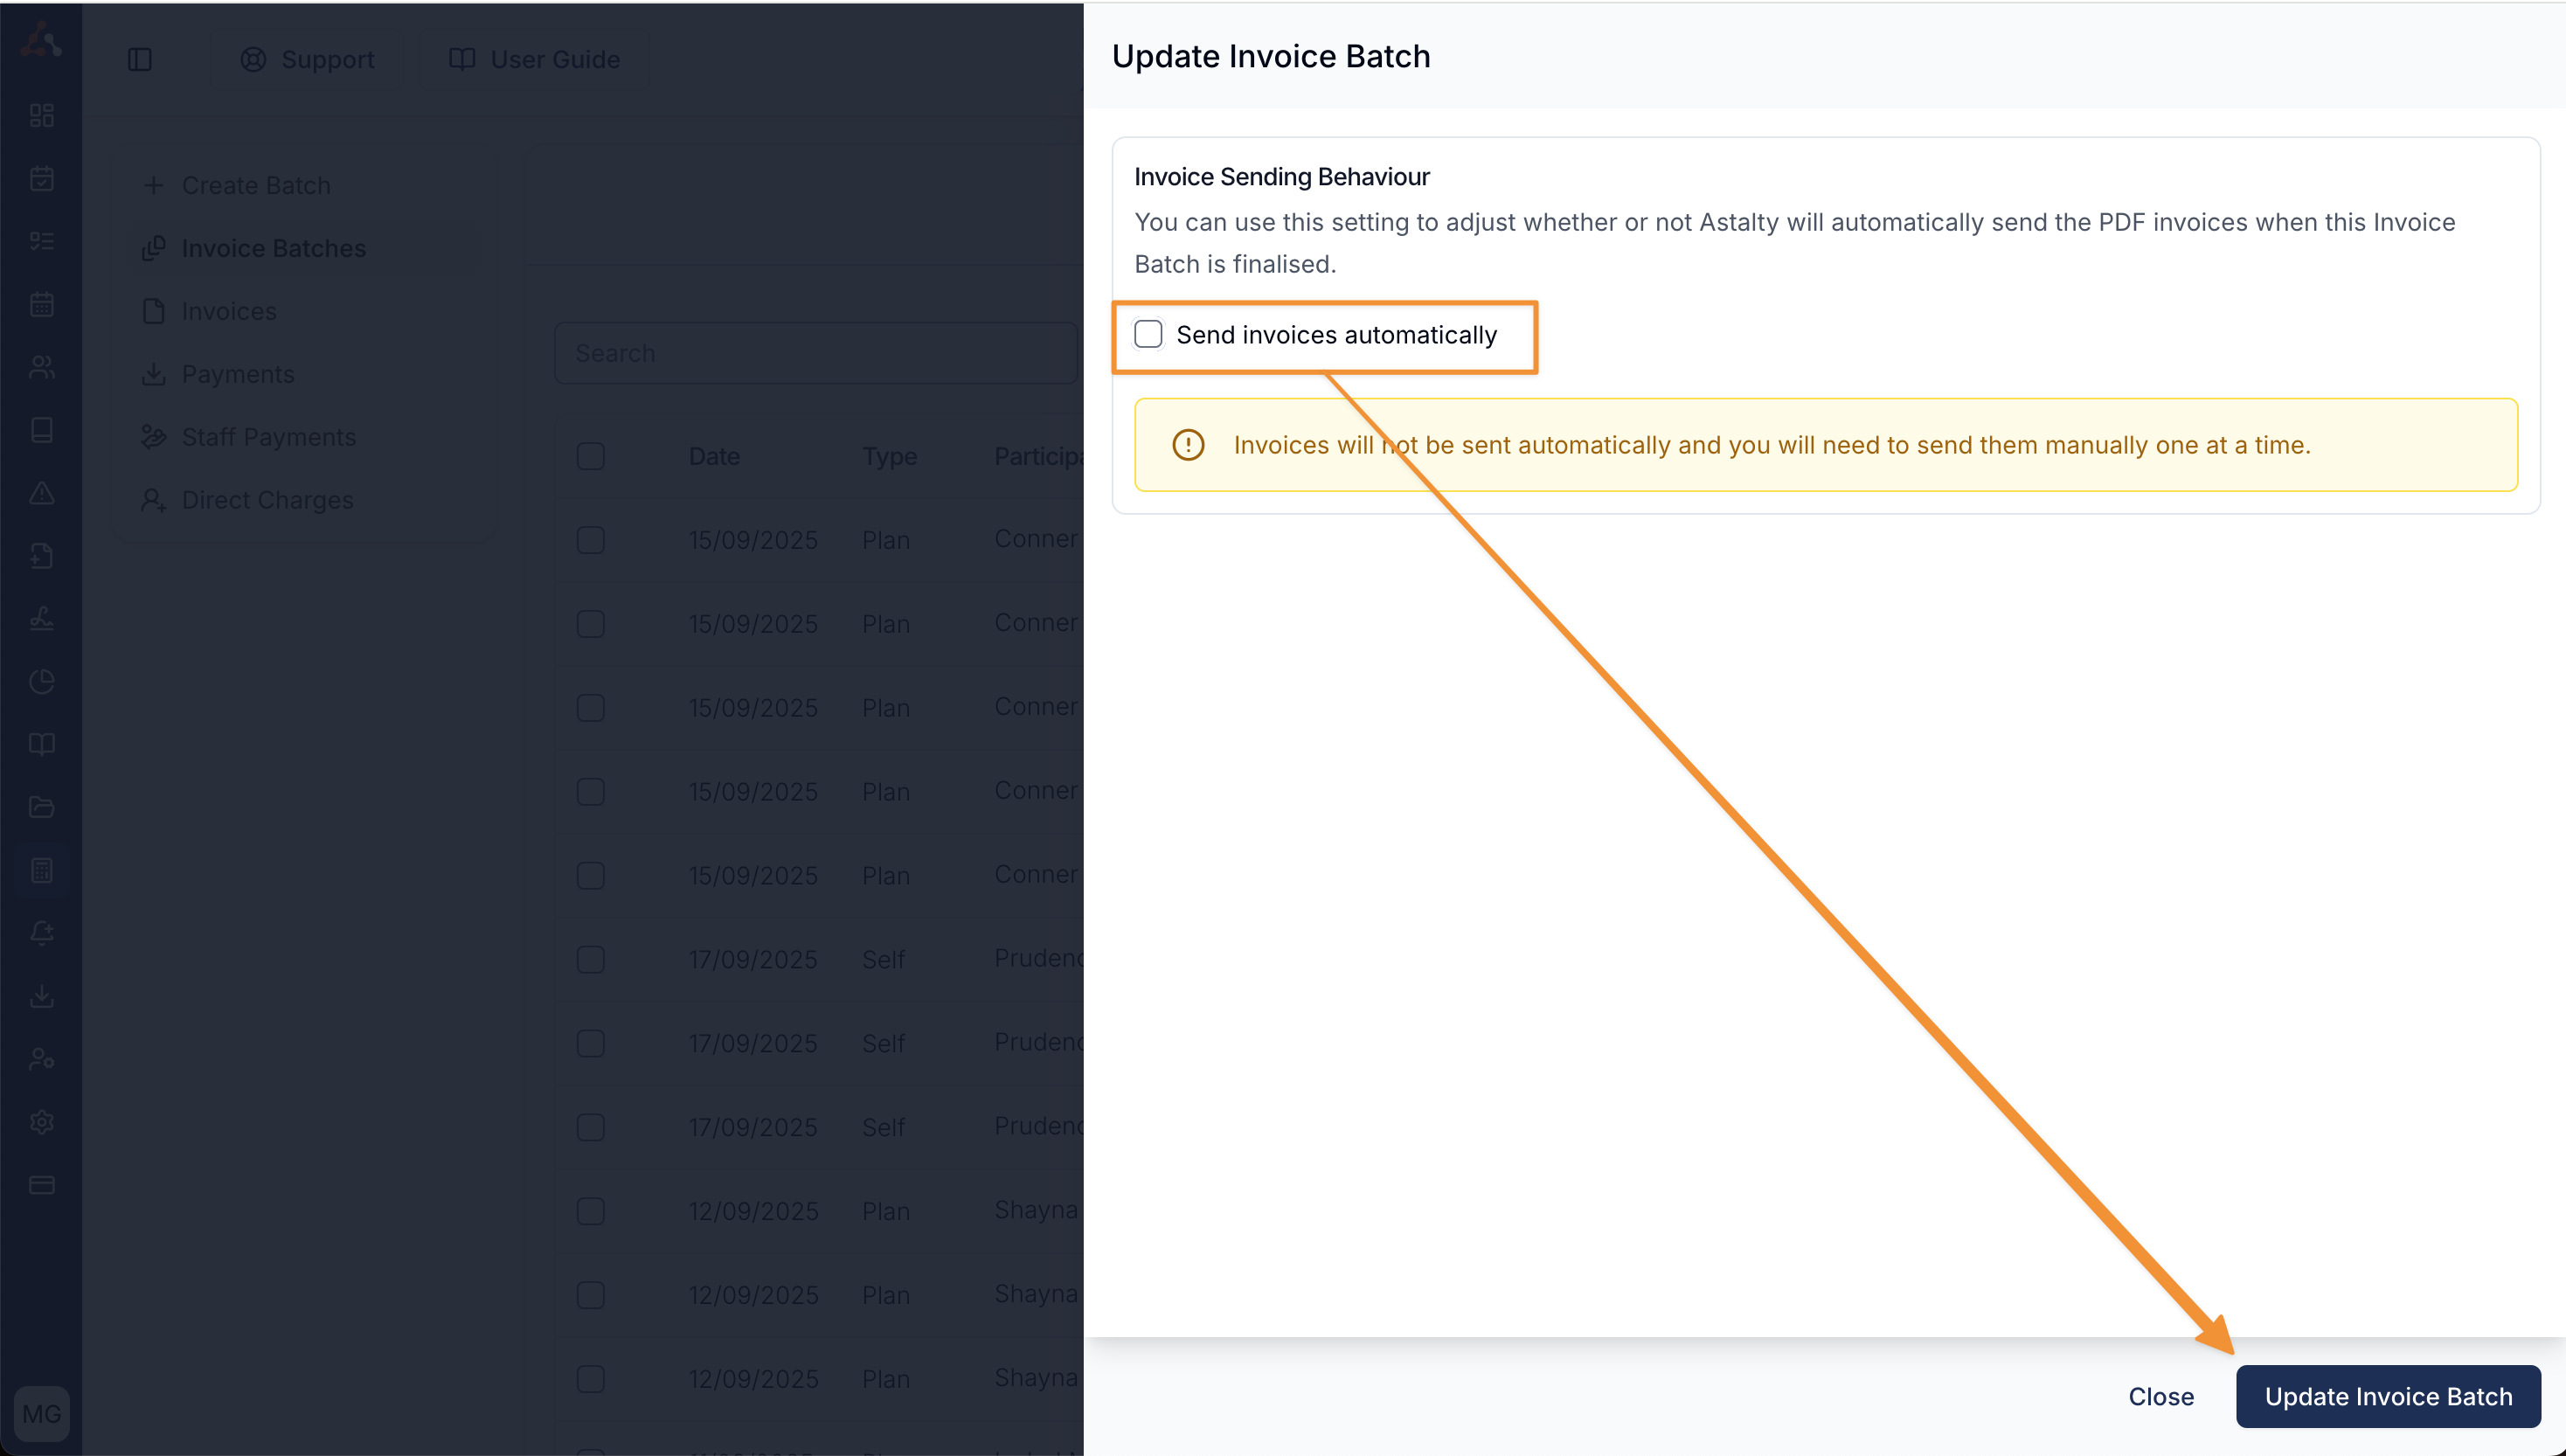
This setting can be useful if you want to make adjustments to an invoice such as applying a payment, before sending it to the Plan Manager. You will need to send each invoice one by one if you turn off automatic sending.
Generating an Invoice Batch Video Walkthrough
Next Steps
Once the invoice has been finalised, Astalty will start sending PDF invoices. You can also generate the Bulk Upload file - click here to learn more about how to do this.