- Participants
- Participant Check-In
Participant Check-In
Introduction
The Participant Check-In functionality is designed to efficiently monitor and track interactions with Participants. This feature allows for the setting up of customisable check-in periods, facilitating ongoing support and interaction management based on the individual’s funding, preferences, and support needs.
Setting Up a Check-In Period
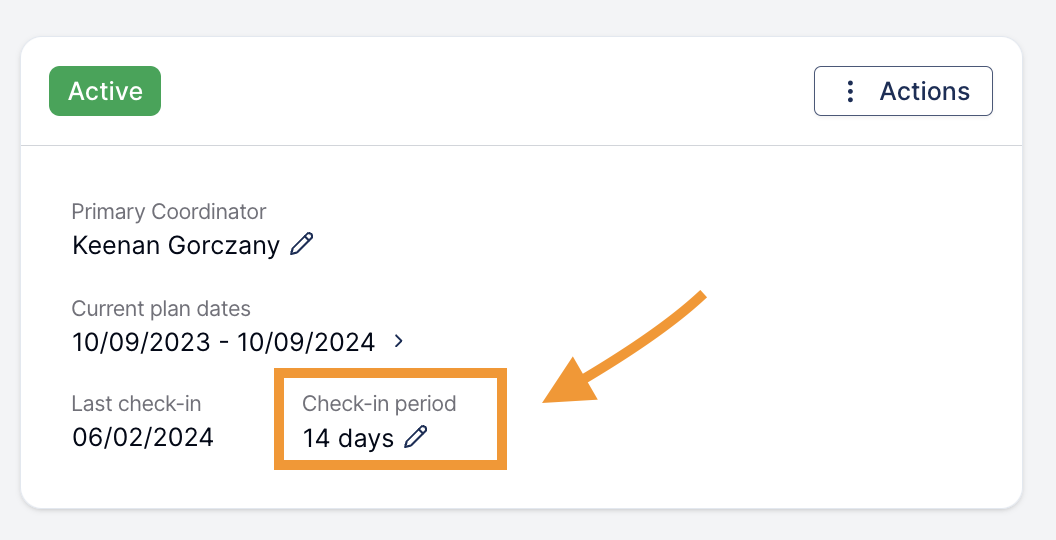
Open the Participant's profile and expand the profile header. Find Check-in period, then select the pencil beside it. If no period is set, select the Edit button shown there. This opens Update check-in period directly; you do not need to open the main Participant edit form.
Customising Check-In Period
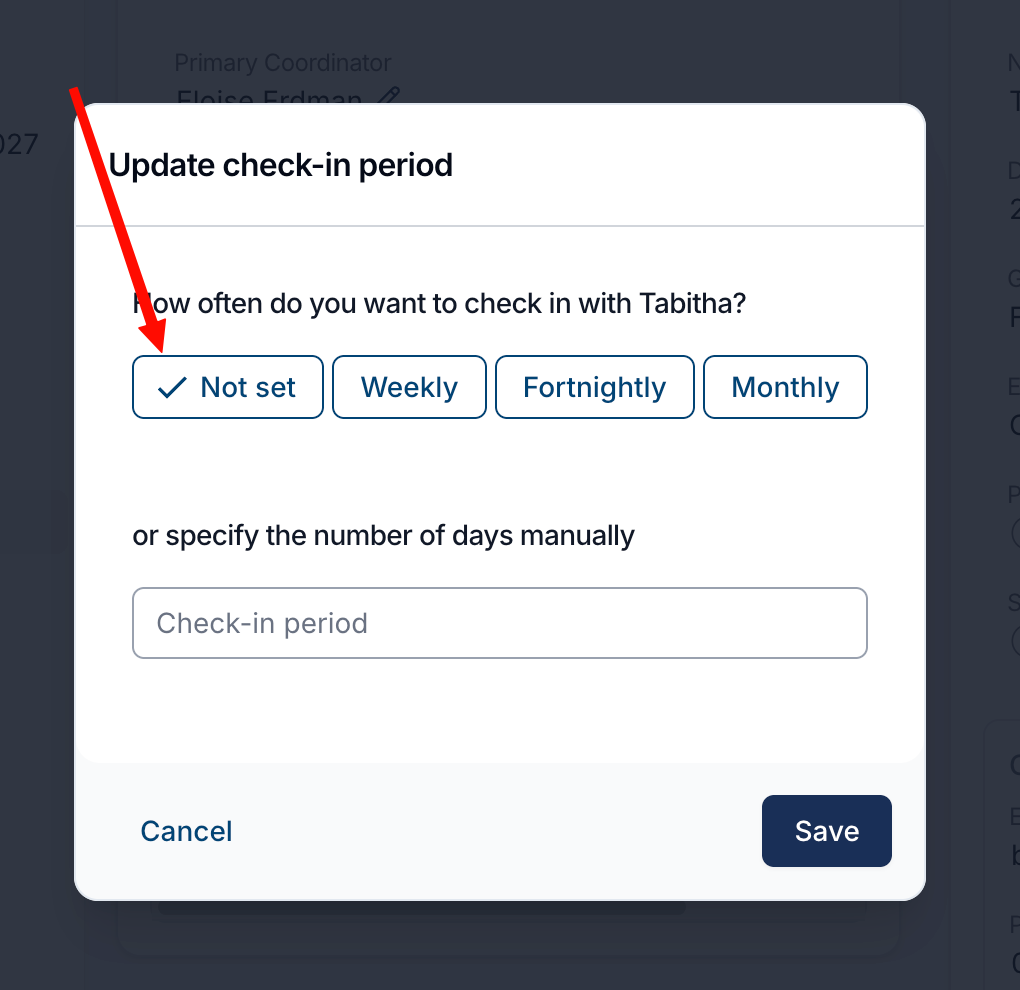
The Check-in period on the Participant’s profile shows how often you want to check in with them. Click the edit pencil beside it — or the Edit button if no period is set yet — to open the Update check-in period window.
From here you can:
- Pick a preset frequency: Weekly (7 days), Fortnightly (14 days) or Monthly (30 days).
- Or specify the number of days manually, from 1 to 365, in the Check-in period field.
Click Save to apply the change. The profile then shows the period in days — for example, a fortnightly check-in displays as "14 days".
Clearing a Check-In Period
If a Participant no longer needs to be tracked for check-ins, you can clear their check-in period rather than leaving an old frequency in place. In the Update check-in period window, select Not set and click Save.
Once the check-in period is cleared:
- The Participant’s profile shows the check-in period as Not set.
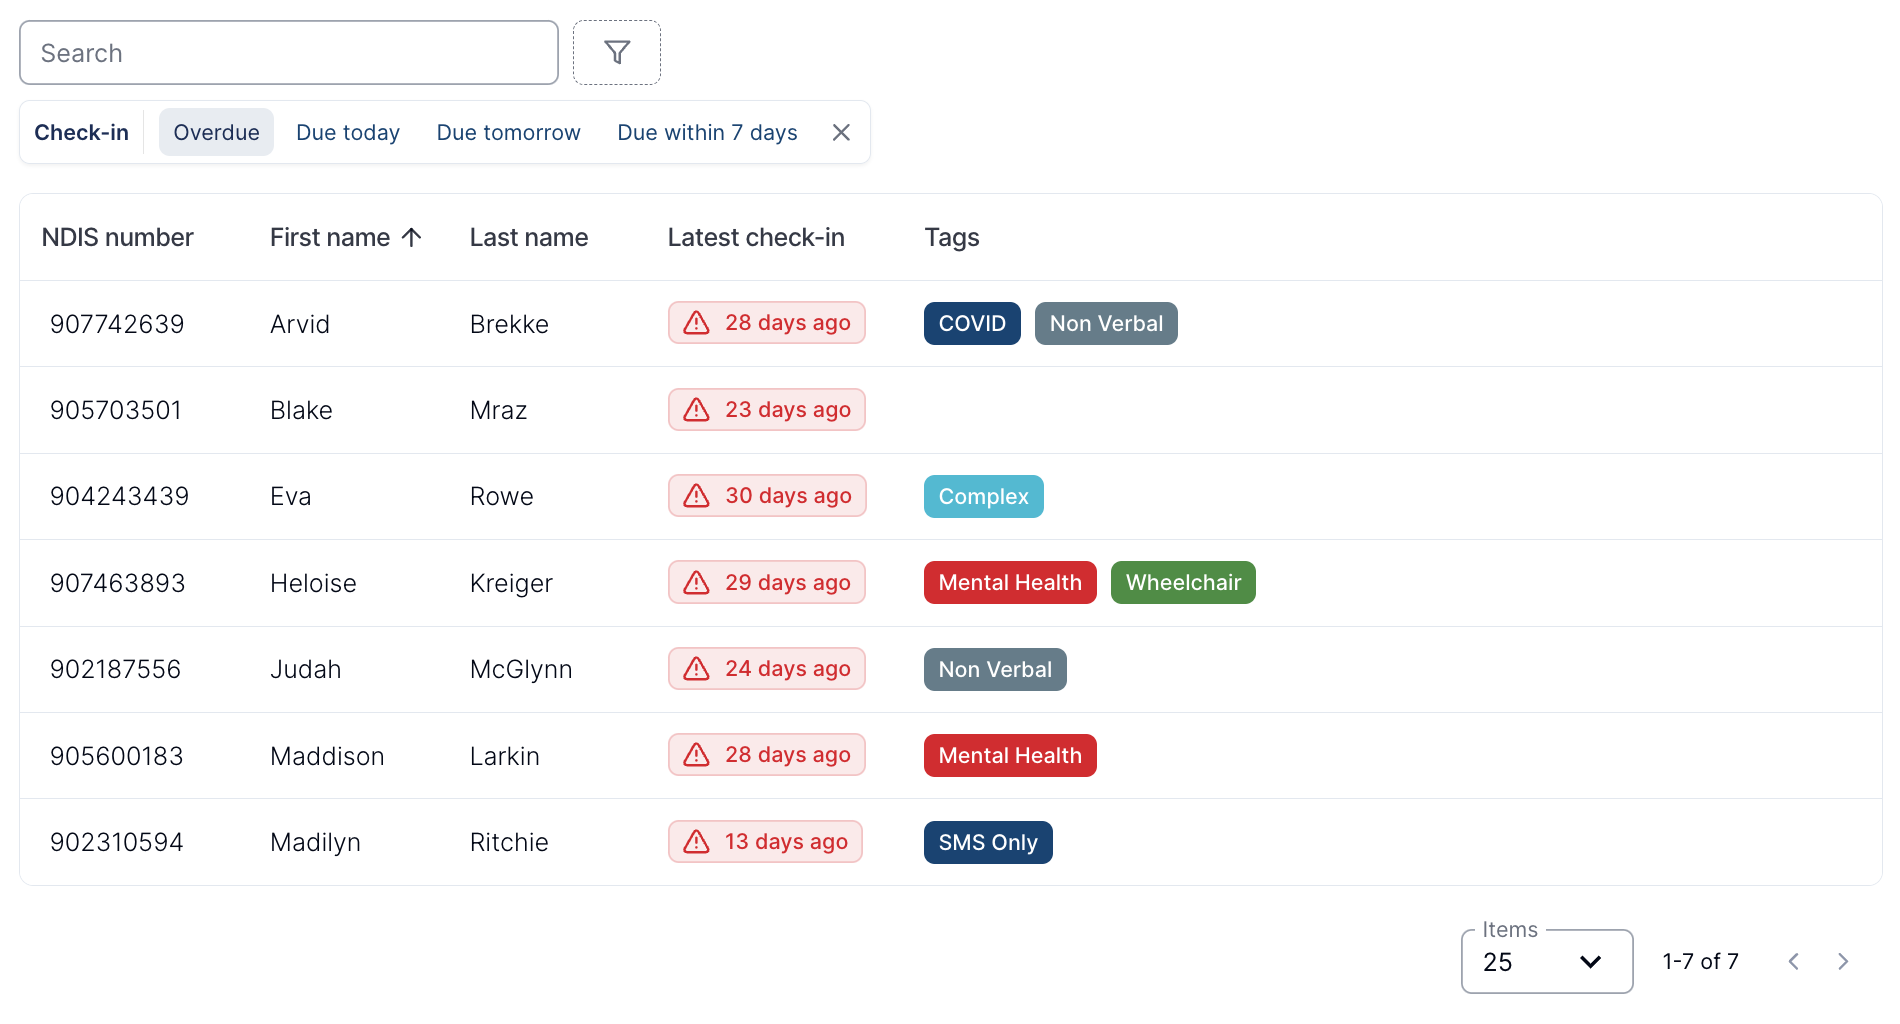
- Their check-in status on the Participants page shows as Not set, and they are excluded from the Check-in status filters (Overdue, Due today, Due tomorrow and Due within 7 days).
- Participant Check-in Notifications are no longer sent for that Participant.
- Check-ins already recorded are kept. The Last check-in date stays on the profile, and existing check-in case notes are unaffected.
Updating Check-Ins
Check-ins are recorded on Notes. On the Participant's Notes page, select Add Note, add the Note content, then select Add Check-in. You can also add a check-in while recording a relevant case note elsewhere in Astalty.
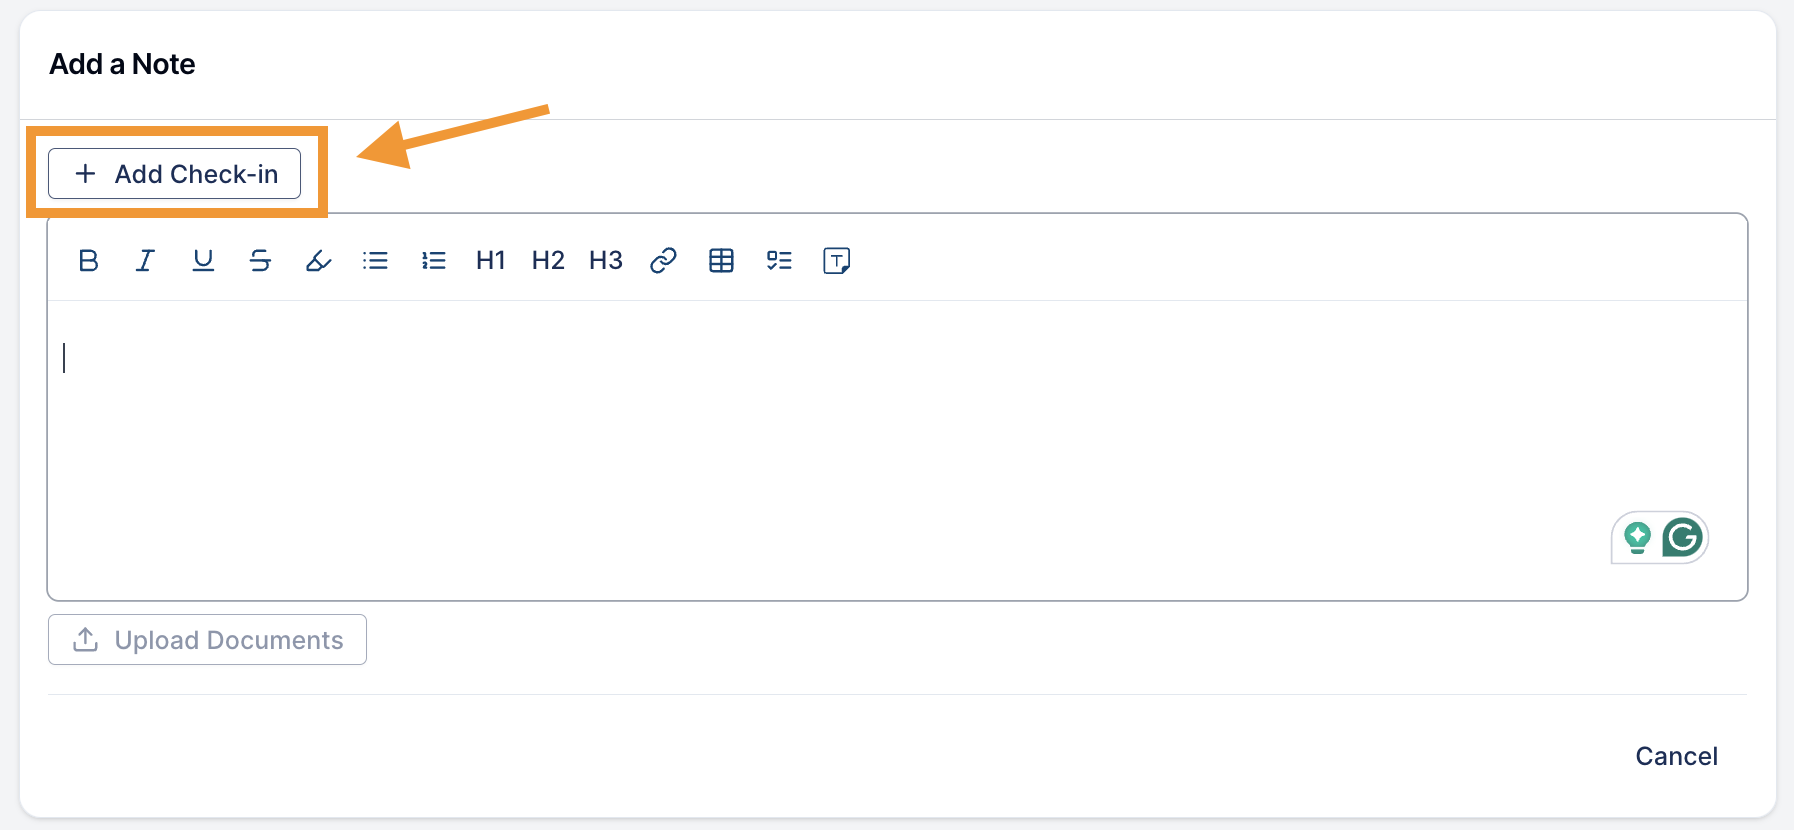
Selecting Interaction Type: You can then choose the method of interaction for the check-in, such as Email, Phone, SMS, Face-to-Face, or Teleconsult. Note that this functionality should only be used for actual interactions with the Participant and not for communications with external stakeholders.
Monitoring Check-In Status
Viewing Participants: To review the status of any check-in period, open Participants.
Applying Filters: Add the Check-in filter. This lets you view Participants whose check-in is Overdue, Due today, Due tomorrow, or Due within 7 days.

Conclusion
The Participant Check-In feature is a crucial tool for NDIS professionals, offering a structured and efficient way to maintain consistent and meaningful engagement with Participants. By following this procedure, users can enhance their support coordination efforts, ensuring timely and personalised care for each Participant.