Adding a 1:1 Shift
Overview
Create a Direct Support when one Participant receives support from one or more workers. Set the time and place, choose the Participant and their Service, assign the workers, then add any travel, charging and support details.
How to Add a Direct Support
Navigate to the Schedule
- Open Schedule.
- Click Add Shift.

Select the Event Type
Choose Direct Support. For another event type, see Adding a Group Shift, Adding an Internal or Non-Support Shift, or Meal Breaks.

Set the Time and Date of the Scheduled Support
- Use the date and time picker to select the start and end.
- Select the Timezone when multi-timezone scheduling is enabled. Otherwise, Astalty uses your organisation's scheduling timezone.
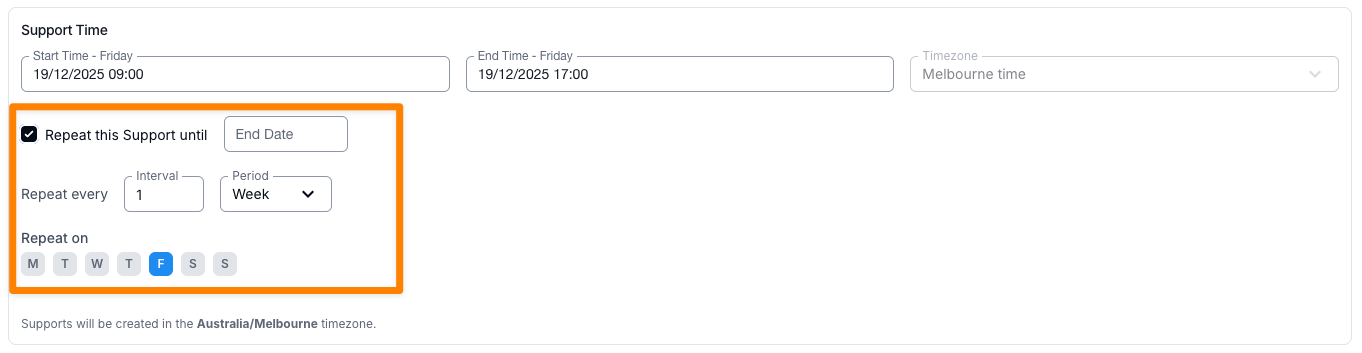
- Turn on Repeat this Support if needed. Set Every, choose Day, Week, or Month, then choose the end date. Weekly repeats let you select weekdays, while monthly repeats let you select the day of the month. A fortnightly support is every 2 weeks.
Select the Site
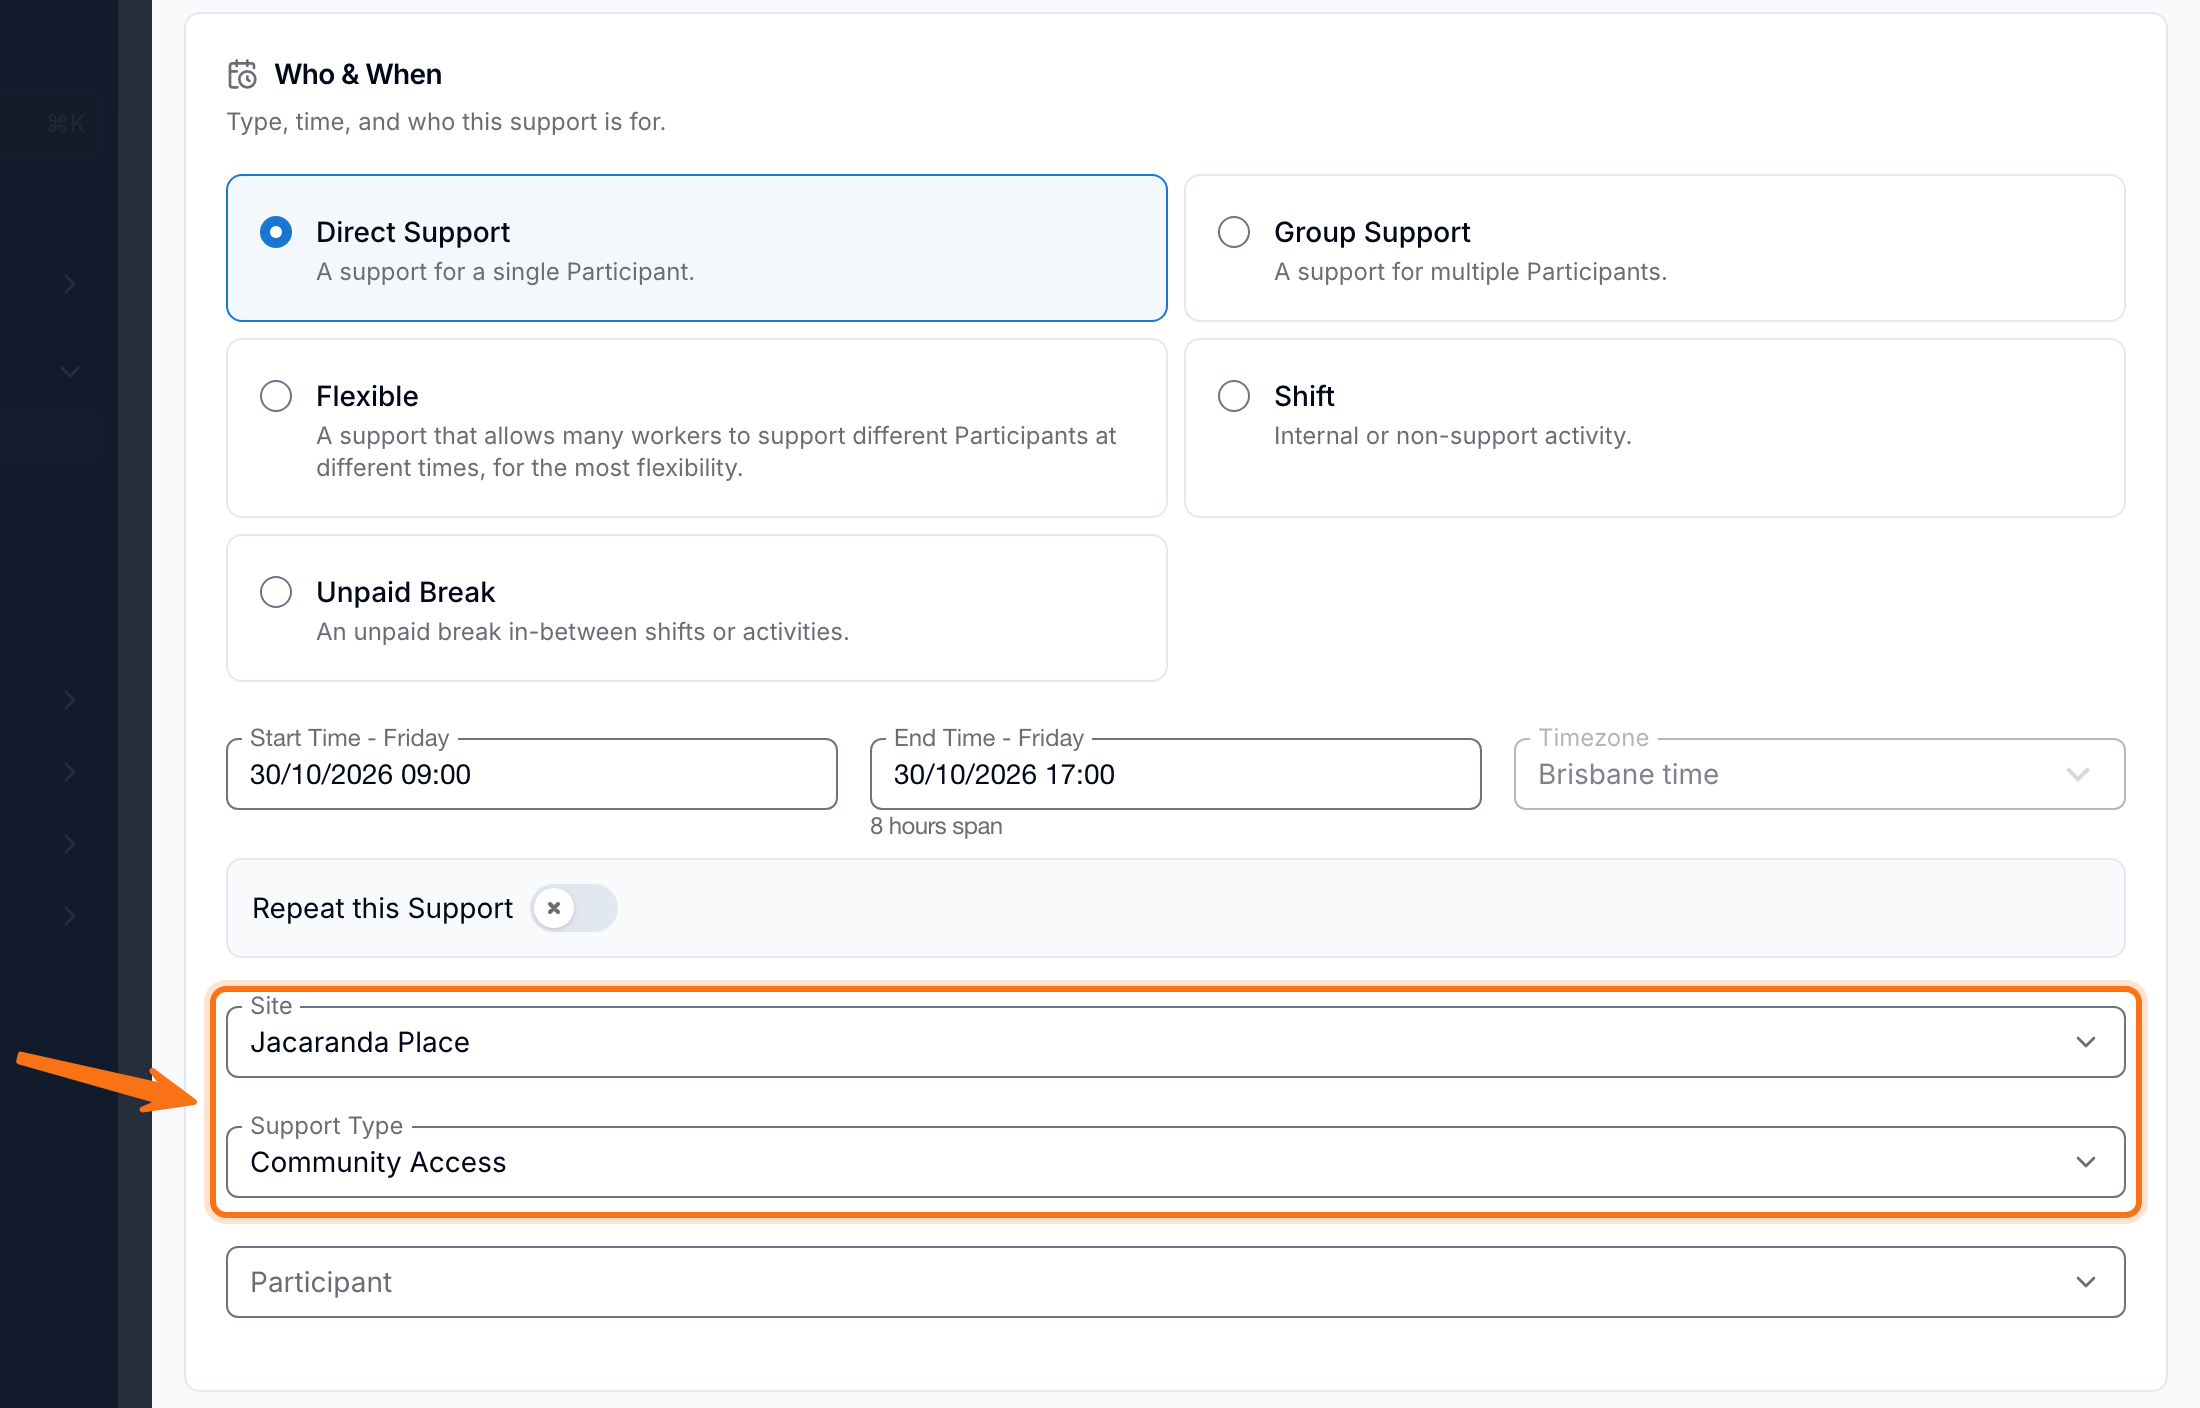
Select the Site from the drop-down menu. This restricts the Participant list to only those Participants assigned to that Site. If the Site has a Default Support Type set, choosing it also fills in the Support Type below - leave the Site without one to choose a Support Type yourself each time.
Select the Support Type
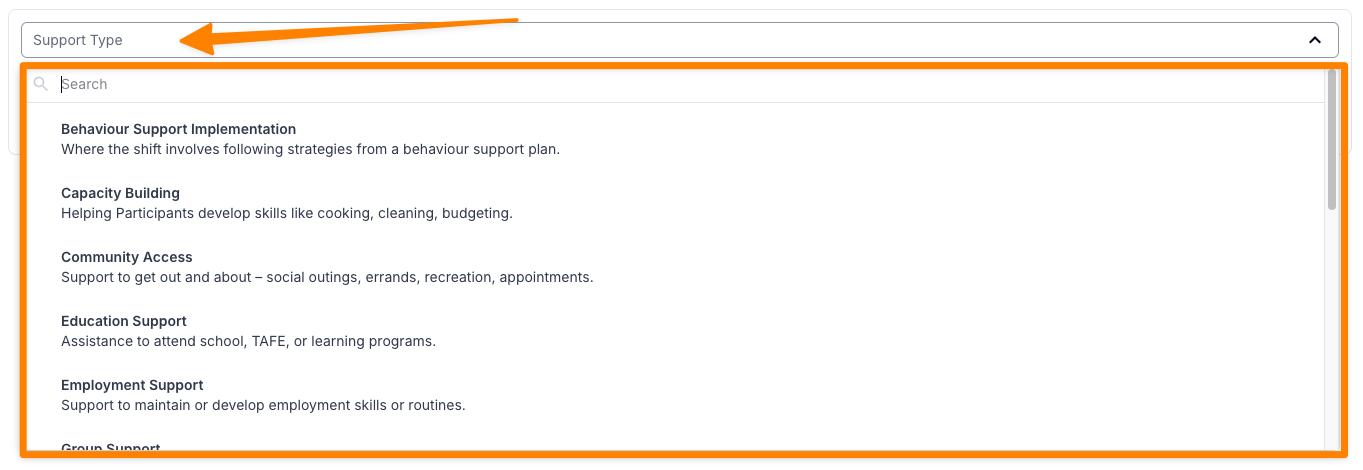
Options include Personal Care, Community Access, In-Home Support, Training and more. The dropdown is searchable, and each option shows a short description of when to use it. See Support Types for the full list.
Assign Participant
After selecting the support type, you can add the Participant information.
- Select the relevant Participant from the list.
- On the right-hand side, the View Details section will appear.

This section shows additional Participant information, including:
- Tags linked to the Participant
- Participant Details (core profile information)
- Information Items (customised details relevant to supports)
By toggling between Participant Details and Information Items, you can gather further context that may be important when rostering the support.


If the support is delivered at a Site, select it before choosing the Participant. The Participant must be linked to that Site. Selecting a Site can also prefill the address and the Site's default Support Type.
Where your organisation uses Cost Codes, you can also select a Support Cost Code. Cost Code rules may apply one automatically after the support is saved.
Select a Charge Item Set
- If a planned service has already been created for a Participant, it will appear by default.
- If no planned service exists for scheduled services, you will be prompted to create one.
- See Services for how to set up scheduled services.
Once the Participant and Charge Item Set are chosen, Funding Utilisation shows the Participant's funding for the Service, and what this support adds to it once its details are complete. See Checking Funding While You Book.
Participant Address
You can assign the Participant's address for the support, or choose an alternate address if there is a different pickup location.
Assign a Support Worker
- Select one or more workers delivering the support. Each selected worker gets their own shift on the same Direct Support.
- To leave the support unfilled, tick Create Unassigned Shifts and enter how many shifts Astalty should create.
- Indicate if there is a paid meal break. If selected, this will appear in the shift details for the Support Worker.
- If your account uses custom allowances, choose any that apply to each worker in their Custom Allowances (optional) field.
Add Support and Admin Details
- Support Details - Visible to Support Workers.
- Admin Details - Visible only from the desktop application.

Configure Travel (Optional)

Add planned travel to, during, or from the support when it applies. Leave a travel type empty when it is not needed.
The amounts you enter represent the estimated distances and the budgeted kilometres expected to be travelled.
When configuring travel, record the driver, distance and estimated duration. The budgeted distance is visible to Support Workers in the app.

Set Charges
- If billing from a Charge Item Set, configure automatic charges. For example, you would like to bill from the Community Access 04, Charge Item Set.
- For respite, bill from a Short Term Accommodation Charge Item Set - see How to Claim for Respite?.
- For other billing types (e.g., SIL), you may wish to set up manual charges.
- If Centre Capital Costs apply, select the option in this list. See Adding Centre Capital Costs.

Additional Charges
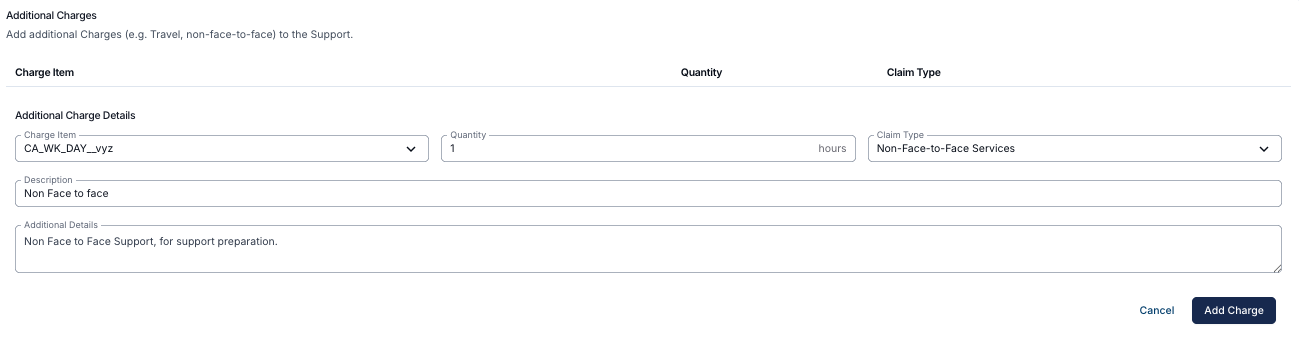
Add any Additional Charges (e.g., non-face-to-face work) using the drop-down. Enter details such as quantity, claim type, description, and any extra notes, then click Add Charge.

Manual Charges
There may be occasions where more than one type of support is delivered within a single shift-for example, 2 hours of Community Access and 1 hour of Assistance with Self Care. Instead of using Charge Item Sets (which would require creating separate shifts), you can use Manual Charges to record multiple supports within the same shift.
To do this, create the support as usual and complete all required details, then select Manual Charges under Charge behaviour in the Service & Billing section. The Charge Item Set field is hidden while Manual Charges is selected.

Select Add an Additional Charge and choose the Charge Item. Enter the hours that should use that item, then add more Charge Items until the shift's delivered support is accounted for.


To see more on this, check out the video walk-through.
Create the Shift
- Once all details are complete, click Create to save the shift.
Unpublished Shifts
New shifts are unpublished by default. See Published and Unpublished Shifts.
Duplicating a Direct Support
Clone a Support to copy an existing 1:1 support, including its uploaded Documents. Use it when the new session should keep details such as the Participant, assigned Support Worker, transport, ratios, and location.
- Open the Support you want to duplicate
- Click Actions
- Select Clone Support
- Update any details that need to be changed (such as date, time, location, etc.)
- Once all updates are complete, click Create at the bottom of the pop-out

Extending a Direct Support
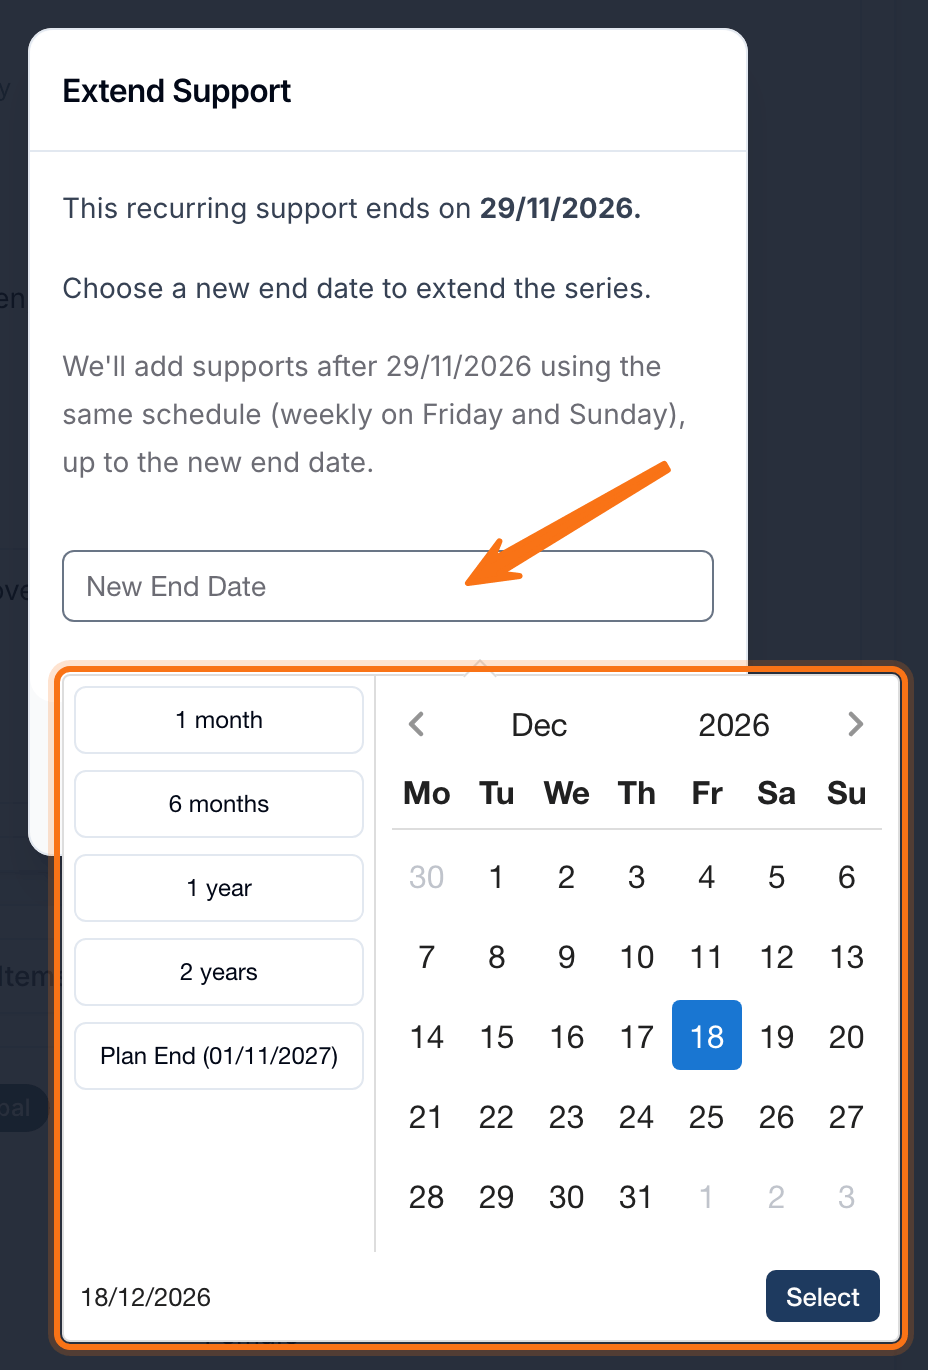
If you need to extend a Support beyond its current end date, you can do so from the Support's Actions menu. Select Extend Support, choose the new end date, and click Extend to apply the change.
Astalty will automatically carry over the Supports from the previous session in the Support series, saving schedulers from having to enter this information manually.


Adding a Direct Support
This video walks through how to add direct support.