- Scheduling
- Adding Shifts
- Adding a Shift (Internal or Non‑support)
Adding a Shift (Internal or Non‑support)
Overview
Use Shift when you want something on a worker’s roster without directly billing a Participant. Handy for admin time, meetings, training, office duties, or other internal tasks. It shows on the roster and timesheets, but it does not create Participant charges.
You can roster one or more Support Workers on the same internal event. This is useful for anything that involves a group of staff — like a regular team meeting or a training session — so you can set it up once instead of creating a separate shift for each person. Every worker you add gets their own shift under the internal event, and you can add or remove workers later.
How to add a Shift
Open Scheduling
Go to the Scheduling option on the left-hand side menu and click Add Shift in the top right.
Choose type
Select Shift.

Assign Support Workers
In the Support Workers field, select everyone who should be rostered on this internal event. You can choose a single worker or add several — each Support Worker you select gets their own shift under the event.
Click a name in the Select Support Workers list to select or deselect that worker, and use Select All in the top right when you want everyone rather than picking them one at a time. See Selecting every Support Worker at once for how it works with search and filters.
Add details
Enter the Shift details text. Use this for what the task is, where, and any instructions.
Set time and date
Use the date and time picker to set the start and finish.
Repeat options
If needed, set it to repeat. You can repeat daily, weekly, fortnightly, or monthly, choose the days, and set an end date. The repeat end date can be up to two years away.
Create
Review and click Create to add the shift.
Selecting every Support Worker at once
If an internal event involves most or all of your staff — an all-hands meeting, a compliance training day, or an organisation-wide briefing — use Select All in the top right of the Select Support Workers list to add everyone in one click, instead of ticking each person off.
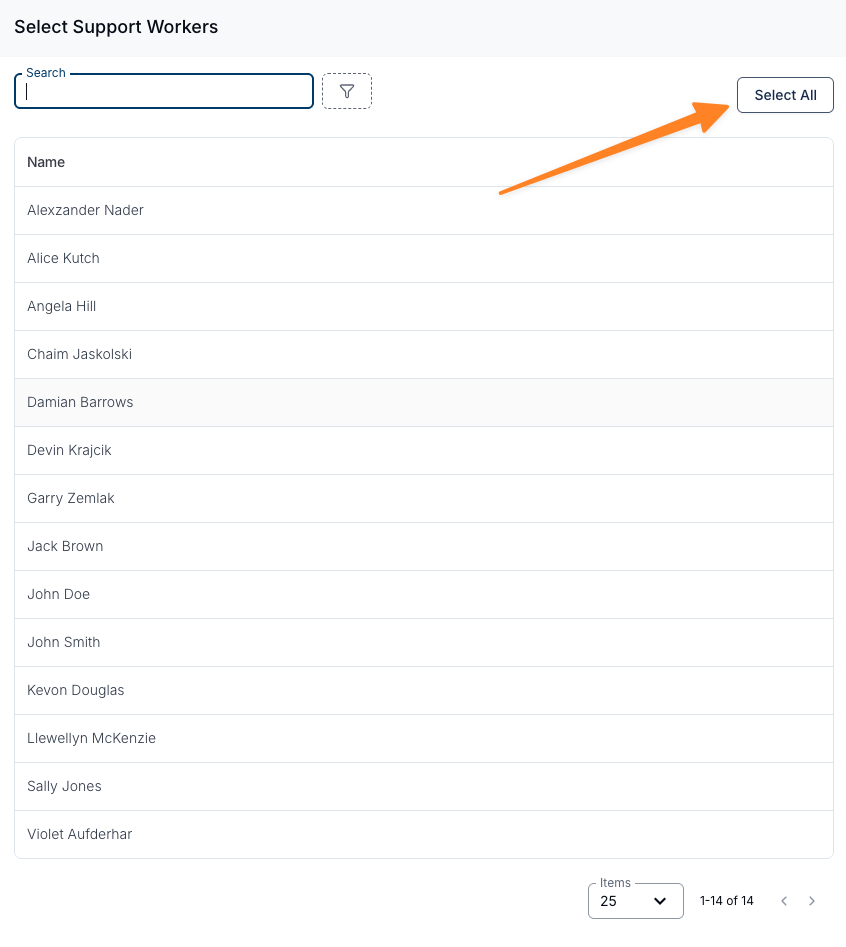
Once everyone has been added, the button changes to Deselect All, so the same button clears the selection again.
Select All is available both when you first create the shift and when you use Add Attendees on an existing internal event.
The list only ever includes Support Workers who can be rostered, so archived and deactivated staff are never picked up by Select All.
Selecting a group instead of everyone
Select All only ever applies to the Support Workers who match what is currently in the list, so search or filter first to add a specific group:
- Type in Search to narrow the list by name, then click Select All to add only those workers.
- Use the filter icon next to the search box to filter by Team or Region, then click Select All to add just that team or region.
This includes every worker who matches, not only the ones visible on the page you are looking at — so you do not need to page through the list first.
Selection limit
You can put up to 500 Support Workers on a single internal shift, and add up to 500 attendees at a time to an existing one. That is enough for a whole organisation in most cases.
If Select All matches more workers than there is room for, Astalty adds as many as it can and tells you how many were left out, so you can narrow the filters and choose a different group. Once the selection is full, the remaining names are greyed out until you deselect someone.
Managing Support Workers on an internal event
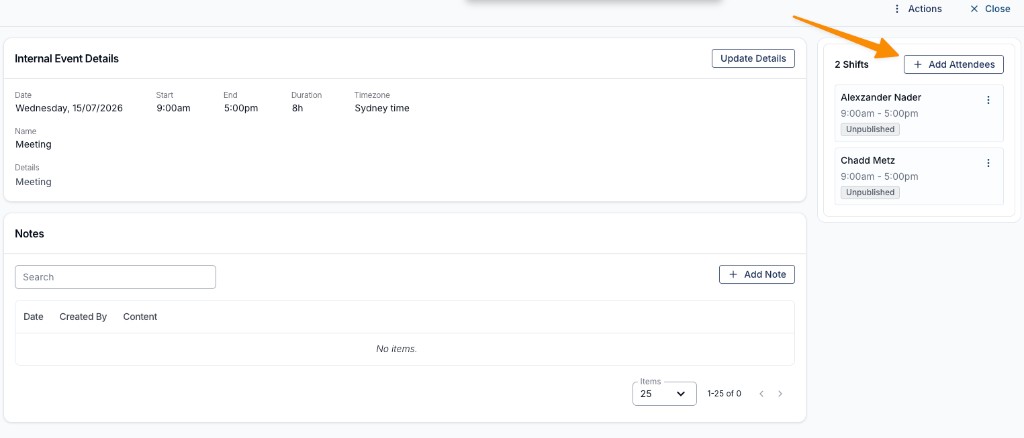
Open an internal event from the Schedule to see everyone rostered on it. The Internal Event Details drawer lists a shift for each attending Support Worker, so you can manage each person’s shift — including breaks, clock in/out, publishing, or reassigning — individually.
Adding more Support Workers
To add extra workers after the event has been created, click Add Attendees, select the Support Workers you want to add, and confirm. Each new attendee gets their own shift on the event. Select All is available here too — see Selecting every Support Worker at once.
If the internal event repeats, you can also tick Add attendees to future internal events in this schedule and then choose which upcoming events in the series to add the workers to.
Removing a Support Worker
To take one worker off the event, open their shift from the list, and use its Actions menu to Delete Shift (or Unassign Support Worker to leave the shift in place but unassigned). The rest of the attendees keep their shifts.
Cloning a Shift
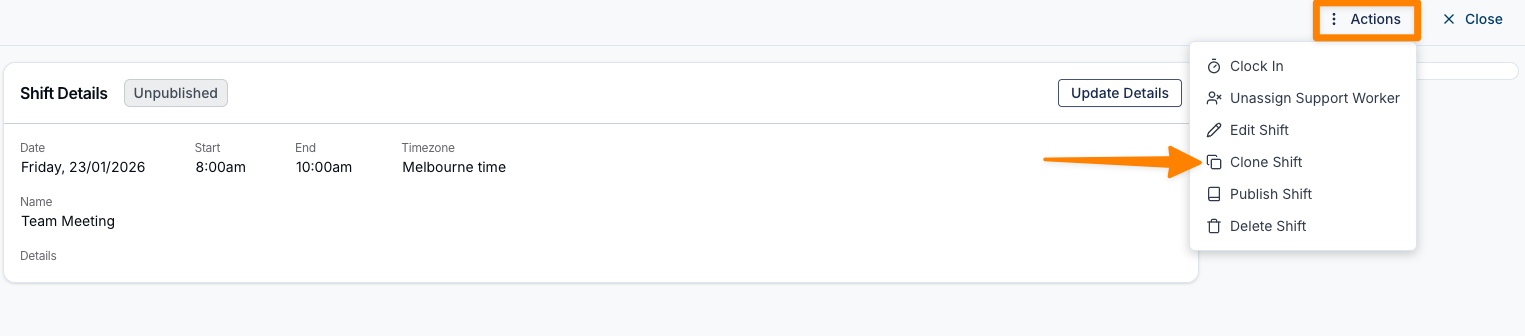
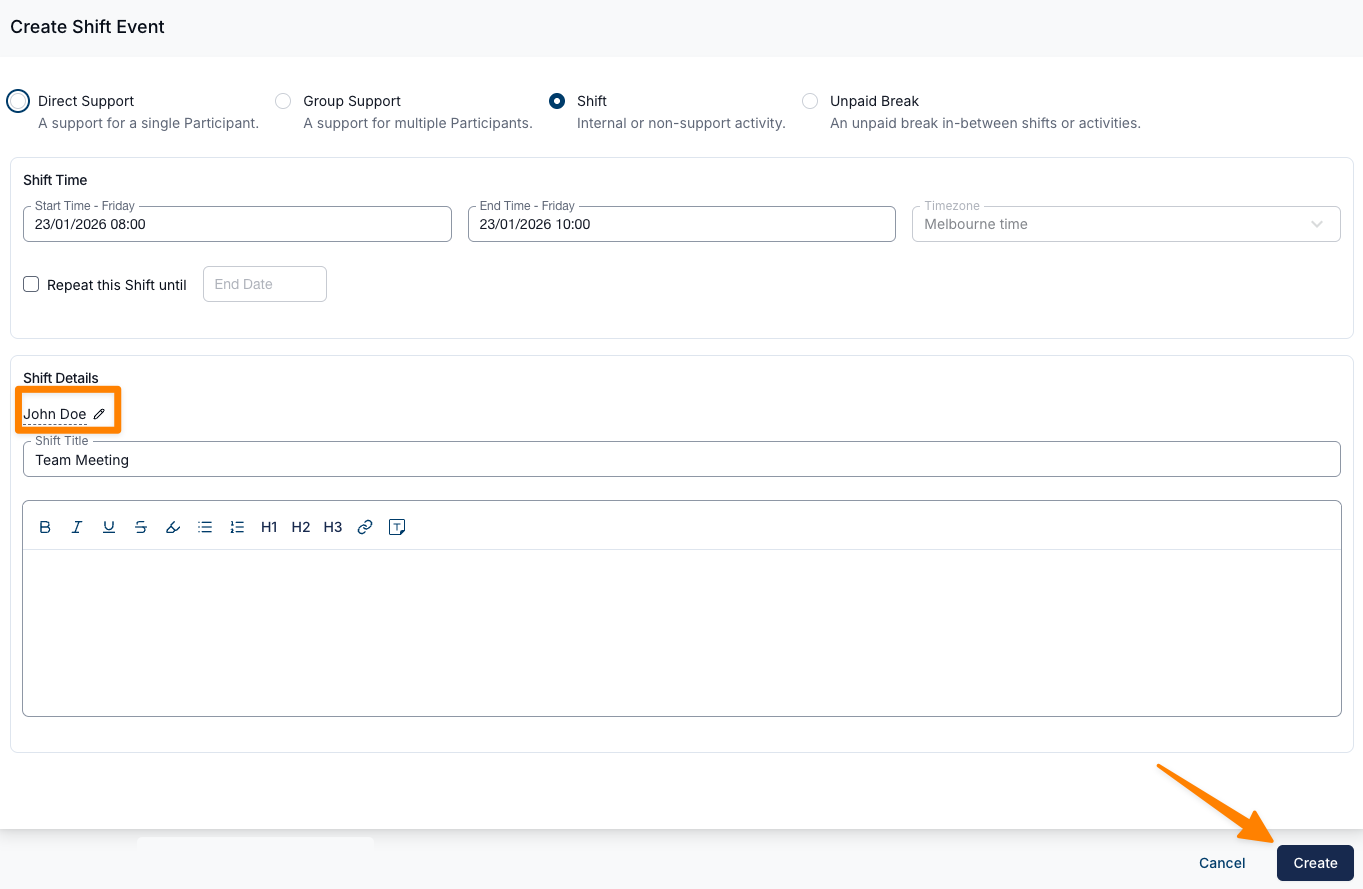
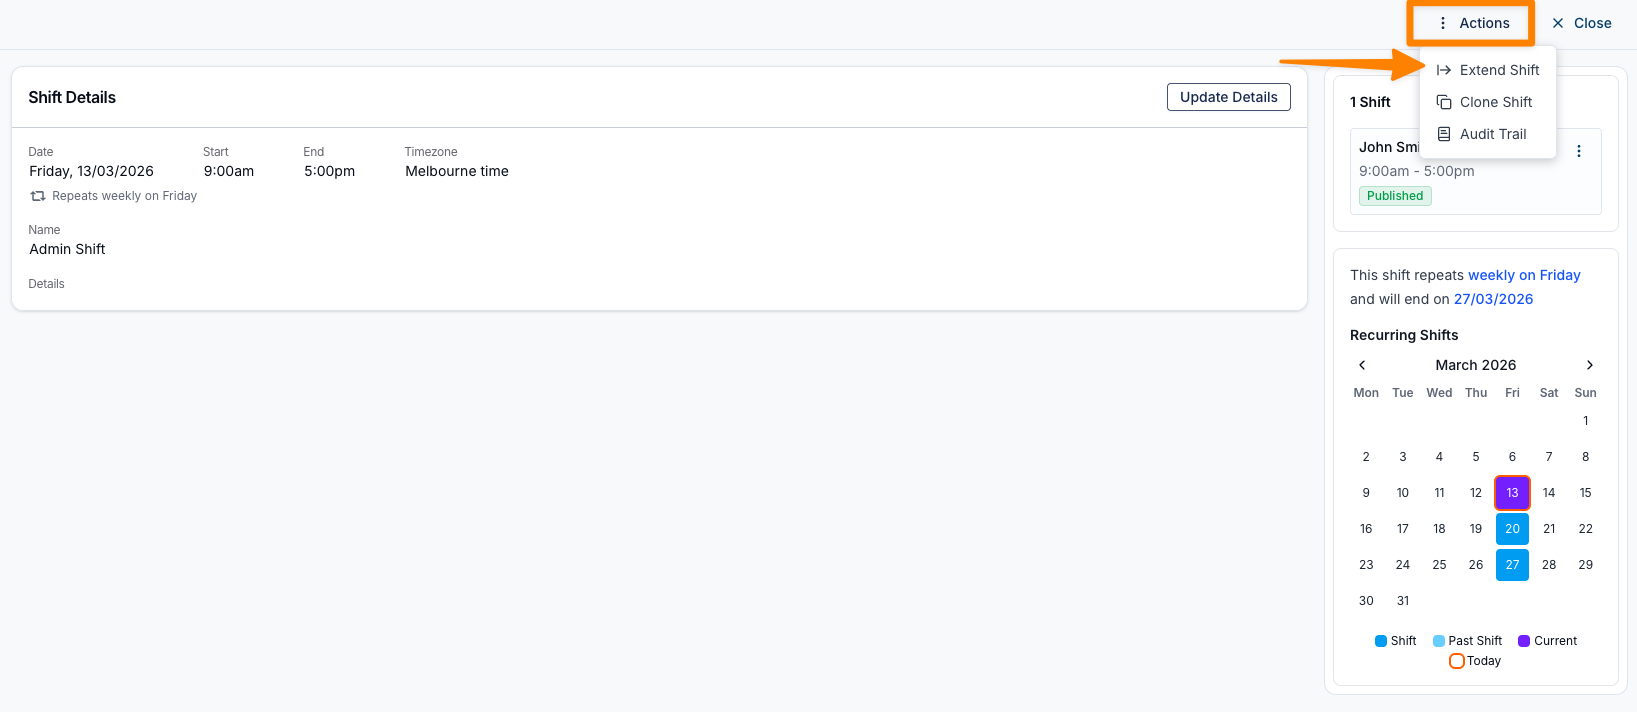
You can clone a Shift to create a duplicate event for the same or different Support Workers. To do this, click on the Actions button, and select Clone Shift. The attendees from the original event are carried across, so you can add or remove workers as needed.
From there, you can update the details as required, and then click Create.
Extending a Shift
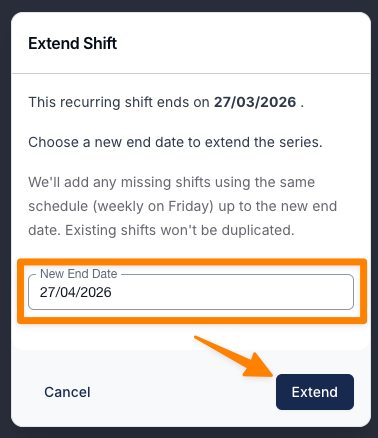
If you need to extend a recurring Shift beyond its current end date, you can do so from the Shift's Actions menu. Select Extend Shift, choose the new end date, and click Extend to apply the change.
Video Walkthrough on How to Add a Shift (Internal or Non‑support)
This video walks through how to add a shift support.