- Scheduling
- During a Shift
- Case Noting in the App
Case Noting in the App
Overview
Most organisations require a case note to be completed as evidence that a shift occurred. Within the Astalty app, Support Workers can easily record, view, and edit case notes linked to their shifts.
Writing a Case Note
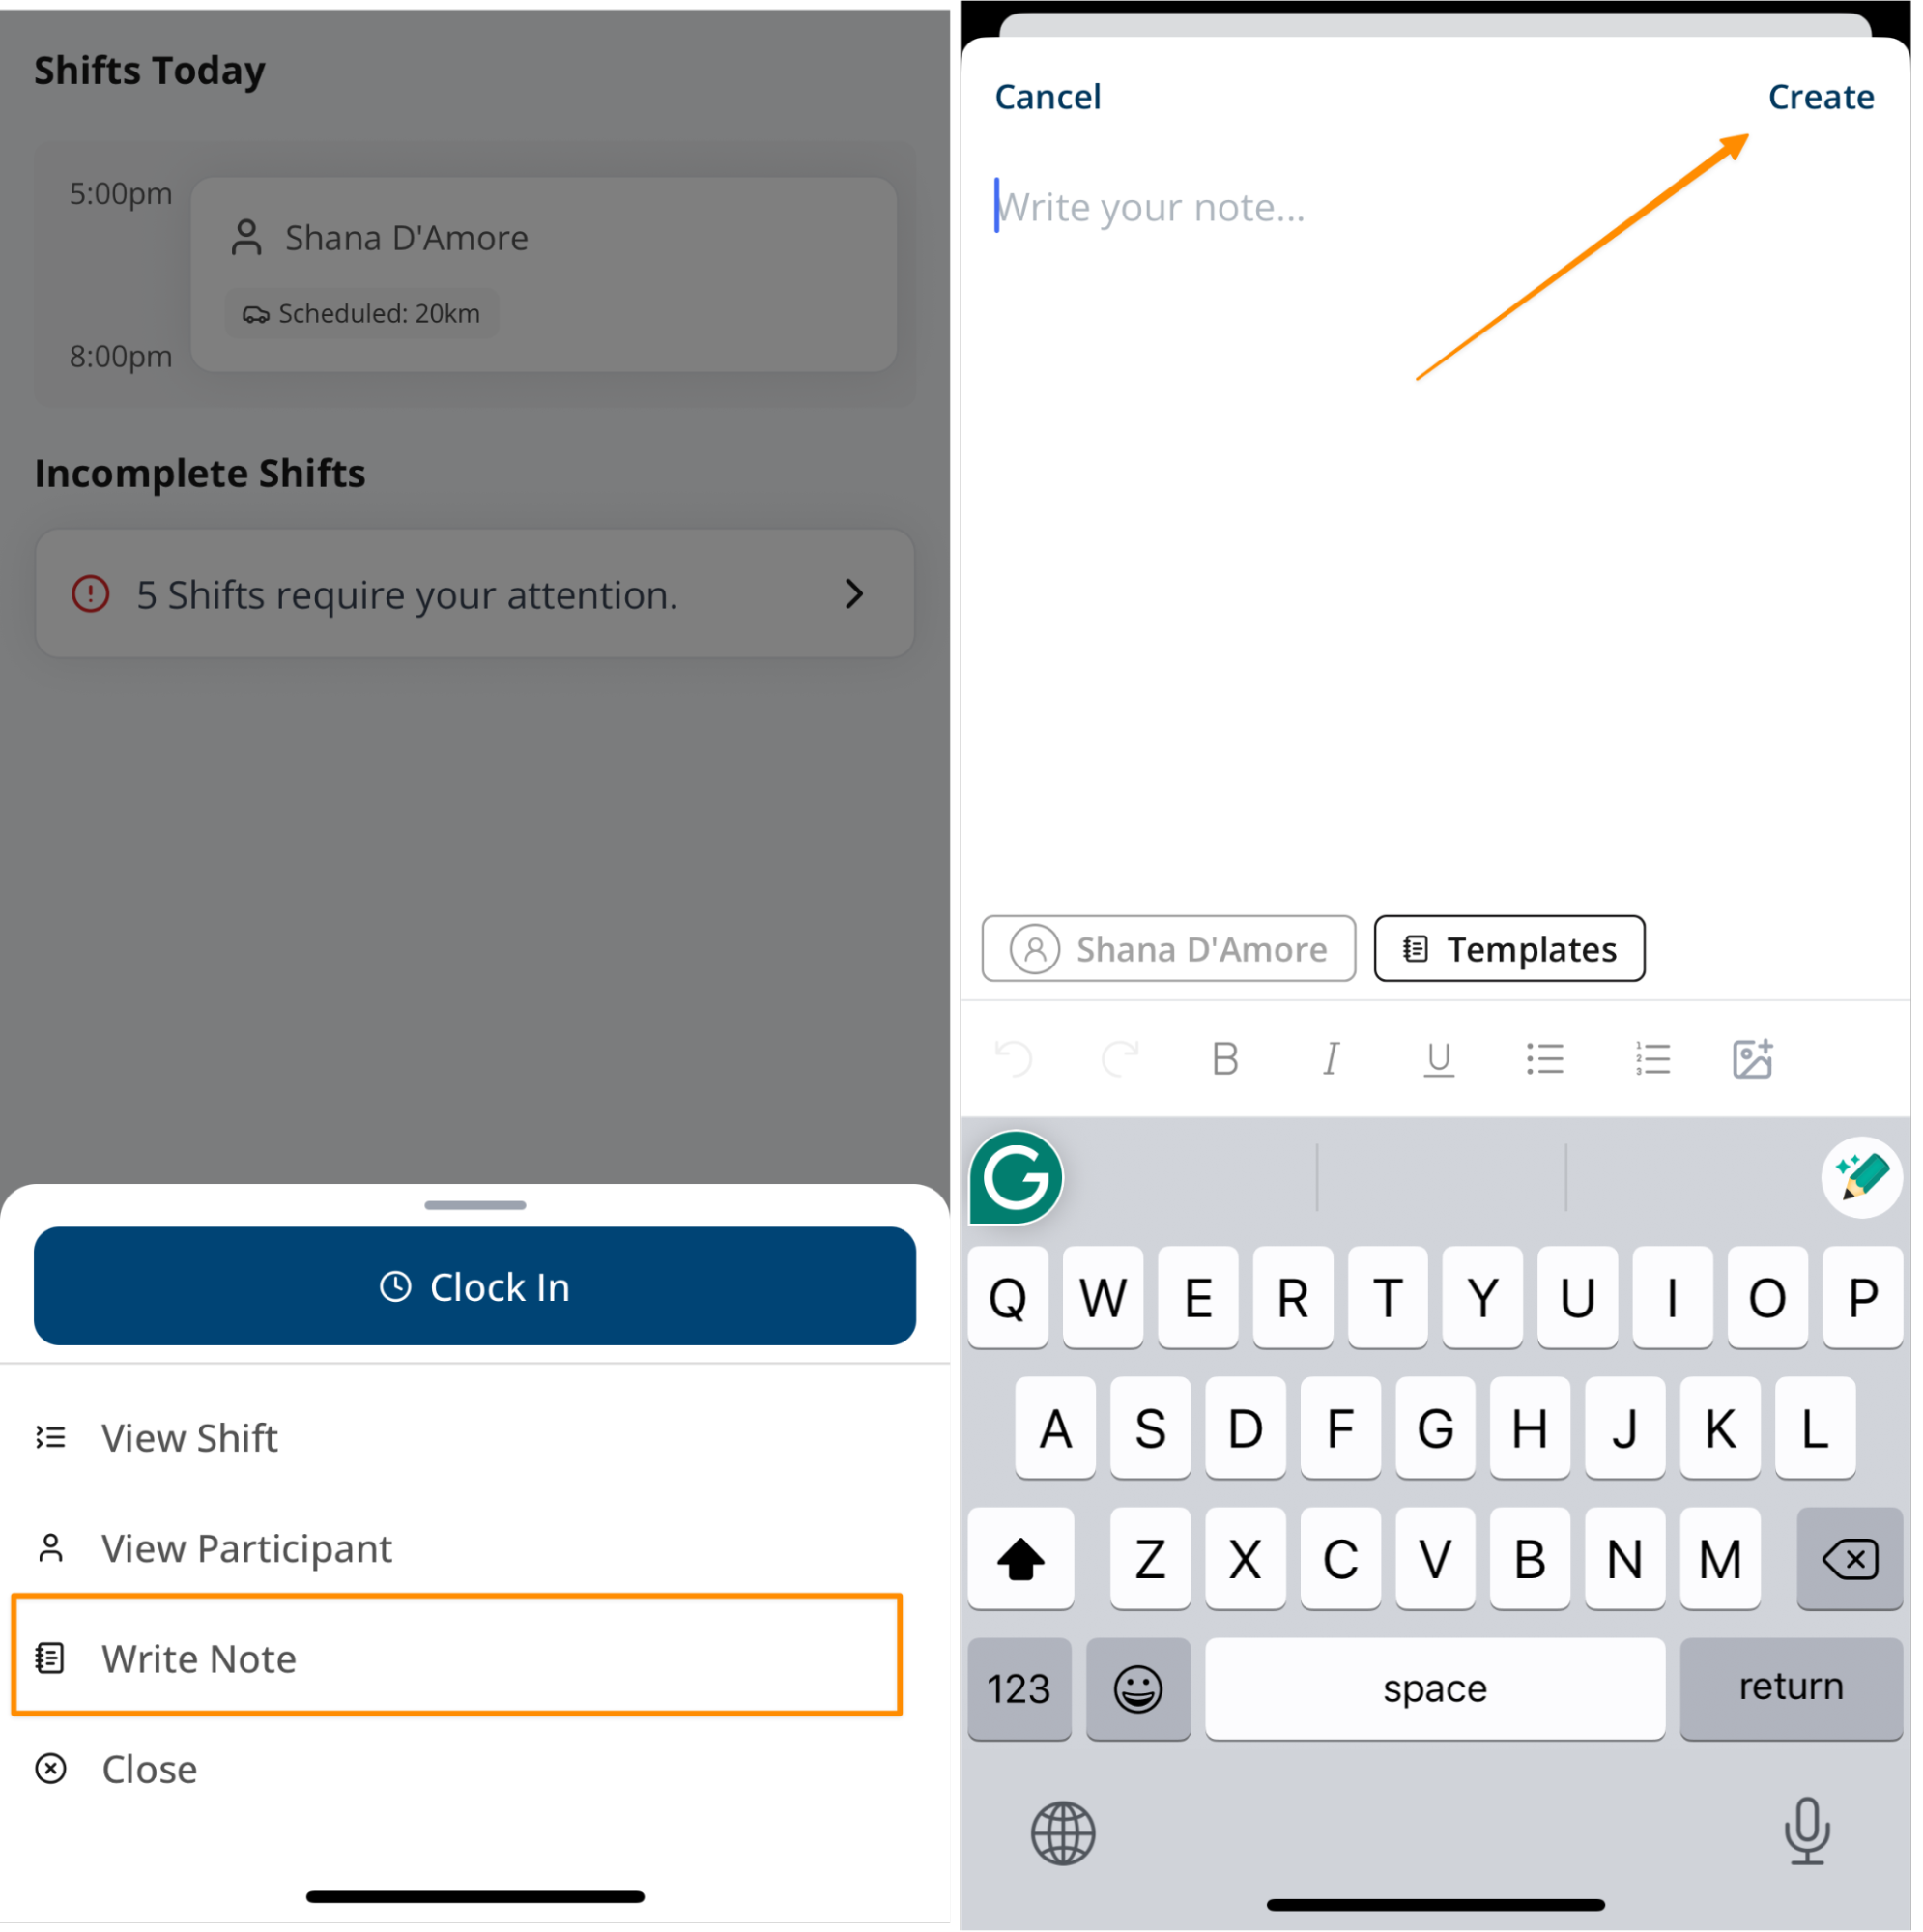
- Open the Support you are documenting.
- Tap Write Note.
- Enter the details of your case note. It saves as you type, so there is nothing to press to keep it.
- When you are finished, tap the tick in the top right to close the note.
The tick stays greyed out until the note reaches the minimum length your organisation has set, so a note that is too short cannot be finished off.
Editing a Case Note
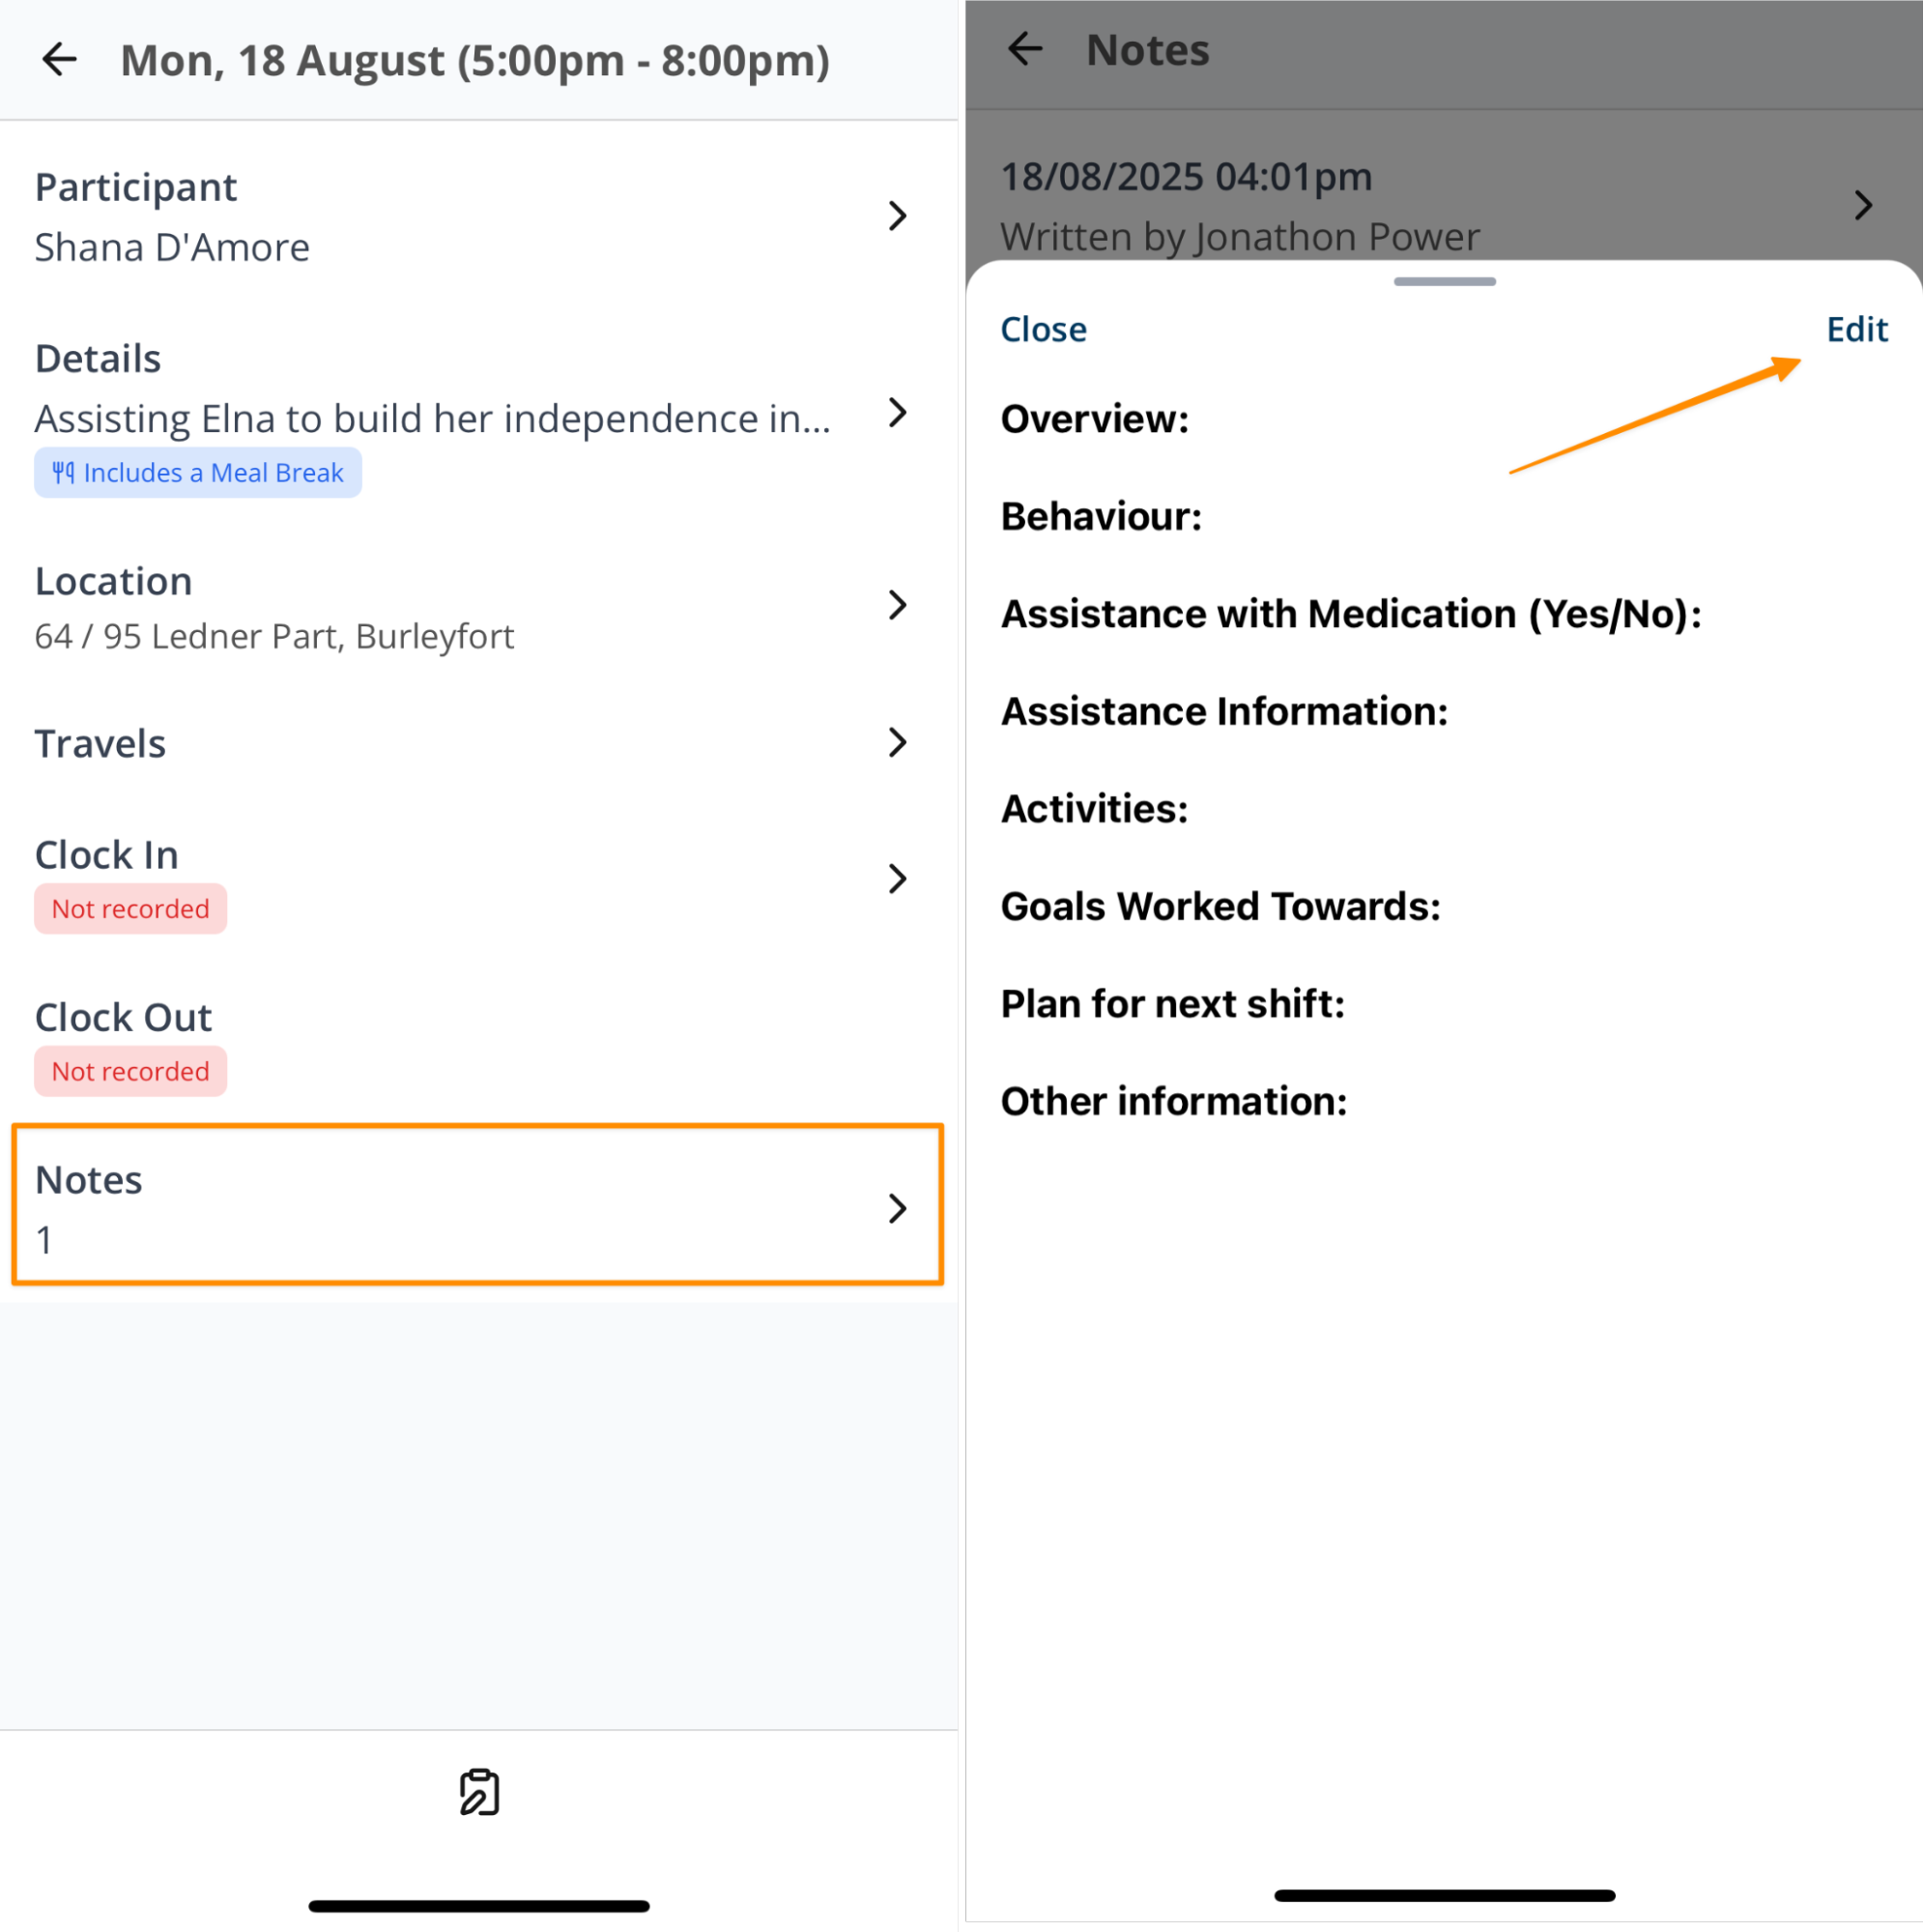
- Open the Shift and select Notes.
- Tap the case note you want to update.
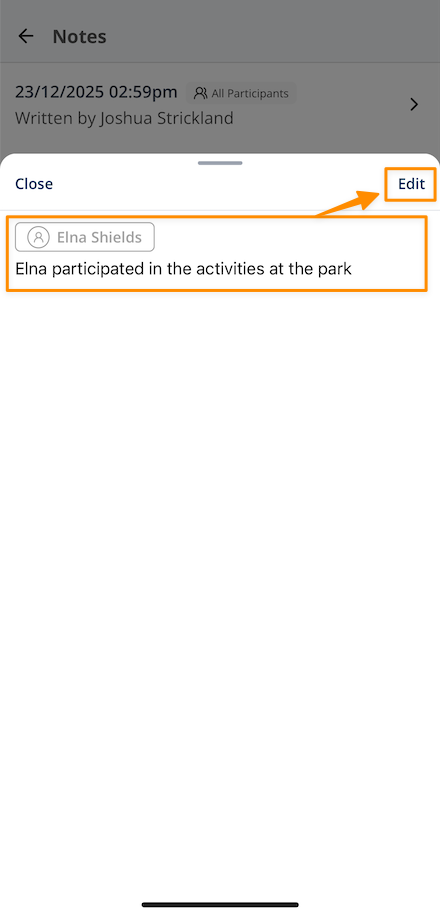
- Select Edit.
- Make your changes. They save as you type. Select the tick in the top right when you are done.
Are case notes saved as drafts?
No. Case notes have no draft state. The note is created as soon as you start typing and every change is saved as you go, so there is no separate list of draft notes to find and nothing is lost if you leave the screen part-way through.
The tick in the top right finishes the note and closes it; it is not what saves your text.
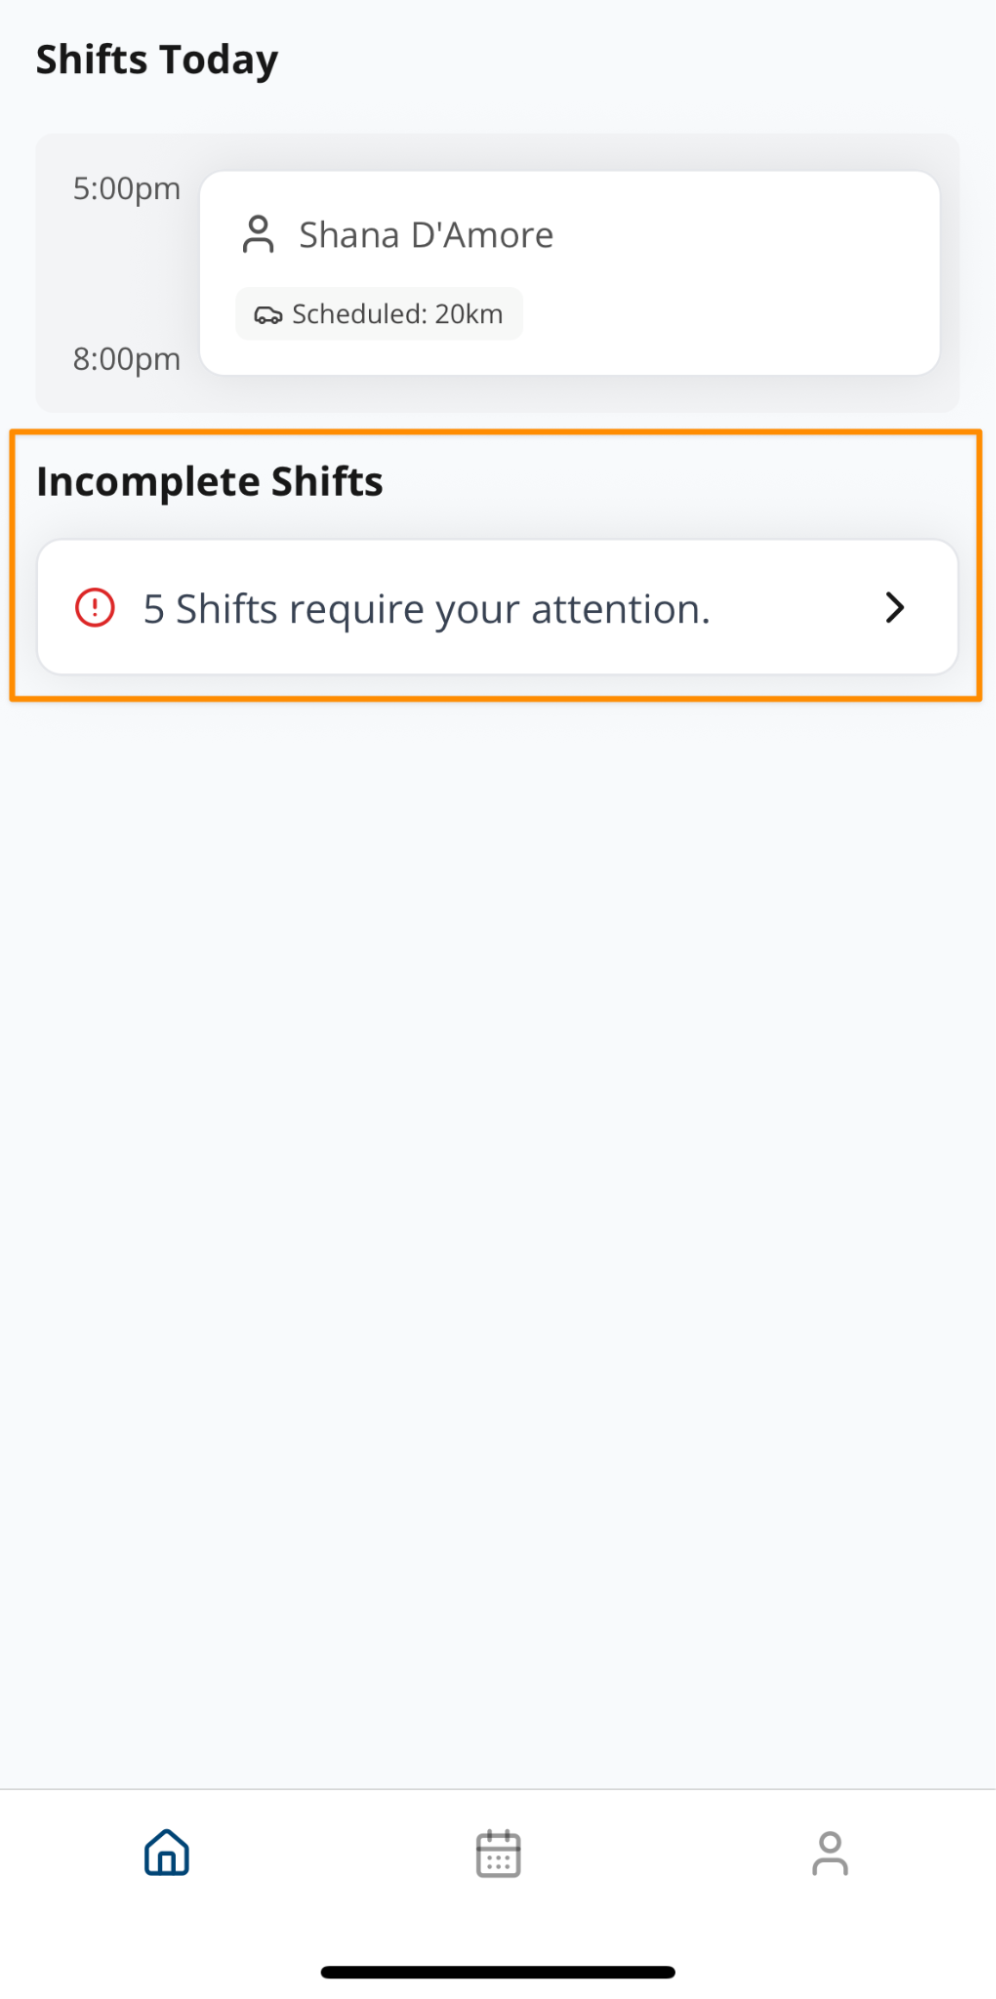
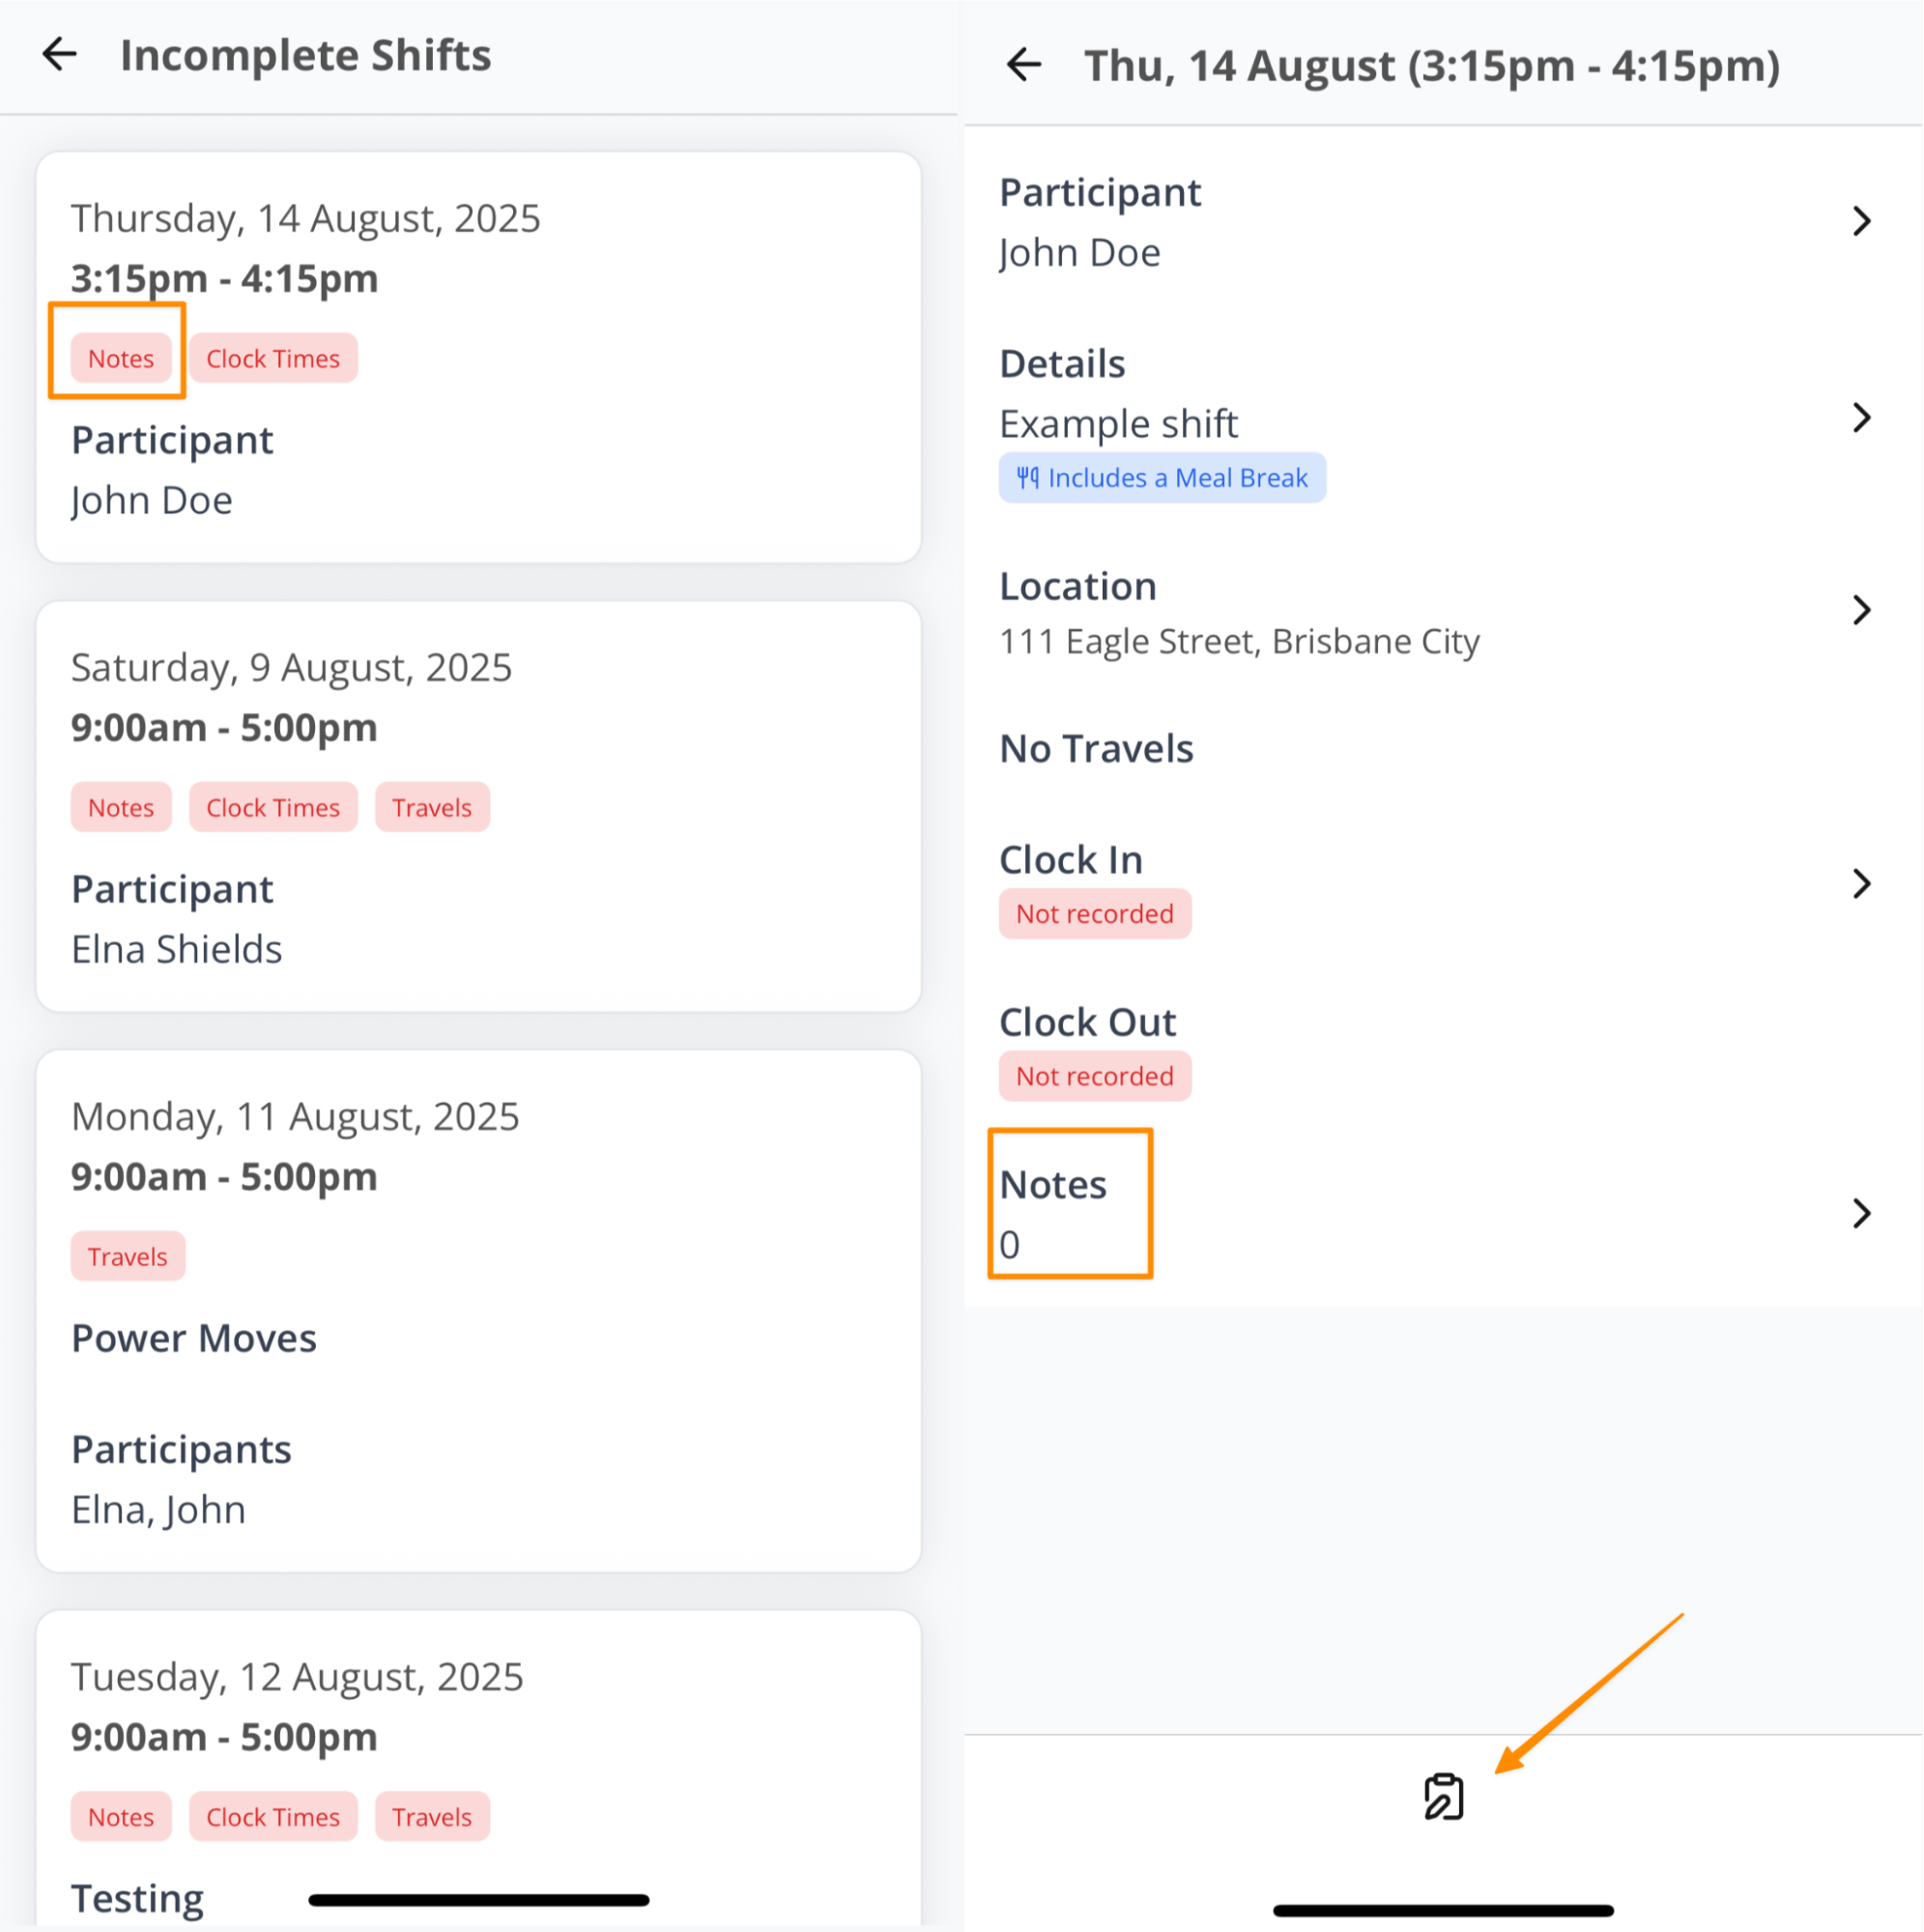
What you may be looking for is a shift whose note was never written. Those appear under Incomplete Shifts on the home screen, showing Notes: 0.
Attaching Photos and Files
You can attach photos and files to a case note while writing a new note or editing an existing one, including group case notes.
Attaching a Photo
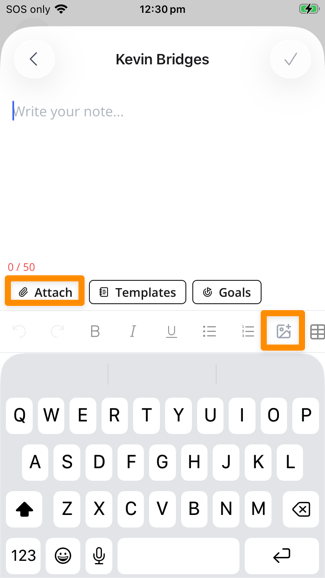
- Tap the photo icon above the keyboard.
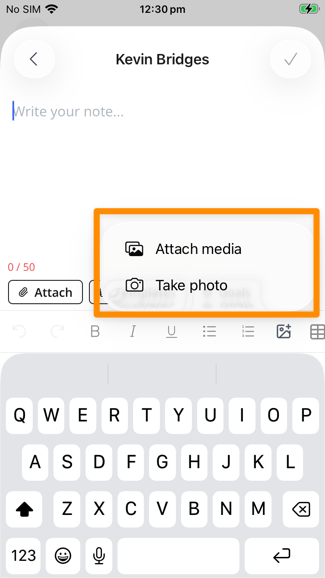
- Choose Attach media to select an existing photo from your gallery, or Take photo to use your camera.
- A button shows how many photos you have added. Select it to review them and remove any you do not want to keep before finishing the note.
Attaching a File
- Tap Attach.
- Choose one or more files from your device.
- Accepted file types are PDF, JPG, PNG, CSV, DOCX, DOC, XLSX, XLS, TXT, and ZIP. Each file can be up to 100MB.
Viewing Attachments
After you finish the note, its attachments appear under Images and Documents. Select a photo, PDF, video, or audio file to preview it. Other file types are not supported for in-app preview.
Adding Goals to a Case Note
Tag the Participant Goals a shift worked towards against the case note itself.
- While writing or editing a note, tap Goals.
- Tap each Goal you want to tag. A tick marks selected Goals, and the button shows the count, such as Goals (2).
- Swipe the picker down, or go back, to return to the note.
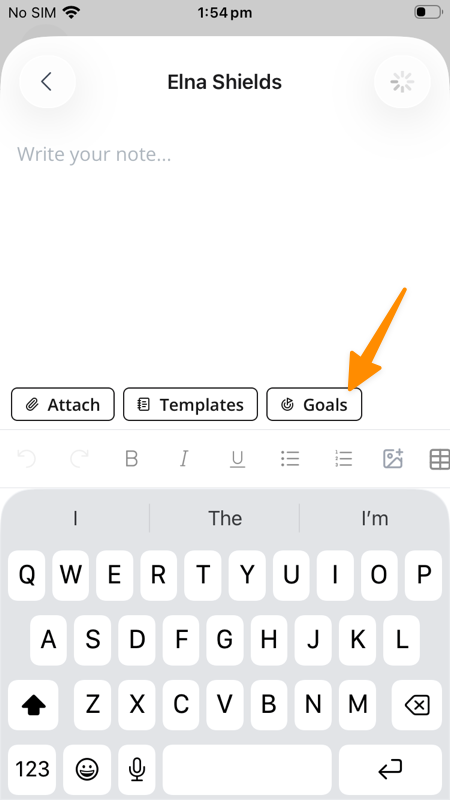
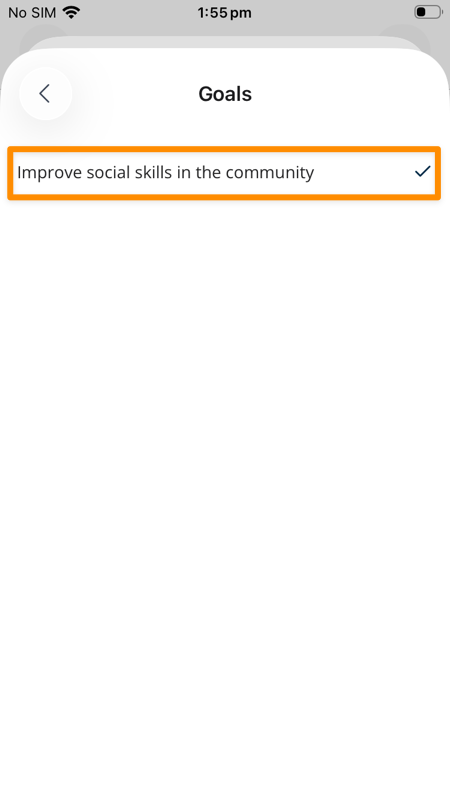
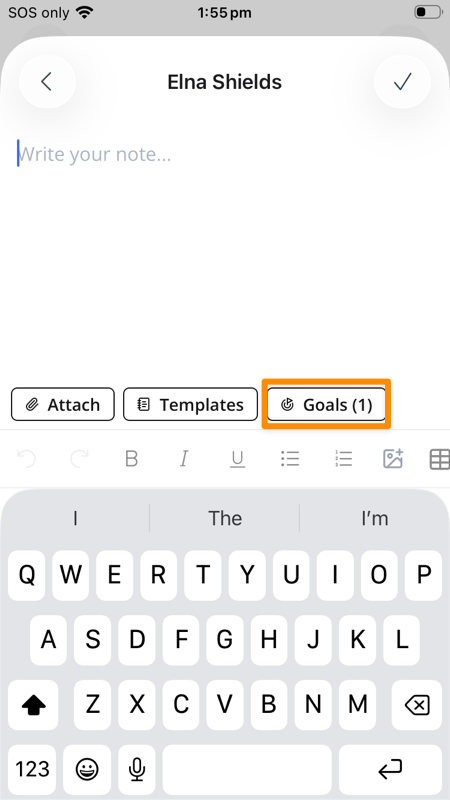
The picker lists the Participant's Goals by name and shows the Goal type, such as Short Term, Medium Term or Long Term, where one has been set. When no Goals are available it reads "No goals available for this participant."
When you are editing an existing note, each tap saves straight away. On a new note the Goals are attached once the note itself has been created, so finish the note rather than leaving the screen part-way through.
Removing a Tagged Goal
Tap Goals, then tap the ticked Goal again to untick it.
Viewing Tagged Goals
A finished note shows a Goals heading with a chip for each tagged Goal. Tap a chip to read that Goal's Description, Achievement Strategy and Barriers. In note lists, a goal icon shows how many Goals the note has.
A Goal tagged on a case note is also linked to the shift, so it appears on that Support's Goals tab.
Incomplete Case Notes
If a case note is not completed at the end of a shift, it will appear under Incomplete Shifts on the main screen of the Support Worker app. This helps you quickly identify any missing information that still needs to be recorded.
Completing an Incomplete Case Note
- On the home page, go to Incomplete Shifts.
- Find the shift marked with a red chip showing what is still outstanding.
- If a case note is missing, it will display as Notes: 0.
- Tap the entry, then tap the clipboard icon at the bottom of the screen.
- Enter your case note, then tap the tick in the top right to finish it.
Once completed, the shift will disappear from the Incomplete Shifts list.
Templates
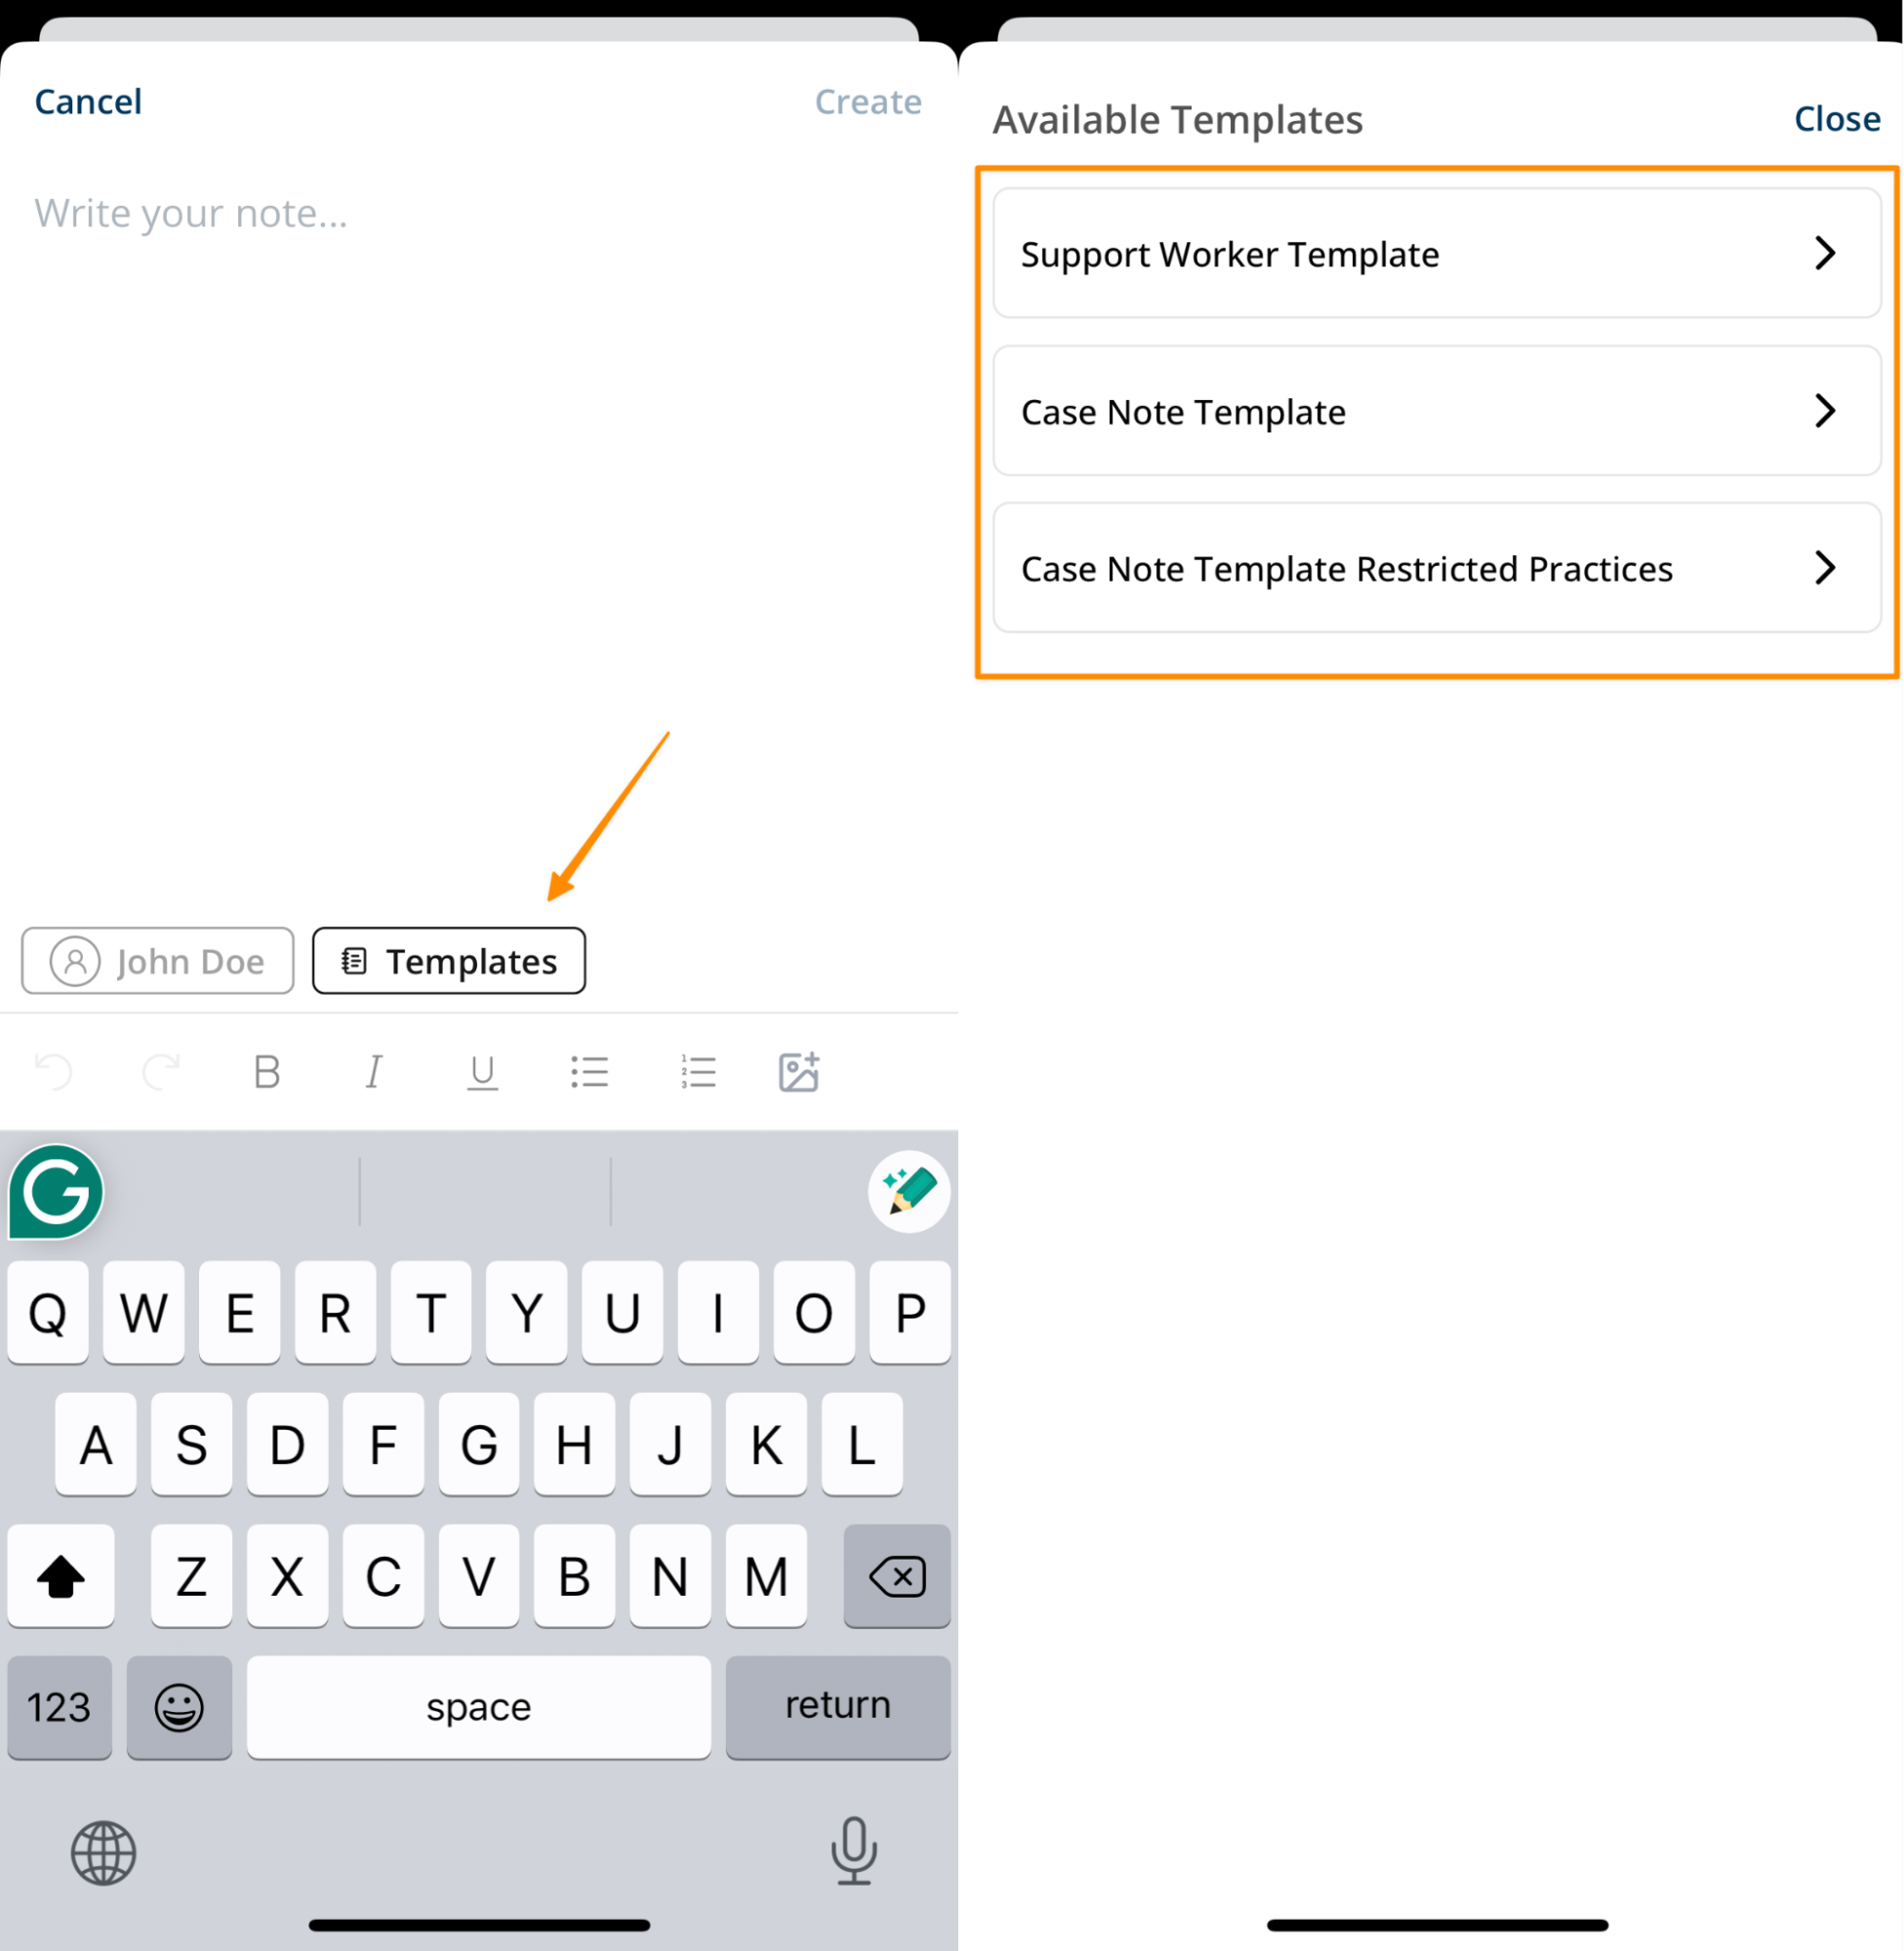
When writing case notes, you may have access to templates if your organisation has set them up. Templates provide a pre-structured format for notes, helping you remember what details to include and ensuring consistency across all case notes.
Accessing Templates
- When writing a note, tap Templates.
- Select the relevant template.
- The template content is added after any note content already entered. Complete it with the shift-specific details.
Which Case Notes a Support Worker Can See
By default a Support Worker sees every case note on the Participants they work with. Admins can narrow this from the worker's Permissions tab using Can view all case notes and Can only view case notes written by users in their user groups.
When a Support Worker is restricted, the notes they see on a Participant are:
- Notes they wrote themselves.
- Notes written by someone who shares a Team or Custom User Group with them, if the user-group option is on.
- Notes on any shift they personally worked, whoever wrote them.
Notes written by workers outside their user groups, on shifts they didn't work, are hidden.
Case Noting Group Supports
If you are scheduled to a group support, there may be times where you need to write notes that need to be applied to all Participants in the group, or write notes specifically for each individual Participant.
Completing Group Case Notes
To complete case notes for a group support:
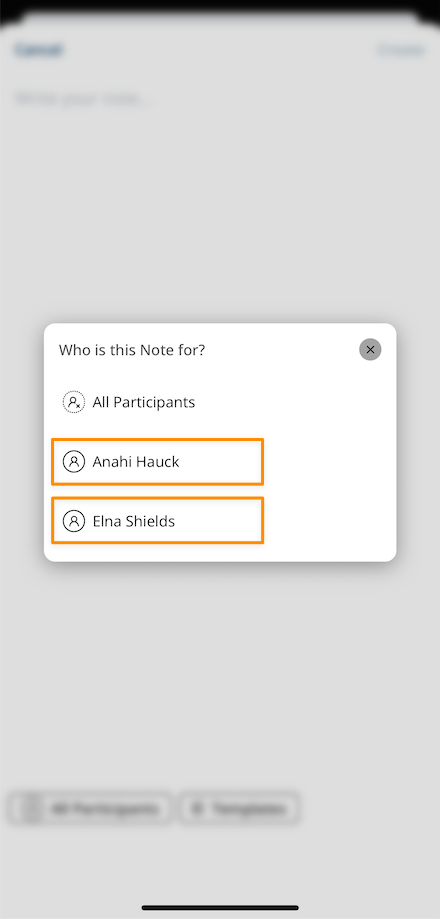
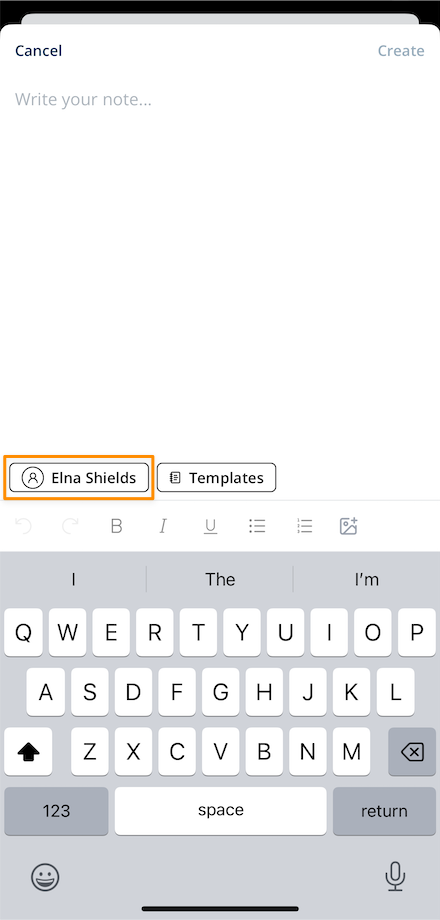
- Once you've selected your group shift, tap Write Note. When the blank note page opens, it will be automatically defaulted to All Participants.
- If you are intending to write a case note for all Participants attached to this group support, complete your case note and then tap the tick in the top right.
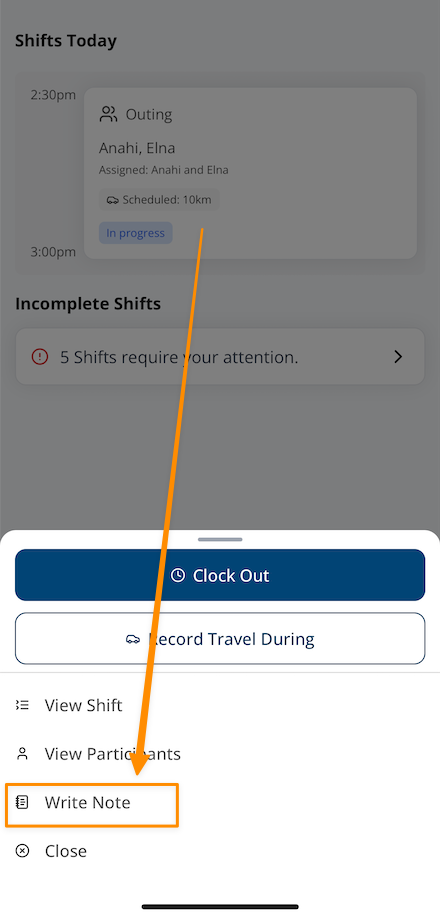
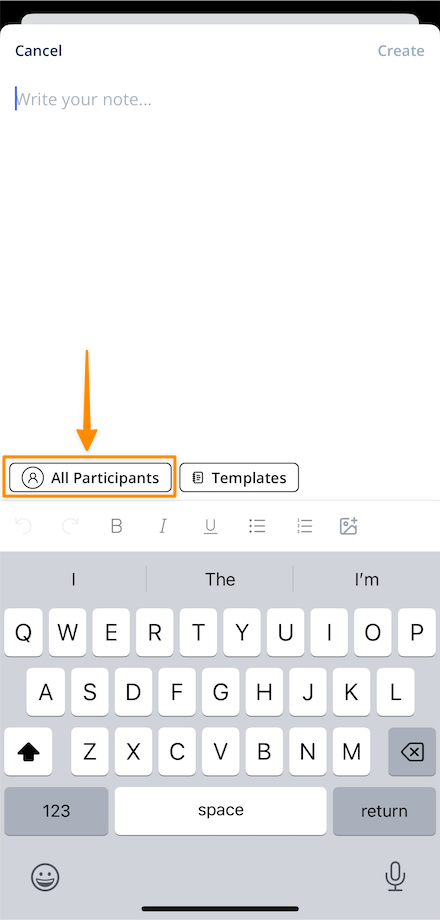
- However, if you need to write a note for a specific Participant - tap the All Participants button and tap on the Participant that you would like to write the case note for. Write your case note and then tap the tick in the top right.
Viewing Group Case Notes
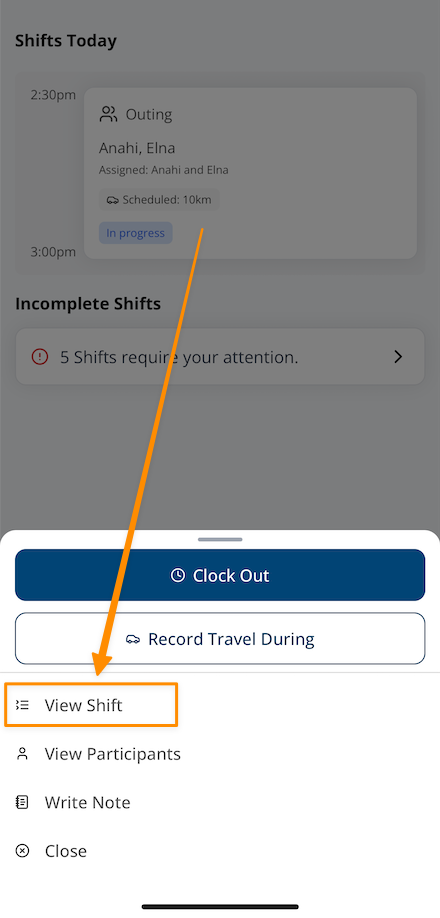
All case notes completed for this group support, can be viewed from the shift.
- Once you've selected your group shift, tap View Shift.
- Then tap on Notes - where it displays the number of notes already completed for this support.
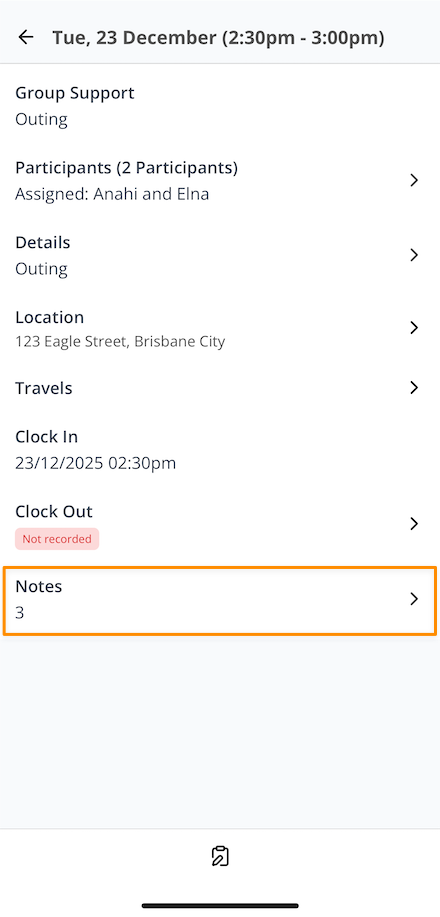
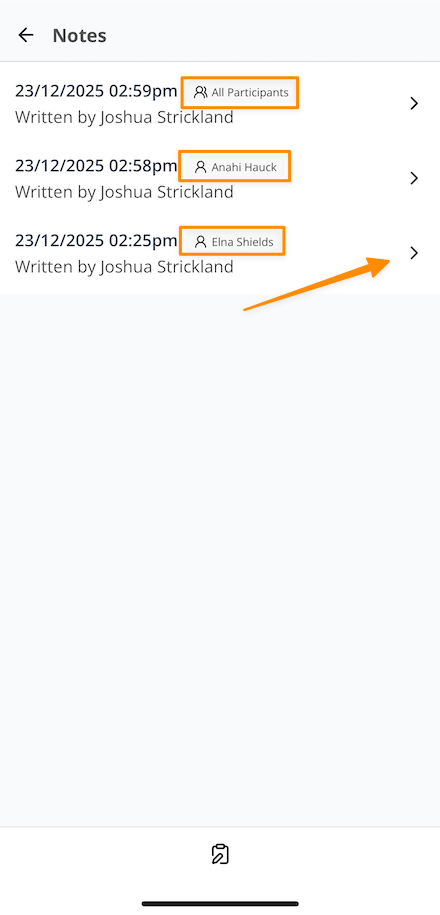
The notes page will display all the notes completed for this group support so far, including:
- The date and time
- Who it was written by
- Which Participants were assigned to that note - all or specific Participants.
If a note is selected, it will open up where it can be viewed and if you are the user who wrote the note it can also be edited.
Case Noting in the App - Video Overview
The following video provides a walkthrough of how to create, edit, and complete case notes in the Support Worker app.