- Scheduling
- During a Shift
- Record Travel During a Shift
Record Travel During a Shift
Overview
Support workers can record travel directly in the app while clocked in to a shift. This ensures accurate kilometre tracking using odometer readings, with automatic calculations of distance travelled.
How to Record Travel
Open the Shift
Tap the shift in question and make sure you are clocked in.
Start Travel
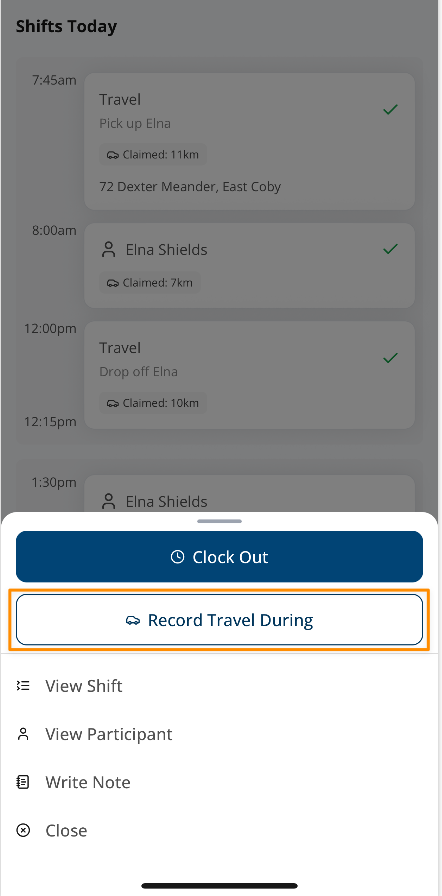
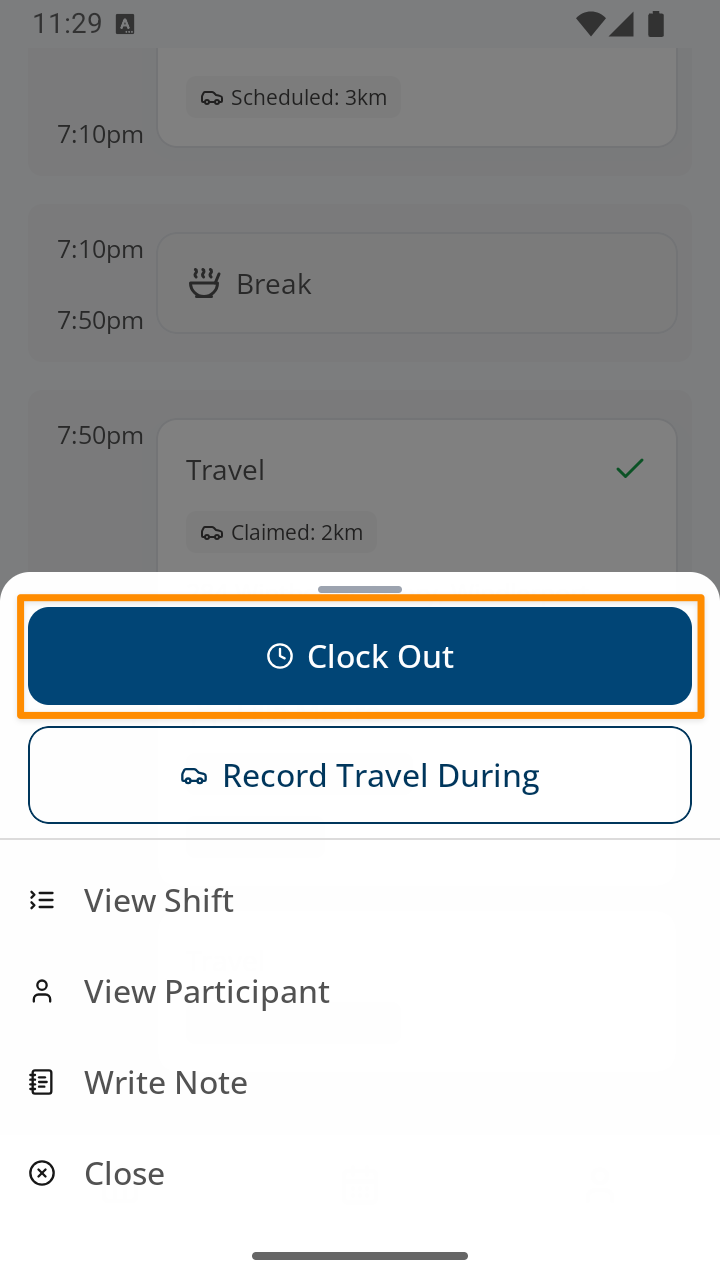
- Beneath the Clock Out button, tap Record Travel During.
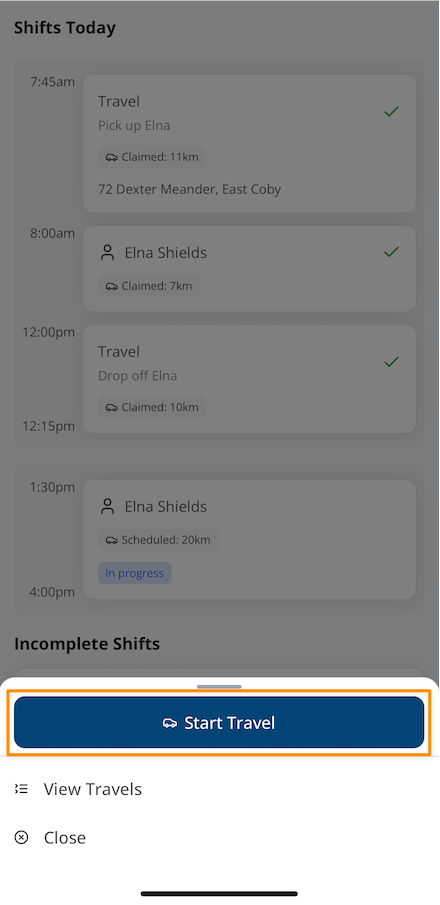
- Select Start Travel.
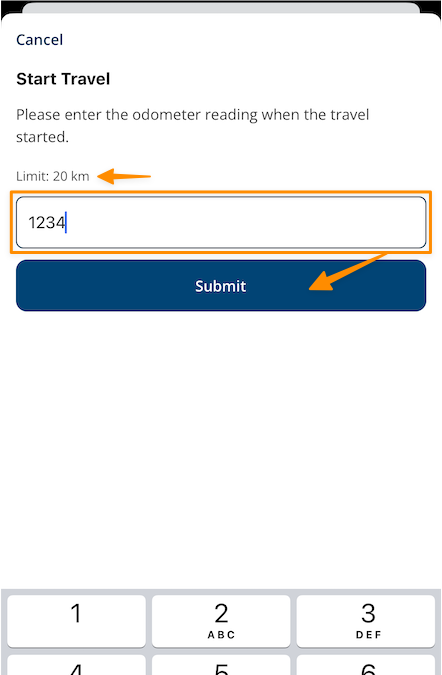
- Enter your start odometer reading.
- If your organisation has set a travel limit, you’ll see this displayed (e.g., Limit: 20 km).
- Tap Submit.
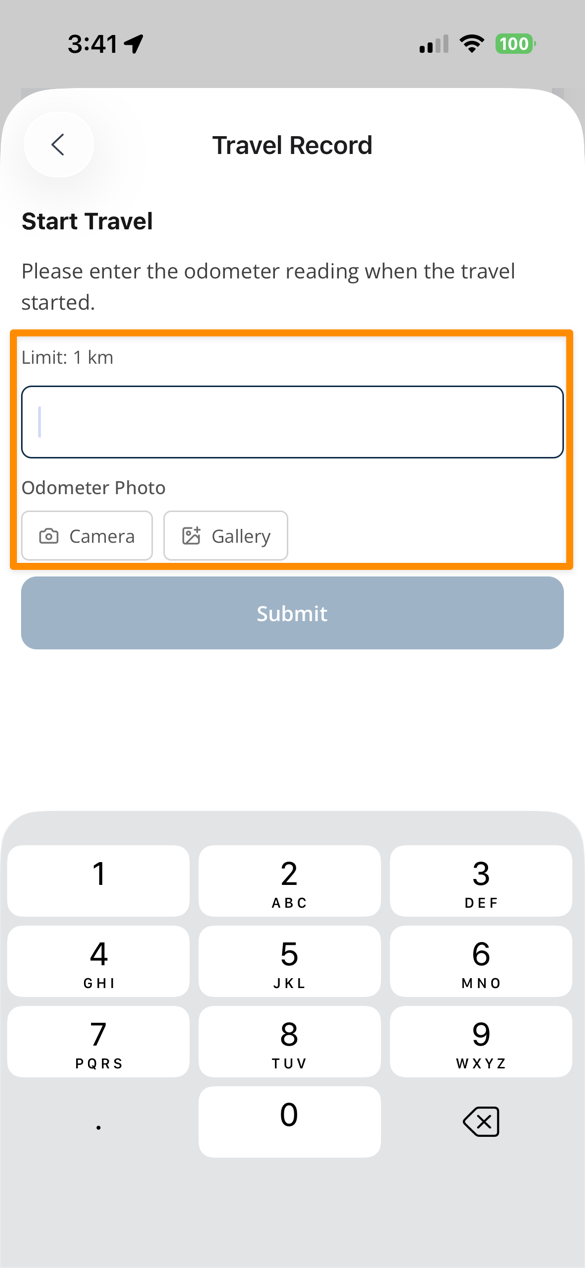
If your organisation requires photographic evidence of your odometer reading, you’ll be prompted to provide this when you start your travel. You can either take a photo using your camera or upload one from your gallery.
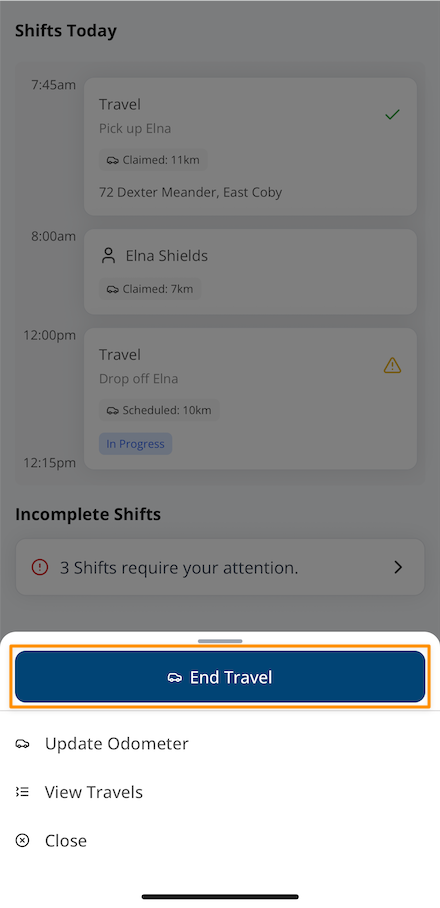
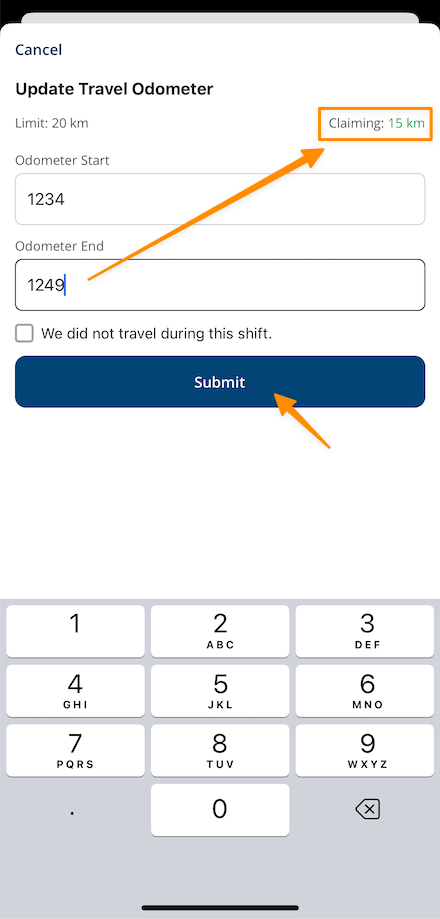
End Travel
- Tap Record Travel During again.
- Select End Travel.
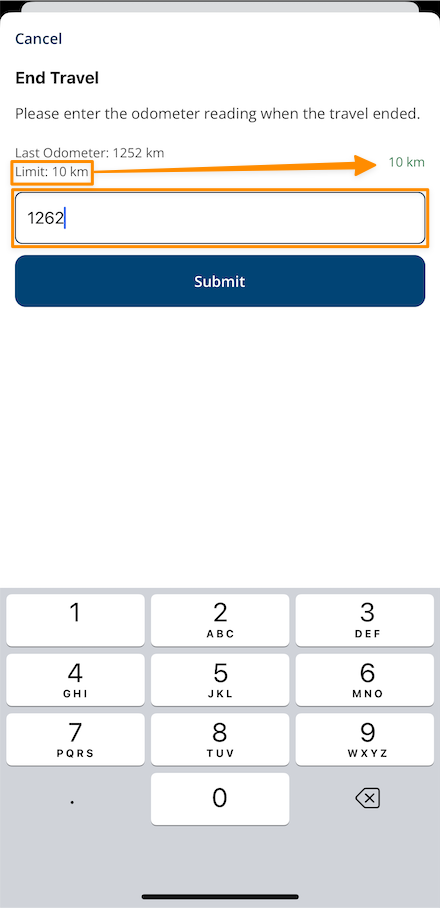
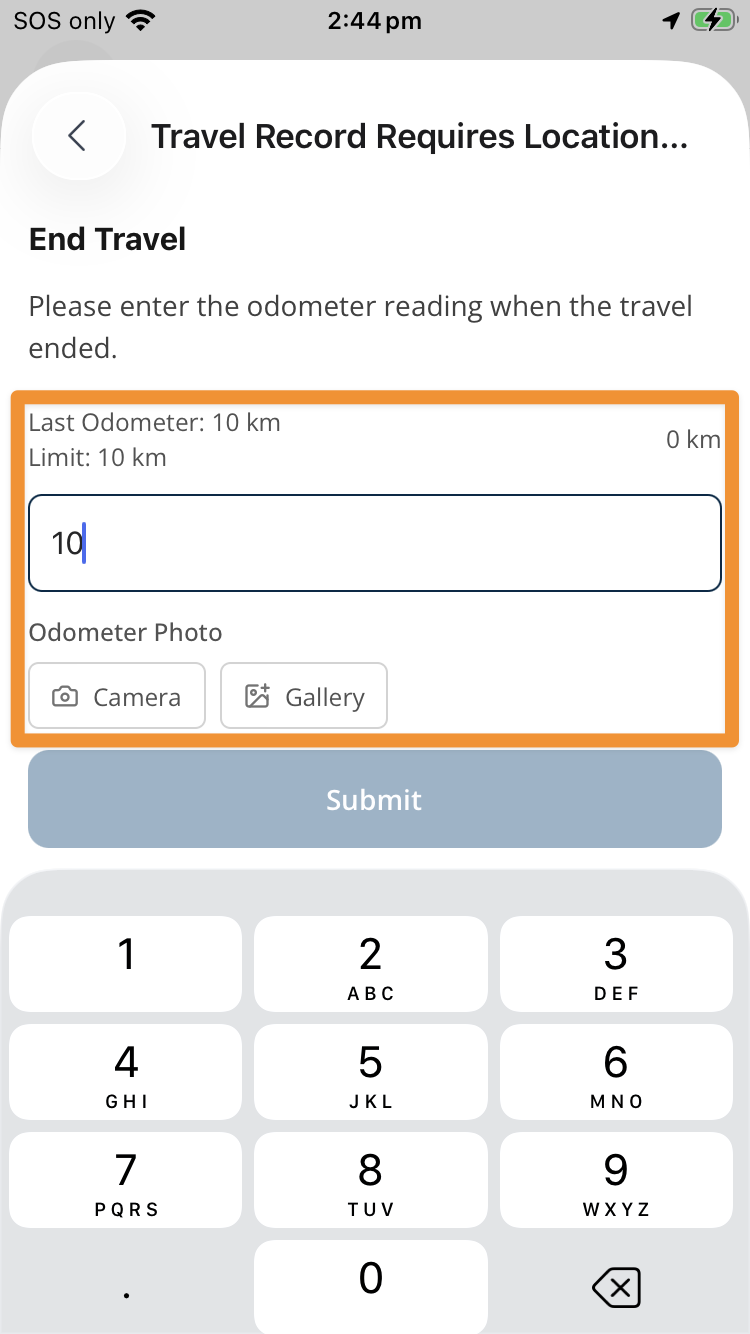
- Enter your end odometer reading.
- The app will automatically calculate the kilometres travelled based on the difference between the start and end readings.
- if the kilometres calculated are equal to or below the scheduled amount, they will be displayed in green text.
- if the kilometres calculated are greater than the scheduled amount, they will be displayed in red text.
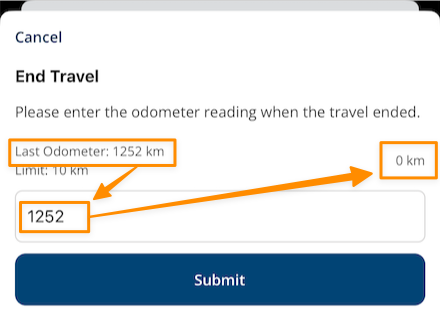
- if the kilometres calculated are equal 0, they will be displayed in black text
- Tap Submit.
When the kilometres are automatically calculated based on the difference between your start and end readings, the travelled kilometres will display as per the following colour scheme to assist you:
- if the kilometres calculated are equal to or below the scheduled amount, they will be displayed in green text.
- if the kilometres calculated are greater than the scheduled amount, they will be displayed in red text.
- if the kilometres calculated are equal 0, they will be displayed in grey text.
If your organisation requires photographic evidence of your odometer reading, you will be prompted to provide this when you end your travel. You can either take a photo using your camera or upload an image from your gallery.
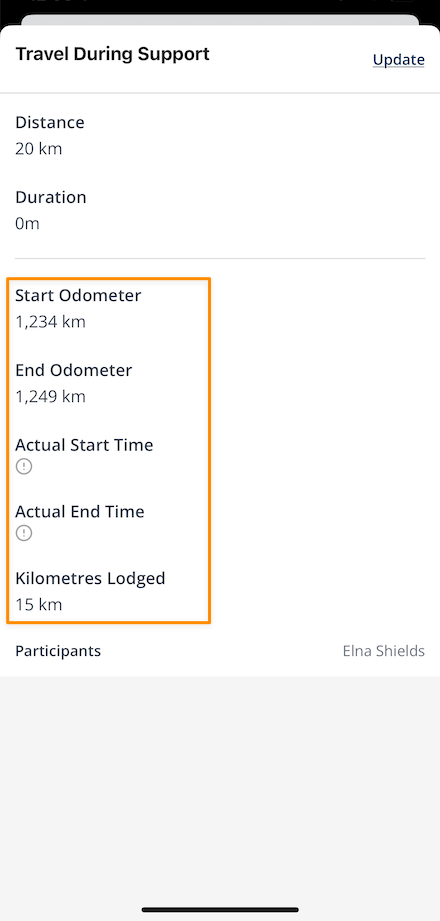
Updating a Travel Entry
If you entered an incorrect reading:
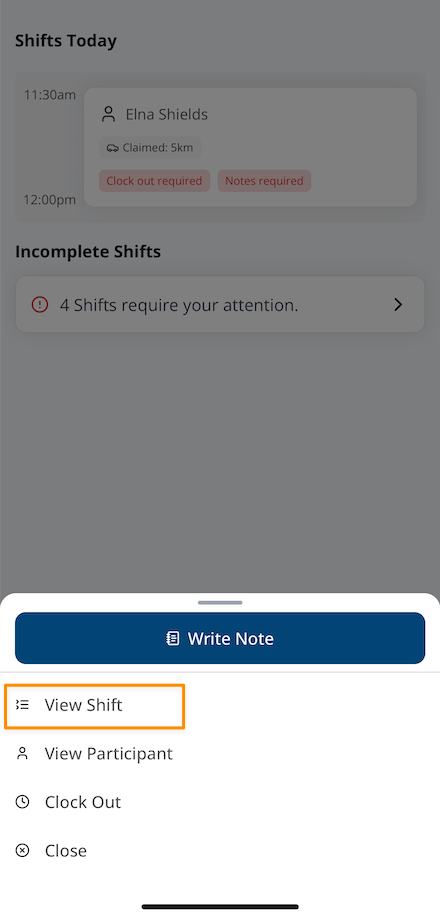
- Tap View Shift,
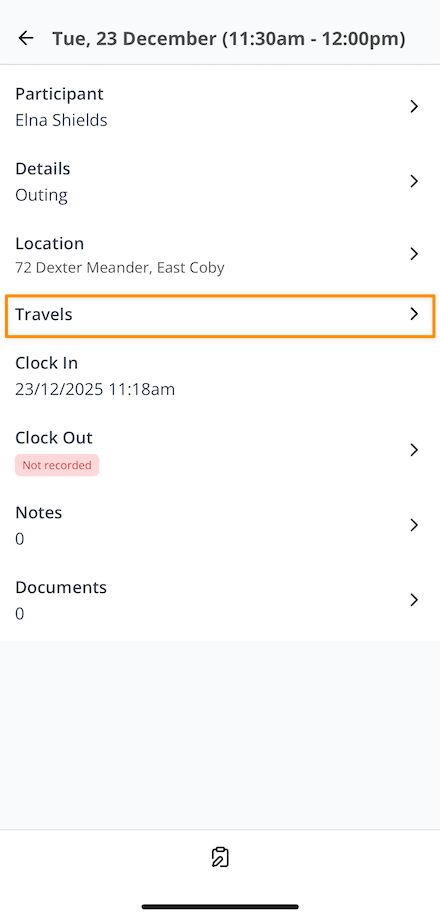
- Select Travels,
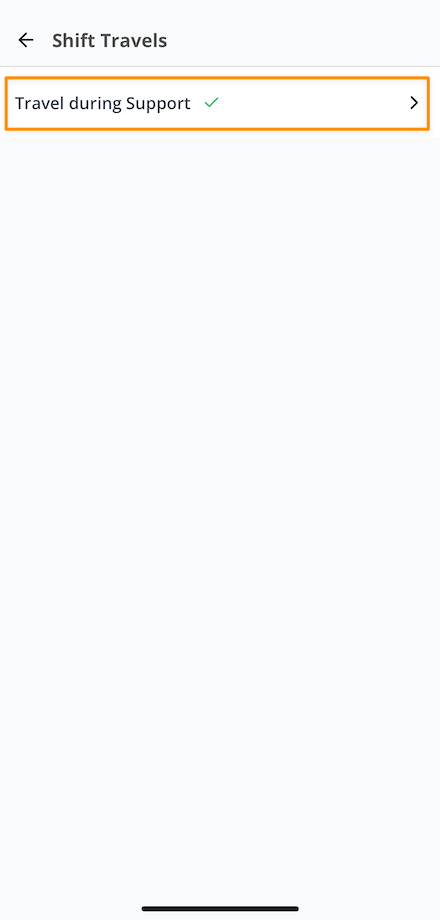
- Select the specific Travel you wish to update,
- Tap Update,
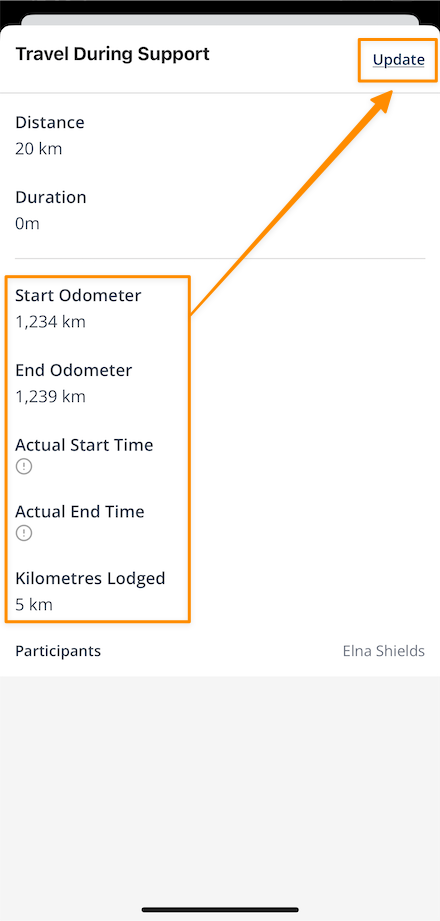
- Enter the corrected odometer reading/s, check the amount claimed, and tap Submit,
- You're changes are now saved and displayed for that specific travel.
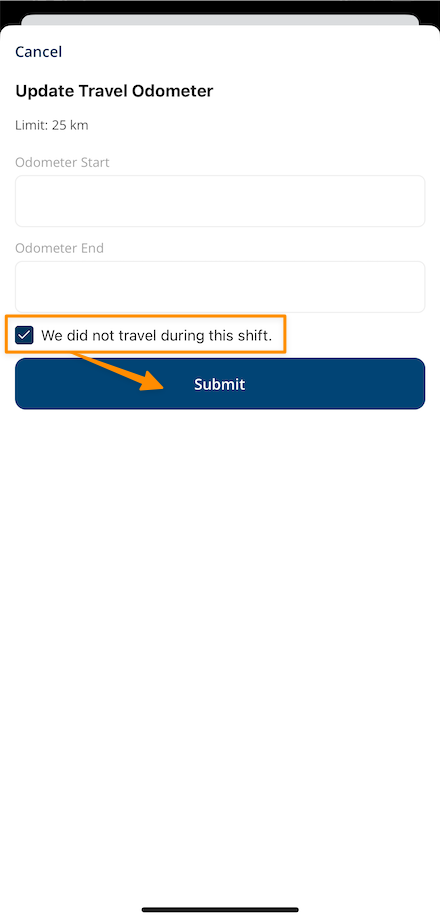
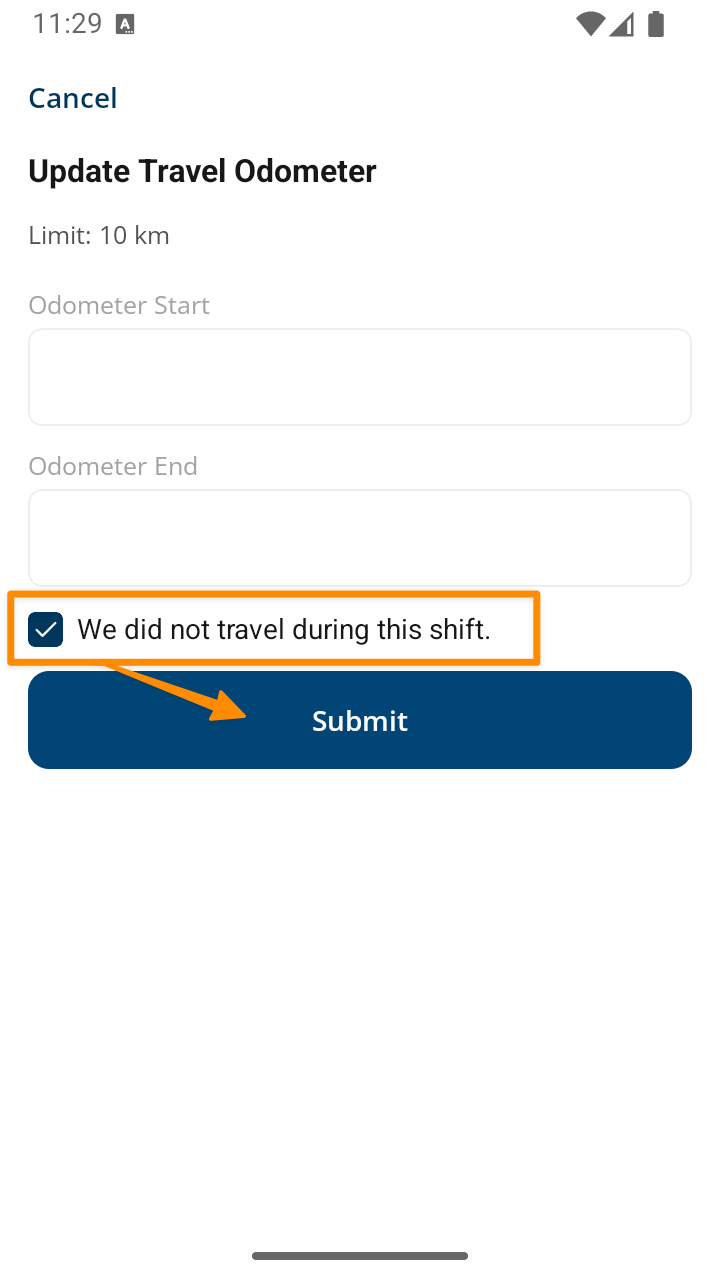
No Travel Recorded
When updating travel, if no travel was recorded during the shift, you can use the checkbox available to communicate that there was no travel during your shift.
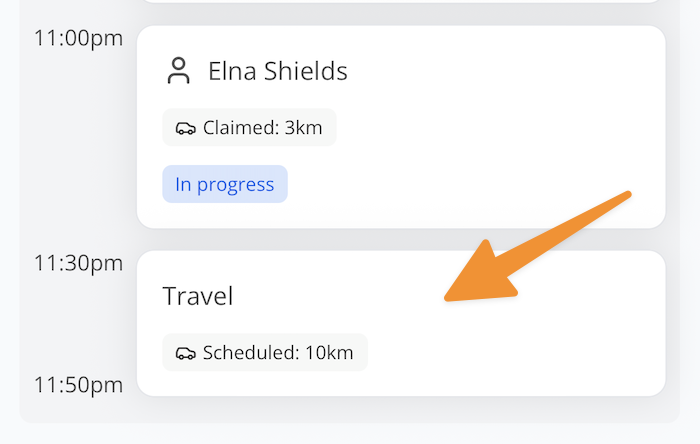
Travel To and From Support
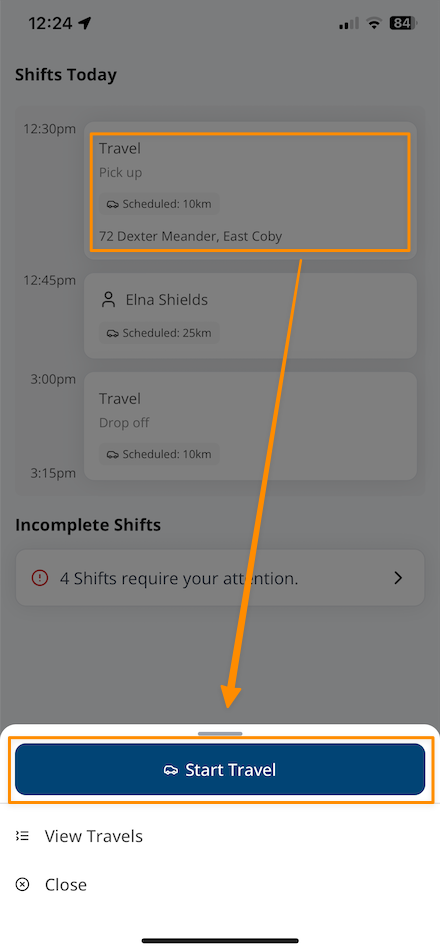
If travel to or from a support is payable, it will appear on your schedule with the heading Travel. This allows you to record start and end odometer readings so that travel distances can be tracked and billed accurately.
How to Record Travel To and From Support
Open the Shift
Tap the shift in question from your schedule.
Start Travel
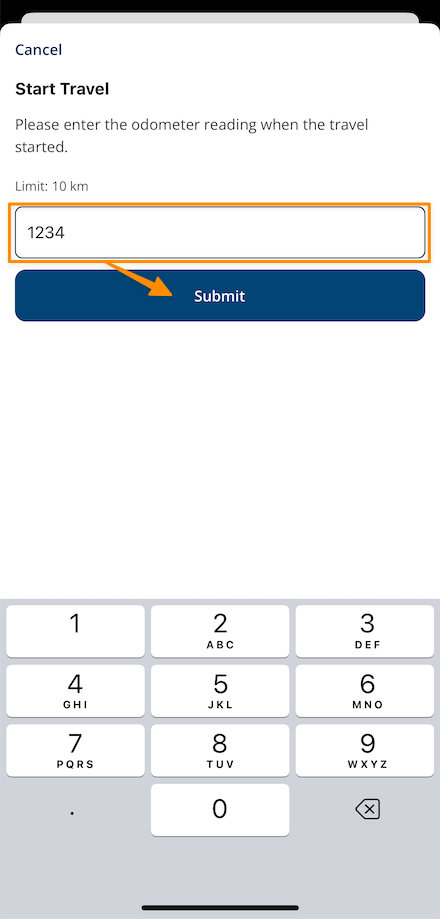
- Select Start Travel.
- Enter your start odometer reading.
- Tap Submit.
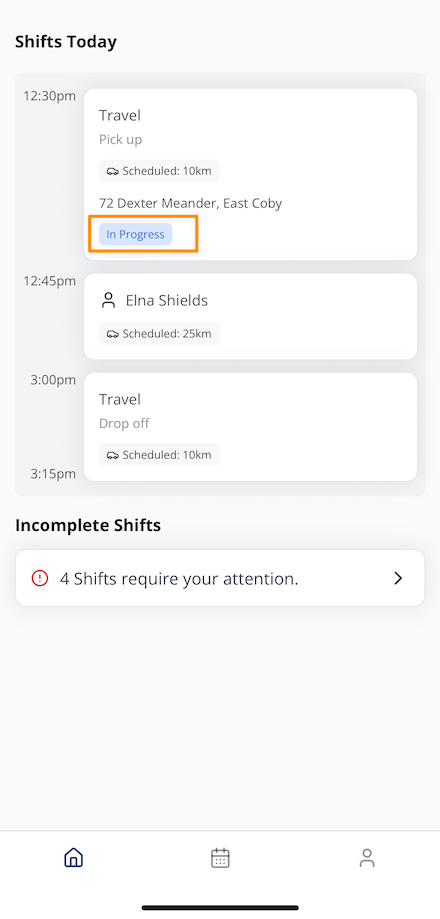
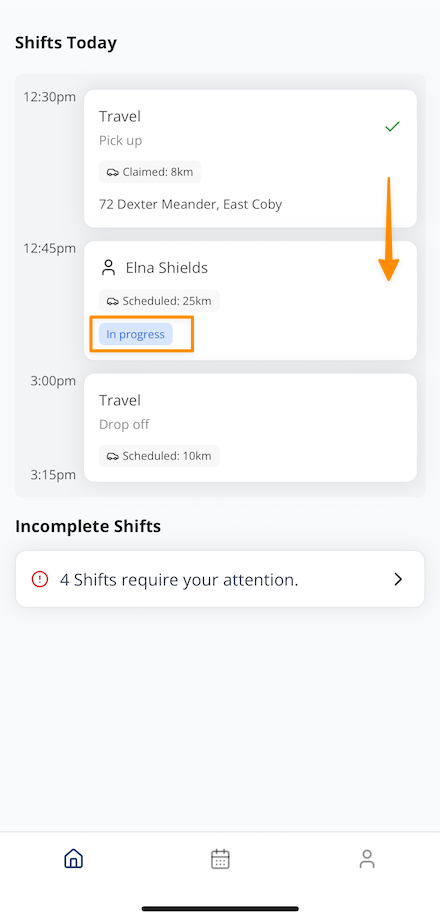
Once submitted, the Travel will display a tag "In Progress".
End Travel
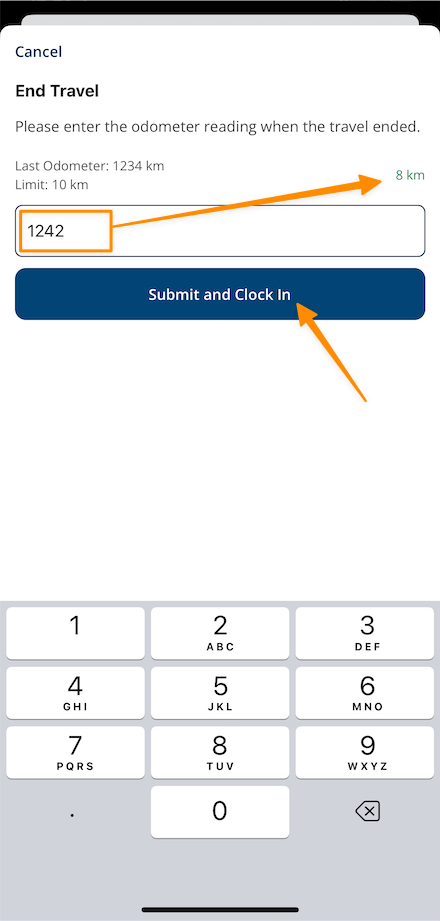
- Select End Travel.
- Enter your end odometer reading.
- Tap Submit
- If you are submitting "Travel To", you'll be asked to Submit and Clock In
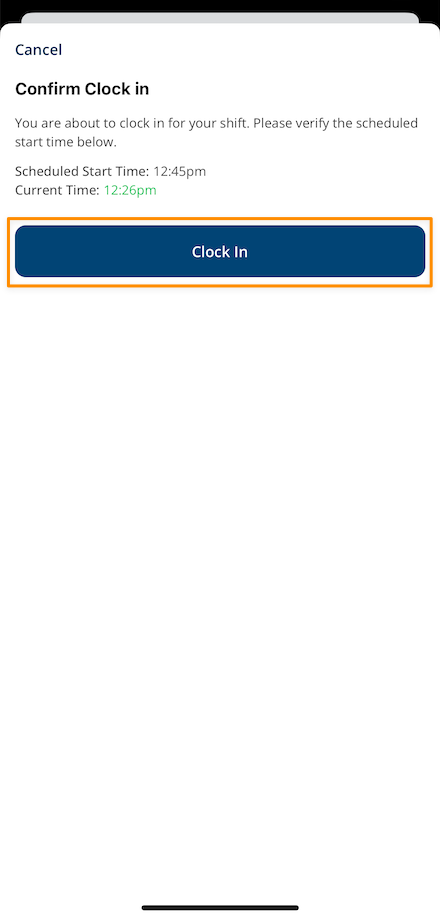
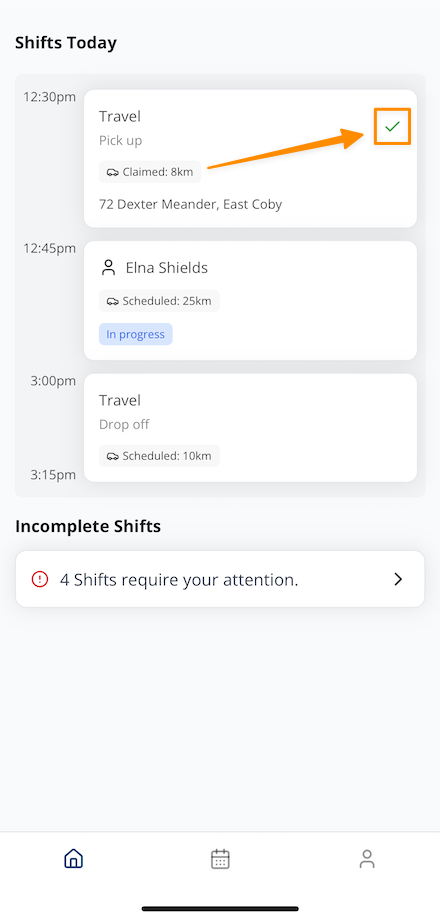
Confirmation
Once submitted correctly, a green tick will appear to confirm the travel record has been completed.
If you were submitting "Travel To" and selected the option to Submit and Clock In, your Shift will be automatically clocked in - and will display the "In Progress" tag.
Forgetting To Record Travel
If you attempt to Clock Out without recording or ending Travel, Astalty will highlight this in the Clock Out page.
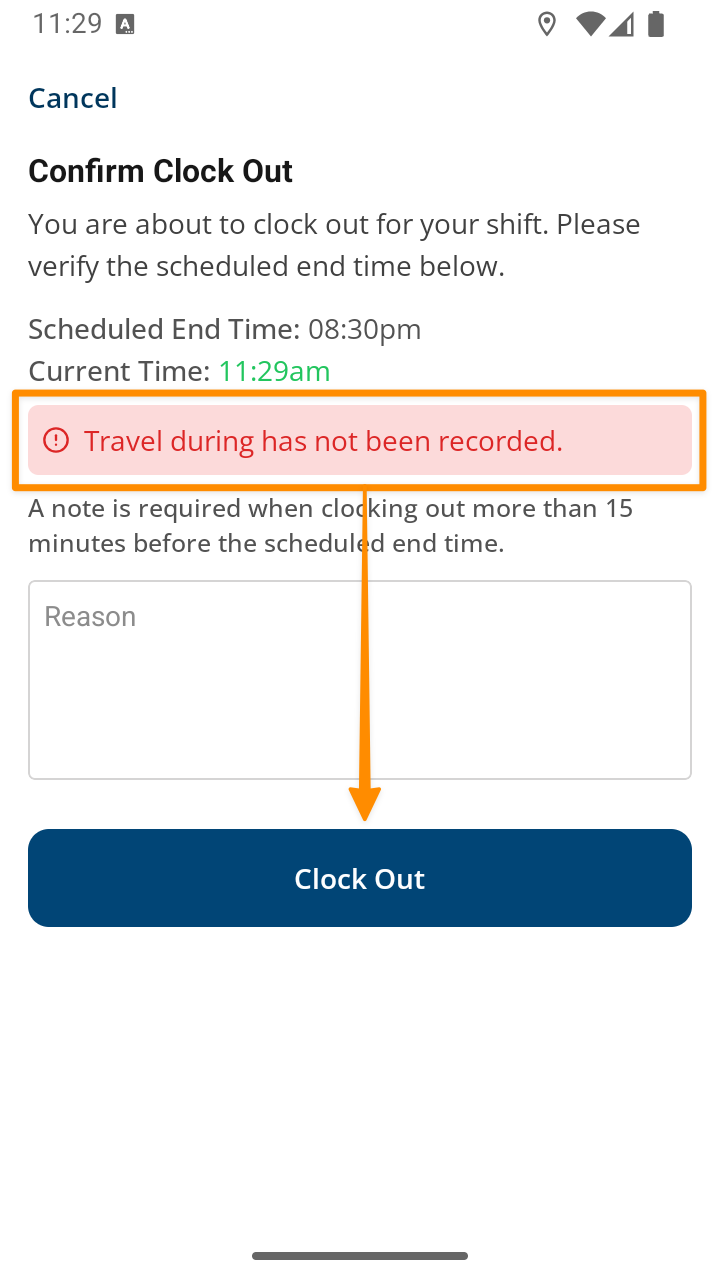
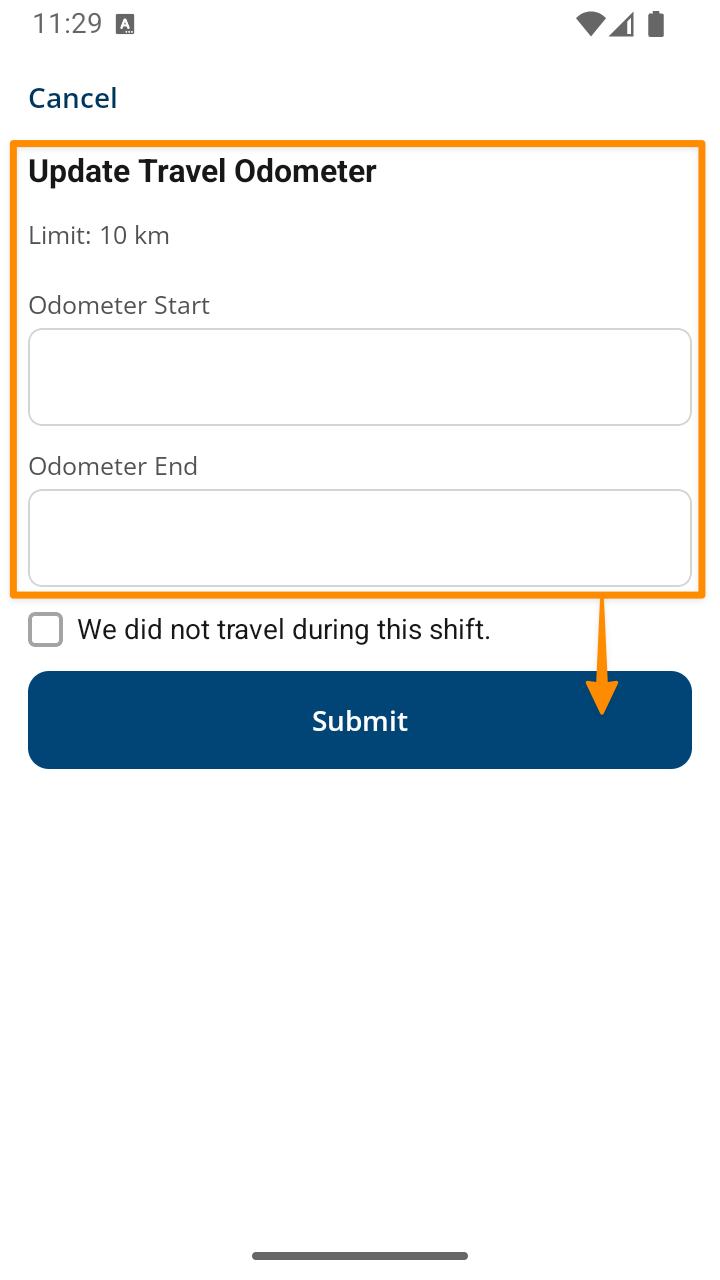
To confirm Clock Out, Astalty will navigate you to the Update Travel Odometer page where you can either:
- enter your odometer readings, or
- you can mark the travel as not occurring during this shift.
Report Unscheduled Travel
If your organisation has Allow Unscheduled Travel enabled, you can report travel that wasn't scheduled on a shift. Open the shift and tap Report Unscheduled Travel, then record your odometer readings the same way you would for any other travel.
By default, Report Unscheduled Travel is only available while you are clocked in to the shift.
Reporting Unscheduled Travel After Clocking Out
If your organisation has also enabled Allow Reporting Unscheduled Travel after Clocking Out (see Scheduling Settings), Report Unscheduled Travel stays available on a shift after you have clocked out. This means you can still log travel you forgot to record before ending the shift.
Recording Travel During in the App – Video Overview
The following video provides a walkthrough of how to record travel during a support.
Recording Travel To & From in the App – Video Overview
The following video provides a walkthrough of how to record travel to and from a support.