- Administration
- Settings
- Role Permissions
Role Permissions
Overview
The Role Permissions page (Settings > Permissions) lets you control which permissions each role, such as Manager or Team Member, has across your whole organisation. Turning a permission on or off here applies to every user with that role, so you can tailor what a role can do without editing each user one by one.
For the full default permissions matrix across all roles, including permissions that are not toggled on this page, see Roles & Permissions.
Every permission on this page also shows as read-only on each user's own Permissions tab in a role settings box. See Role Settings Shown on This Tab.
Who Can Manage Role Permissions
Opening Settings > Permissions requires Can view Settings. Editing the overrides also requires Can update Settings. These permissions are enabled for Admins by default, including the Account Owner, and can differ if an individual Admin's permissions have been changed.
Editing Role Permissions
- Go to Settings > Permissions.
- On the Role Permissions card, click Edit.
- Tick or untick the permissions you want to enable or disable for each role.
- Save your changes. The new permissions apply to all users with that role straight away.
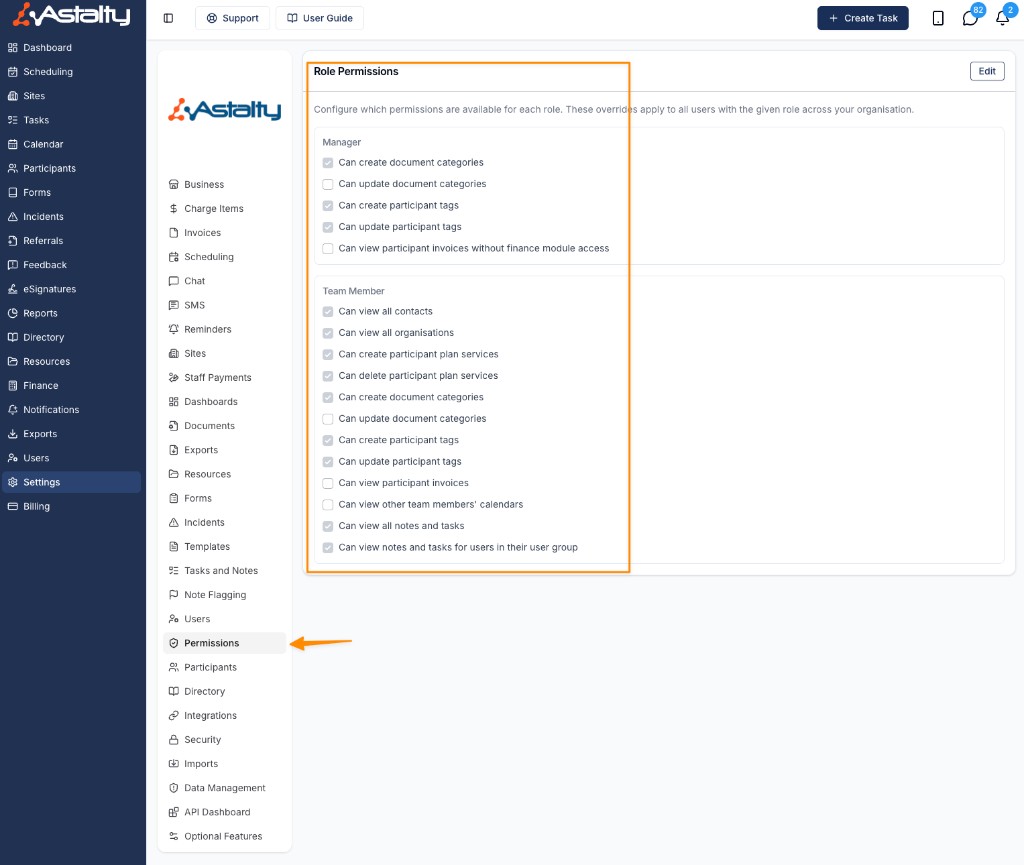
Available Role Permissions
The permissions you can configure depend on the role. The tables below show each configurable permission and whether it is enabled by default.
Manager
| Permission | Default |
|---|---|
| Can create document categories | On |
| Can update document categories | Off |
| Can create Participant tags | On |
| Can update Participant tags | On |
| Can view Participant invoices without finance module access | Off |
| Can view all notes and tasks | On |
| Can only view notes and tasks for users in their user groups | On |
Team Member
| Permission | Default |
|---|---|
| Can view all contacts | On |
| Can view all organisations | On |
| Can create Participant plan services | On |
| Can delete Participant plan services | On |
| Can create document categories | On |
| Can update document categories | Off |
| Can create Participant tags | On |
| Can update Participant tags | On |
| Can view Participant invoices | Off |
| Can view other team members' calendars | Off |
| Can view all notes and tasks | On |
| Can only view notes and tasks for users in their user groups | On |
Support Worker
| Permission | Default |
|---|---|
| Can view all case notes | On |
| Can only view case notes written by users in their user groups | On |
Notes & Tasks Visibility
Two permissions work together to control which Participant notes and tasks a user can see. They exist for Manager, Team Member and Support Worker. The Support Worker versions are labelled case notes, but they gate exactly the same records as the other roles' notes and tasks controls.
Because the limited option is based on shared User Groups, it helps to know which groups count.
Admins always see every note and task; the pair isn't configurable for them.
Which User Groups Count
Astalty has four kinds of User Groups (see the User Groups guide for how to create and manage them):
- All Users: everyone in your organisation, kept up to date automatically. This is ignored for notes and task visibility. Being in All Users with someone does not let you see their notes, otherwise everyone would see everything.
- Role-based groups: Admin, Manager, Team Member and Support Worker. Every user is automatically added to the group matching their role, and it updates whenever their role changes. These are ignored for notes and task visibility. Sharing the Team Member group with someone does not let you see their notes.
- Team groups: if you use Teams, Astalty creates a reserved group for each team and adds members automatically. A user can belong to only one team. These count.
- Custom groups: groups you create yourself, for example, "Support Coordinators" or "Finance". These count.
So for visibility, what matters is whether two people share at least one Team or Custom User Group. All Users and role-based groups are excluded.
How the Two Settings Work Together
"Can view all notes and tasks" always takes precedence over the more limited user-group option:
- Can view all notes and tasks - On (default): the user sees every note and task across the organisation. The user-group permission is ignored while this is on.
- Can view all notes and tasks - Off, user-group option - On: the user sees notes and tasks they created, plus those created by anyone who shares a Team or Custom User Group with them.
- Both Off: the user sees only the notes and tasks they created themselves.
On an individual user's Permissions tab this precedence is enforced in the form itself: while Can view all notes and tasks is ticked, the user-group option below it greys out and can't be changed. Untick the first option to make the second selectable. The role-wide screen on this page doesn't grey the options out, but the precedence still applies.
A Quick Example
Alice is in the Support Coordination custom group. Bob is in Support Coordination and Finance. Charlie is only in Finance.
With "Can view all notes and tasks" off and the user-group setting on, Alice sees her own notes and tasks plus Bob's because they share Support Coordination. She cannot see Charlie's because they have no Team or Custom User Group in common.
Related Role-Wide Settings
Chat messaging between roles, meaning which roles a Manager, Team Member or Support Worker can start conversations with, is also configured role-wide. These controls are under Settings > Chat rather than on this page.
Related Guides
- Roles & Permissions: default permissions matrix for every role
- Updating Roles and Permissions: change permissions for one user
- User Groups: groups used by notes and tasks visibility