- Day-to-Day
- Chat Configuration
Chat Configuration
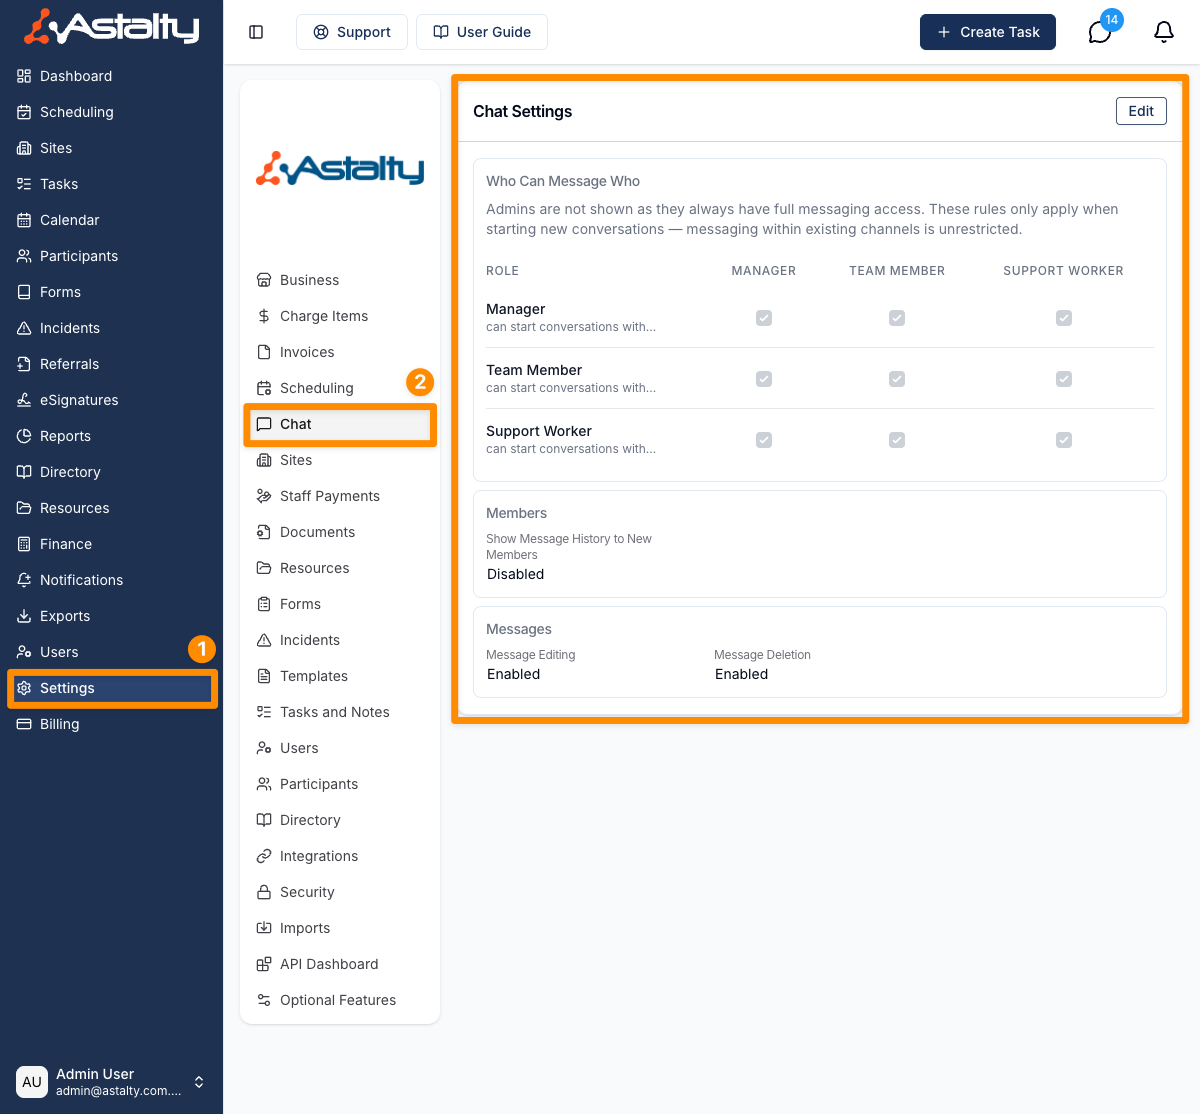
The Chat Settings page allows administrators to configure how Chat behaves across your organisation.
Accessing Chat Settings
Navigate to Settings in the left-hand menu, then select Chat. You must have the appropriate administrative permissions to access this page.
Available Settings
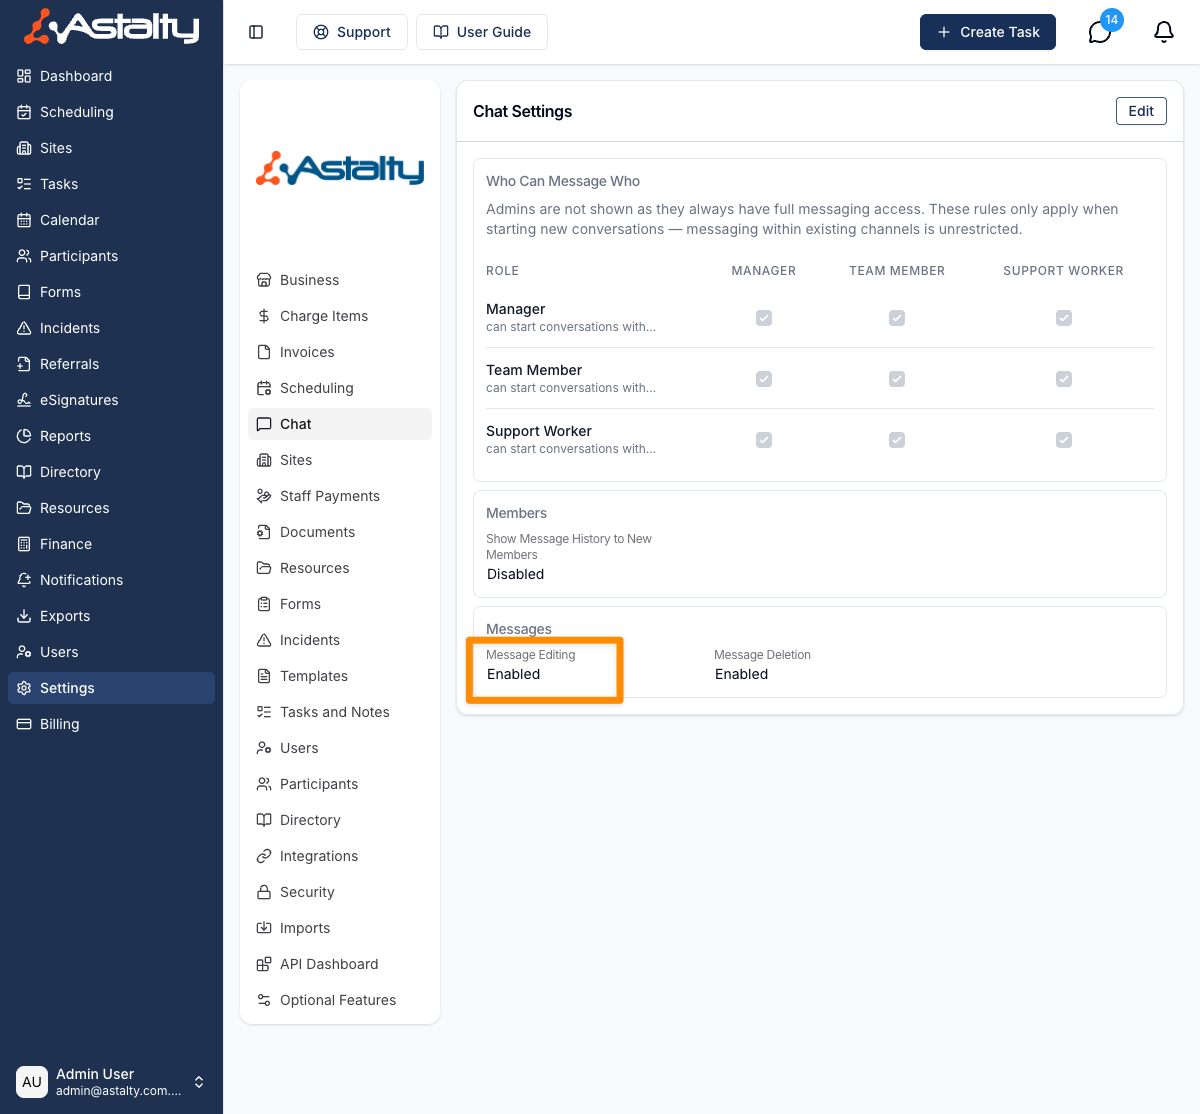
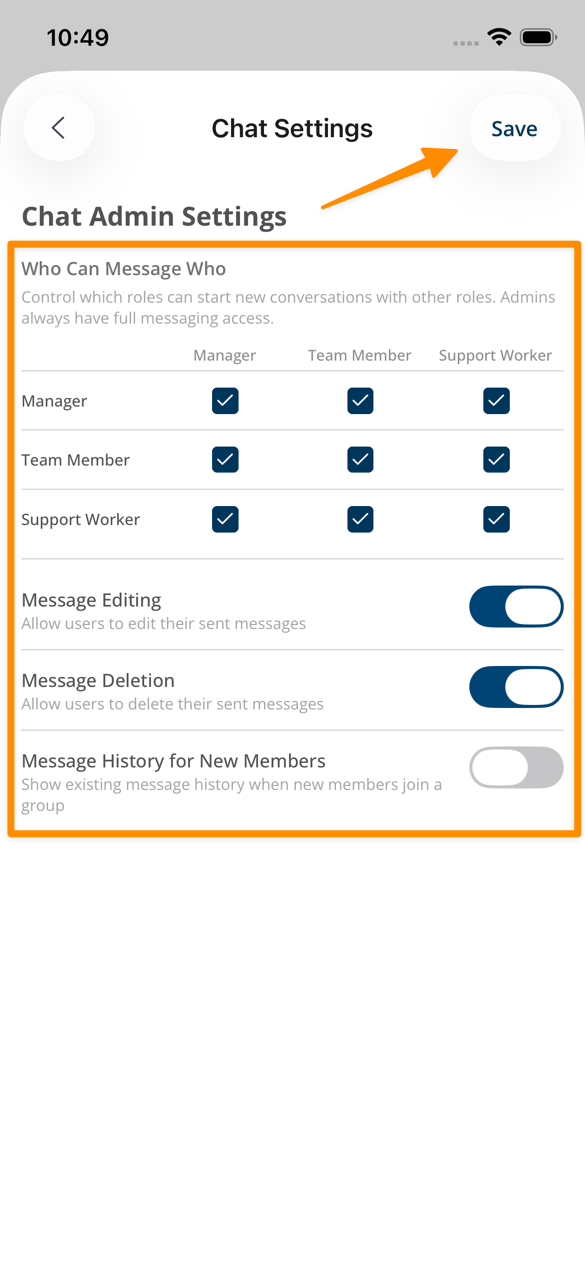
Allow Message Editing
When enabled, users with the appropriate permission can edit their own messages after they have been sent. Edited messages will display an "edited" indicator.
When disabled, no users will be able to edit messages, regardless of their individual permissions.
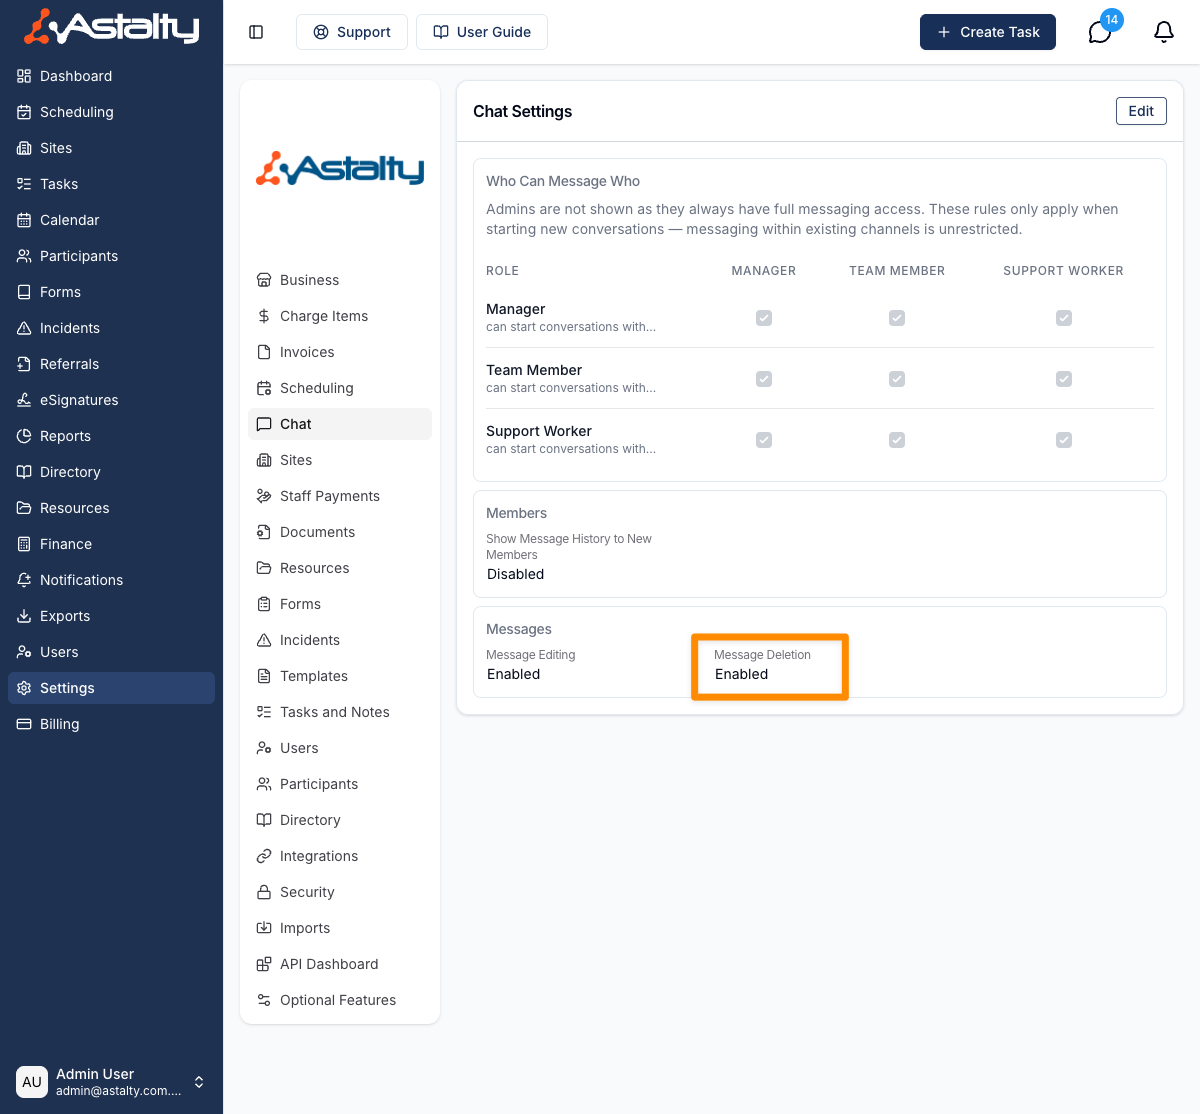
Allow Message Deletion
When enabled, users with the appropriate permission can delete messages. Depending on their permission level, users may be able to delete only their own messages or any message in the channel.
When disabled, no users will be able to delete messages, regardless of their individual permissions.
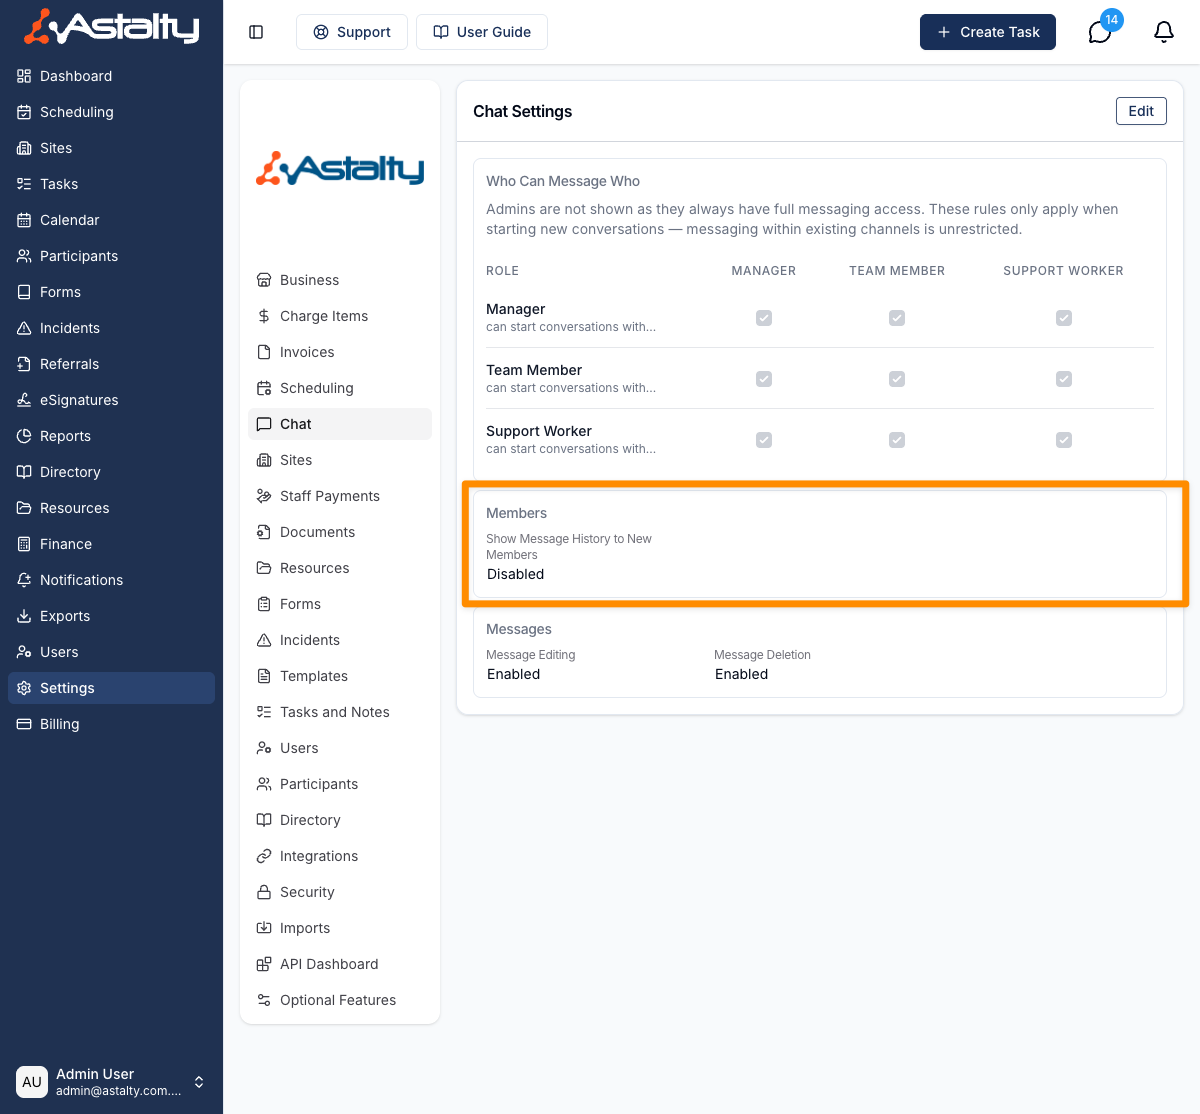
Show Message History to New Members
This setting controls whether new members added to a group channel can see messages sent before they joined.
- Enabled: New members can see the full conversation history
- Disabled: New members will only see messages sent after they were added
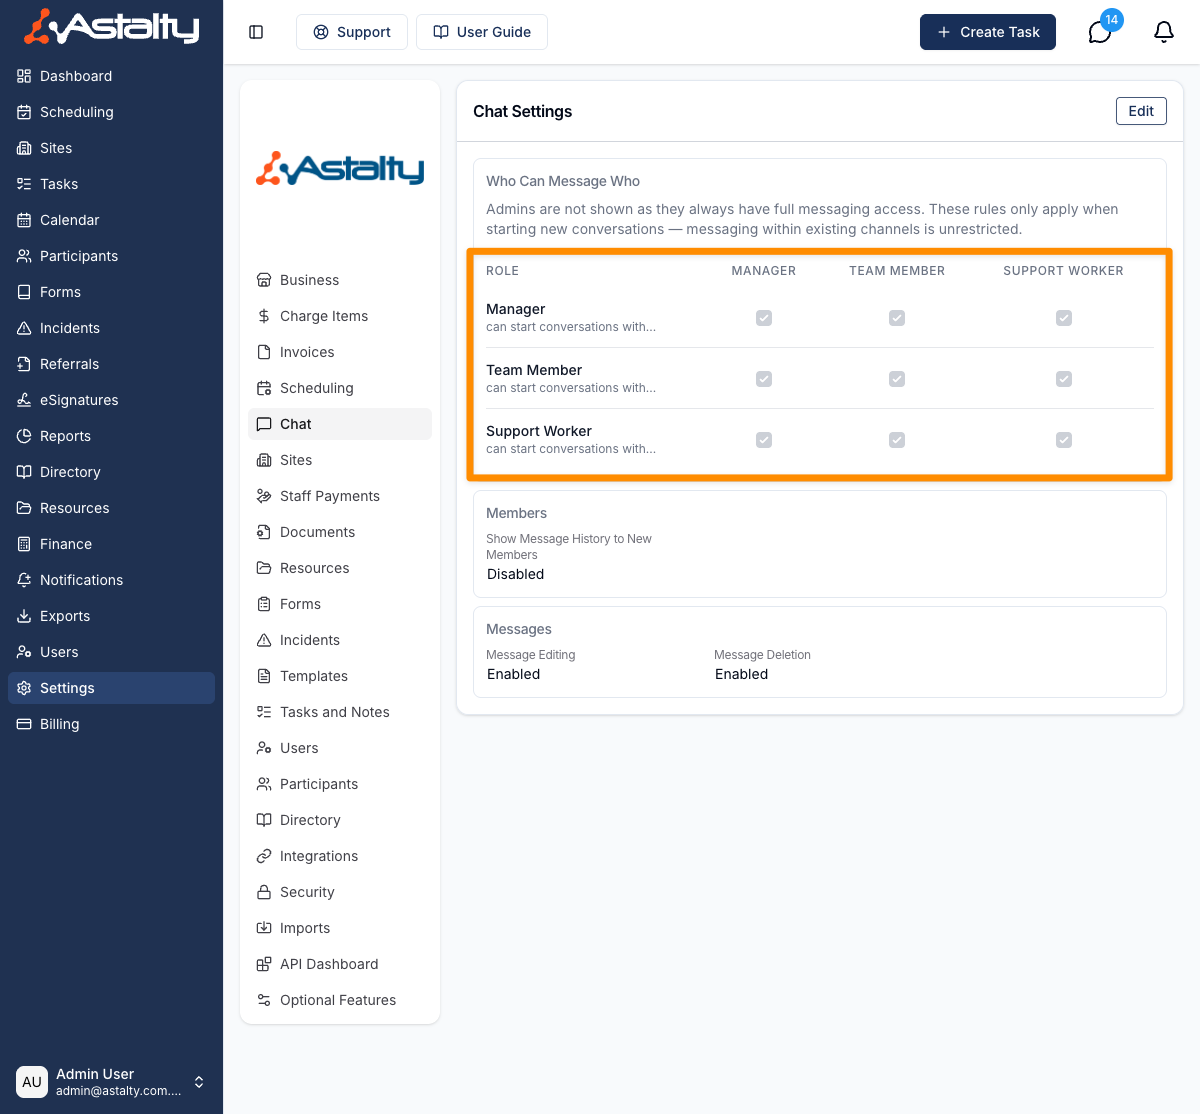
Conversation Permissions
Chat Settings also includes permission options for starting new conversations. These rules apply when someone creates a new chat; once a person is already in a channel, they can continue messaging in that channel.
- Managers
- Team Members
- Support Workers
Admins are not listed as a source role because they always have full messaging access.
Who Can Message Who
Use the Who Can Message Who matrix to choose which roles Managers, Team Members, and Support Workers can start conversations with.
Allowed Recipients (Exceptions)
Use Allowed Recipients (Exceptions) to choose specific people each role can always direct message, even if the matrix would otherwise block that conversation.
Allowed User Groups (Exceptions)
Use Allowed User Groups (Exceptions) to choose which User Groups each role can start chats with.
When a role is allowed to start chats with a User Group, users in that role can select the group when creating a new conversation. Everyone in the selected User Group is added to the chat automatically, even if the role-to-role matrix would otherwise block messaging some members of that group.
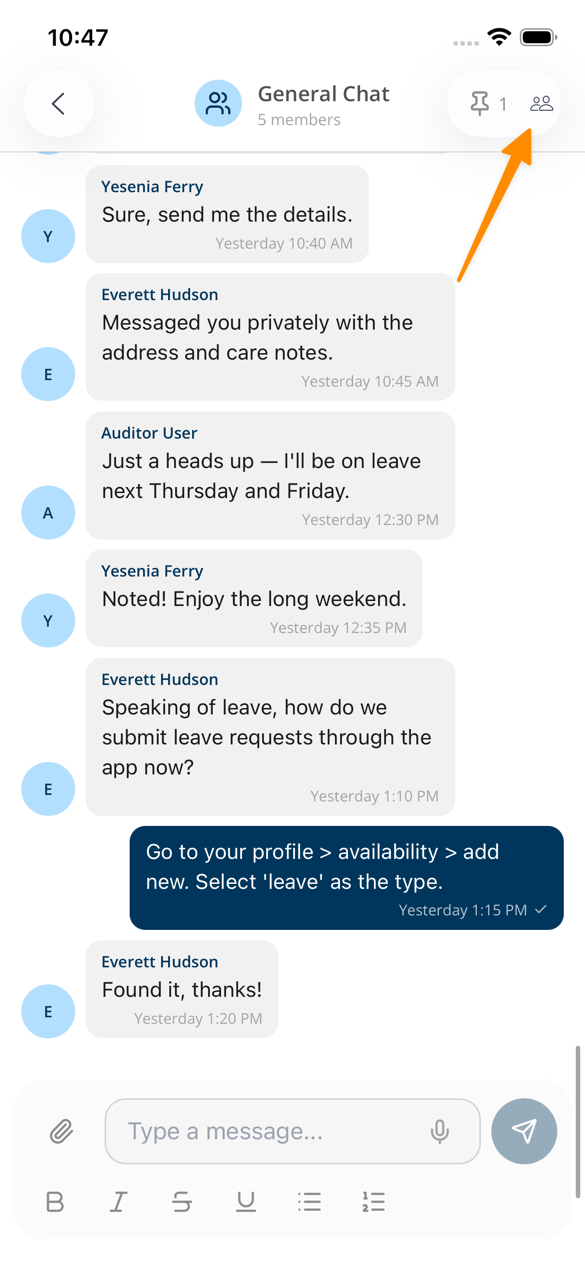
Managing Chat in the App
In addition to the standard actions available to Support Workers in the Chat in the App guide, Admin users have access to additional functions within the app.
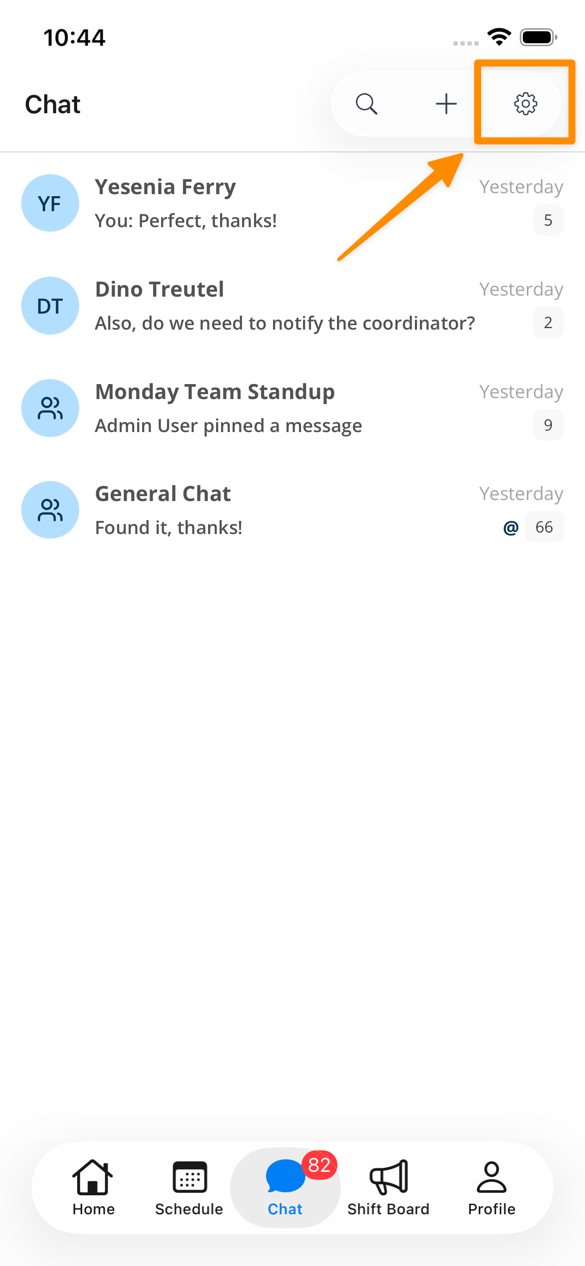
Chat Settings
To adjust settings within the app, tap the Settings icon in the top-right corner of the screen.
From here, you can update your settings in the same way as in the browser-based version of Astalty. Be sure to tap Save to apply any changes.
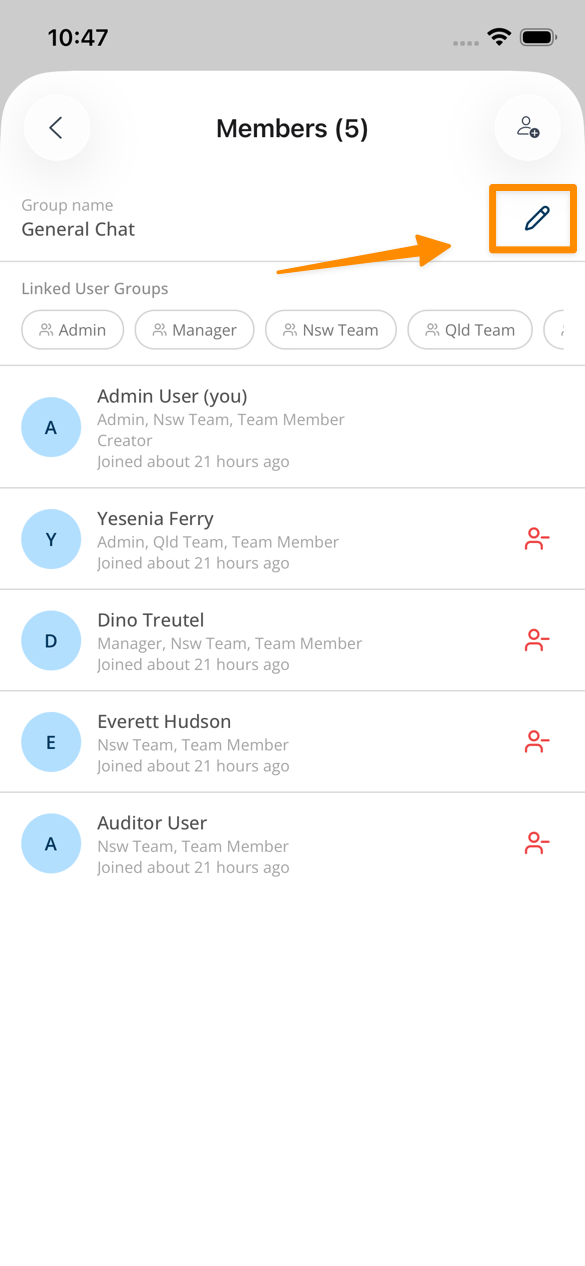
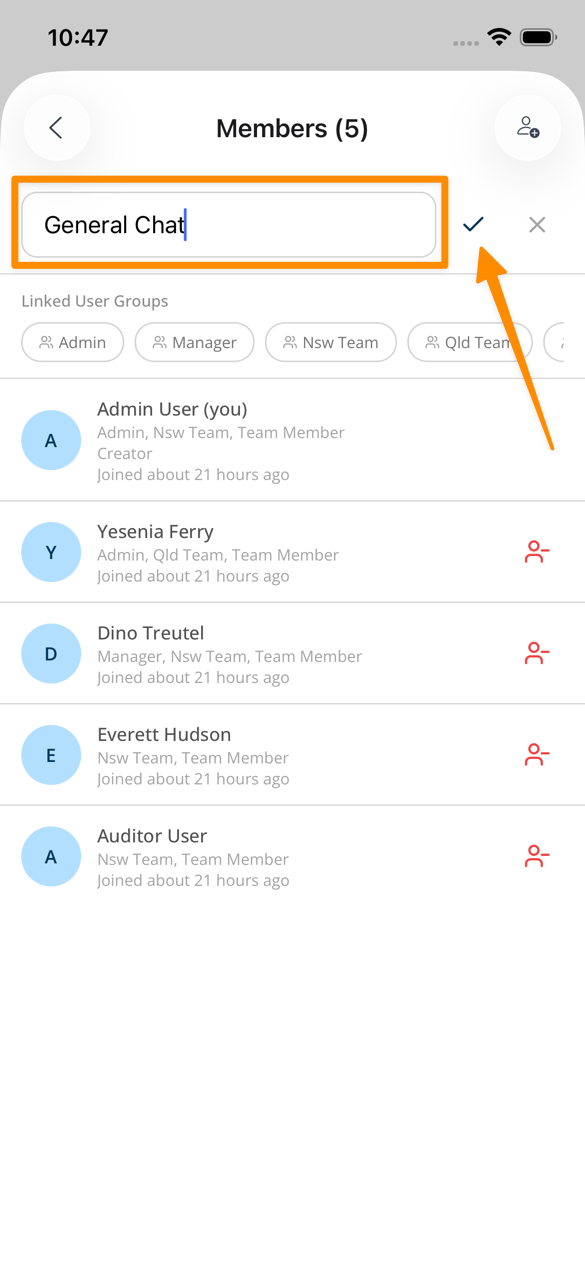
Editing Groups
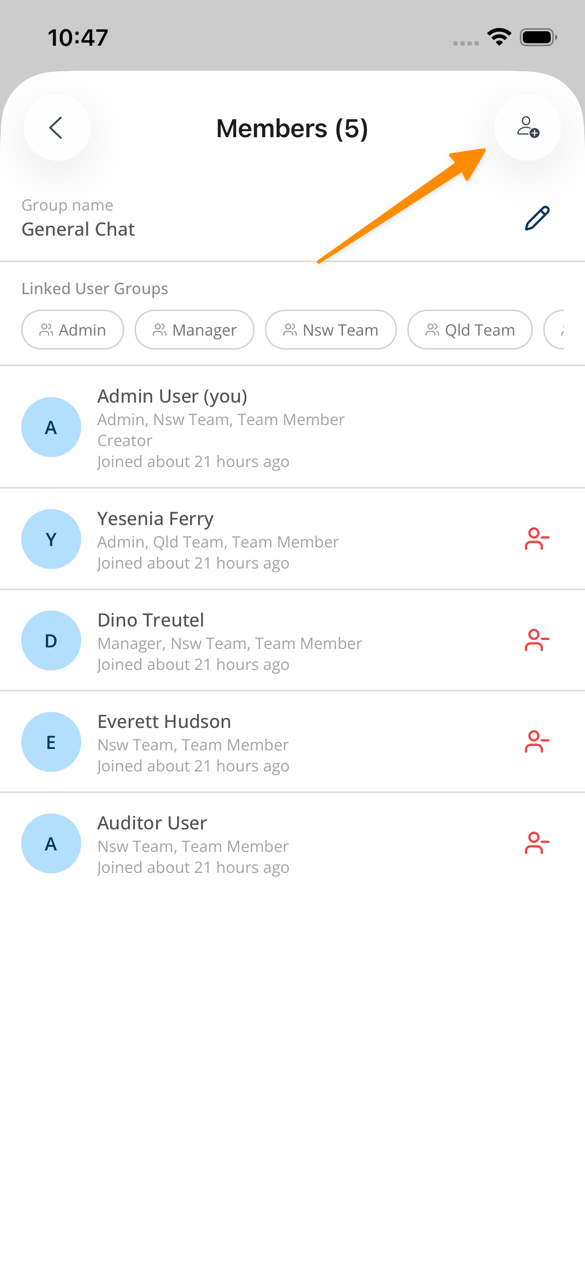
Within the app, Admin users can update Group Chats, including the group name and members.
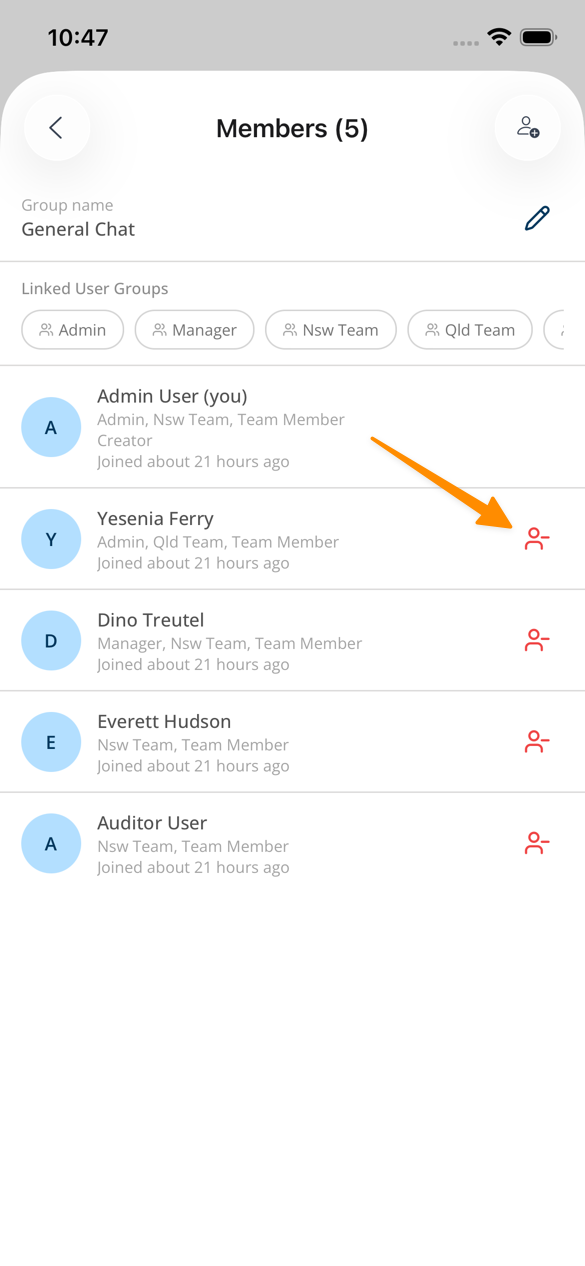
Tap the Group Members icon at the top of the screen. From here, you can:
- Tap the Edit icon to update the group name
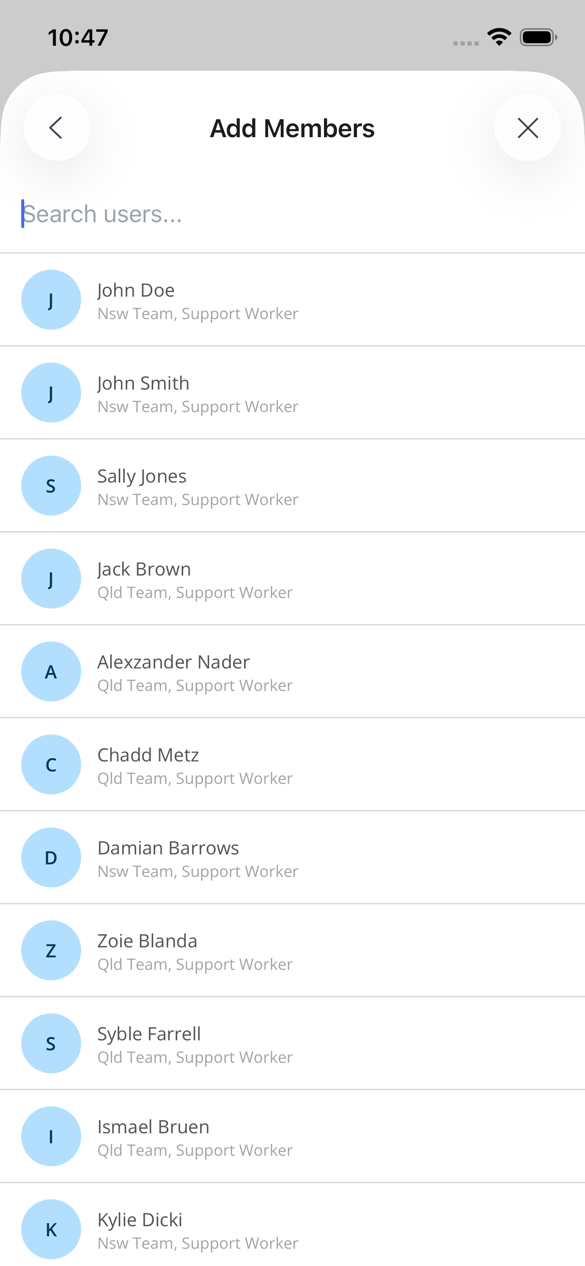
- Tap the Add Member icon to include additional members
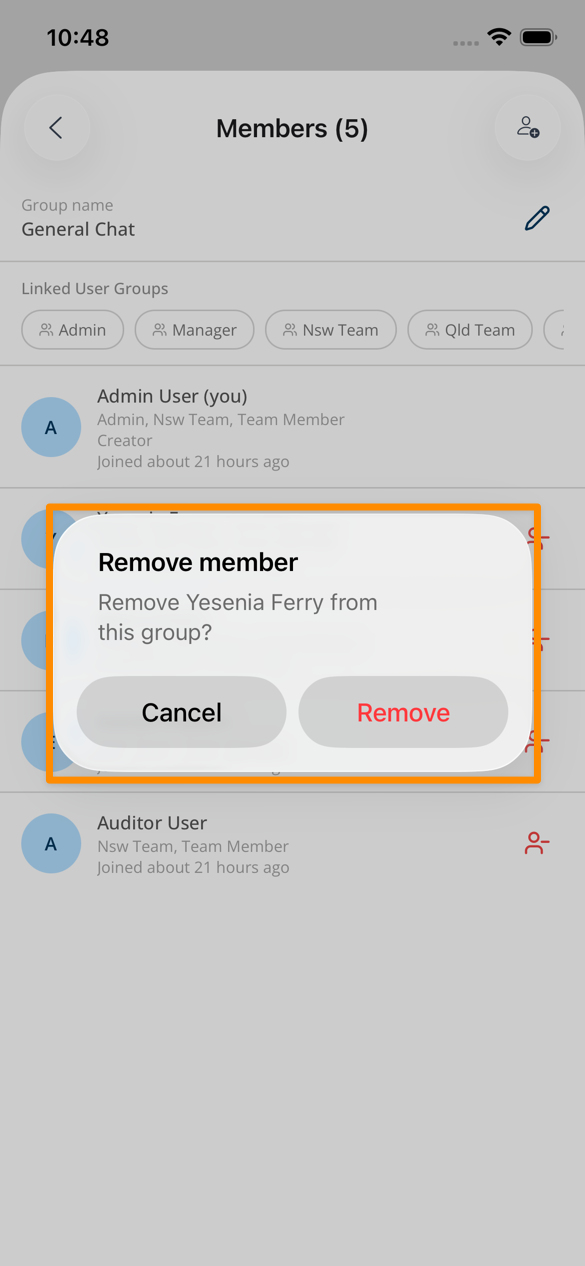
- Tap the icon next to a member’s name to remove them from the group
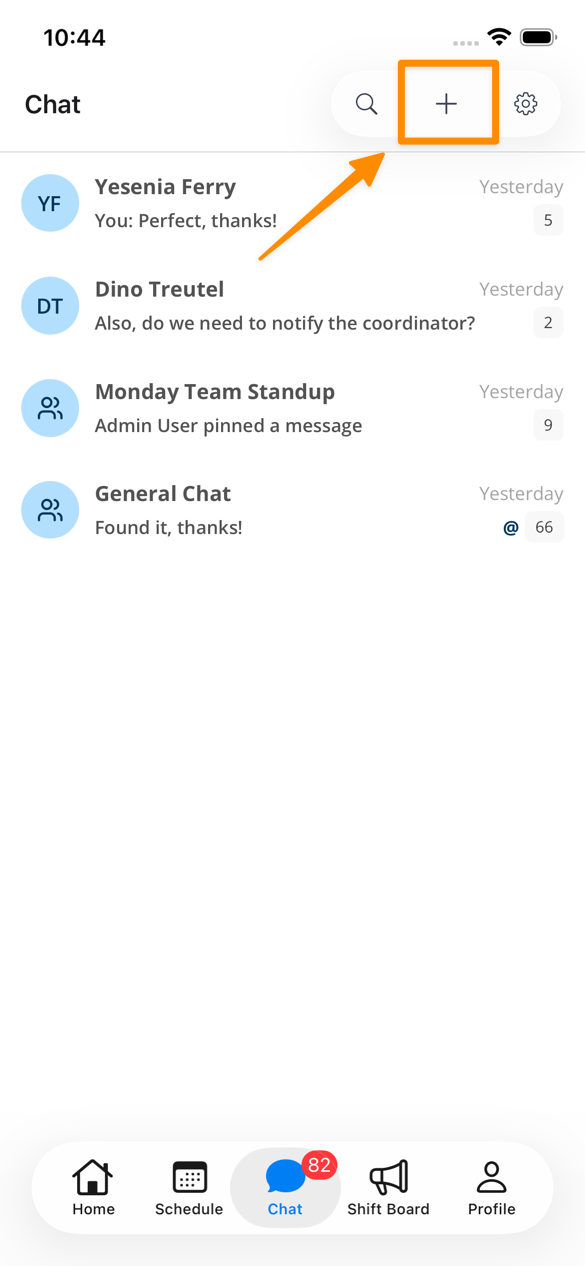
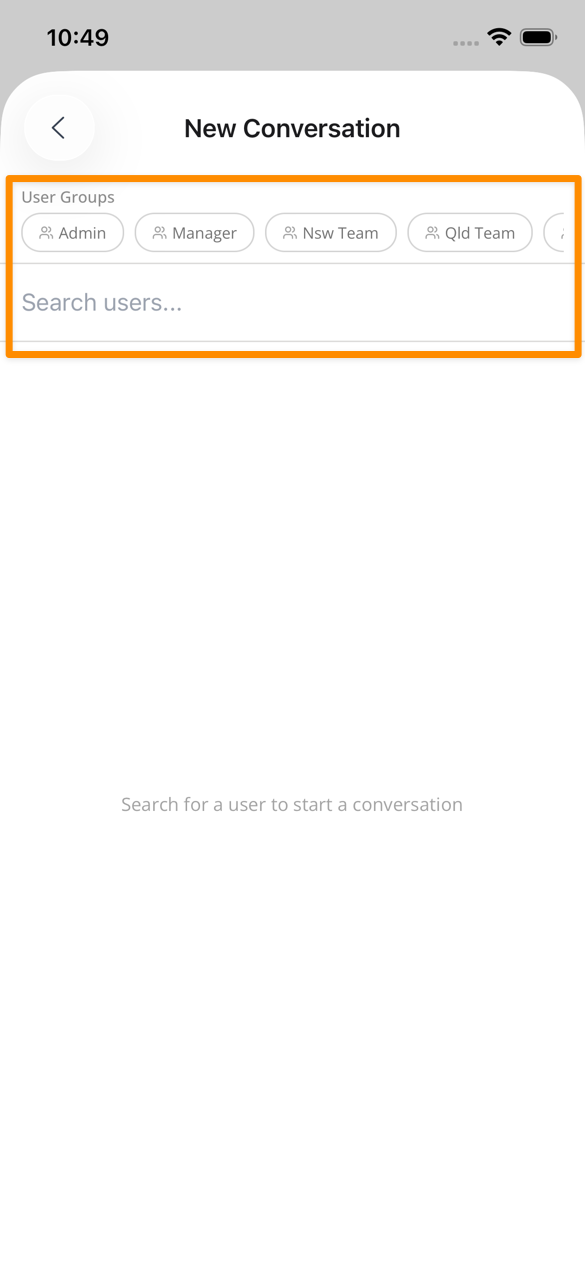
Creating Chats
Tap the + icon in the top-right corner of the screen to create a new Chat Group. You can then choose to add User Groups within Astalty as well as individual users.