- Day-to-Day
- Group Channels
Group Channels
Group channels allow multiple team members to communicate together in a single, named conversation. Group channels are ideal for team discussions, project-based communication, or any situation where more than two people need to collaborate.

Creating a Group Channel
To create a new group channel:
- Navigate to Chat
- Click the New Message button (compose icon) at the top of the channel list
- Enter a Channel Name (e.g., "SIL House A" or "Monday Team Meeting")
- Add members to the channel by searching for and selecting team members
- Optionally, link one or more User Groups to automatically include all members of those groups
- Click Create to create the channel
Once the channel is created, a system message will appear confirming the channel has been created, and all added members will see the channel in their channel list.
Creating a Separate Group with the Same Members
If you start a group chat with a set of members (or a linked User Group) that exactly matches an existing group channel, Astalty asks whether you want to reuse the existing conversation or start a fresh one:
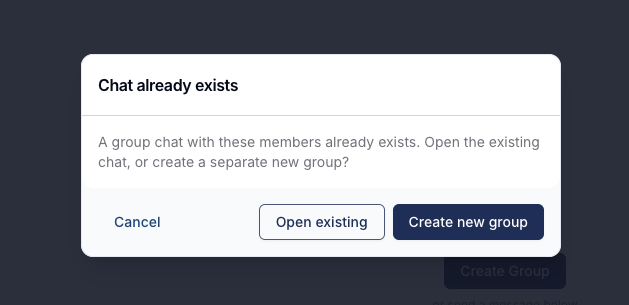
- Open existing — takes you to the group channel that already contains those members.
- Create new group — creates a separate, brand-new group channel with the same members, kept independent of the existing one.
- Cancel — closes the prompt without creating or opening anything, so you can adjust your selection.
This lets you keep several distinct group chats for the same people — for example, giving each participant their own dedicated conversation even when the same support workers appear in more than one group.
Updating a Group Channel Name
To update the name of an existing group channel:
- Open the group channel
- Click on the channel name in the header
- Enter the new name
- Confirm the change
A system message will be displayed in the channel indicating that the channel name has been updated.
Managing Channel Members
Group channels support flexible membership management. You can add or remove individual members, or link User Groups for automatic membership syncing.
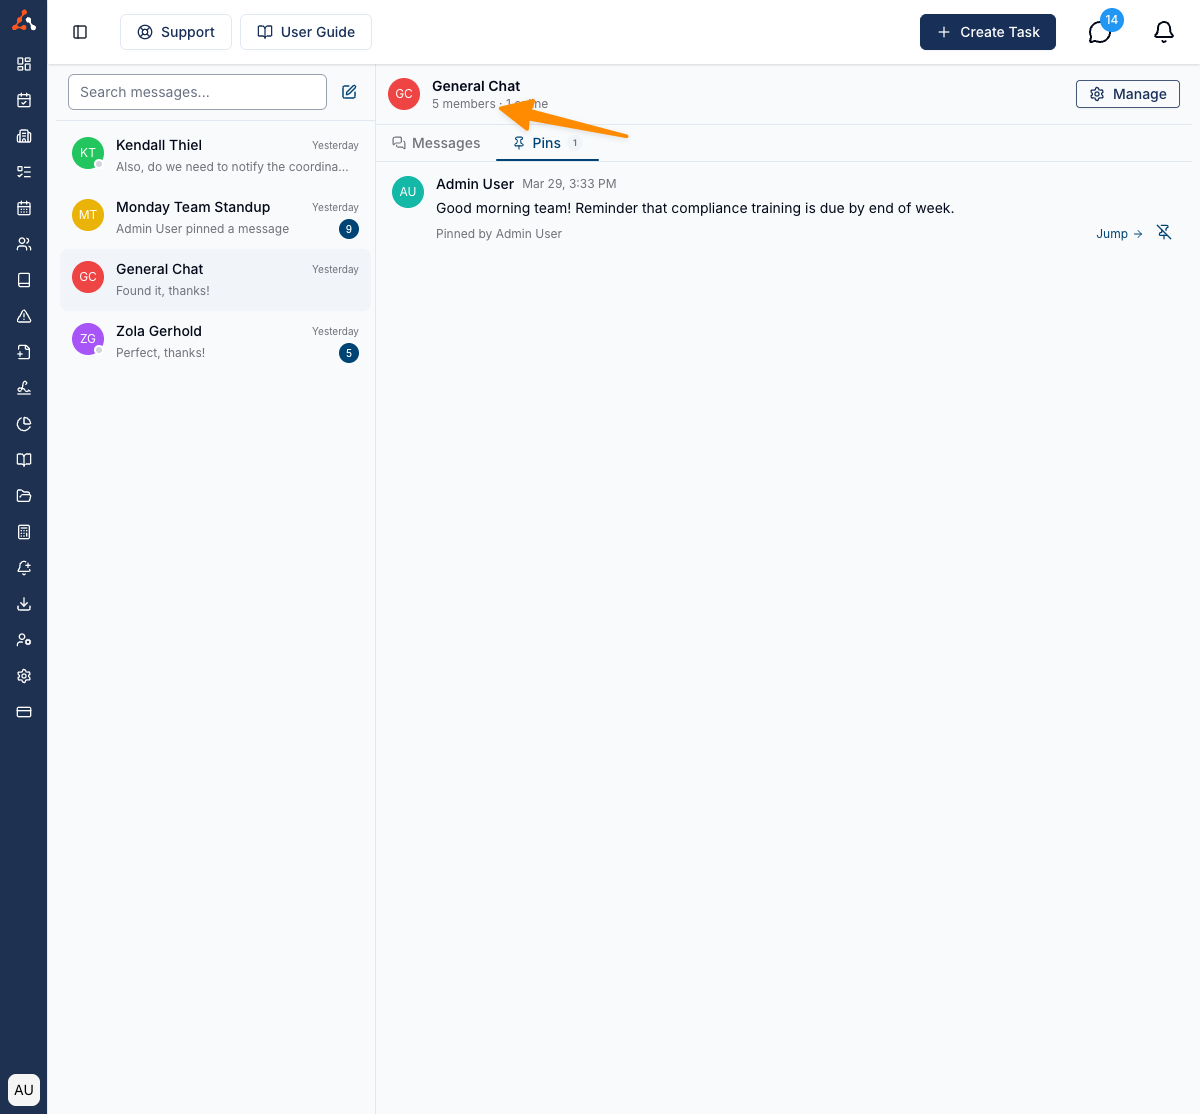
Viewing Channel Members
To view the current members of a group channel:
- Open the group channel
- Click the Members option in the channel header
This will open a dialog showing all current members of the channel.
Adding Members
To add a member to a group channel:
- Open the group channel
- Click the Members option in the channel header
- Click Add Members
- Search for and select the team member(s) you would like to add
- Confirm your selection
A system message will appear in the channel for each member that is added. This requires the Manage Channel Members permission.
Removing Members
To remove a member from a group channel:
- Open the group channel
- Click the Members option in the channel header
- Find the member you wish to remove
- Click the remove option next to their name
- Confirm the removal
A system message will appear indicating that the member has been removed. The removed member will no longer see the channel in their channel list.
Linking User Groups
You can link one or more User Groups to a group channel. When a User Group is linked:
- All current members of the User Group are automatically added to the channel
- When new users are added to the User Group in the future, they will automatically be added to the channel
- When users are removed from the User Group, they will automatically be removed from the channel (unless they were also added manually or are covered by another linked User Group)
To link a User Group:
- Open the group channel
- Click the Members option in the channel header
- Select the User Groups tab or section
- Search for and select the User Group(s) you would like to link
- Confirm your selection
A system message will appear confirming the User Group has been linked.
Unlinking User Groups
To unlink a User Group from a channel:
- Open the group channel
- Click the Members option in the channel header
- Navigate to the User Groups section
- Click the remove or unlink option next to the User Group
- Confirm the removal
When a User Group is unlinked, members who were added solely through that User Group will be removed. Members who were also manually added, or who are covered by another linked User Group, will remain.
Read-Only Channels
A read-only channel lets everyone see the conversation while preventing members from posting — ideal for announcement-style channels where only certain people should be able to send messages. You can keep a channel read-only for everyone while still allowing specific members to post.
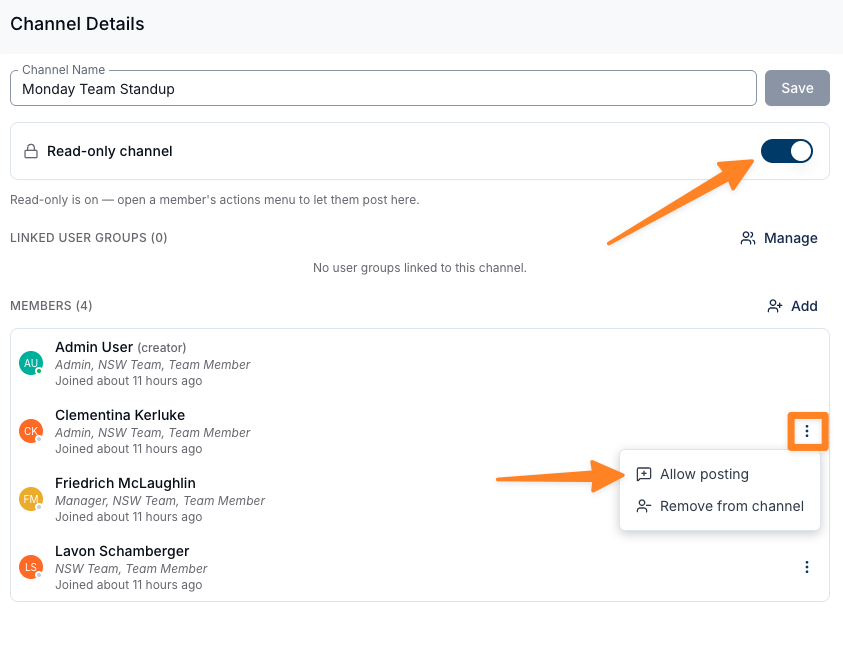
Making a Channel Read-Only
- Open the group channel
- Click Actions > Manage Channel
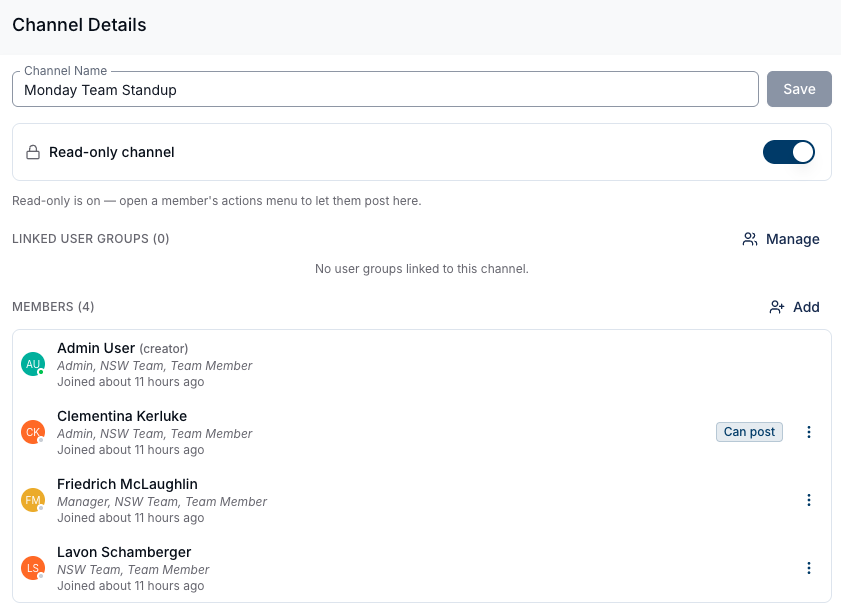
- In the Channel Details panel, turn on the Read-only channel toggle
Once read-only is on, members can still read the channel but cannot post, unless you specifically allow them to.
Allowing a Member to Post
With the channel set to read-only:
- In the Channel Details panel, find the member in the Members list
- Click the three dots (actions menu) next to their name
- Click Allow posting
To remove a member's posting permission, open the same actions menu and select Stop allowing posting. They will keep read access but will no longer be able to post.
Seeing Who Can Post
Members who have been granted posting permission display a Can post chip next to their name in the Channel Details panel, making it easy to see who can post in a read-only channel.
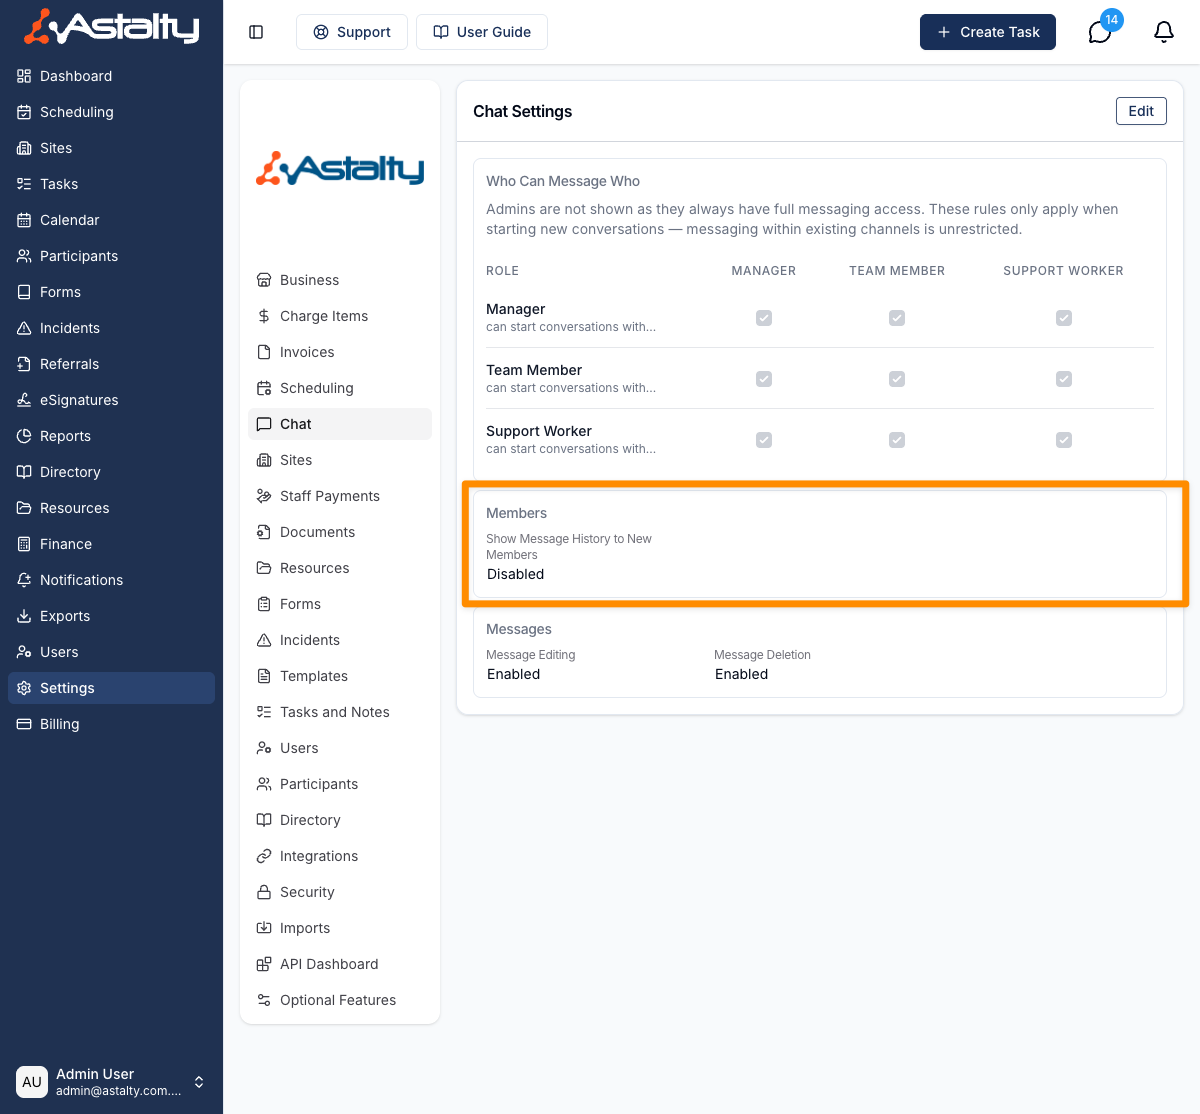
Message History for New Members
When a new member is added to a group channel, whether they can see messages sent before they joined depends on the Show Message History to New Members setting in your Chat Configuration. If enabled, new members can see the full history. If disabled, they will only see messages sent after they joined.