- Forms & Quality
- Templates
- Formatting Tables
Formatting Tables
Astalty's text editor builds tables, and then lets you format them — shade cells, align the text inside them, merge and split cells, and switch header rows and columns on and off.
Overview
Tables live in Astalty's full text editor, which is the editor you get when you write the content of a Document Template, edit a generated document before finalising it, write a note, or write a Resource. Two toolbar buttons control them:
- The table icon adds a table while your cursor sits outside one, and turns into the table options menu as soon as your cursor is inside a table.
- The paint bucket icon opens cell formatting — text alignment and cell fill. It appears only while your cursor is inside a table.
Shorter fields use a cut-down editor with no table controls at all — comments, email messages, alerts and similar fields fall into that group.
Adding a Table
- Put your cursor where the table should sit.
- Select the table icon in the toolbar.
- Move across the grid to size the table, then select to insert it.
A table can be inserted at up to five rows by five columns, and its first row is created as a header row. Add rows and columns afterwards from the table options menu, and drag a cell border sideways to change how wide a column is.
Table Options
With your cursor inside a table, the table icon opens the structural options.
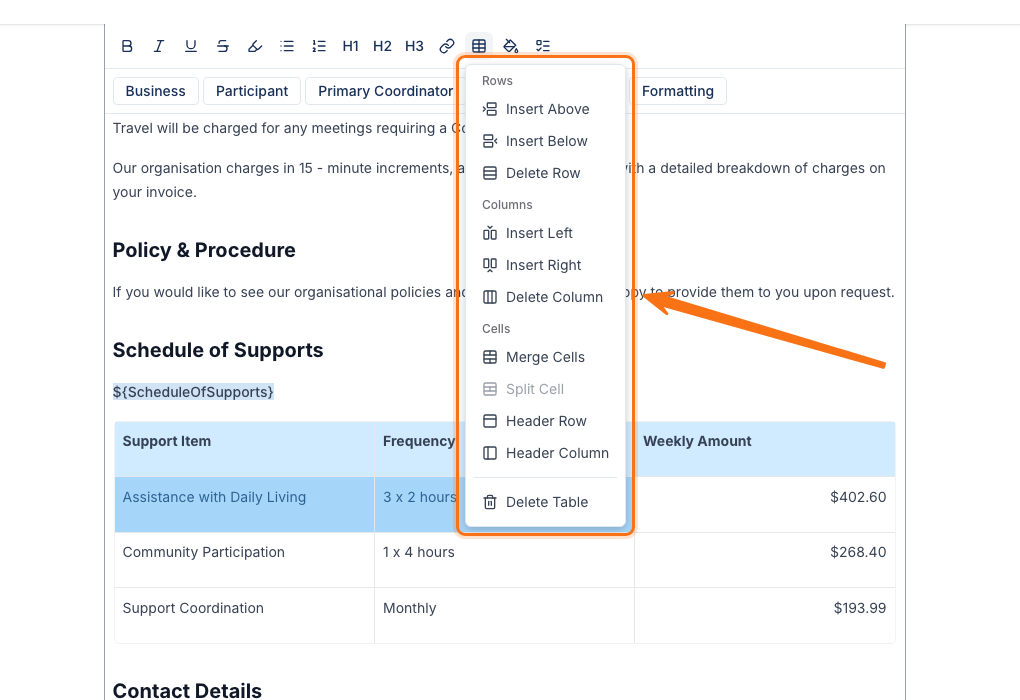
| Option | What it does |
|---|---|
| Insert Above | Adds a row above the row your cursor is in |
| Insert Below | Adds a row below the row your cursor is in |
| Delete Row | Removes the row your cursor is in |
| Insert Left | Adds a column to the left of the column your cursor is in |
| Insert Right | Adds a column to the right of the column your cursor is in |
| Delete Column | Removes the column your cursor is in |
| Merge Cells | Combines the cells you have selected into one |
| Split Cell | Breaks a merged cell back into separate cells |
| Header Row | Turns the first row of the table into a header row, or back into an ordinary row |
| Header Column | Turns the first column of the table into a header column, or back into an ordinary column |
| Delete Table | Removes the whole table |
An option is greyed out when it cannot be used from where your cursor is — Merge Cells needs more than one cell selected, and Split Cell only works on a cell that was merged earlier.
To work with more than one cell at a time, select inside the first cell and drag across the rest.
Shading Cells and Aligning Text
The paint bucket icon opens Text alignment and Cell fill for the cells you have selected.
- Select the cell you want to change, or drag across several cells.
- Select the paint bucket icon in the toolbar.
- Under Text alignment, choose left, centre or right.
- Under Cell fill, choose one of the colours.
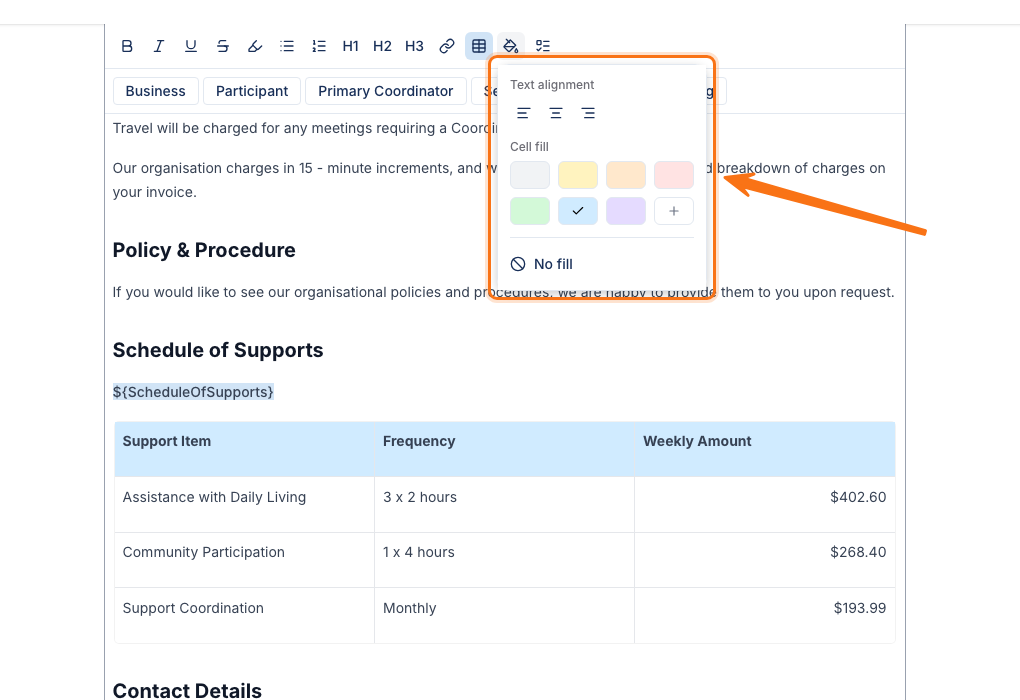
Cell fill offers seven colours — grey, yellow, orange, red, green, blue and purple. The + swatch opens your device's colour picker if you need to match an organisational colour exactly, and No fill clears the shading again.
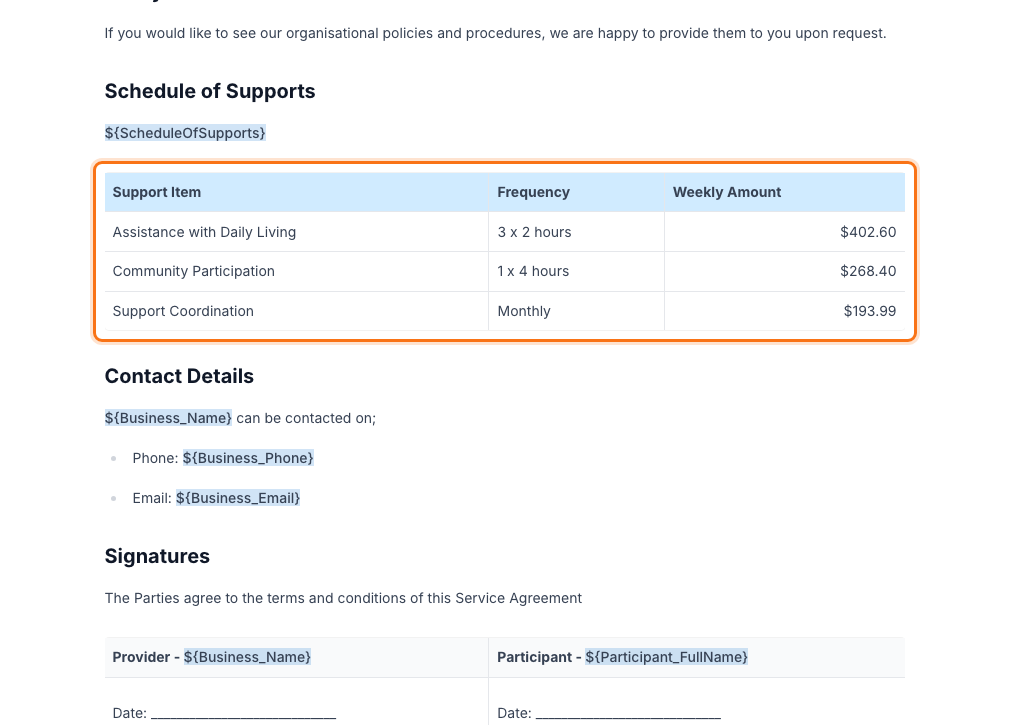
Both settings apply to every cell in your selection, so a whole header row can be shaded in one go.
Things to Keep in Mind
- Shading and alignment save with the content, so they carry through to the PDF generated from a Document Template as well as to the note or Resource on screen.
- Tables pasted in from Excel or Word keep the cell shading they arrive with. Older templates built from a pasted table can therefore look different the next time you open them, because Astalty used to discard those colours.
- Merge Cells keeps the fill from the top-left cell of your selection and discards the others.
- Split Cell copies the merged cell's fill to every cell it produces, so clear any fill you do not want afterwards.