- Administration
- Managing Charge Items
- Creating & Updating Charge Items
Creating & Updating Charge Items
Create, update or clone a Charge Item from Charge Items settings. See the Overview for how items connect to services.
Creating and updating standalone Charge Items requires an Admin role and the corresponding Charge Item permission.
To manage Charge Items, navigate to the Charge Items settings page.
Creating a Charge Item
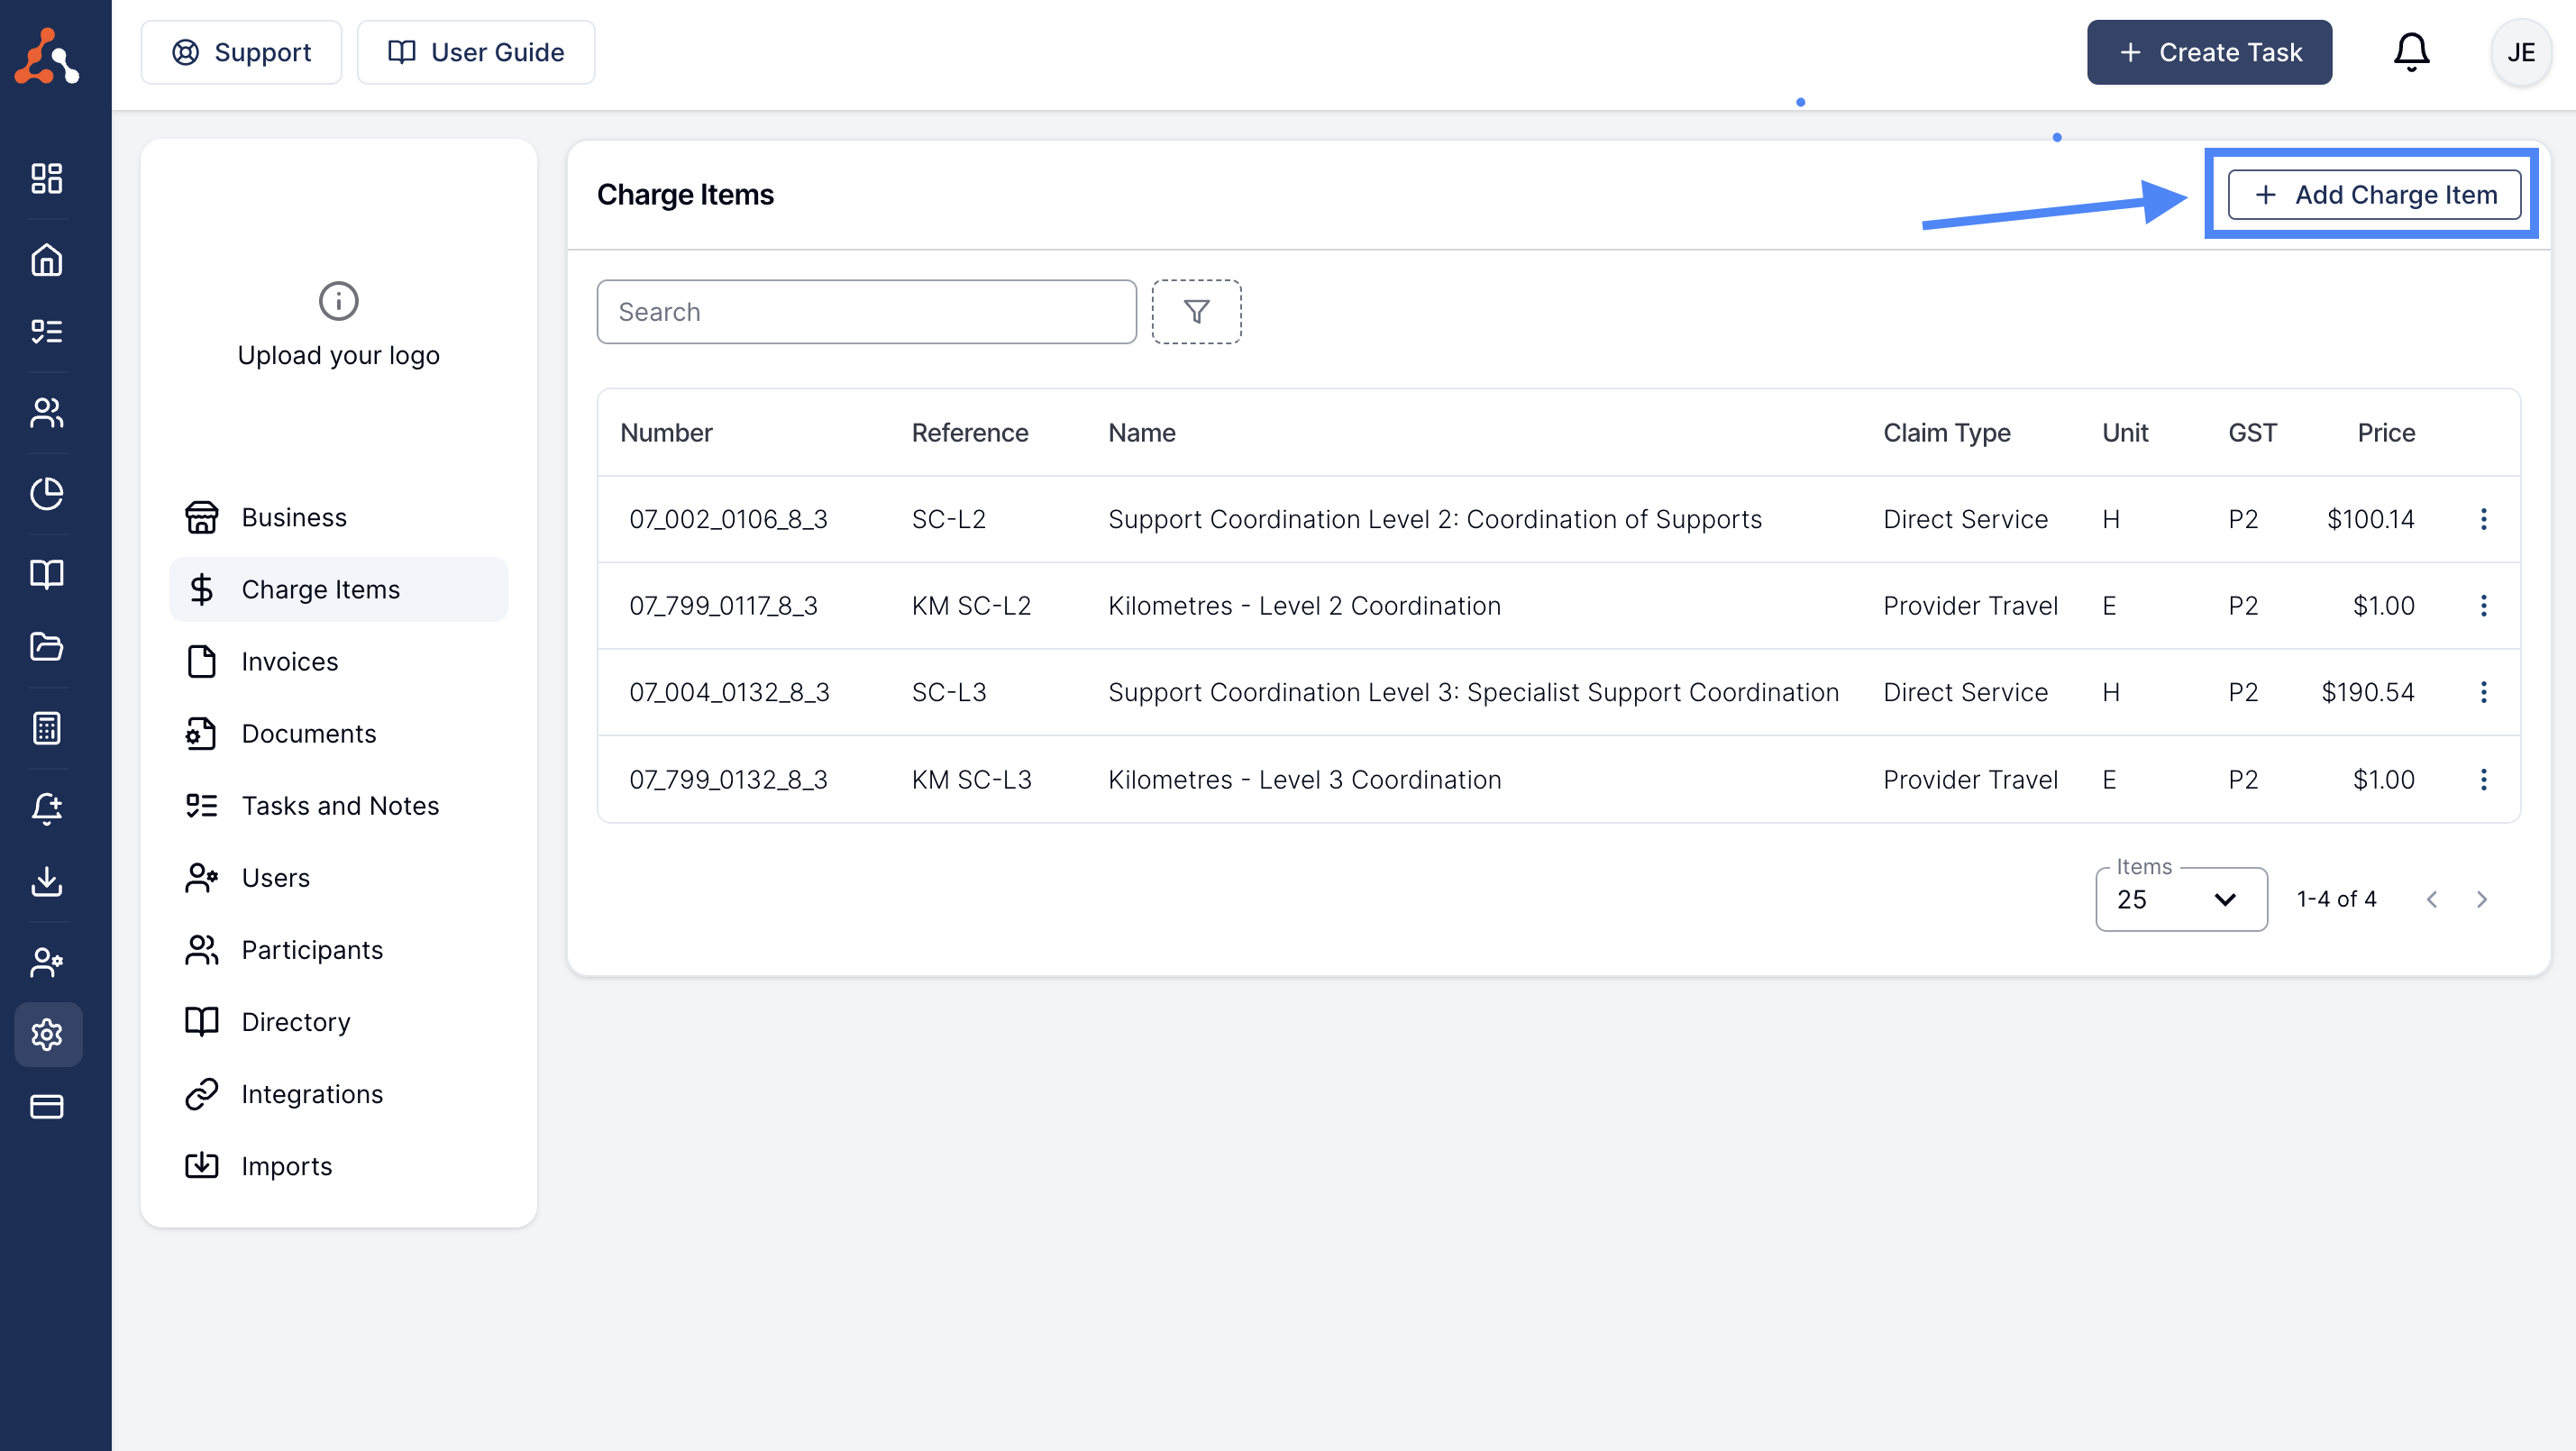
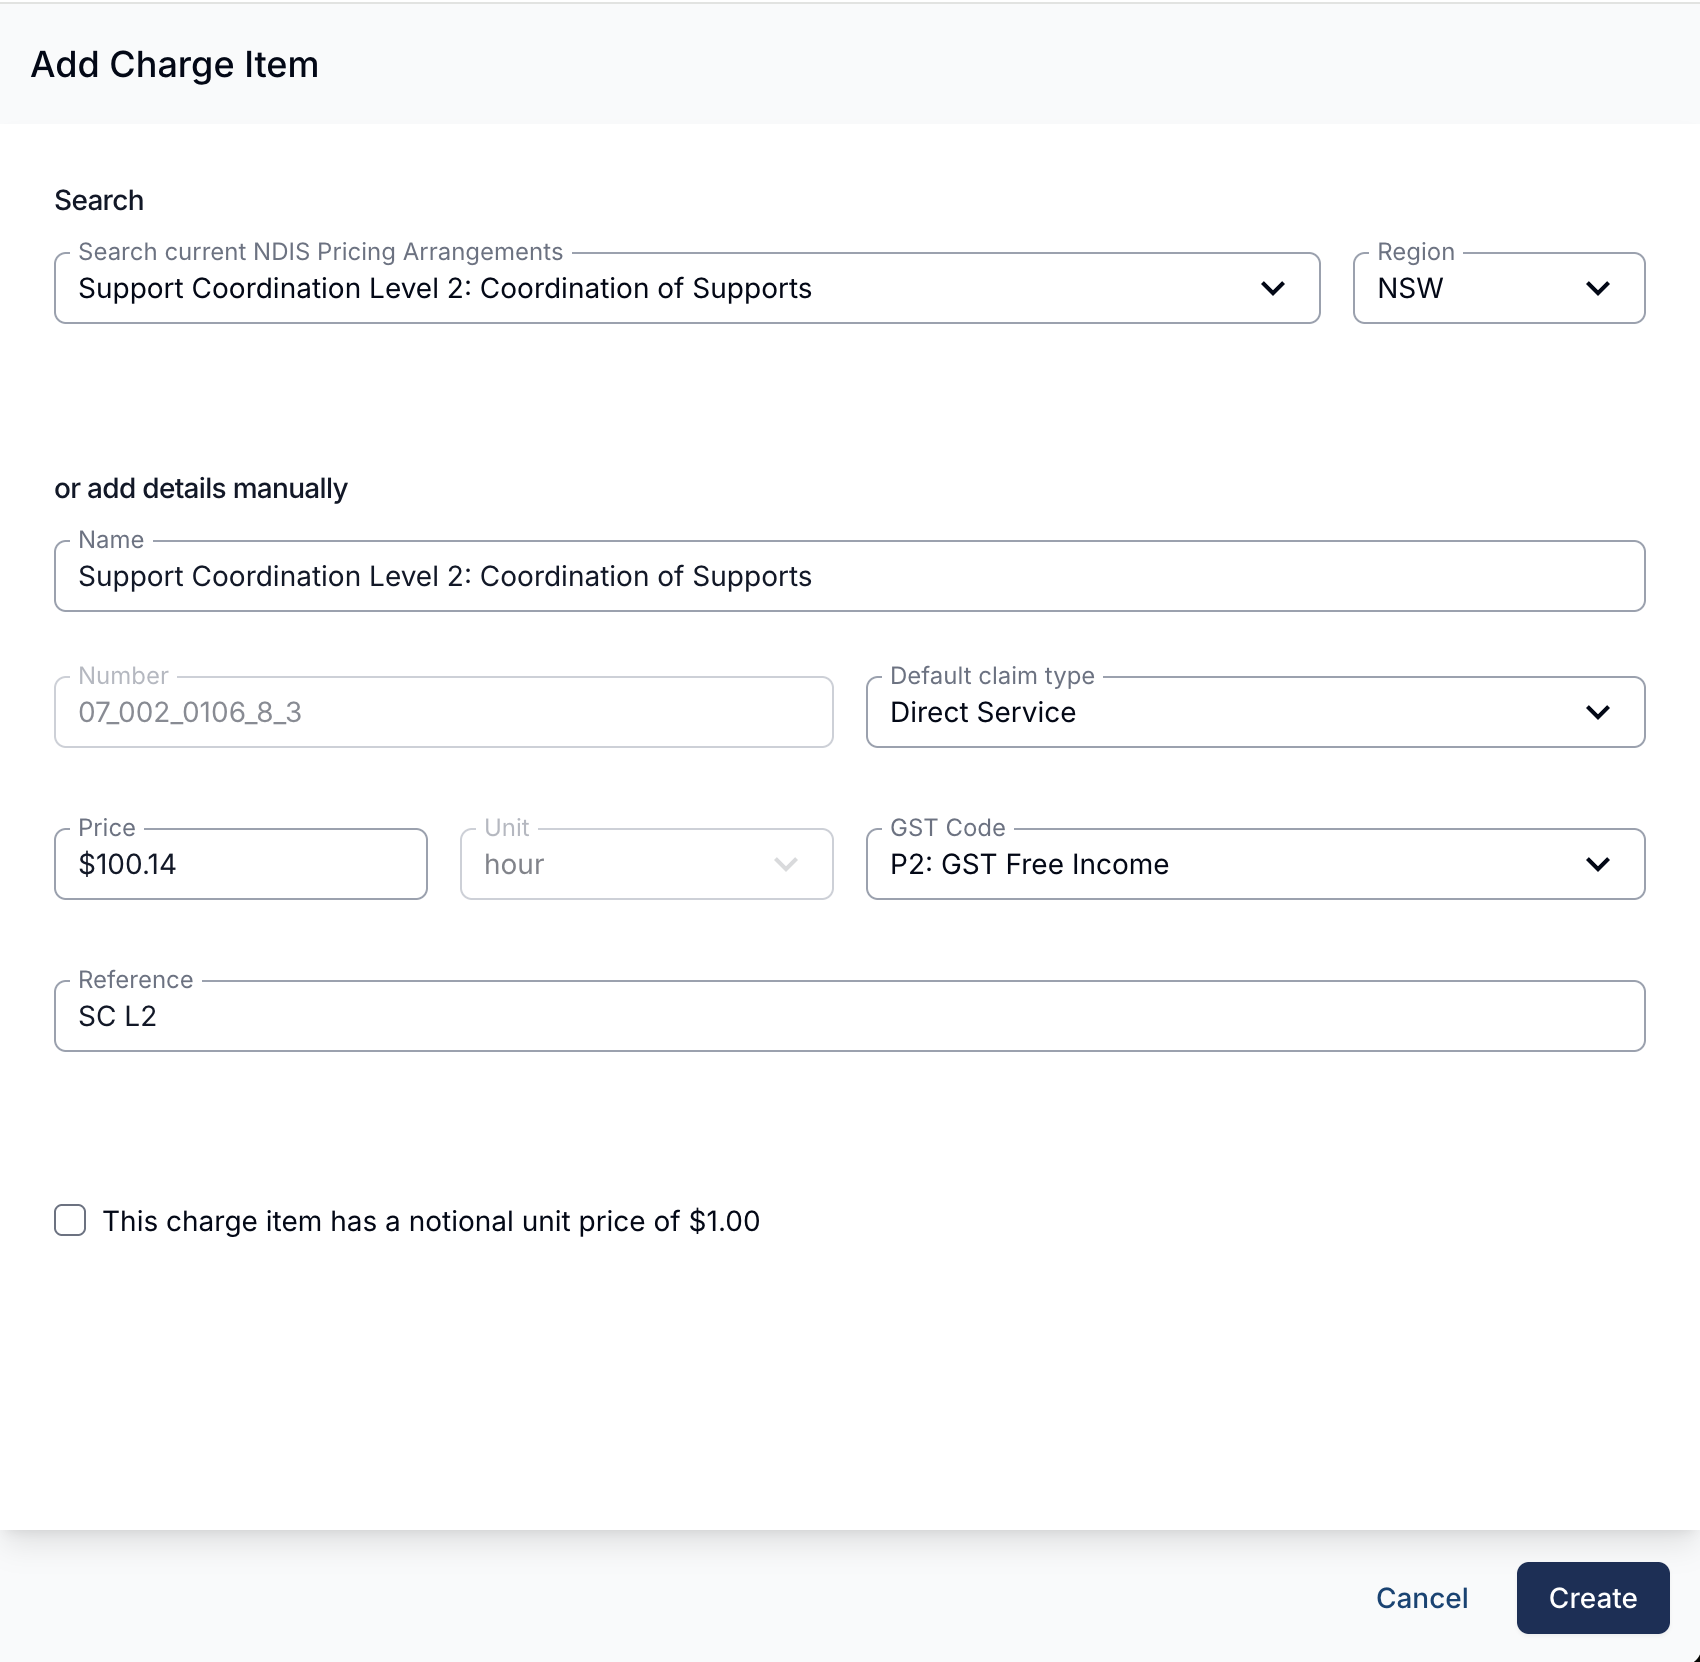
To create a Charge Item click Add Charge Item towards the top right of the screen.
Importing from the Price Guide
Before you import prices from the Price Guide, you'll need to ensure you have set your Region in Business Settings. If you have not yet done this, you will be prompted to set your Region first.
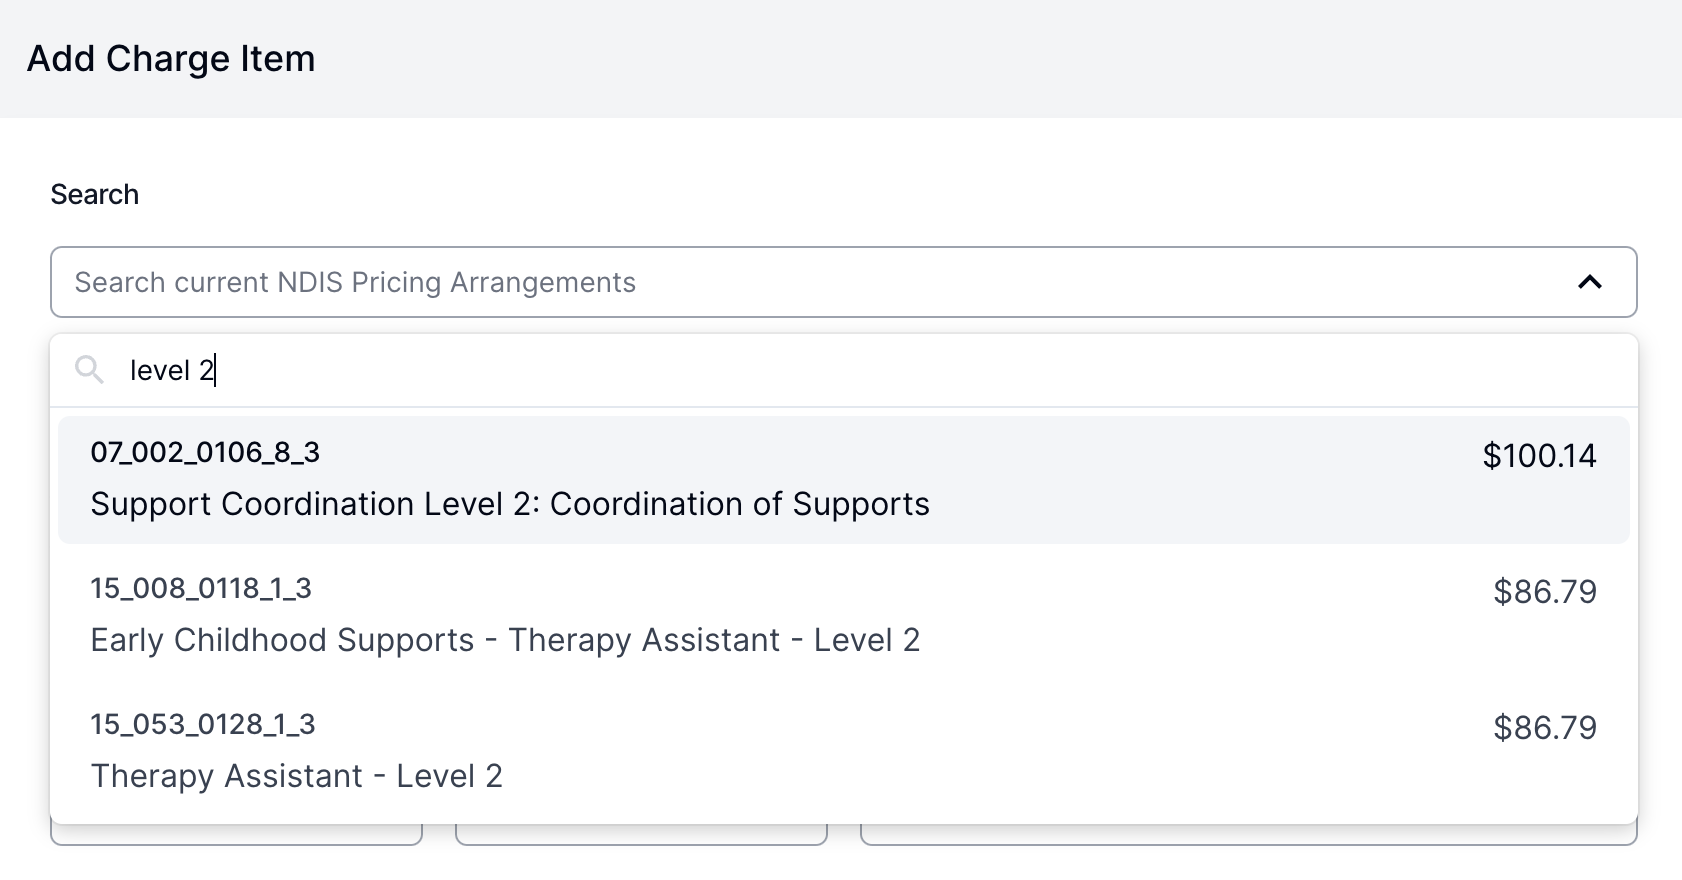
Search by name or number
To find the Charge Item you need, simply start searching by line item number or name.
Select the line item
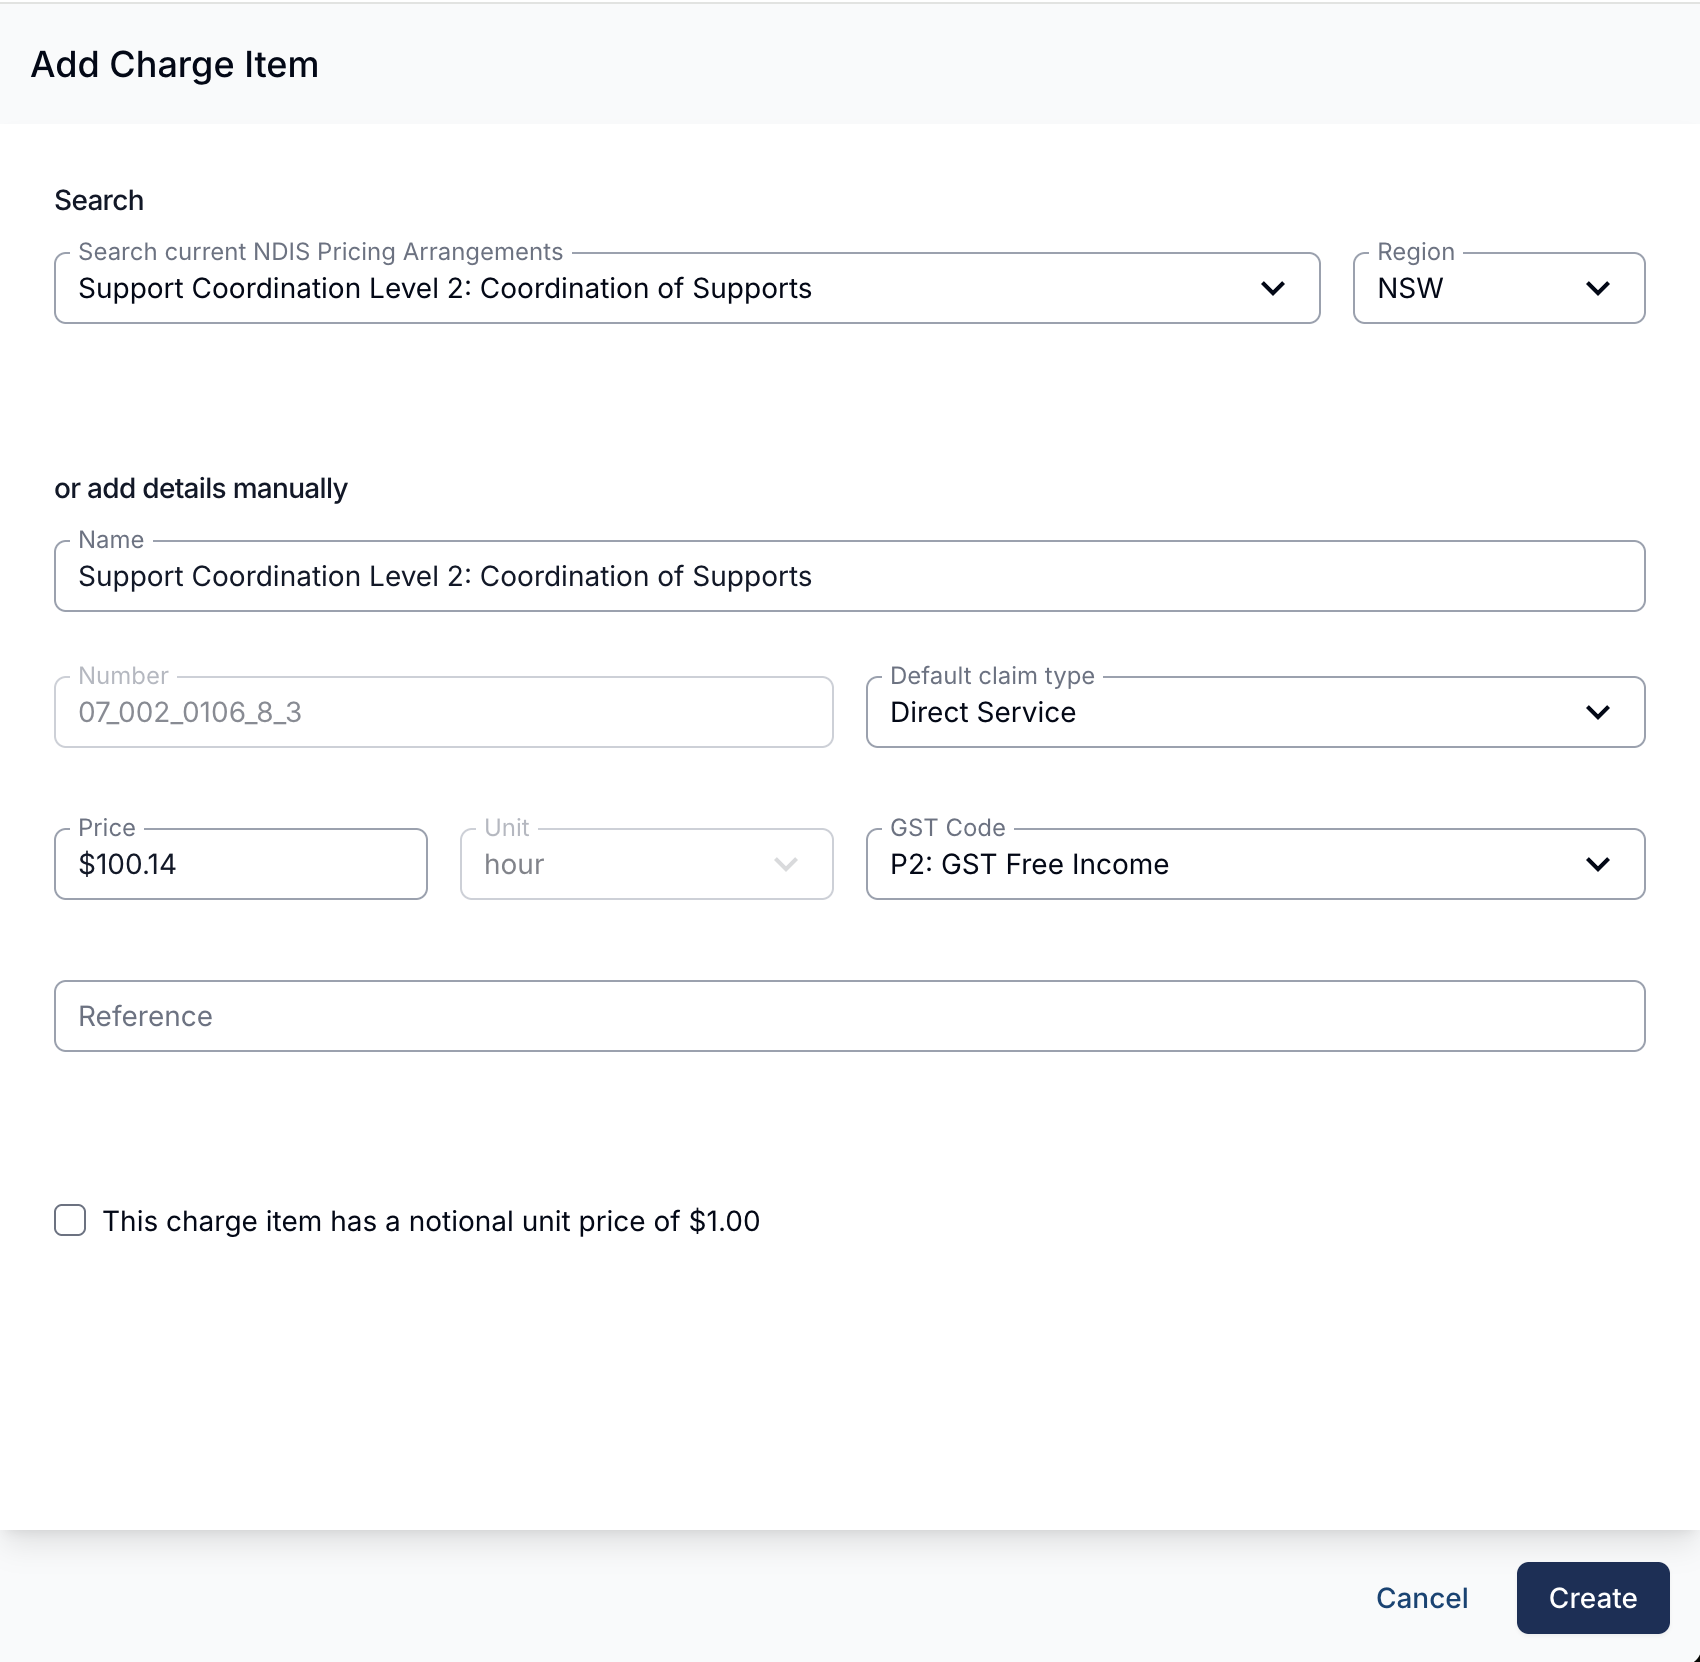
Once you have found the line item you need simply click on it and the Charge Item details form will be pre-filled for you.
Manually entering or updating details
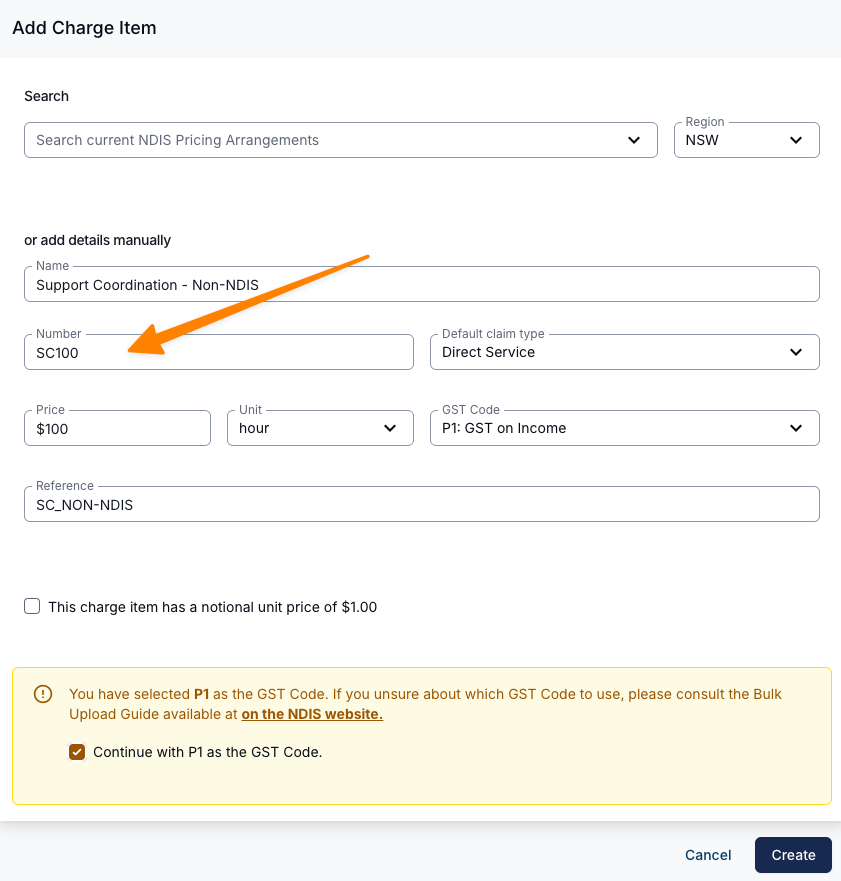
If you are not charging for something from the NDIS Price Guide, you can simply manually enter all of the details for the Charge Item.
After selecting a price-guide item, you can customise its price, name and reference. Number and Unit are locked in the import form. Once a Charge Item is saved, its Number and Unit cannot be edited; create a replacement if those are wrong. Claim Type is also fixed on locked variants.
Charge Item Number
This corresponds to the NDIS Price Guide. Unless you are charging for items outside the NDIS, you should not change this number as it may result in your payment request being rejected.
For non-NDIS work, use a clearly non-NDIS number such as PRIVATE_SERVICE and attach it to a 100 - Non-NDIS service. Adding a letter to an NDIS-style number does not necessarily change the support category Astalty derives from its prefix. See Services FAQs.
Charge Item Name
This is the name of the charge that will appear on the PDF invoices. You are free to customise this as you wish.
Default Claim Type
When creating a Charge Item, you should select the Default Claim Type. This means that any time this Charge Item is assigned to a Task, the Claim Type for that charge will be set to the default.
Unit
This corresponds to the NDIS Price Guide unit. Unless you are charging for items outside the NDIS, you should not change this value as it may result in your payment request being rejected.
Price
The price of the Charge Item. You may customise this if you need however it will be prefilled with the price imported from the NDIS price guide.
GST Code
Astalty offers these codes:
| Code | Label |
|---|---|
| P1 | GST On Income |
| P2 | GST Free Income |
| P5 | BAS Excluded |
The form defaults to P2. Selecting another code requires confirmation before saving. Choose the code appropriate to the service and your tax treatment; a default or preset does not establish eligibility.
Reference
This is a short and unique description of the Charge Item - This is what users will see when selecting the Charge Item in the Task.
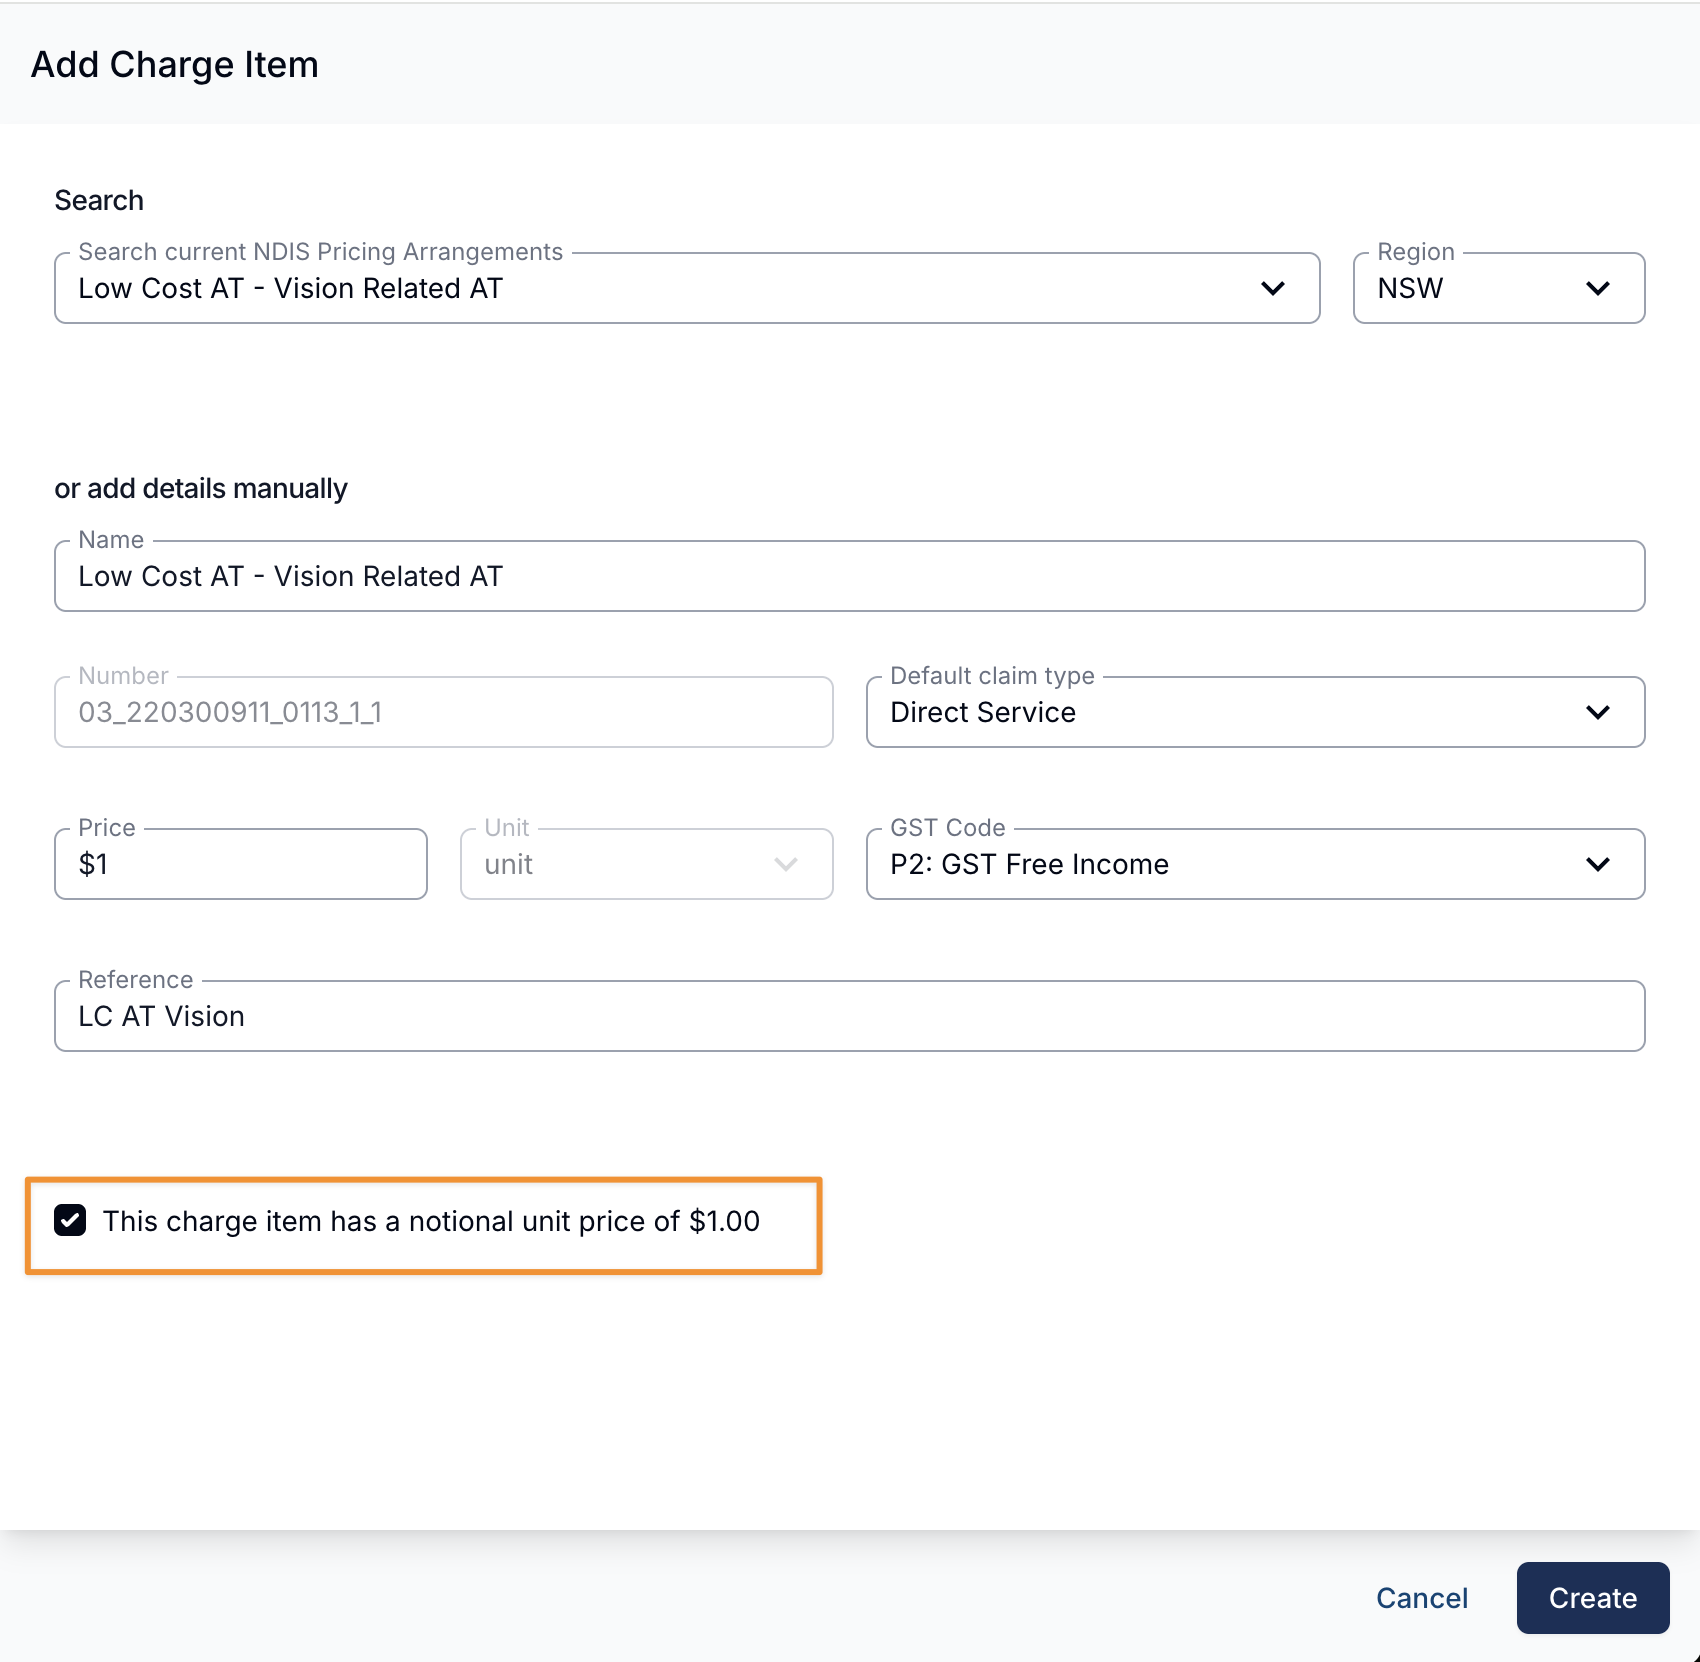
Notional unit price
Tick This charge item has a notional unit price of $1.00 for Notional Charge Items, where we need to recalculate the quantity when we process the charge for invoicing. For more on Notional Charge Items see Notional charge items below.
You can tick or untick this at any time, including on a Charge Item you have already saved and used - see Removing the notional unit price.
Notional Charge Items
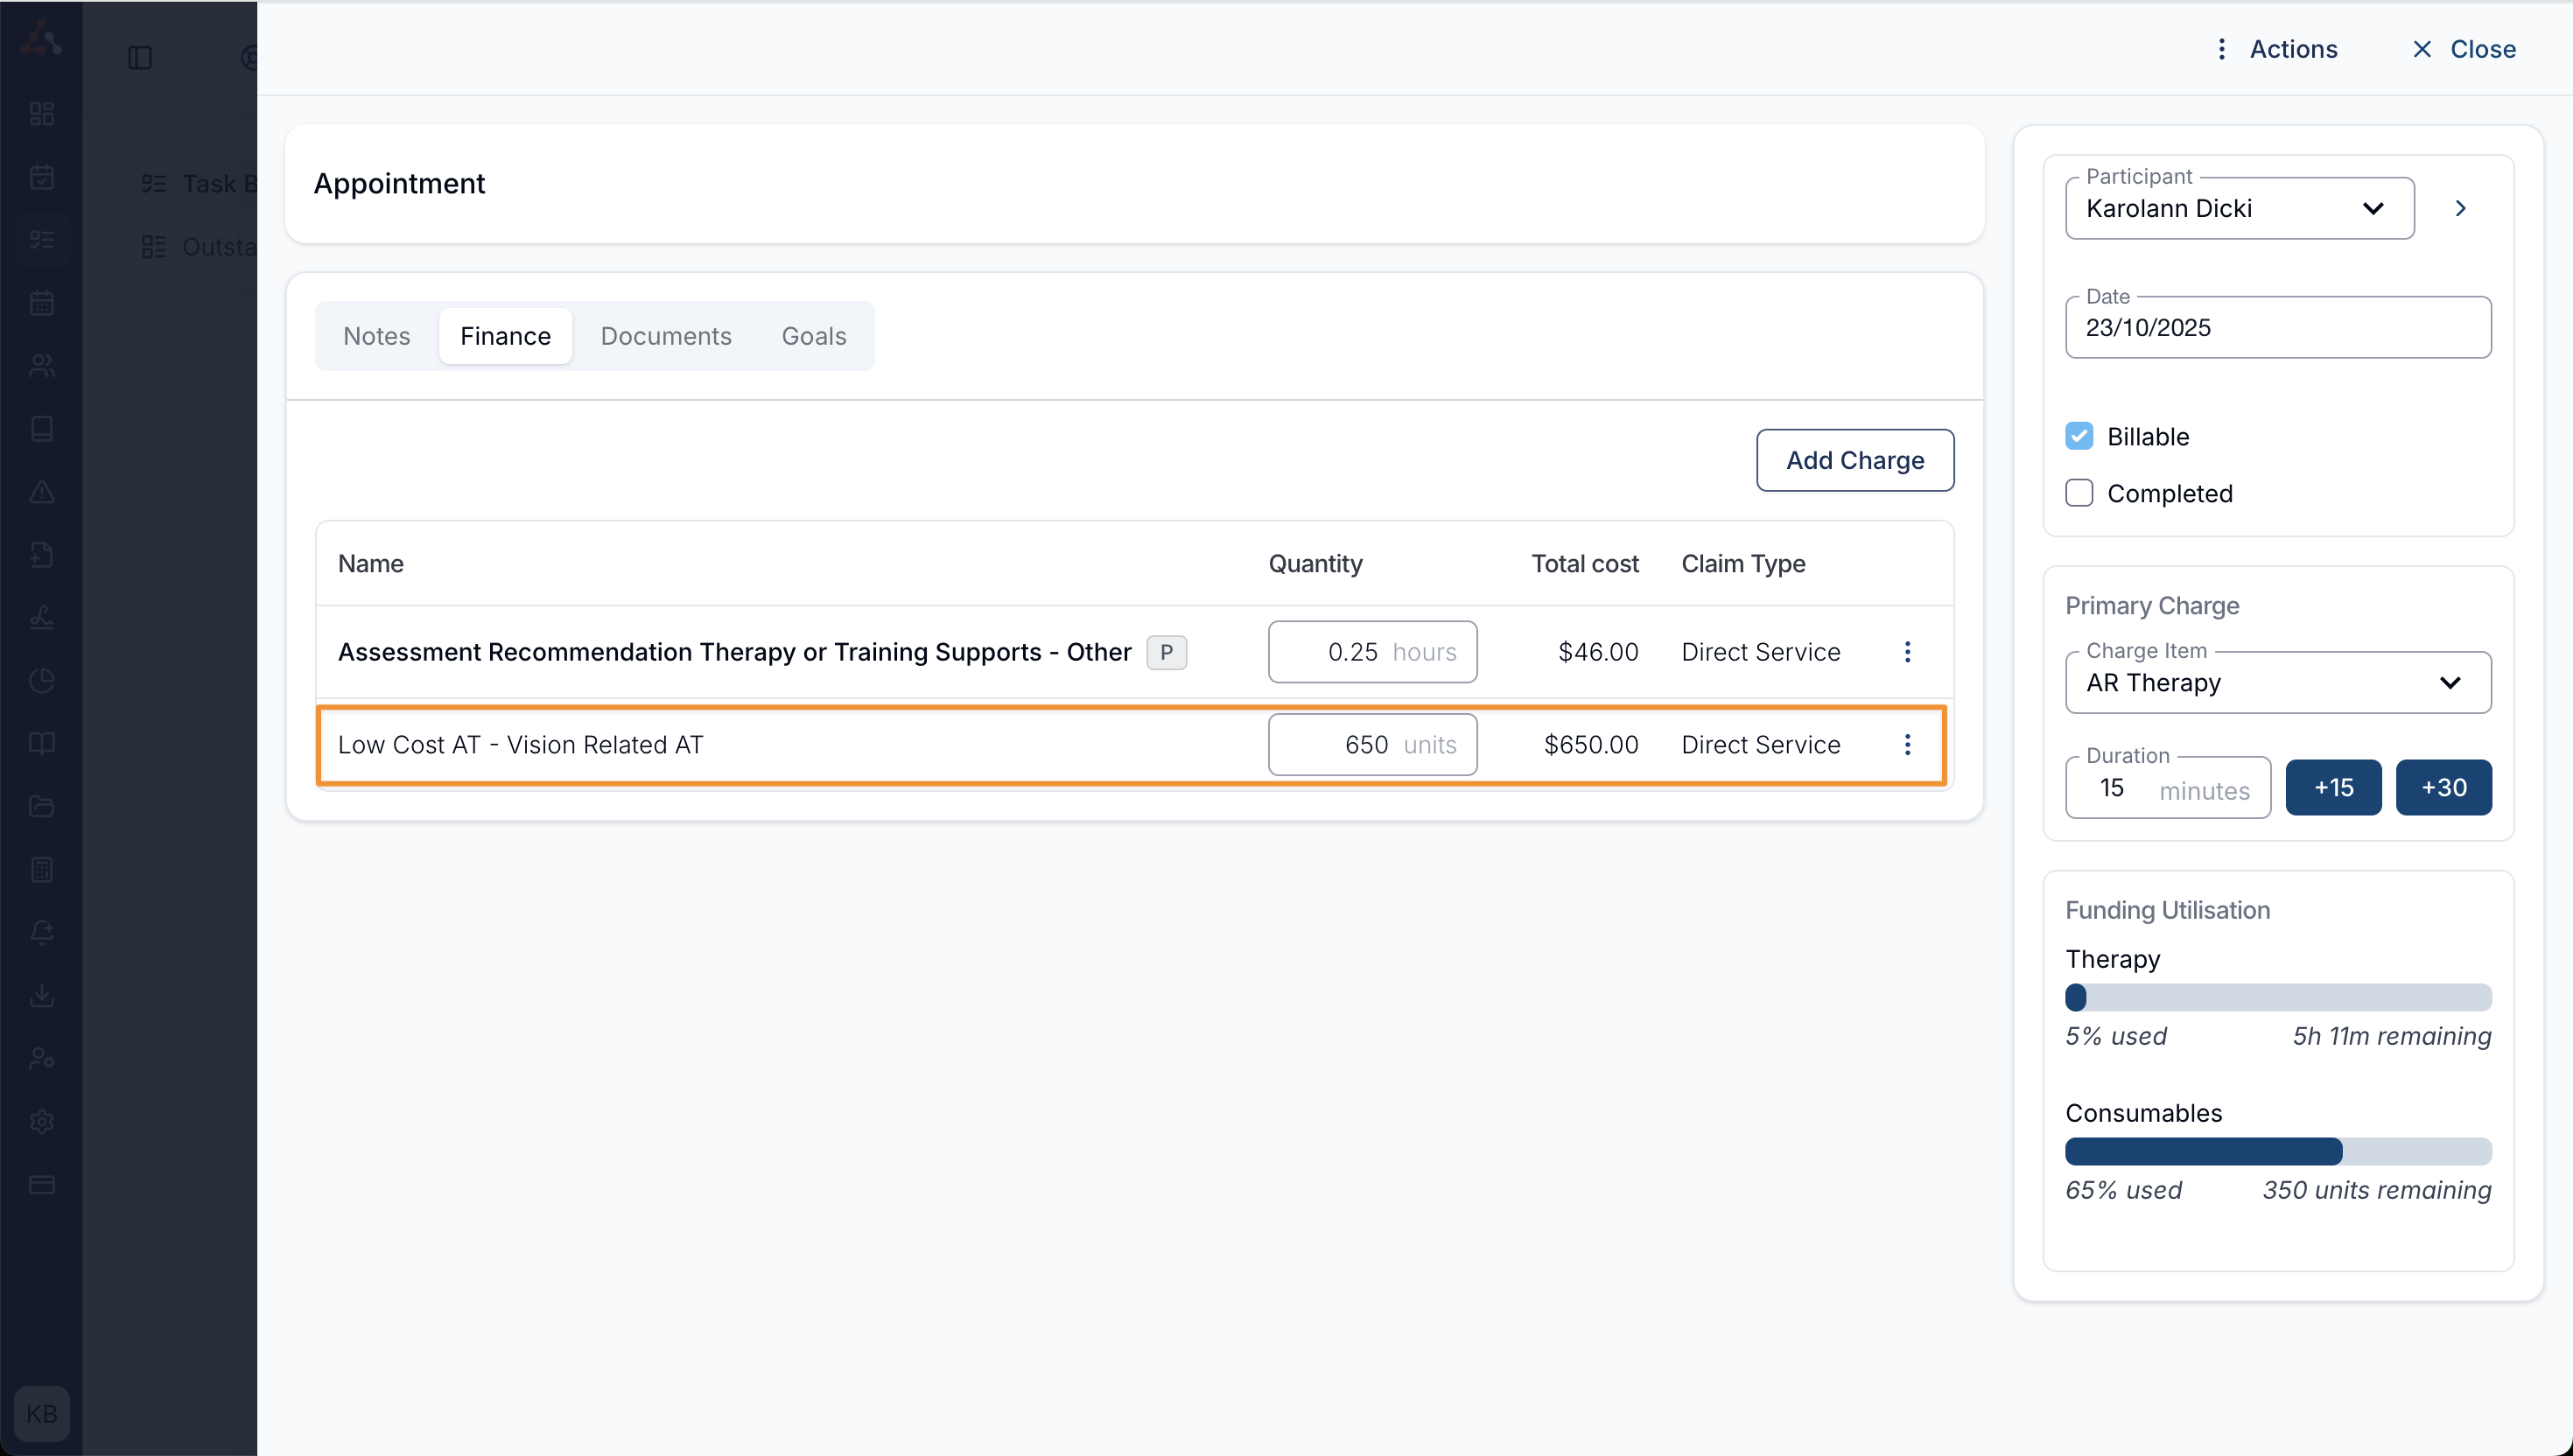
In Astalty, marking a Charge Item as notional uses a $1 unit price and recalculates the quantity to preserve the charge total. A GST-exclusive invoice display can adjust the displayed unit price for a GST-bearing item. For example:
- 10 units @ $1.50 = $15
- When we invoice this becomes 15 units @ $1
Once you have the Notional Charge Item created and setup within a Participant's Service, it can be assigned via the Finance tab within a Task.
Removing the notional unit price
If a Charge Item was marked as notional by mistake, open the Charge Item, untick This charge item has a notional unit price of $1.00 and save.
Once the notional unit price is removed, the Charge Item goes back to its normal unit price and quantity everywhere Astalty produces pricing, including:
- PDF invoices
- The charges listed on the invoice screen: the N badge next to the unit price disappears
- Bulk upload files
Items without a price limit
In Astalty, you can charge for items that do not have a price limit. To do this, you should create a Charge Item with the relevant line item and set the price to $1. When using this Charge Item, you would then adjust the quantity to arrive at the desired total.
From the NDIS Price Guide
Check the current NDIS pricing and claiming requirements for the item before using a notional price. Astalty's checkbox controls how quantity and unit price are presented; it does not determine whether the support can be claimed.
For example, a charge worth $530 can be represented as 530 units at $1.00. Confirm the correct item number and claiming treatment separately.
Cloning a Charge Item
If you need a Charge Item that is similar to one you already have, you can clone it instead of re-entering every field.
To clone a Charge Item, click the three-dot menu at the end of its row in the Charge Items table and select Clone.
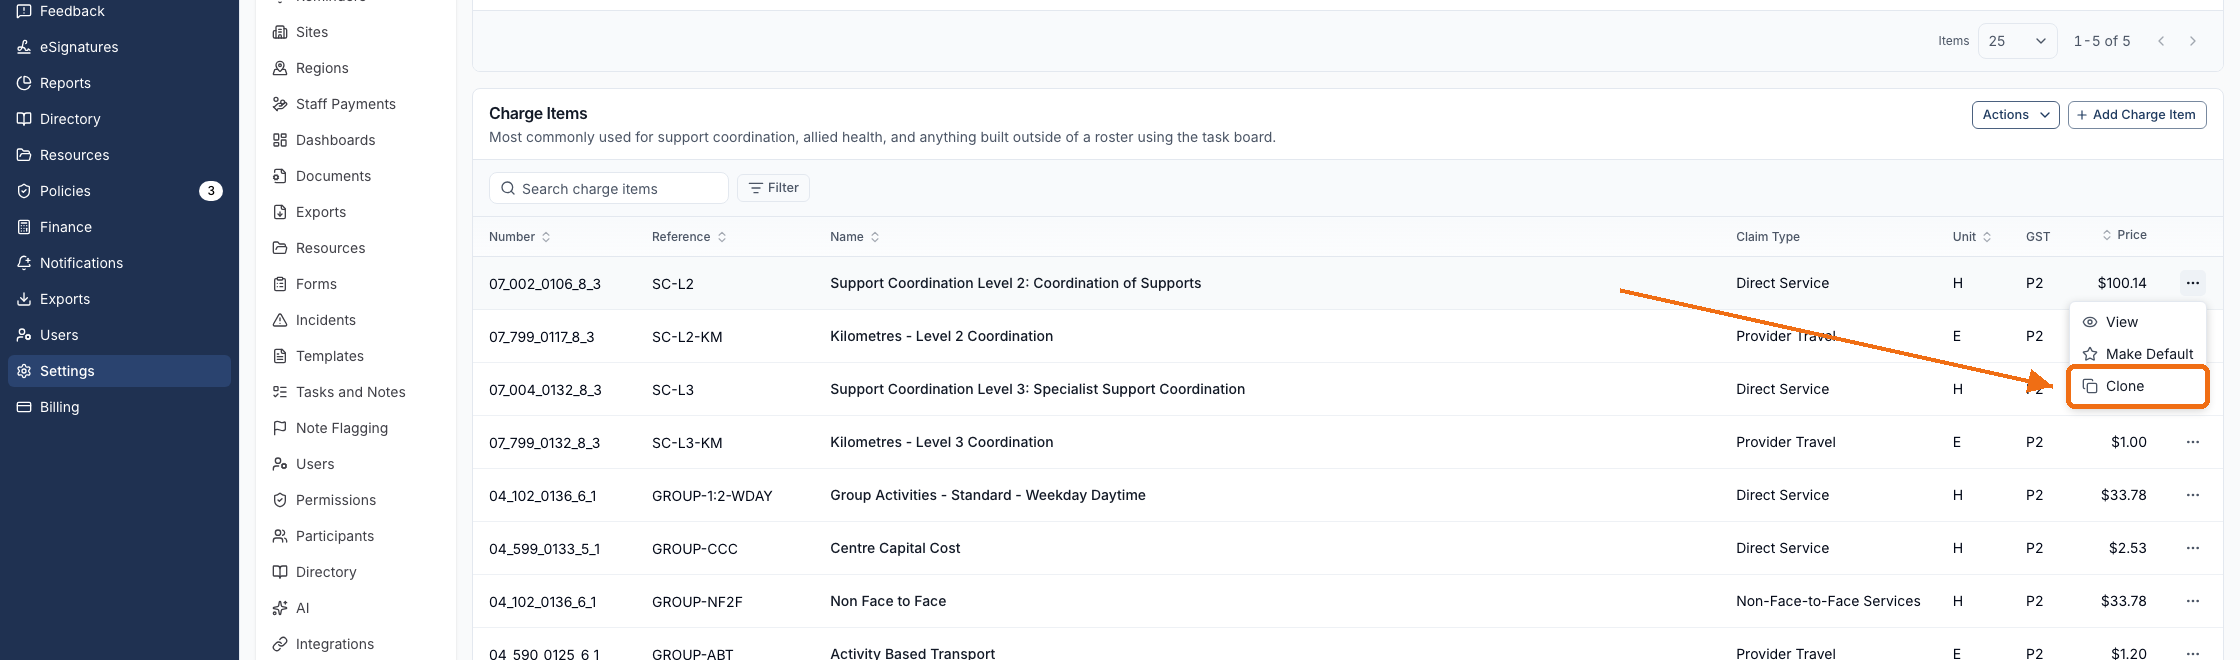
The Clone Charge Item drawer opens, pre-filled from the original with its Number, Unit, Price, GST Code, Default Claim Type, and Notional unit price setting. The Name and Reference are also carried over, each with (Copy) added to the end. Every Charge Item Reference must be unique, so if that suggested Reference is already in use, including from an earlier clone of the same item, change it before saving the clone.
The price guide Search section isn't shown, so importing a line item can't overwrite the values you're cloning. The manual entry section is titled Details instead of or add details manually.
Once you're happy with it, click Clone. A new Charge Item is created, and the one you copied from is left exactly as it was.
Video Walkthrough
Watch the following video to see a visual guide on how to create and update Charge Items.
Updating Charge Item prices
Open the Charge Item, enter the new Price, then save. When the price changes, previously unlocked charges dated before today in your account's timezone retain the previous rate. Existing today/future charges still using the live price, and newly entered charges, can use the new rate. Use a Unit Price override when backdating requires an earlier rate.