- Administration
- Xero
- Configuring the Integration
Configuring the Integration
Configuration
Open Settings > Integrations > Xero. You need permission to view Settings to see the configuration and permission to update Settings to use Edit.
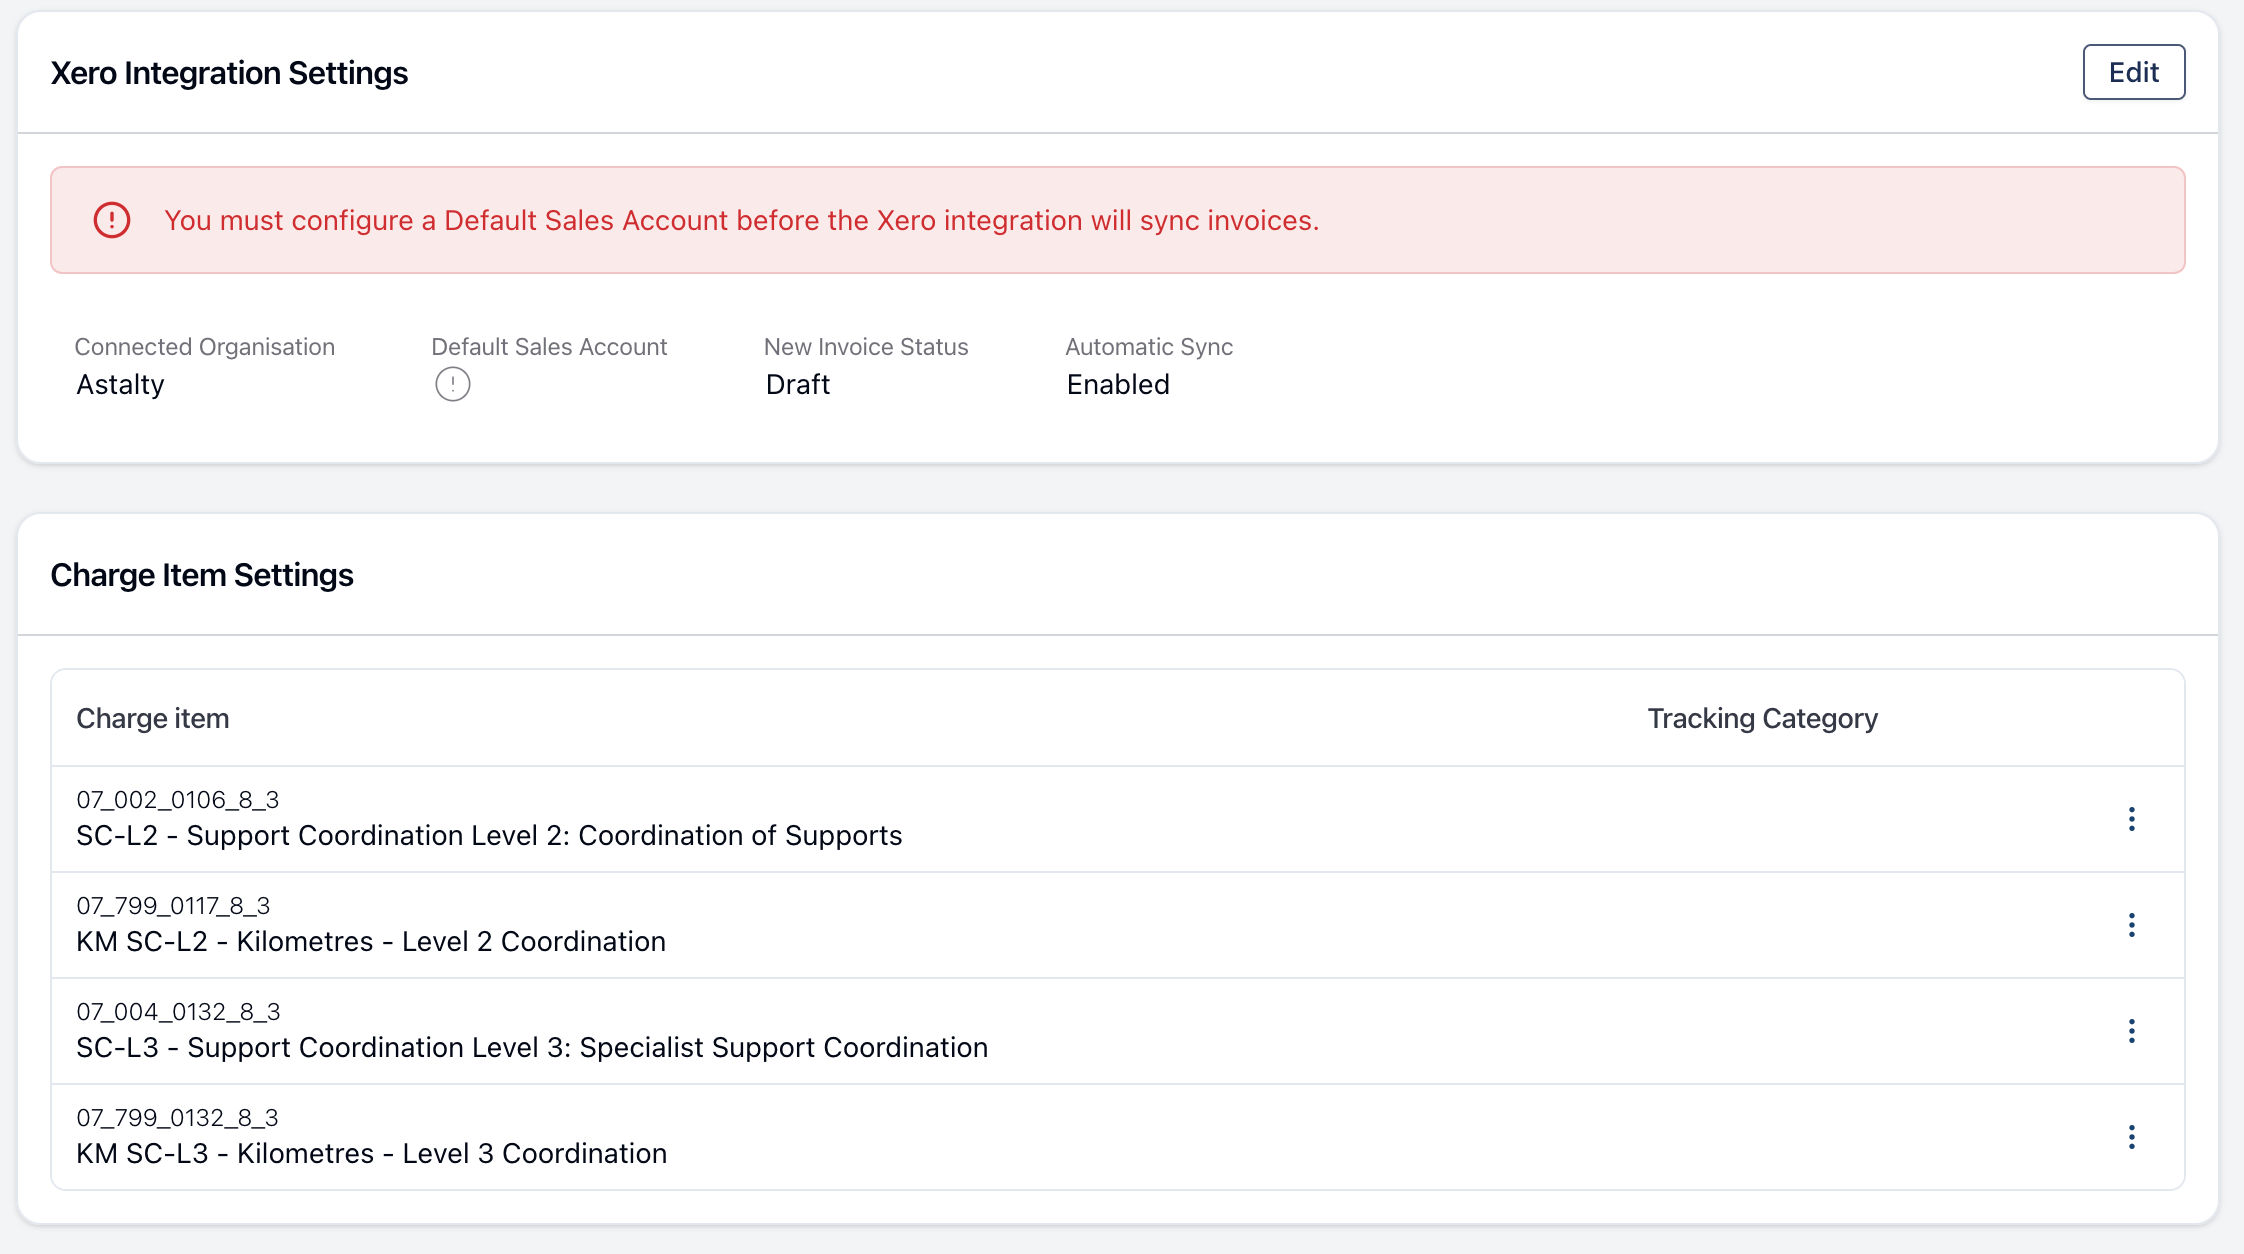
Click Edit on the Xero Integration Settings card.
Default Sales Account
This is the income account Astalty uses when a Charge Item has no separate Xero sales account mapping. A default is required even if every active Charge Item has its own mapping. Invoice batches do not sync while it is missing.
New Invoice Status
Choose how new Xero invoices are created: Draft, Awaiting Approval, or Approved. The default is Draft. A payment cannot be recorded against a draft invoice, so approve it in Xero before reconciling a payment.
Sync Invoices Automatically
This setting is on by default. When it is on, finalising an invoice batch queues the eligible invoices for Xero. When it is off, the finalised batch stays pending until you choose Actions > Sync with accounting. A failed batch can also be queued again from that action. The sync runs in the background and can retry for transient Xero failures.
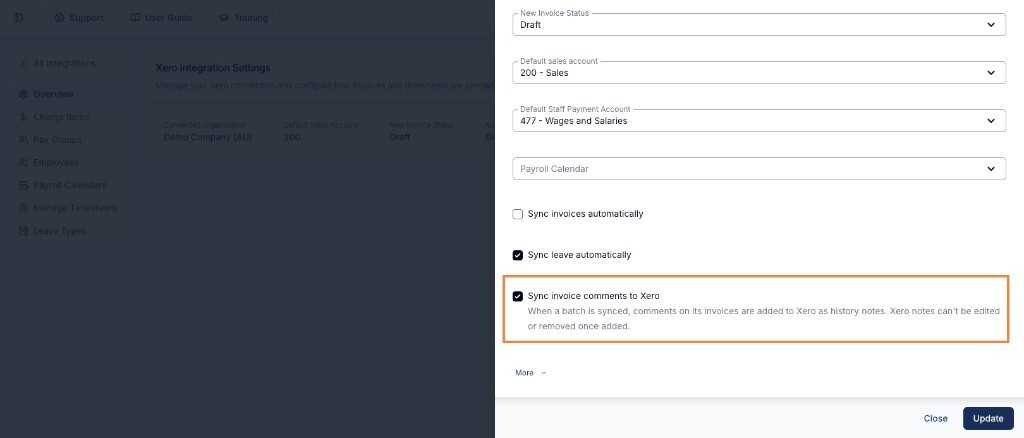
Sync Invoice Comments to Xero
Tick Sync invoice comments to add comments on individual invoices to the matching Xero invoice as history notes. It is off by default. Comments waiting on an unsynced invoice are included after the invoice sync; later comments are queued separately. Invoice batch comments never sync. See Syncing Invoice Comments to Xero.
Advanced Settings
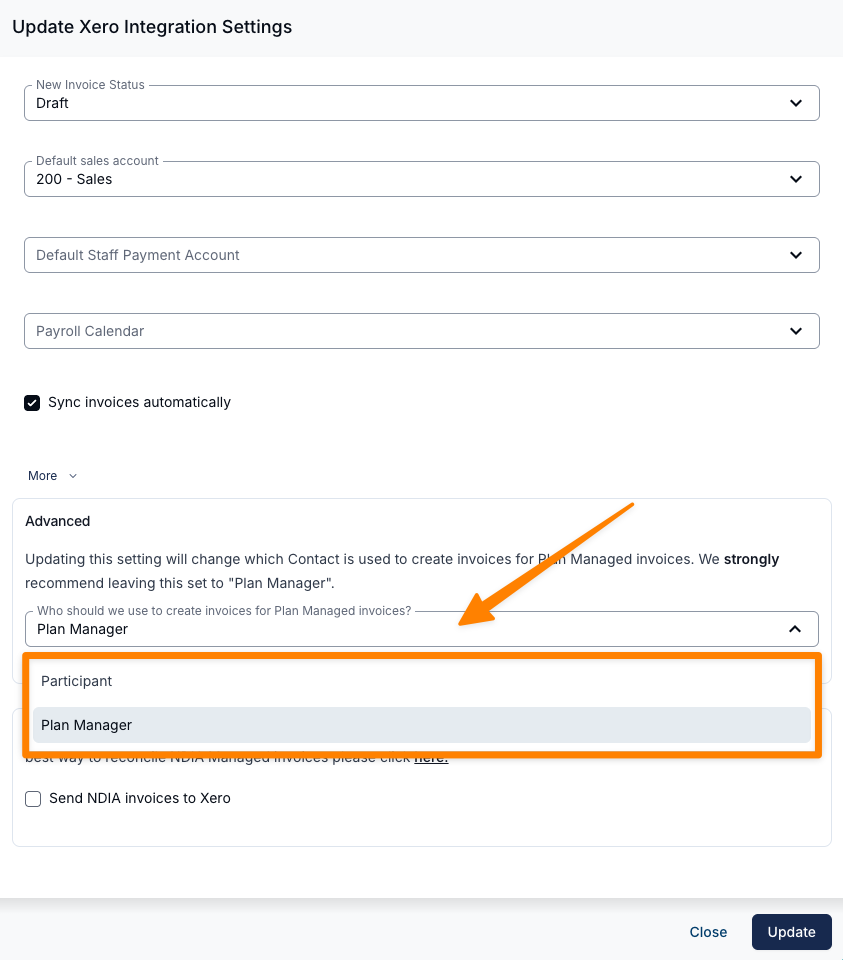
On the Xero settings page, click Edit, then expand More.
Changing the Invoice Contact
Choose whether Astalty creates each plan managed Xero invoice against the Plan Manager or the Participant contact. Plan Manager is the default and recommended option. This setting changes the Xero contact; it does not change the invoice email recipient in Astalty.
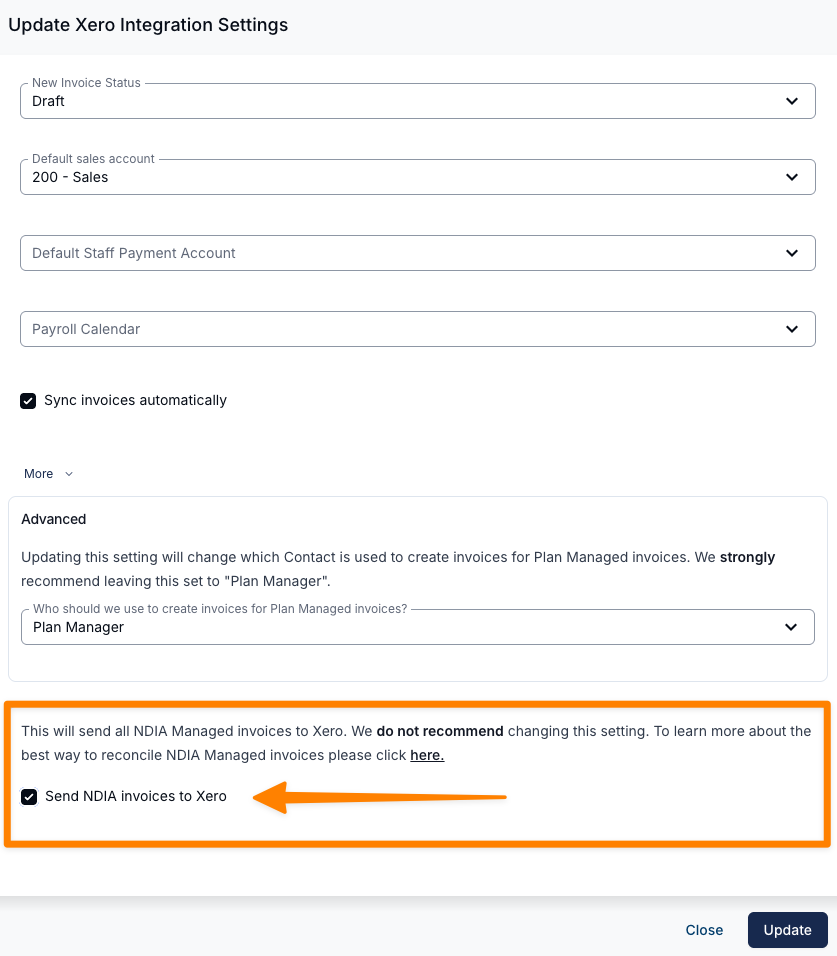
Send NDIA Invoices
Send NDIA invoices sends NDIA managed invoices to Xero alongside your plan and self managed ones. It is off by default, and Astalty recommends leaving it off.
With it off, NDIA managed invoices never reach Xero. You reconcile the NDIA batch in Astalty against the receipt file, which tells you how much the NDIA paid, and record that total in Xero as a single Receive Money transaction. See Reconciling NDIA Payments.
Why NDIA Invoices Are Kept Out of Xero
Astalty reconciles NDIA claims line by line from the receipt file, which is the only thing that matches how the NDIA actually pays:
- The NDIA rejects claims individually. An invoice can be partly paid, with rejected charges fixed and claimed again later. The invoice in Xero keeps its original total while Astalty reconciles the individual claim results.
- A claim can remain open, then be paid in a later deposit, which can split one invoice across receipt files.
- Payments do not reconcile through Xero for NDIA invoices. Astalty excludes NDIA invoices from Xero payment pulls regardless of this setting. Payments also never travel from Astalty to Xero. Turning the setting on therefore adds a separate Xero reconciliation step.
- Every NDIA invoice uses one contact. Astalty creates them in Xero against a single contact named NDIA, so one deposit covering a whole batch has to be split across those invoices manually.
Charge Item Settings
Sales Account
You can map each Charge Item to a Xero income account. That mapping overrides the default sales account for that invoice line.
Tracking Categories
You can assign a Xero tracking category and option to each Charge Item. A cost code mapping takes priority over this mapping for the first tracking dimension. See Teams Tracking Categories in Xero for the full precedence rules.