- Start Here
- Astalty for Outlook
Astalty for Outlook
The Astalty for Outlook add-in lets you log a task in Astalty directly against an email, without switching back to the app. Open an email, click Astalty on the toolbar, and a panel opens beside your inbox where you can pick a Participant, choose a Charge Item, record your time, add a note, attach the email and its files, and create the task — all in a few clicks. You can also add the email to a task you already have instead of creating a new one — see Adding an email to a task you already have.
Adding the add-in to Outlook
The add-in is available to Astalty users whose Outlook account meets the connection requirement above. It is installed once and then stays available on every email you open. Depending on your organisation, it may be added for you by your Microsoft administrator, or you may add it yourself from within Outlook.
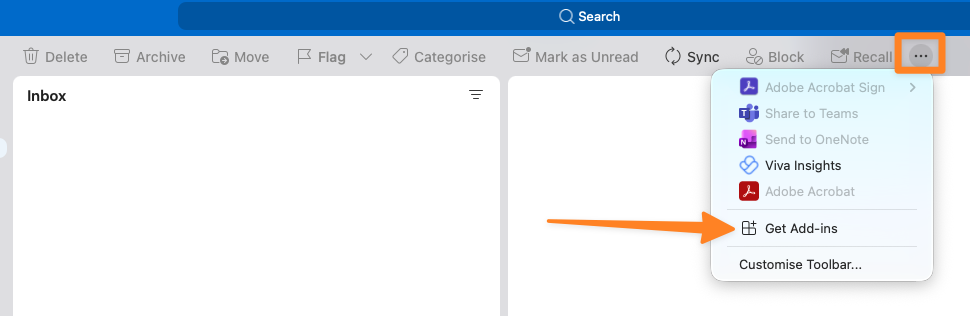
In Outlook, open the … (more actions) menu on the toolbar and choose Get Add-ins.
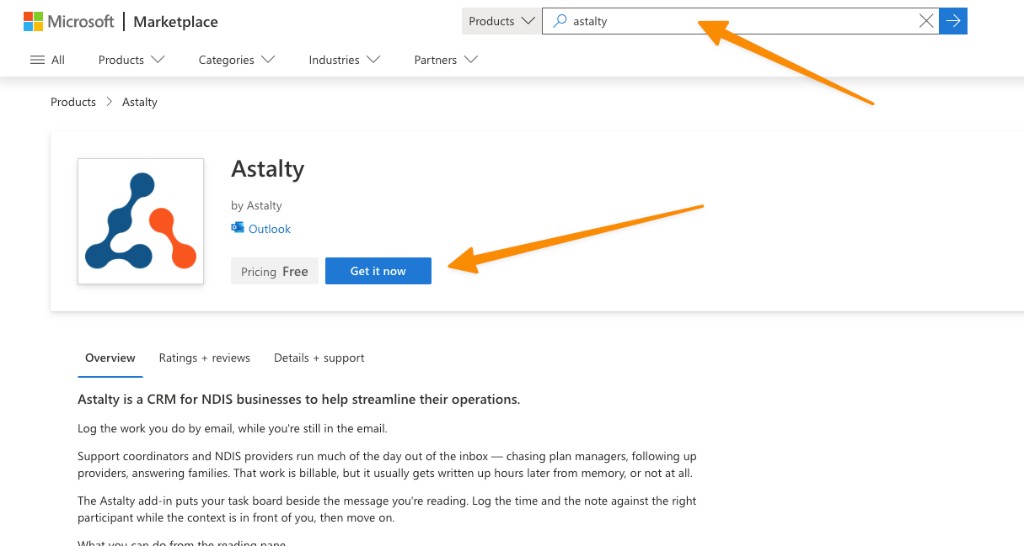
Search for Astalty, open the Astalty add-in, and click Get it now.
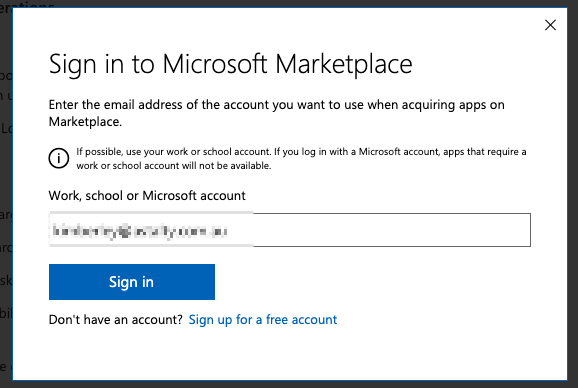
If you're prompted, sign in to the Microsoft Marketplace with your work, school or Microsoft account to finish adding the add-in.
Opening the panel and signing in
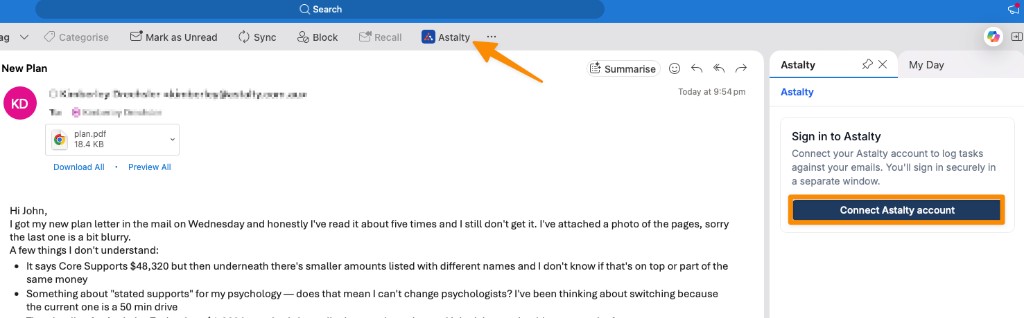
Open any email and click the Astalty button on the message toolbar to open the panel. The first time, you'll be asked to connect your Astalty account — click Connect Astalty account and a secure sign-in window opens where you log in exactly as you would in the browser, including any two-factor authentication step.
Your name and organisation are shown at the bottom of the panel, and you can Sign out from there at any time.
Changing or resetting your password, selecting Logout all other sessions, or setting up 2FA also signs the add-in out. Connect again the next time you open the panel. See What Happens to Your Other Sessions.
The panel matches Outlook's light or dark theme automatically, switching as you switch Outlook's.
Logging a task from an email
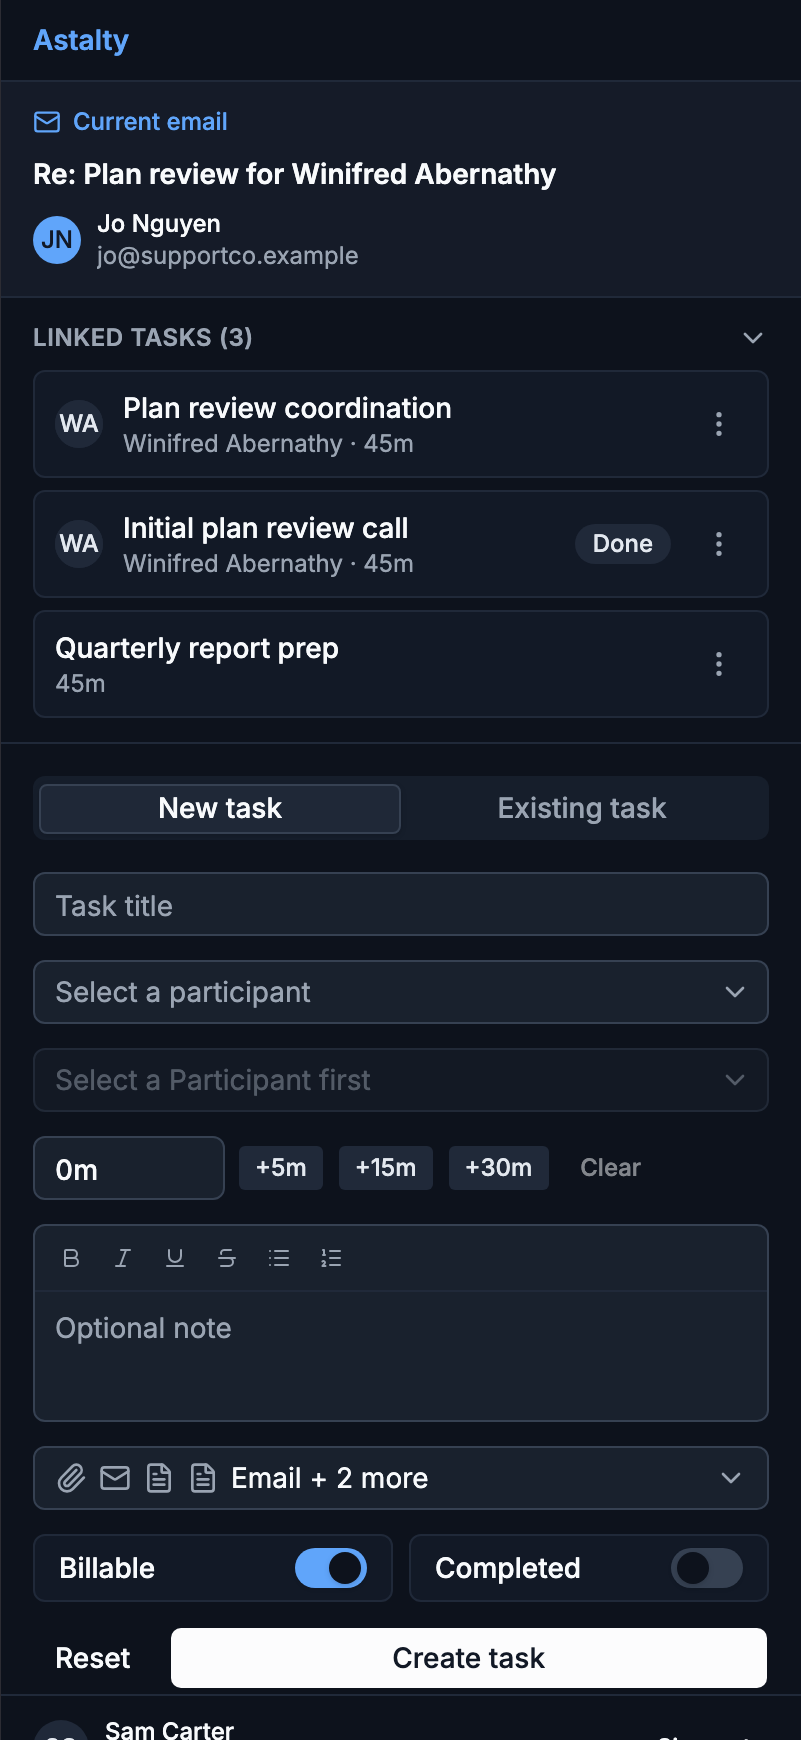
With an email open, the panel shows the email you are working from at the top, then New task and Existing task tabs. New task is selected by default and opens a Log a task form below it.
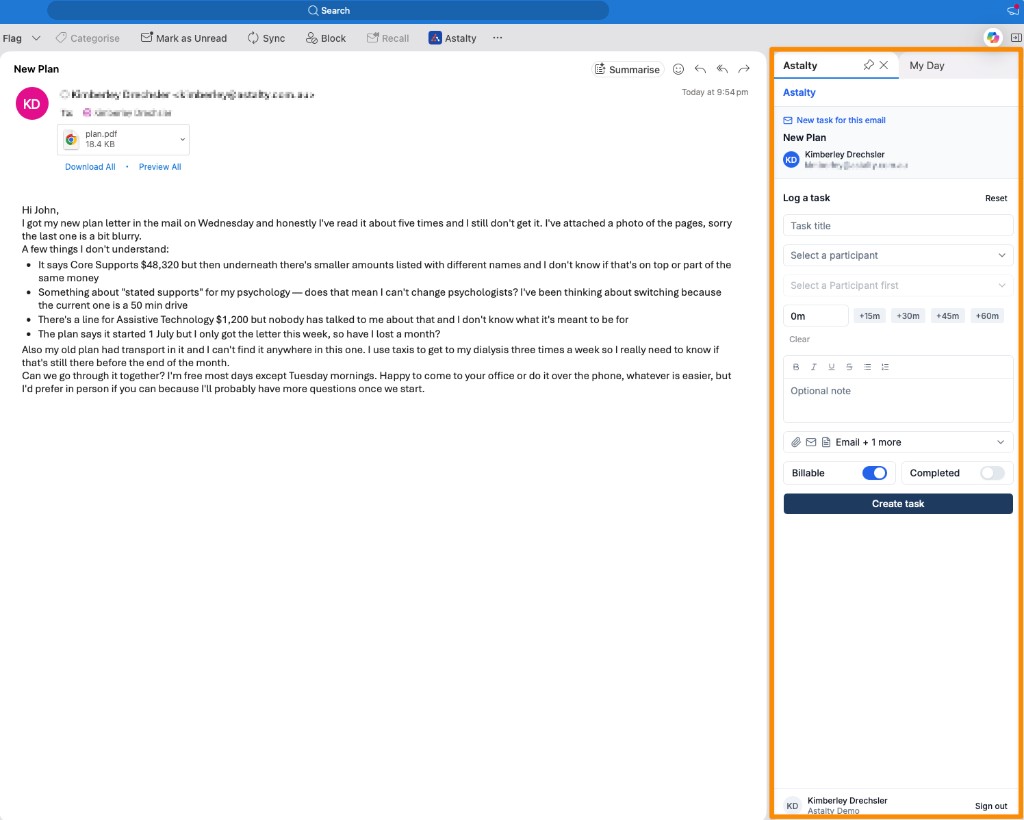
Fill in the task the same way you would with a quick task in Astalty:
- Task title — a short description of the task.
- Participant — start typing to search, or pick from the list. The add-in reads the email's sender and recipients and marks any that match a Participant in your account with a Suggested badge, so the right person is usually one click away.
- Charge Item — once a Participant is selected, choose the Charge Item to bill against. Their default Charge Item is selected automatically if they have one.
- Time — enter the time spent, or use the quick + buttons to add your organisation's standard increments. Use Clear to reset it.
- Note — an optional case note that is saved against the task.
- Billable and Completed — toggle these on or off just like a quick task.
Attaching the email and its files
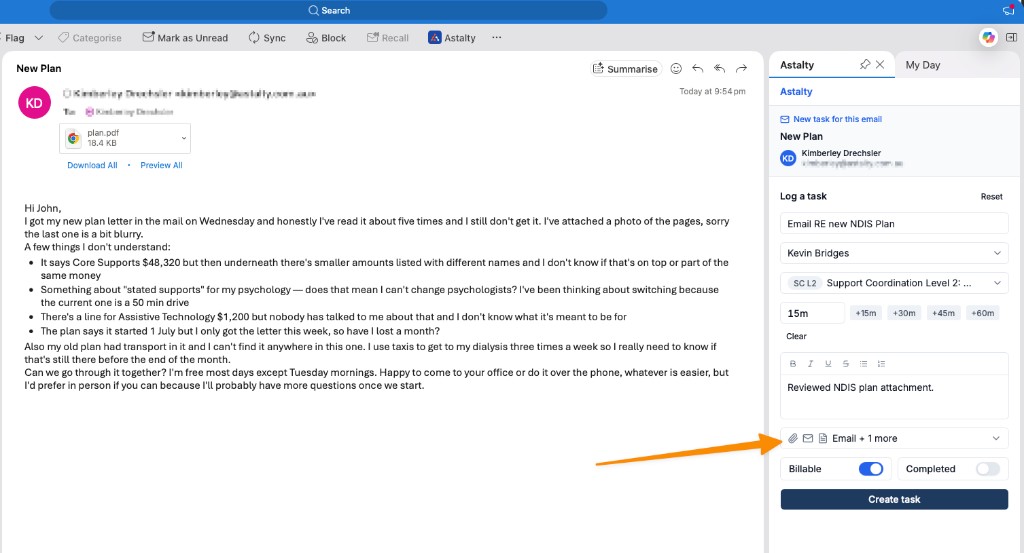
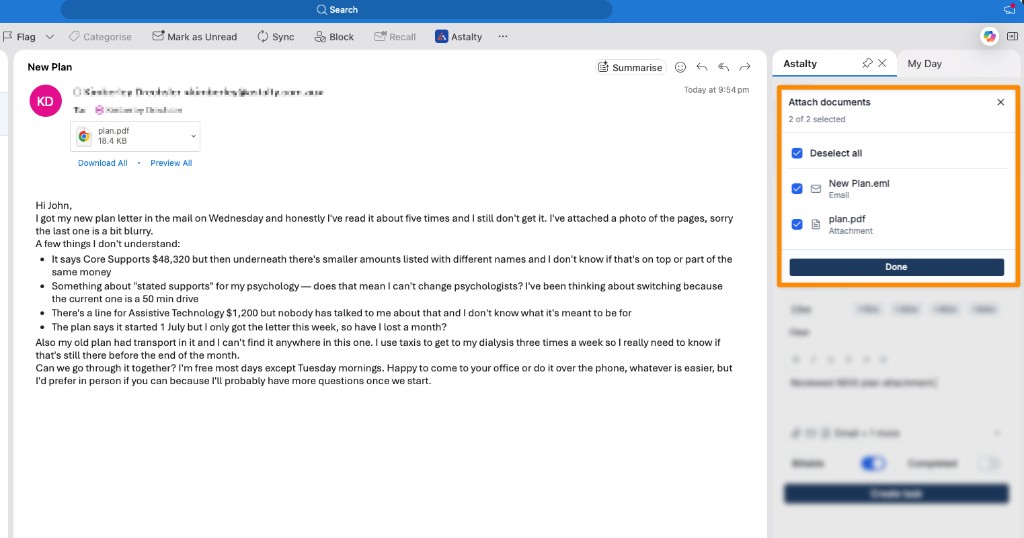
If the email has attachments, or you want to keep a copy of the email itself, use the attachments button (it shows a summary such as Email + 1 more) to choose what to include. By default, the email and every attachment are selected.
The email and each attachment are listed, and you can select or deselect them individually before creating the task.
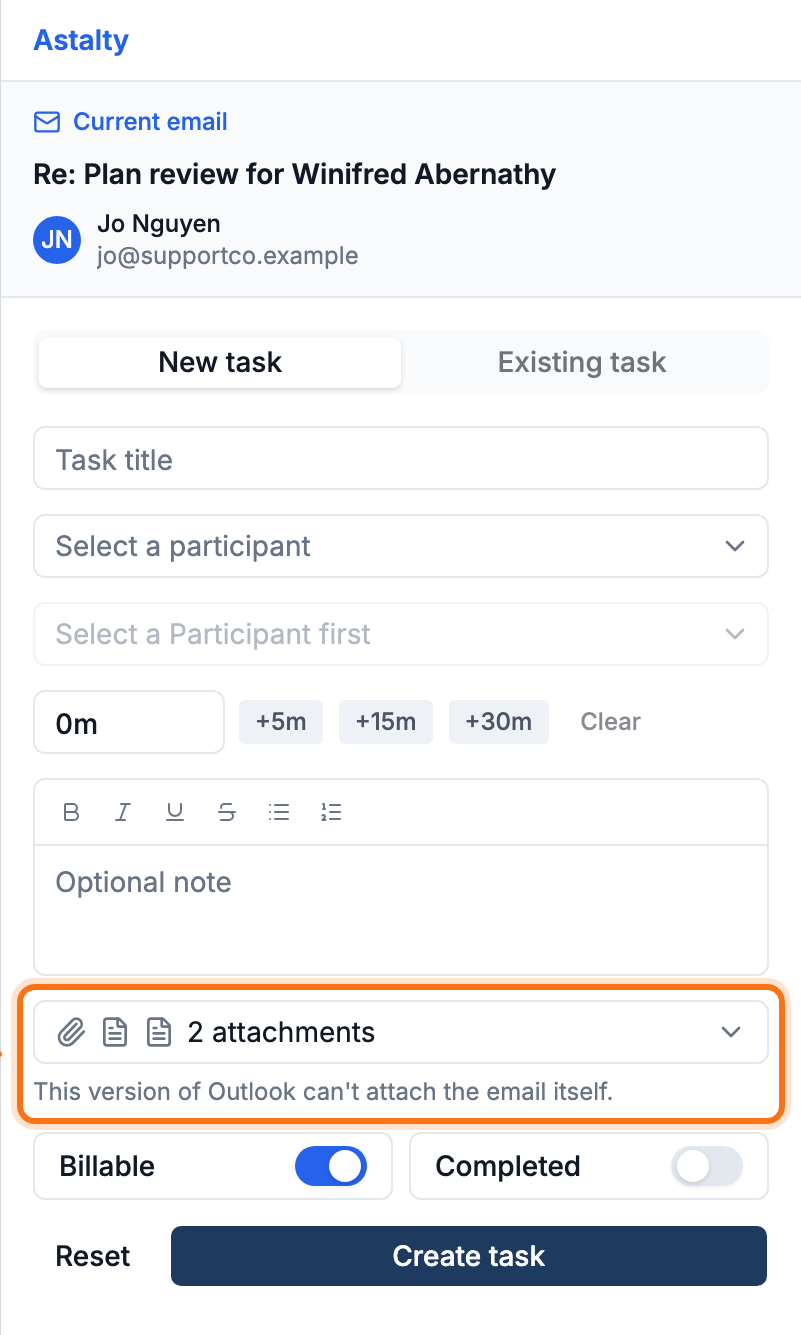
If a selected document still fails to attach — for example a network error during upload — the task is created anyway and the warning names what didn't make it, such as "Task created, but 1 document couldn't be attached" with the email or file name below it.
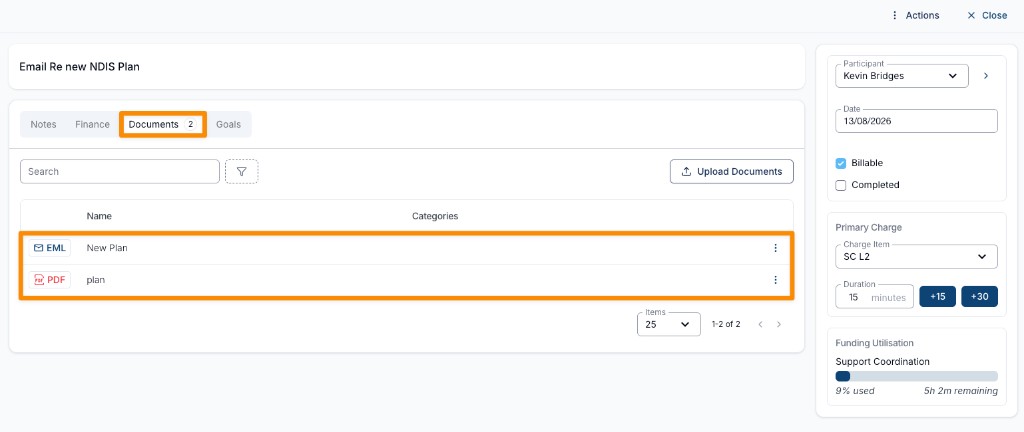
The selected files are saved to the task's documents when it is created. Opening the task in Astalty, you'll find them on the Documents tab — the email is stored as an .eml file and each attachment as its original file type.
Creating the task
Click Create task. This creates the same task, charge, and note you would get from a quick task in Astalty, and links it to the email you were viewing. The task's start date and time default to the moment you create it.
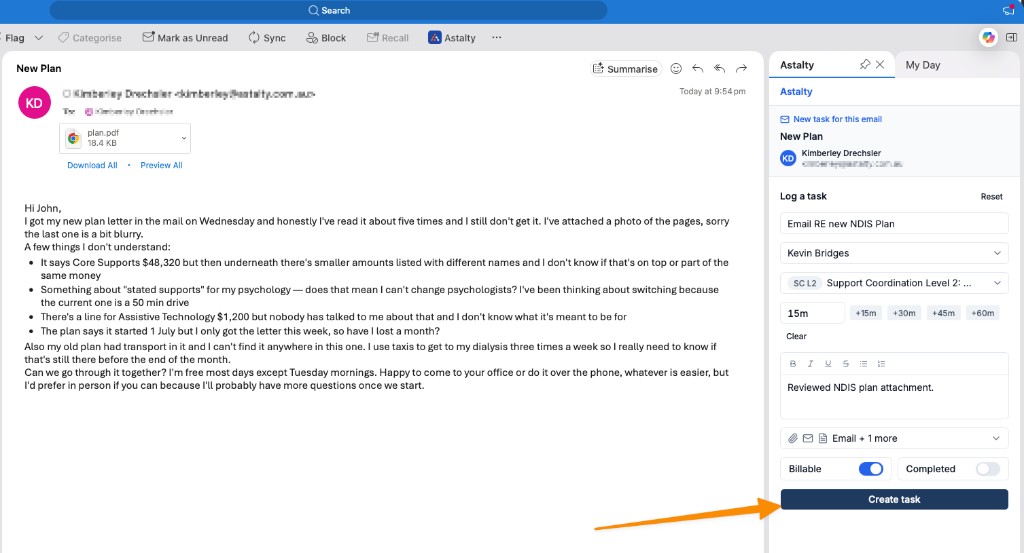
The form then clears so you are ready to log the next task. Use Reset at any time to clear the form yourself.
Adding an email to a task you already have
Select the Existing task tab to add the current email — and optionally a note and its attachments — to a task you already have, instead of creating a new one. Useful when several emails about the same thing should end up on one task, such as replies in a thread.
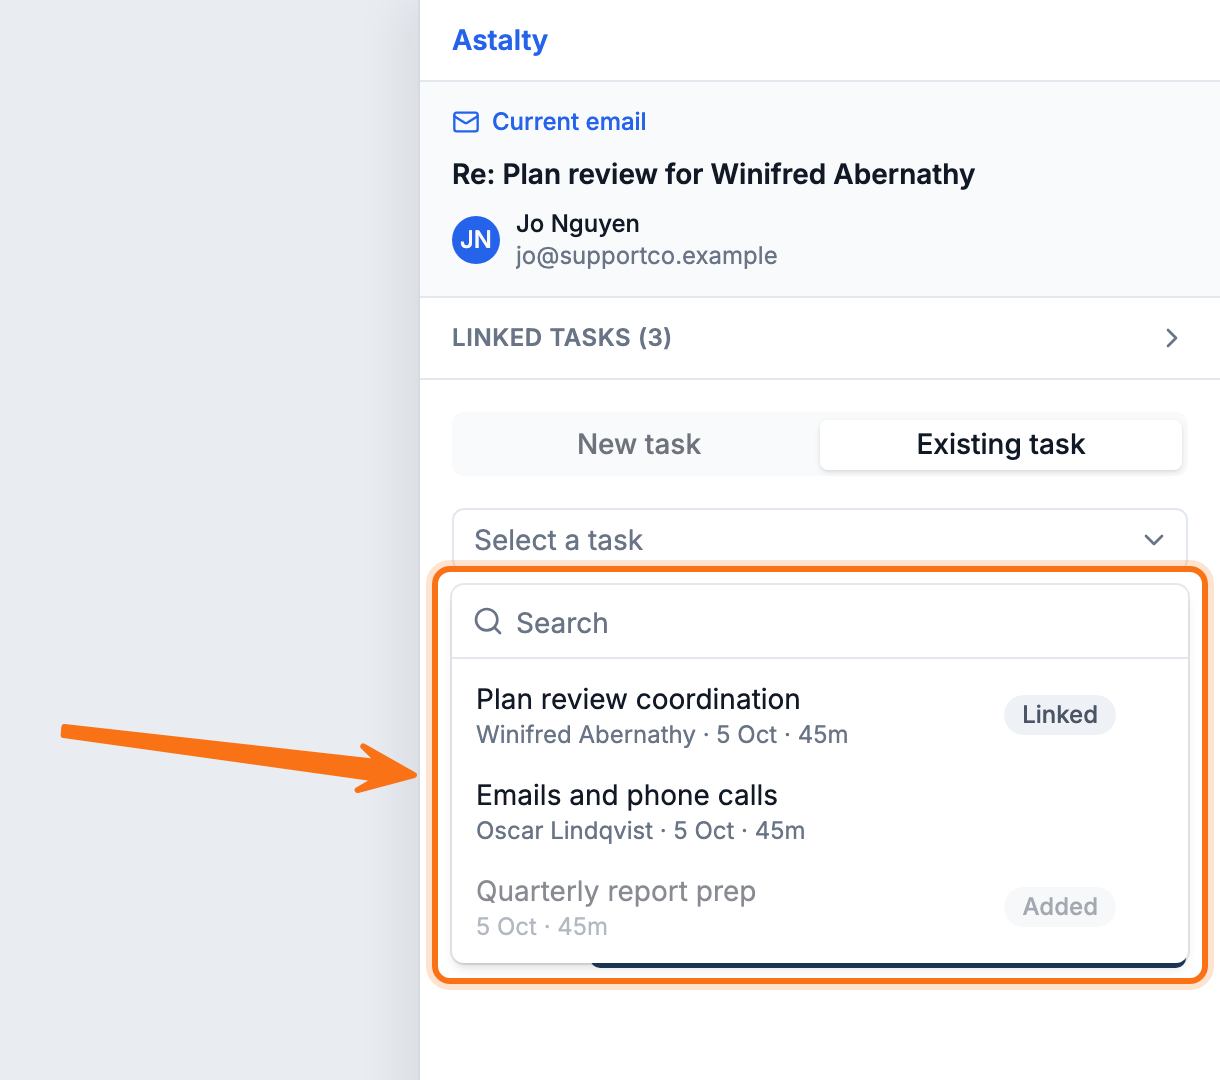
- Select a task — search by task or Participant name, from 2 characters, or browse the list. Tasks linked to the open email's thread that you can edit are listed first, badged Linked; your other tasks follow. A task that already holds this exact email is disabled and badged Added, so the same email can't end up on one task twice.
- Note — an optional case note, added to the task the same way as the note on a new task.
- Attachments — if the email has attachments, or you want to keep a copy of the email itself, choose what to include the same way as attaching the email and its files. This control doesn't appear if you don't have permission to attach documents — you can still add the email and a note to the task.
Click Add to task. The email, its thread, the note and any selected files are saved to the task you picked, and the form clears ready for the next email.
Seeing tasks already logged against an email
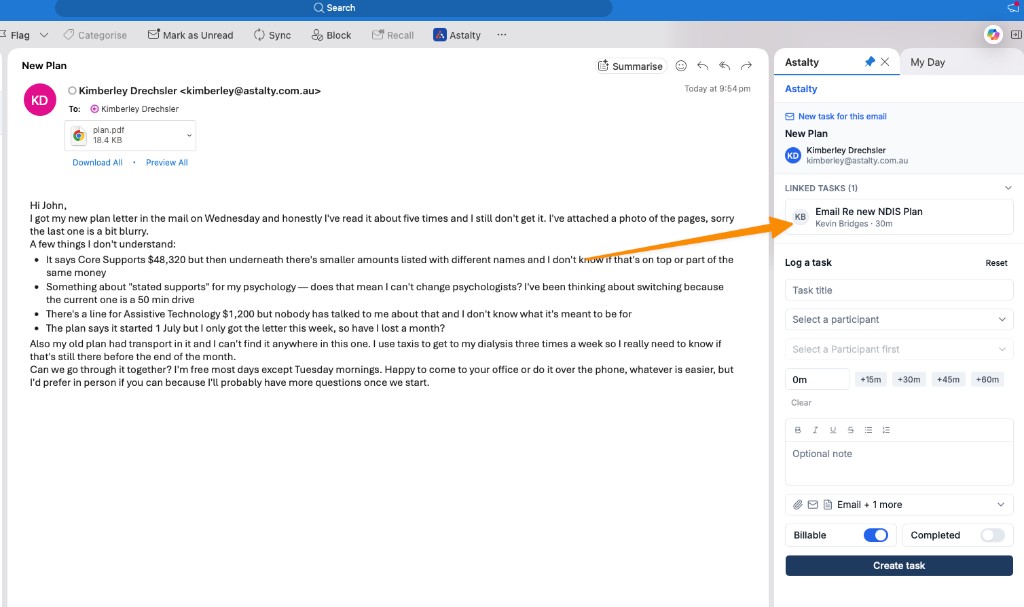
When you open an email that already has one or more tasks logged against it, a Linked tasks section appears at the top of the panel. Expand it to see each task, its Participant, and the time recorded — a quick way to check whether an email has already been actioned before you log another task.
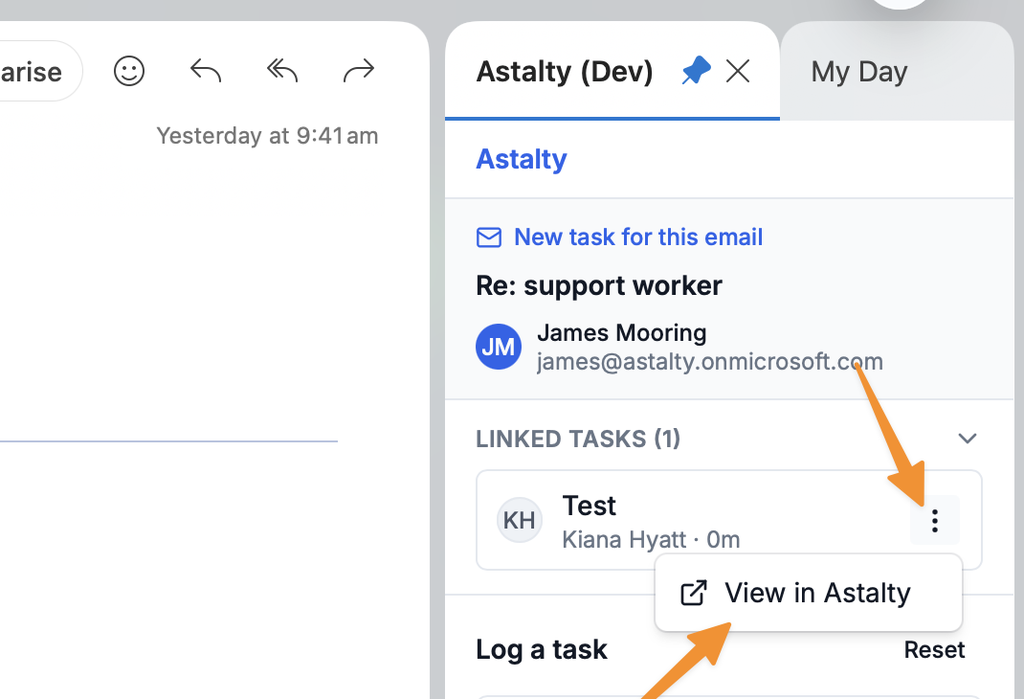
Opening a linked task in Astalty
To see the full task, click the ⋮ (more actions) button on the linked task and choose View in Astalty. The task opens in a new browser tab, on the task board with its task view already open — handy when you need to check the note, the charge, or the documents saved against it.
Adding this email to a linked task
Click the ⋮ button on a linked task and choose Add this email to add the email you're viewing to that task — handy for a later reply in the same thread. This switches to the Existing task tab with that task already selected; scroll down and click Add to task to confirm, or add a note or attachments first. See Adding an email to a task you already have.
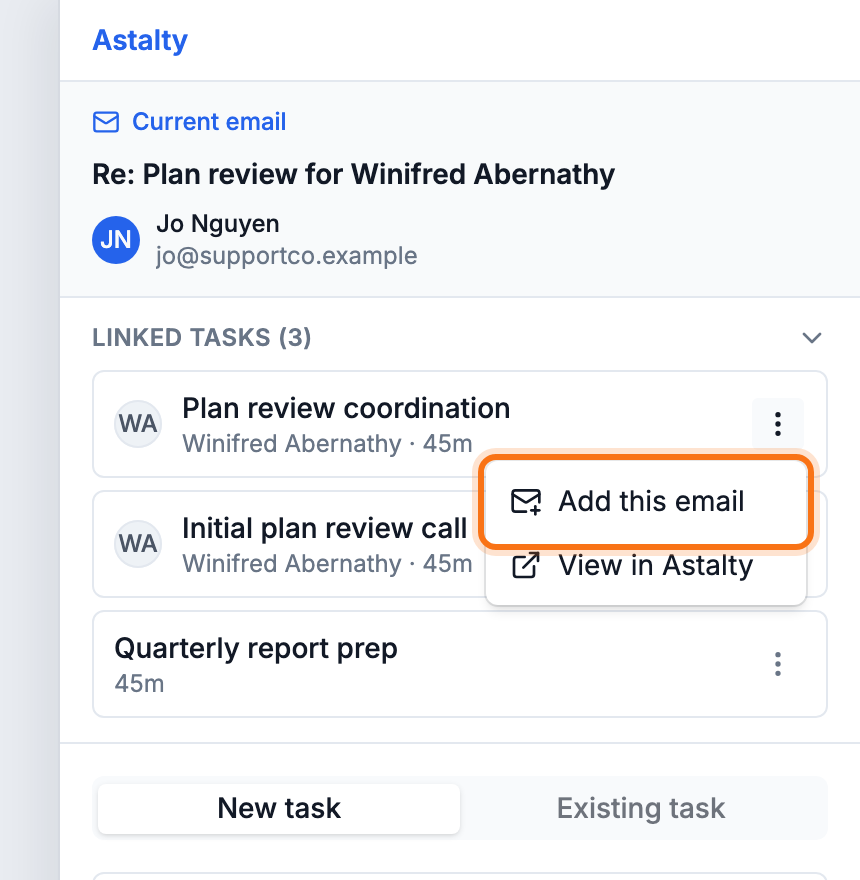
Add this email only appears on a task you can edit that doesn't already hold this email — it's hidden for a colleague's task you can't edit, and for a task already badged Added.