- Finance
- Staff Payments
- Settings
Settings
Overview
We have the option to create staff payments for contractors within your Astalty account! This guide will help you with any set up needed for this process. Please follow the steps below to find out how to set up your payment rates per Charge Items and also how to ensure that you have enabled your users to be eligible for staff payments.
Setting Up Payment Rates
*Before you can set up any payment rates you must ensure that you have created the corresponding Charge Item. To find out how to do this you can visit our user guide article here. *
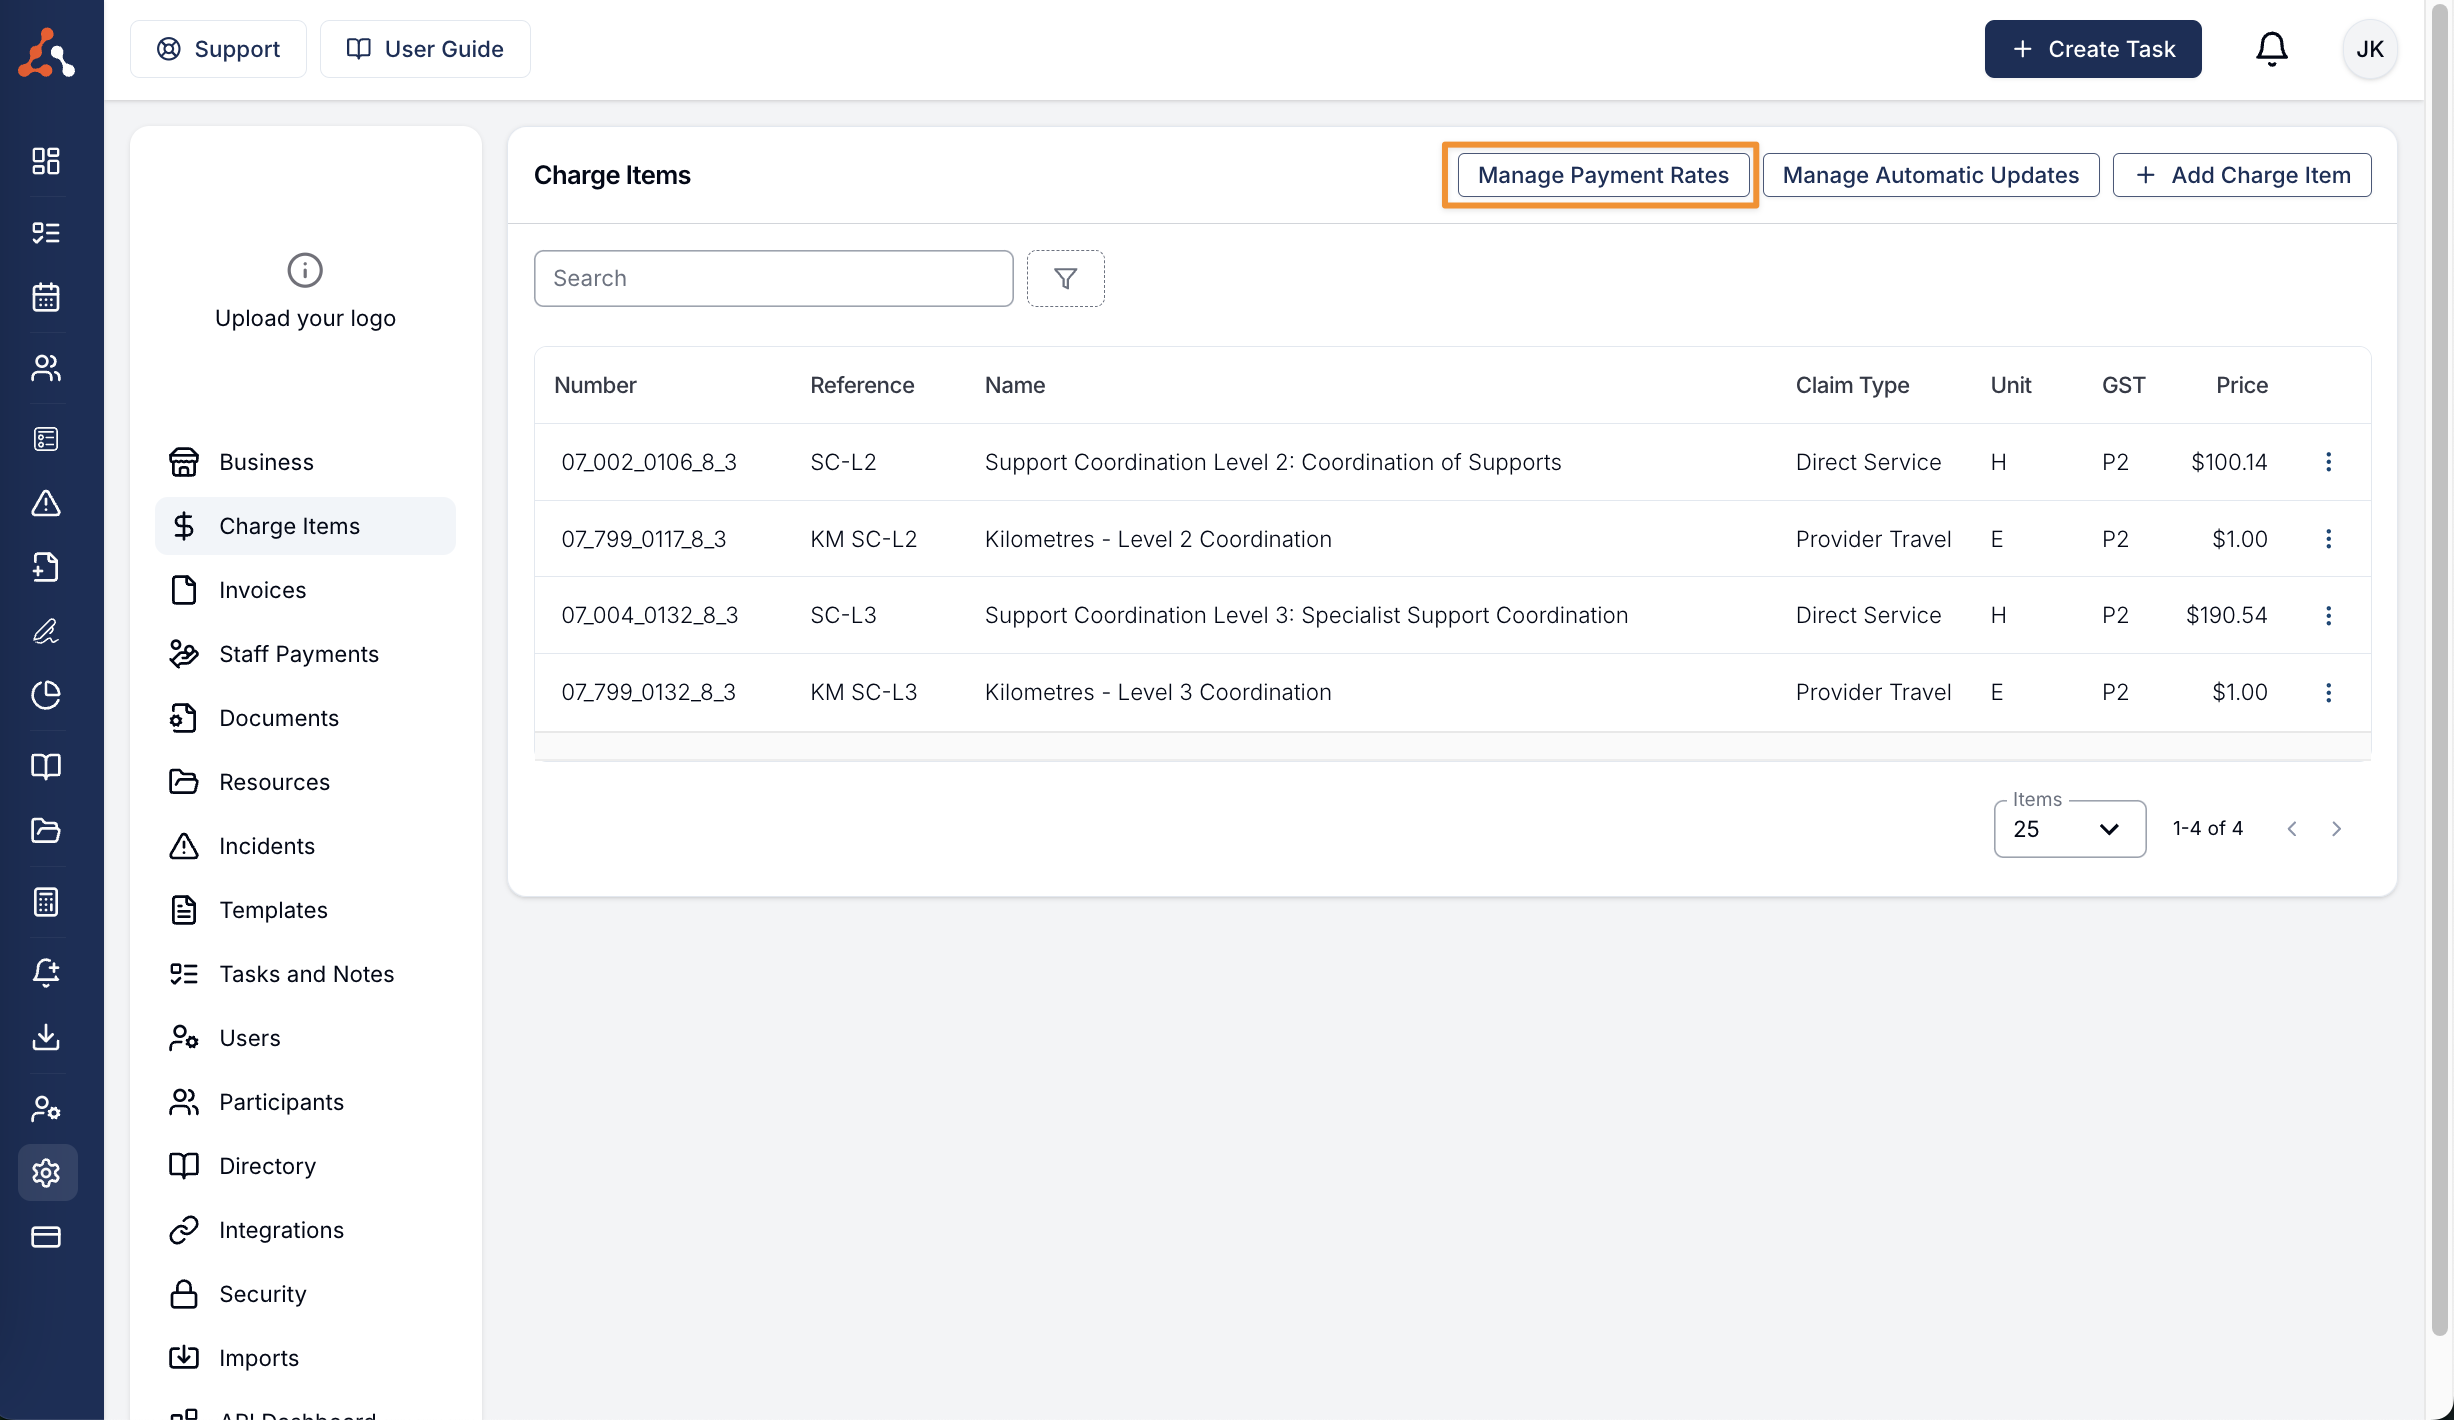
To set up your payment rates per Charge Item simply navigate to the Charge Items Settings menu and select the 'Manage Payment Rates' button within this menu. This will take you to a menu where you can configure each payment rate that you will opt to pay your contractors on a per Charge Item basis.
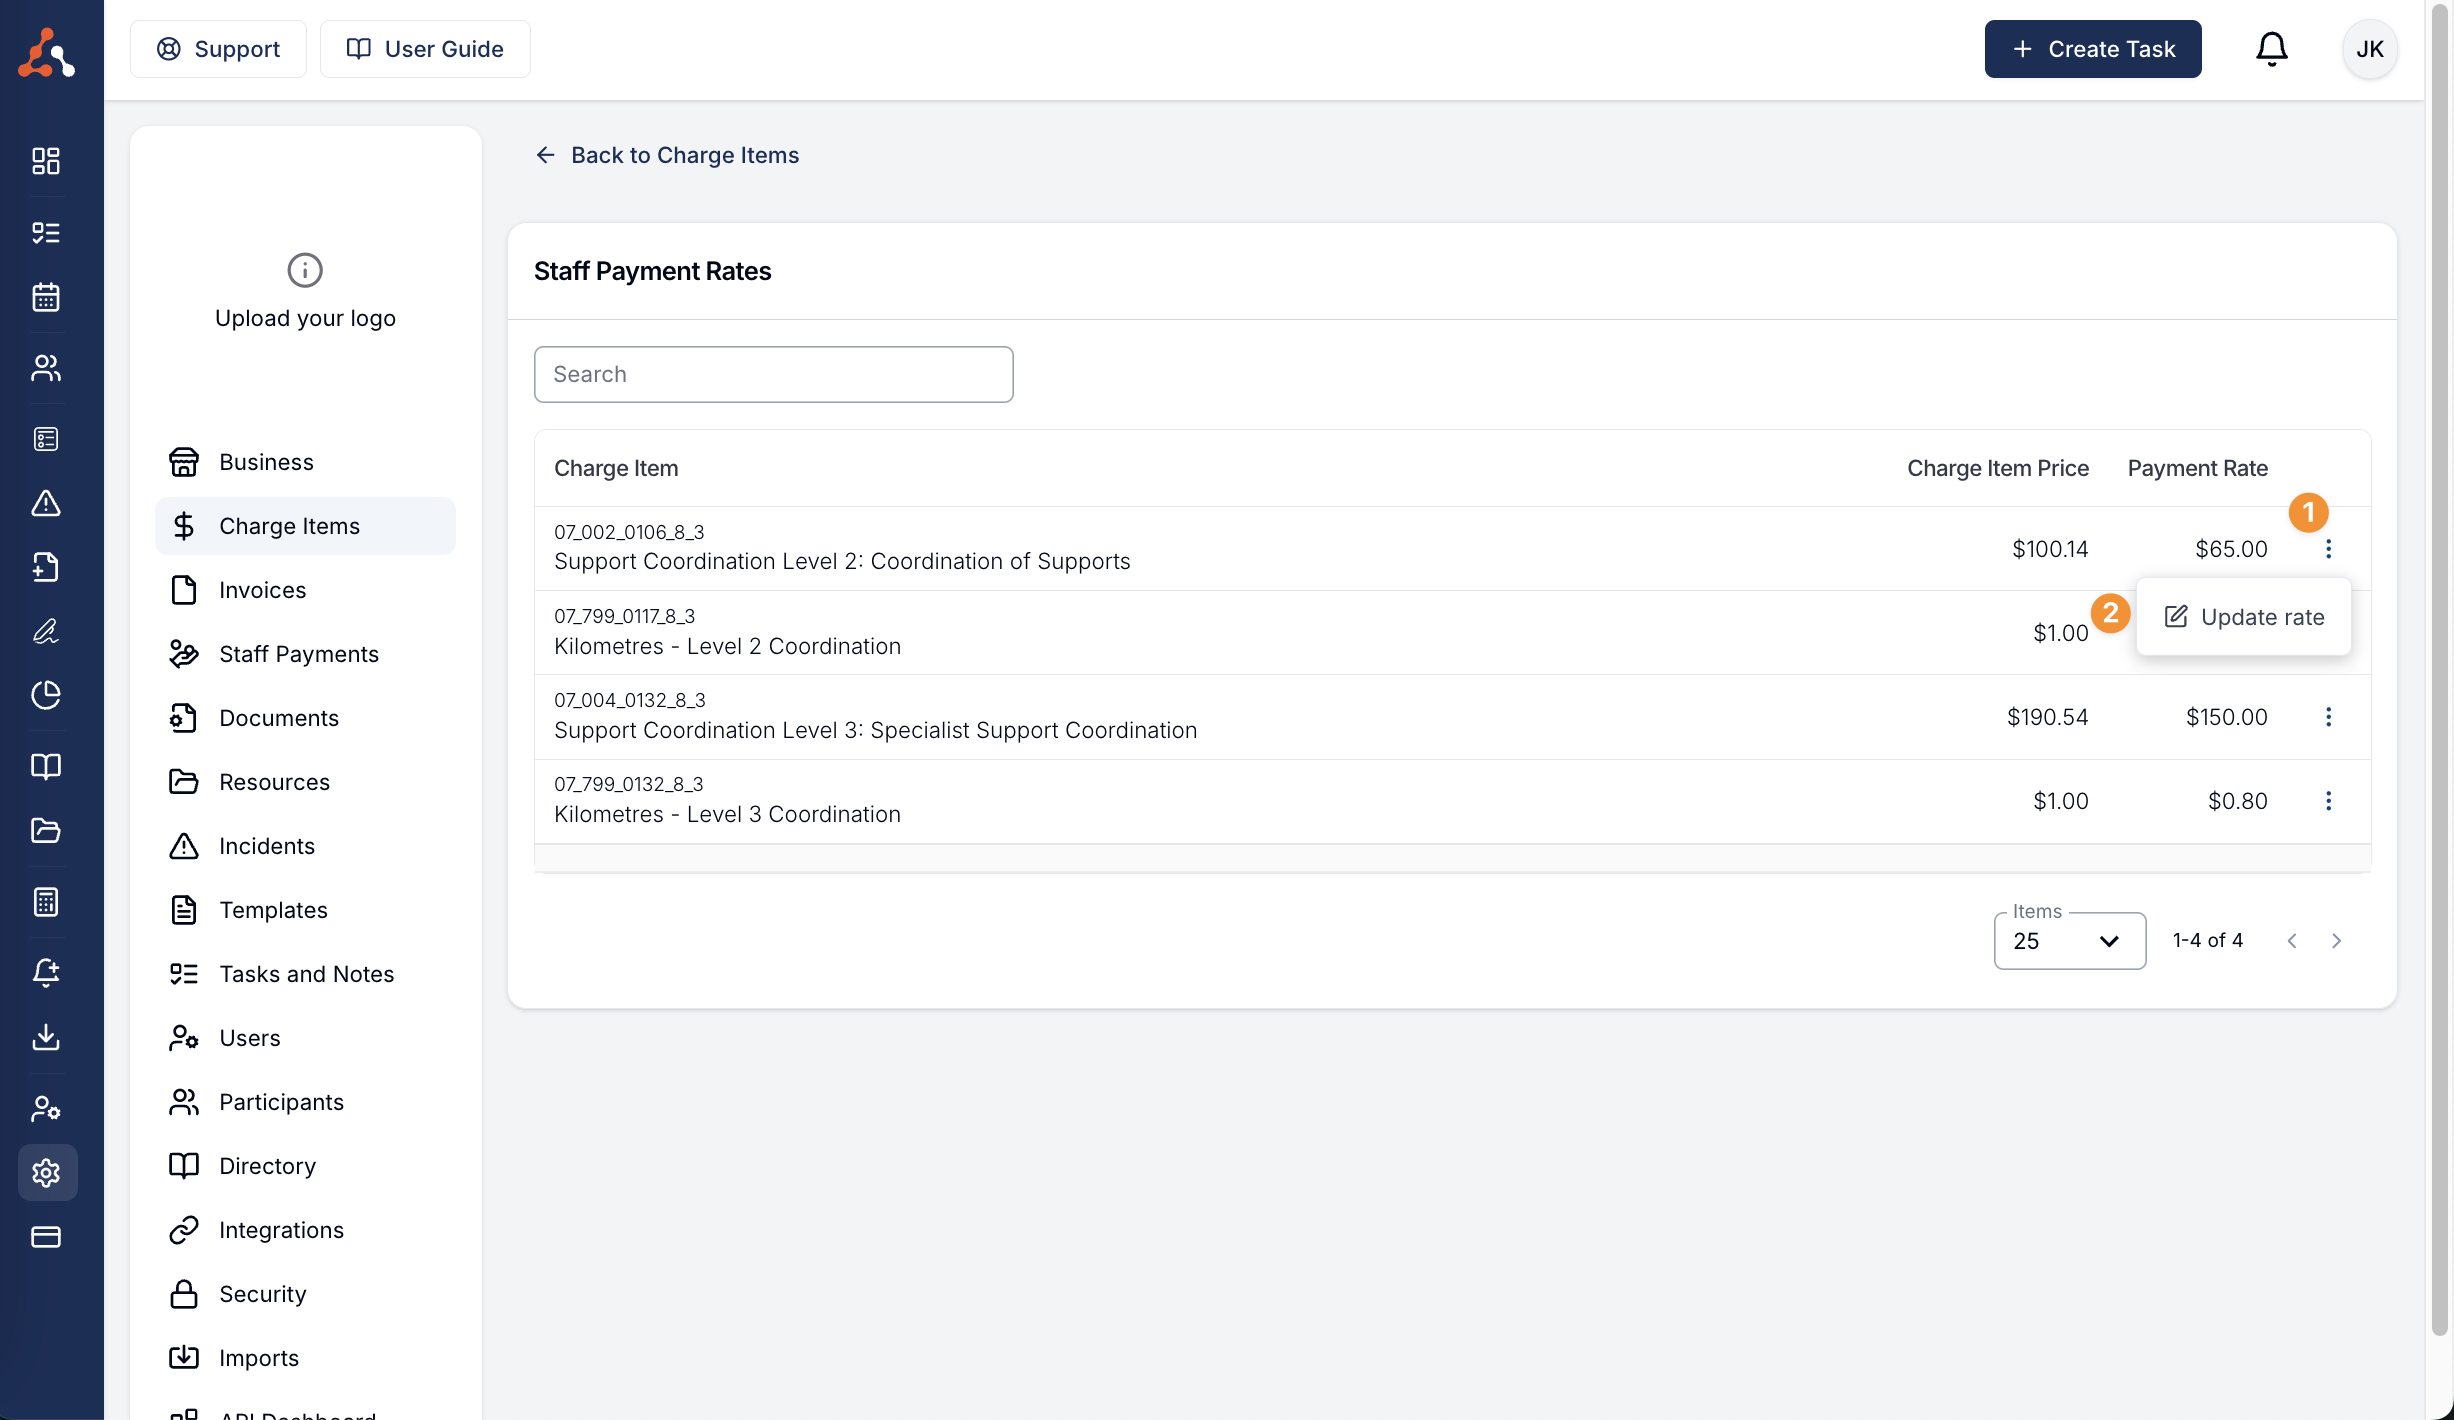
To add a payment rate click the three dots to the right of the Charge Item and select 'update rate' from the dropdown menu that appears.
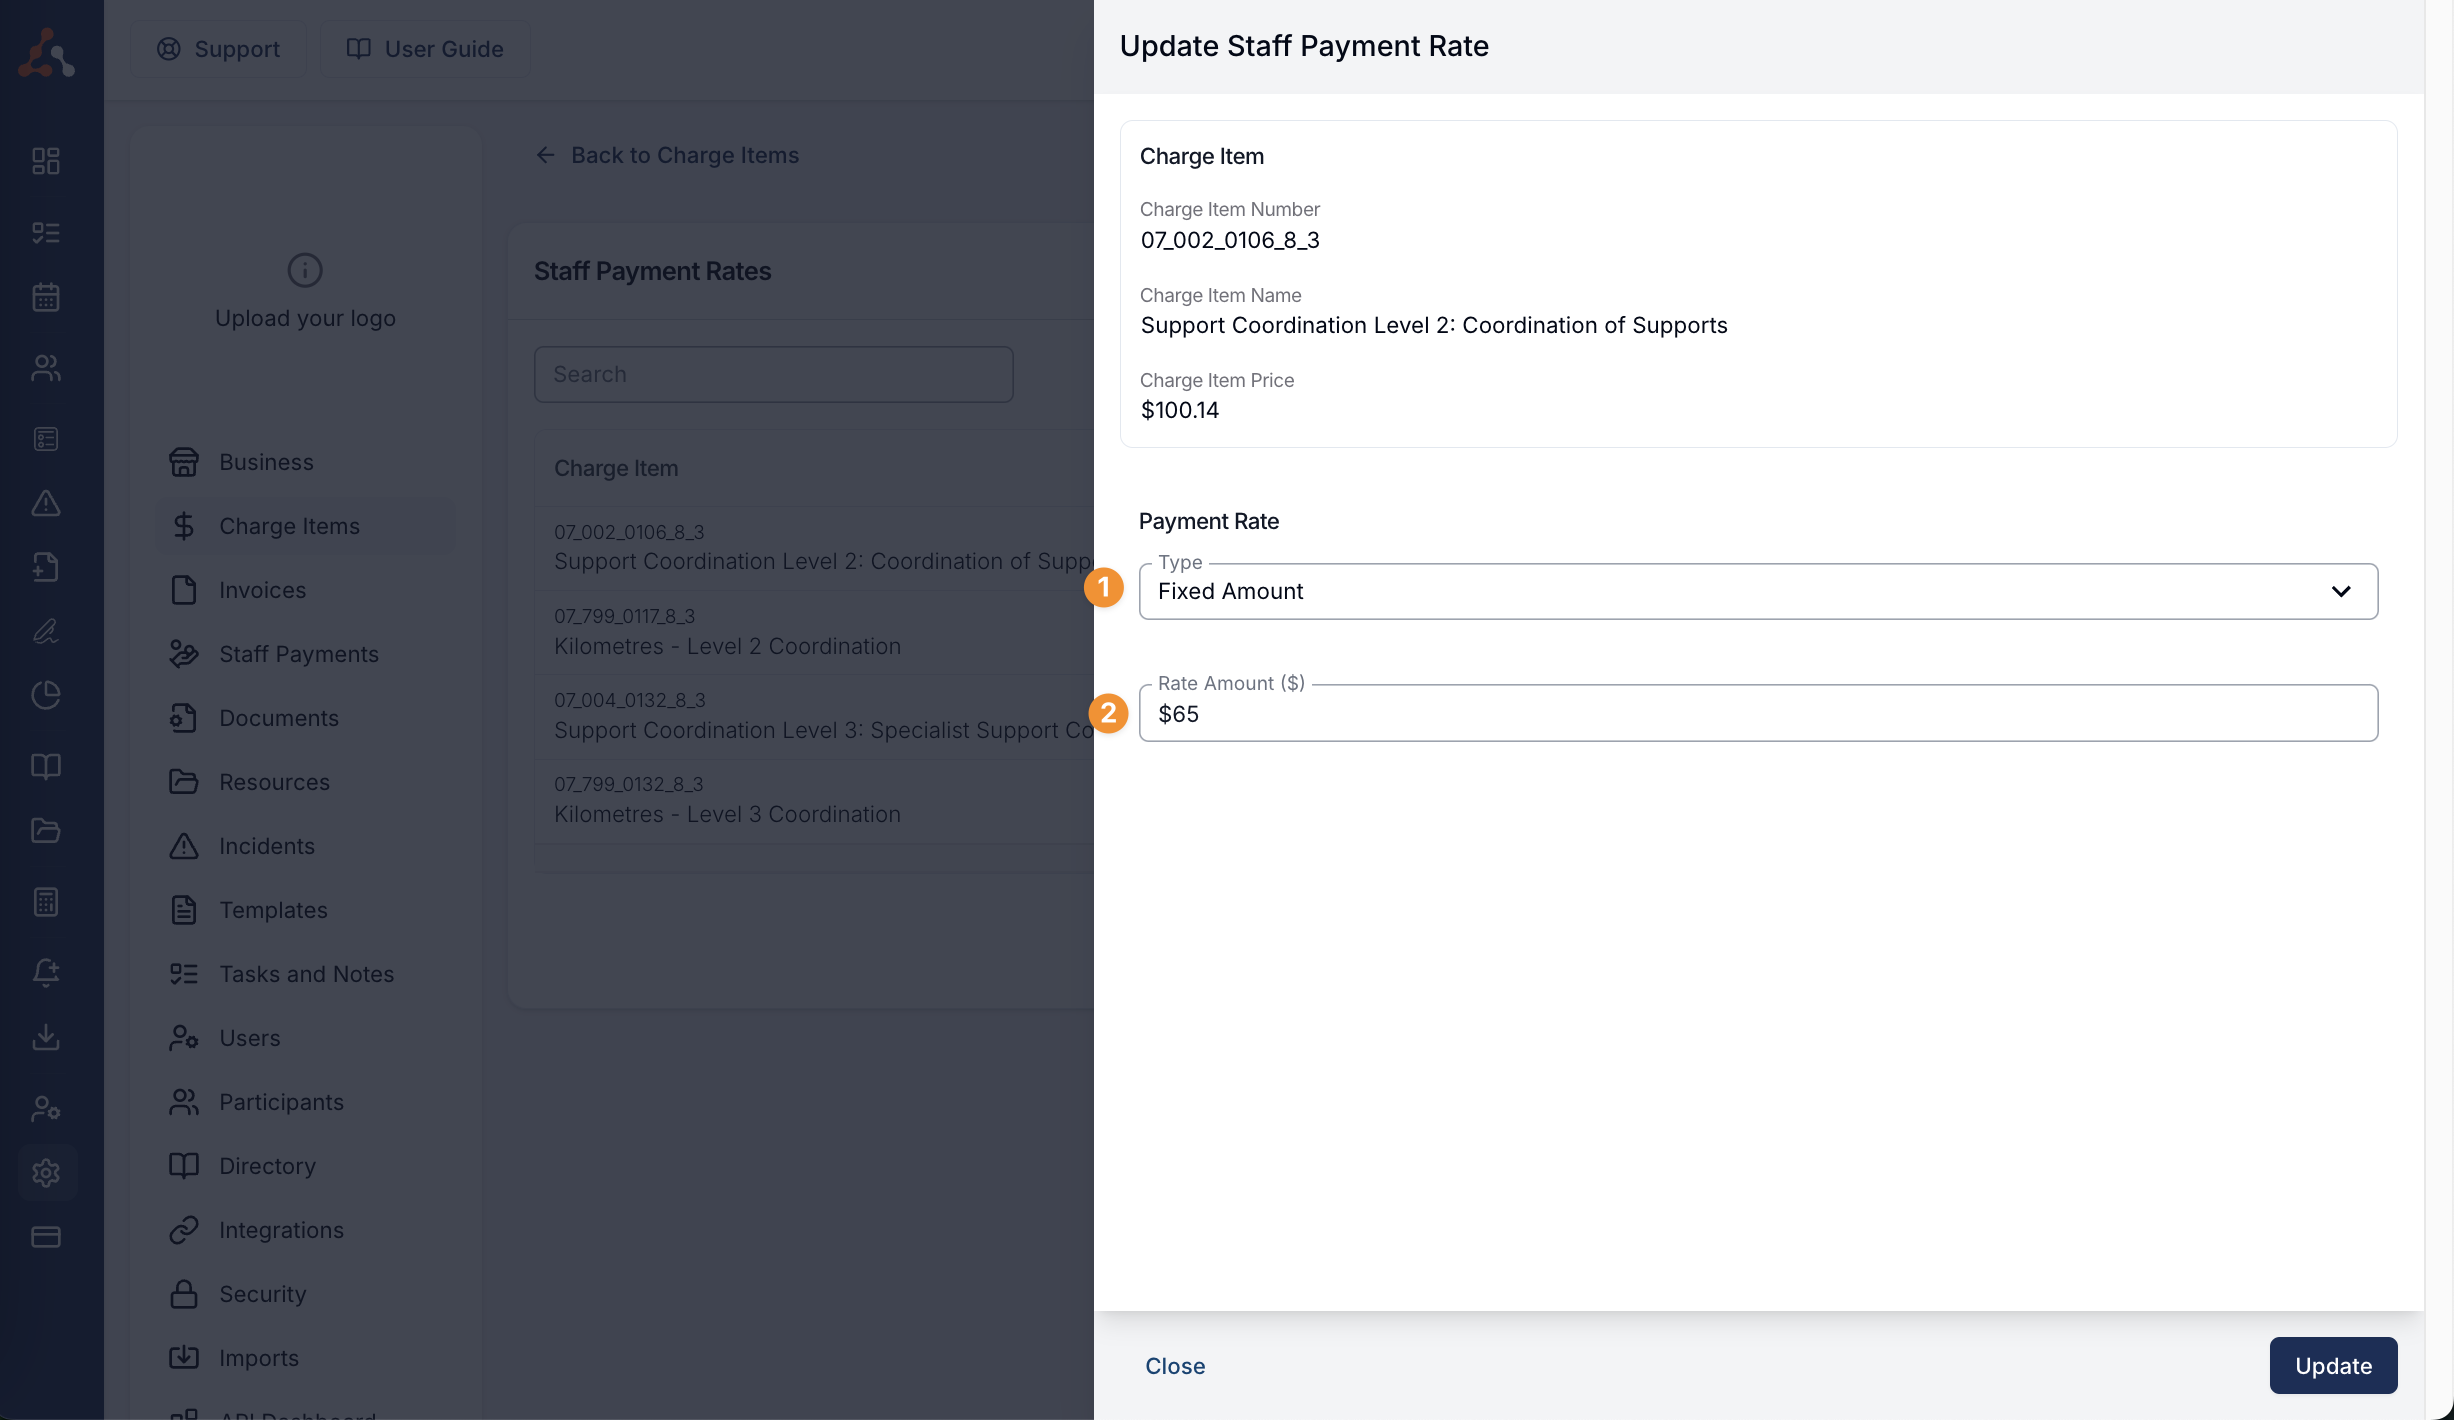
This will bring you to the payment rate menu view for this Charge Item, now you will be prompted to select the Payment Rate Types, they are Fixed Amount and Percentage of Price, and also Rate amount expressed as the Payment in dollar ($) or as a percentage (%) depending on the type selected.
In the example below, the Charge Item unit price for Support Coordination Level 2 (SC-L2) is $100.14 per hour and the contractor payment rate is $65 per hour and is a fixed payment rate type. This means that for every hour billed by a contractor for the SC-L2 Charge Item a contractor will receive $65.
Editing a Payment Rate
A payment rate can be changed at any time, including after a payment batch has been finalised. Click the three dots to the right of the Charge Item and select Update rate — the same path you used to set it. The drawer shows the Current Rate and the date it applies to work from. Enter the new rate type and amount, then select Update. Astalty emails the Account Owner whenever a Charge Item's payment rate changes.
Each task is paid at the rate that applied on the date the work was delivered, not the date of the batch or the date you changed the rate. A batch calculated today therefore pays last month's work at last month's rate.
Astalty records the rate and the calculated amount against each batch item when the batch is calculated, so a Finalised or Paid batch keeps the amounts it was calculated with. Changing a rate never alters them.
When a New Rate Starts
You cannot choose the date a rate starts from — Astalty sets it:
| Rate | Applies from |
|---|---|
| The first rate set on a Charge Item | 1 July of the current financial year |
| Every rate after that | The day you set it |
Backdating the first rate to 1 July makes every task delivered since the start of the financial year eligible for staff payments, so a batch can pick up older work than you expect.
A batch cannot be calculated while any task in it has no rate covering its delivery date. Astalty warns that the batch is not ready for calculation and lists the Charge Items missing a rate. Setting a rate clears the block for tasks delivered on or after 1 July of the current financial year. Nothing covers work delivered before that date, because no rate can start earlier — use Exclude Charge on the batch to drop those items so the rest can calculate.
Correcting a Rate on the Same Day
Setting a rate again on the same day replaces that day's rate rather than adding a second one, so the rate you are correcting is discarded instead of being kept as a superseded rate. The correction re-rates any work that has not been calculated yet; amounts already calculated onto a batch do not change.
Removing a Rate
Update rate is the only action available on the rates table — a payment rate cannot be deleted. To stop paying an existing rate, set a new one in its place.
Setting Up Staff Payment Settings
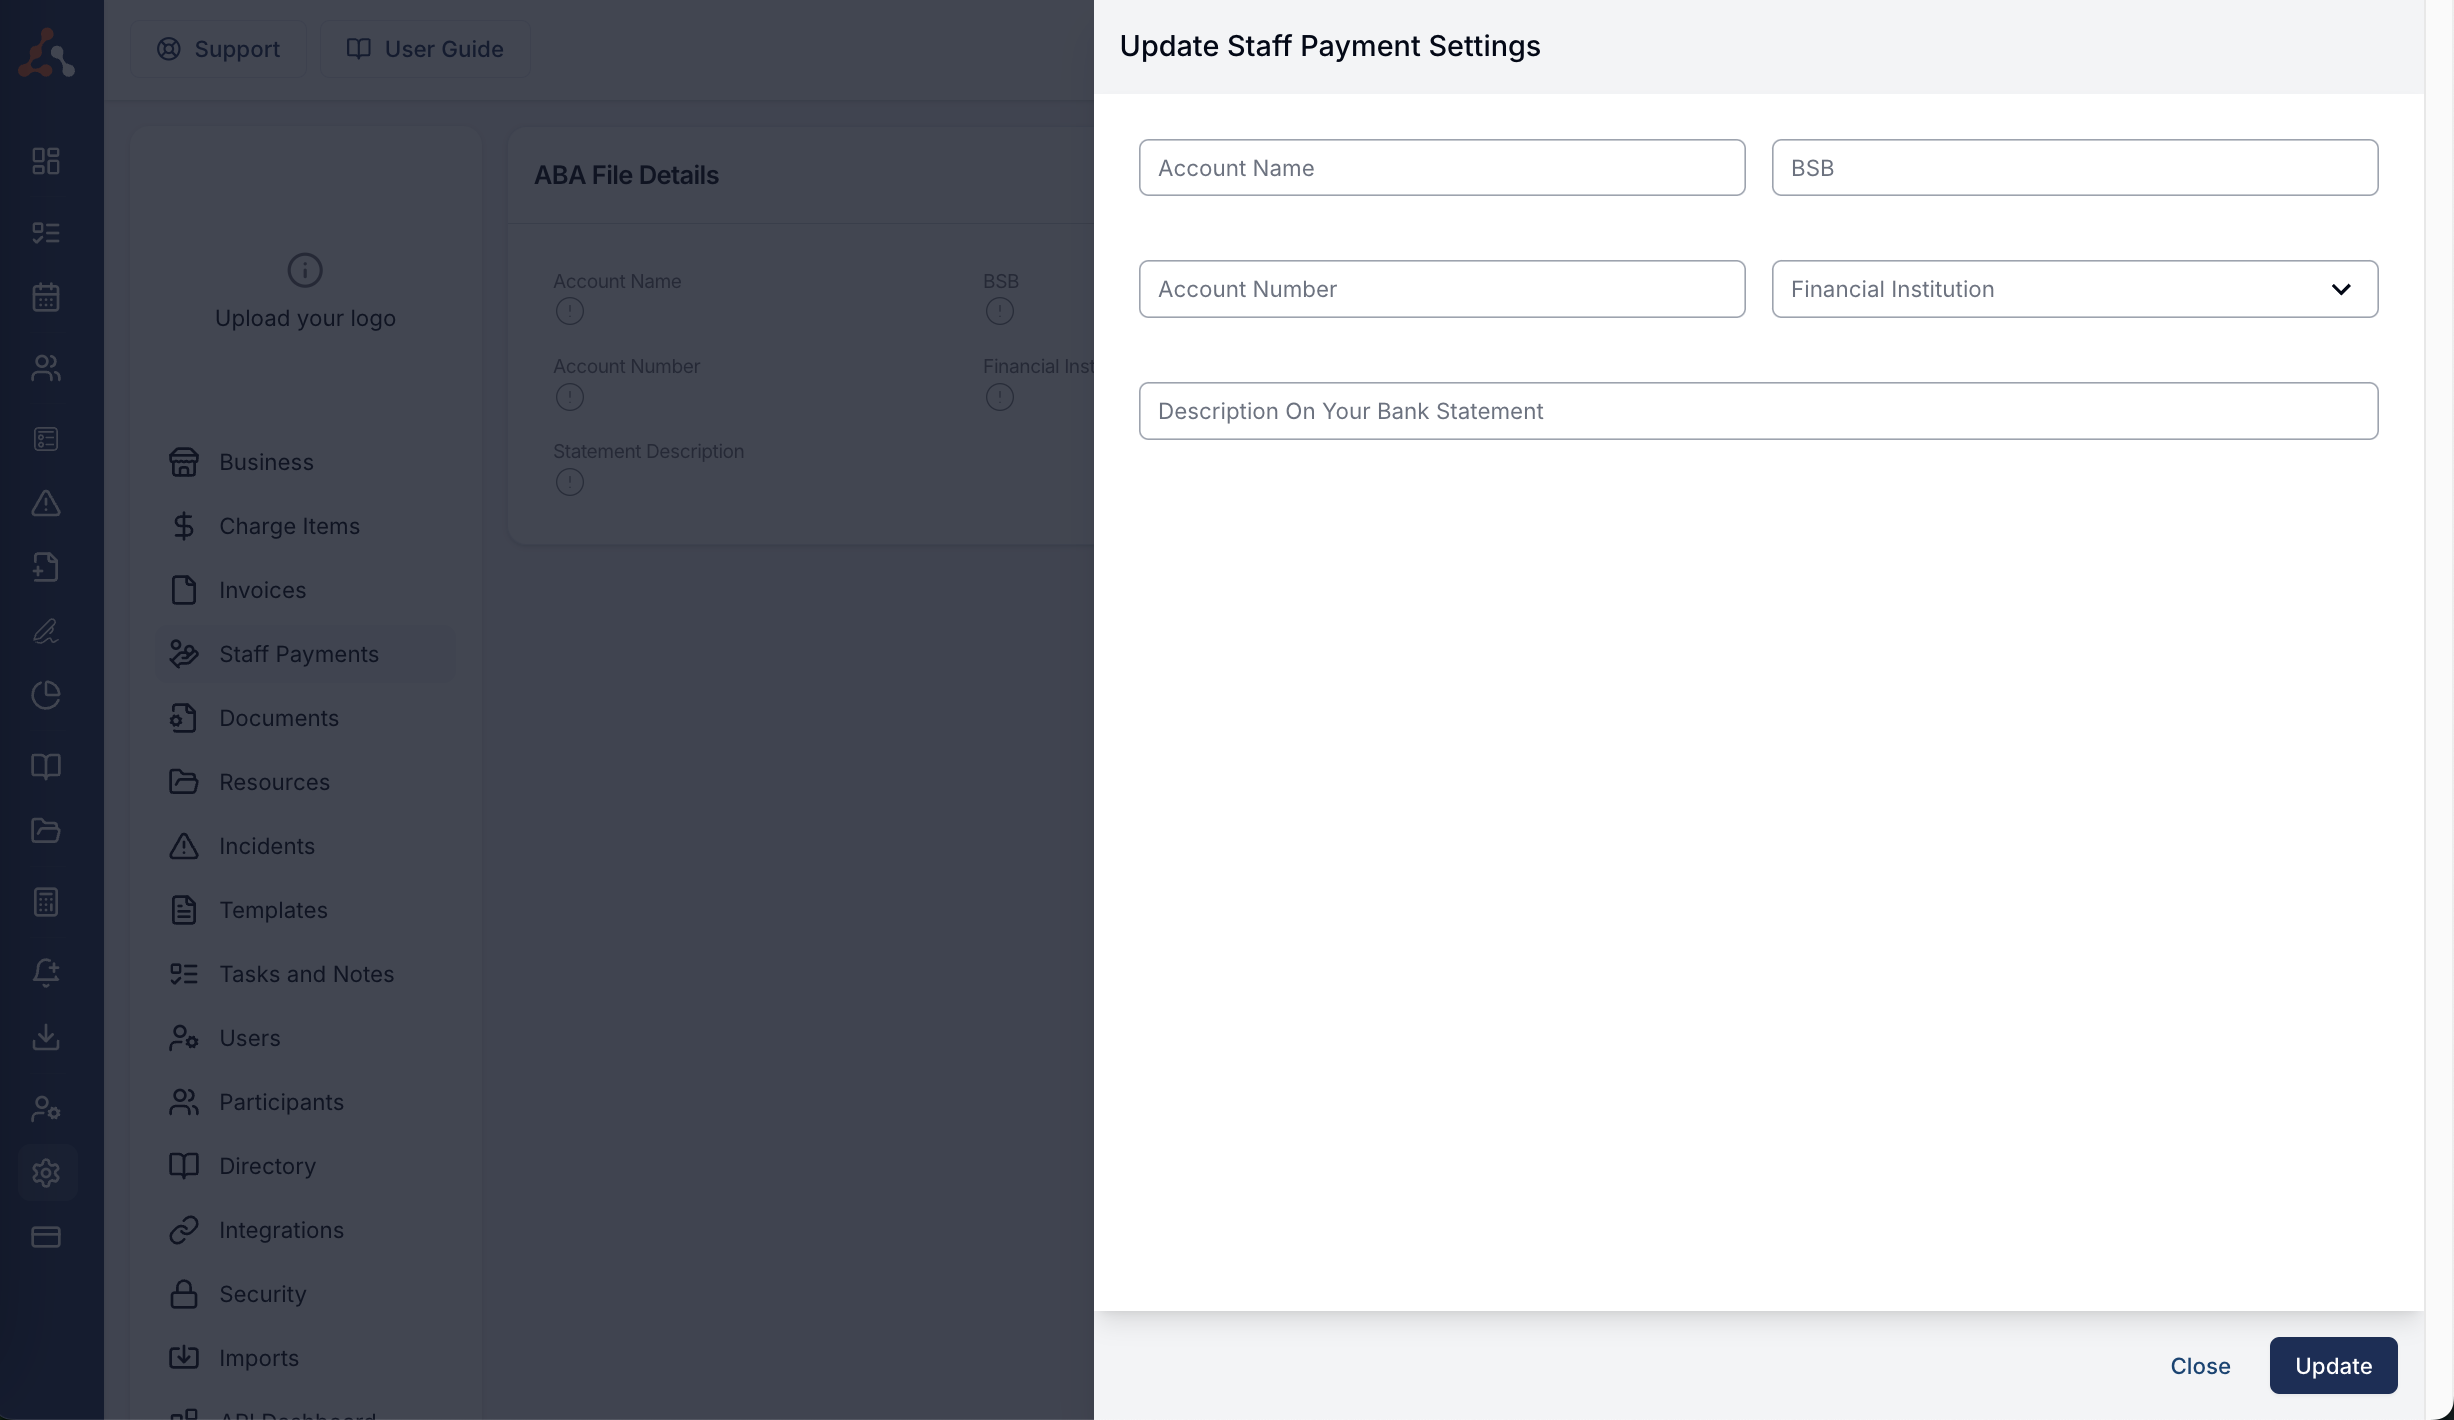
Next step you will need to set up the payment account that you will be making your staff payments from. This will inform the ABA file that you will export with your staff payments. To do this navigate to the Staff Payments Settings menu. Once in this menu you will have to configure the bank account information by clicking the 'edit' button in the right corner of the ABA File Details table.
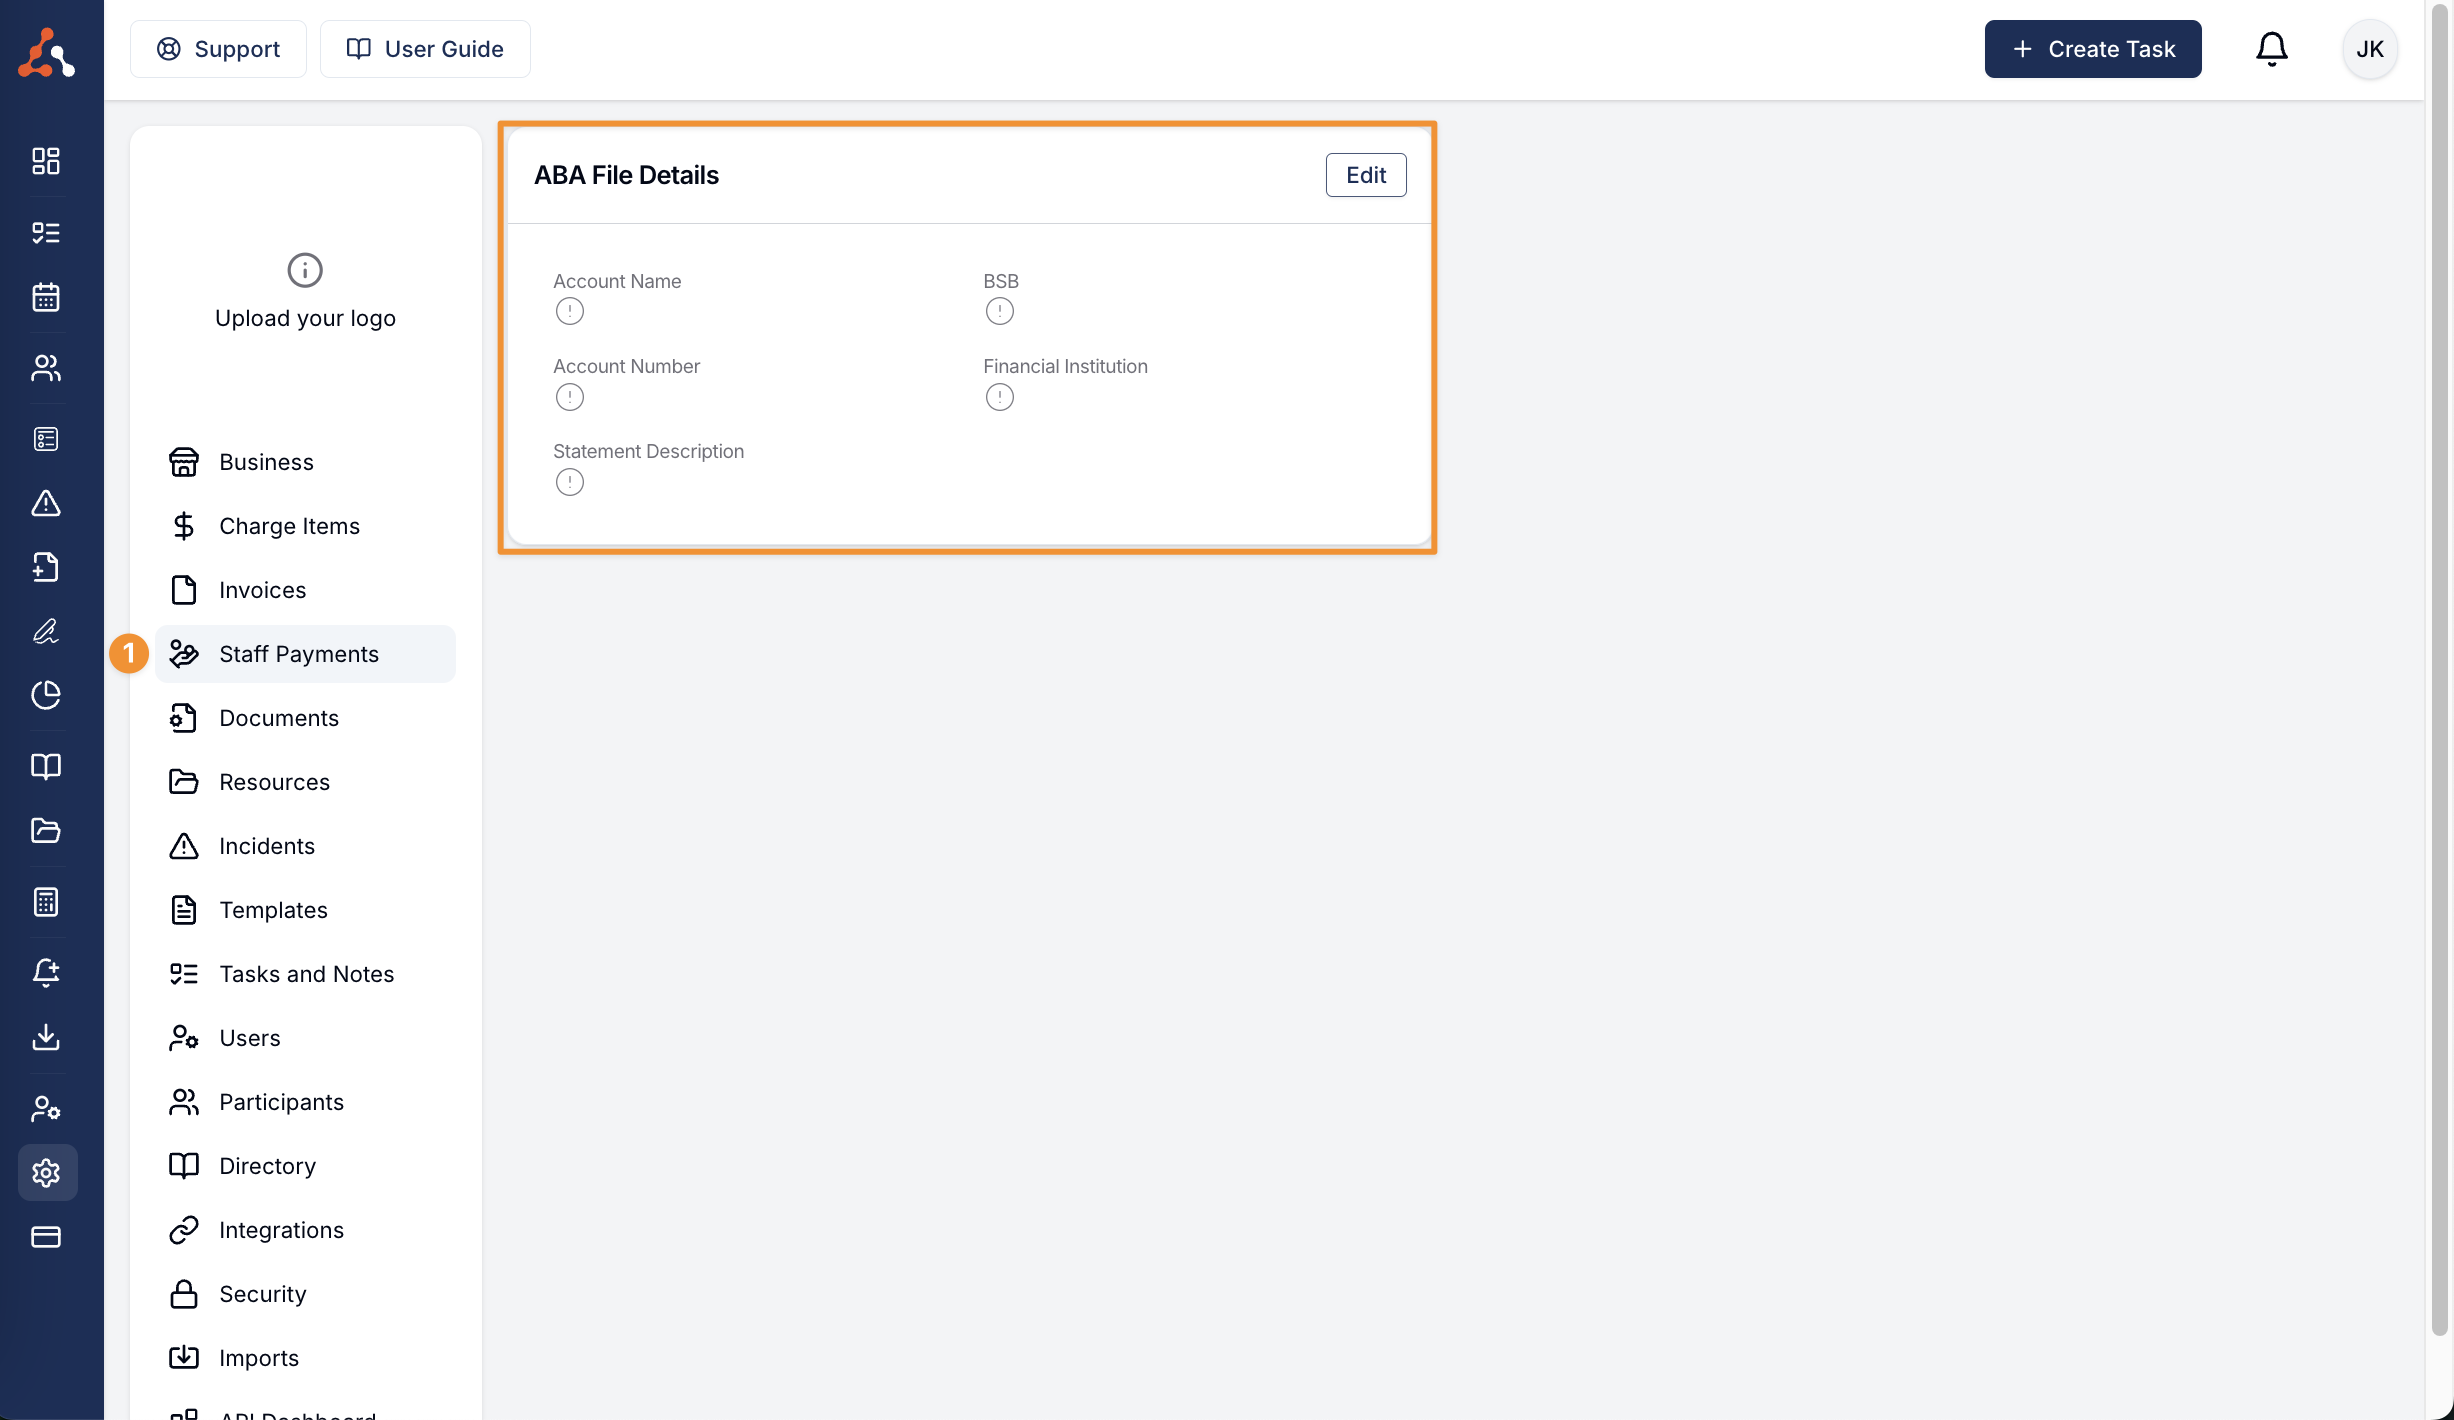
After selecting edit you will see the following menu view where you can enter the bank account details.
User Profile Set Up
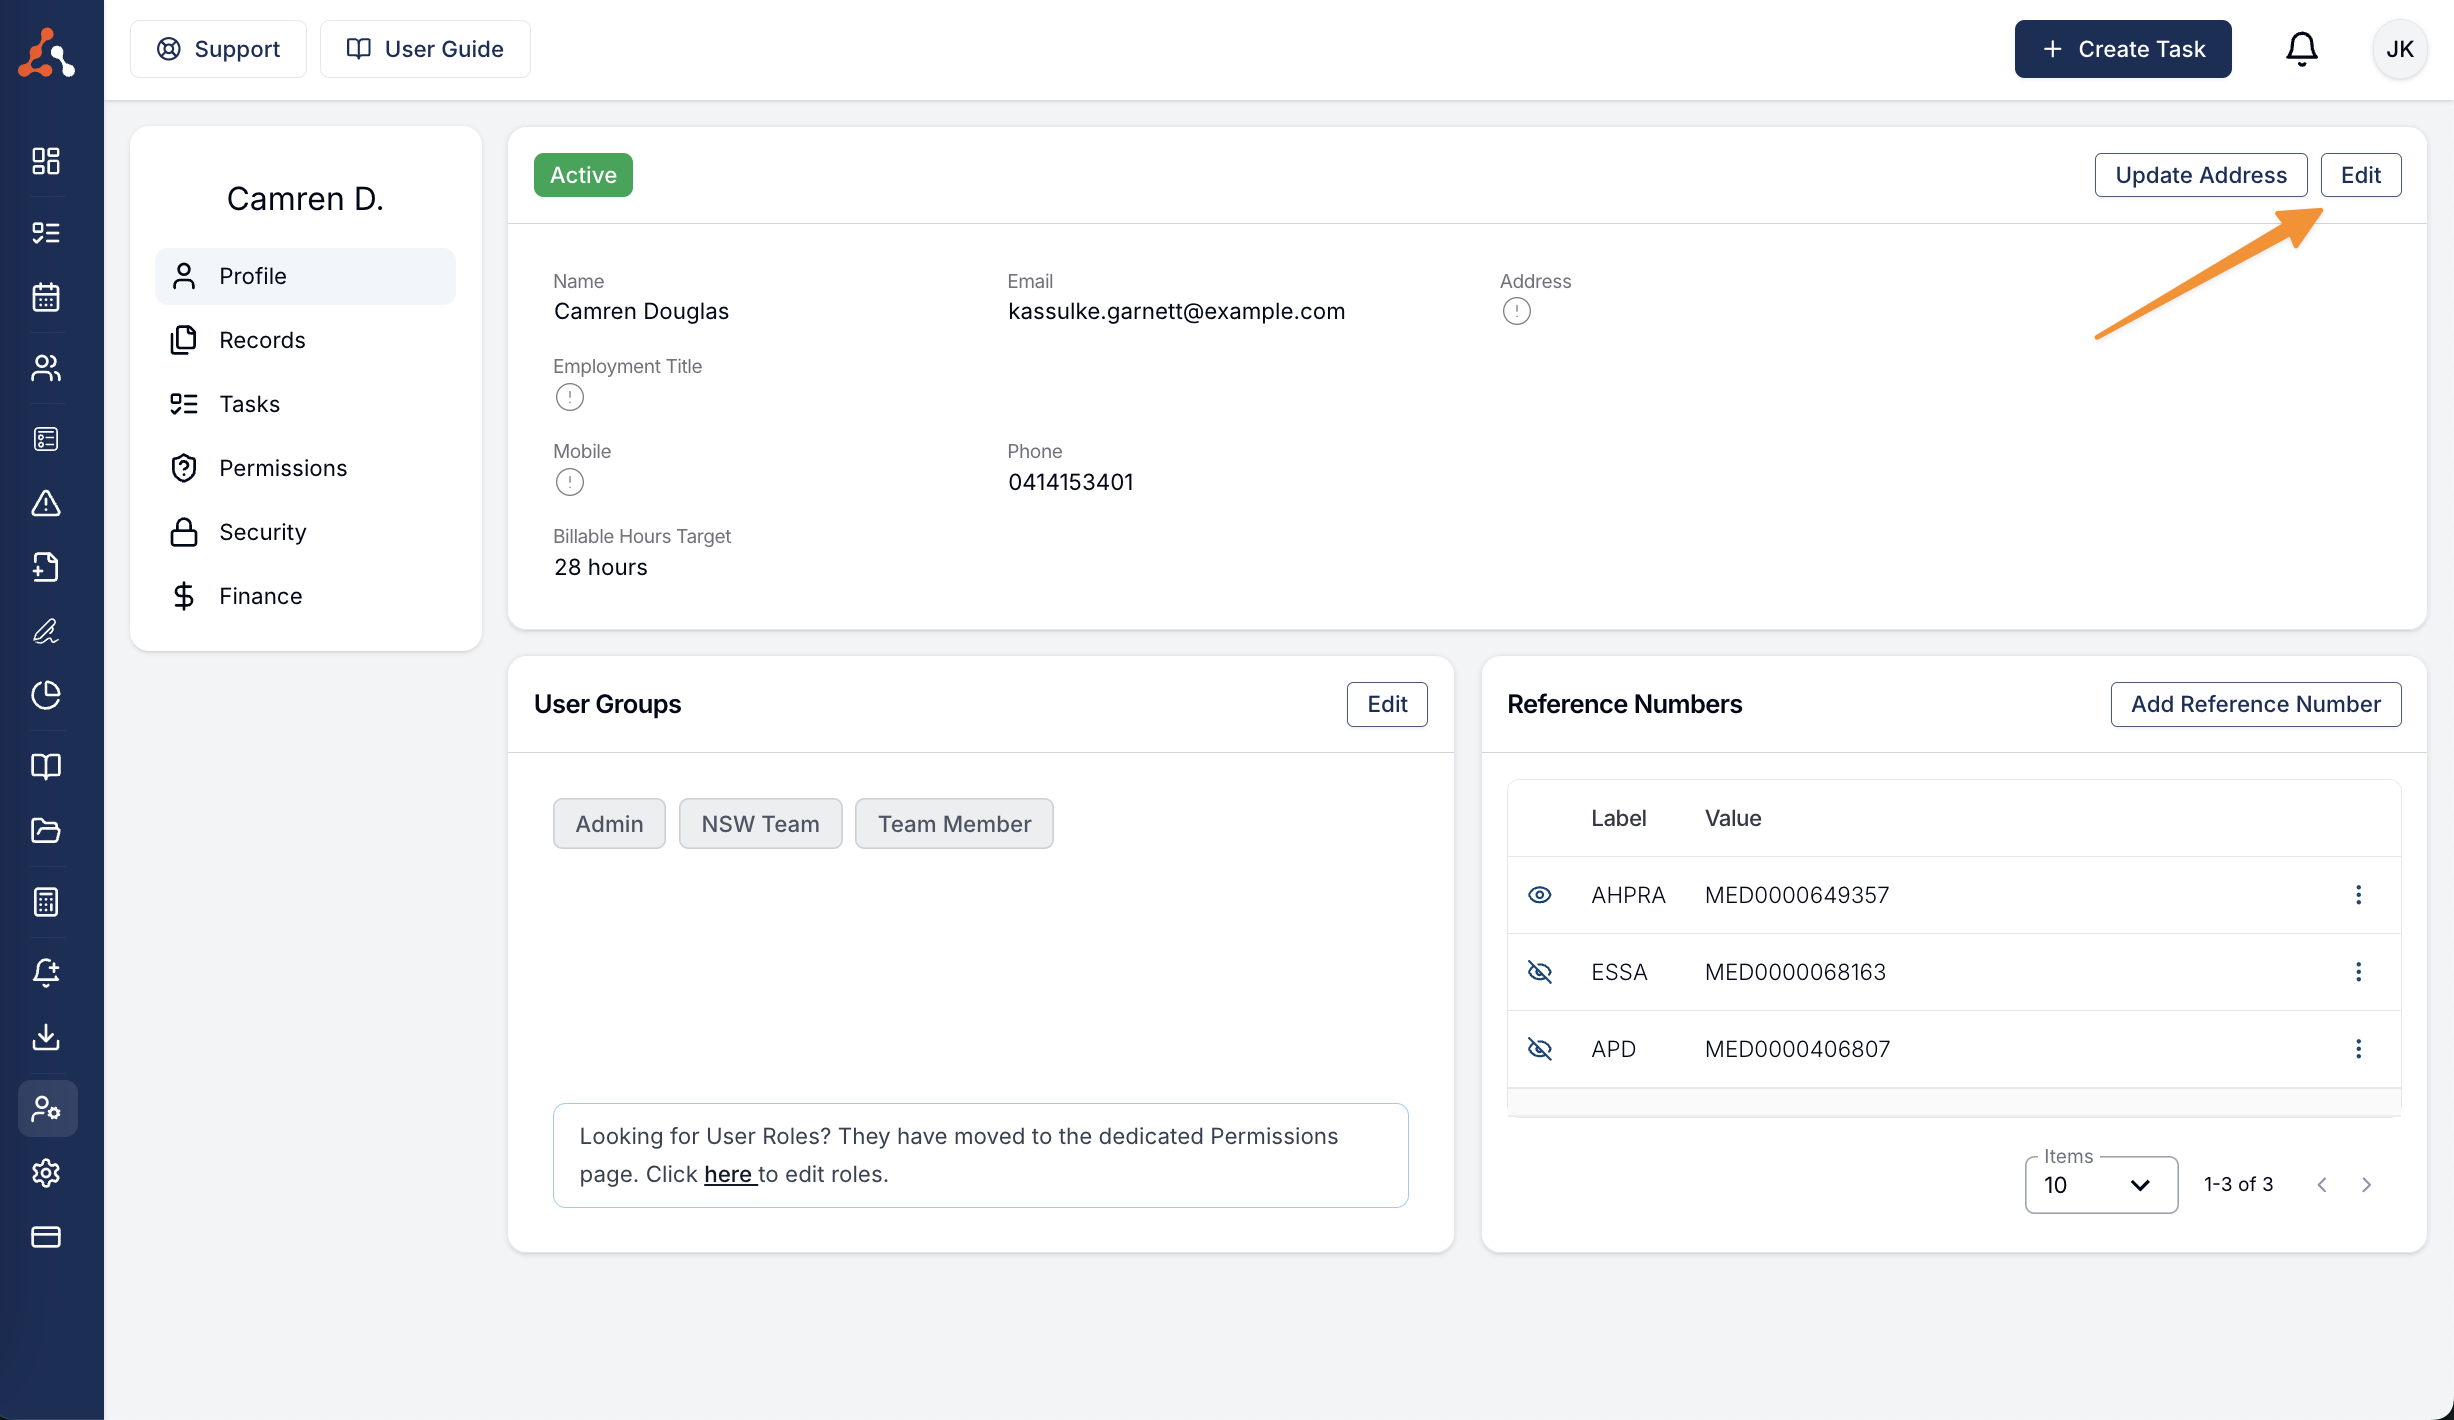
Once you have set up the Staff Payment settings as per the instruction above. You will need to head to your contractors User Profile from the User menu. From the Users profile you will need to set their employment type. To do this select the edit button within their profile as seen below.
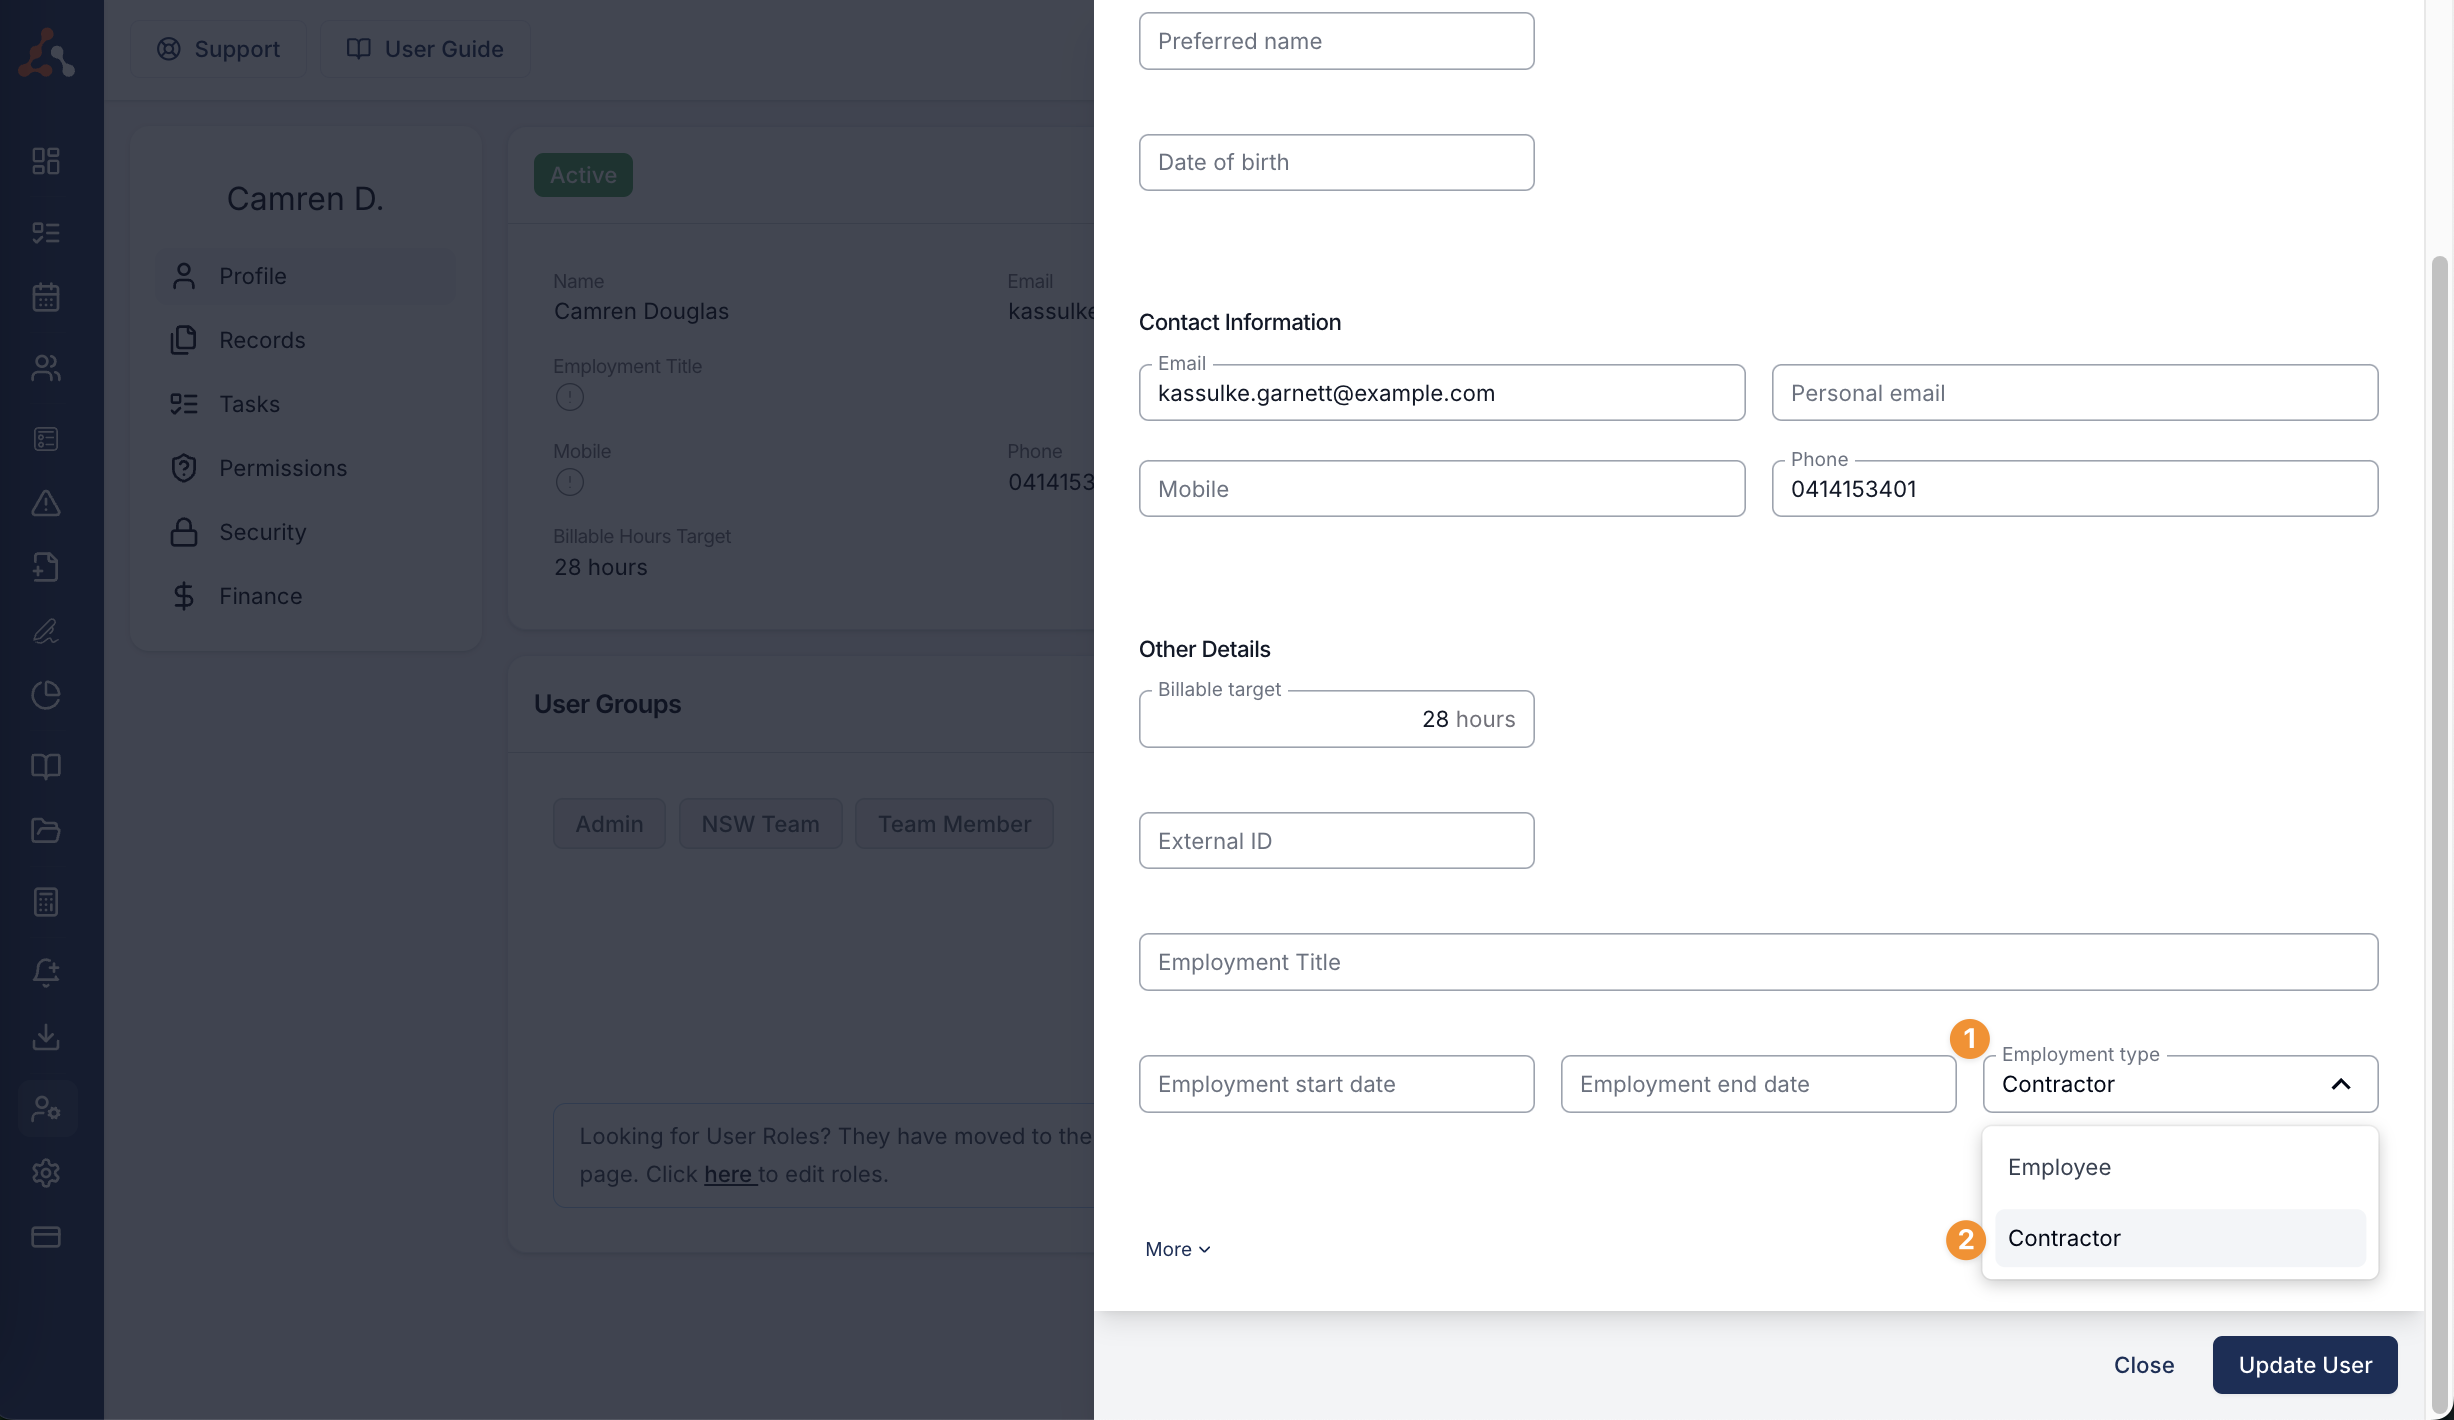
This will bring up the user edit menu view, if you scroll down you will see the employment type dropdown menu. If you want to set up this staff member as a contractor, select Contractor from this drop down menu. This will make them eligible for Staff Payments. Make sure you clcik 'Update User' to save any changes.
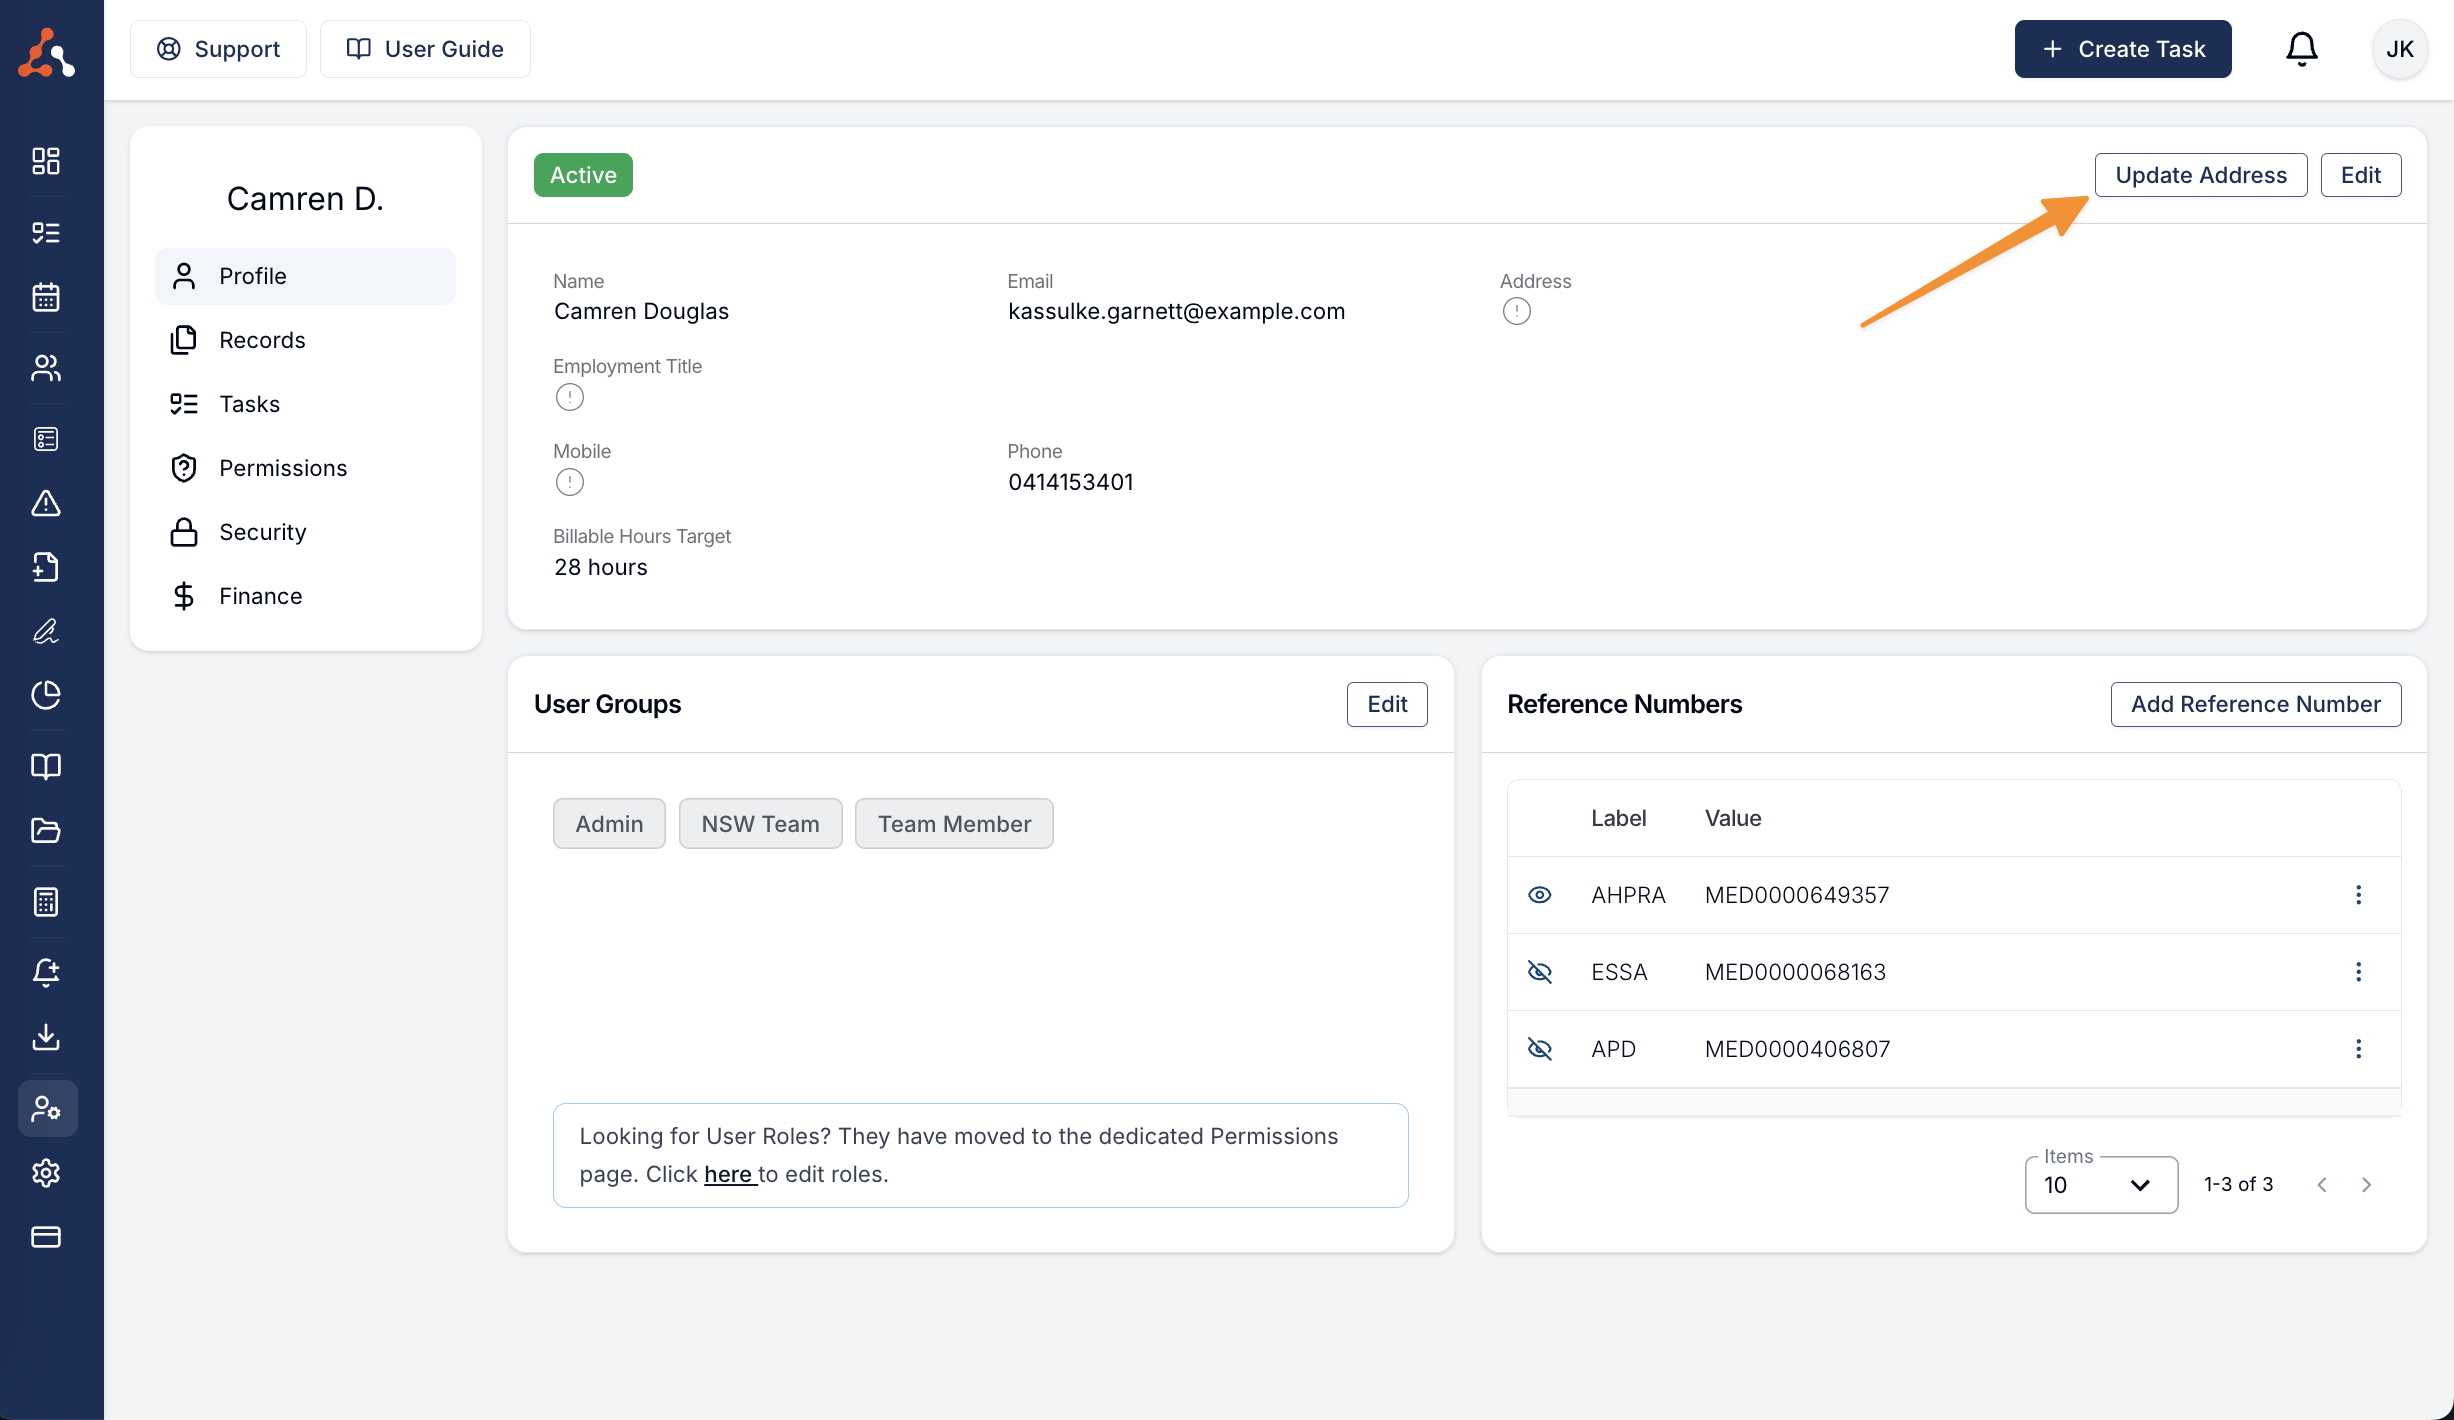
To update a users home address simply select 'Update Address' form within thier user profile.
User Finances Set Up
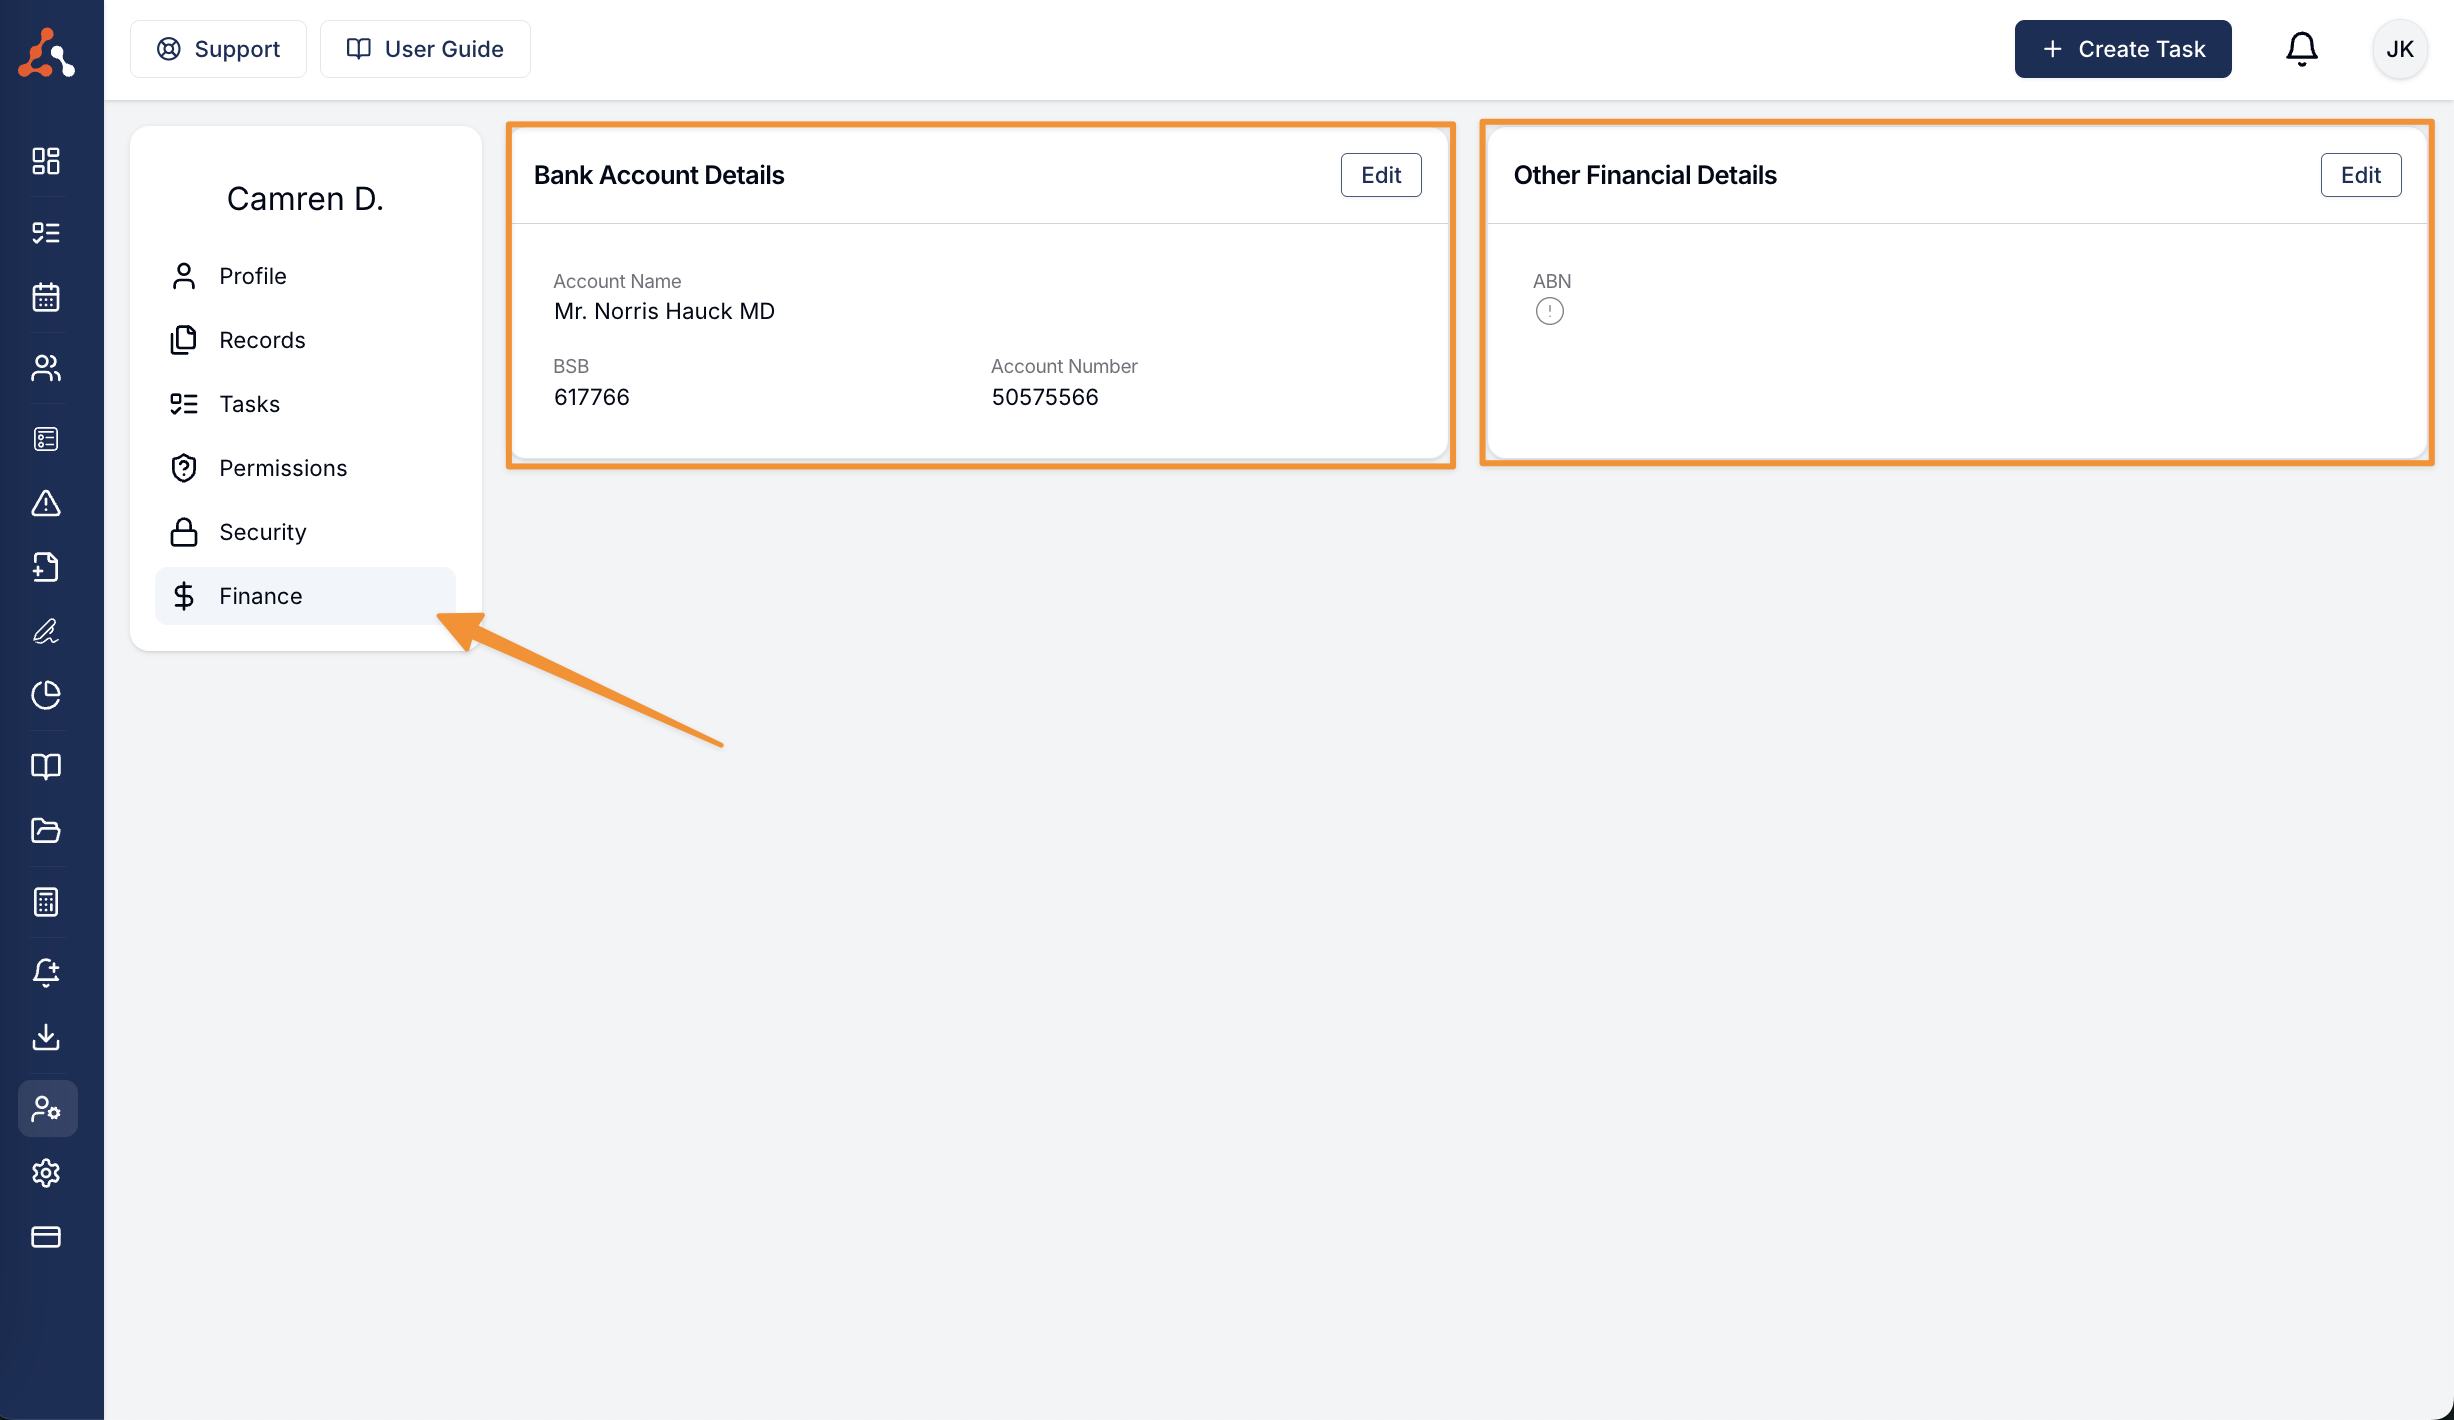
Once you have assigned the employment type you will then need to input the contractors Bank Account Details, and if required their ABN. You can do this from within the Finance menu within their user profile. To update this information simply select the 'edit' button above the entry to add the users banking or ANB information.
Processing a Staff Payment Batch
The next step is to process a Staff Payment Batch! To learn how to do this, click here for our user guide article.